CANbus has been used by DJI from nearly their beginnings but it has not been available for Ardupilot users. What is CANbus? It is a network to connect smart devices that is message-based. You can think of it as a little internet for the multirotor.
I did a comparison of Mini-Pixhawks and found every one had different pin-outs for each connector, even when they were using the same physical connector and it was being used for the same device, like GPS. No wonder users have problems buying and connecting simple required accessories for a multirotor build. It is absurd and a pain.
CANbus can eliminate all that pain. CANbus was designed by Robert Bosch for the automotive industry decades ago. The new implementation for unmanned vehicles by Pavel Kirienko called UAVCAN brings CANbus to the Pixhawk community and OlliW’s UC4H project brings it to the DIY community with low-cost adapters to interface commonly used M8N based GPS/Mags, a beautiful UAVCAN Power module with Hall sensor for accurate voltage and current measurements, and he has added UAVCAN to his STorM32 gimbal controller board.
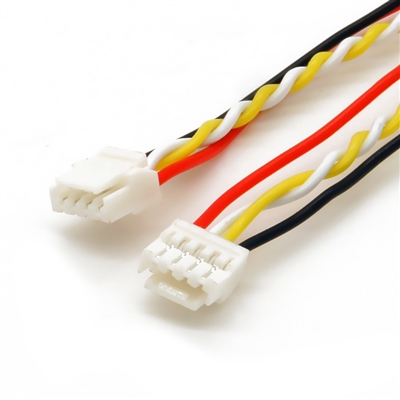
UAVCAN can bring to DIY a standard way to connect all your devices to your flight controller. One connector, the JST-GH, is easy to click into place and remove and it won’t fall out. The cables are all the same four-wire configuration for all your devices and they are daisy chained together. No more having to have all the cables to all the devices go all the way back to the flight controller.
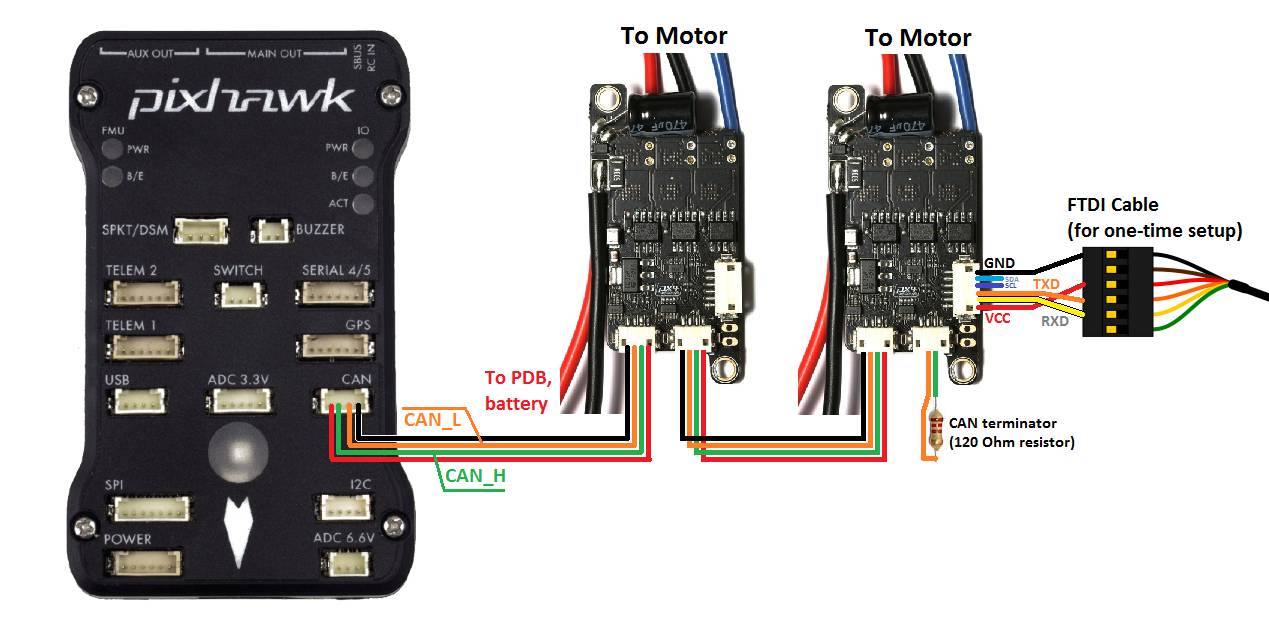
Even more importantly, each device on the UAVCAN bus is a smart device. They send out messages that can be monitored by a bus sniffer called a SLCAN. This allows you to monitor, configure and test every device on your UAVCAN network from one utility, Pavels UAVCAN GUI.
So let’s take a look at UAVCAN GUI. UAVCAN GUI is available for Windows, Linux and MAC.
First, you need a SLCAN sniffer. Like the one OlliW designed for his UC4H, UAVCAN for Hobbyists project or Pavel’s own Babel.
These usb devices attach to your UAVCAN bus as just another device. UAVCAN wiring is composed of 4 wires, two canbus signal wires and 5v power and ground. But there can only be one device on the bus that supplies the bus 5v. In our case it is usually the flight controller but when you are configuring maybe a single device with your SLCAN, OlliW’s SLCAN be jumpered to be a supplier for the bus power.
The UAVCAN GUI is a powerful tool but don’t let it intimidate you. We will just use the features we need one at a time. Plug in your SLCAN to a usb port on your computer. Next, start UAVCAN and it will pop up a dialog box that allows you to set the com port your SLCAN is assigned and what speed you want to talk to the SLCAN. If you are unsure what com port your operating system assigned, simply look at the available ports in the drop-down. Note the com ports it lists, then unplug your SLCAN. The port that disappears from the list is the one you want to use. Plug your SLCAN back in and choose that port.
Next choose 1000000 as the speed in both of the next two boxes.
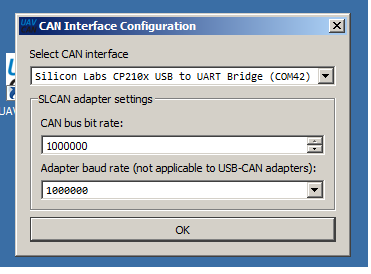
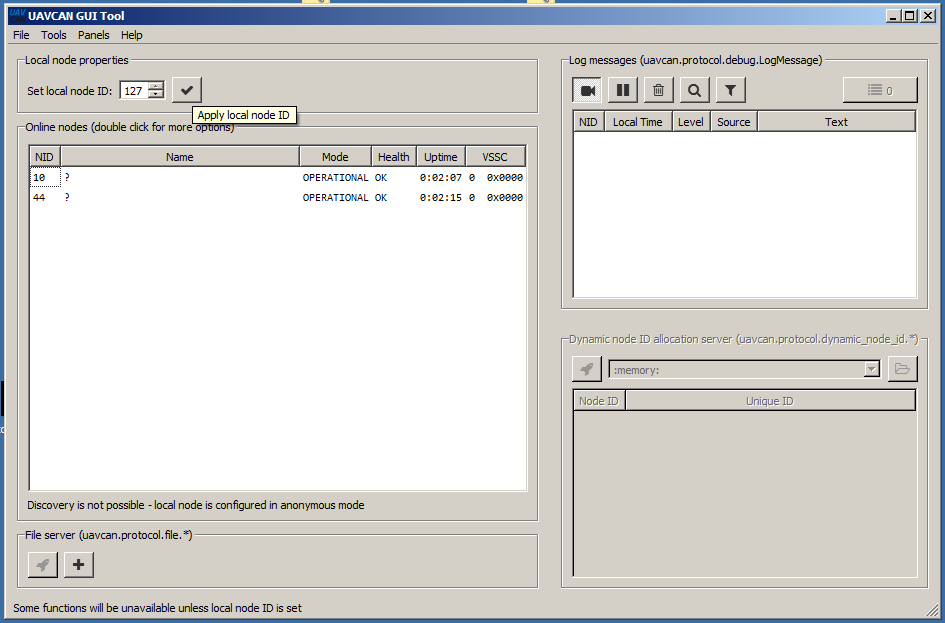
When you hit ok the main window of UAVAN GUI will appear.
Click on the button for “Local node ID” and leave it at 127
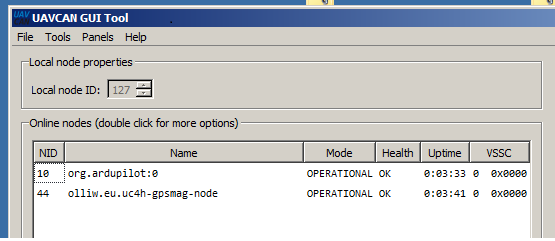
Note that now the descriptions of the nodes on the bus are displayed.
First notice that each node has an ID. The Pixhawk is 10 and the GPSMAg node is 44. The Zubax Orel ESC comes configured for an auto node assignment. But Ardupilot cannot assign dynamic node IDs. They won’t show up until they get a node ID. You must set the node IDs manually for the ESCs. For the ZUBAX OREL UAVCAN ESCs you can click on the main panel’s “Dynamic Node ID Server” in the lower right and it will assign a temporary node ID for the ESCs. Then you you can set static node IDs that will be the permanent IDs for the ESCs.
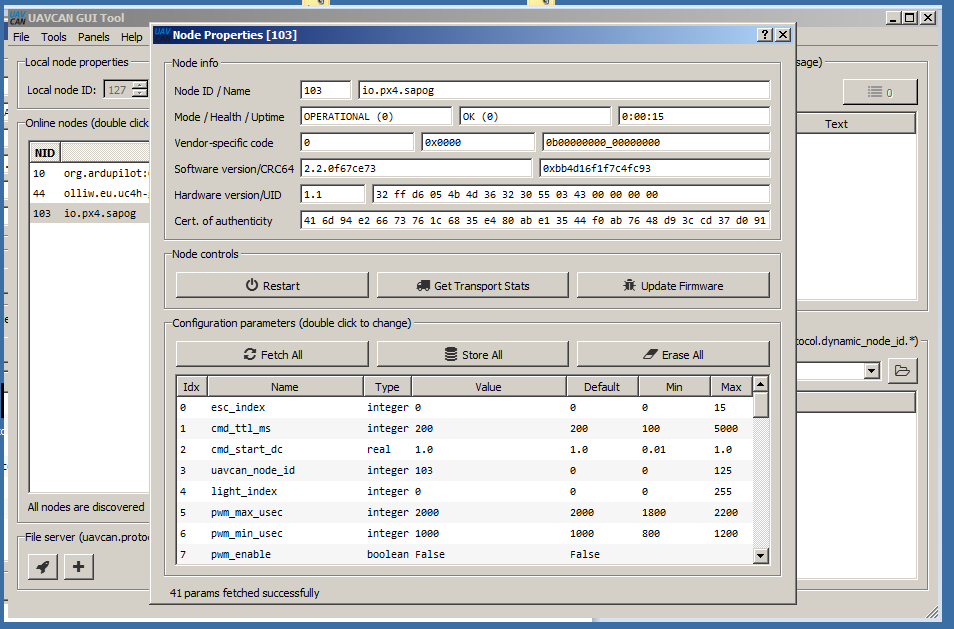
In the illustration above I clicked on the “io.px4.sapog” which is the name of the ESC. This opens the node properties window for the ESC. I have only one ESC connected in this example and you will see more if you have them all connected, like 4 with a QUAD.
If you click on “Fetch All” the tool will query the ESC for all its parameters. One of those parameters is called “uavcan_node_ID”. Click on this and set the value to a unique ID for each ESC. I choose 100,101,102 and 103 for the four ESCs for my Solo quad. But I could have chosen 52,87,105 and 22. They just must not be used by any other device. Click on “Store All” to save your settings. Some changes may require a reboot of the device.
The node IDs don’t have any relation to the position of the ESC in the multirotor geometry. That is set by esc_index. Set the index of each ESC to match their position in the motor order of the multirotor. In the case of an ArduCopter quad, that would be starting from the forward right motor 1,4,2,3 around clockwise.
There is another handy parameter for the ESCs and that is ctl_dir which allows you to change the rotation of the motor on that ESC.
As you can see, you get ultimate control, easily compared to traditional ESCs.
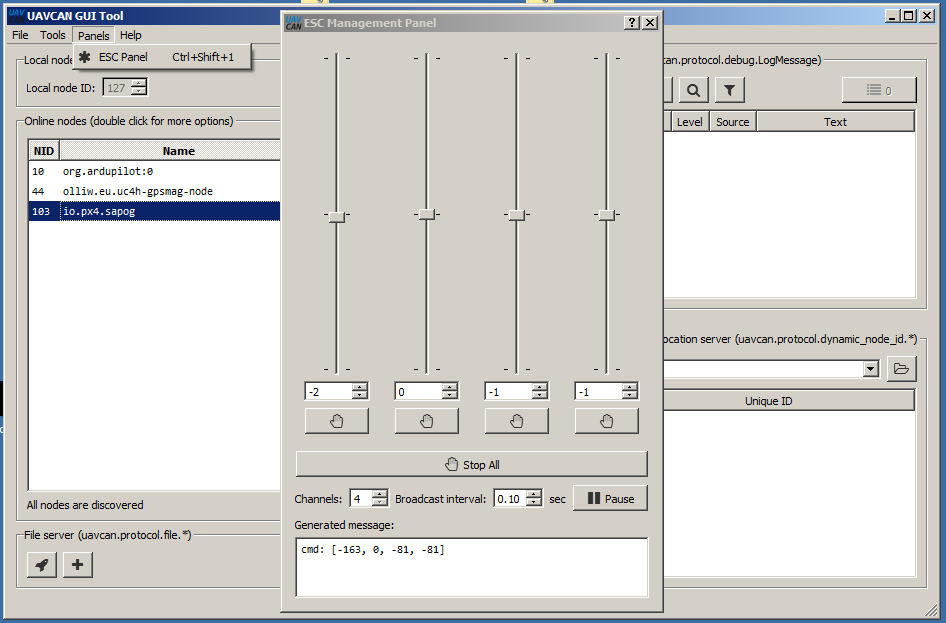
Next, we can test the ESCs and see if they are working on the ESC Panel. The smart ESCs get the throttle endpoints automatically from the flight controller.
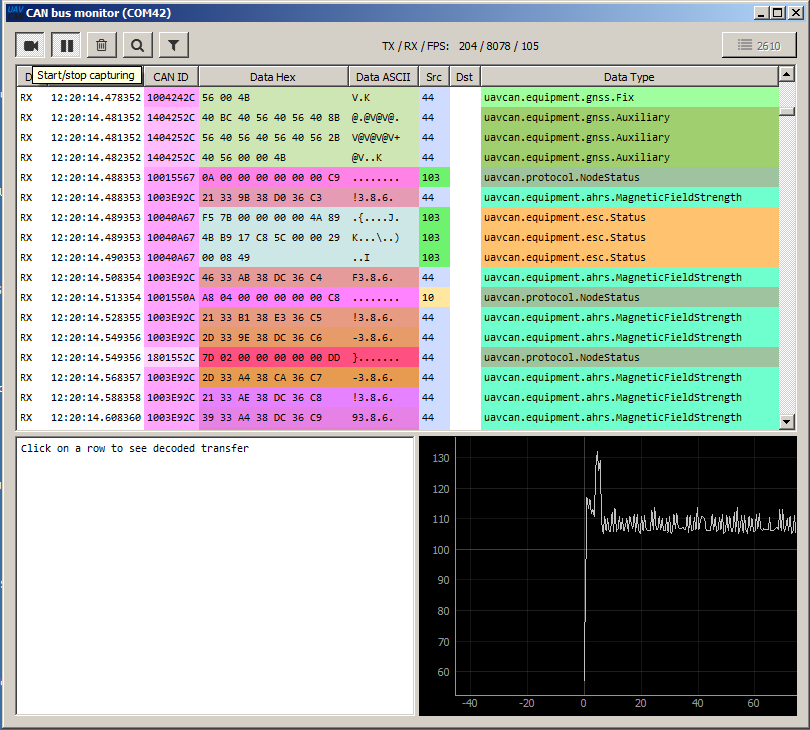
We can use the Bus Monitor to see the devices in action and check the values in operation. Now you can actually see your devices working while installed in your multirotor or other UAV.
You can see messages above for the GPS (uavcan.equipment.gnss), the Compass (uavcan.equipment.ahrs), and the ESC (uavcan.equipment.esc)
You start recording with the video camera icon in the upper left and you can pause at any point and check the value of the device you are interested in.
Not all the needed messages are currently in Ardupilot but hopefully they will be soon. OlliW has a fork of ArduCopter with the needed messages available now that he calls BetaCopter that allows his GPS/Mag interface, UAVCAN Power Module and UAVCAN to his STorM32 gimbal controller board to be used right now!
I think you can see that UAVCAN can give you a much more integrated multirotor build, with a common bus for all your devices and a common way to configure, test and troubleshoot them. OlliW brought UAVCAN to the DIY enthusiast with his UAVCAN 4 Hobbyist project UC4H. I have successfully used OlliW’s UAVCAN devices to convert a 3DR Solo to UAVCAN.
