CANbus for Ardupilot with UAVCAN and UC4H
I think that CANbus is the single most important feature added to the Ardupilot eco-system for years. What is CANbus? Think of CANbus as the internet for multirotor devices like GPS, ESC, Barometer, Airspeed sensors, power modules and Gimbal controllers. Instead of serial, I2C, SPI, PWM and other protocols, CANbus unifies all the devices on your multirotor to one common protocol and, even more important, one cable/connector. In my blog I did a survey of Mini Pixhawks and found that the cables and connectors for the same features were all different on each of the boards. You could not unplug the GPS from one and plug it into any of the other boards. If you wanted to swap one mini Pixhawk board for a different vendor’s board you would have to re-wire everything!
Typical Pixhawk Build without CANBus
What is possible using CANbus, just three connections to the Pixhawk -Power-RC Radio- CANBus
CANbus eliminates the “rat’s nest” of wires for Ardupilot builds. All the devices connect to the CANbus with the same connector and it is a simple four-wire cable and they are all the same interchangeable cable for all devices. No more hacking and splicing cables up trying to make one to work. No more trying to figure out for hours if the serial lines go RX-TX or RX-RX. A CANBus network is a “daisy chain” which allows one device to connect to the next and then to the next. No longer do all devices have to go all the way back to the flight controller causing a “rats nest” of long cables with all the related problems they can have.
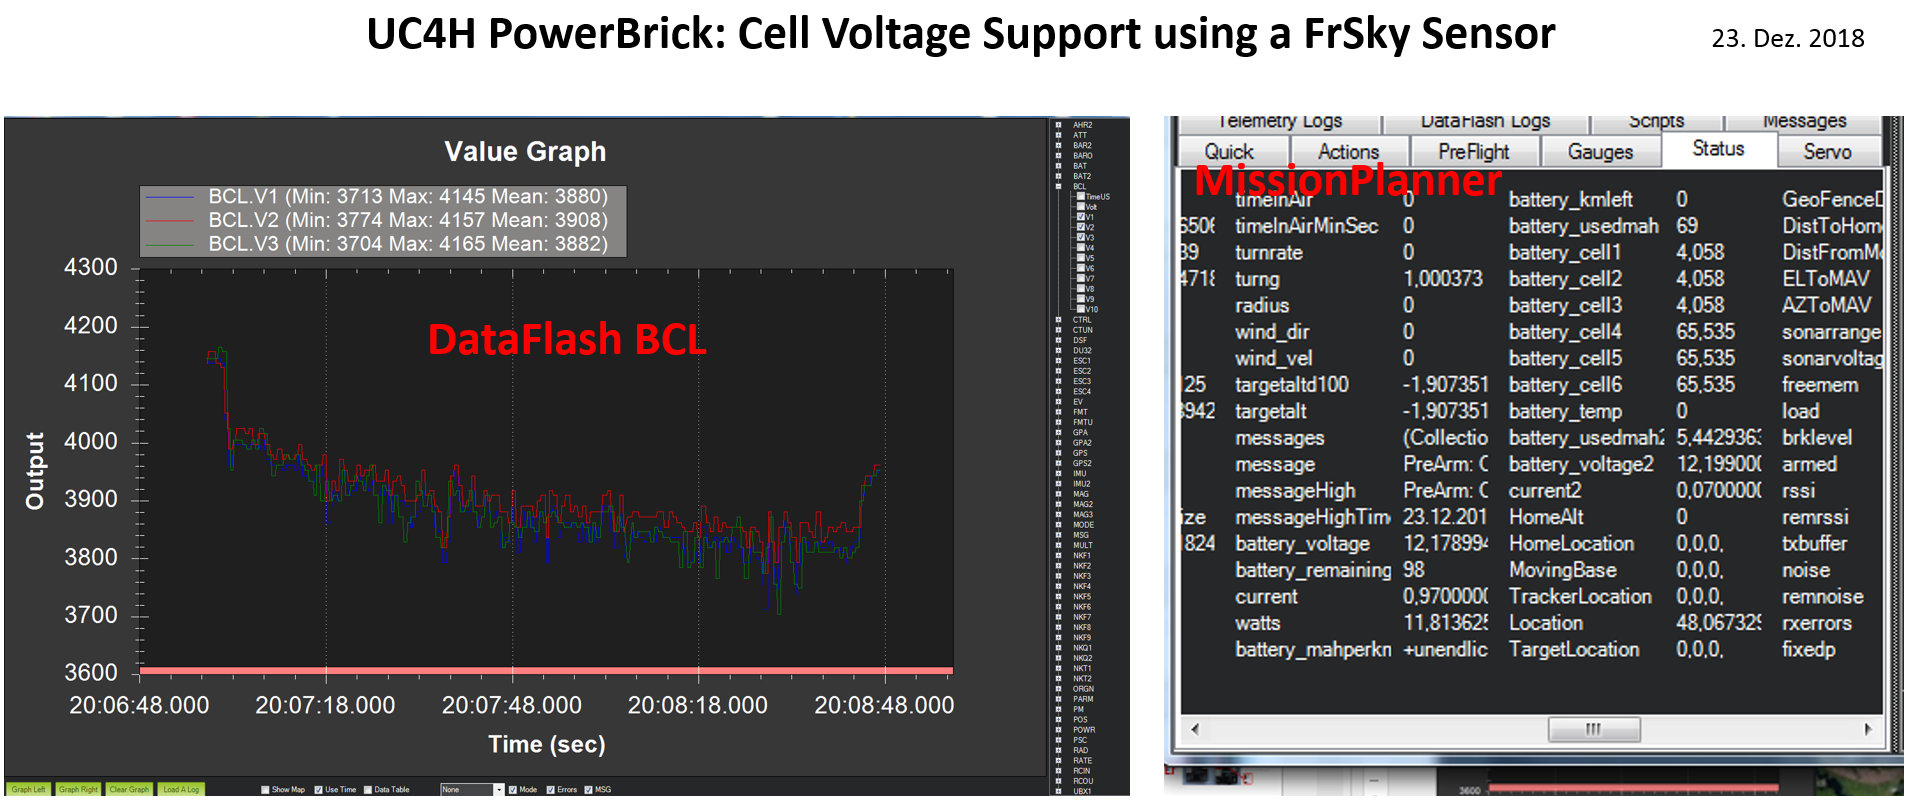
All of the devices on CANbus are smart devices. Each device knows how to talk to the other devices in the network. The gimbal controller can listen to the position information directly from the GPS rather than going through the flight controller. But this means that each device must be designed for the CANbus. But this also means novel features such as ESC telemetry, which brings real-time ESC status, or high-precision battery information during flight. In addition, a CANbus network wiring can be completely redundant bringing a much higher level of reliability to multirotors.
CANbus was originally designed by Robert Bosch GMBH for automobiles many years ago. Pavel Kirienko created a software layer which runs on top of the CANbus, made specifically for UAVs, that he calls UAVCAN. He also started a company, called Zubax, to produce high quality commercial grade UAVCAN devices: www.Zubax.com Being that they are commercial grade, they are appropriately and reasonably priced for the commercial market, but they are expensive for the DIY user and only ESCs and GPS are available now.
DJI has been using CANbus for years but they can build all the devices themselves. They did not have to wait for vendors to build CANbus devices or the flight controller firmware to be modified to use CANbus.
UC4H for Ardupilot
OlliW, the designer of the STorM32 gimbal controller, liked what he saw in UAVCAN and decided to build an interface to use standard RC components and convert them to be used with UAVCAN and Ardupilot for the DIY builder. It was ground-breaking work for Ardupilot. He created the first system that would allow a complete build using UAVCAN and Ardupilot with all devices connected using UAVCAN.
OlliW calls his project UavCan 4 Hobbyist or UC4H
The UC4H project has grown considerably and now consists of many pieces:
UC4H GPS-Magnetometer-Barometer
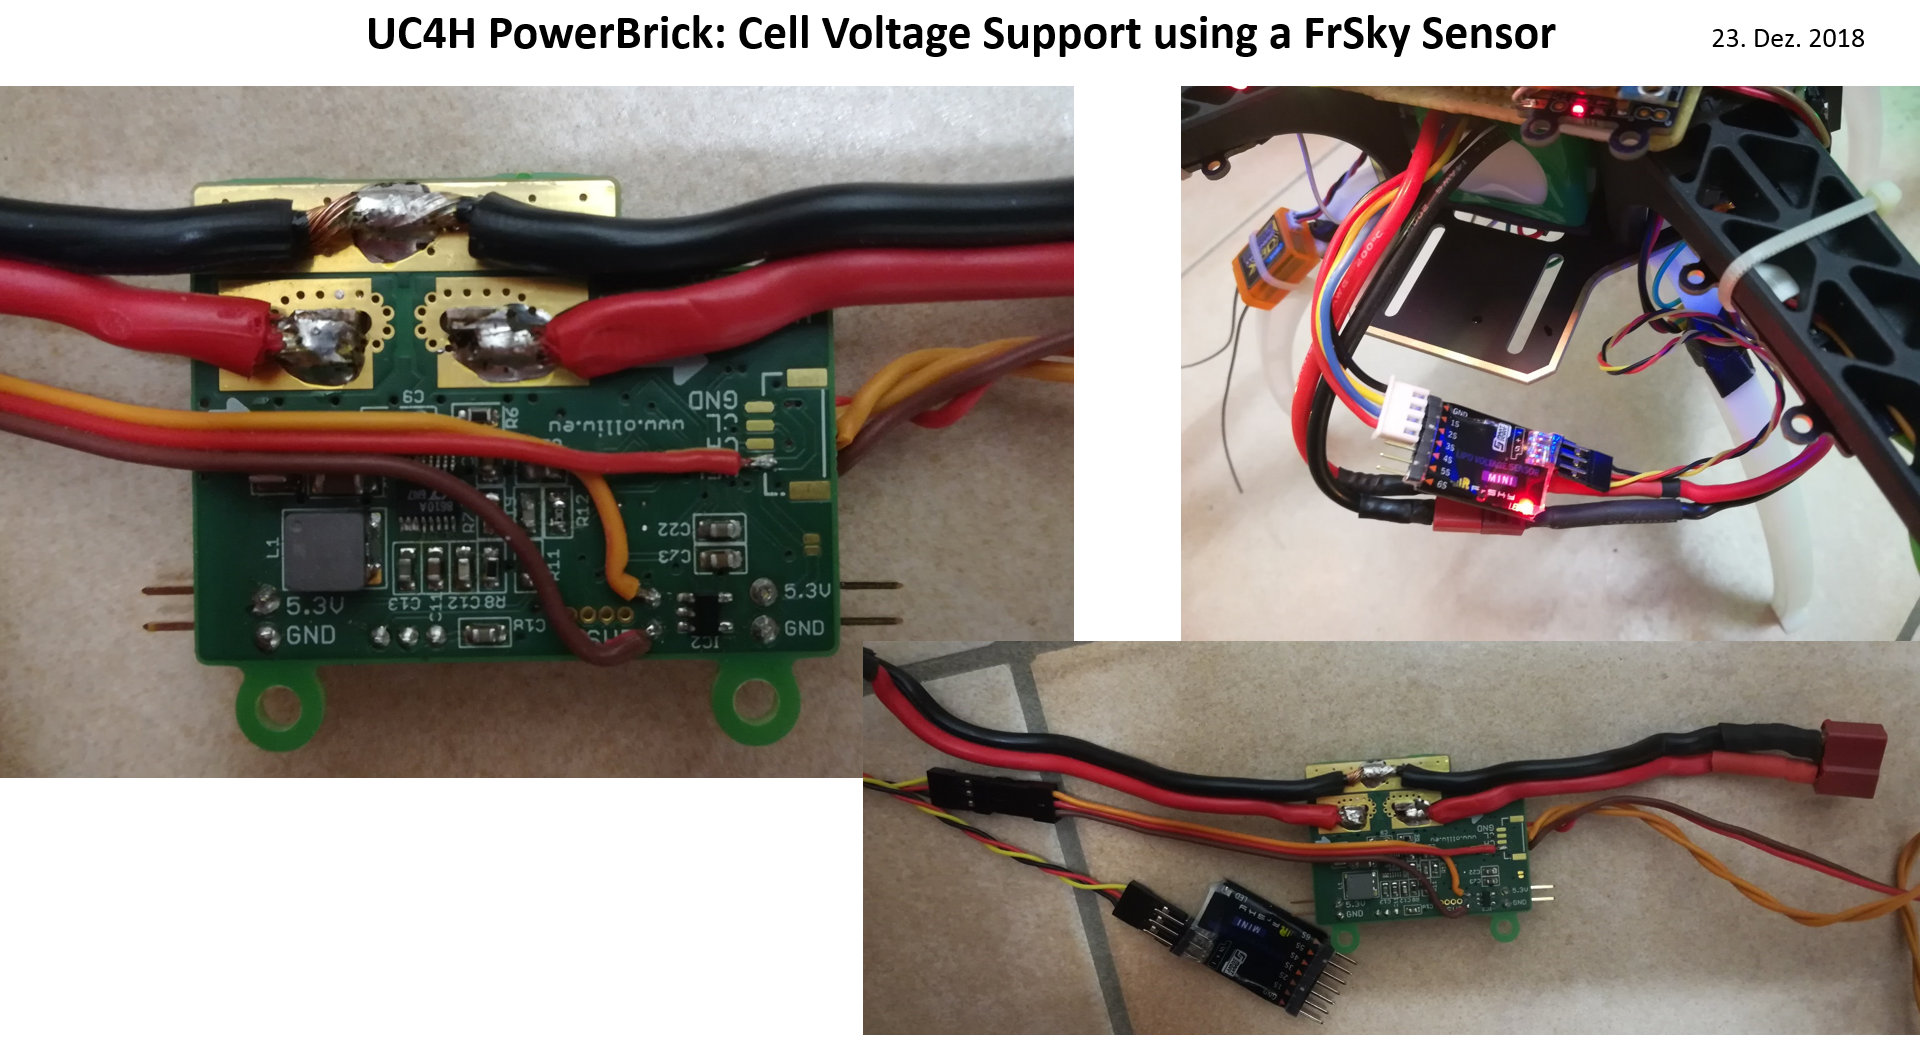
UC4H PowerBrick
UC4H ESC-Actuator
UC4H UartBridge
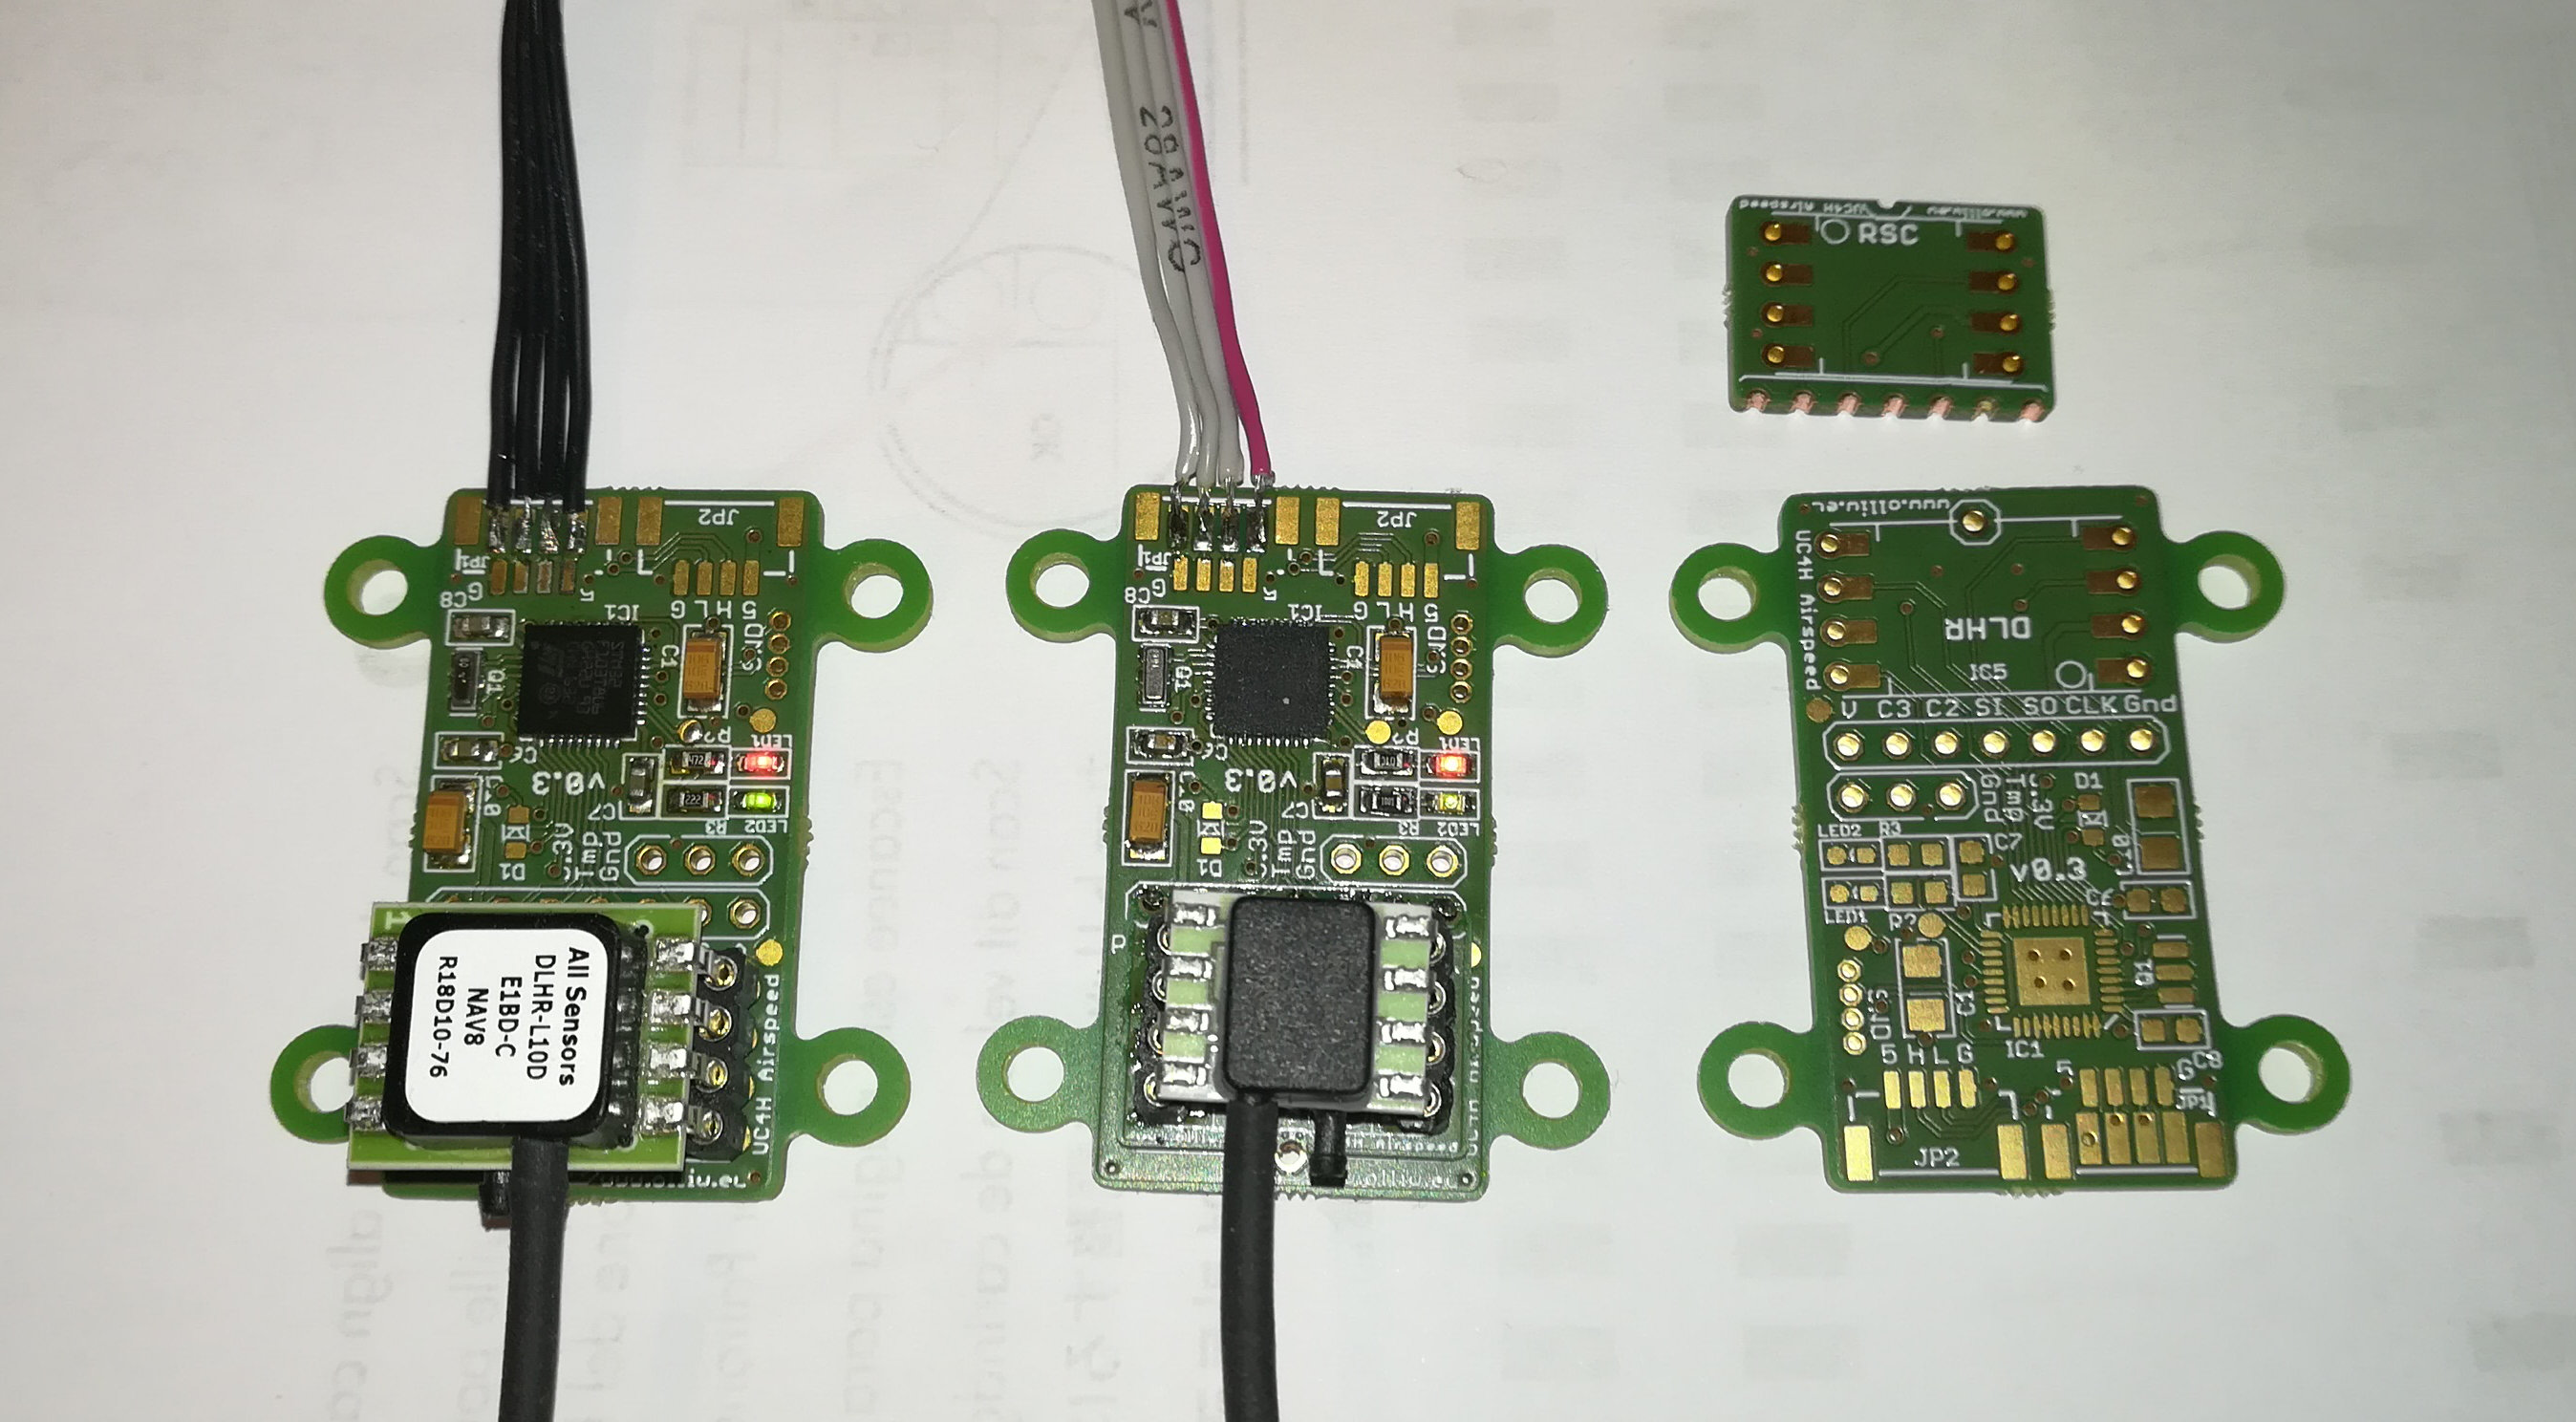
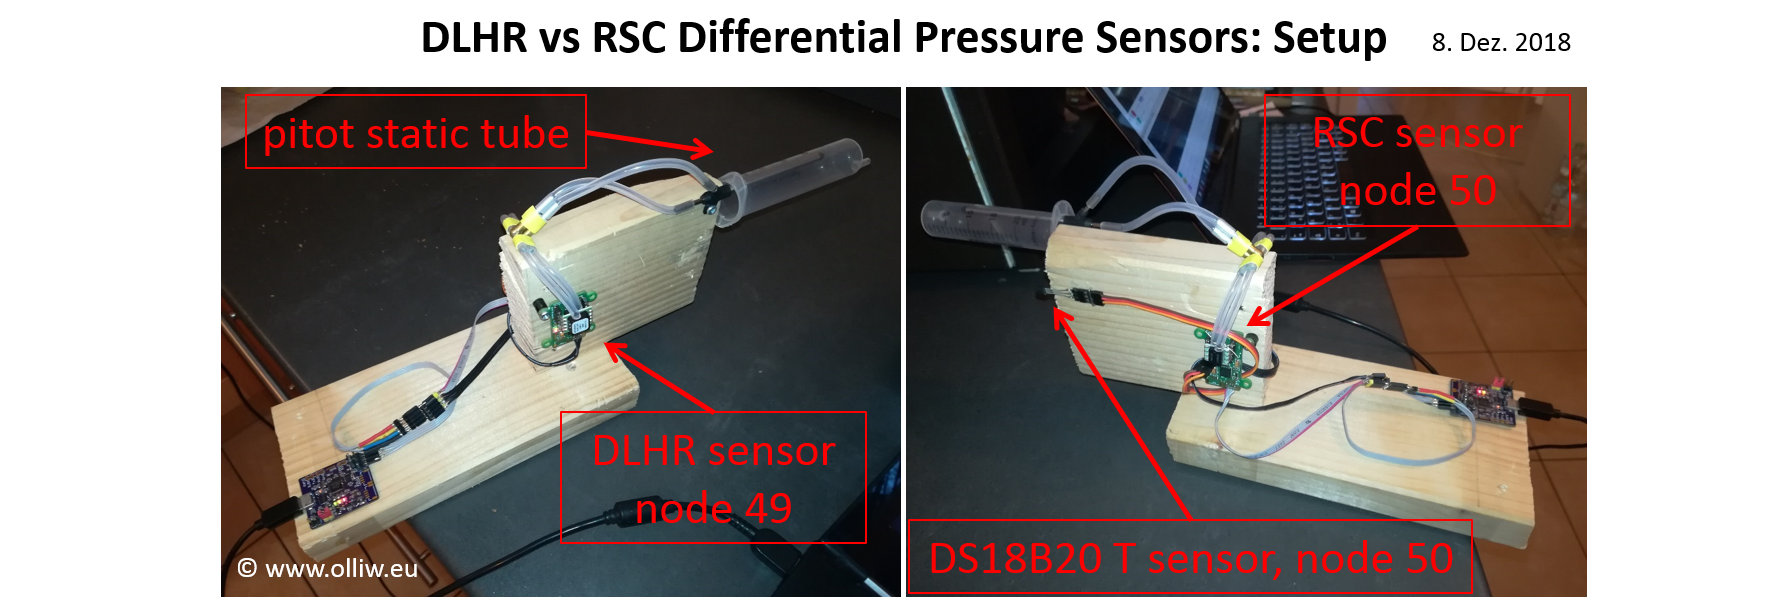
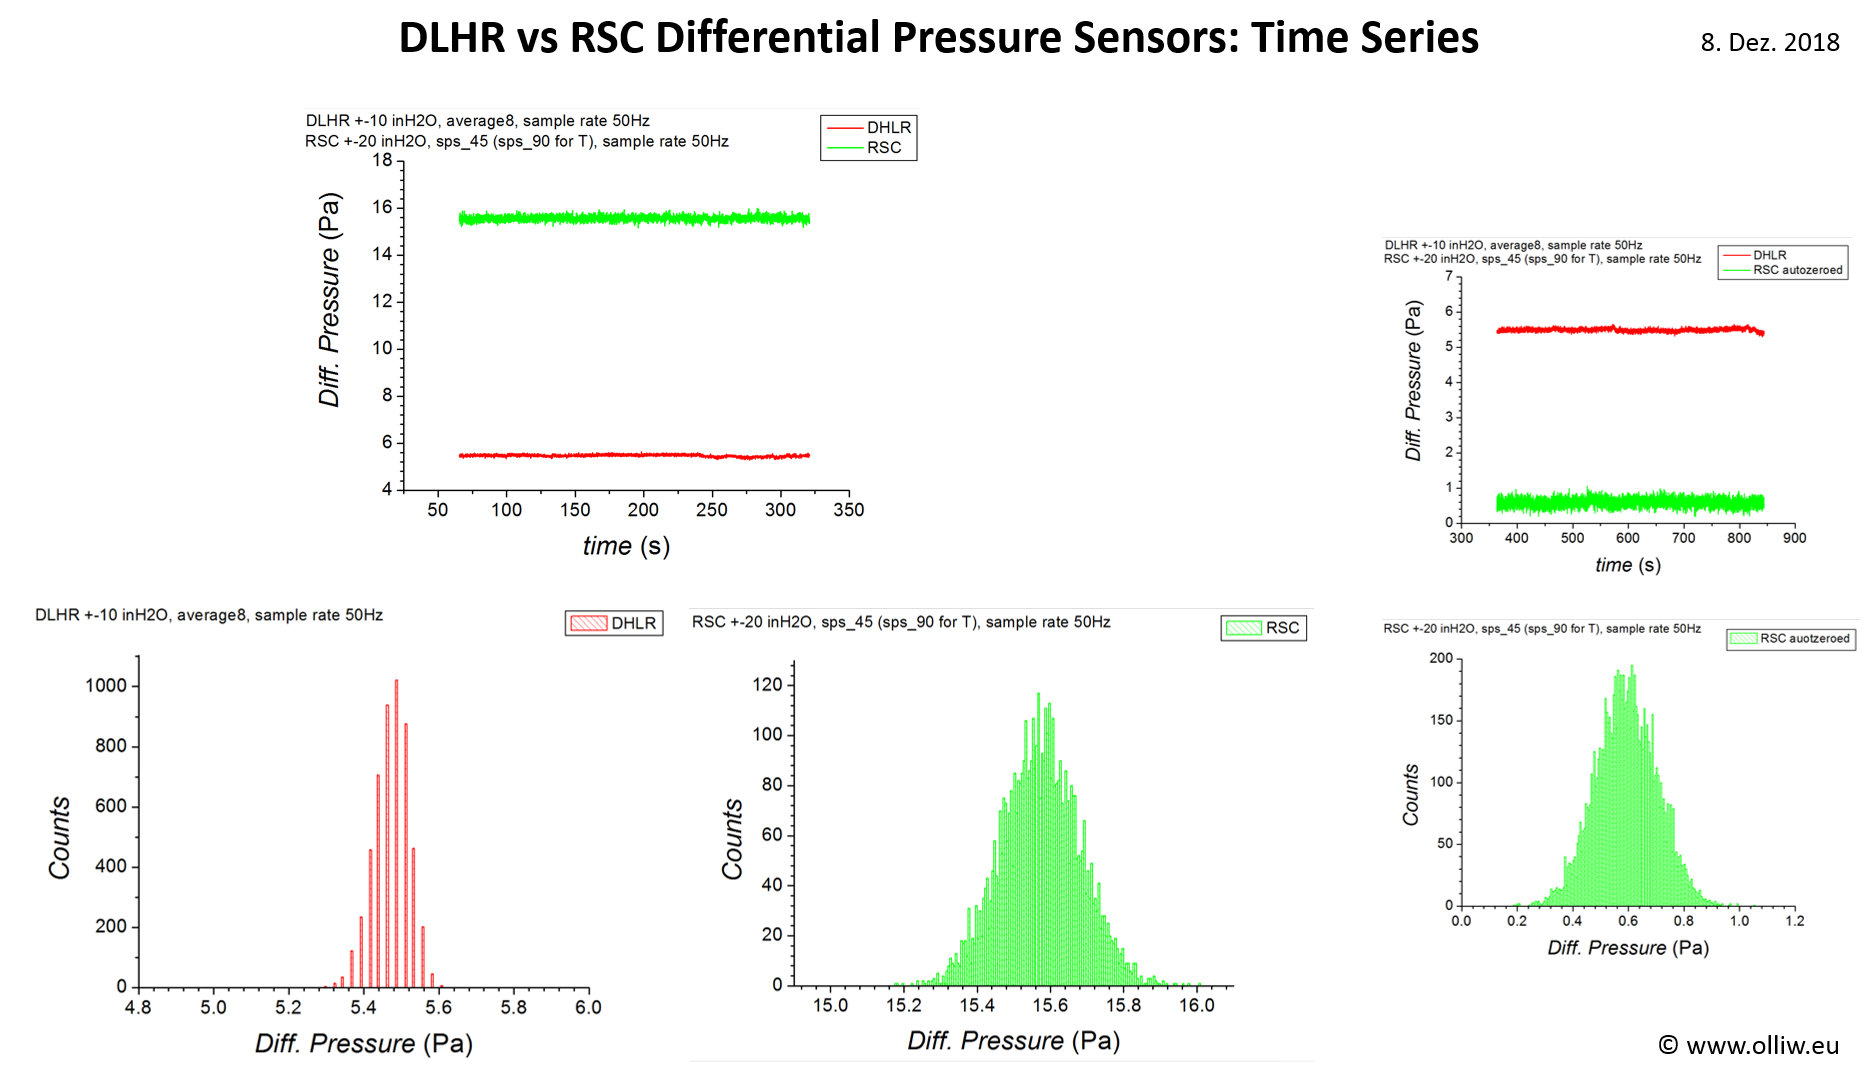
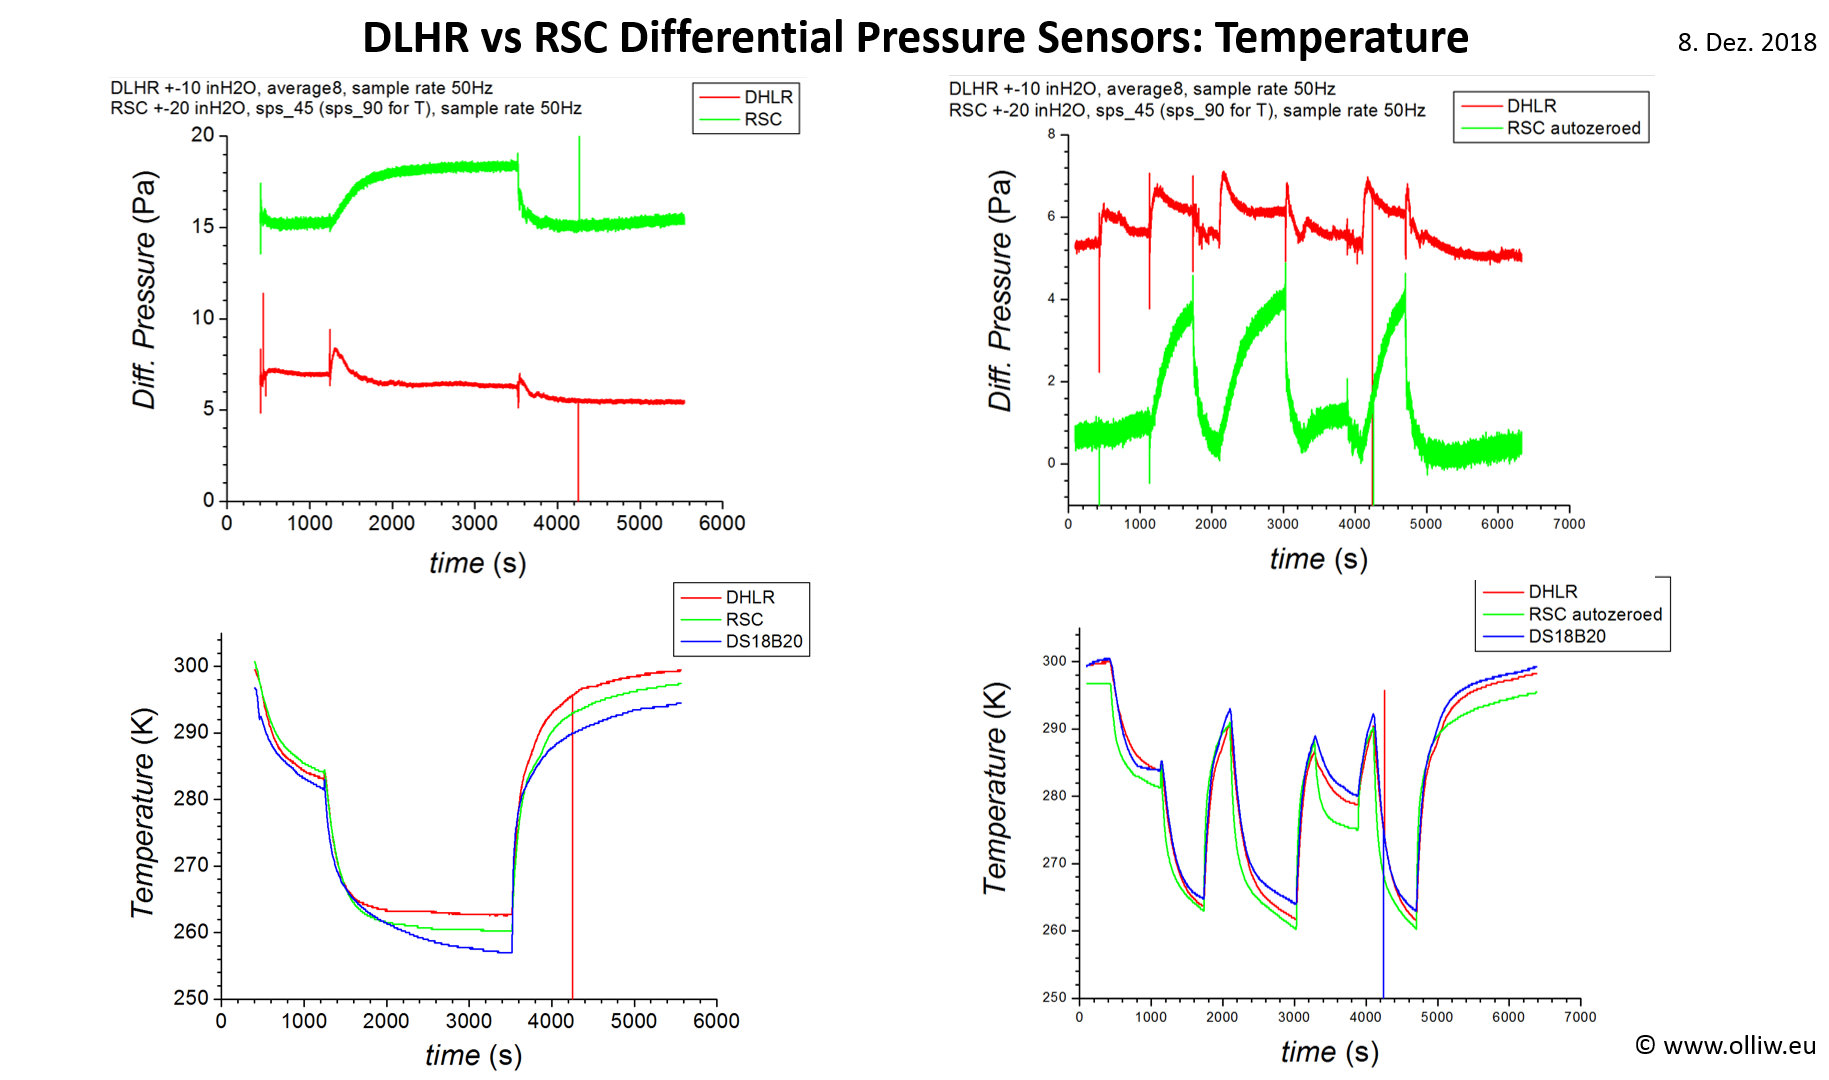
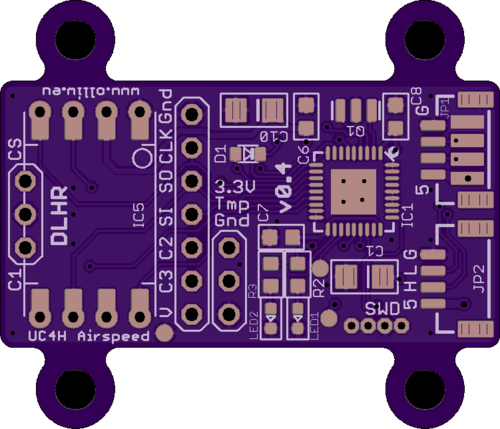
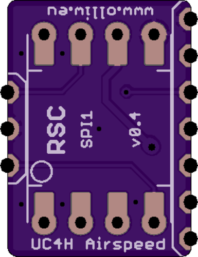
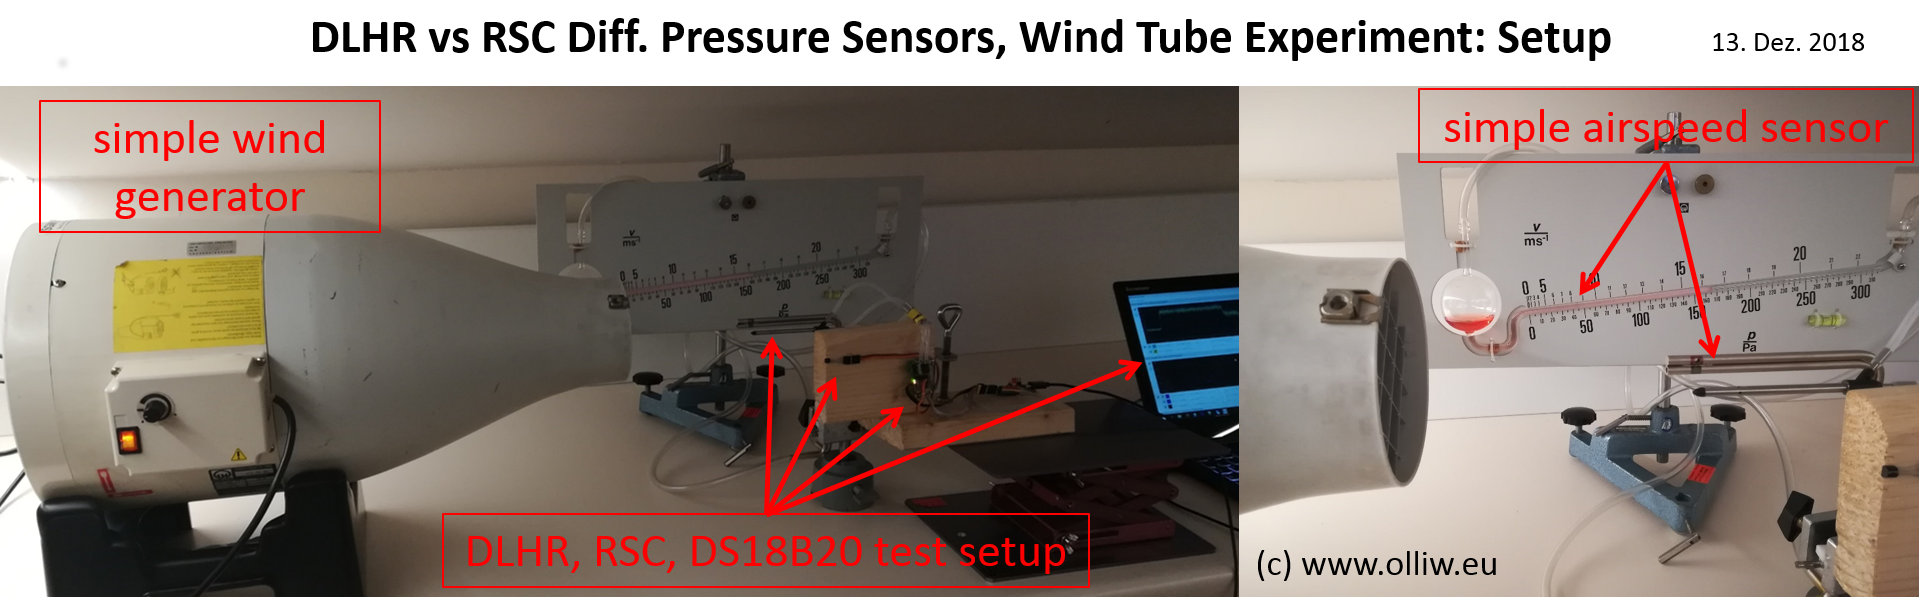
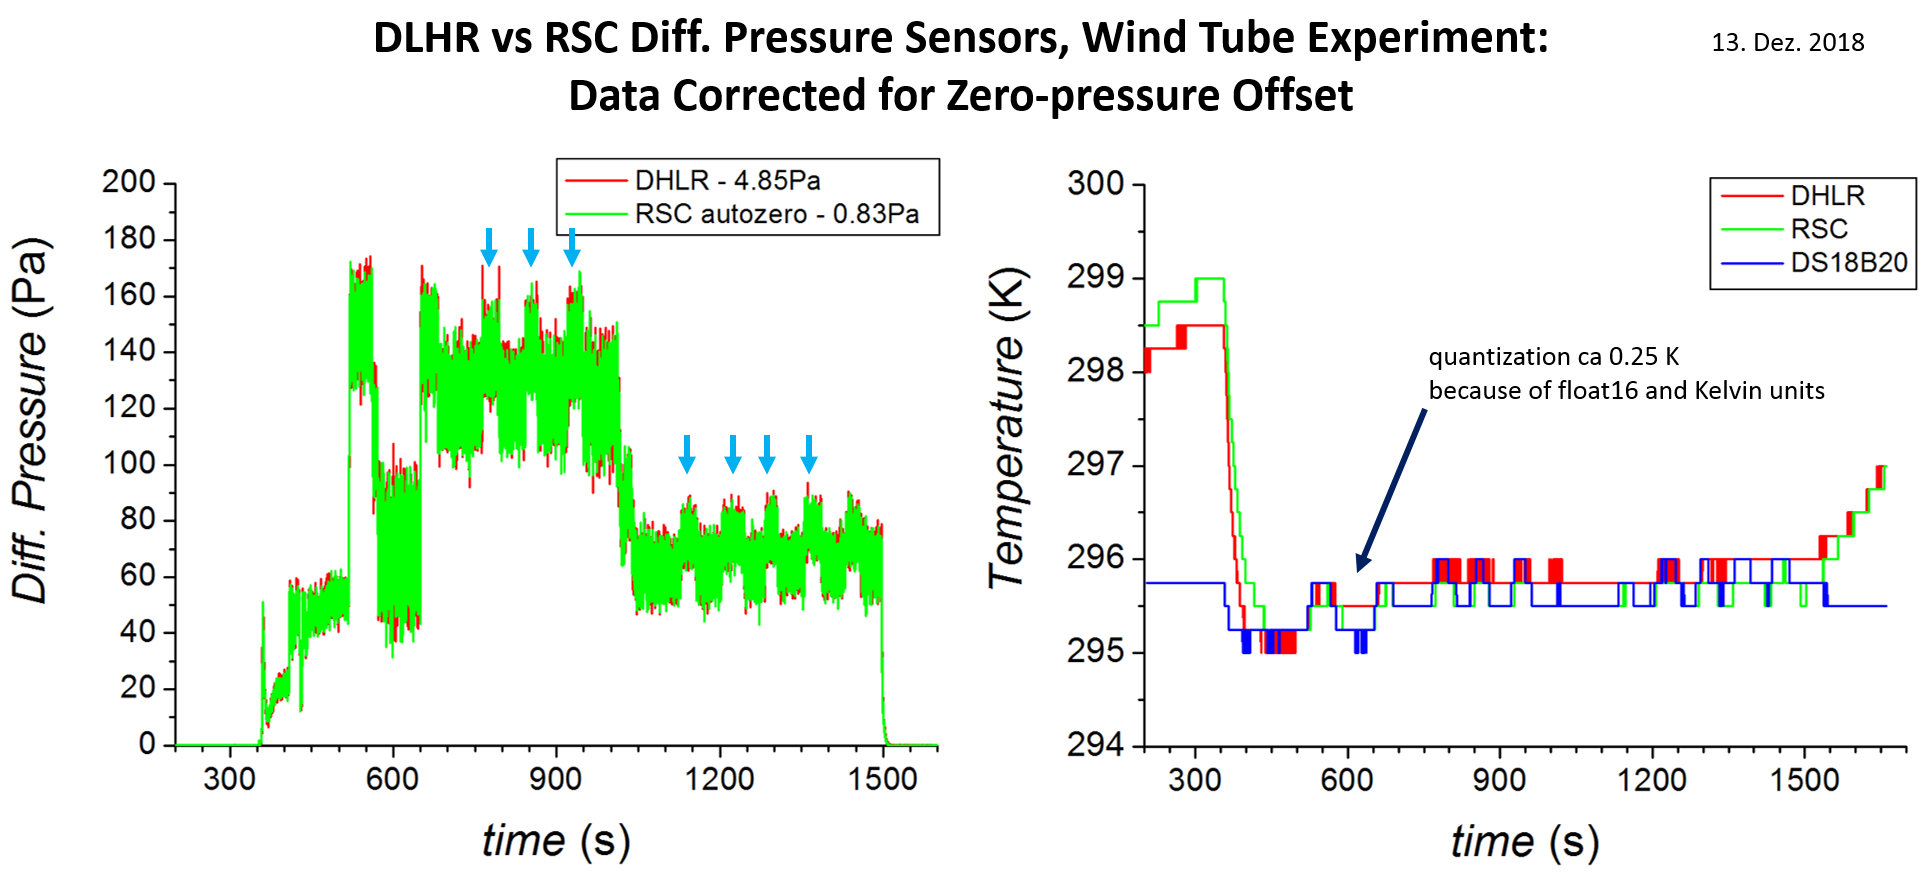
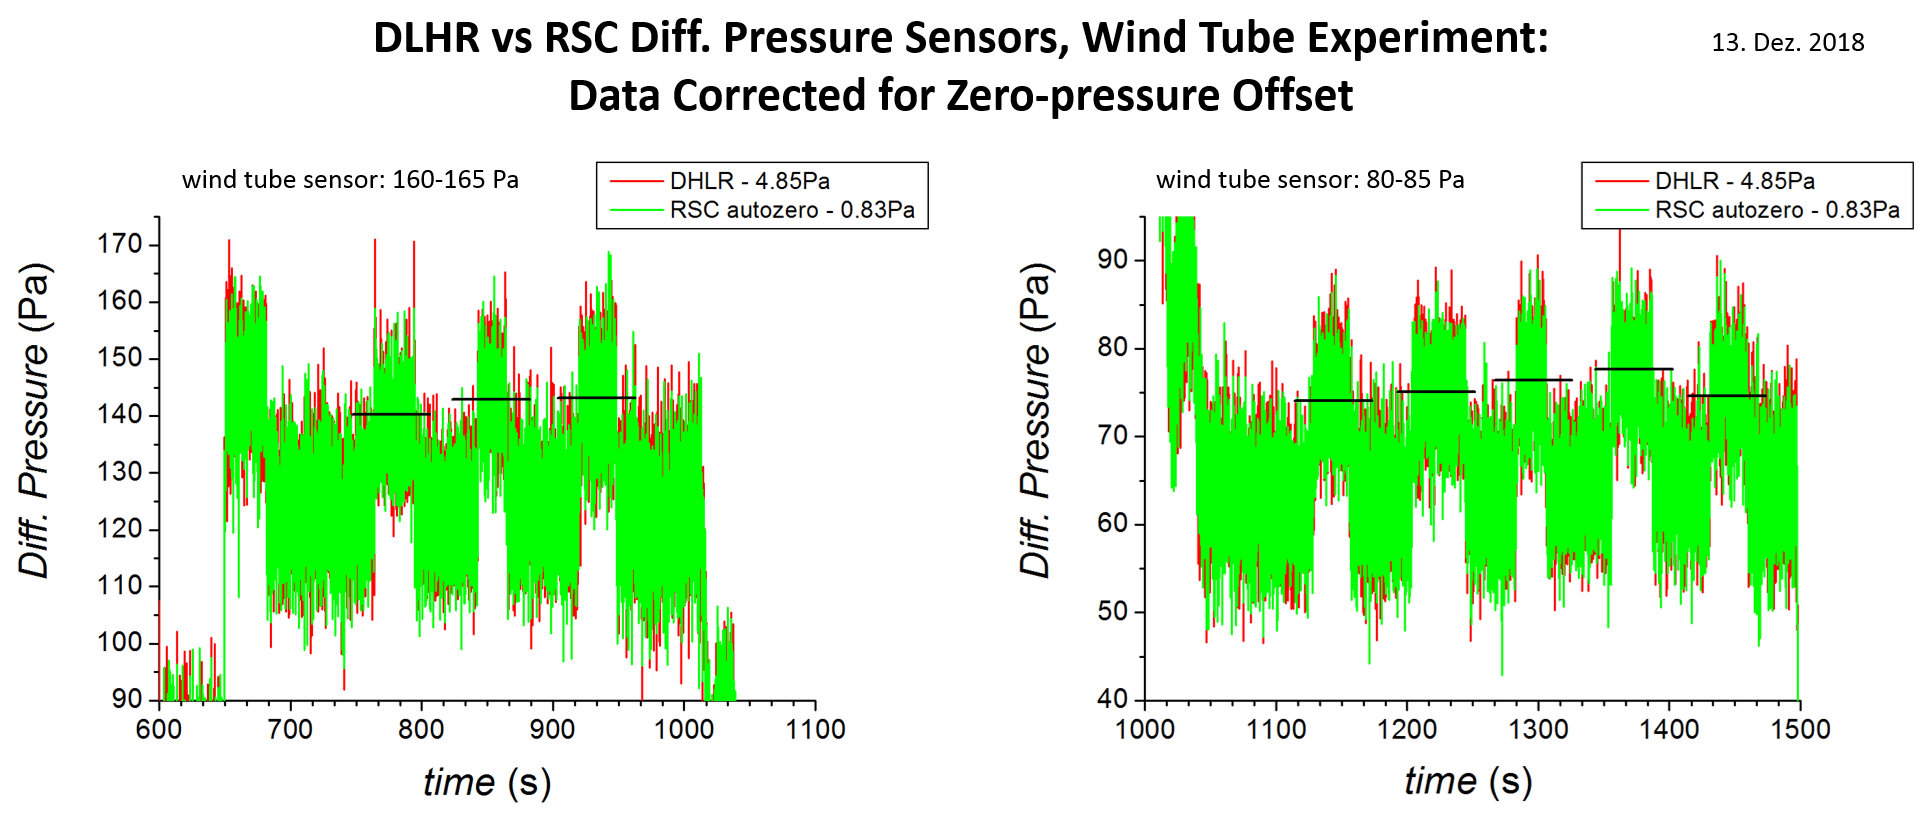
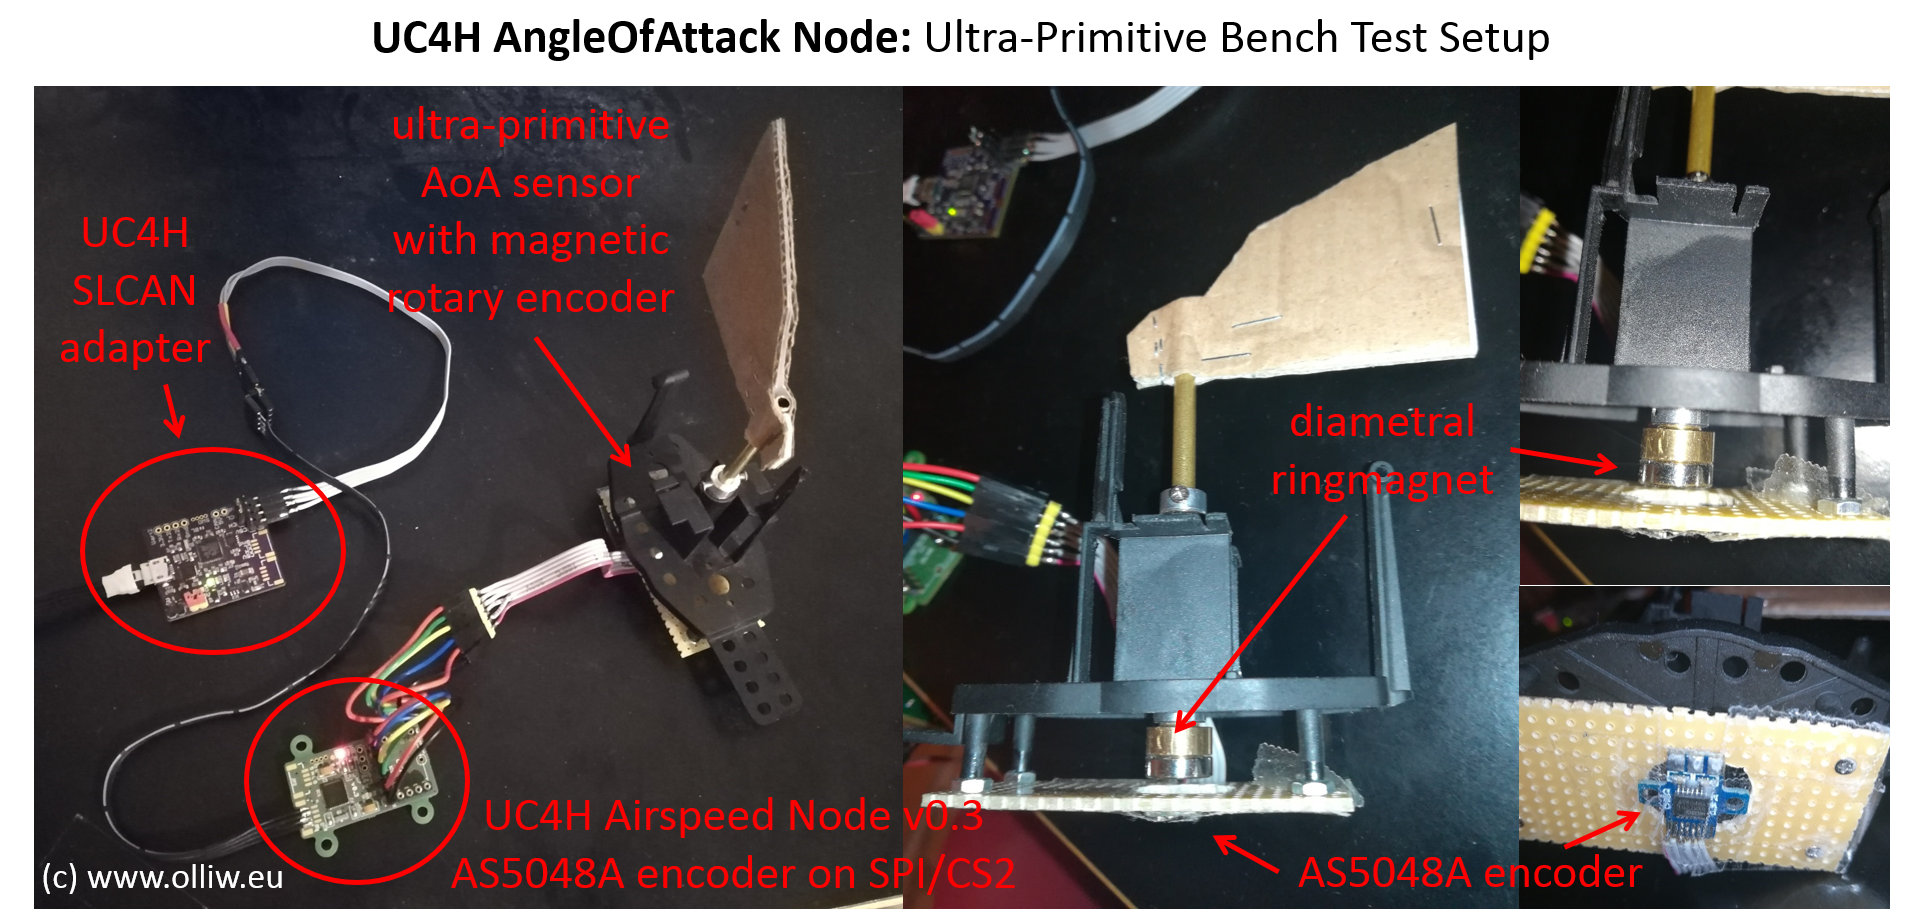
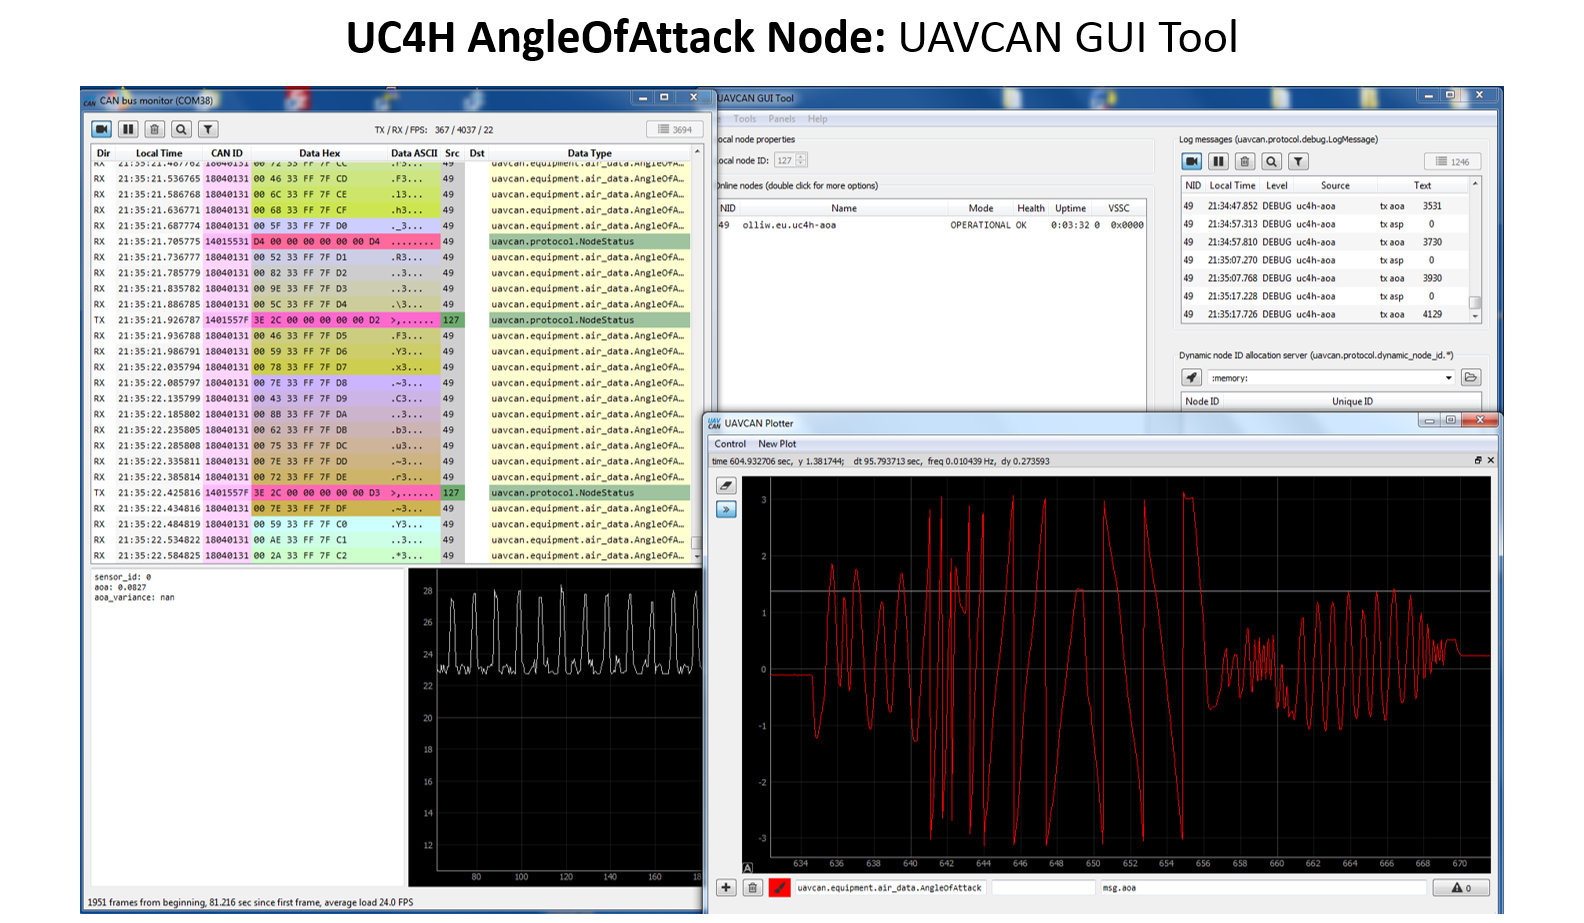
UC4H Airspeed-AngleOfAttack
UC4H Notifiers: Notify, Display, OreoLEDs
UC4H IndicatorLED
UC4H FunThing
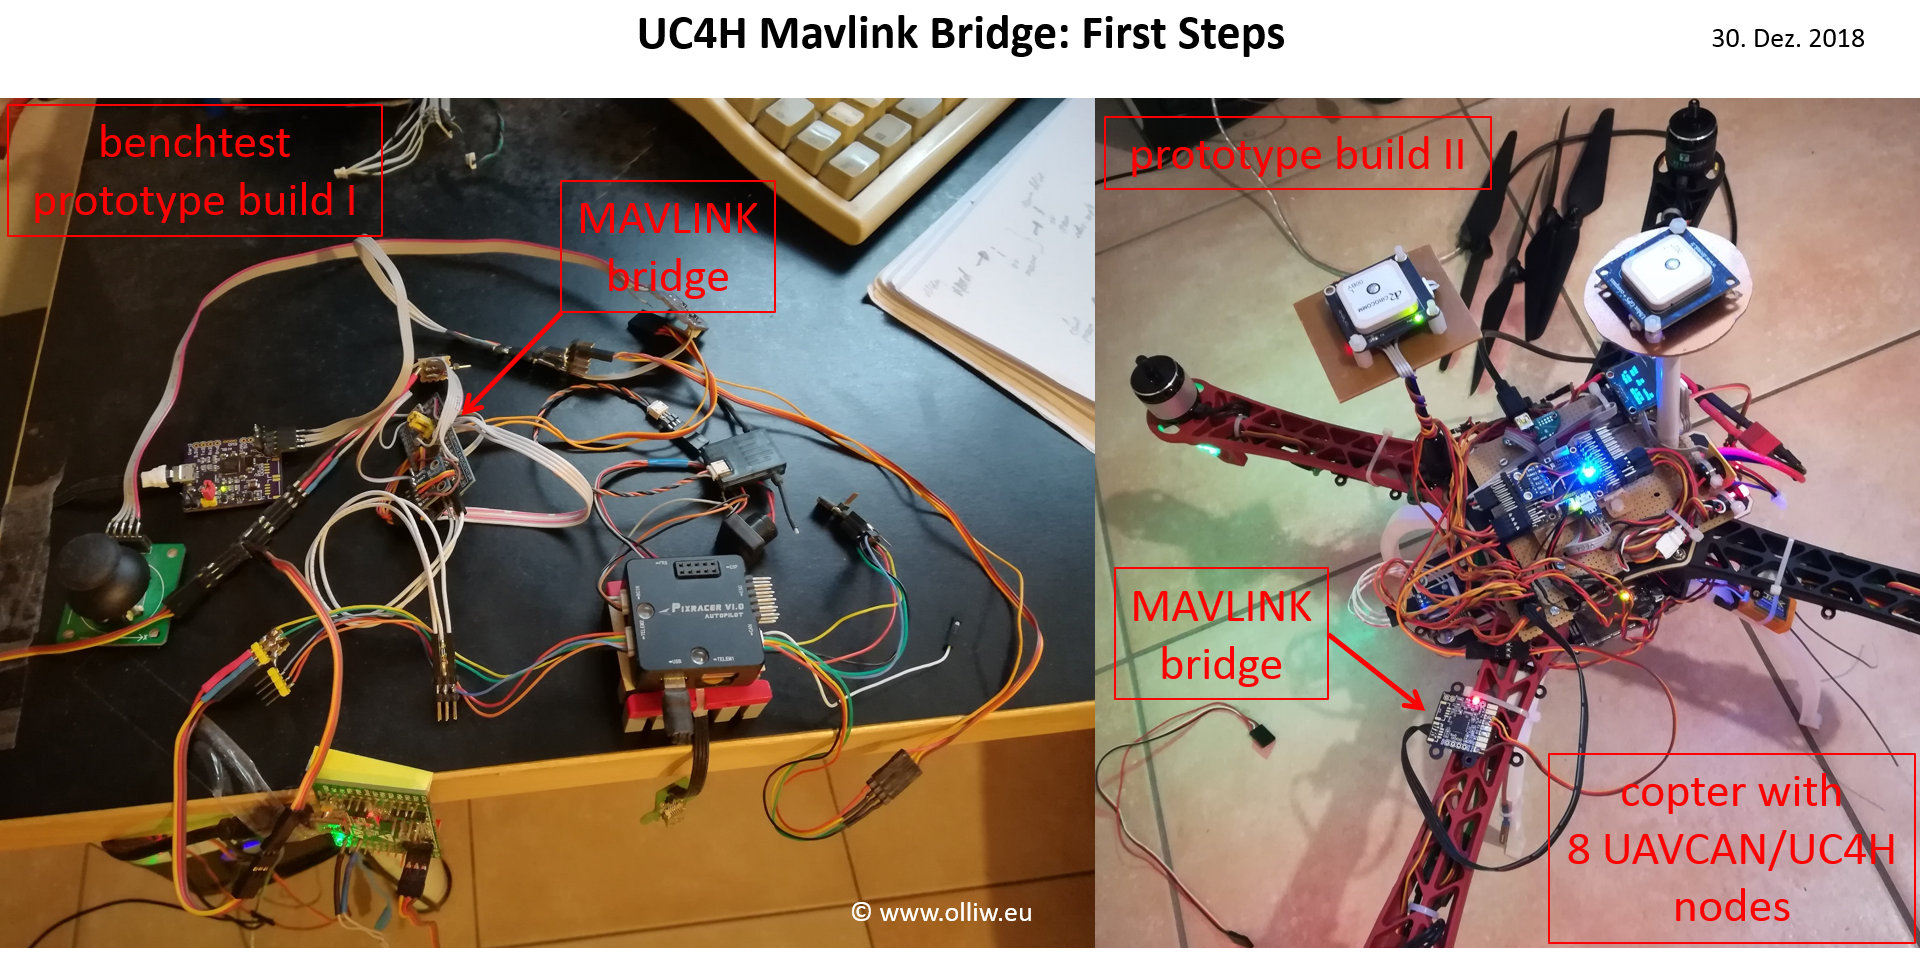
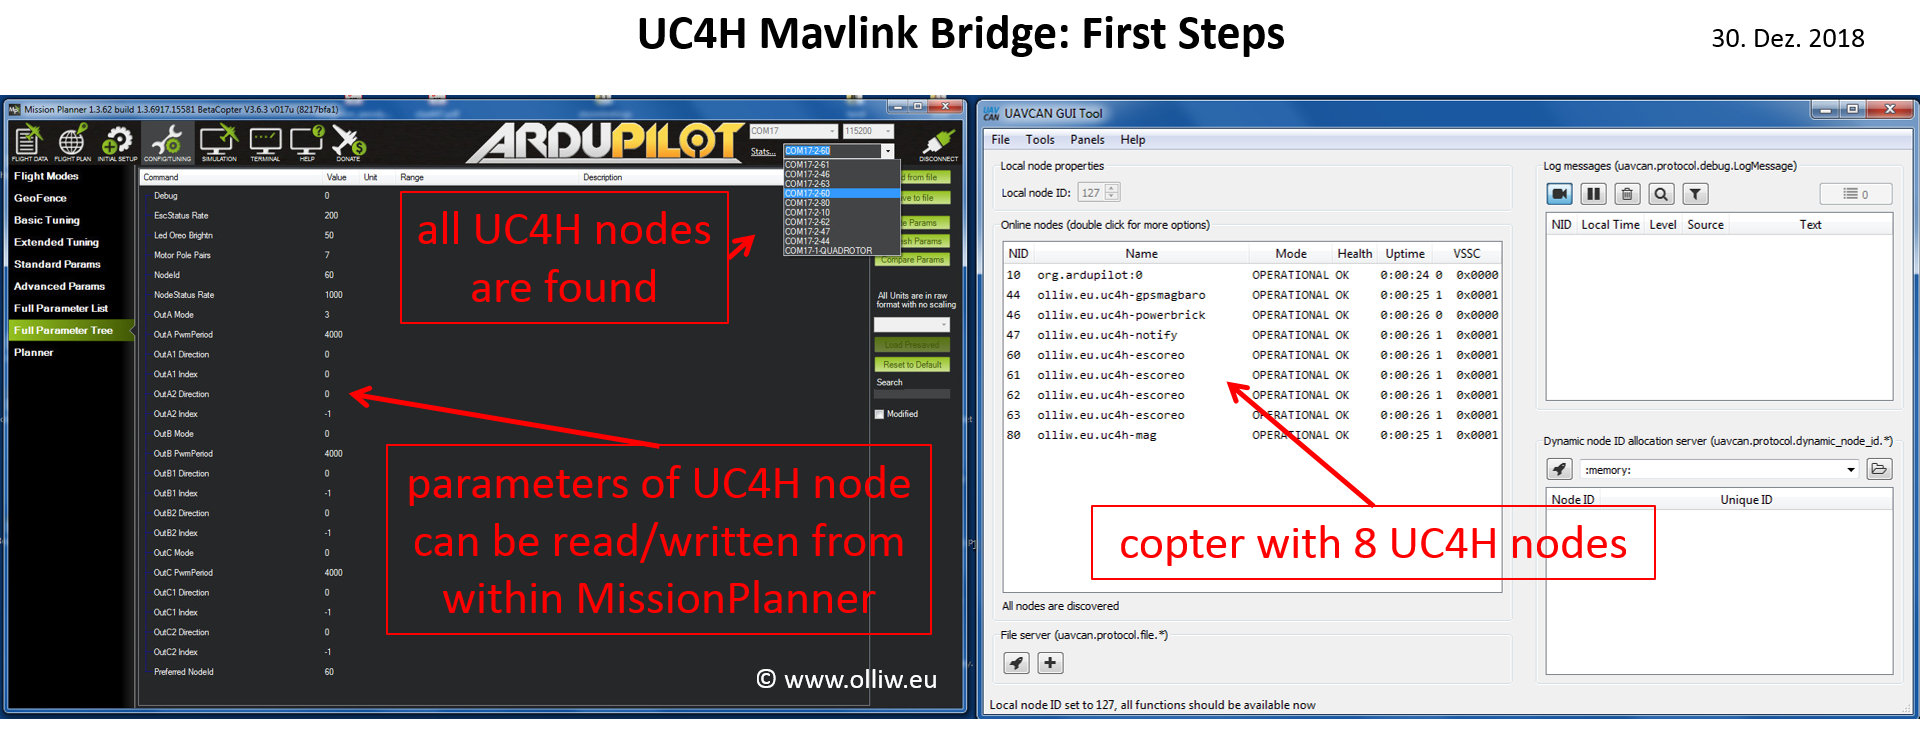
UC4H MAVLinkBridge
UC4H Bootloader
UC4H SLCAN Adapter
Now, in version two, there is a general purpose board that can be used to interface a GPS, ESC, LED lights, Oled Notifier, etc. to UAVCAN for Ardupilot along with a Hall effect power module and KISS ESC carrier boards. These are commercially available at low cost from Jdrones Store. Now, any DIY builder can afford to use UAVCAN. This set of boards allows for complete, fully functional UAVCAN drones, with unprecedented features. With all devices using the same 4-wire cable type with locking, easy to release connectors.
In my first demonstration build using UAVCAN on a quad, I had only three connections to the flight controller - Power, CANBus, and RC radio. No PWM wires going to the ESCs, no cable going to the GPS, no wires going to the power sense on the power module. It is so much simpler to build. More importantly, it is simpler to build CORRECTLY so it will fly reliably.
But first the RULES. There are always rules. OlliW does not sell anything. He makes no money off all the STorM32 gimbal controllers out in the world nor UC4H. He is a hobbyist who is kind enough to share his work with the rest of us. You can use his hardware designs to build your own hardware if you like and you can use his firmware for free. You can use both to make your own commercial product if you like. But this is not open-source firmware. THAT IS HIS RIGHT. He can do anything he wants with it because he wrote it. You can use it for free all you want. You just cannot take it and change it. So let’s not debate open source here.
Now back to fun. On my first UC4H build I used junk box parts to hack together a spyder quad based on some plates from a DAYA 680 Folding Quad. The finished quad flew better than any of my previous 12 builds. But I was tired of hacking boards together trying to get everything to fit. So I sketched out a spyder quad with holes for all the things I would need to mount, like the power distribution board, the ESCs, the landing gear, etc. This time I was just going to bolt everything in because it was designed to work. So I sent the drawing to Nick at CNCMadness and he cleaned up the drawings and cut me some beautiful plates. It is a folding spyder quad designed for 17” props. So check out the build log here: CANbus Quadcopter using UC4H : Son of FrankenSolo
I am going to take a pause now and reserve some posts below and copy all of OlliW’s UC4H posts on his blog to here so there is a reference. But I encourage you to visit OllW’s blog to see the latest and greatest article. http://www.olliw.eu/2018/uavcan-for-hobbyists-blog/
More information at