This is my first QuadPlane project so I decided to keep it simple and small as a test bed for future larger conversions.
I have many multi-rotor copters and planes but only two conversions to ArduPlane. My first conversion was a Skywalker using an older Arduflyer v2.5.2 controller and more recently a Bix 3 Trainer from Hobby King using a Pixhawk.
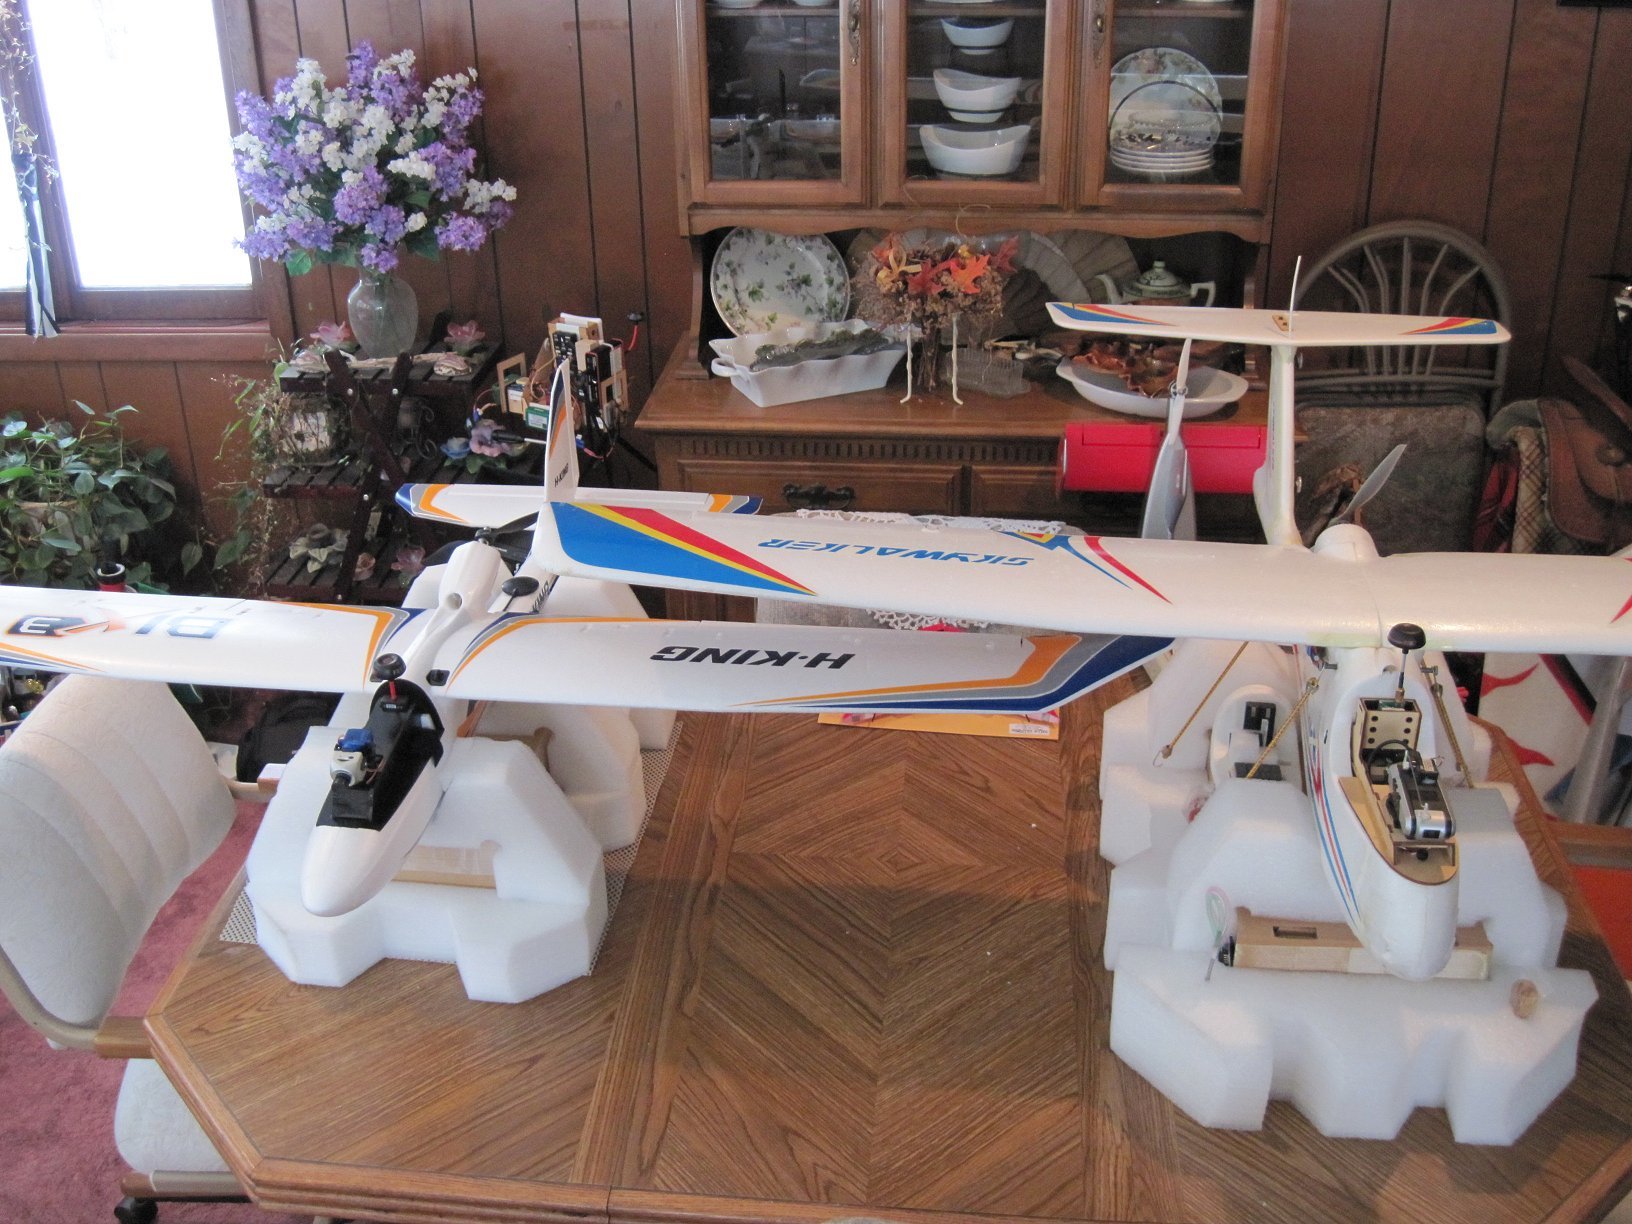
I’ll start the thread with my initial conversion to APM plane. The Hobby King Bix3 Trainer comes in ARF and RTF packages and all the spares are inexpensive. There was virtually no work needed to get this plane flying!
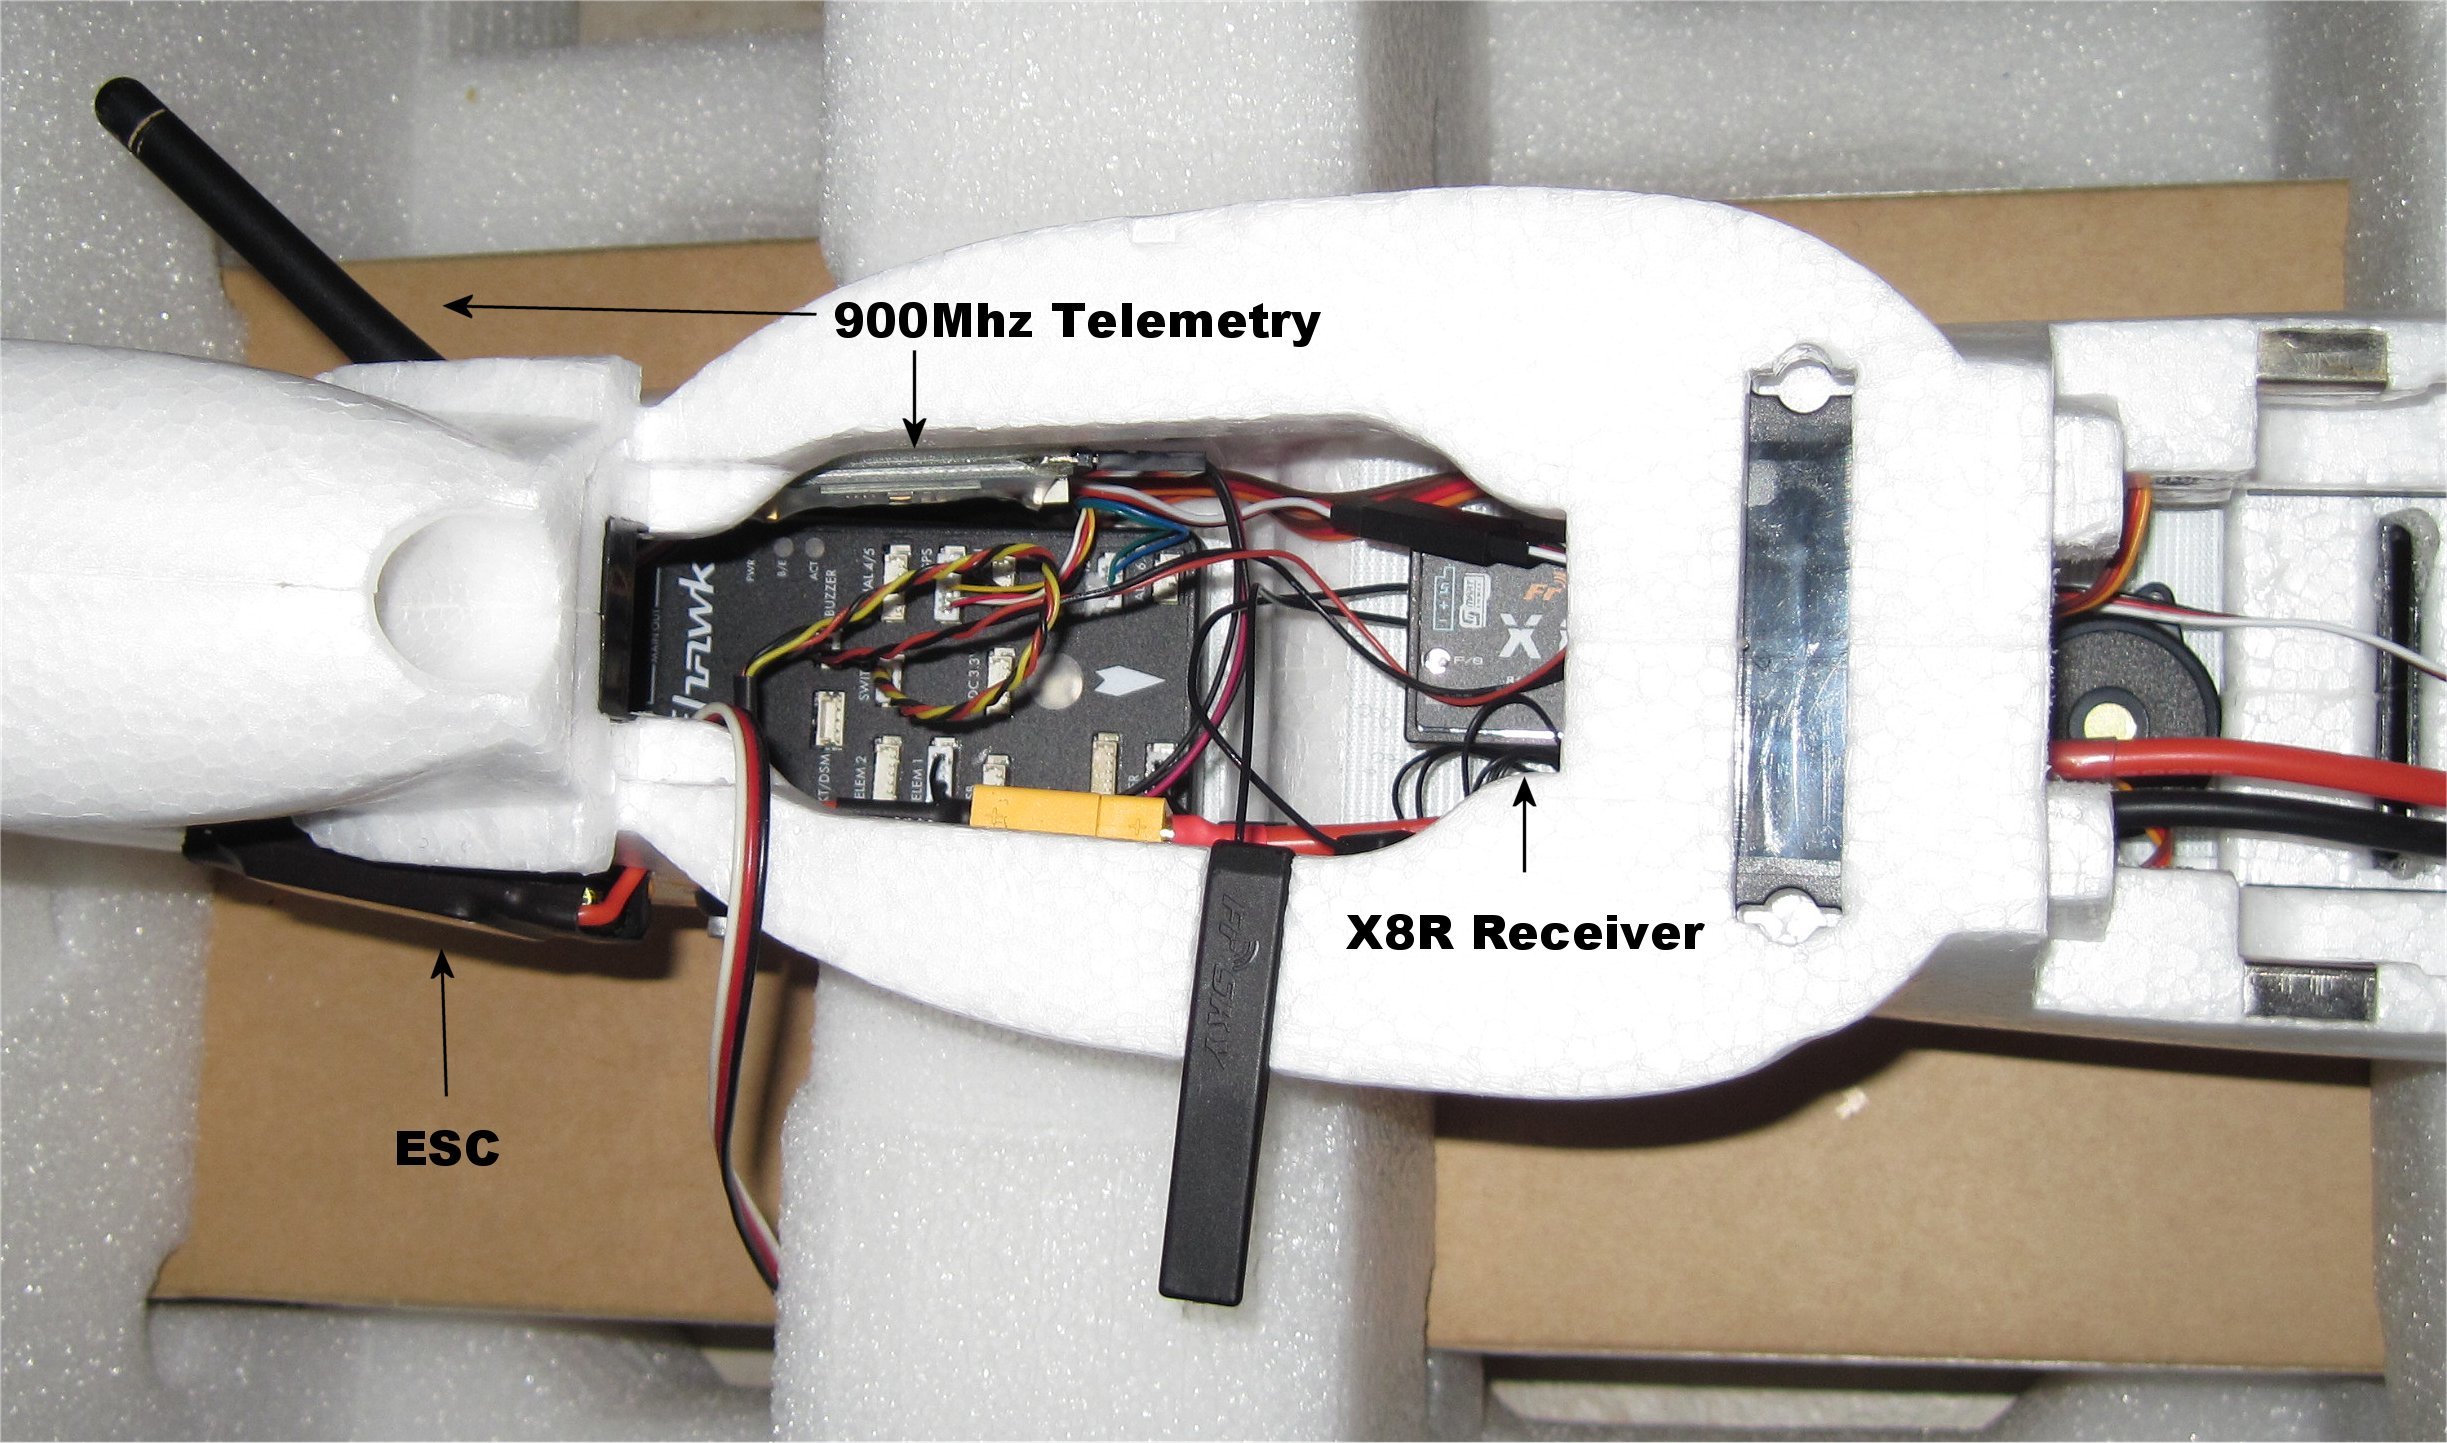
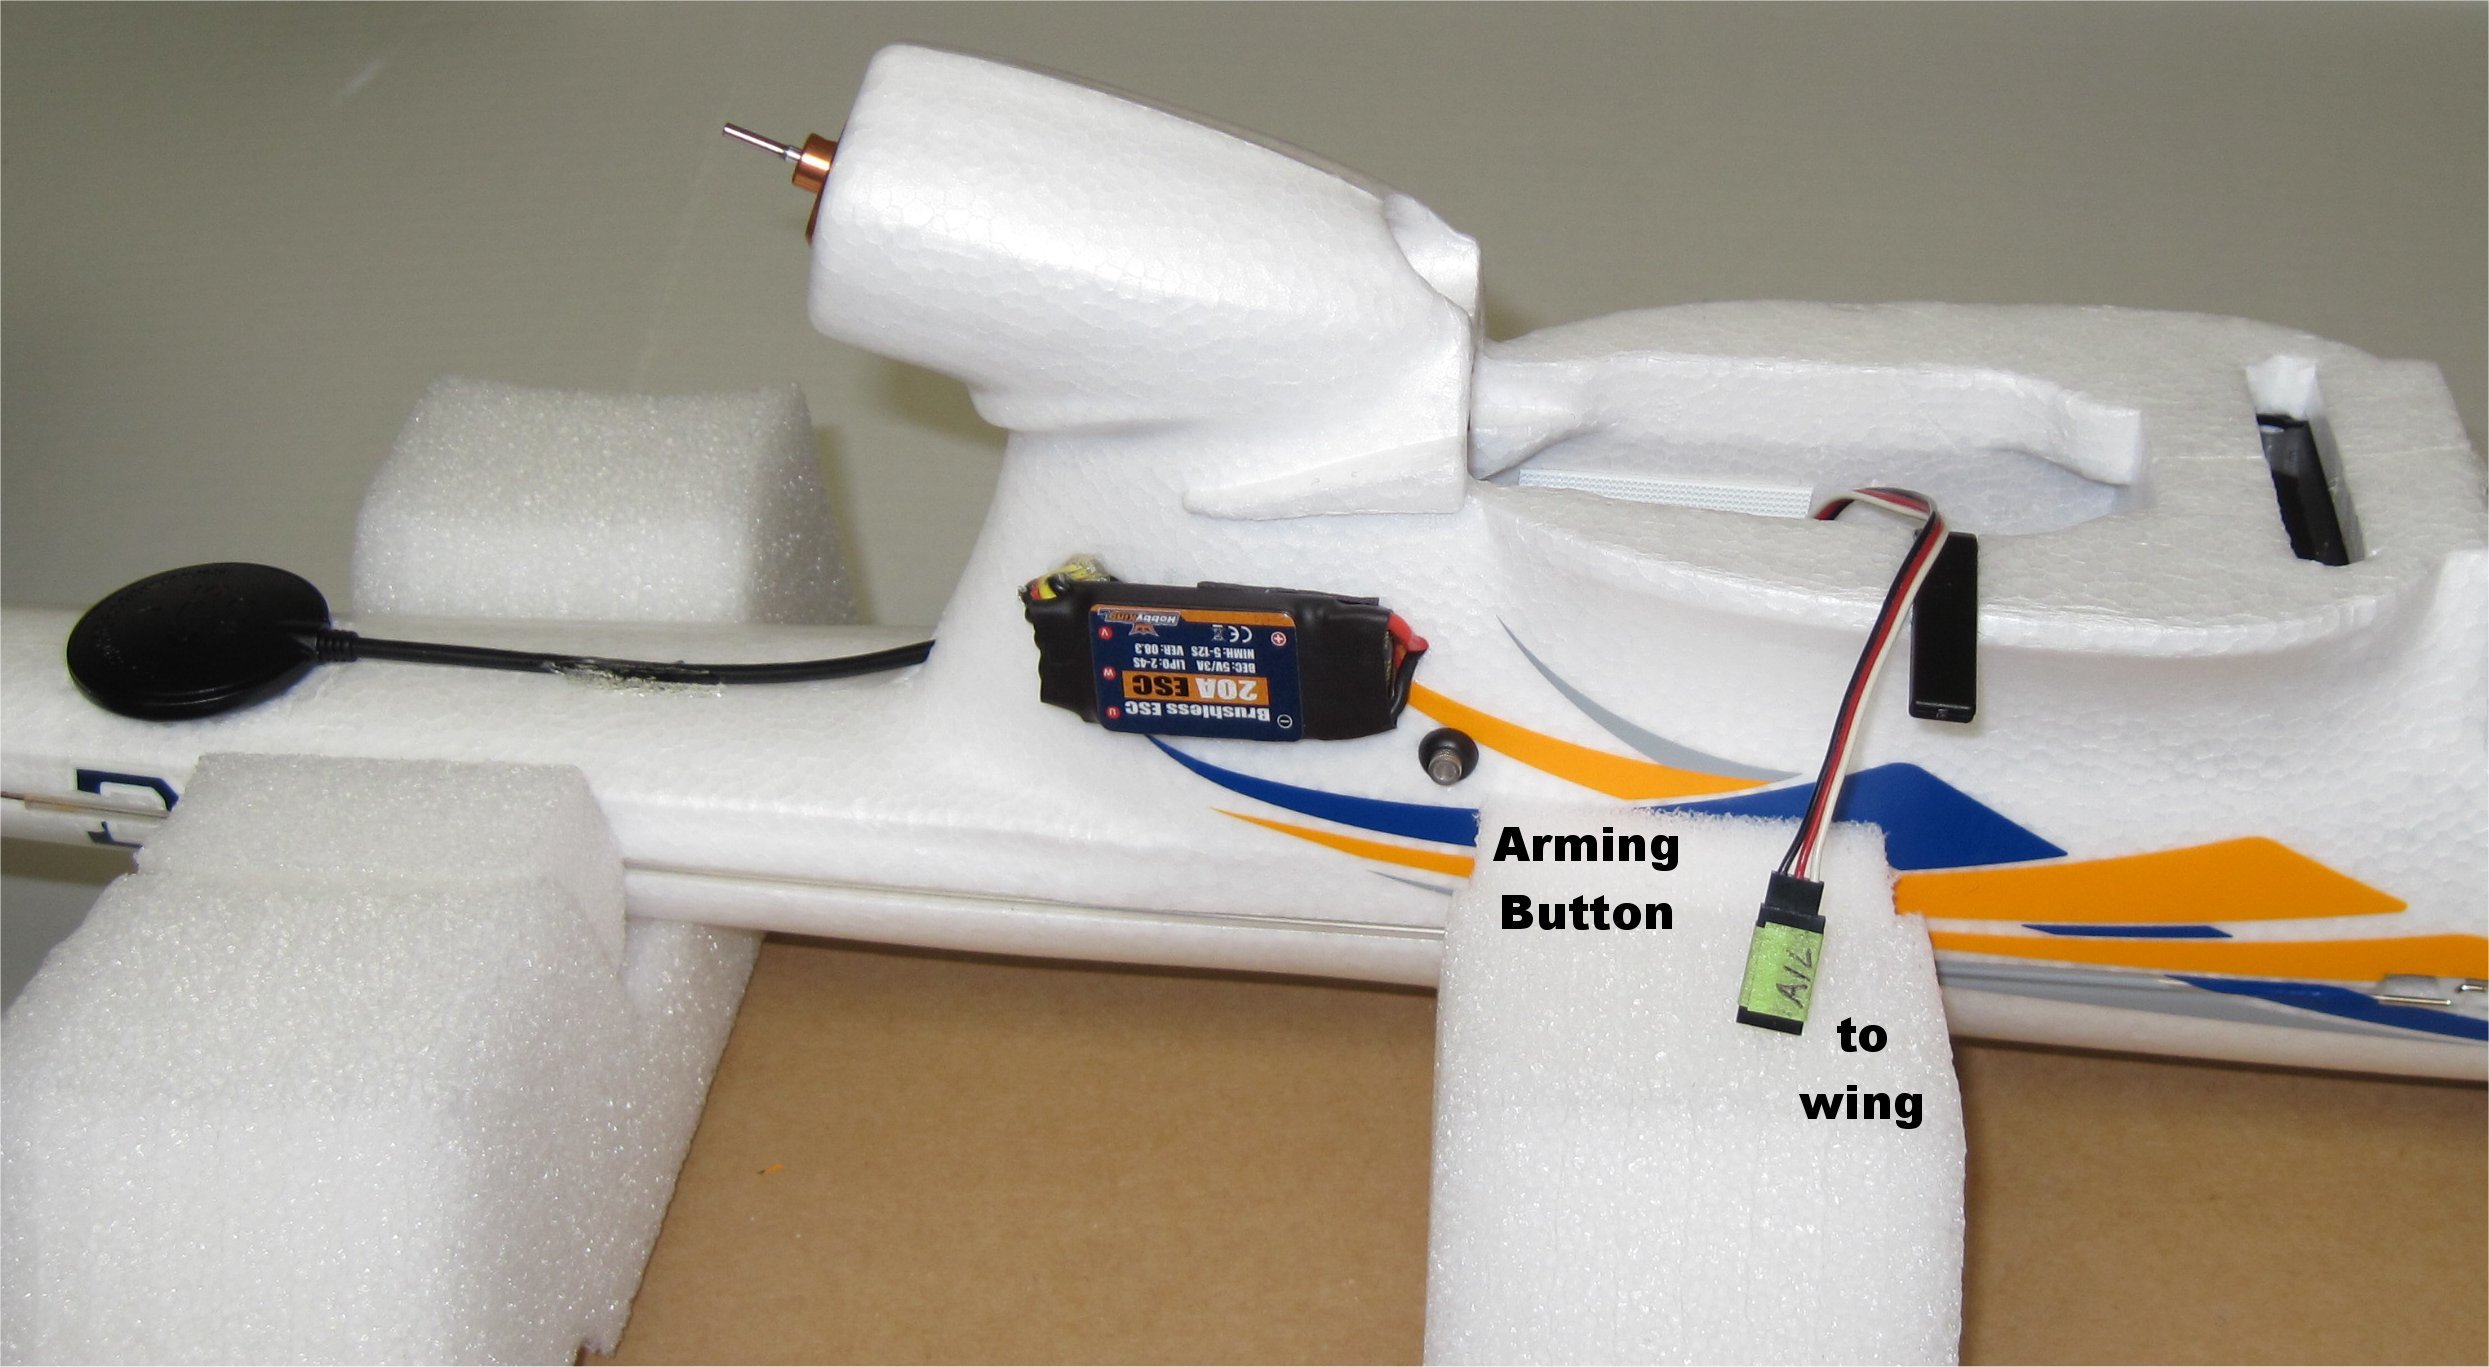
My Bix3 build is meant for a shorter range test bed for use at a smaller local field. I used a Pixhawk clone in my Bix3 with my favorite Taranis + radio system. In order to reduce noise and make room for the flight controller, I moved the 20-amp ESC outside like it is on my Skywalker.
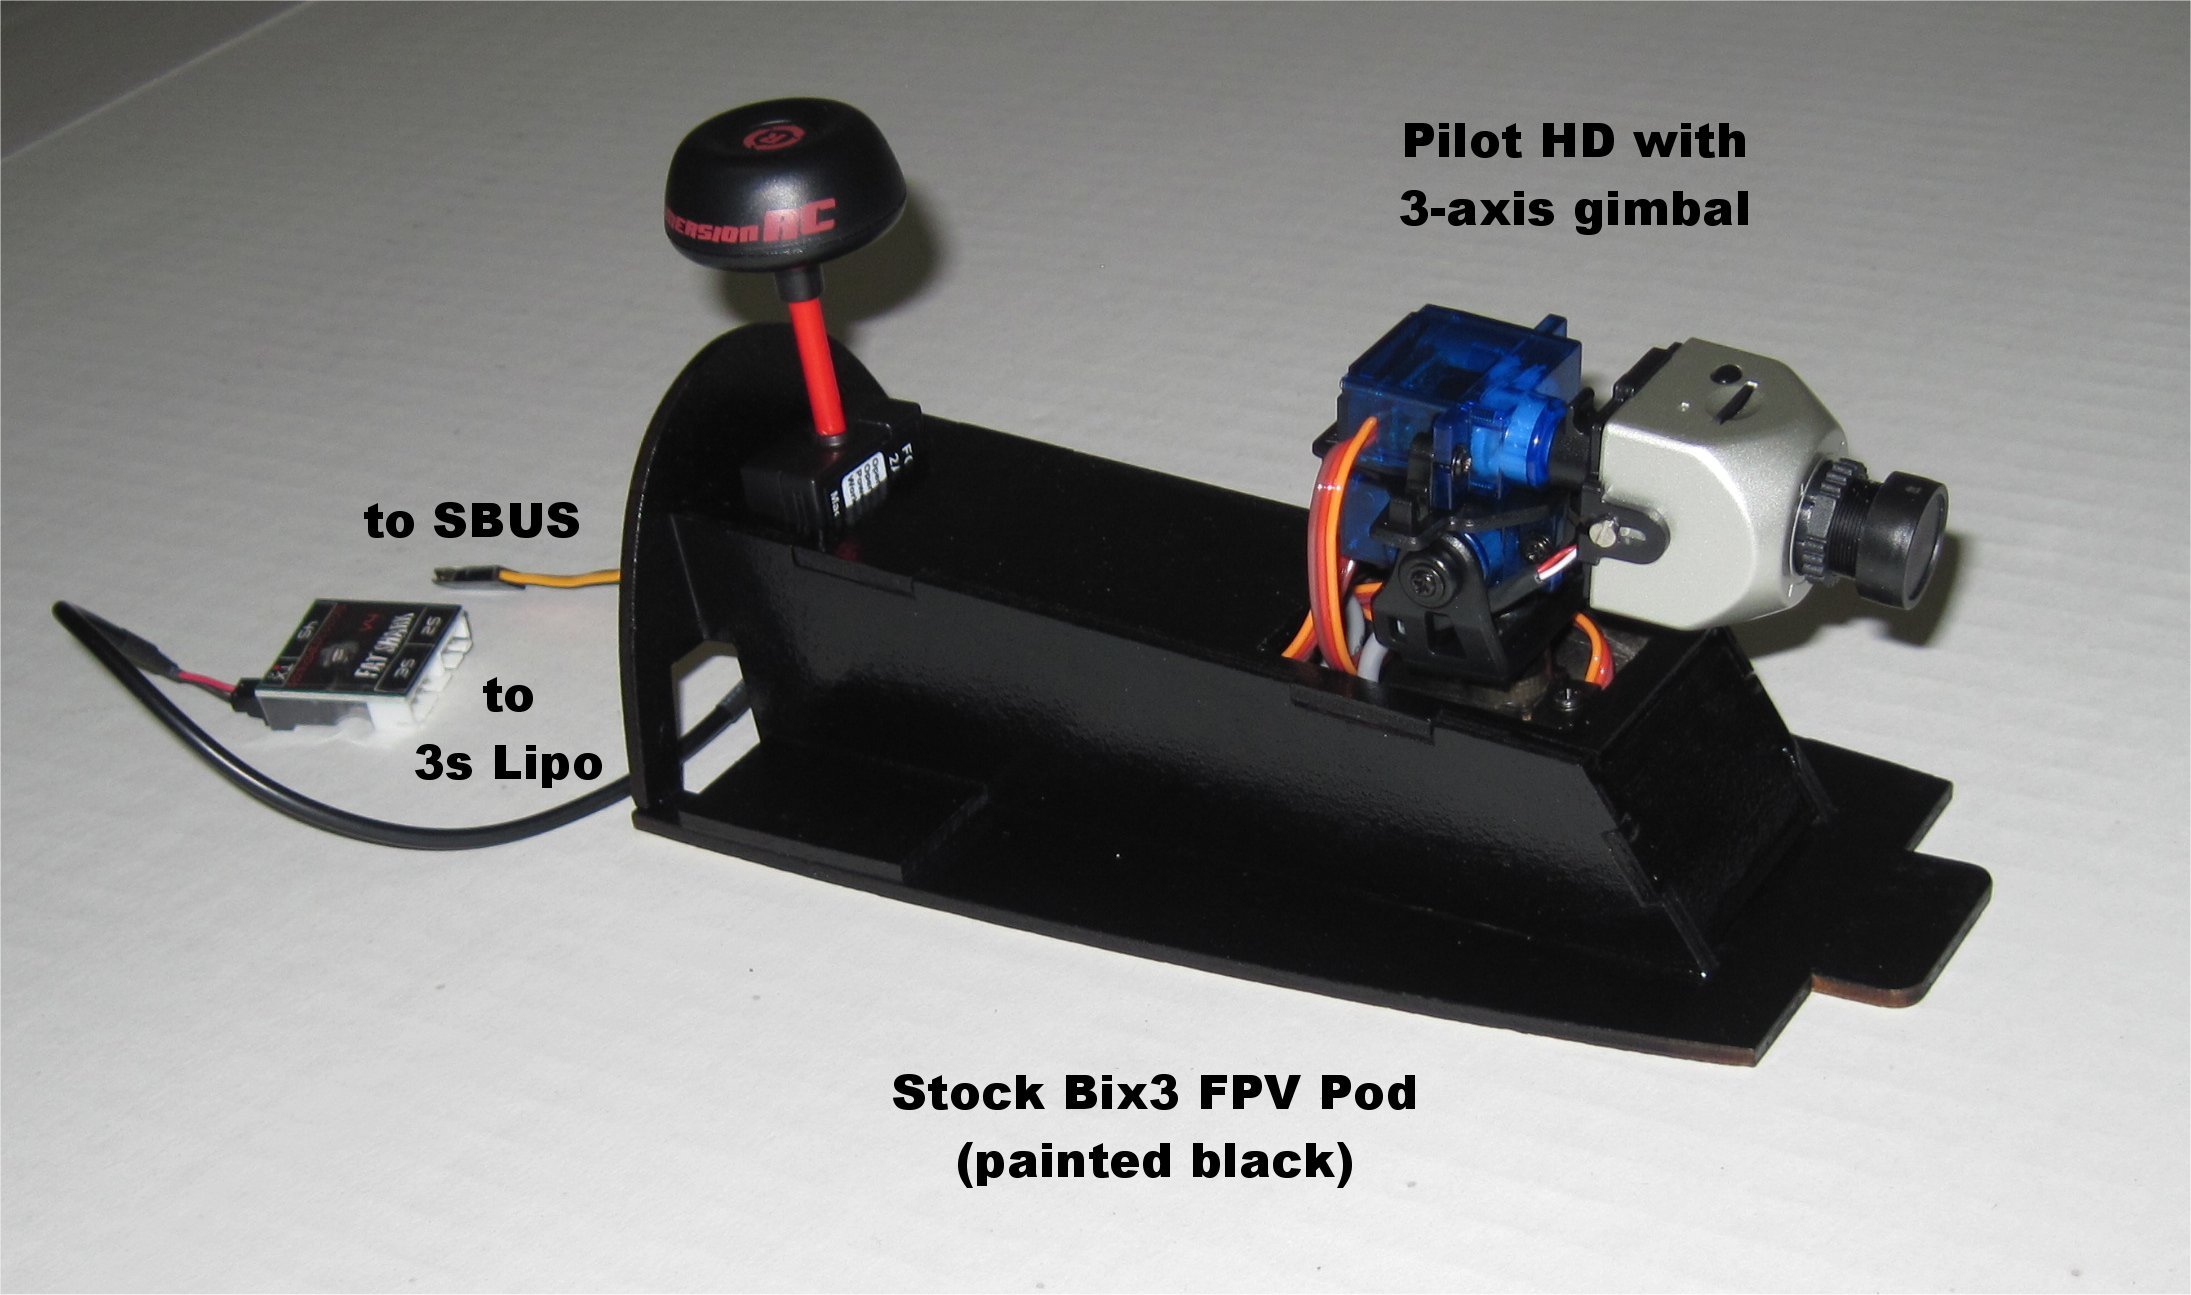
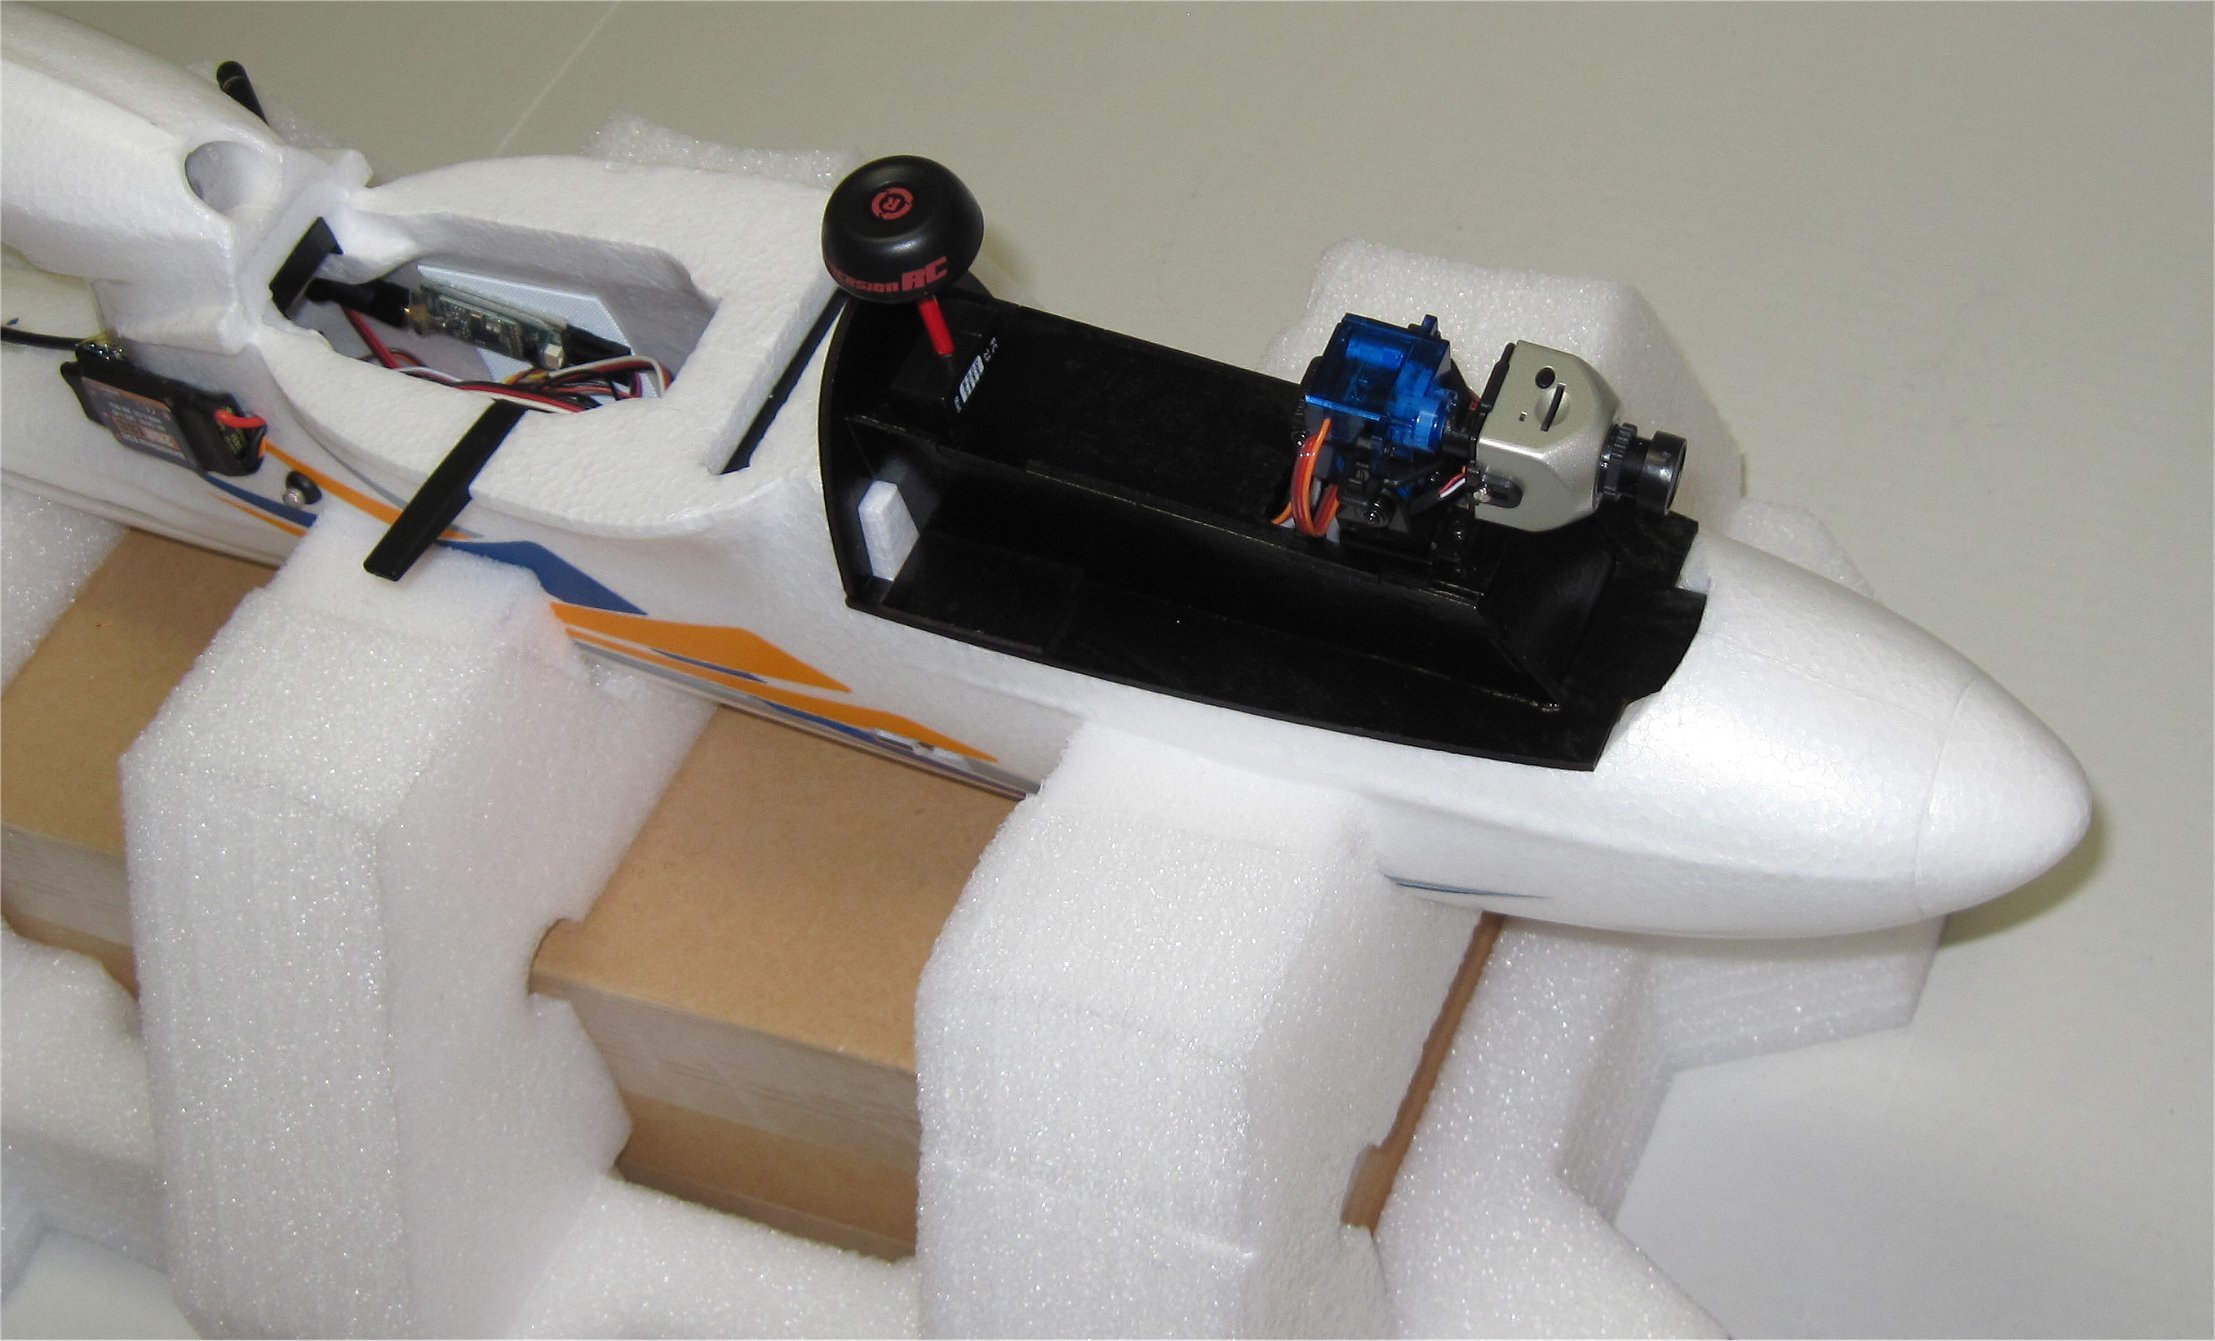
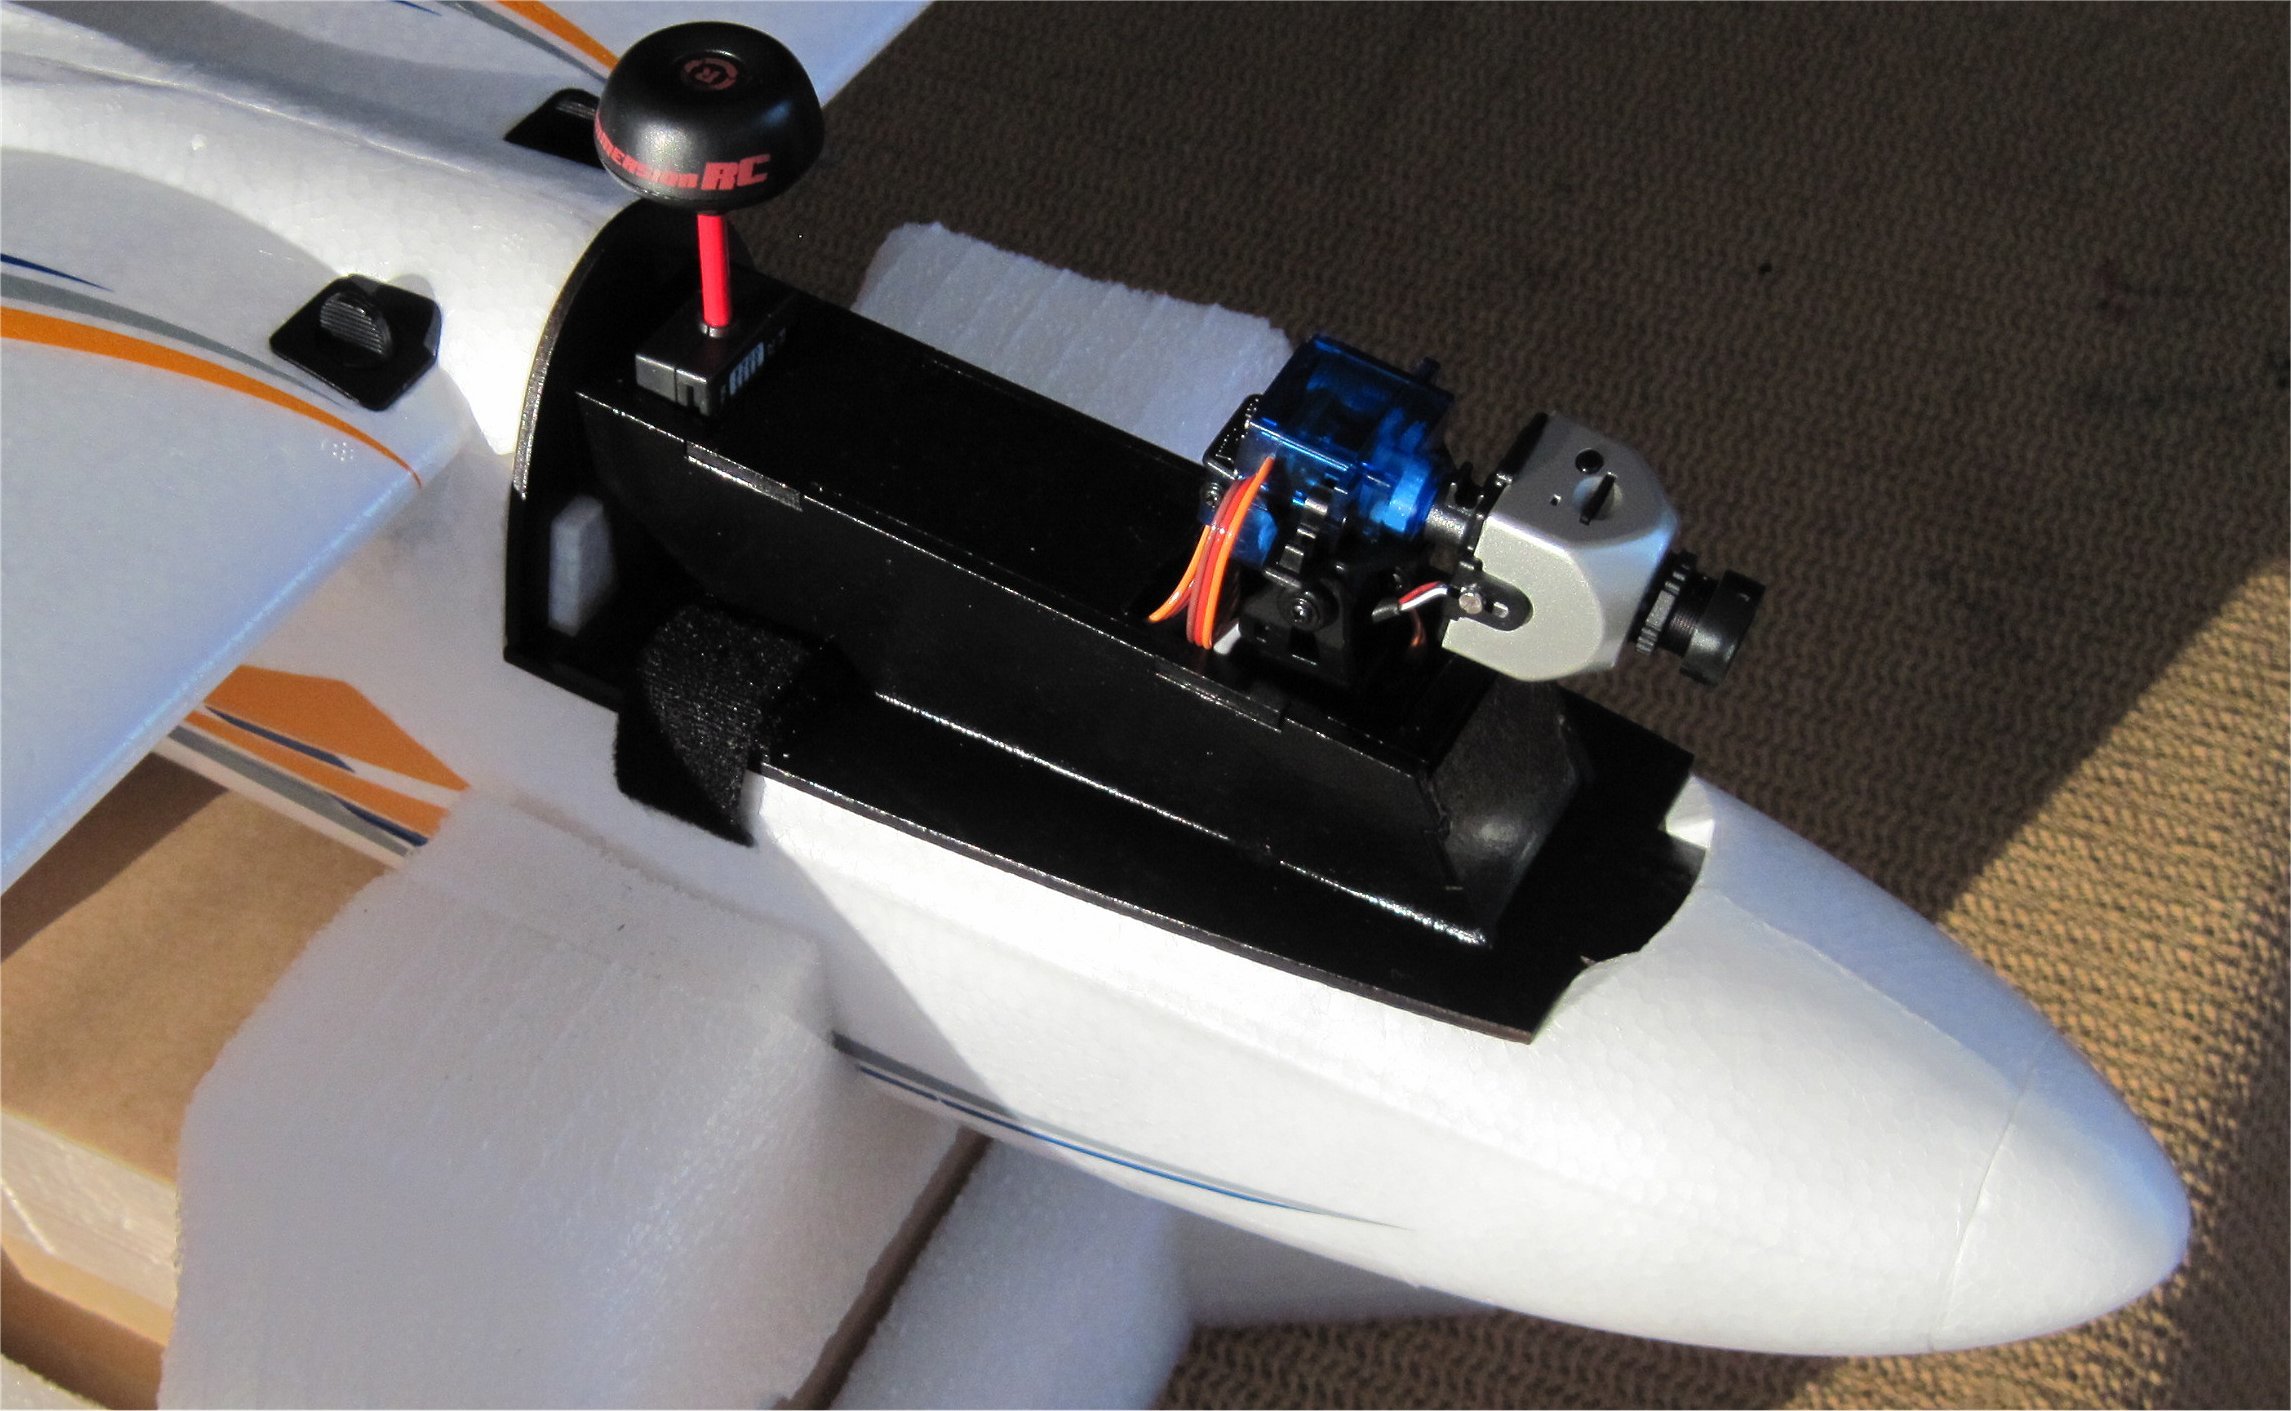
The FrSky X8R receiver makes it easy to connect to the controller and 3-axis gimbal using SBUS. Inside the FPV pod is a FrSky SBUS to PWM converter. The FatShark 5.8GHz transmitter connects to the Lipo pack charge/balance connector. Everything calibrated fine and works great on the ground in both manual and FBWA modes. Note that this setup, along with my long range Skywalker and copters all work with my APM Antenna Tracker due to the 900MHz telemetry link.
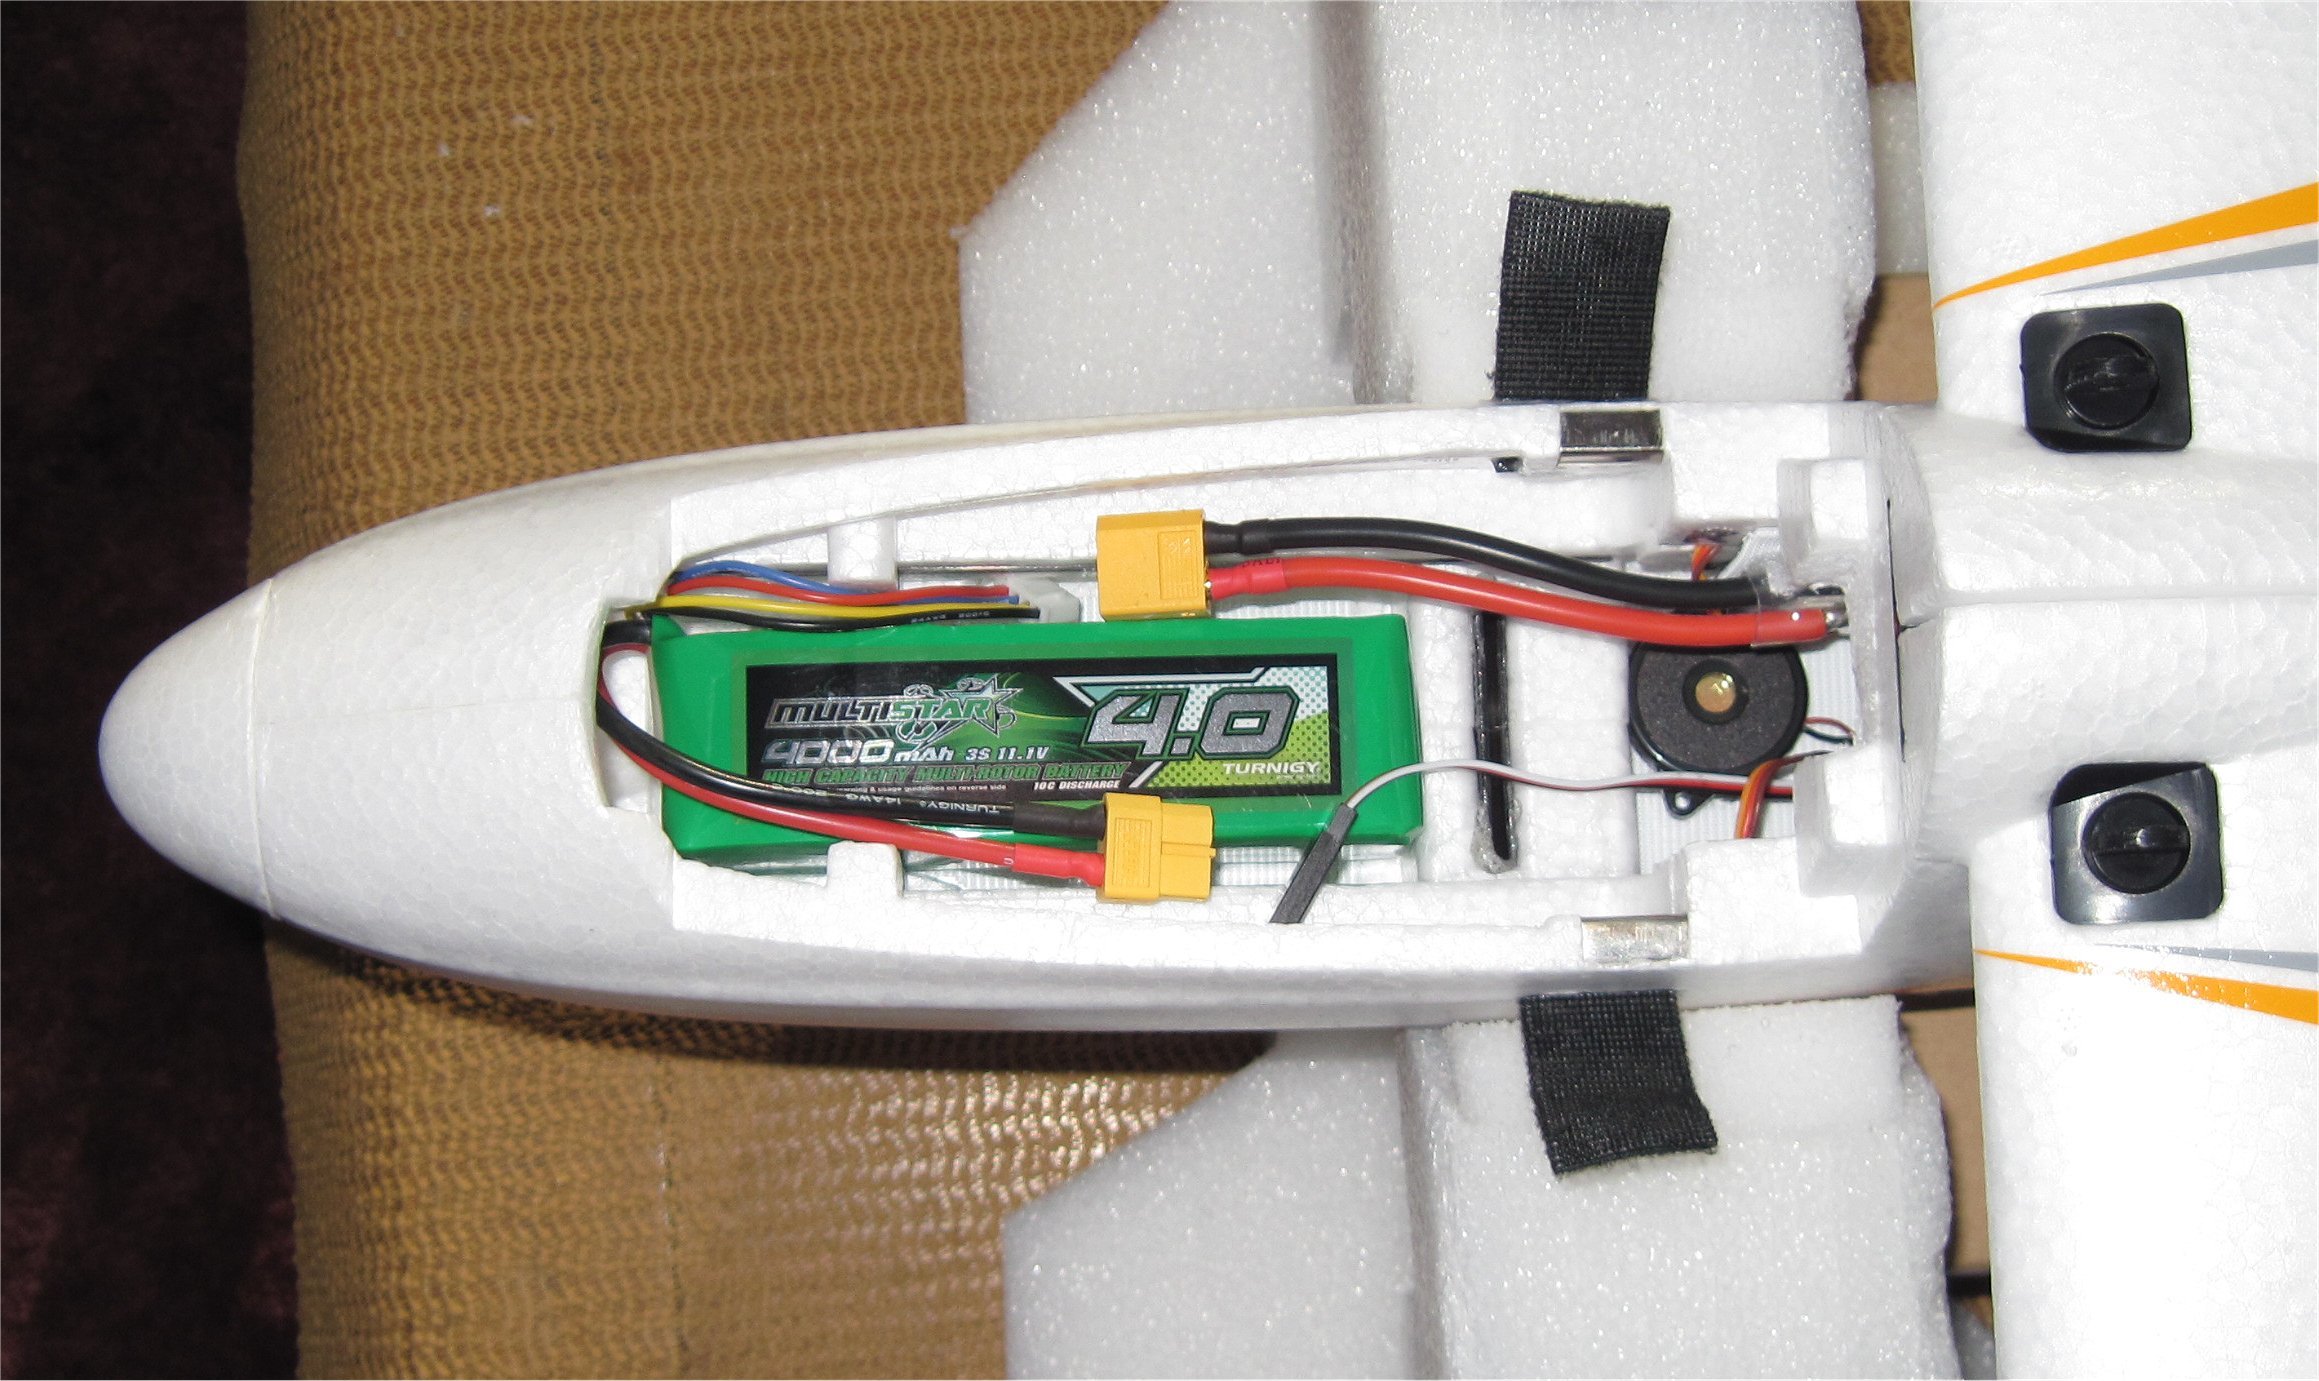
The near 9oz Multistar 3s 4AH pack balanced the Bix3 perfectly. I’m not sure why HK recommends an 1800mAh~2200mAh pack. Anyway, the 4AH pack will give a much better flight time. I added some Velcro straps that just fold over to lock the FPV pod in place.
My initial flight of the Bix3 using a Pixhawk with APM:Plane v3.2.3. The on-board camera was a FatShark Pilot HD on a 3-axis gimbal. This initial flight was flown by direct eyesight so no FPV.
I trimmed it out using Manual mode and then tested FBWA mode with Auto-Trim enabled. Loiter mode was set to a radius of -60 meters for CCW circles. It flew great!
My Bix3 had already been set up for APM Plane using a Pixhawk so all I needed to do was to modify it to become a QuadPlane.
I decided to use some old (very old) components from my FW550 setup that was originally used to test the first RTFhawk. I had iPower 2212 1000kv motors and Next Level 20-amp ESCs that preceded the SimonK versions. On a 3s or 4s Lipo pack, the system worked great with Graupner 10x5 props and now the much less expensive copies called HQ 10x5 props. Note that these iPower 2212 motors can be purchased in the US for only $8 at Altitude Hobbies.
My other FW450 quad used the same setup on APM Copter with a 4s 4AH Lipo and could easiliy lift a Tarot 2-axis gimbal and Hero3 camera. The total flying weight was 58oz so this was my goal for my Bix3 conversion.
My loaded Bix3 frame weighed 15oz and the wing 10oz. The 3s 4AH Multistar Lipo pack weighed 9oz so this left me with a 20oz play weight for the QuadPlane addition. My 4 iPower 2212 1000kv motors and Next Level 20-amp ESCs and 4 HQ 10x5 props weighed only 15oz so I had 5 oz to spare.
I decided to use a ZIPPY Flightmax 2800mAh 4S1P 30C Lipo pack to start which weighs an ounce more than my previous 3s pack so I still had 4oz to spare for extra wires. I was off to a good start!
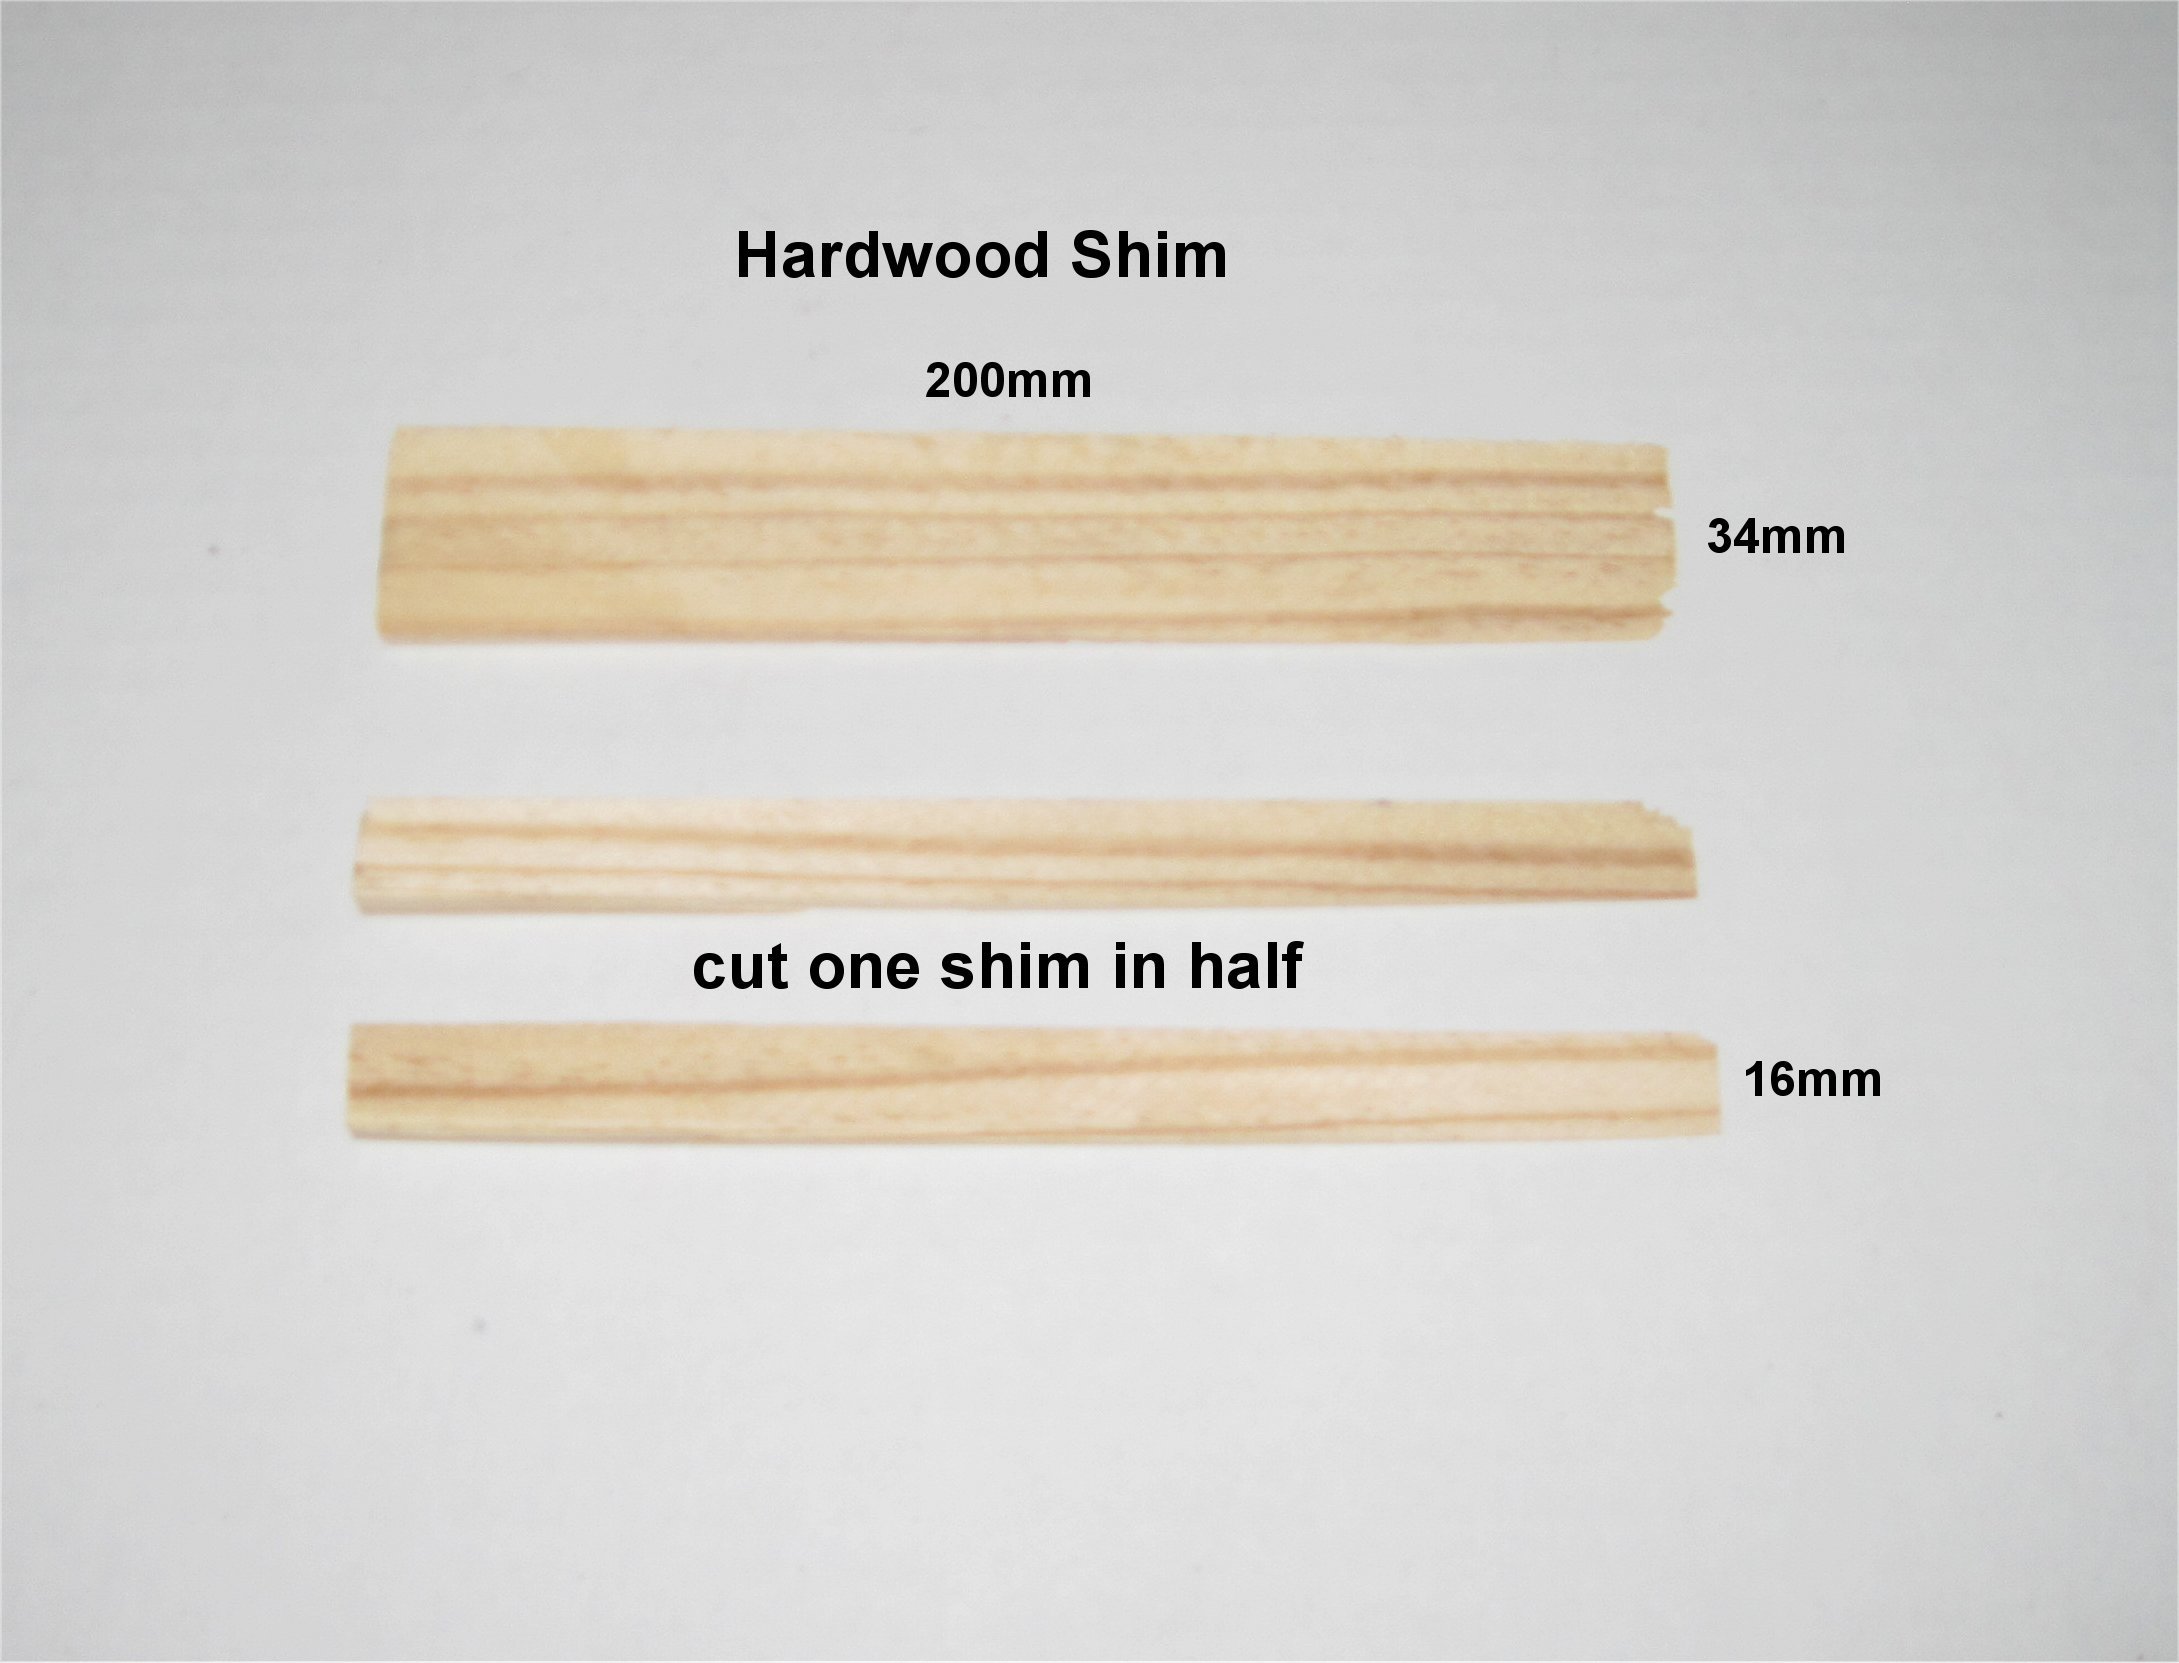
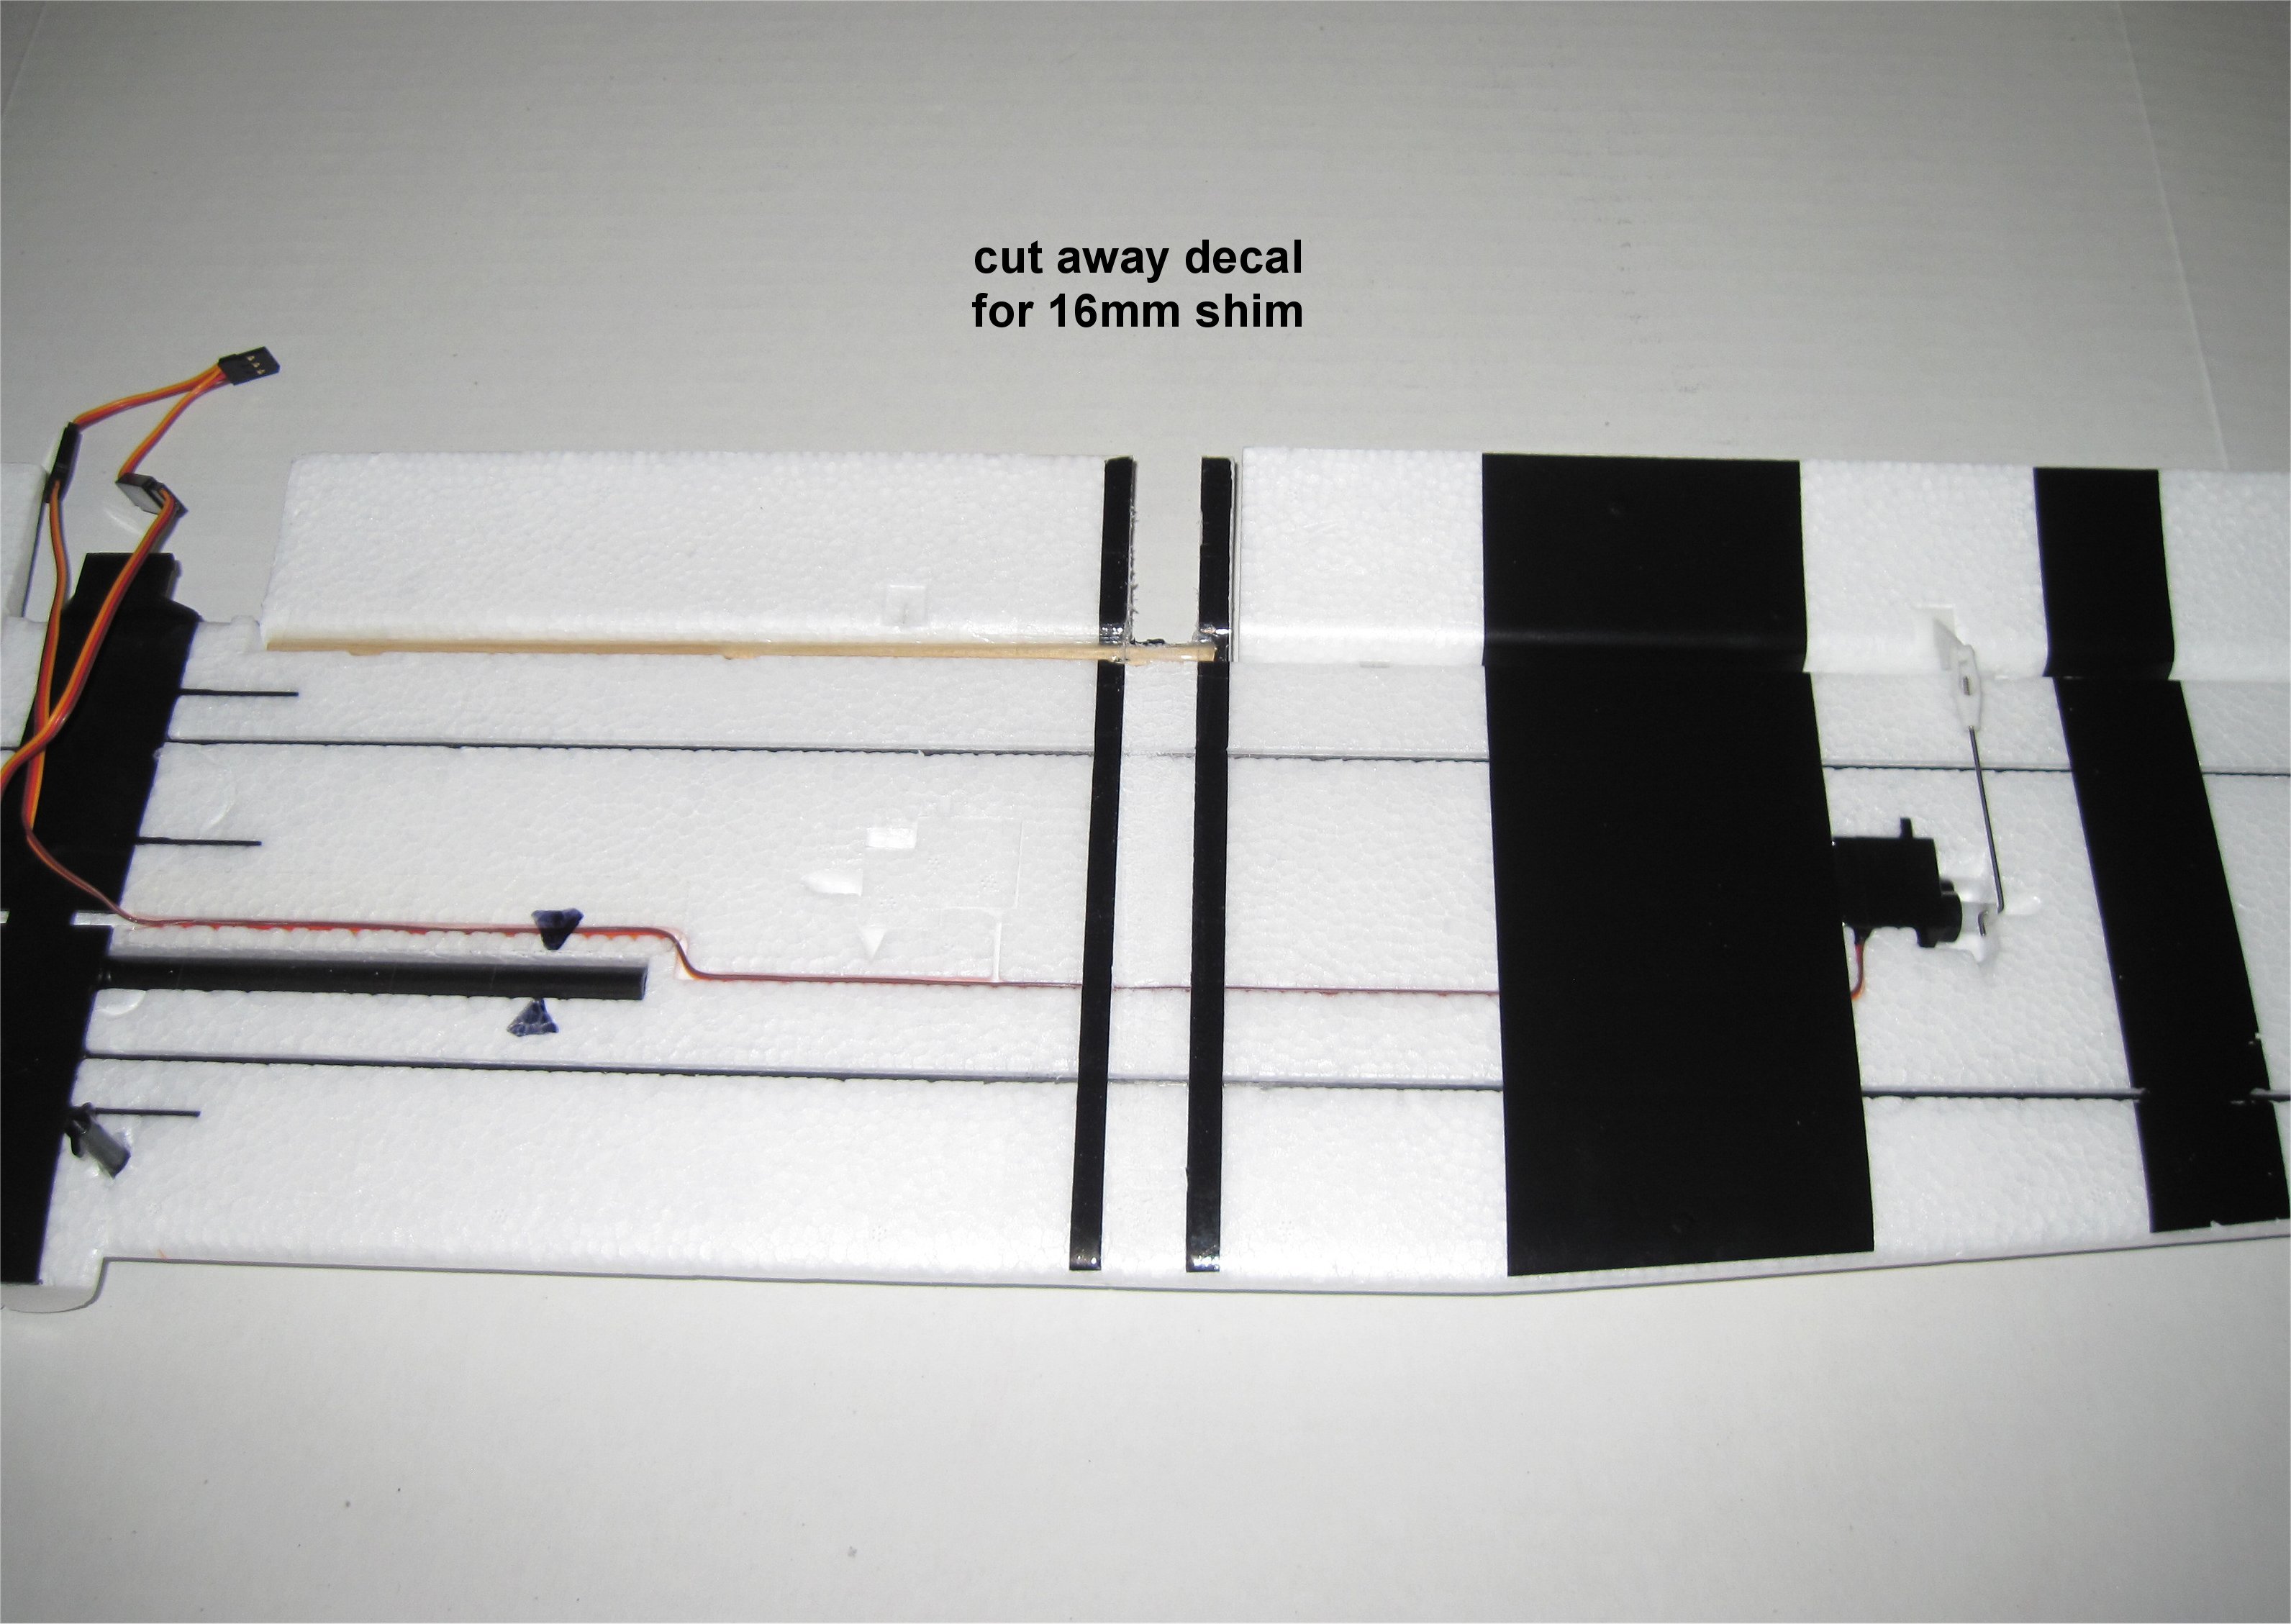
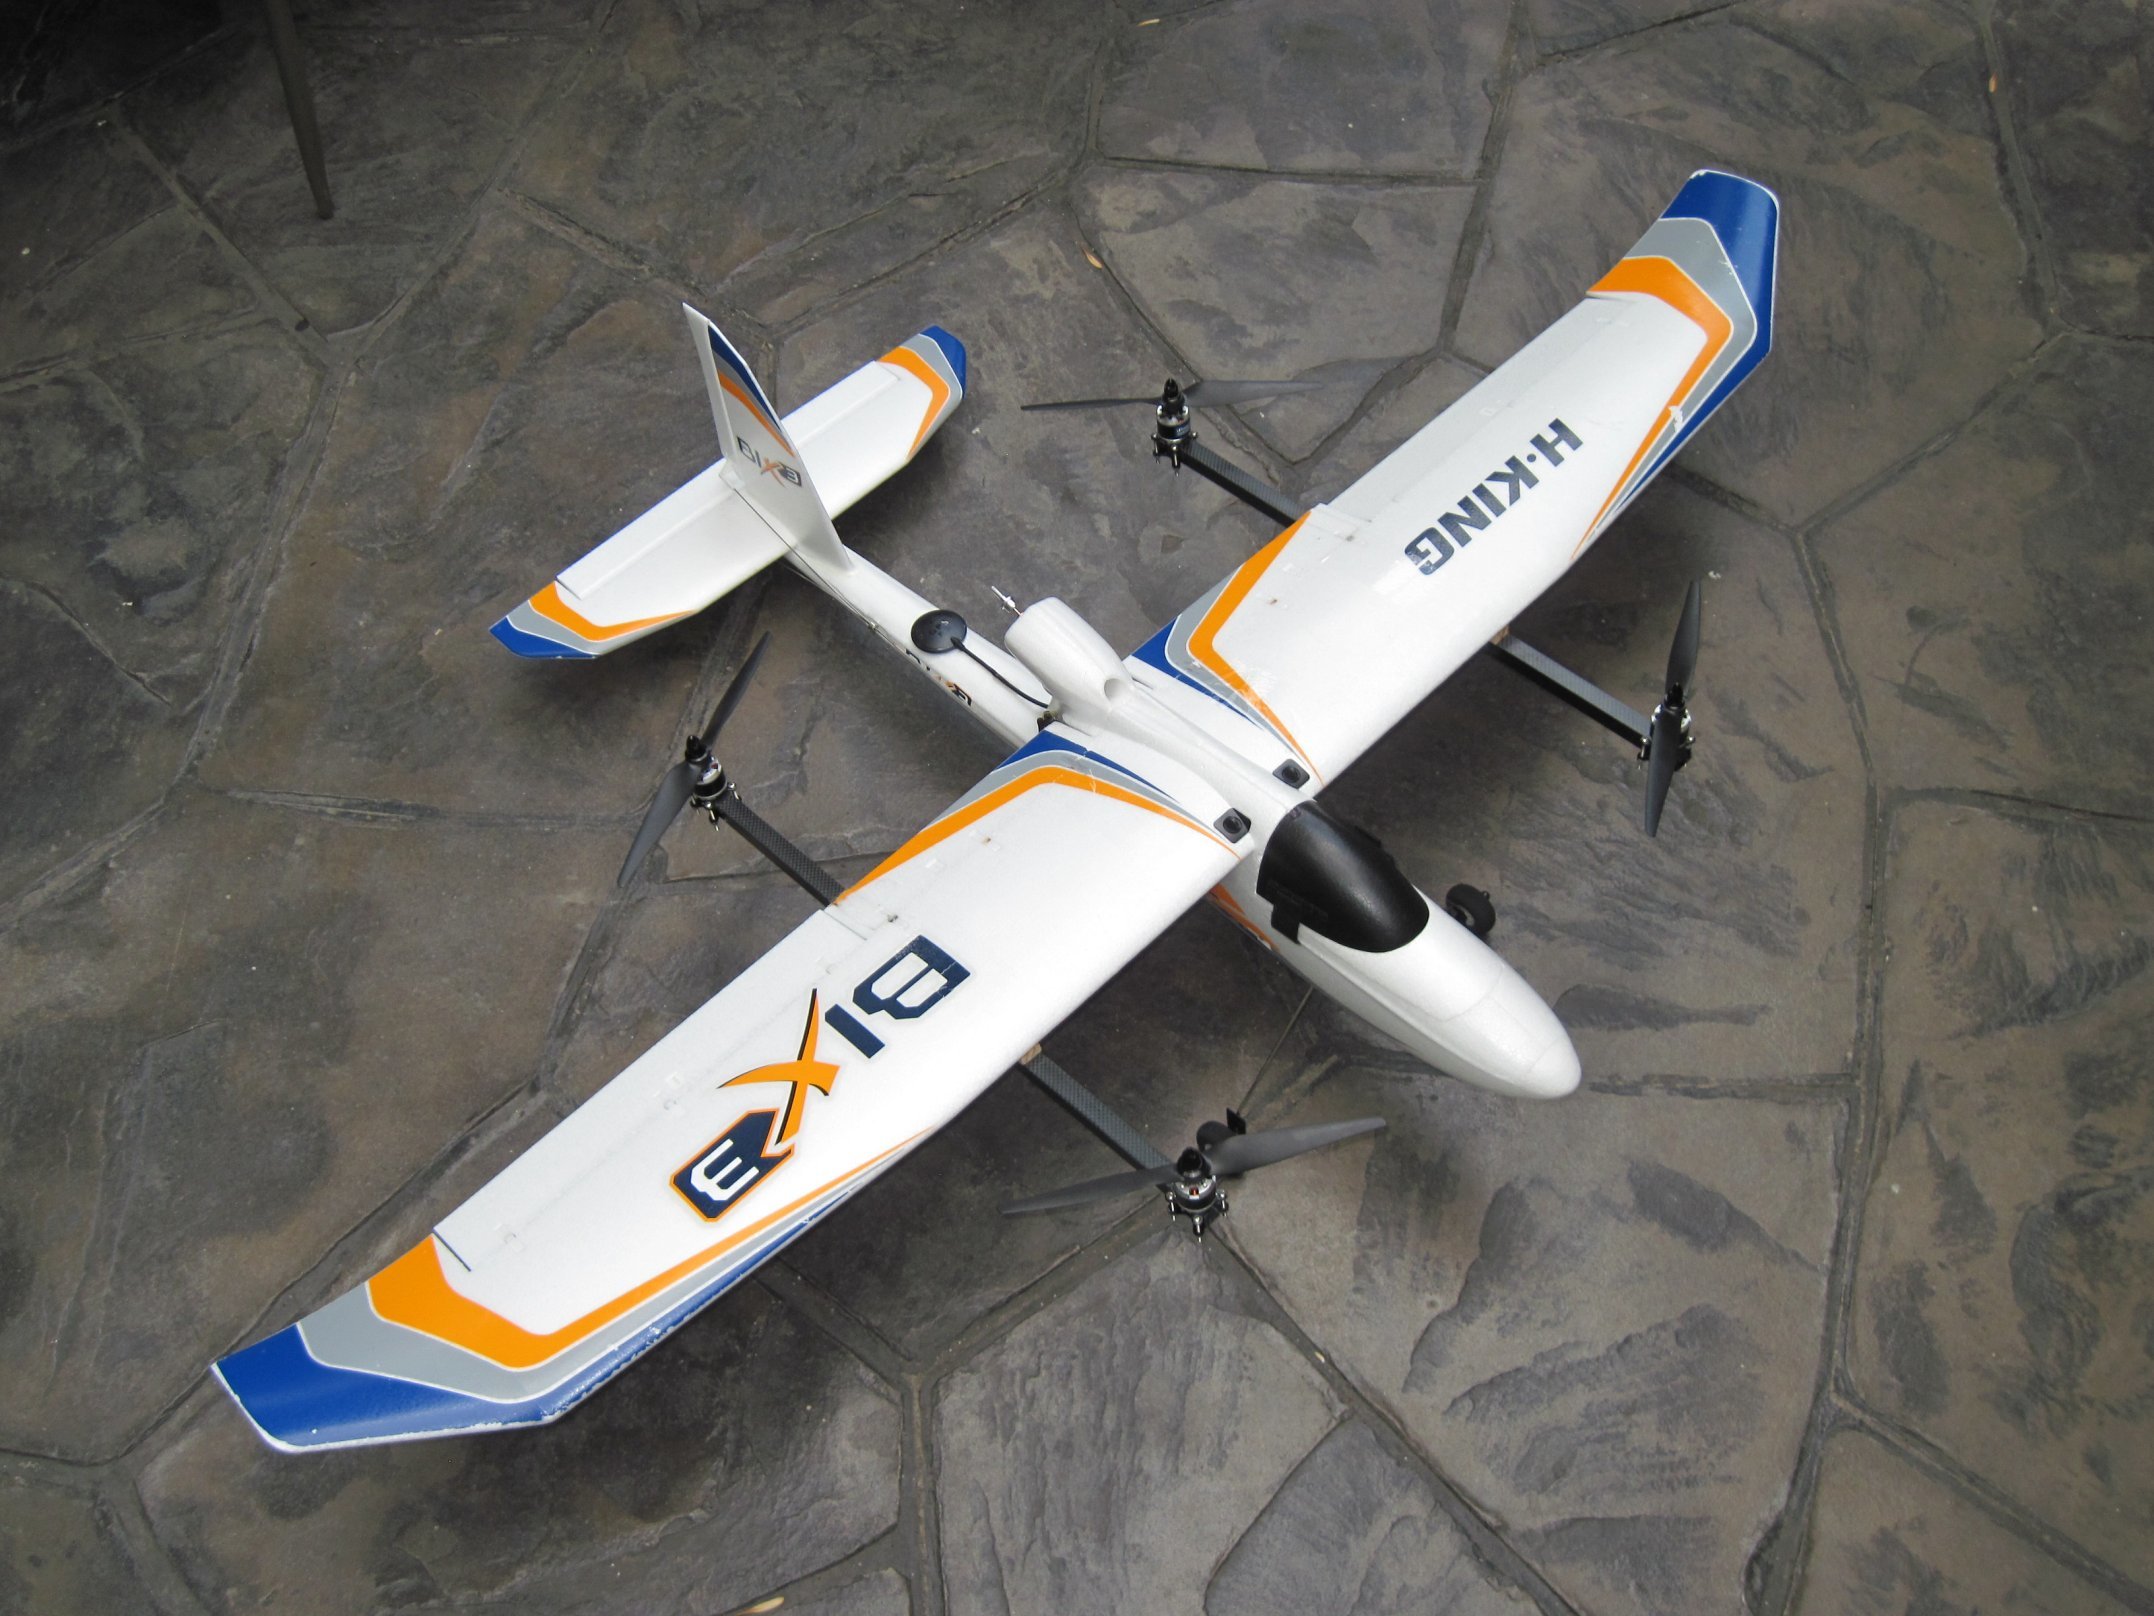
I decided to use the same 15mm Carbon Fibre Square Tubes from Tridge’s conversion to mount the motors. The Bix3 wings needed an offset which was equivalent to an inexpensive hardwood shim sold at home improvement stores like Home Depot. Cutting one in half gives you the needed 15mm width for the 15mm carbon tube. Simply cut away the black stripe decal center and epoxy in place. Note that it is important to level the shims before the epoxy sets.
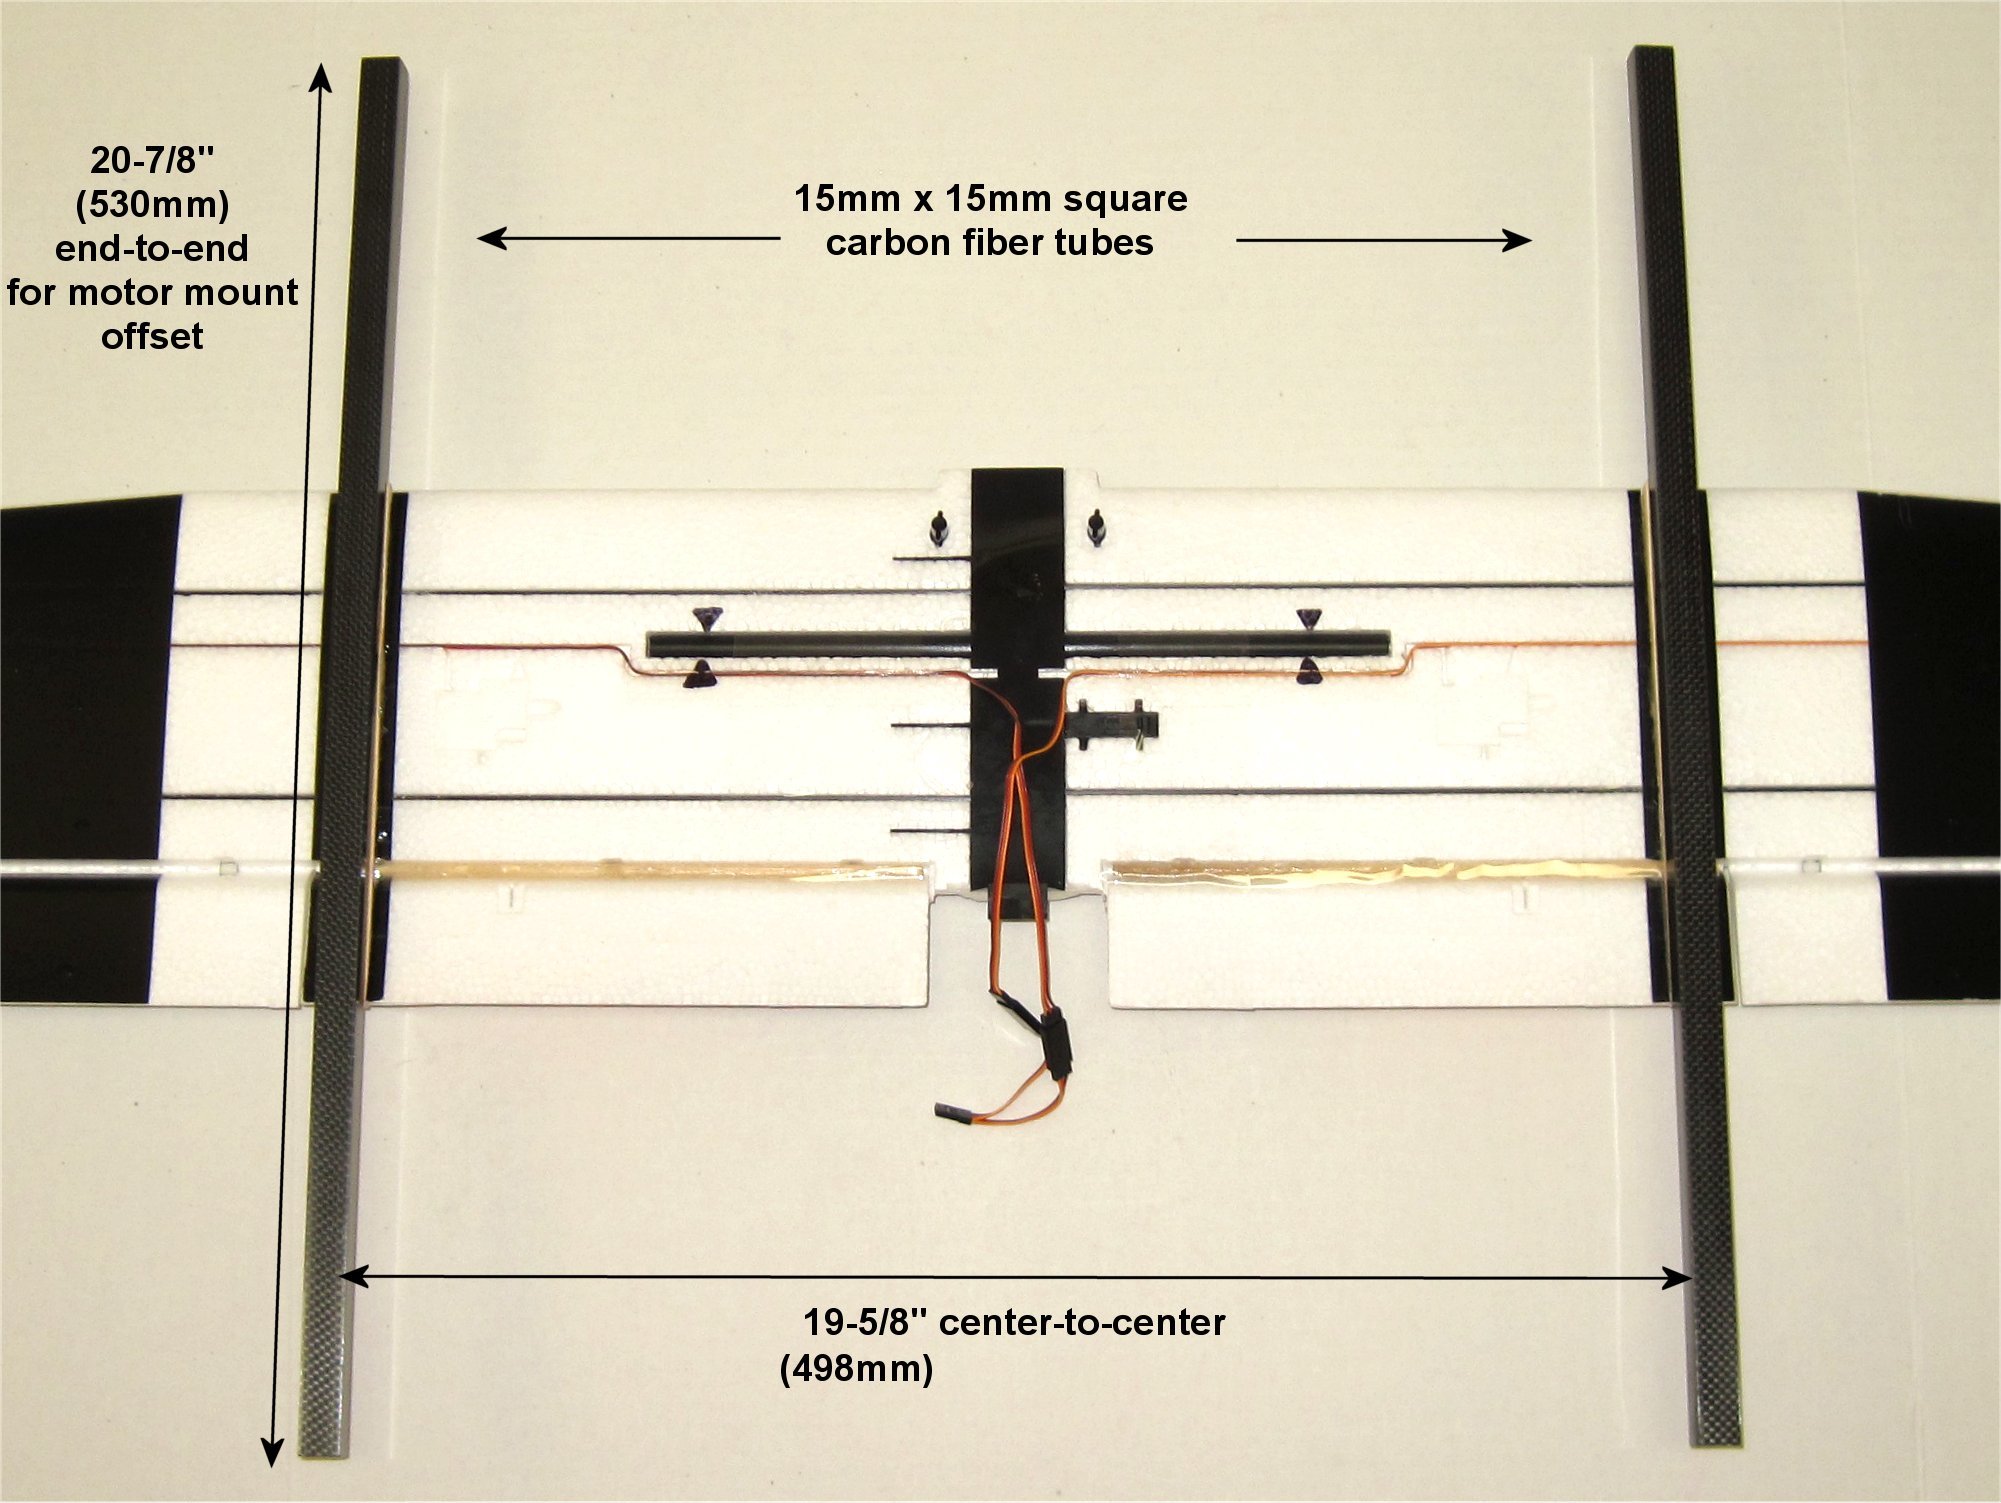
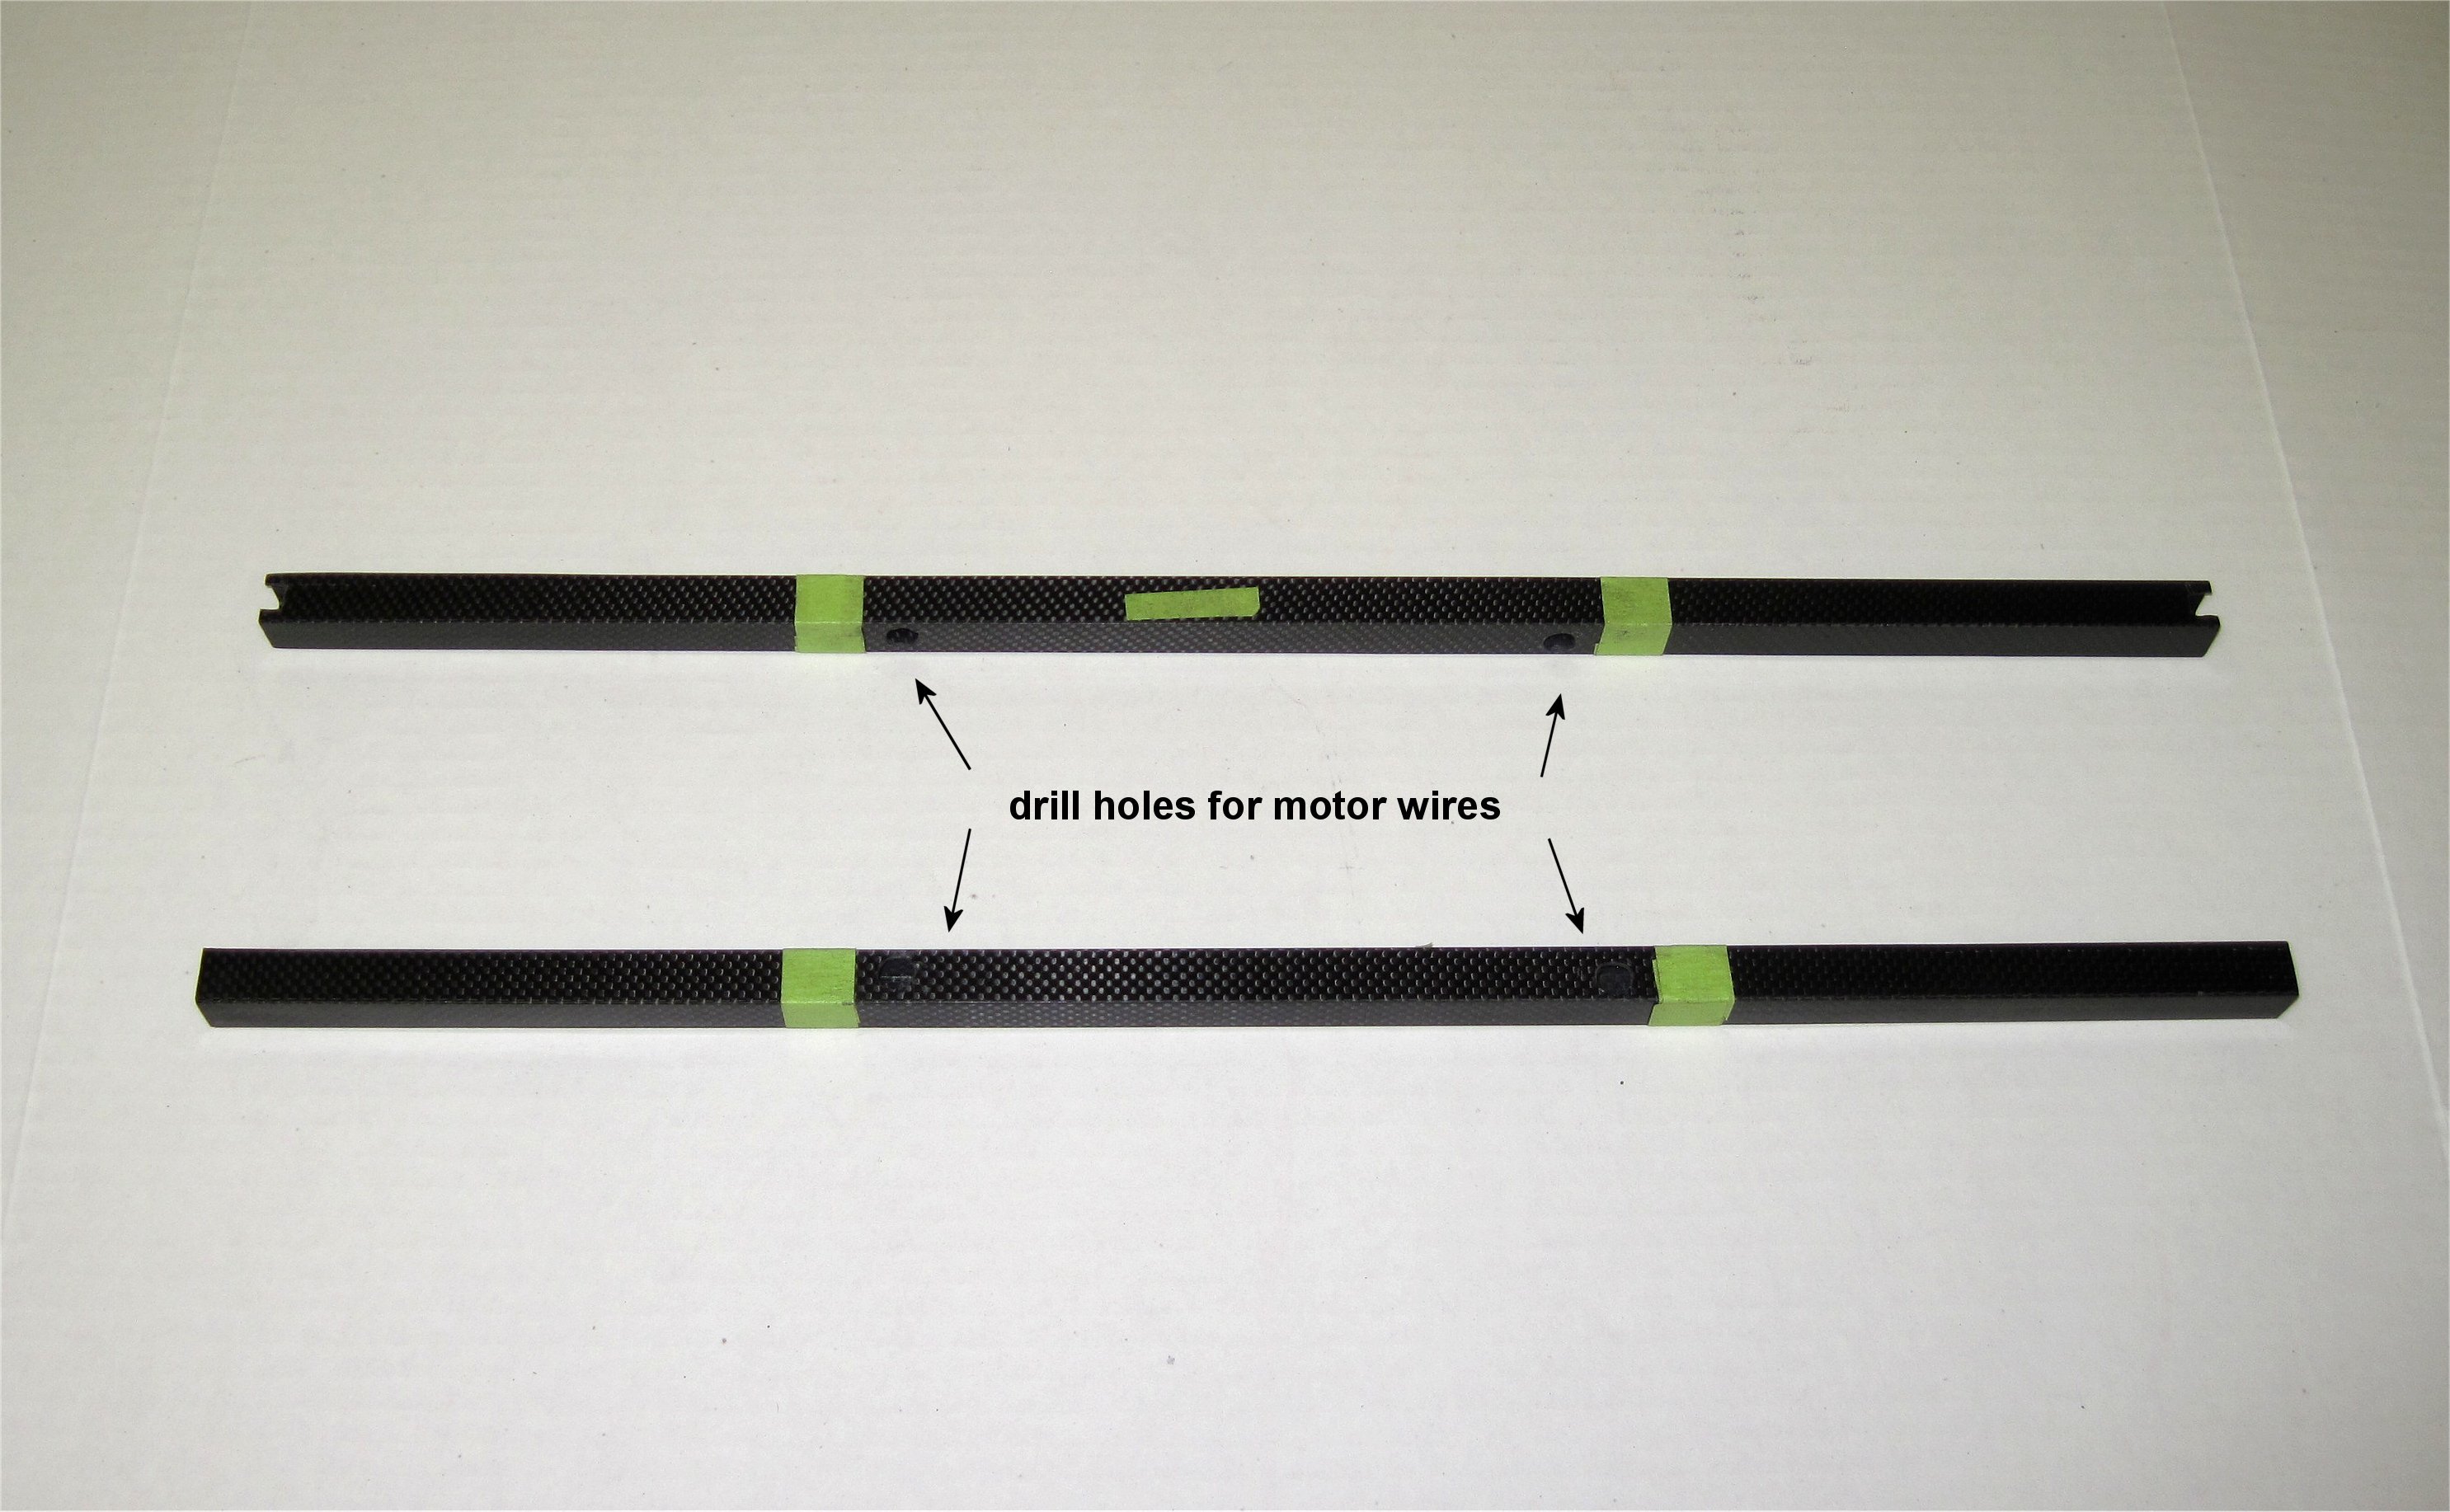
When my 15mm x 15mm square carbon tubes arrived, I cut them to length and positioned them how I will glue them in place.
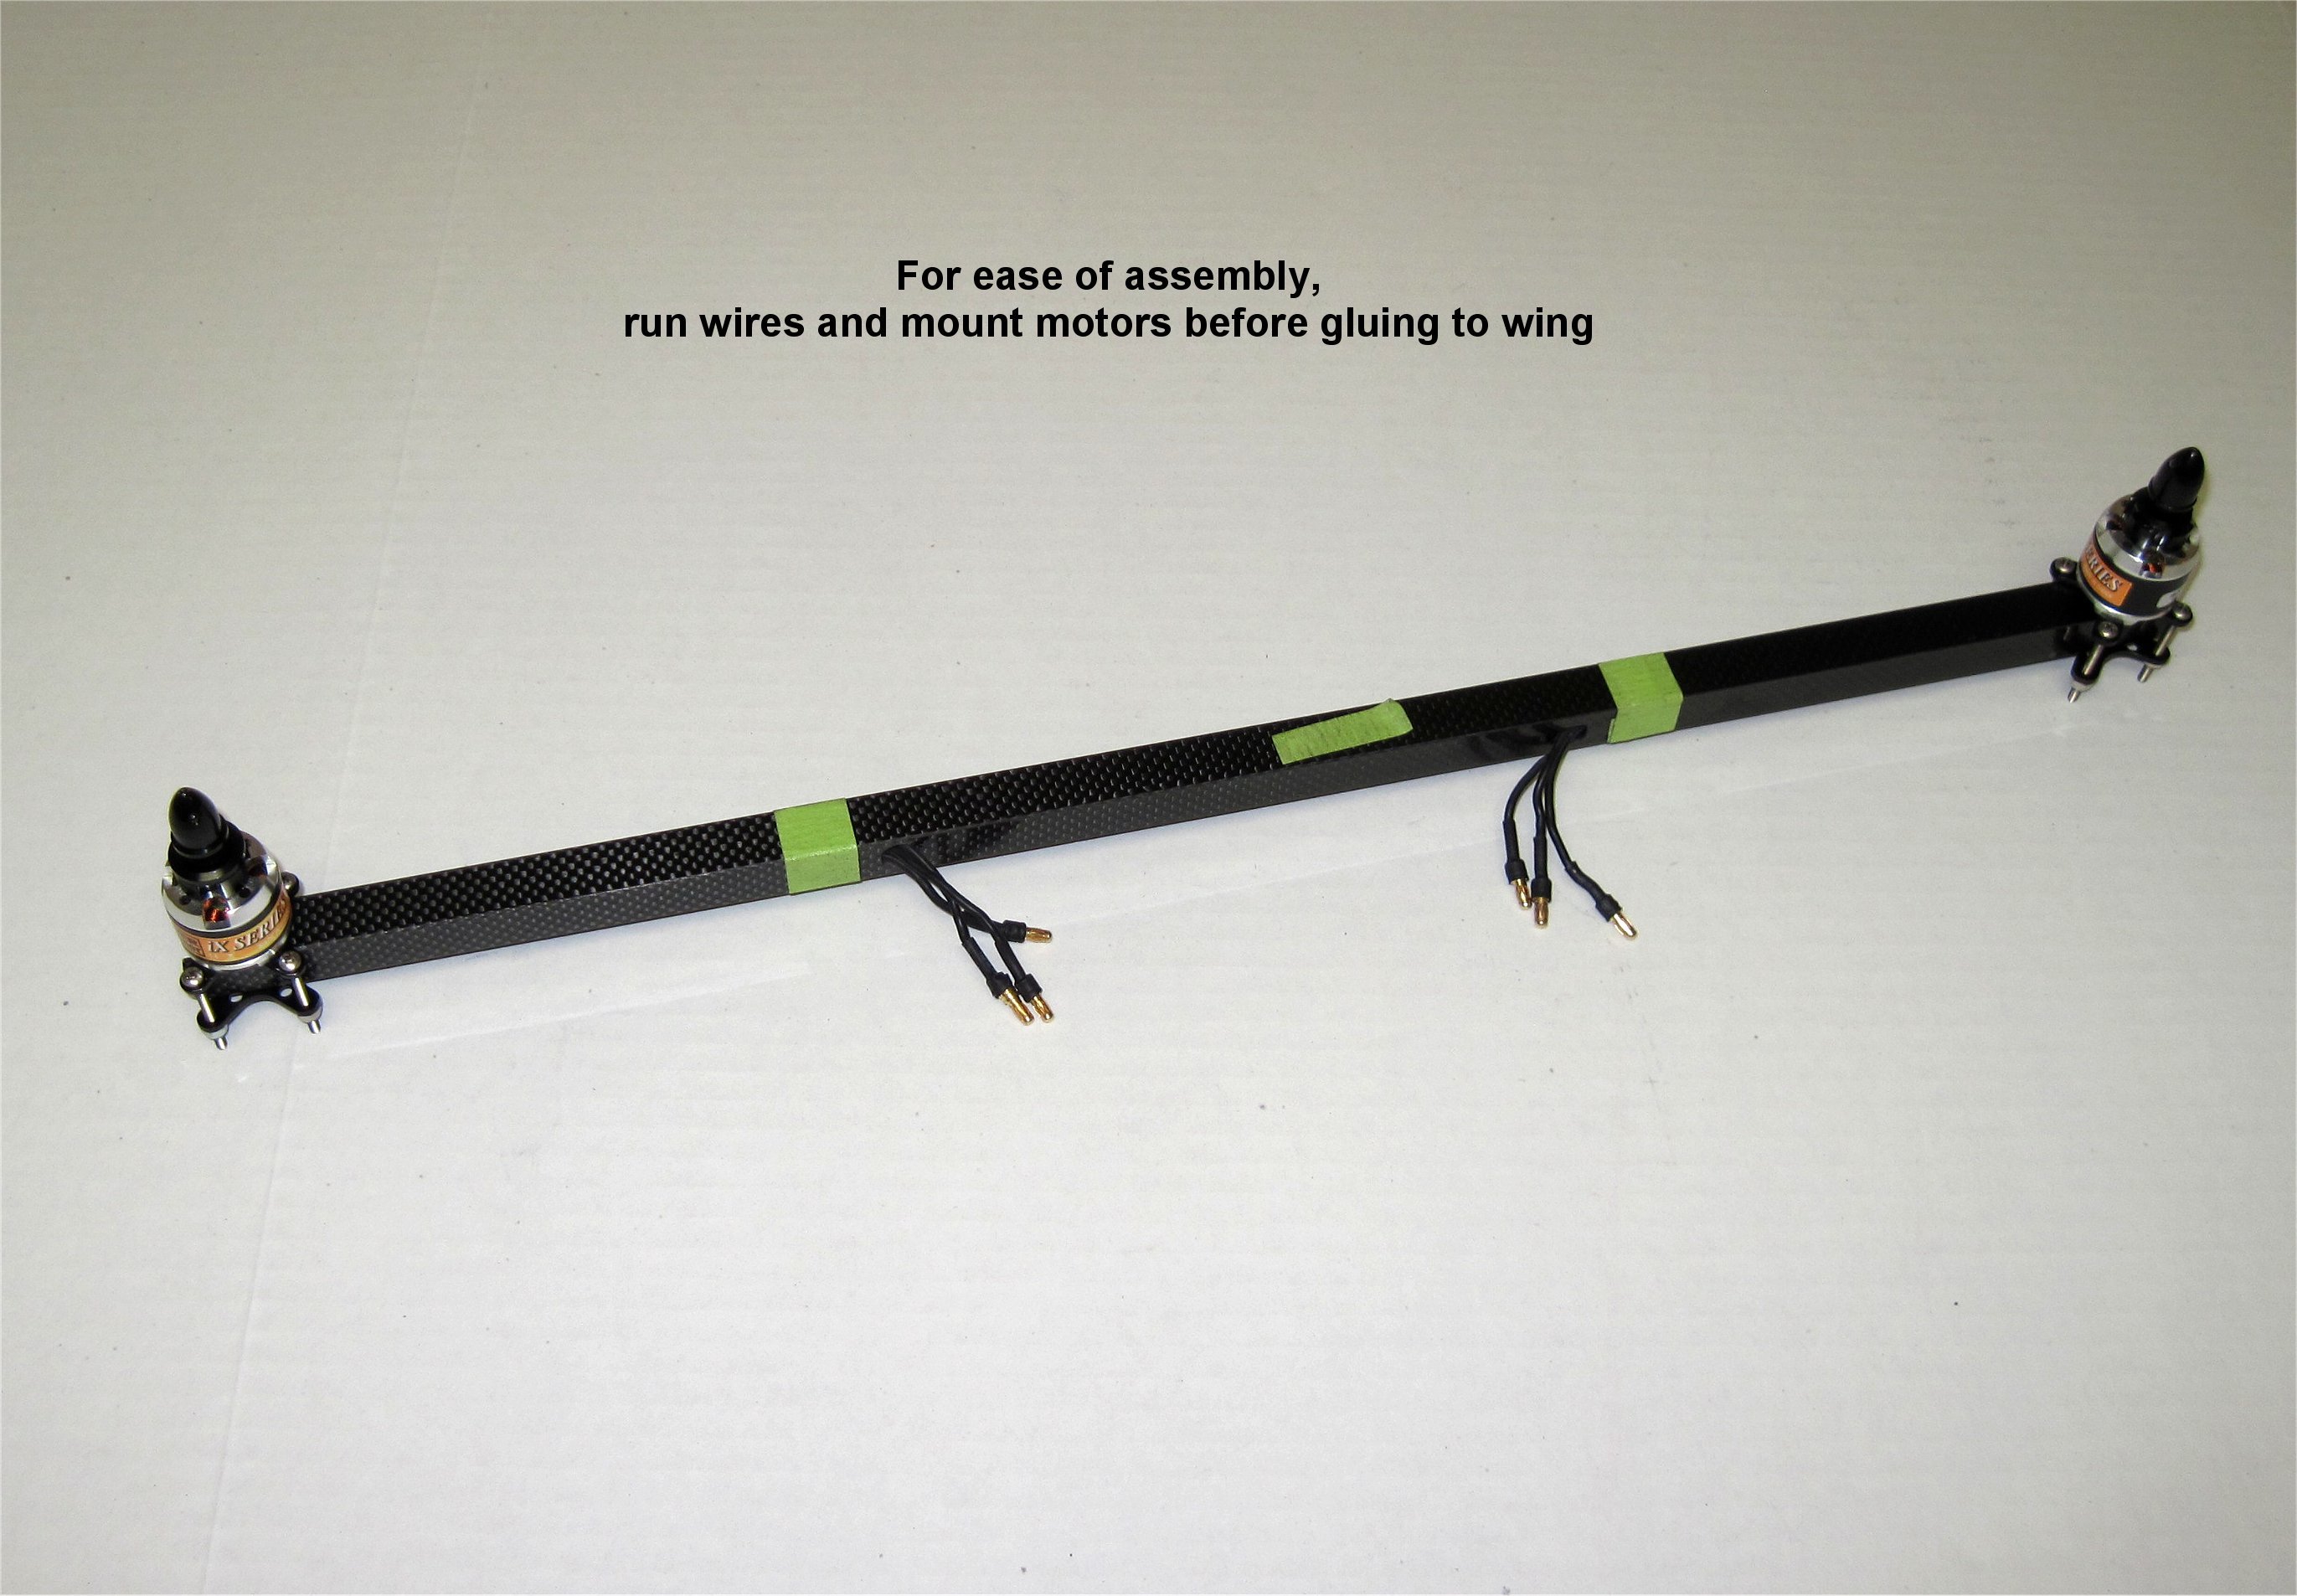
I decided to mount my motors before gluing the square carbon tubes to the wing for ease of assembly. They can still be removed afterwards, if needed. As it turned out, mounting the motors after gluing the tubes worked fine too because there was enough room even for the 3.5mm bullet connectors.
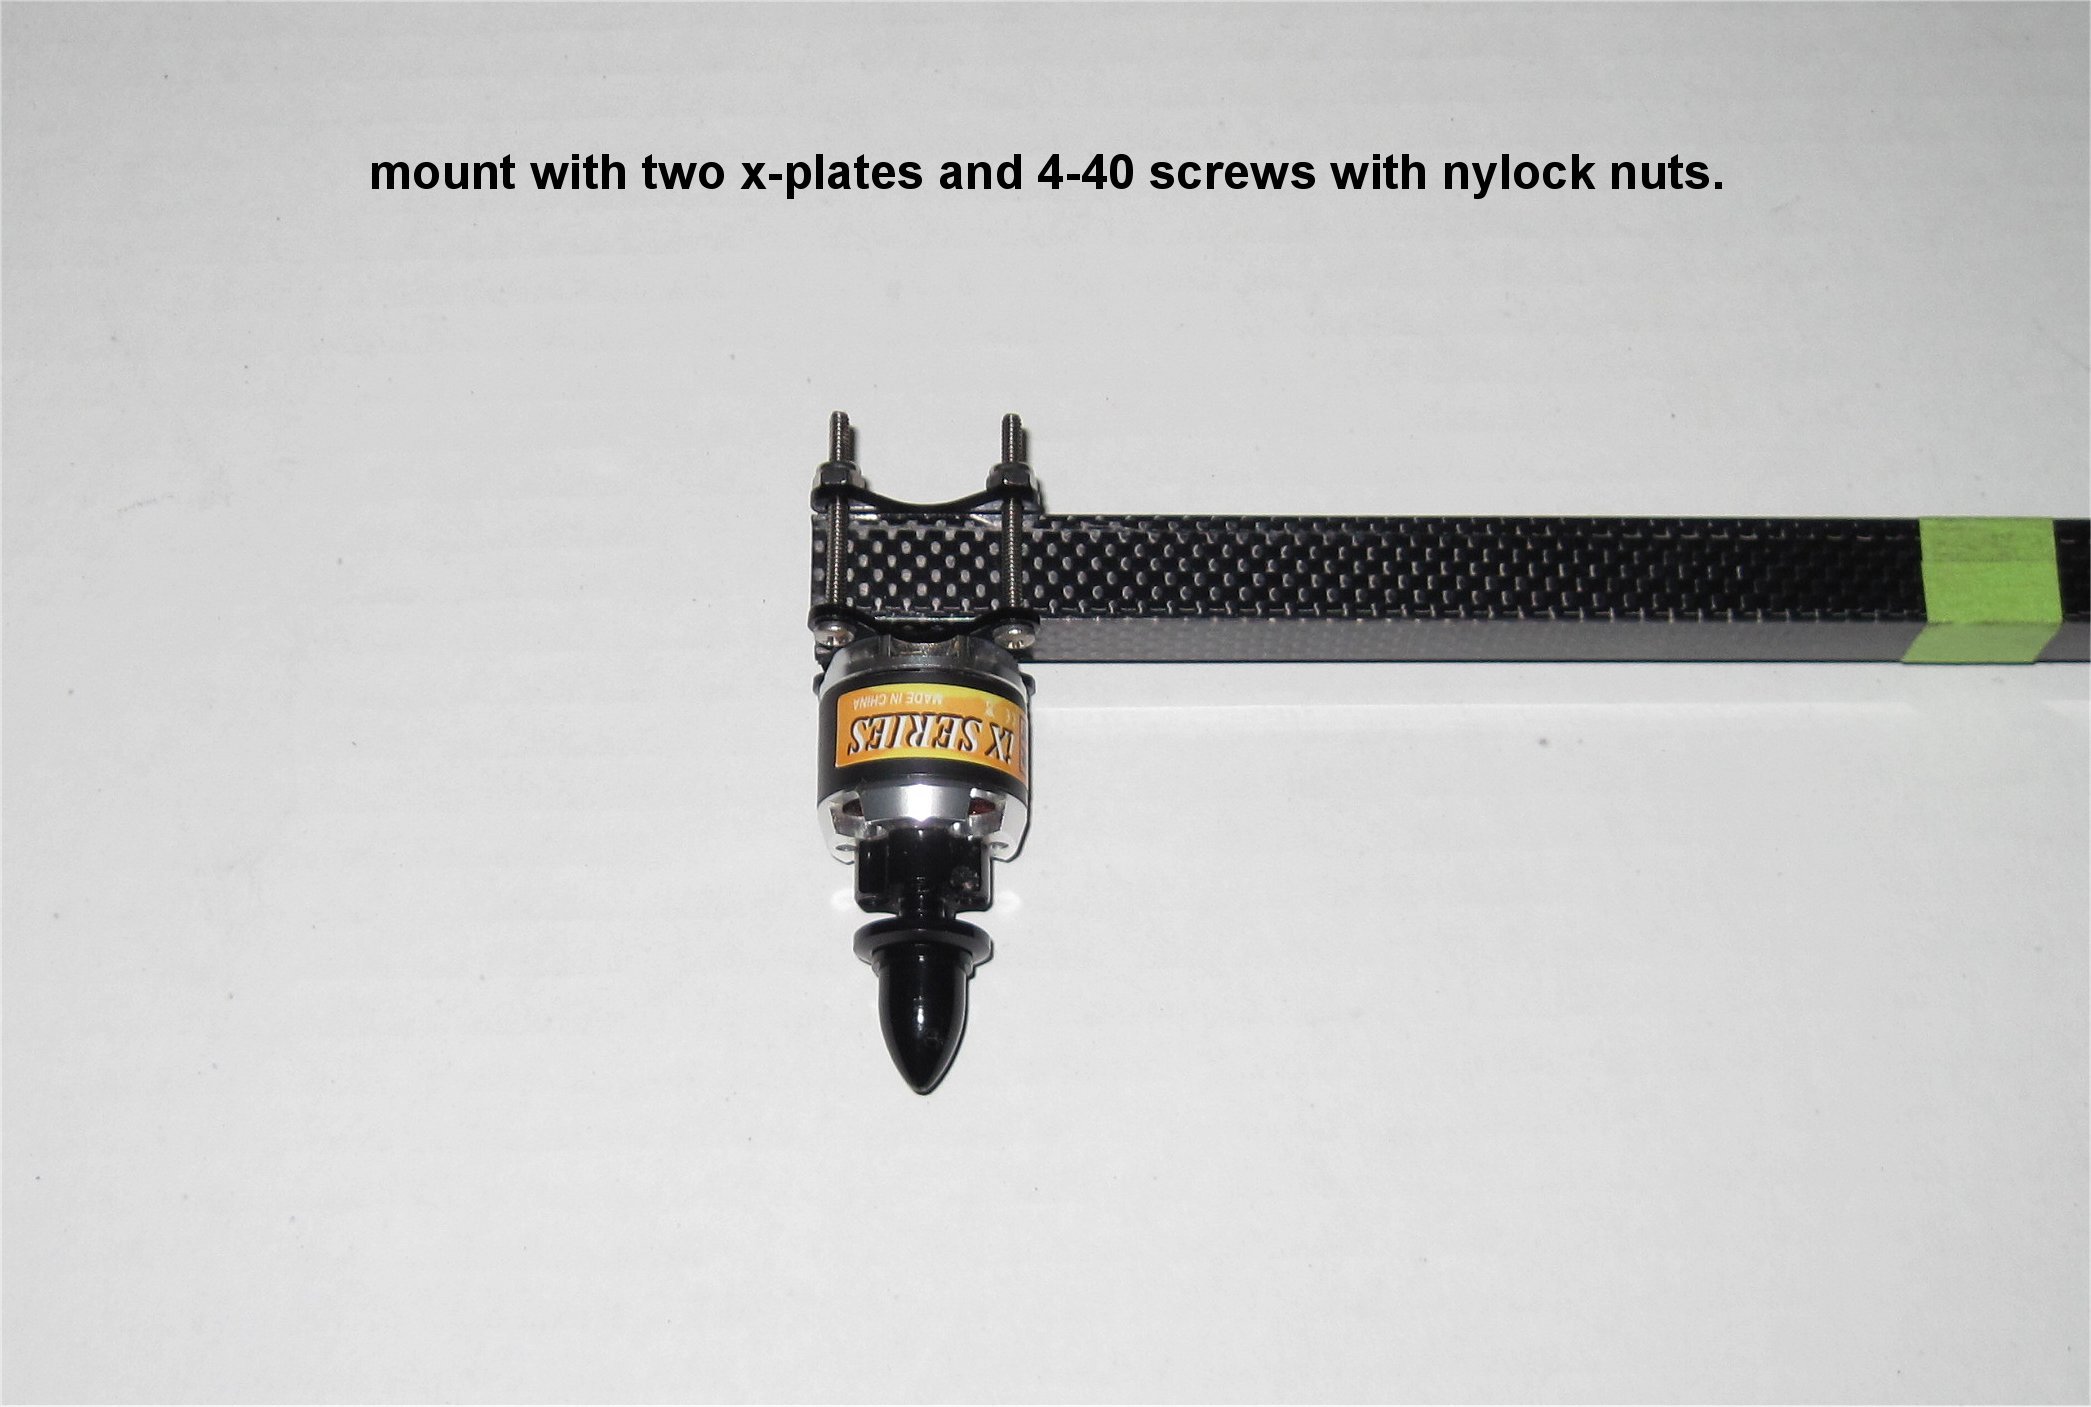
I cut notches on the top side and drilled holes on the inner side for the motor wires so they could be run inside the tube for a cleaner look. The mounting hardware is light 4-40 screws and nylock nuts.
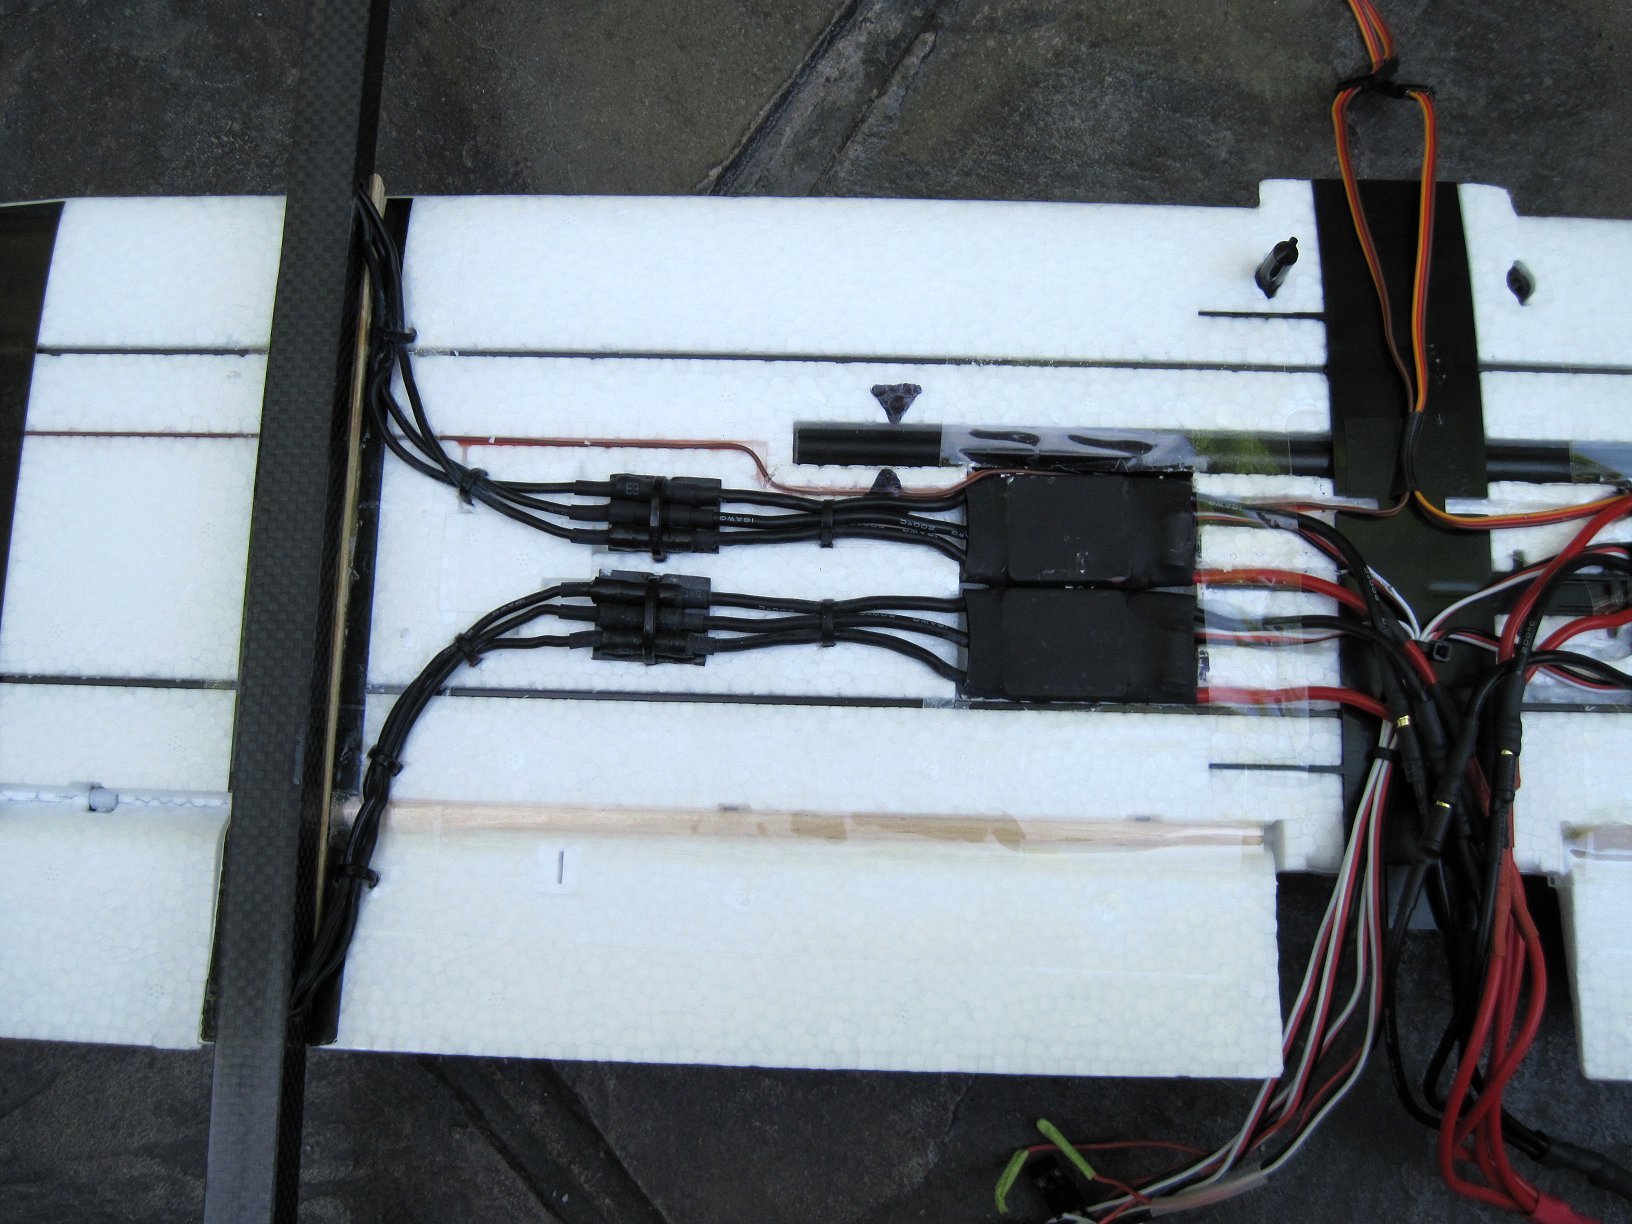
I wired up my 20-amp ESCs to the motors after first running the motor wires through the tubes and then cutting areas to recess the ESC body. This made for a clean low-drag profile.
I tested the motor direction before mounting the ESCs using a simple receiver setup. The XT60 2:1 Adapter plugged directly into the battery pack and 3.5mm bullet connectors. The ESCs were tack glued in place using Beacon 3-in-1 glue.
The typical QuadPlane setup for a Quad-X frame on a Pixhawk is as follows:
Channel 5 / Front Right / CCW
Channel 6 / Rear Left / CCW
Channel 7 / Front Left / CW
Channel 8 / Rear Right / CW
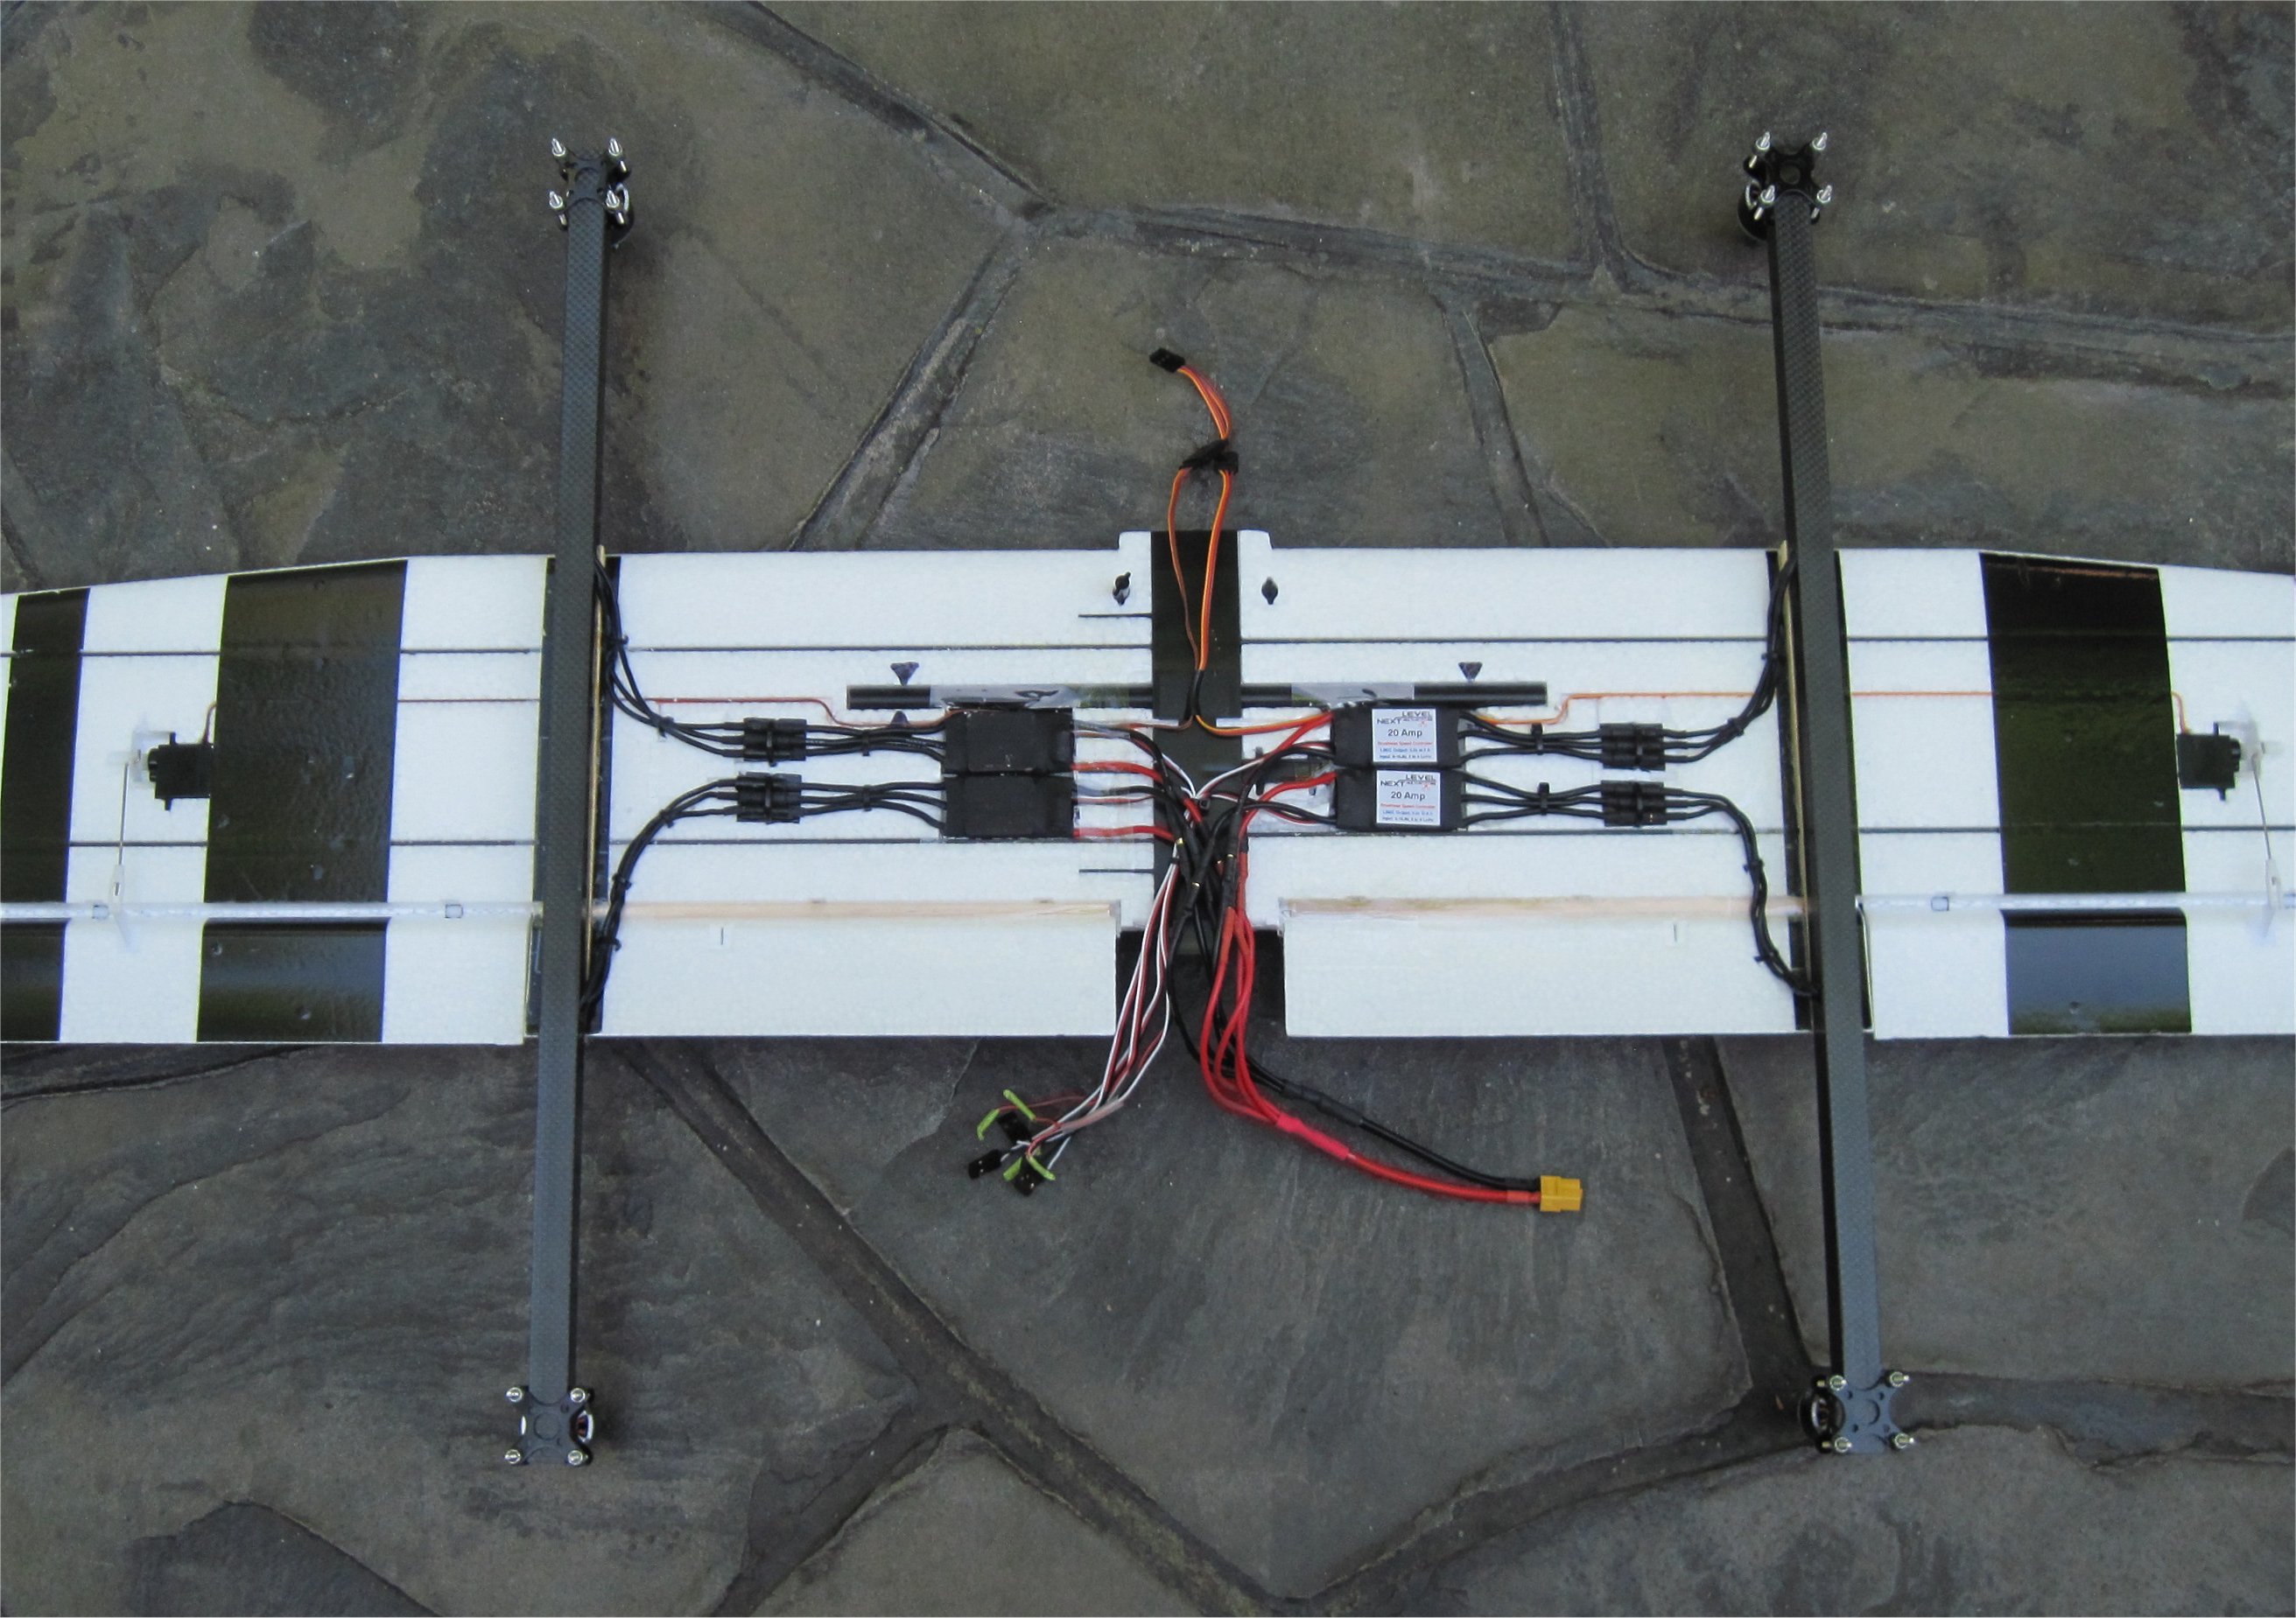
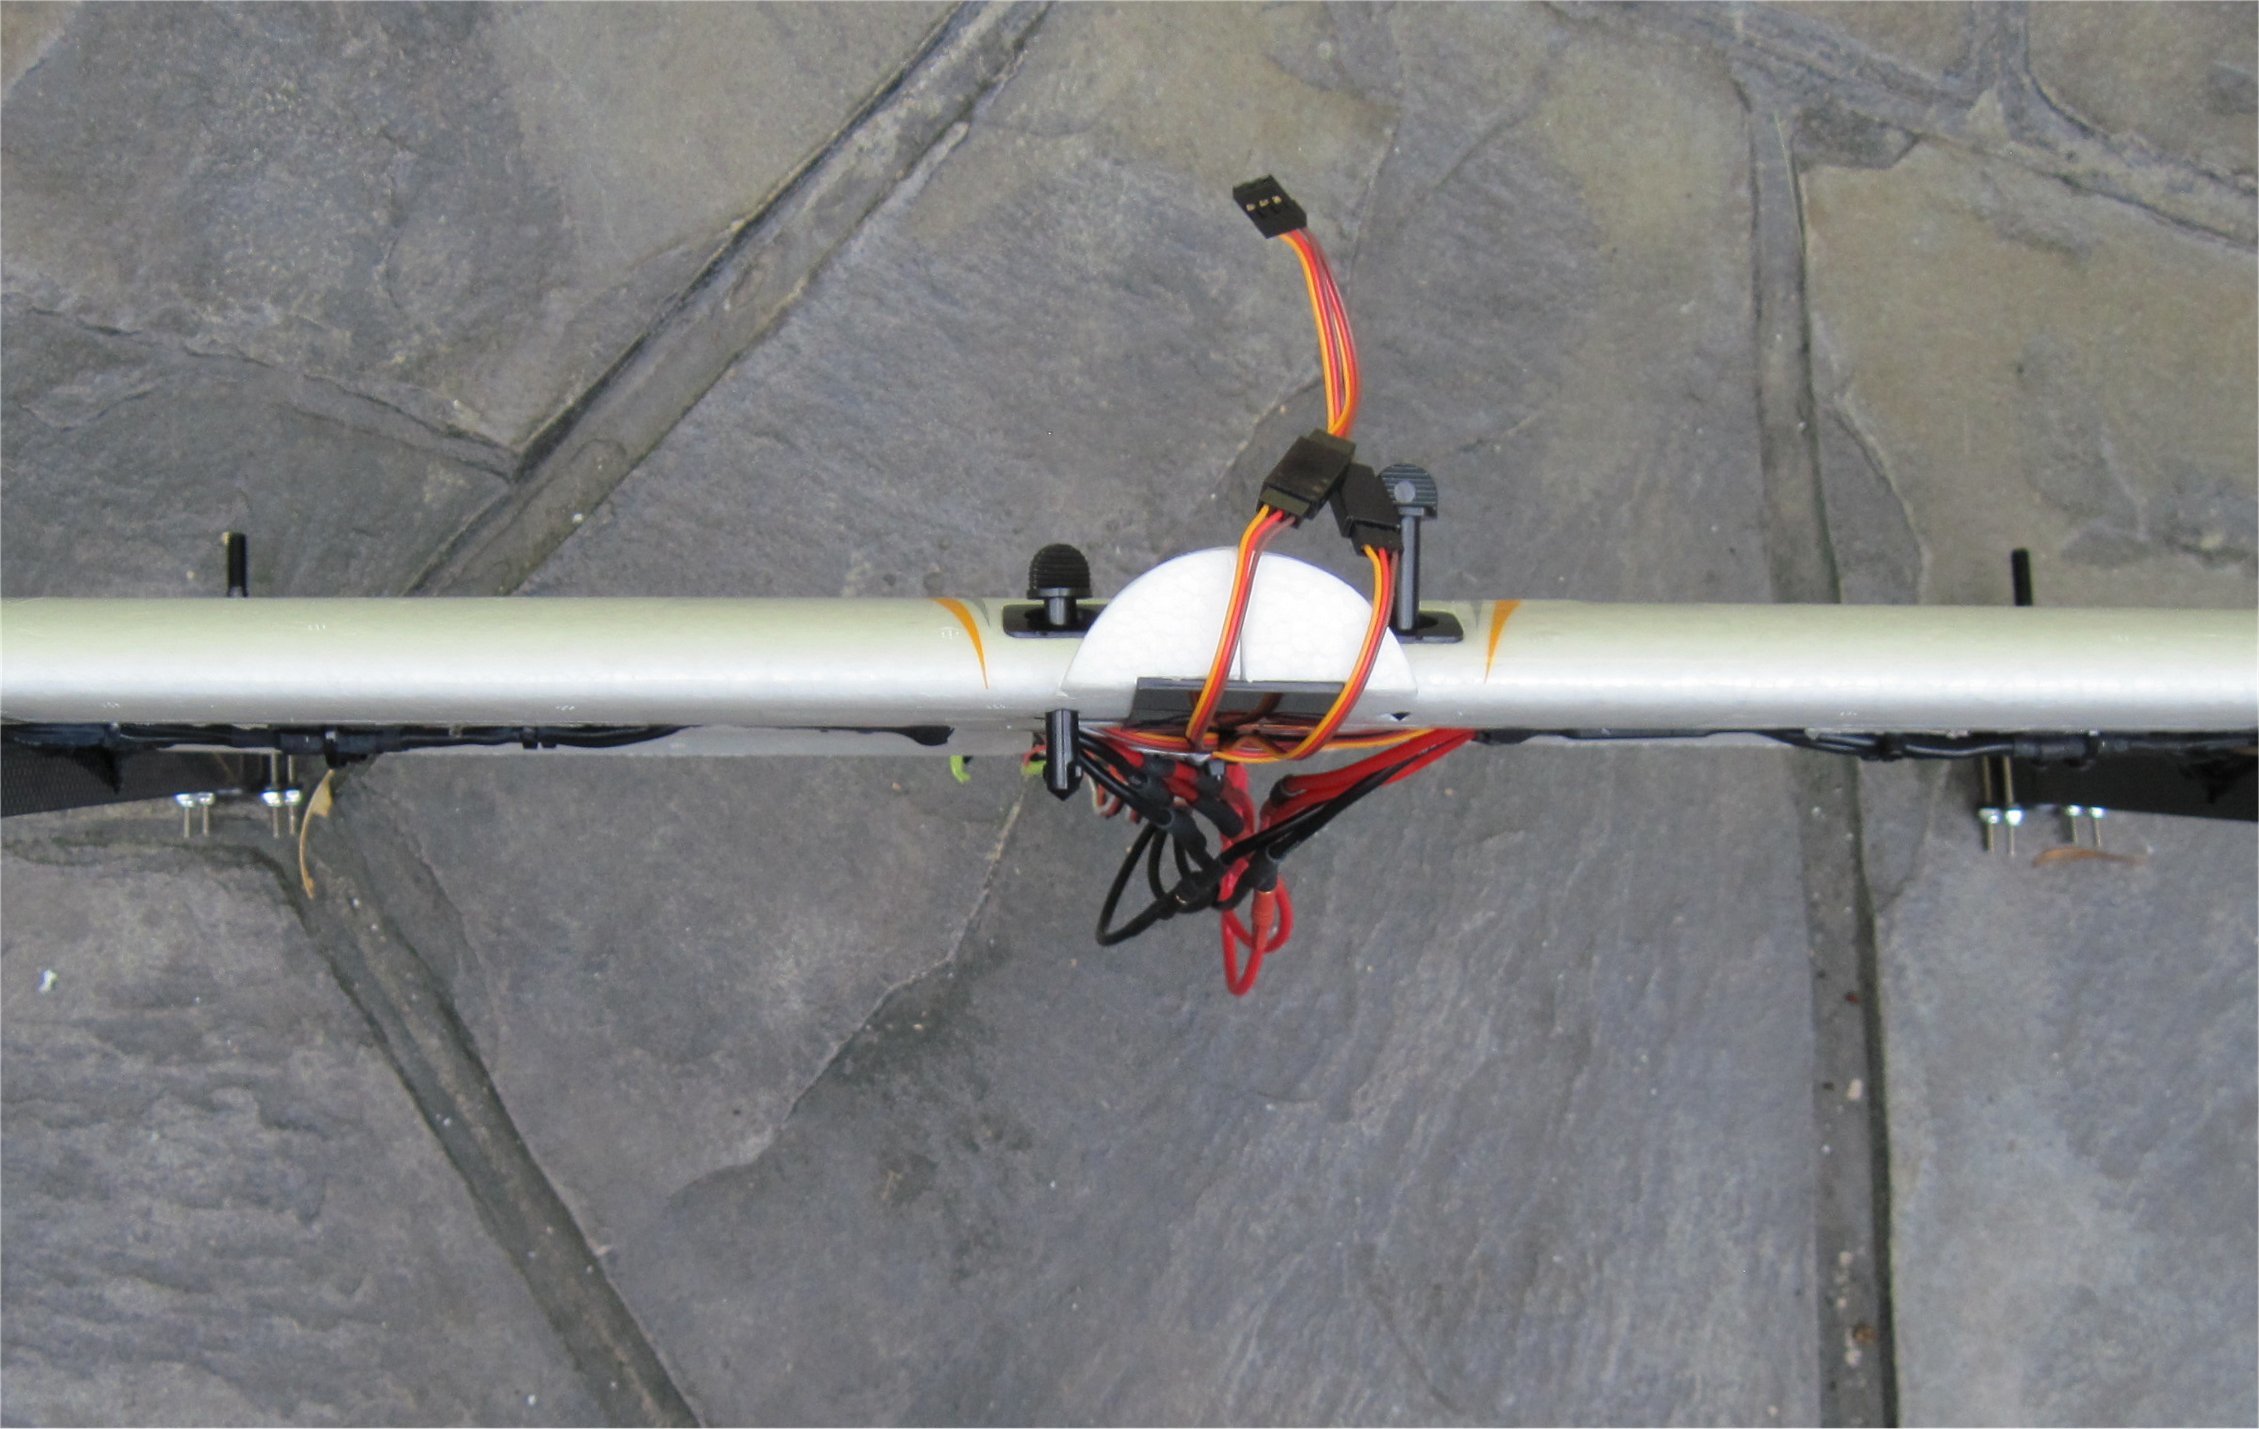
Now it’s time to connect the wires to the Bix3 body…
I had a successful first hover with my Bix3 QuadPlane. I took a few shots with the camera in one hand and the transmitter in the other.
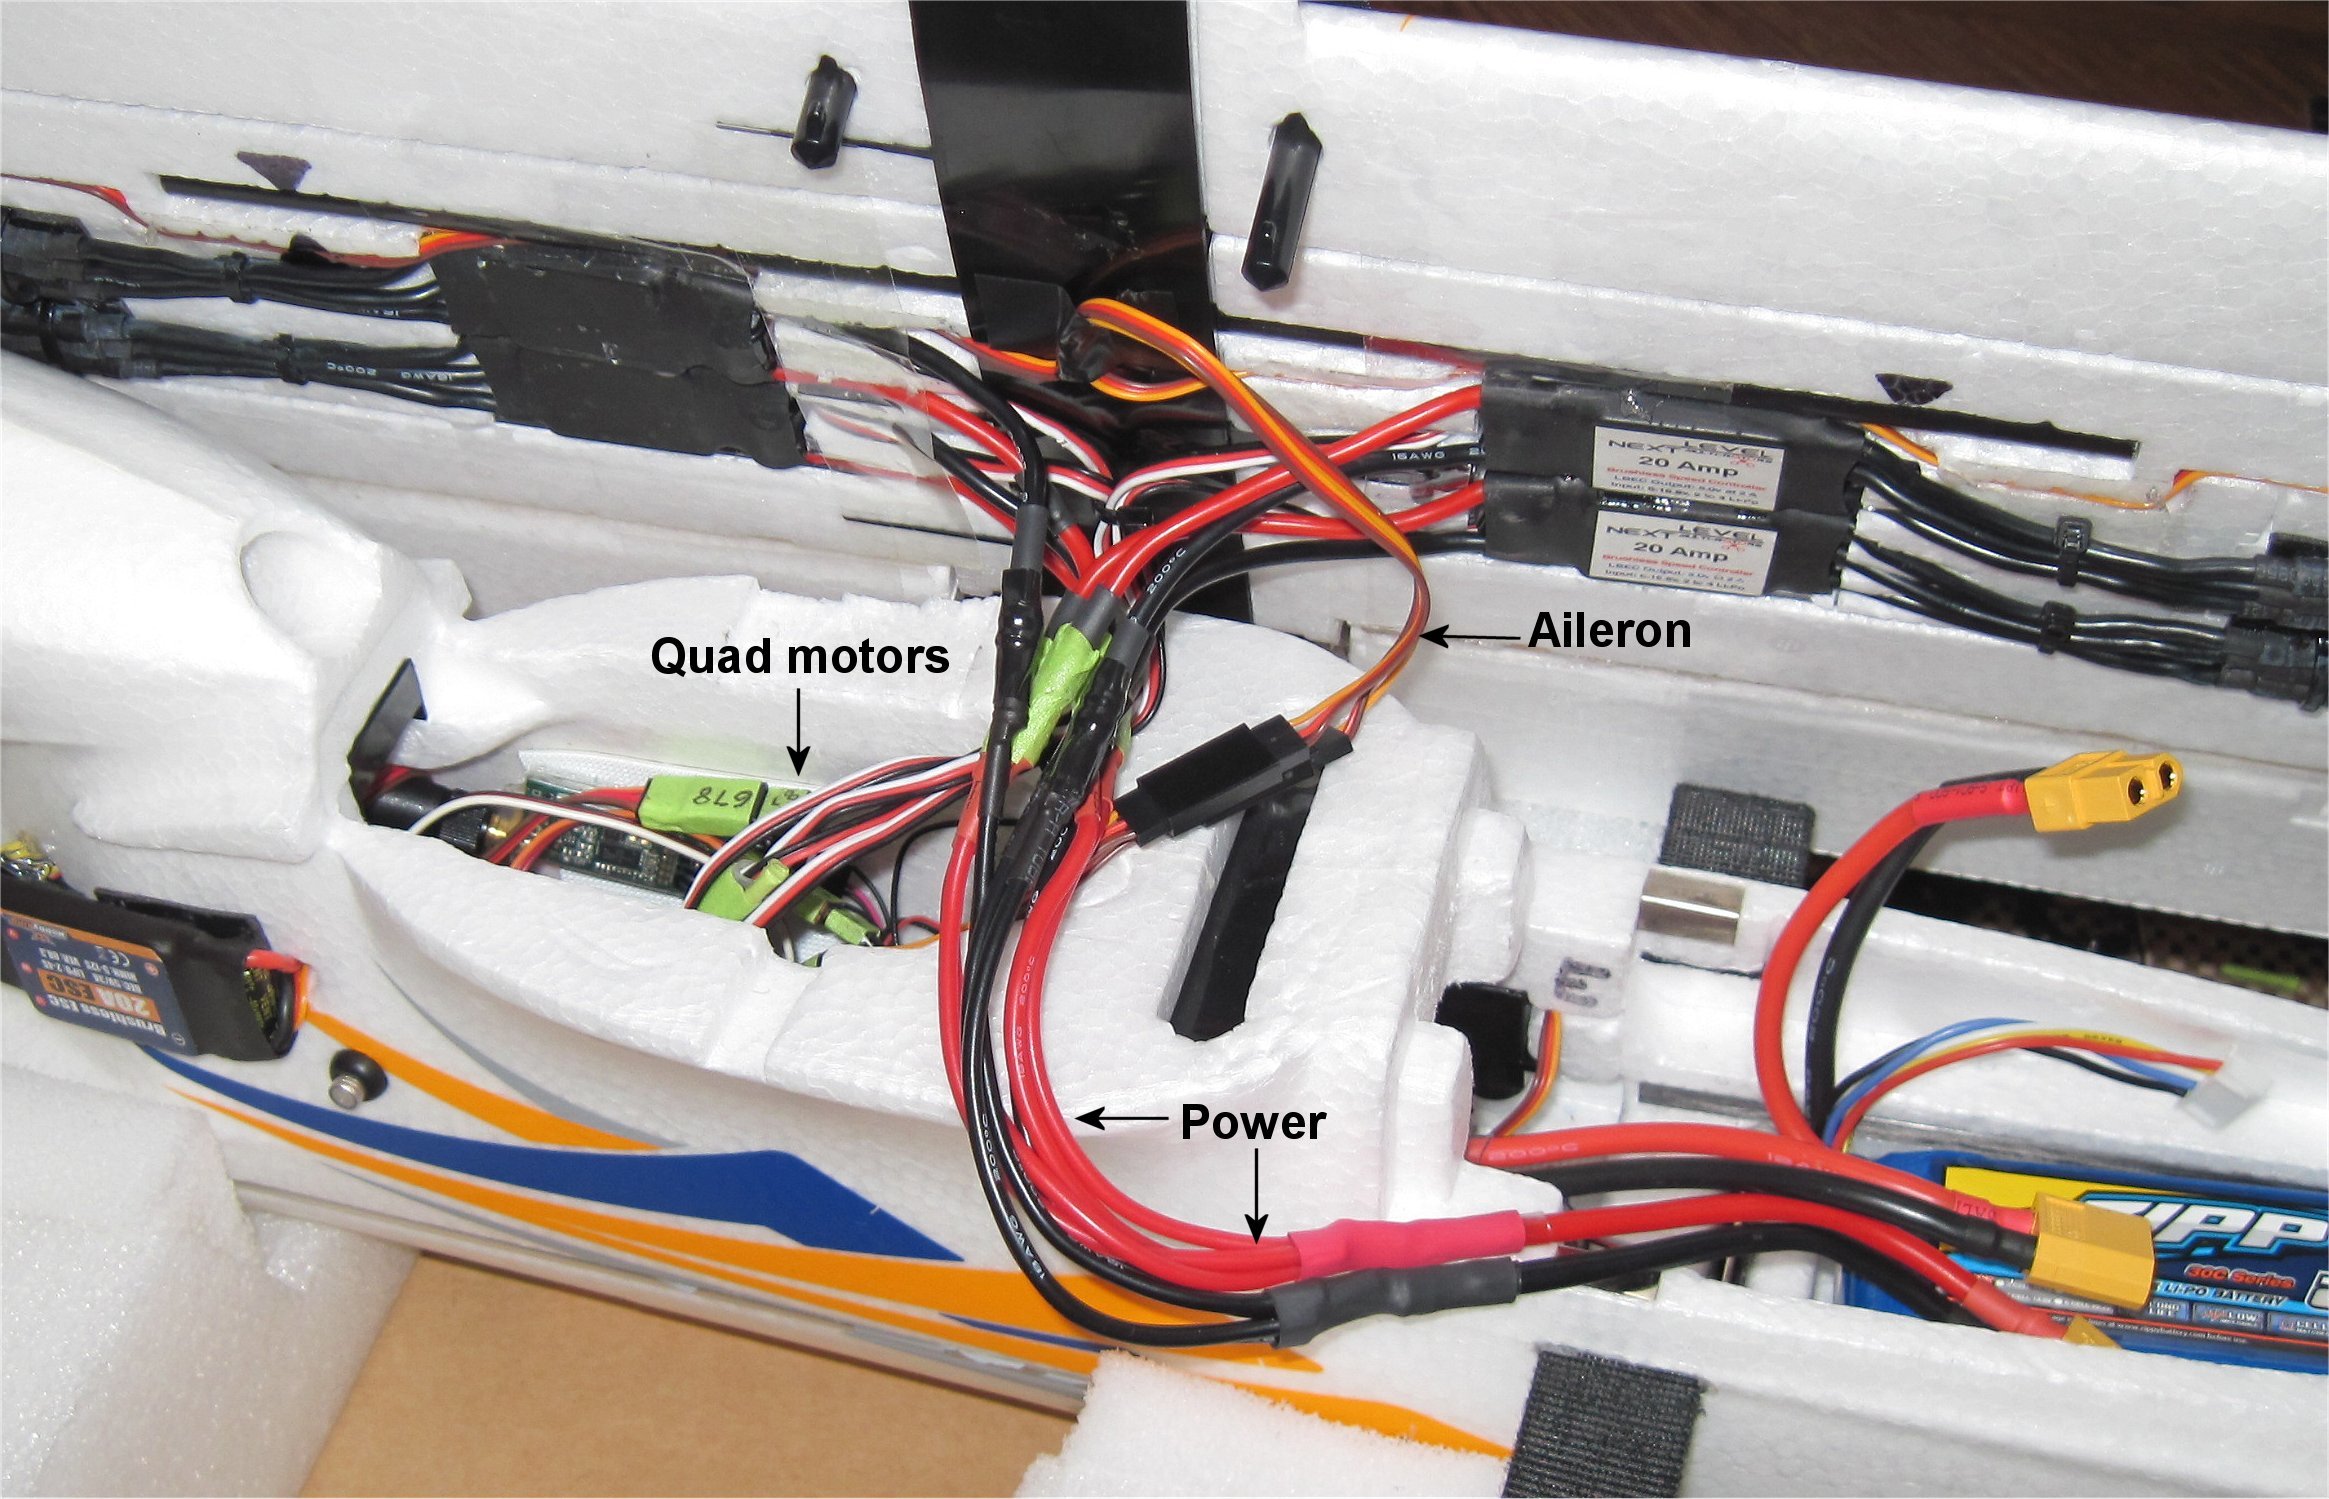
The three groups of wires (Aileron, Power, and Quad ESC control) fit nicely inside the fuselage and are easy to connect or disconnect. I used only two 12" servo cable extensions to connect the quad motor ESCs to channels 5-8. One cable connected channel 5 normally for my signal and ground. The other cable connected channels 6-8 and I soldered the grounds from the ESC wires to the first cable going to channel 5. For the power connection, I used a modified XT60 to 3.5mm bullet cable from Hobby King.
When using APM: Plane v3.6.0, it is best to re-calibrate everything! ACCs, Compass, Radio, etc. I kept the normal plane prop for forward flight off just as a precaution in my backyard. I also used my weighted stock canopy instead of my more expensive FPV pod.
The Bix3 hovered nicely so I am now going to focus on transitions.
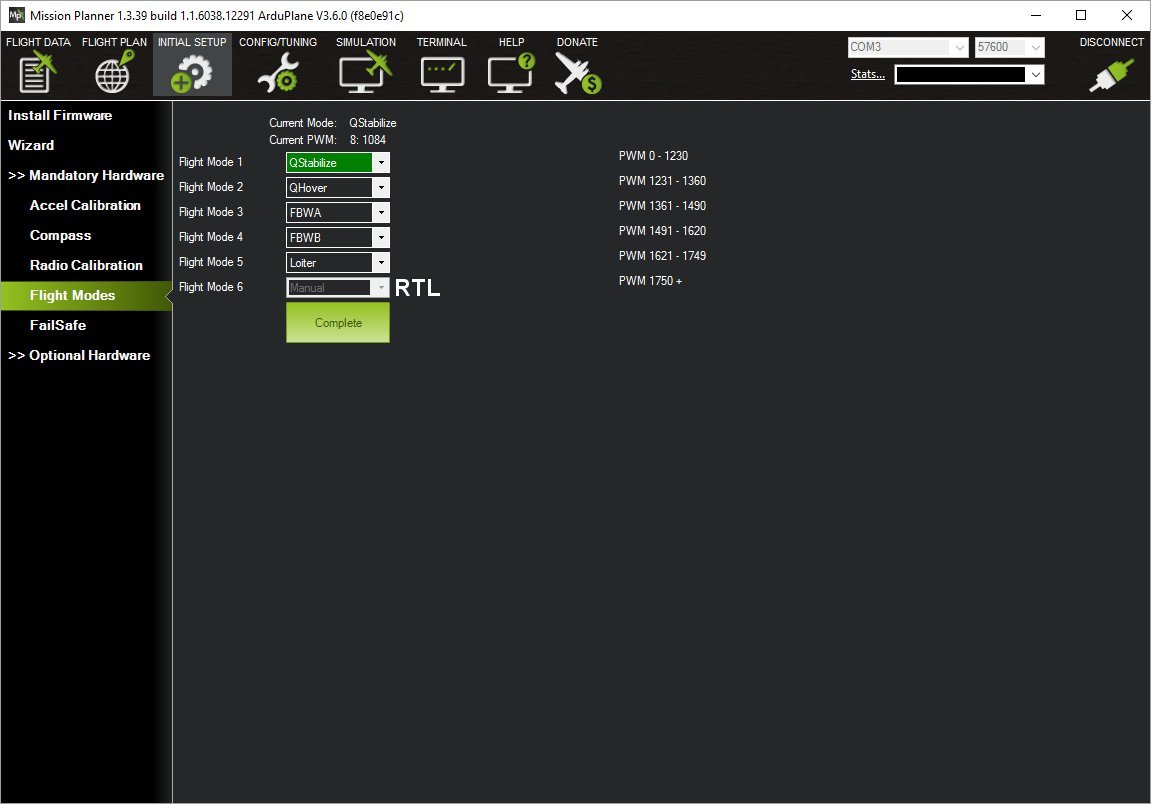
My initial Flight Modes are set as follows. My main tiltrotor/tiltwing experience has been with the FireFLY6 and CL-84 which both used a Hover/Forward Flight mode switch to transition. The QuadPlane design uses the appropriate flight mode to determine if it is a copter or plane so I have a learning curve here. I didn’t see any need to use QLoiter mode. It would have been nice to also program QRTL on my channel 7 switch like I do in copter but plane doesn’t allow it.
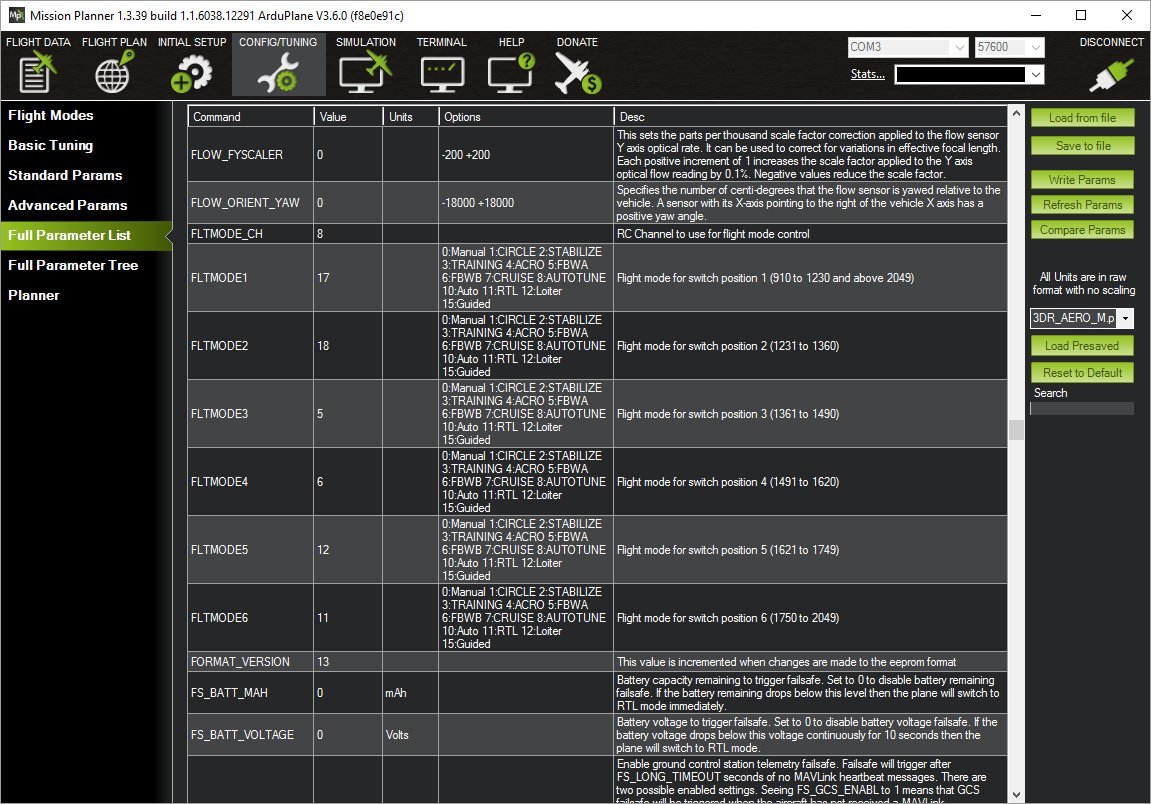
There appears to be a bug in the Mission Planner v1.3.39 Flight Modes screen where it always displays “Manual” for Flight Mode 6. The HUD properly displays my RTL mode which was programmed in the Full Parameter List.
It’s not a bug. By design, for reasons of safety, Mission Planner tries to force you to have a Manual mode during setup, although you can override this by changing the parameters.
However there is a known bug that will not allow you to disarm out of a Qmode with the rudder stick. https://github.com/ArduPilot/ardupilot/issues/4476
The only way to shutdown the Qmotors quickly is to switch to Manual mode. Therefore, for now, I highly recommend keeping Manual mode. Be very careful not to accidentally switch to Manual while flying below stall speed, or you will fall. Us longtime Arduplane flyers have a habit of going quickly to Manual if anything goes wrong, like a stall or unpredictable autopilot behavior. This is a tough habit to break but could have disastrous consequences. It helps to give yourself a preflight briefing, reviewing which switch your fingers will go for in case of emergency.
Ok, thanks for the tips. Wouldn’t the bug be that the Mission Planner Flight Modes screen doesn’t reflect my actual programmed modes? By changing the FLTMODE6 parameter to 11 in the Full Parameter List, the Flight Modes screen should reflect this. APM Copter seems to have more features than Plane and you get used to programming extra modes using channels 6 and 7 of the receiver. Believe it or not, the Taranis 6-position knob just isn’t enough for me.
The QuadPlane features differ from my previous experience with the FireFLY6 and CL-84. The normal bail-out mode is hover mode, or in the QuadPlane world, QStabilize or QHover. I set my Q_M_SPIN_ARMED to 30 which disables the motors spinning in QStabilize at minimum throttle so I don’t need Manual mode. Since the FireFLY6 and CL-84 fly in similar fashion, I am hoping to set up my first QuadPlane in a way that is familiar. Time will tell…
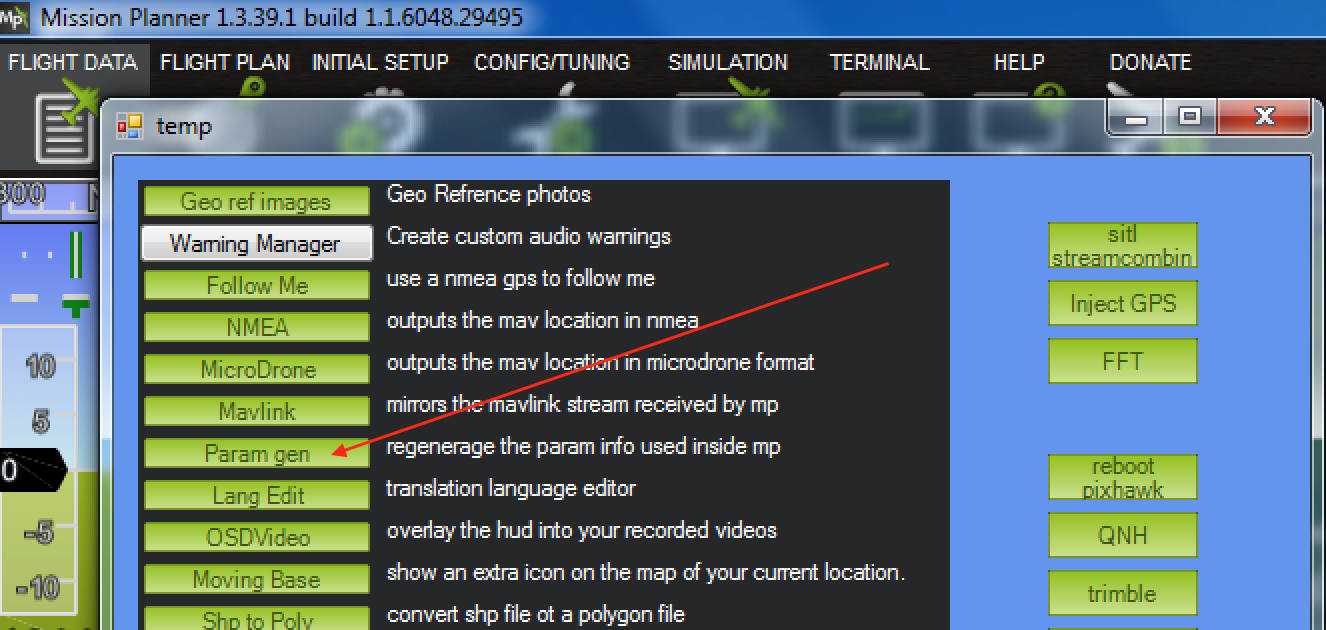
Thanks for the suggestion but it didn’t change the “Manual” display for Flight Mode 6. I had not used the CTRL-F screen in quite a while and it is much cleaner than I remember.
That being said, I have changed my initial Flight Modes for my maiden flight. With my new Quad frame setup, I realized that I likely need to trim everything again so Manual mode is needed. Normally, I fly either Stabilize or FBWA modes for Plane but I think Manual mode is needed for TRIM_AUTO. Here is my new Flight Mode setup for my initial flight testing.
Note that instead of using Manual mode to bailout of trouble in Plane, my bailout mode for a QuadPlane will be QStabilize or QHover.
I suppose you could view that as a bug. I think the intent is that screen is not where you go to see the modes you have set, but rather where you go to set your modes. MANUAL is preselected so that when you hit Save Modes, it will force you to have Manual mode. Like it or not, I think it’s working how it was originally intended, long before QuadPlane raised this question.
Hi Greg
Nice write up and description on a Bixler quadplane mod. Congrats.
Once you have her all tuned and have ironed out all the kinks, maybe this can become the official Bixler quadplane documentation?
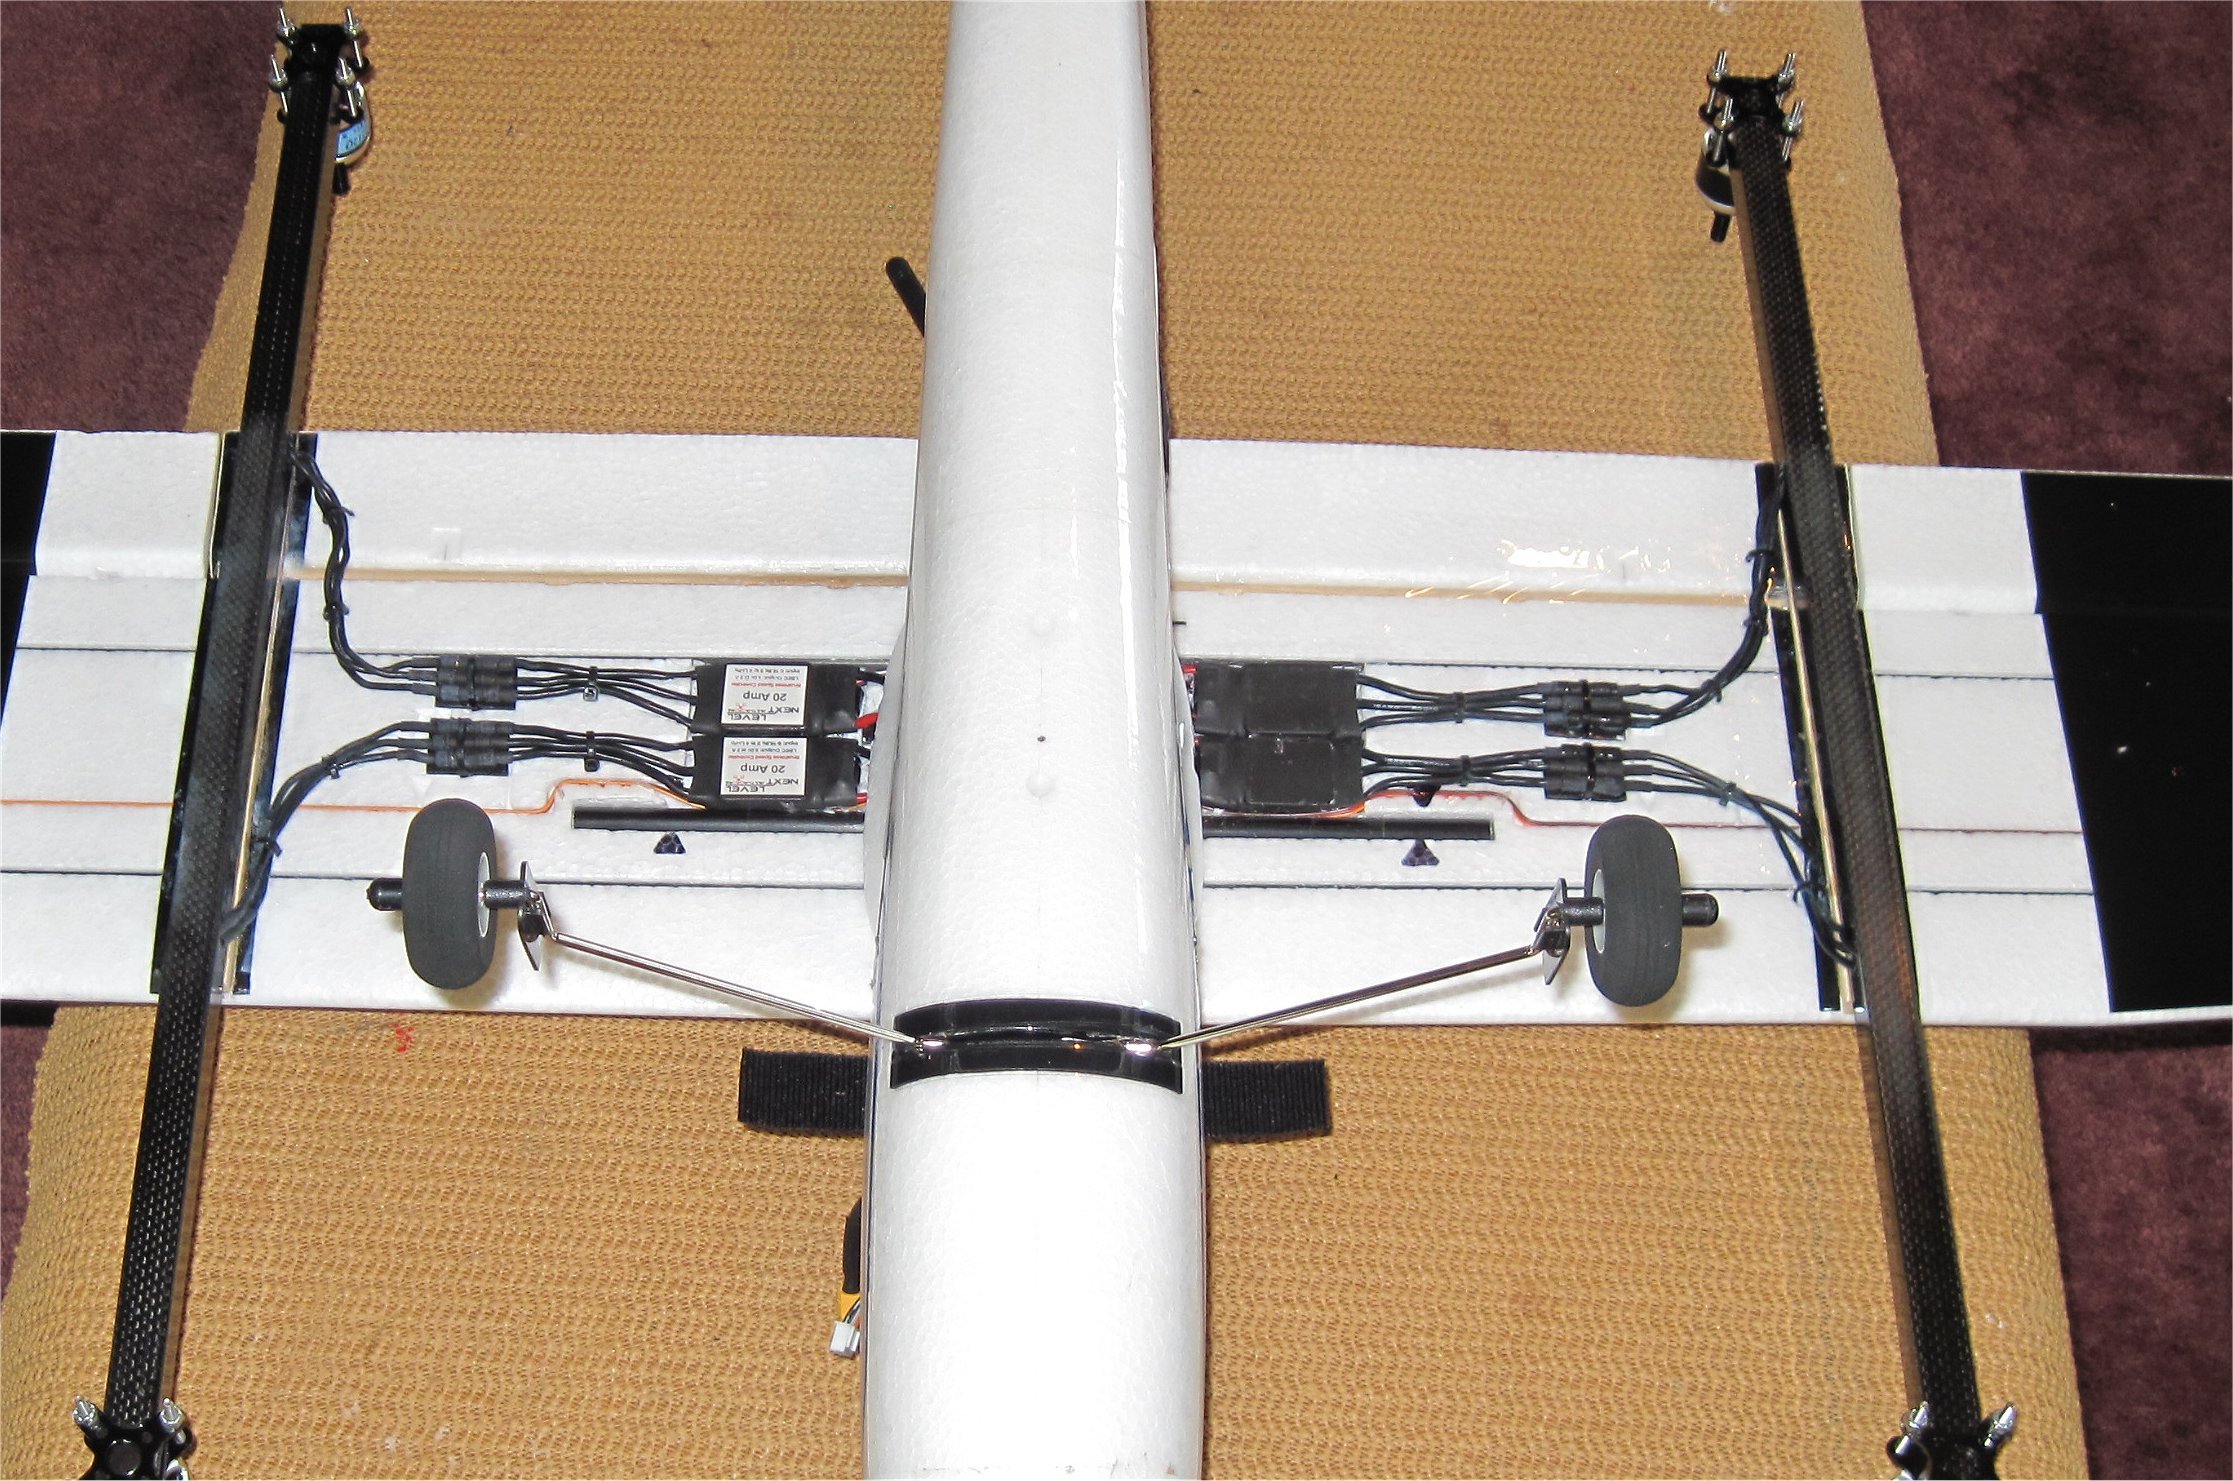
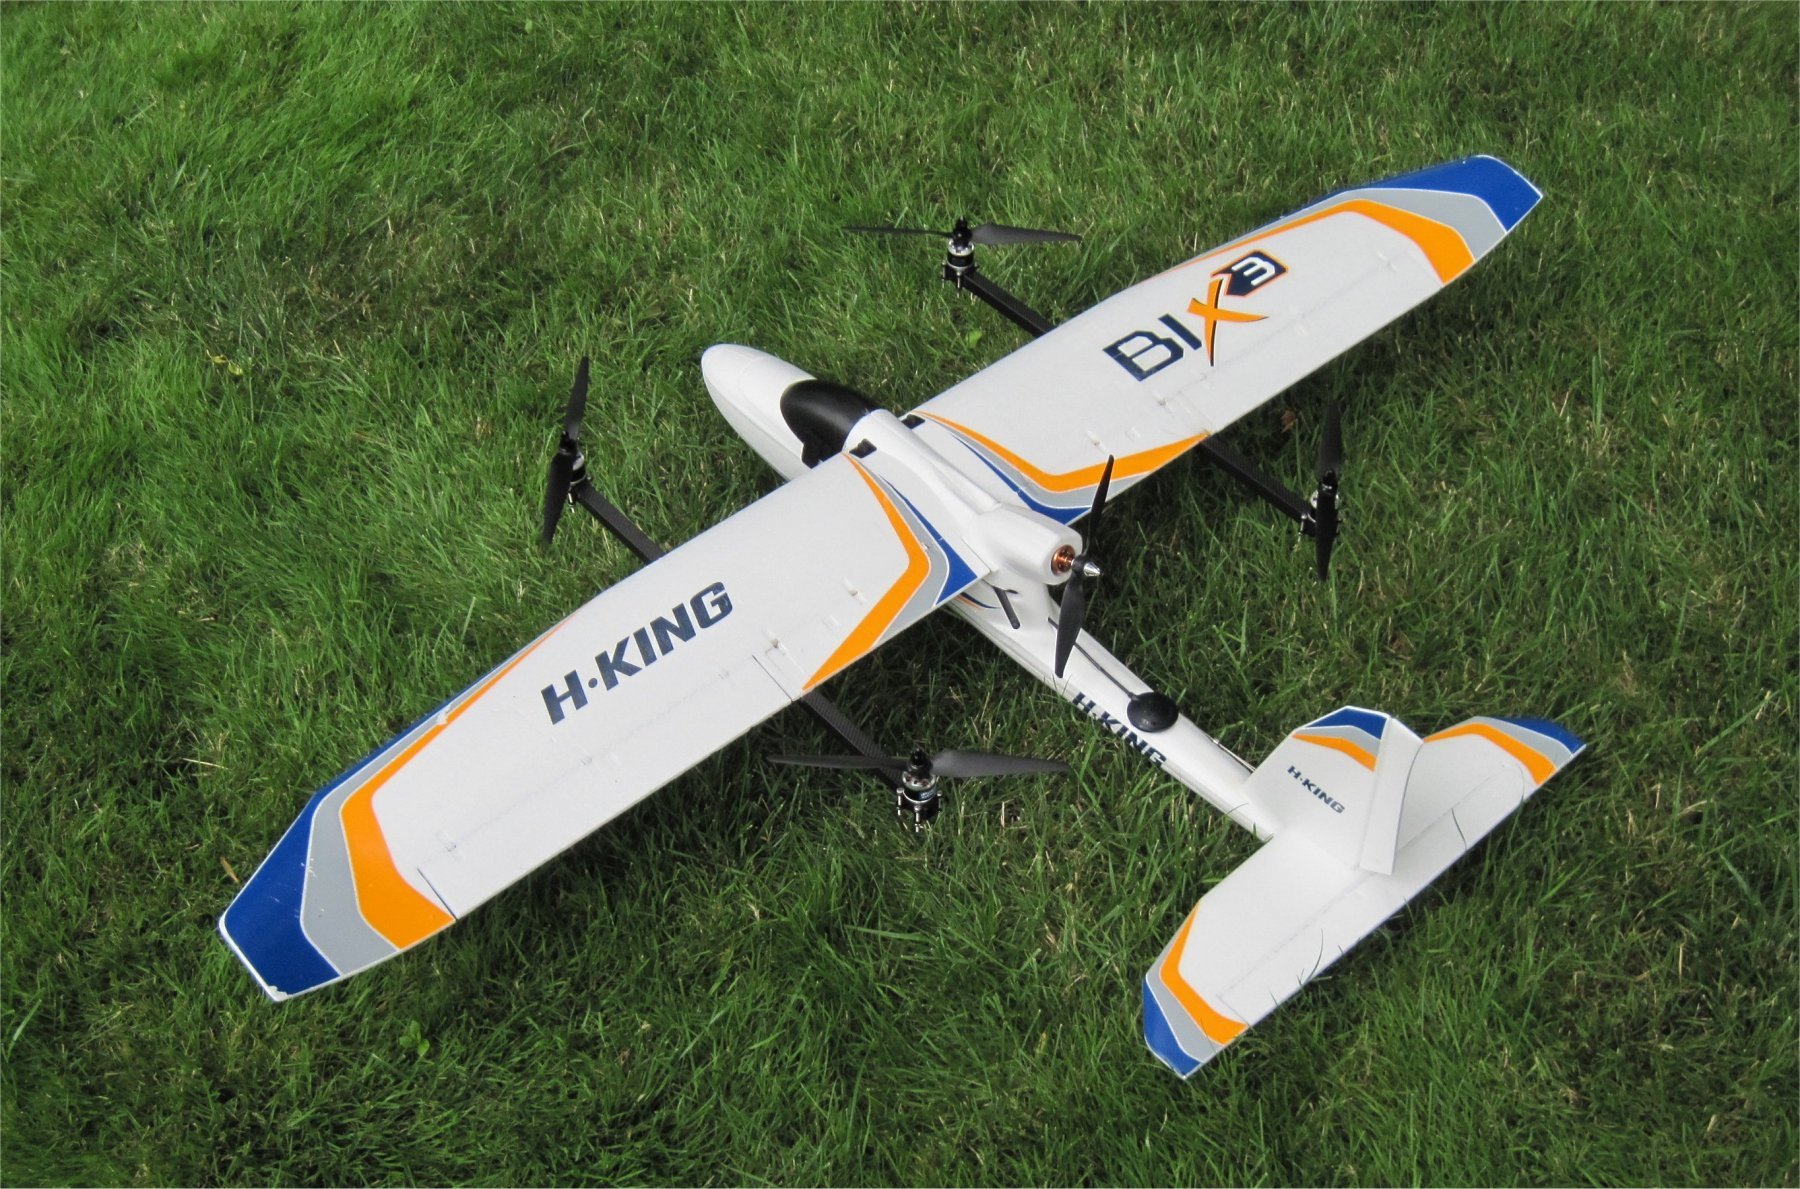
Just one question in regards to the quad setup: are the front spars long enough to be on COG with the rear? They look a little short atm. from the perspective of that last photo, which might lead to loading up the front motors more than the rear.
Also, if you end up using weathervaning and forward motor for position hold, be careful in higher wind speeds that she actually descends. We’ve found it it becomes very floaty once the quad motors start and it can take a while to descend or will even climb at times. If so maybe bring her down in plane mode instead if you have the space to land.
Thanks, I’m trying to document my conversion so it becomes an easy one for others to duplicate. Feel free to add it anywhere.
The photos can give a false perspective of placement. Use the Bix3QP7.jpg image above for actual dimensions of the spars. I did a CG check and it is fine. I used Mission Planner to tell me when the plane was standing level on the gear from my initial Pixhawk conversion to Plane. I then used a bubble level to keep a relative perspective during the conversion. It seems to have worked out fine. All the motors and ESCs seem to be the same warm to hot temperature after a longer than normal hover test. I don’t expect to hover long with this setup before changing to a plane mode.
It should be a fun test, hopefully next weekend. Once I get my initial testing finished, I would like to try using weathervaning and forward motor power for position hold.
When is your Outback challenge? Has it happened already?
No probs, will do. Sounds like you have it well under control. On our original talon builds the forward arms were nearly twice as long as the rear to get CoG, so we converted it to arms coming out of the fuselage instead using flat aluminium or CF bar. That got rid of the vibration issues as well as the flex, and also considerably shortened the wiring etc. We also set it up as a h-quad and not an X-quad as the flex in the arms actually helps yaw control.
If using forward motor, or your expecting to operate in higher winds, then a small amount of forward tilt on the quad motors will help reduce the quad motor loading whilst trying to maintain position, because of the wings positive AoA.
The Outback Challenge is on the 25th September (thankfully!), but there’s already been a few. This challenge requires a VTOL aircraft to locate “Joe” and to pickup a blood sample from him 30km away, all in 60minutes. Is fun…but weather is not playing ball atm…let alone some quadplane issues. But we’re getting there.
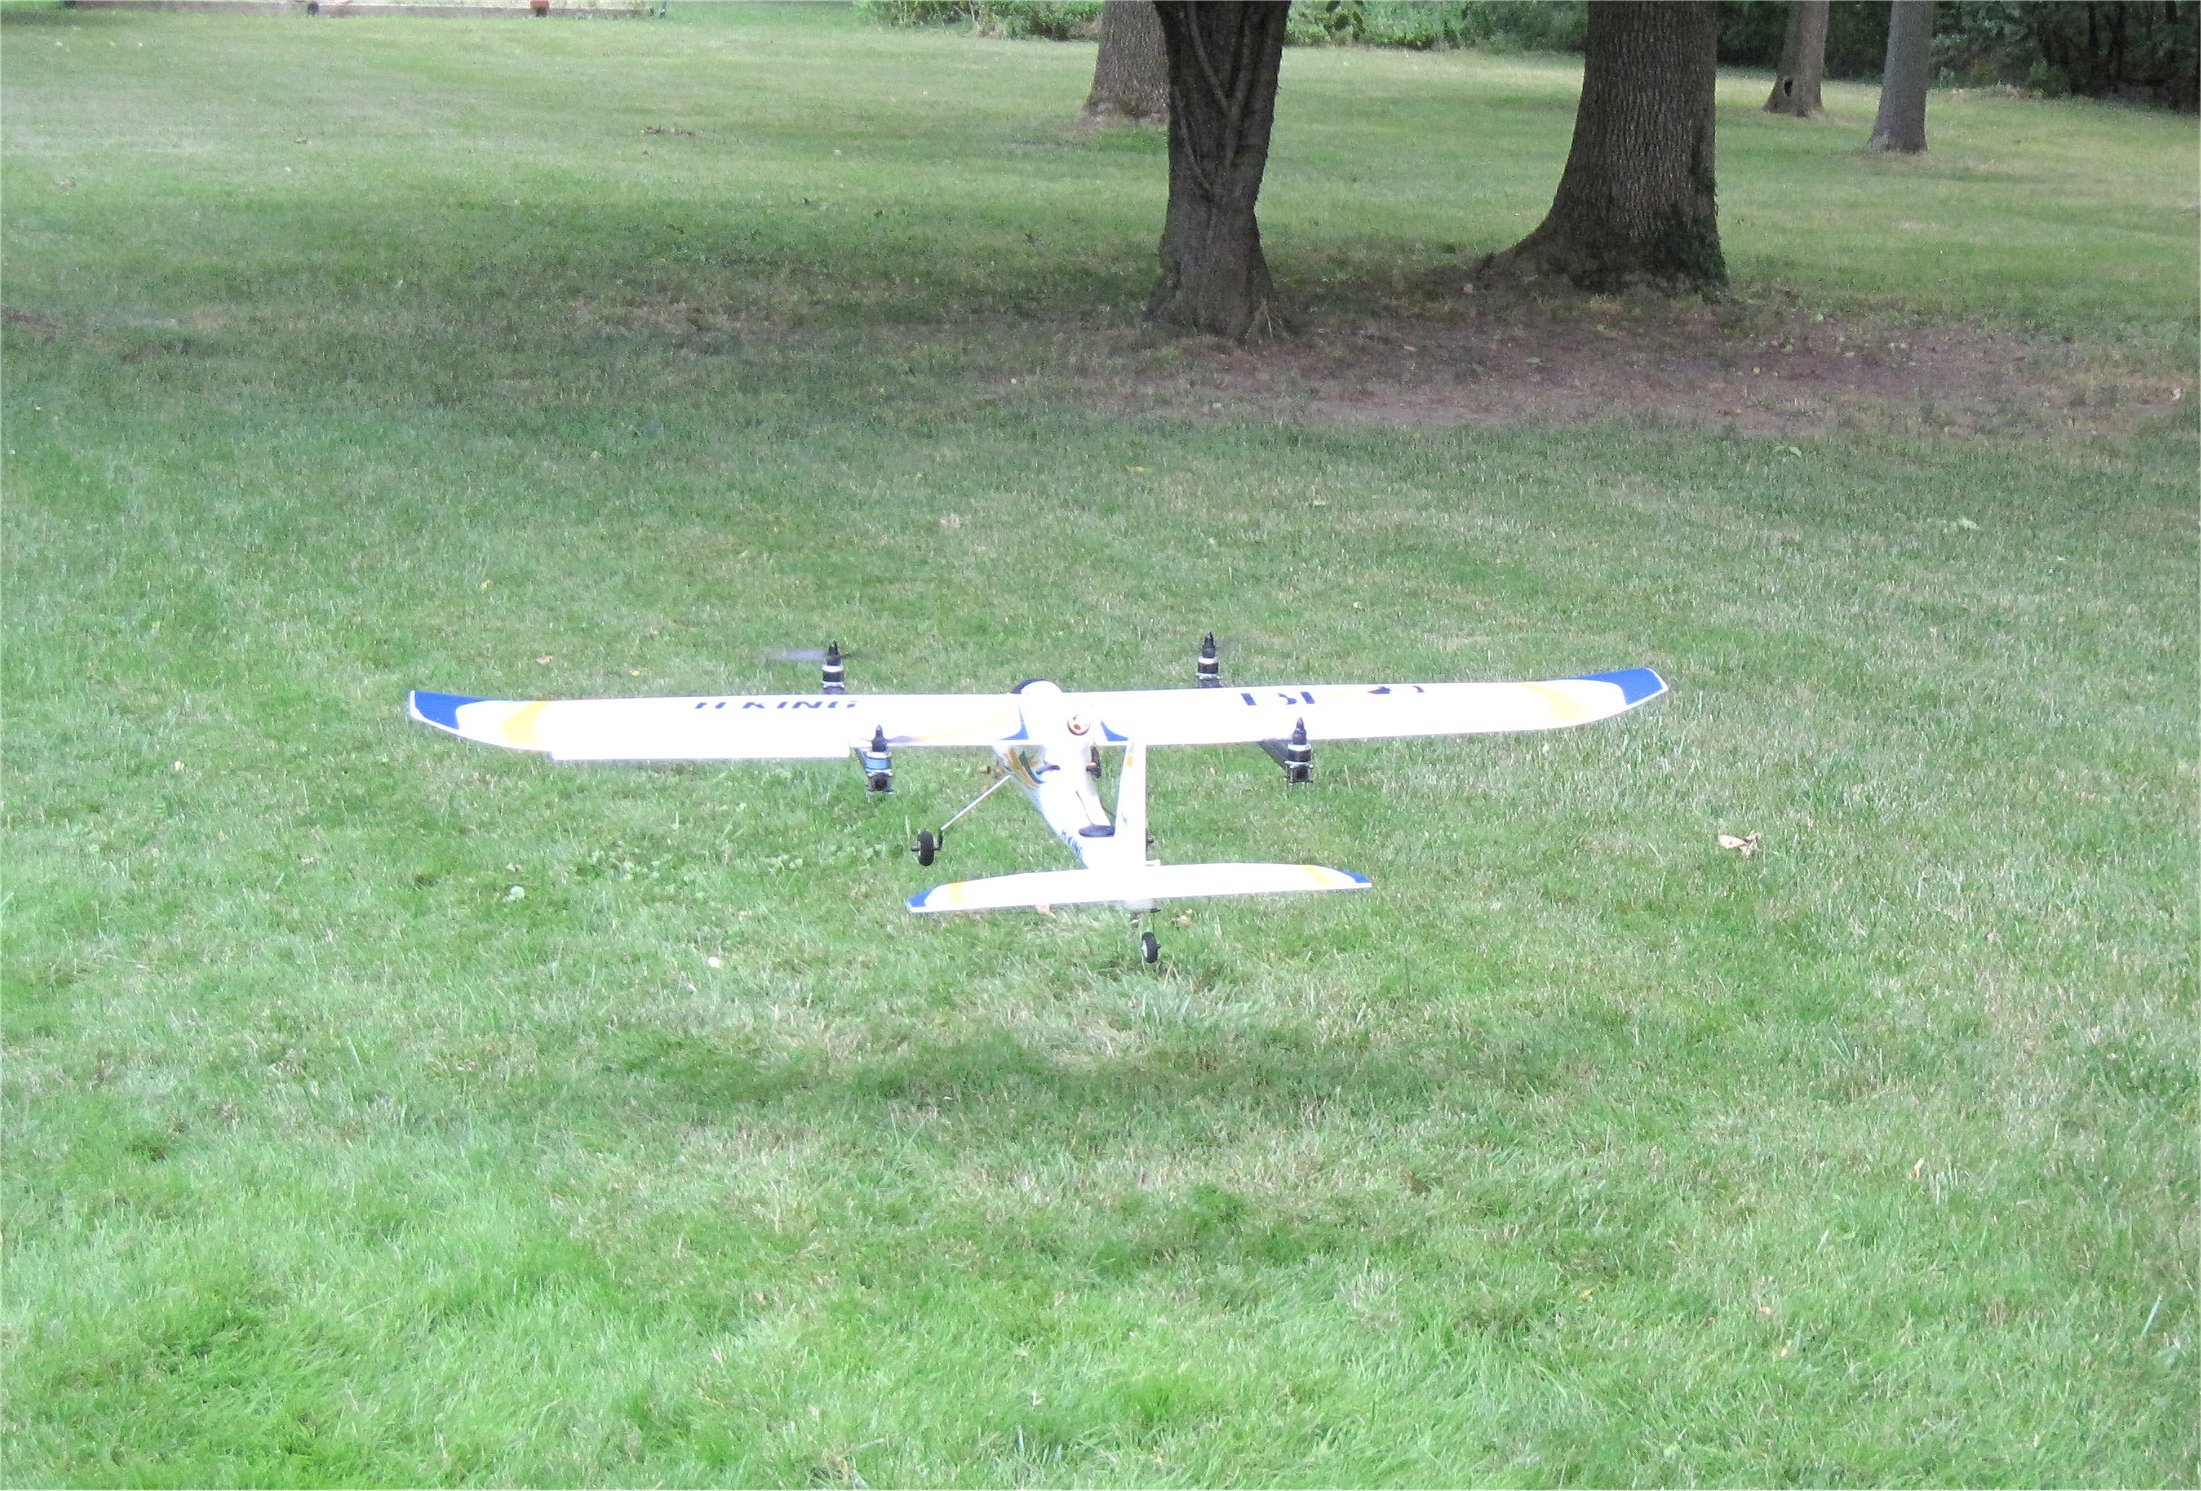
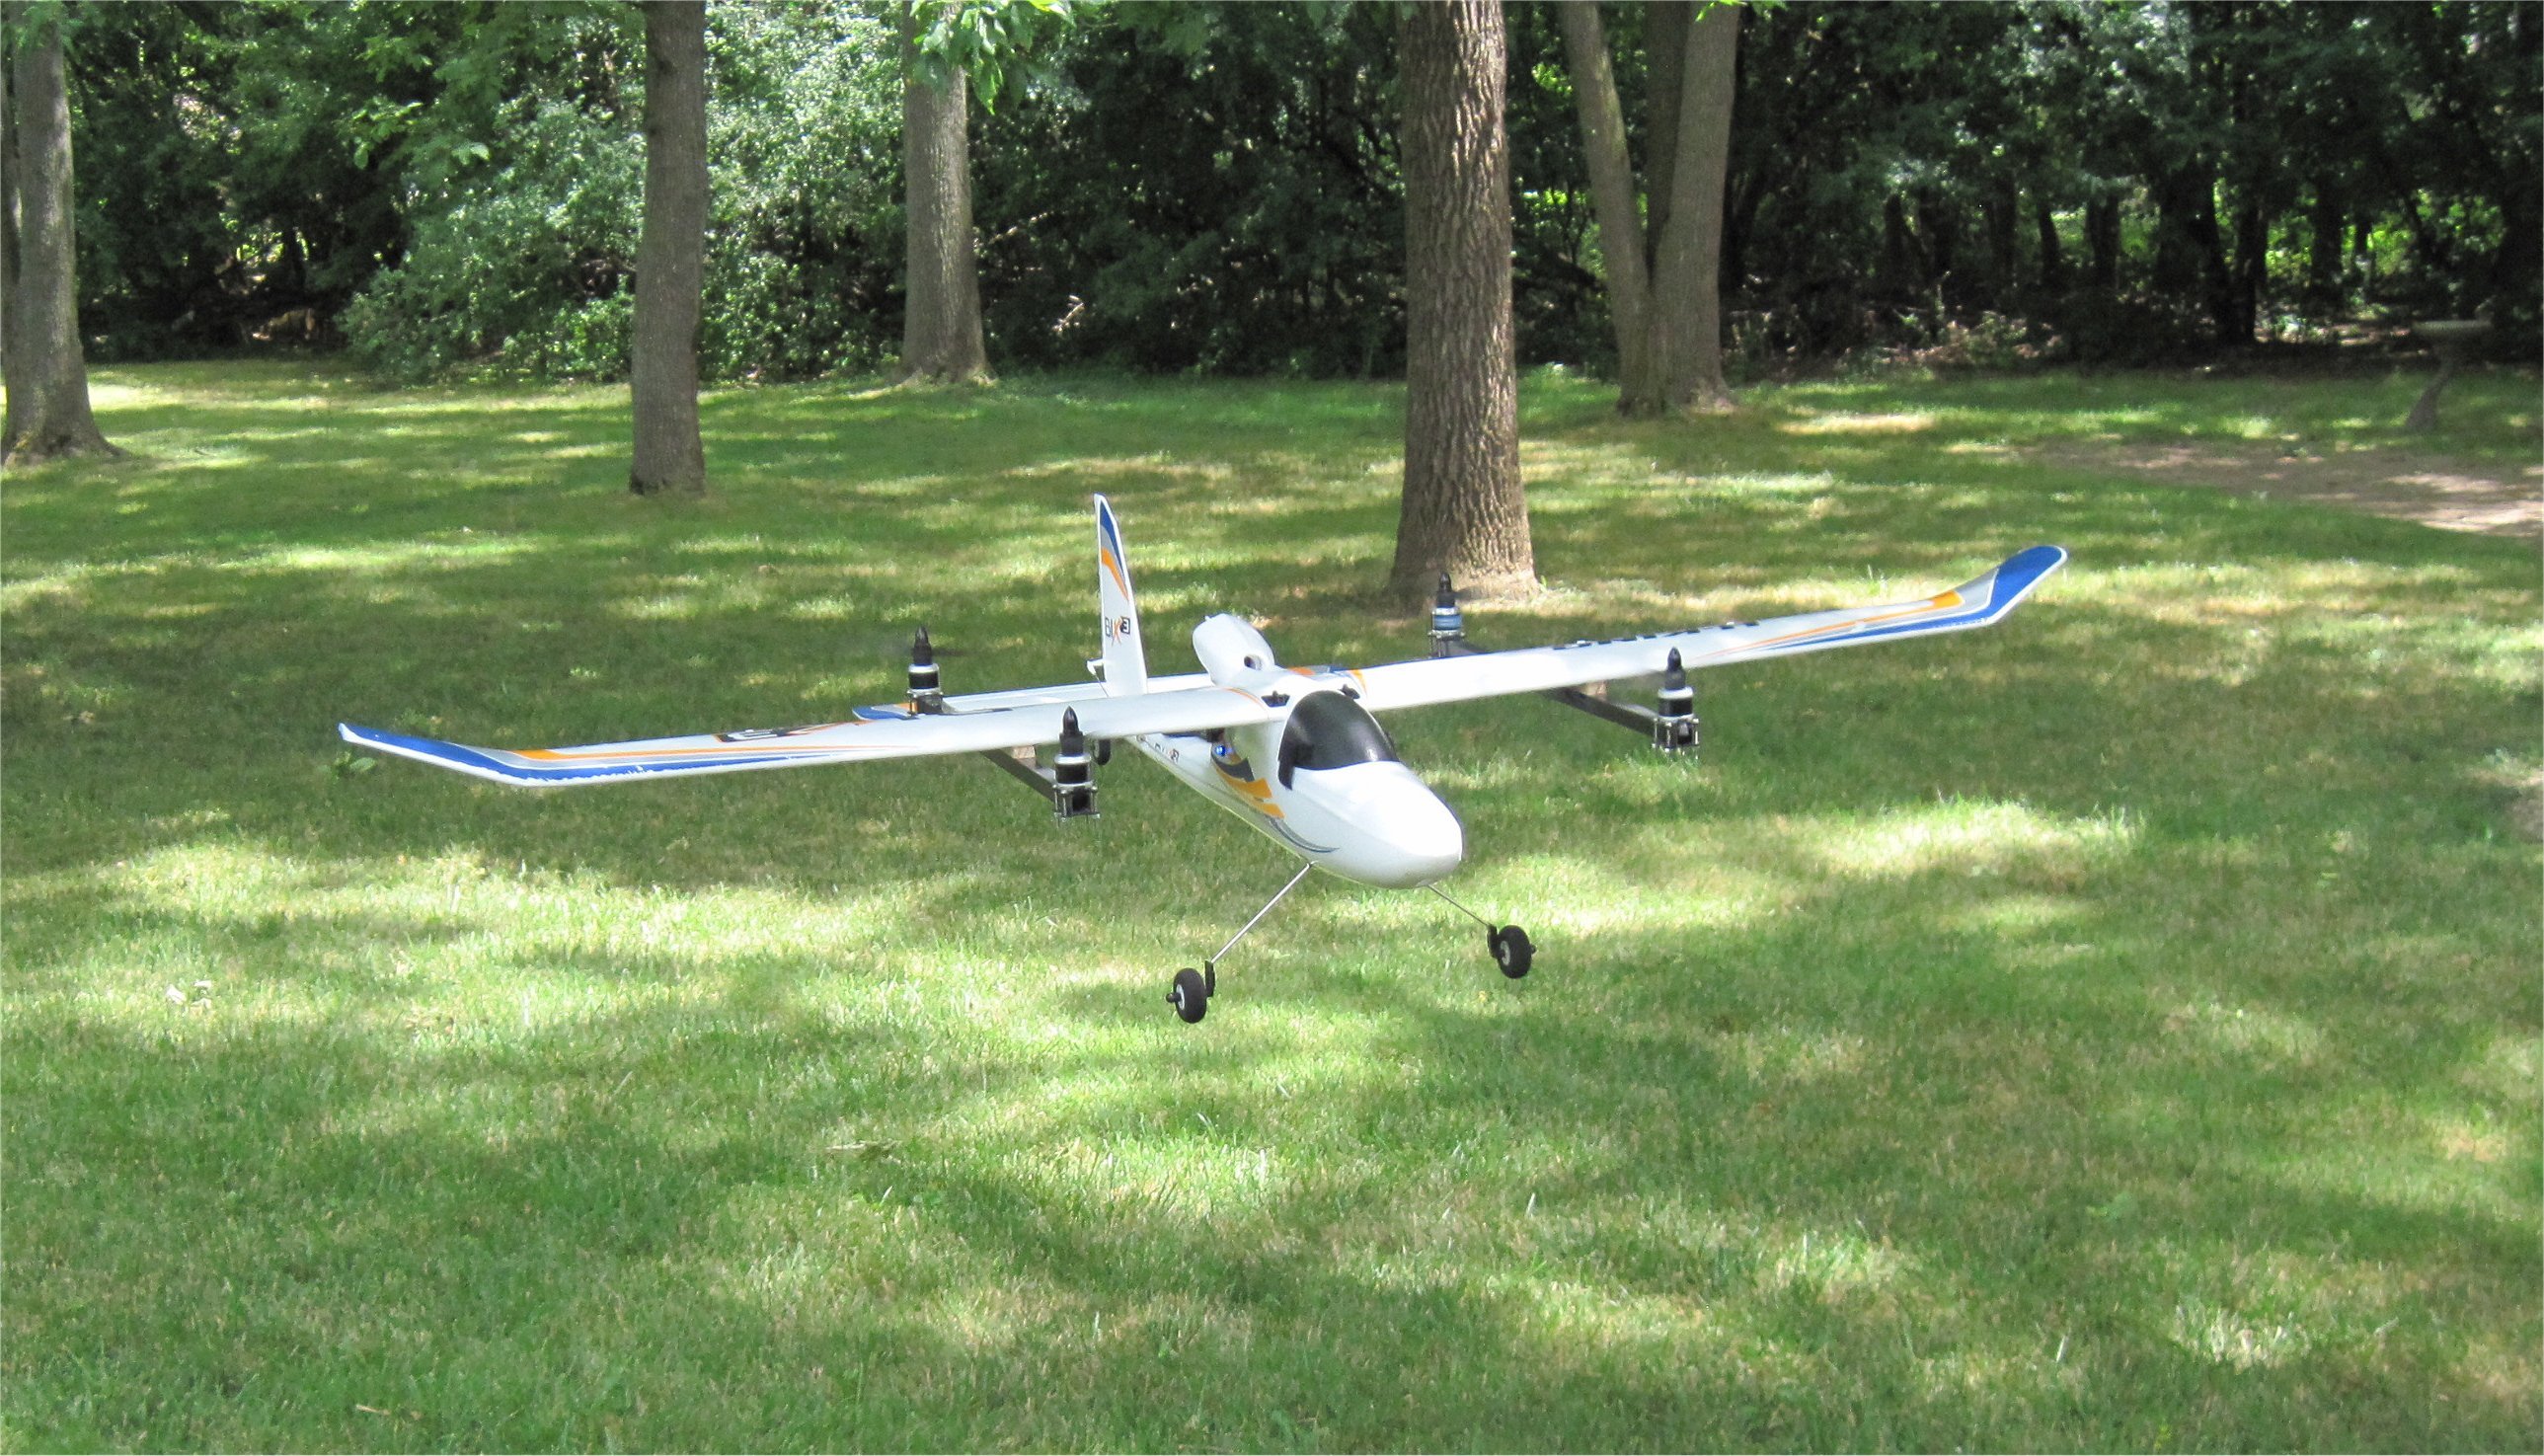
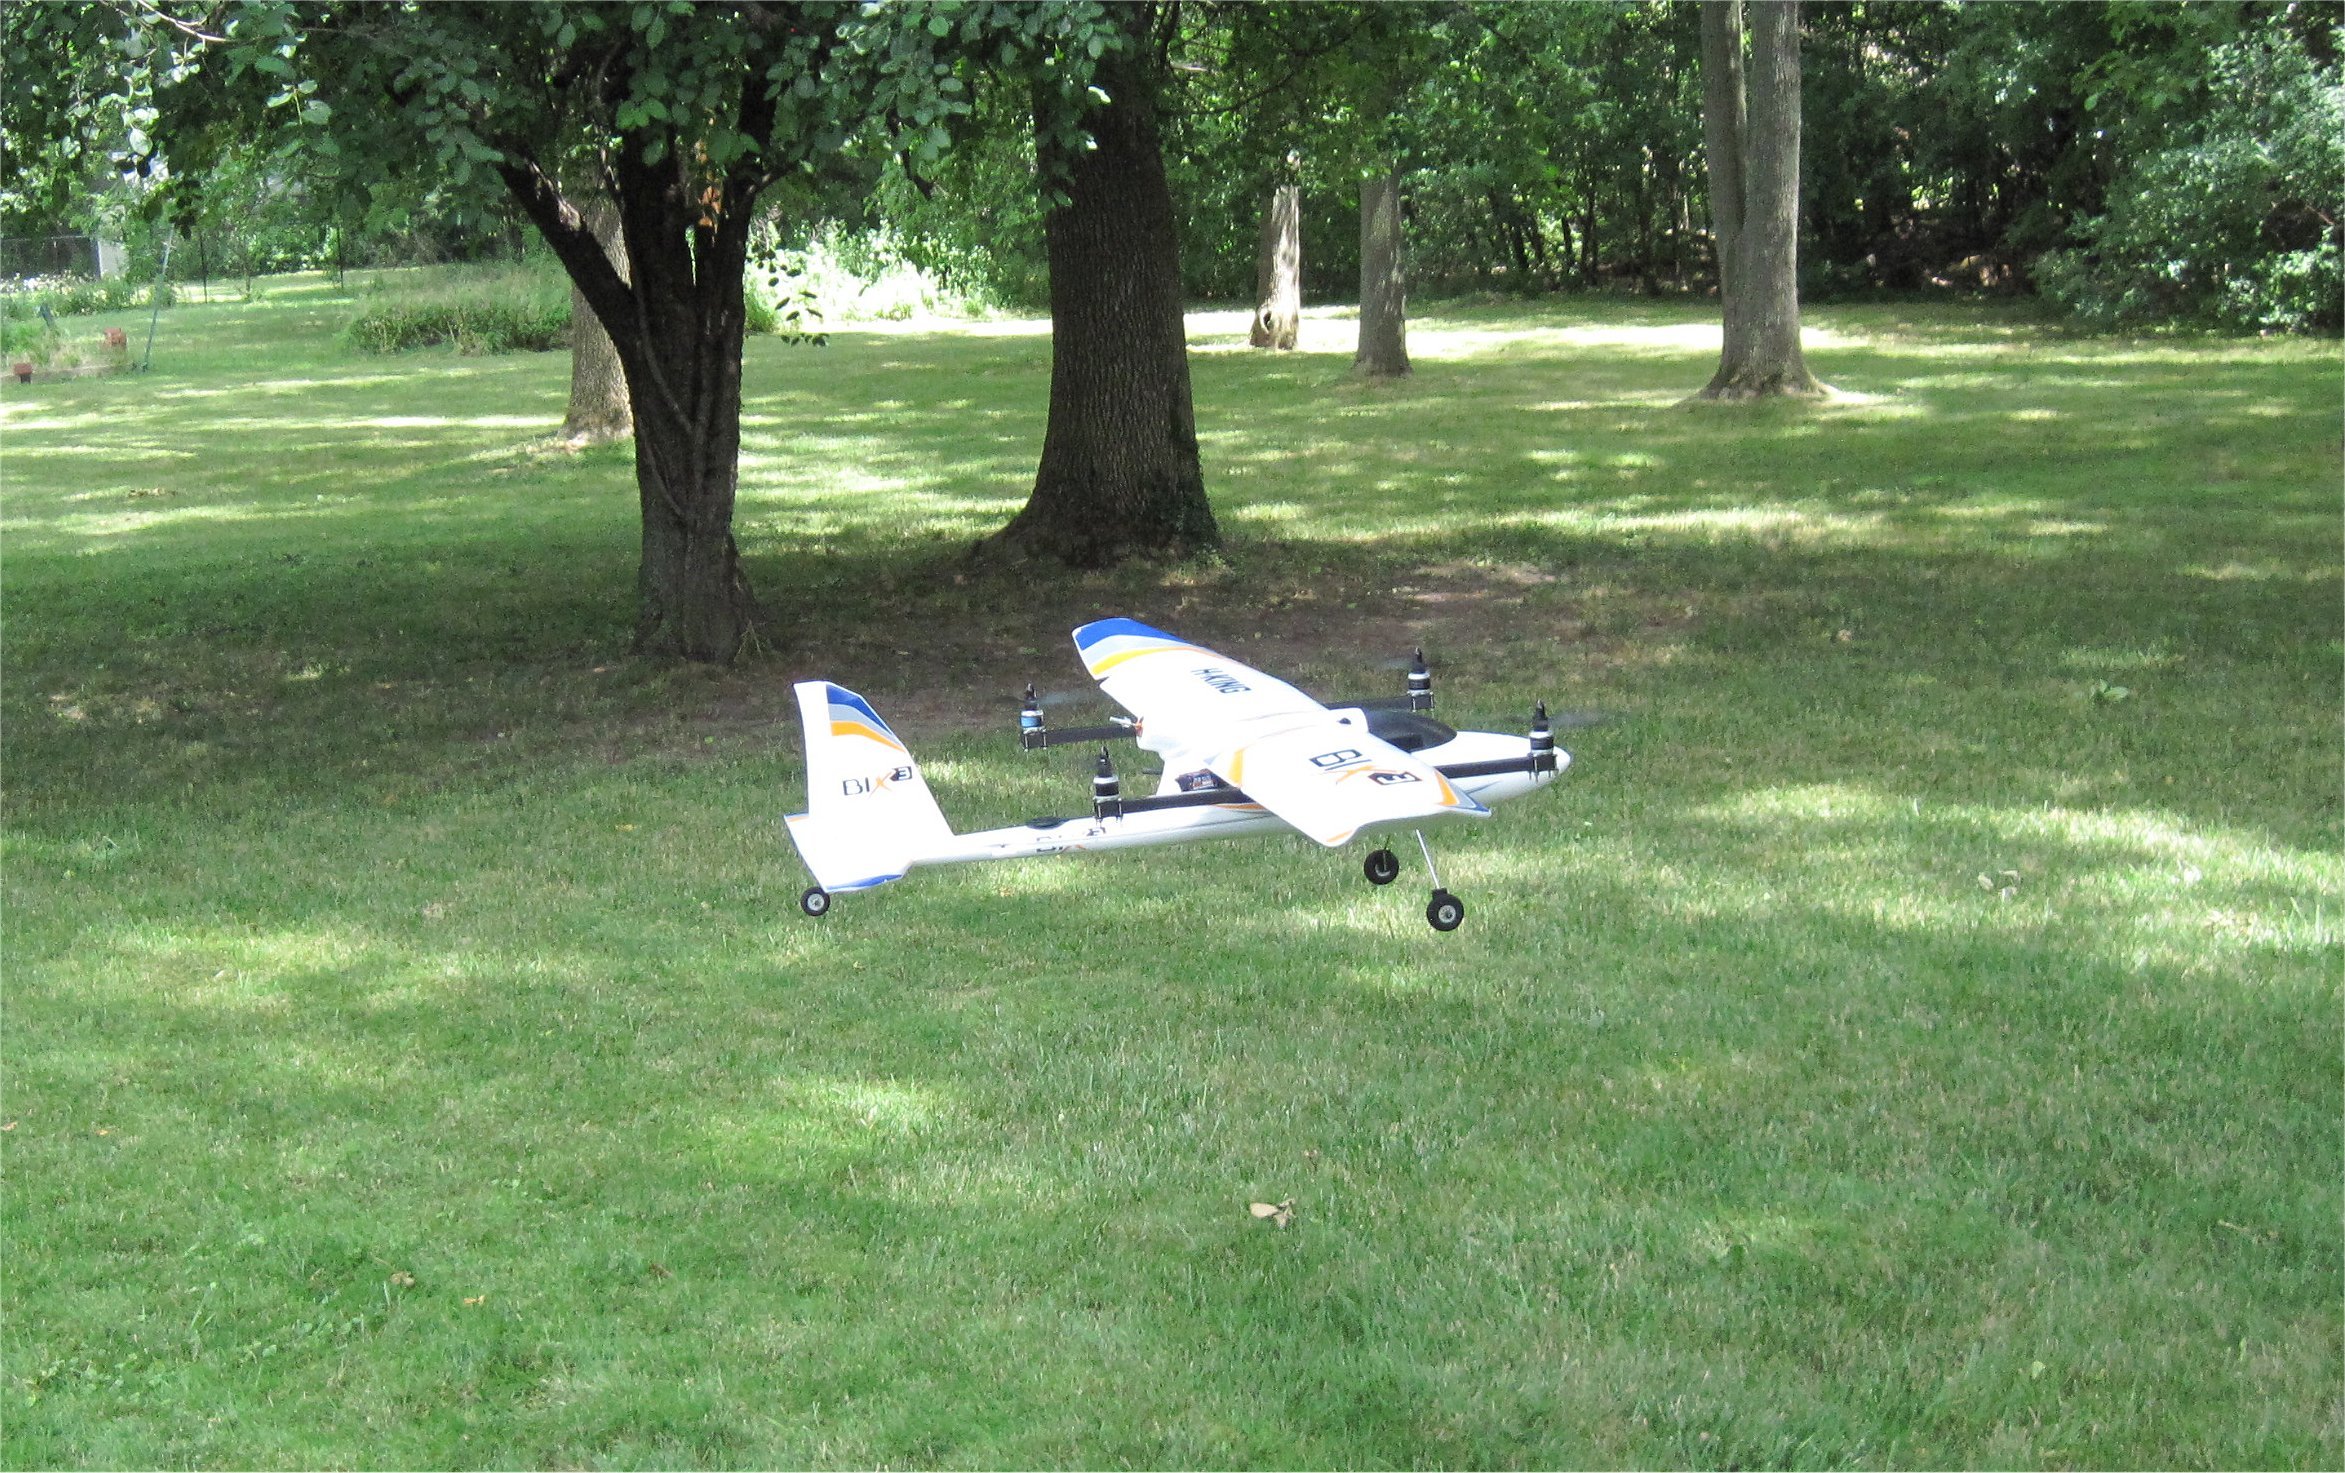
My maiden flight of the Bix3 conversion to a QuadPlane was very successful! Take-off was from an overgrown field into an open field that we otherwise didn’t have access to. We missed the initial transition from QSTabilize mode to Manual on video but it was uneventful other than being out of trim. After trimming the plane in Manual mode, I changed to FBWA mode with TRIM_AUTO enabled. The plane flew great!
To my surprise, the transition from FBWA mode back to QStabilize mode worked perfectly! I’m still using all default PIDs for Plane v3.6. I brought it back down for a landing without issue. The toughest part of the maiden flight was trimming it out in Manual mode. After the 4 minute flight, I still had 60% capacity in my 10oz 4s 2.8AH pack.
I’ve already directed several friends that have Bixlers to this thread and the ones that were already using ArduPlane are converting to QuadPlanes, thanks for your very complete description.
Well done Greg.
Looks good! JFYI if flying in high winds, anything over 5m/s or so, especially in the auto modes, be careful that she is in fact coming down when trying to land. I’ve found that in any quad mode the min lift by the quad along with the little bit of lift produced by the wings will not produce a good sink rate on small QP frames. Also I’m glad your using qstabilise for takeoff atm, as it seems that in qhover/loiter in high wind likes to nose dive just after leaving the ground, when using an airspeed sensor. In VTOL_Land note the landing starts on the previous waypoint, so they need to be positioned about 60-80m apart for a smooth transition/deceleration to VTOL. I’m looking forward to the next installment of Bixler 3 QP!