Hi All
I want to install landing gear on my T960. I want to control it through AUX port on my PX 2.1
In doc I get AUX1 for SERVO9_FUNCTION, AUX2 for SERVO10_FUNCTION, AUX3 for SERVO11_FUNCTION, AUX4 for SERVO12_FUNCTION.
I MP I can set an auxiliary switch to “Landing Gear” in order to enable manual control (i.e. set CH7_OPT or CH8_OPT to “29”)
If I connect landing gear to AUX1 where I can set channel 9 to landing gear ? I can only choose ch 7 or ch8 as I understand.
Regards
Tomasz
1 Like
CH7_OPT or CH8_OPT parameters are setting the input function. You’re telling it to use CH7 input as landing control input. Step two is setting the output function so it has something to act on.
The SERVOx_FUNCTION parameter is what sets a servo output for landing gear. So if you’re hooking your landing gear up to AUX 1 (Servo 9), you would set SERVO9_FUNCTION for 29 (landing gear).
Hey there Pedals2Paddles
I’m stuck in the same boat and would be so grateful for some clarification…
I’m also using the TL8X002 from Tarot for my T960/t810 . The unit functions more or less using a CPPM servo ‘tester’ module ( that blue one ) and on the ArduPilot documentation site they mention :
“RCn_FUNCTION” &/or “SERVOn_FUNCTION to 29”
However I have no idea where or how to set this up !
I have that same controller on the landing gear on my stretched 650 Sport.
I also have a set of Tarot Small Landing Gear (TL65B44) on a 680 Pro.
I have a switch on my Taranis X9E set as an input to Channel 7. In Mission Planner > ConfigTuning > Extened Tuning I have Ch7Option set to Landing Gear.
The landing gear controller input is connected to Pixhawk AUX1. The parameter SERVO9_FUNCTION is set to 29.
The LGSERVO_DEPLOY and LGSERVO_RTRACT parameters are set to the PWM values on Channel 7 when the landing gear switch is cycled. For my radio the values are 1750 and 1250 respectively.
I also have BRD_PWM_COUNT set to 6
To find these parameters connect the Pixhawk to your computer and launch Mission Planner.
When MP completes the connection (stops down loading parameters) Click Config/Tuning.
Click Full Parameter List.
You will see a search box on the right below some green buttons.
To find a specific parameter just type the first few letters of the parameter, like LGS, BRD, etc. MP will search for and display a list of parameters that start with the characters you entered.
To change a parameter value, left click the Value box for that parameter. The box will turn Blue. Type in the new value and then click on any other Value box. The value box you just changed will turn Green. This means MP knows the parameter value has been changed.
Click the green Write Params button and MP will write the new value to Pixhawk.
Tips for the landing gear:
The controller requires a +12 volt input. Use a separate +12volt 3Amp BEC.
Test the landing gear BEFORE you install them. You can use a servo tester to do this. Make a note of which way the individual legs move. Chances are one will go “up” and the other will go down. If this happens, pick one, disconnect it from the controller and swap the wires in the connector and test them again.
Once you get the gear installed, support the aircraft so the gear can move, turn on your radio, power up the aircraft, and cycle the retract switch ONCE. At this point the gear is armed and you can continue testing…
Hey Old Gazer
Thanks for the very detailed instructions …
I already read the official documentation on the ArduPilot website. I have tested the gear using a CPPM servo master and noticed there is a small delay in the time it takes to react. Still the TL8X002 controller and motors work nonetheless.
I followed almost all the steps and still no luck. One thing I noticed is that on the ‘smart’ controller itself, all I get when powering on (using a stand alone 3 cell lipo) is a fast flashing blue led which I think must be saying that there is no signal is found …
Another thing is that I can’t find ‘SERVO9_FUNCTION’ and ’ LGSERVO_DEPLOY ’ anywhere in the Full Parameter list ?
I would love to get this up and running soon
Thanks in advance!
When looking at the controller unit from the input end the signal pin is on the far right.So check if you have the servo lead connected the rght way round.
Thanks Mick ^^, @Jagger
Yes the signal is on the far Right hand side, actually its fixed upside down so in my case its the far left but yeh its the pin furthest on the outside right …
Worth a try,Simple fixes sometimes happen.Can’t remember the LED pattern on my big Tarot but a flashing blue one sounds familiar.It may go solid with a signal but I really can’t remember.I’ll fire it up later if I get the chance.
These are my SERVO9_ settings read from a log.Changed in full parameters or full parameter tree.
PARM, 152663831, SERVO9_MIN, 1100
PARM, 152664088, SERVO9_MAX, 1900
PARM, 152664412, SERVO9_TRIM, 1500
PARM, 152664573, SERVO9_REVERSED, 0
PARM, 152665045, SERVO9_FUNCTION, 29
PARM, 152665167, SERVO10_MIN, 1100
And this is where the LG_SERVO_DEPLOY lives in the log.
PARM, 152498281, RELAY_DEFAULT, 0
PARM, 152498328, CHUTE_ENABLED, 0
PARM, 152498352, LGR_SERVO_RTRACT, 1250
PARM, 152498374, LGR_SERVO_DEPLOY, 1750
PARM, 152498400, COMPASS_OFS_X, -109.5335
PARM, 152498423, COMPASS_OFS_Y, 116.2444
PARM, 152498445, COMPASS_OFS_Z, -12.54292
In full parameters it’s fully alphabetical and same in parameter tree.Which firmware have you got loaded ? Can you pull a log from it ?
@Jagger How to make a log ? (noob)
BTW I cannot find SERVO9 anywhere in my full params list as I mention previously above…
parameter.param.txt (11.5 KB)
Dataflash logs are under the HUD in Mission Planner.Just download the last one,although you may not have unarmed logging switched on as default.It will tell us what firmware you’re using.I think you may be on an older release.The SERVO_ parameters were introduced in 3.5.x I think.The firmware loaded shows on the top bar of Mission Planner.
Have you got Advanced selected in Mission Planner/Config/tuning/Layout ?
I looked at your PARAM list and you need to find the RCx_FUNCTION parameters. Currently RC_FUNCTION9 is set to 0.

Thought so.You’re running 3.4.6 and the SERVO parameters came in with 3.5.x.So you need to use the 3.4.6 settings in the wiki.So,as pointed out by Oldgazer, you’re looking for RCx_ settings instead of SERVOx_.
“If using AC3.4.6 (or lower) set RCn_FUNCTION to 29 “Landing Gear”, where n is the number for the connected servo (e.g. RC9_FUNCTION for AUX1, RC10_FUNCTION for AUX2 etc.)
LGR_SERVO_DEPLOY — servo PWM value required to deploy the landing gear.
LGR_SERVO_RTRACT — servo PWM value required to retract the landing gear.”
Ok now I just found the RC 9 FUNCTION and its now set to 29 and I also realised that I have APM planner 2.0 and not Mission Planner …
Would you recommend using MP’ seeing as I am running a Pixhawk and not APM ?
Also could you please show me where to find the new 3.5 Hexa firmware
I think its here http://firmware.ardupilot.org/Copter/stable/PX4/ not really sure though …
APM Planner and Mission Planner are both just ground control software.Both will update firmware and download the latest stable release,allowing you to select your frame at that time.You have to be disconnected from the GCS but connected with a USB lead to load firmware.You could download the V2 firmware but it’s more accurate (or can be for a new user) to let the GCS select it for you.
It will take a while before you are comfortable with the whole set up.Just take your time and keep asking questions but, most importantly,get used to reading the wiki sections.They are usually for the latest stable release but can sometimes get a bit out of date.Never the less, it’s the greatest repository of info available to us mere mortals and worth visiting frequently.
Like Jagger said, APM Planner and Mission Planner have similar functionalities. I’ve used both and my personal preference is Mission Planner.
To get a handle on using Mission Planner go here: http://ardupilot.org/planner/docs/mission-planner-overview.html
Be advised that when you connect to Mission Planner it will tell you that a new version of ArduCopter (AC3.5.5) is available.
Hey Ol’Gazer
Sorry to bother again but I just can’t get my head around this one
So I updated the firmware on my PX4 and I’ve entered all the parameters as you’ve said
In the Radio Calibration page. I have Ch 7, ( 3 pos switch ) giving me the values :
UP : 992
MID: 1500
DWN : 2015
In the TL8X002 user manual it states that the Deploy threshold is 1520’us which I should be cycling
Still all that I see is the controller LED flashing like its not getting any signal ?
Additionally it seems as though the update has added to the situation …
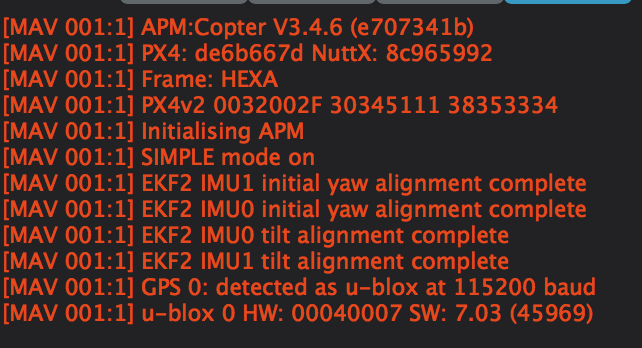
[MAV 001:1] EKF2 IMU0 initial yaw alignment complete
[MAV 001:1] EKF2 IMU1 initial yaw alignment complete
[MAV 001:1] EKF2 IMU1 tilt alignment complete
[MAV 001:1] EKF2 IMU0 tilt alignment complete
[MAV 001:1] GPS 1: detected as u-blox at 115200 baud
[MAV 001:1] PX4: 0384802e NuttX: 1bcae90b
[MAV 001:1] Frame: UNKNOWN
[MAV 001:1] PX4v2 0032002F 30345111 38353334
[MAV 001:1] PreArm: check firmware or FRAME_CLASS
[MAV 001:1] PreArm: check firmware or FRAME_CLASS
[MAV 001:1] PreArm: check firmware or FRAME_CLASS
[MAV 001:1] PreArm: check firmware or FRAME_CLASS
[MAV 001:1] PreArm: check firmware or FRAME_CLASS
[MAV 001:1] PreArm: check firmware or FRAME_CLASS
[MAV 001:1] PreArm: check firmware or FRAME_CLASS
[MAV 001:1] PreArm: check firmware or FRAME_CLASS
[MAV 001:1] PreArm: check firmware or FRAME_CLASS
[MAV 001:1] PreArm: check firmware or FRAME_CLASS
[MAV 001:1] PreArm: check firmware or FRAME_CLASS
[MAV 001:1] PreArm: Duplicate Aux Switch Options
[MAV 001:1] PreArm: check firmware or FRAME_CLASS
[MAV 001:1] PreArm: Duplicate Aux Switch Options
[MAV 001:1] PreArm: check firmware or FRAME_CLASS
[MAV 001:1] PreArm: Duplicate Aux Switch Options
[MAV 001:1] PreArm: check firmware or FRAME_CLASS
[MAV 001:1] PreArm: Duplicate Aux Switch Options
[MAV 001:1] PreArm: check firmware or FRAME_CLASS
[MAV 001:1] PreArm: Duplicate Aux Switch Options
[MAV 001:1] PreArm: check firmware or FRAME_CLASS
[MAV 001:1] PreArm: Duplicate Aux Switch Options
[MAV 001:1] PreArm: check firmware or FRAME_CLASS
[MAV 001:1] PreArm: Duplicate Aux Switch Options
[MAV 001:1] PreArm: check firmware or FRAME_CLASS
[MAV 001:1] PreArm: Duplicate Aux Switch Options
[MAV 001:1] PreArm: check firmware or FRAME_CLASS
[MAV 001:1] Initialising APM
[MAV 001:1] Calibrating barometer
[MAV 001:1] Barometer calibration complete
[MAV 001:1] SIMPLE mode on
Frame class you have to set in parameters after upgrade to 3.5.5.
Looks like you have a conflict of AUX switches.
Don’t forget to set this.
PARM, 152498352, LGR_SERVO_RTRACT, 1250
PARM, 152498374, LGR_SERVO_DEPLOY, 1750
The PWM numbers should work but you could try setting the same as mine.
PARM, 152663831, SERVO9_MIN, 1100
PARM, 152664088, SERVO9_MAX, 1900
PARM, 152664412, SERVO9_TRIM, 1500
PARM, 152664573, SERVO9_REVERSED, 0
PARM, 152665045, SERVO9_FUNCTION, 29
It will be something silly and simple that cracks it.That’s how you learn this stuff.
1 Like
Jagger beat me to the punch. That’s what I get for trying to lean how to use Ubuntu…
1 Like
Ok guys I have checked all those values and have sorted out the duplicate AUX problem and also FRAME_TYPE was not selected since the update but now all is GREEN on the flight data page 
Still NO LUCK with the TL8X002 controller : ( just blinking blue LED
Is there a way to measure PWM from the AUX1 ? I’m guessing that a multimeter isn’t sensitive enough
2 ) What do the values 1250 & 1750 correspond to?
At the Radio Calibration page I still monitor the values 992 > 2015