I’m stuck. I’m building my first drone, and I’m close to flying, but can’t quite get there. I have a DJI F450 kit, and a 3DR Pixhawk, and I’m controlling with a FlySky FS-T6 controller.
I’ve been through as much of the initial setup of the copter using APM Planner 2.0, and have calibrated the accelerometer, and the compass, and it looks like everything is fine.
I made a short 6 minute video of my attempt to fly, with link below, thinking that perhaps one of you might see something that might give you a clue as to what might be going on. The video was taken inside the house, and I know that isn’t a good idea, but it does the same thing outside, and it is raining tonight.
I looked at your video (very good to understand what you did (all ok by the way )
Use mission planner
you didn’t say if you calibrated correctly your gyros and compass?
Like you could arm and actually “fly” you must have a log file.
It is normal that until airborne props seems out of speed…or not sync.
I wouldn’t worry too much about this.
What I would worry about is vibrations and flex of the arms… (dji plastic isn’t the best)
Which version of the firmware are you running on the pixhawk / px4 / pix whatever is installed?
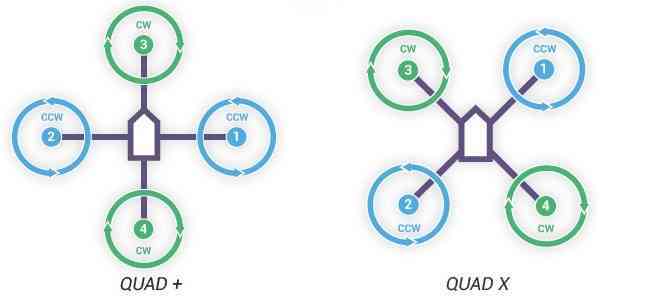
Yes, the props are on correctly according to the “QUAD X” diagram, and I have checked and double checked that the motors are spinning in the right direction.
I am using APM Planner 2. Connection between it and copter is successful, and I have been through the gyro and compass calibration, I believe correctly. As evidence of this, when I’m connected to my laptop, the copter looks to be pointing in the right direction, i.e. East is East, and when rotated about the vertical axis, the heading changes appropriately. Also, when I tip the copter to the left, for example, I get more “green”/ground on the left in the visual box in the upper left. And similarly when I tip to right, forward, backward, etc. All appears to be as it should be.
I don’t know what you mean about the log file. Can you provide me with some clues in that respect?
Do you think the flex of the plastic DJI arms is enough, by itself, to cause the symptom I am experiencing?
As for which version of the firmware, I can’t seem to tell. For some reason all the instructions in the copter documentation seem to be built on an earlier version of the APM planner (v.1) , so whenever I run into trouble and look at the documentation, it doesn’t seem to match because I am using APM Planner 2. Maybe it would be helpful to download and use APM Planner v.1?
It just occurred to me that the plastic you are referring to may be the “tall” landing gear. I bought these legs from a China seller. I don’t think they’re DJI, and I agree, the quality of the plastic is not stiff, lots of flex. So, maybe for testing purposes I’ll remove the tall landing gear. The remainder of the frame kit seems quite sturdy, an appropriate balance between strength and weight.
That said, if I am careful with the throttle, as you can see in the video, I can get the copter to hang off two legs, and it doesn’t appear to be trying to correct itself. I would think that even if there is flex in the legs, that in that condition, it would do something to try to right itself.
I’ll say one other thing - I don’t know if it is related. I had tried for a while to fly, with the same symptoms as now, and while doing so, I finally noticed that I hadn’t programmed the FlySky FS-T6 to match my vehicle. I had been flying it in airplane mode instead of copter mode. As I understand it, the Pixhawk learns from its experience, so I’m wondering if that past experience flying in airplane mode might be part of the problem? Maybe I should try to re-set the Pixhawk and start all over? Is that a good idea? Any instructions on how to reset the Pixhawk?
It is very hard from a distance to comprehend what is happening.
Your video helped a lot (You did everything right)
Any flex in the arms induces vibrations and harmonics. Simplistically even the on board firmware filters try their best to ignore these vibes, they can’t do miracles.(Read you’re looking for trouble)
-With the latest firmware for pixhawk 3.4.4 currently the pixhawk (pixhack, or whatever pixxxx) log events internally as soon as you arm your aircraft. This log file can be downloaded onto your laptop and then you can analyse the log file using the same mission planner to “see” what went wrong.
I would very strongly encourage you to shift from apm planner to mission planner. currently version 1.3.43.
And yes start from scratch, reset the pix from mission planner as well. Your craft will fly
GPS or not you should be starting flight tests in Stabilise.
For your first take off you do not want to be too slow on powering up.
There is generally always a side movement in initial takeoffs and you should aim to “jump” the copter up to .5m to 1m in height.
The longer you are armed on the ground the worse the variances get, this also includes yaw.
Quick take offs are preferable and stabilise is the flight mode to use until you have the copter tuned.
Also, better to put your transmitter in plane mode too, not copter.
The log will let us know, I actually think, from the video, that Mike has a point. Punch some throttle and you’re probably going to be fine. One way to test is to very carefully check stability, by arming, giving some throttle (not enough to take off) then tilting the quad in each direction. If it fights the tilting, I’d suggest going outside and having a fly.
Thanks for all the great replies and assistance. I will try to download a log file and post it here. Also, after attempting to get a log file, I am going to switch to the Mission Planner software v.1 and try to figure out how to reset the Pixhawk. After that, I’ll go through all the calibration and setup procedures again, and then give it another try. Thanks again for all the help.
I tried to download a log from APM Planner 2.0, but I couldn’t figure out how to do it. So, I downloaded and installed the latest version of the Mission Planner software. And, I went through all the initial calibration and setup procedures.
We took it outside, and punched the throttle a bit, and up and away!
Thanks for all the help!
Two questions on my mind now
The right stick is “backwards” compared to what we are used to. Forward is backward and backward is forward.
I don’t know how to tell what the battery capacity is.
It does seem counterintuitive but basically the default settings on most tx are either fixed wing or helicopter. Helicopters generally use some mixing to combine collective pitch and throttle channels, with a switch and curve (poor explanation). Fixed wing doesn’t do this - so is better for multirotors.
One thing you can do is strap the aircraft down, arm the motors and move the throttle just a tad above full low and then give aileron (roll) and elevator (pitch) inputs and the note which motors change speed. For a LEFT roll the RIGHT motors should speed up and the LEFT motors should slow down. For Nose DOWN (elevator forward) the FRONT motors will slow down and the REAR motors will speed up.
Like James said, helicopters use mixing. In a heli you have this thing called a swash plate which is connected to individual servos and either a Bell-Hiller mechanical mixer for Flybar heads, or straight to the pitch arms on the blade grips for flybarless heads.
To get things working, the radio has to mix throttle and collective pitch and then mix roll and pitch for the style of swash plate being used.
Flybarless gyros do all of the mixing, so the radio is set to a different swash plate type, often called H1.
If you use any swash plate mixing with a flight controller running multirotor firmware, and you end up with a mess…
I have a much safer and more accurate way to calibrate for current. The only “tool” you will need is a battery charger that displays how much current was put back into the battery.
The basic process is you take a fresh battery and make a flight of 5 minutes or so, land, disarm and unplug the battery. Charge the battery and record the mAh charged. We will call this number “CHARGED_MAH”
Now take a look at the flight logs and find the total current used. We will call this number “LOGGED_MAH”.
Next look at the BATT_AMP_PERVOLT parameter and record that number (by default its something like 17…). We will call this number “OLD_AMP_PERVOLT”
So, let’s say LOGGED_MAH was 1300Mah, and CHARGED_MAH was 1500mAh, and OLD_AMP_PERVOLT was 17.
We can use this formula:
NEW_AMP_VOLT = (OLD_AMP_VOLT x CHARGED_MAH) / LOGGED_MAH
Thanks for your post. I’ve been meaning to do this for some time, and finally got around to it. I logged 1062 mah, and the charger shows 985. So, pretty close, at less than 100 mah difference.
I could not find the BATT_AMP_PERVOLT parameter, though. Where in Mission Planner do I find it? Is it sufficient for my copter to be connected to my laptop, without the battery connected as well, in order to see this parameter?
All of the parameters are downloaded each time you connect Mission Planner to the flight controller. You do not need to have the battery connected.
You can find BATT_AMP_PERVOLT in Config/Tuning > Full Parameter List. Type BAT into the search box on the right side and Mission Planner will list all parameters that begin with BATT. BAT_AMP_ PERVOLT should be 2nd in the list. Type the new value into the Value box and click Write Params to save the new value.
 )
)