Another mini Talon QuadPlane Conversion

Hi,

Winter is fast approaching here in Upstate New York so I decided to keep busy inside and create a new mini Talon QuadPlane from spare parts that I had on hand. I still love the way my original MT QP flies and performs. It is fast and flies like it is on rails. It’s only crash came from an aggressive bird strike, but I repaired that years ago.

I had a spare MT kit and all the parts. Many of my electronics came from my disassembled FX-79 QuadPlane.

I started using the SunnySky x3508 700kv motors many years ago on my Tarot copters and then my BEV FireFLY6 VTOL. They could spin a 12" on 4s and a 10" prop on 6s. They were a lower cost alternative to the T-motor. For this project, I’ll be using 10" props on a 6s LiPo (two 3s in series). Even the forward flight motor will be the x3508 as I have many spares.

I found several 16mm carbon tubes and motor pods in my spare parts which seem to be a perfect length for the QuadPlane bars and fit the x3508 motors. Next to the Multistar batteries is a carbon landing leg that will be used to keep the MT upright.

So, it’s time to break open this MT kit I have had in my loft for years now and have some winter building fun!

6 Likes

@GregCovey Sir Great, But you do not mention Flight controller :smiley:. which flight controller are you using :thinking:? I am waiting for your flight :airplane: with this MT.

Thank you
Mohan

1 Like

Hi Mohan,

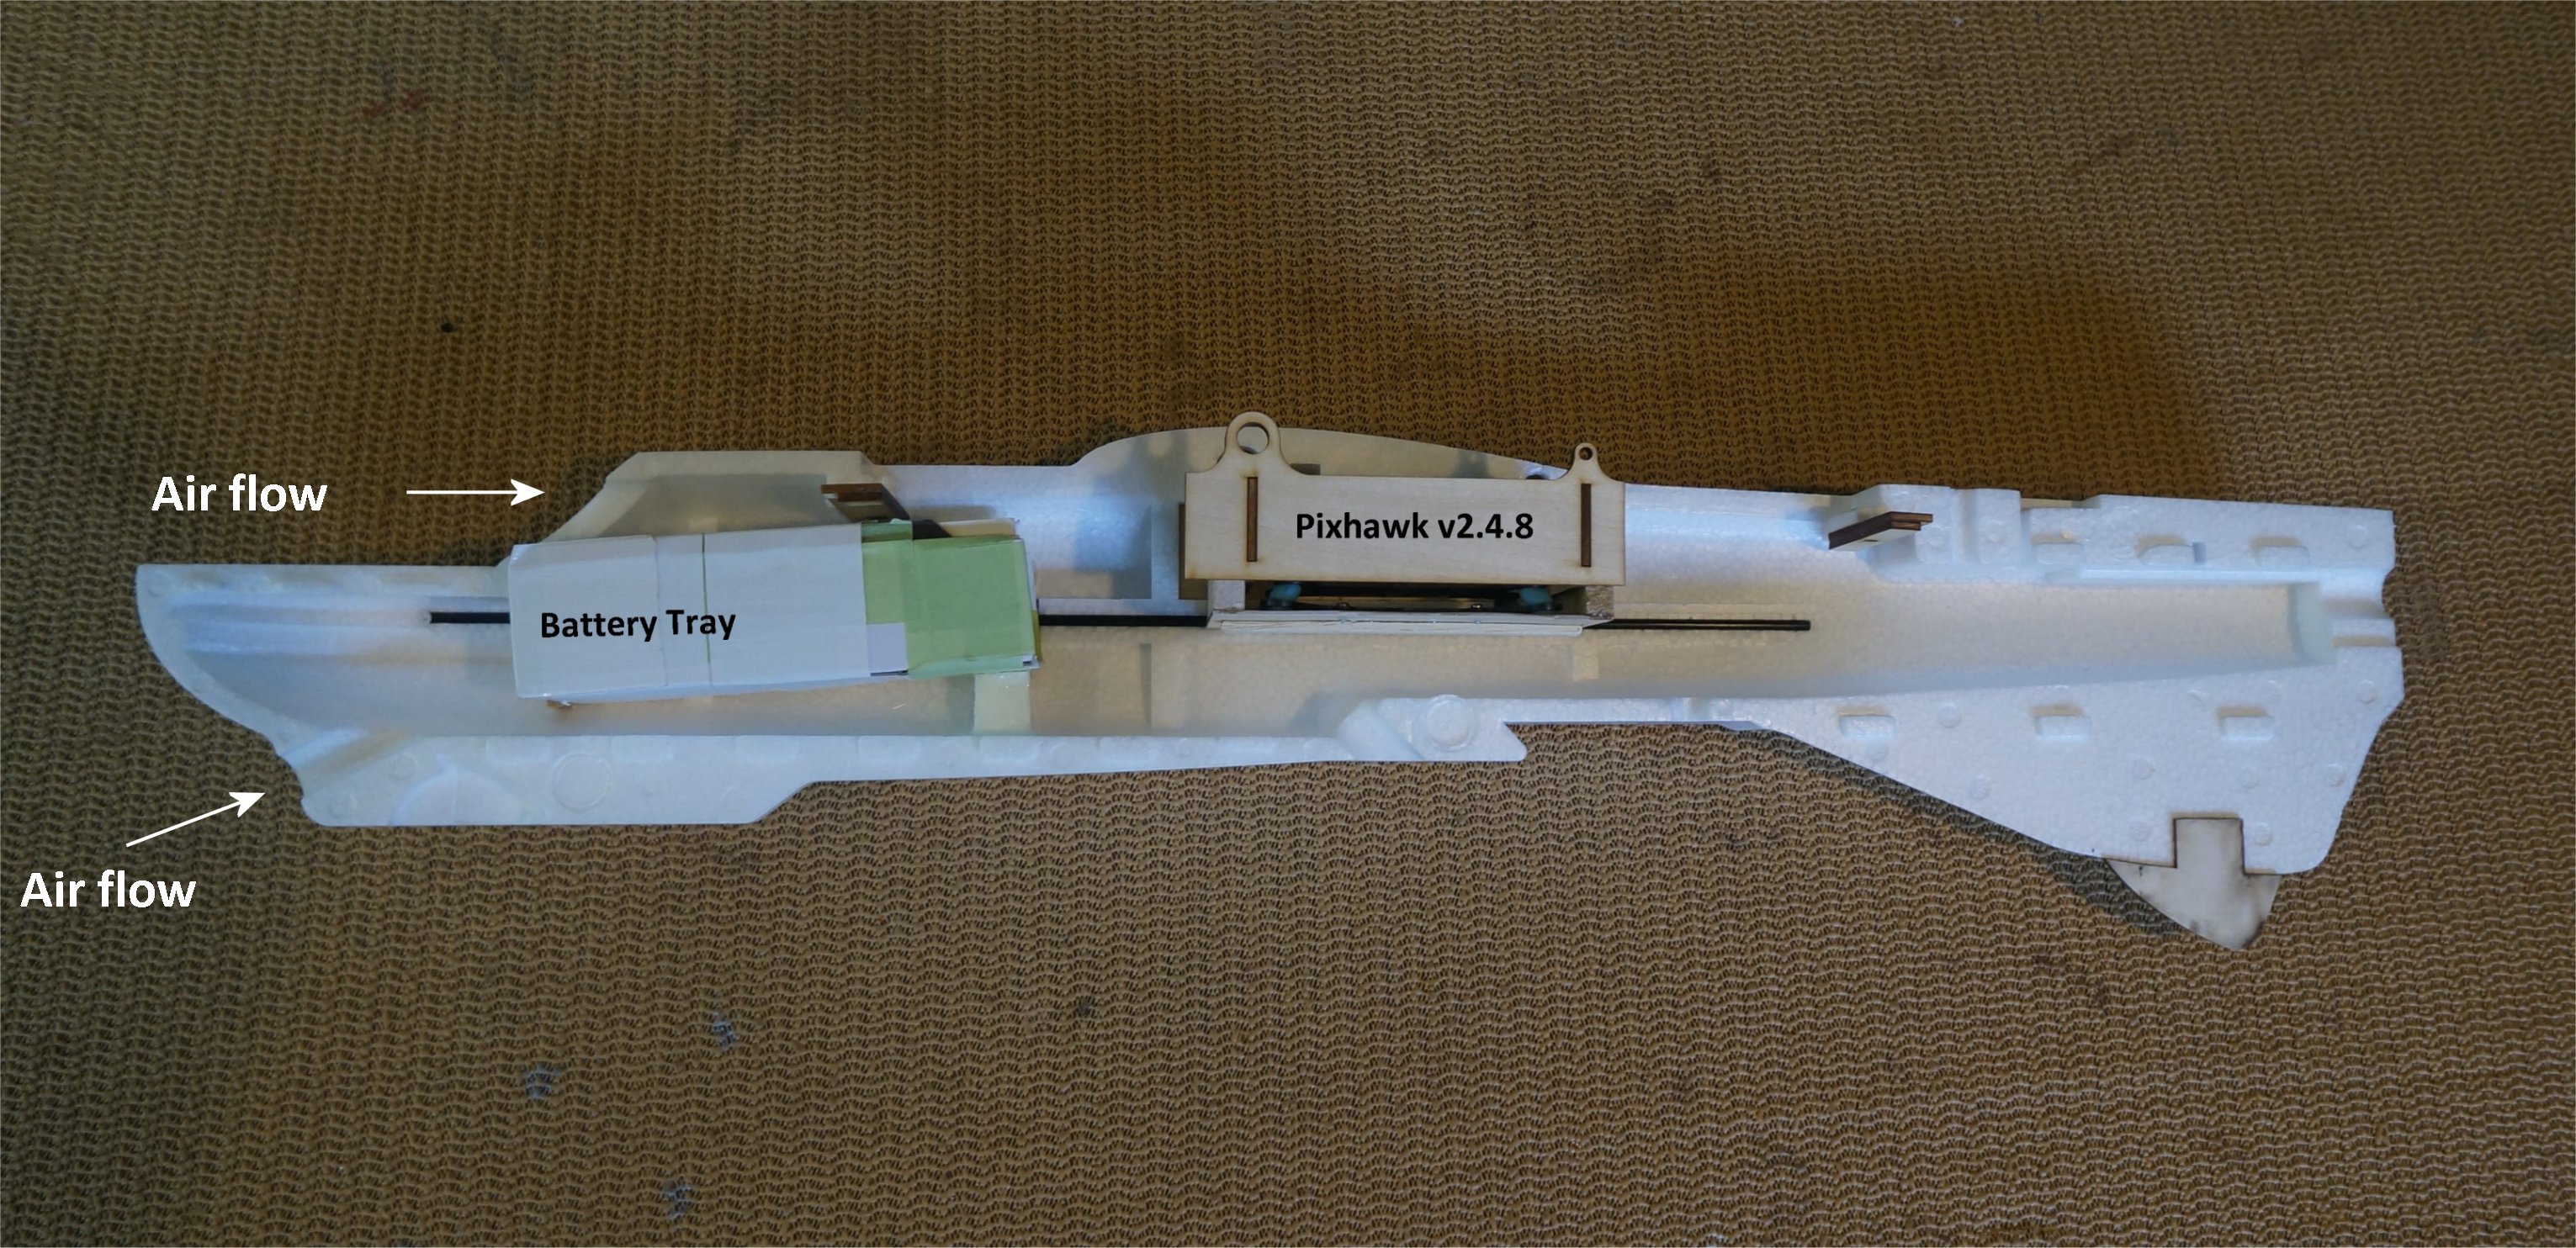
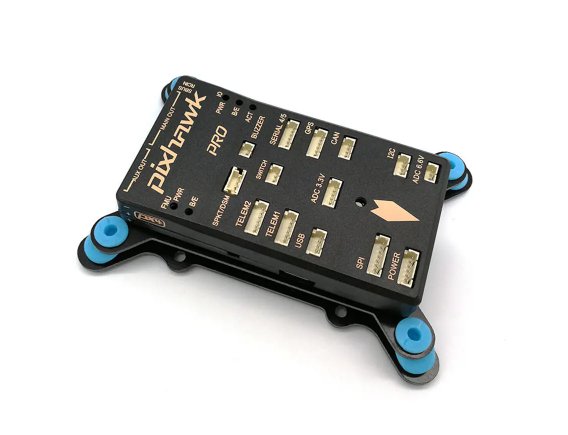
My flight controller will be the same type as my previous MT QT. A Pixhawk 1 (a.k.a. Pixhawk Pro or Pixhawk v2.4.8) These are inexpensive and I have several new and used ones on hand.

Original mini Talon Conversion Links
Mini Talon QuadPlane Conversion (circa 2017)
Mini Talon QuadPlane Conversion (cont.)(circa 2019)
MT2_PixhawkPro

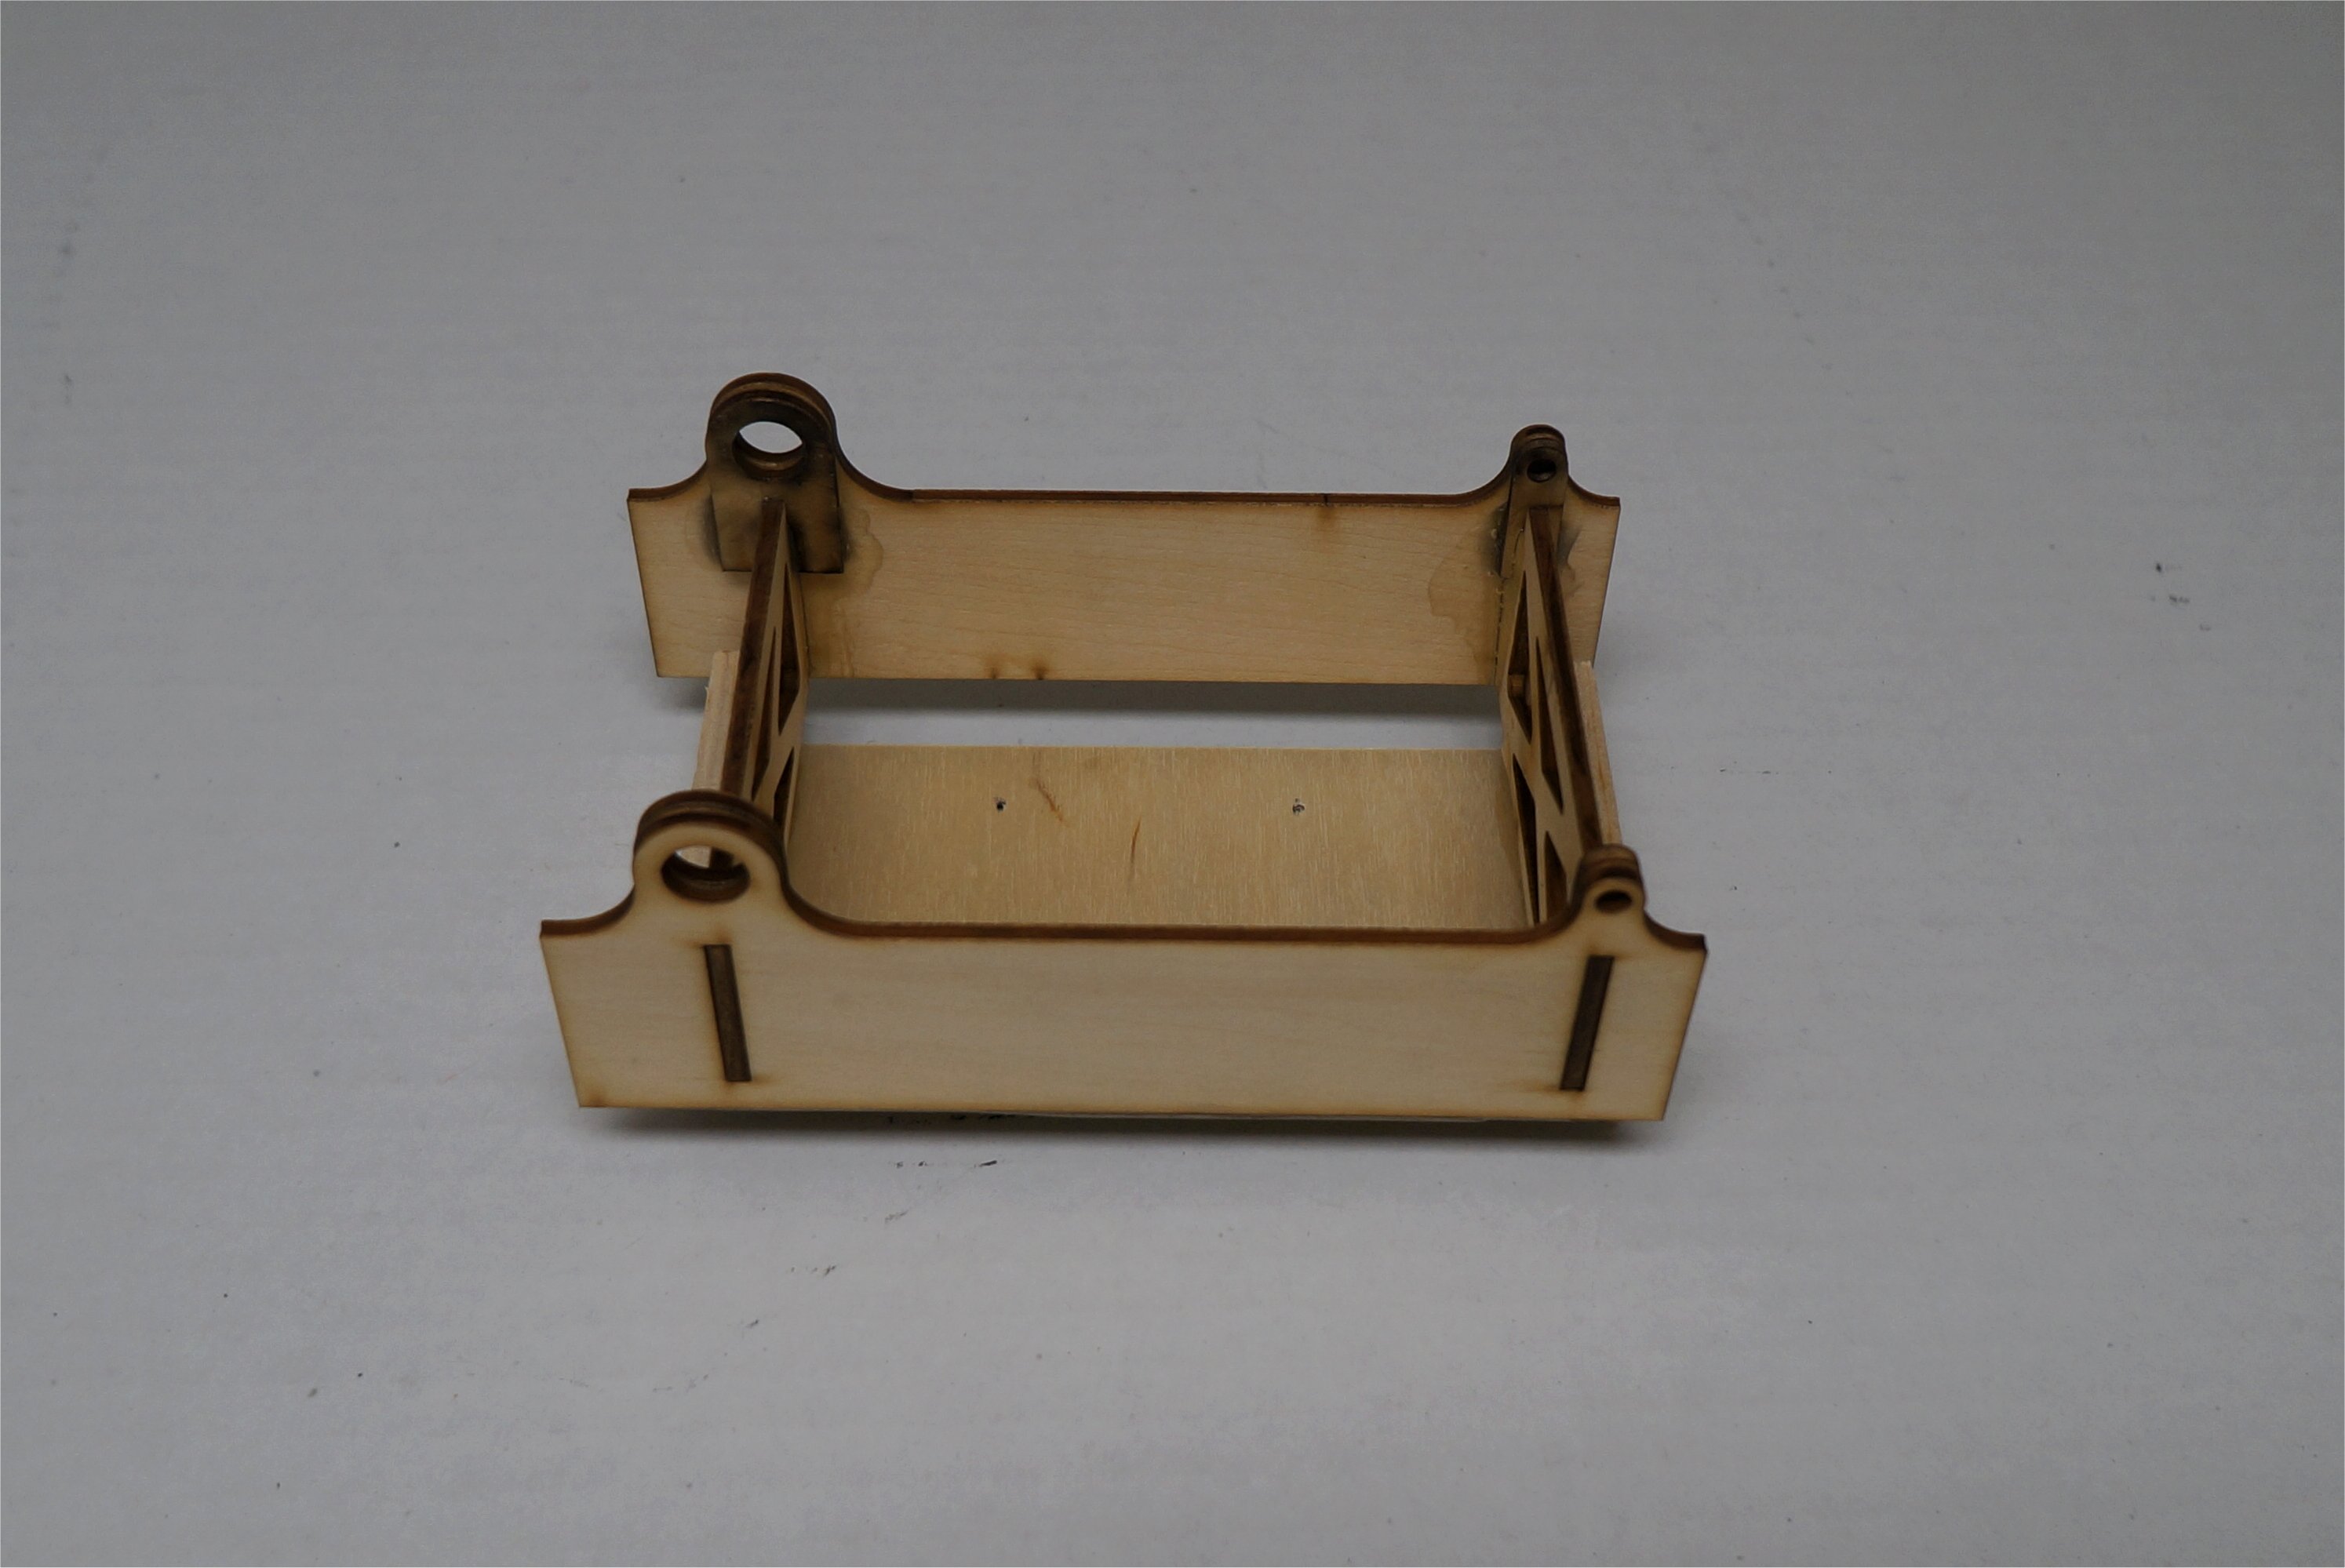
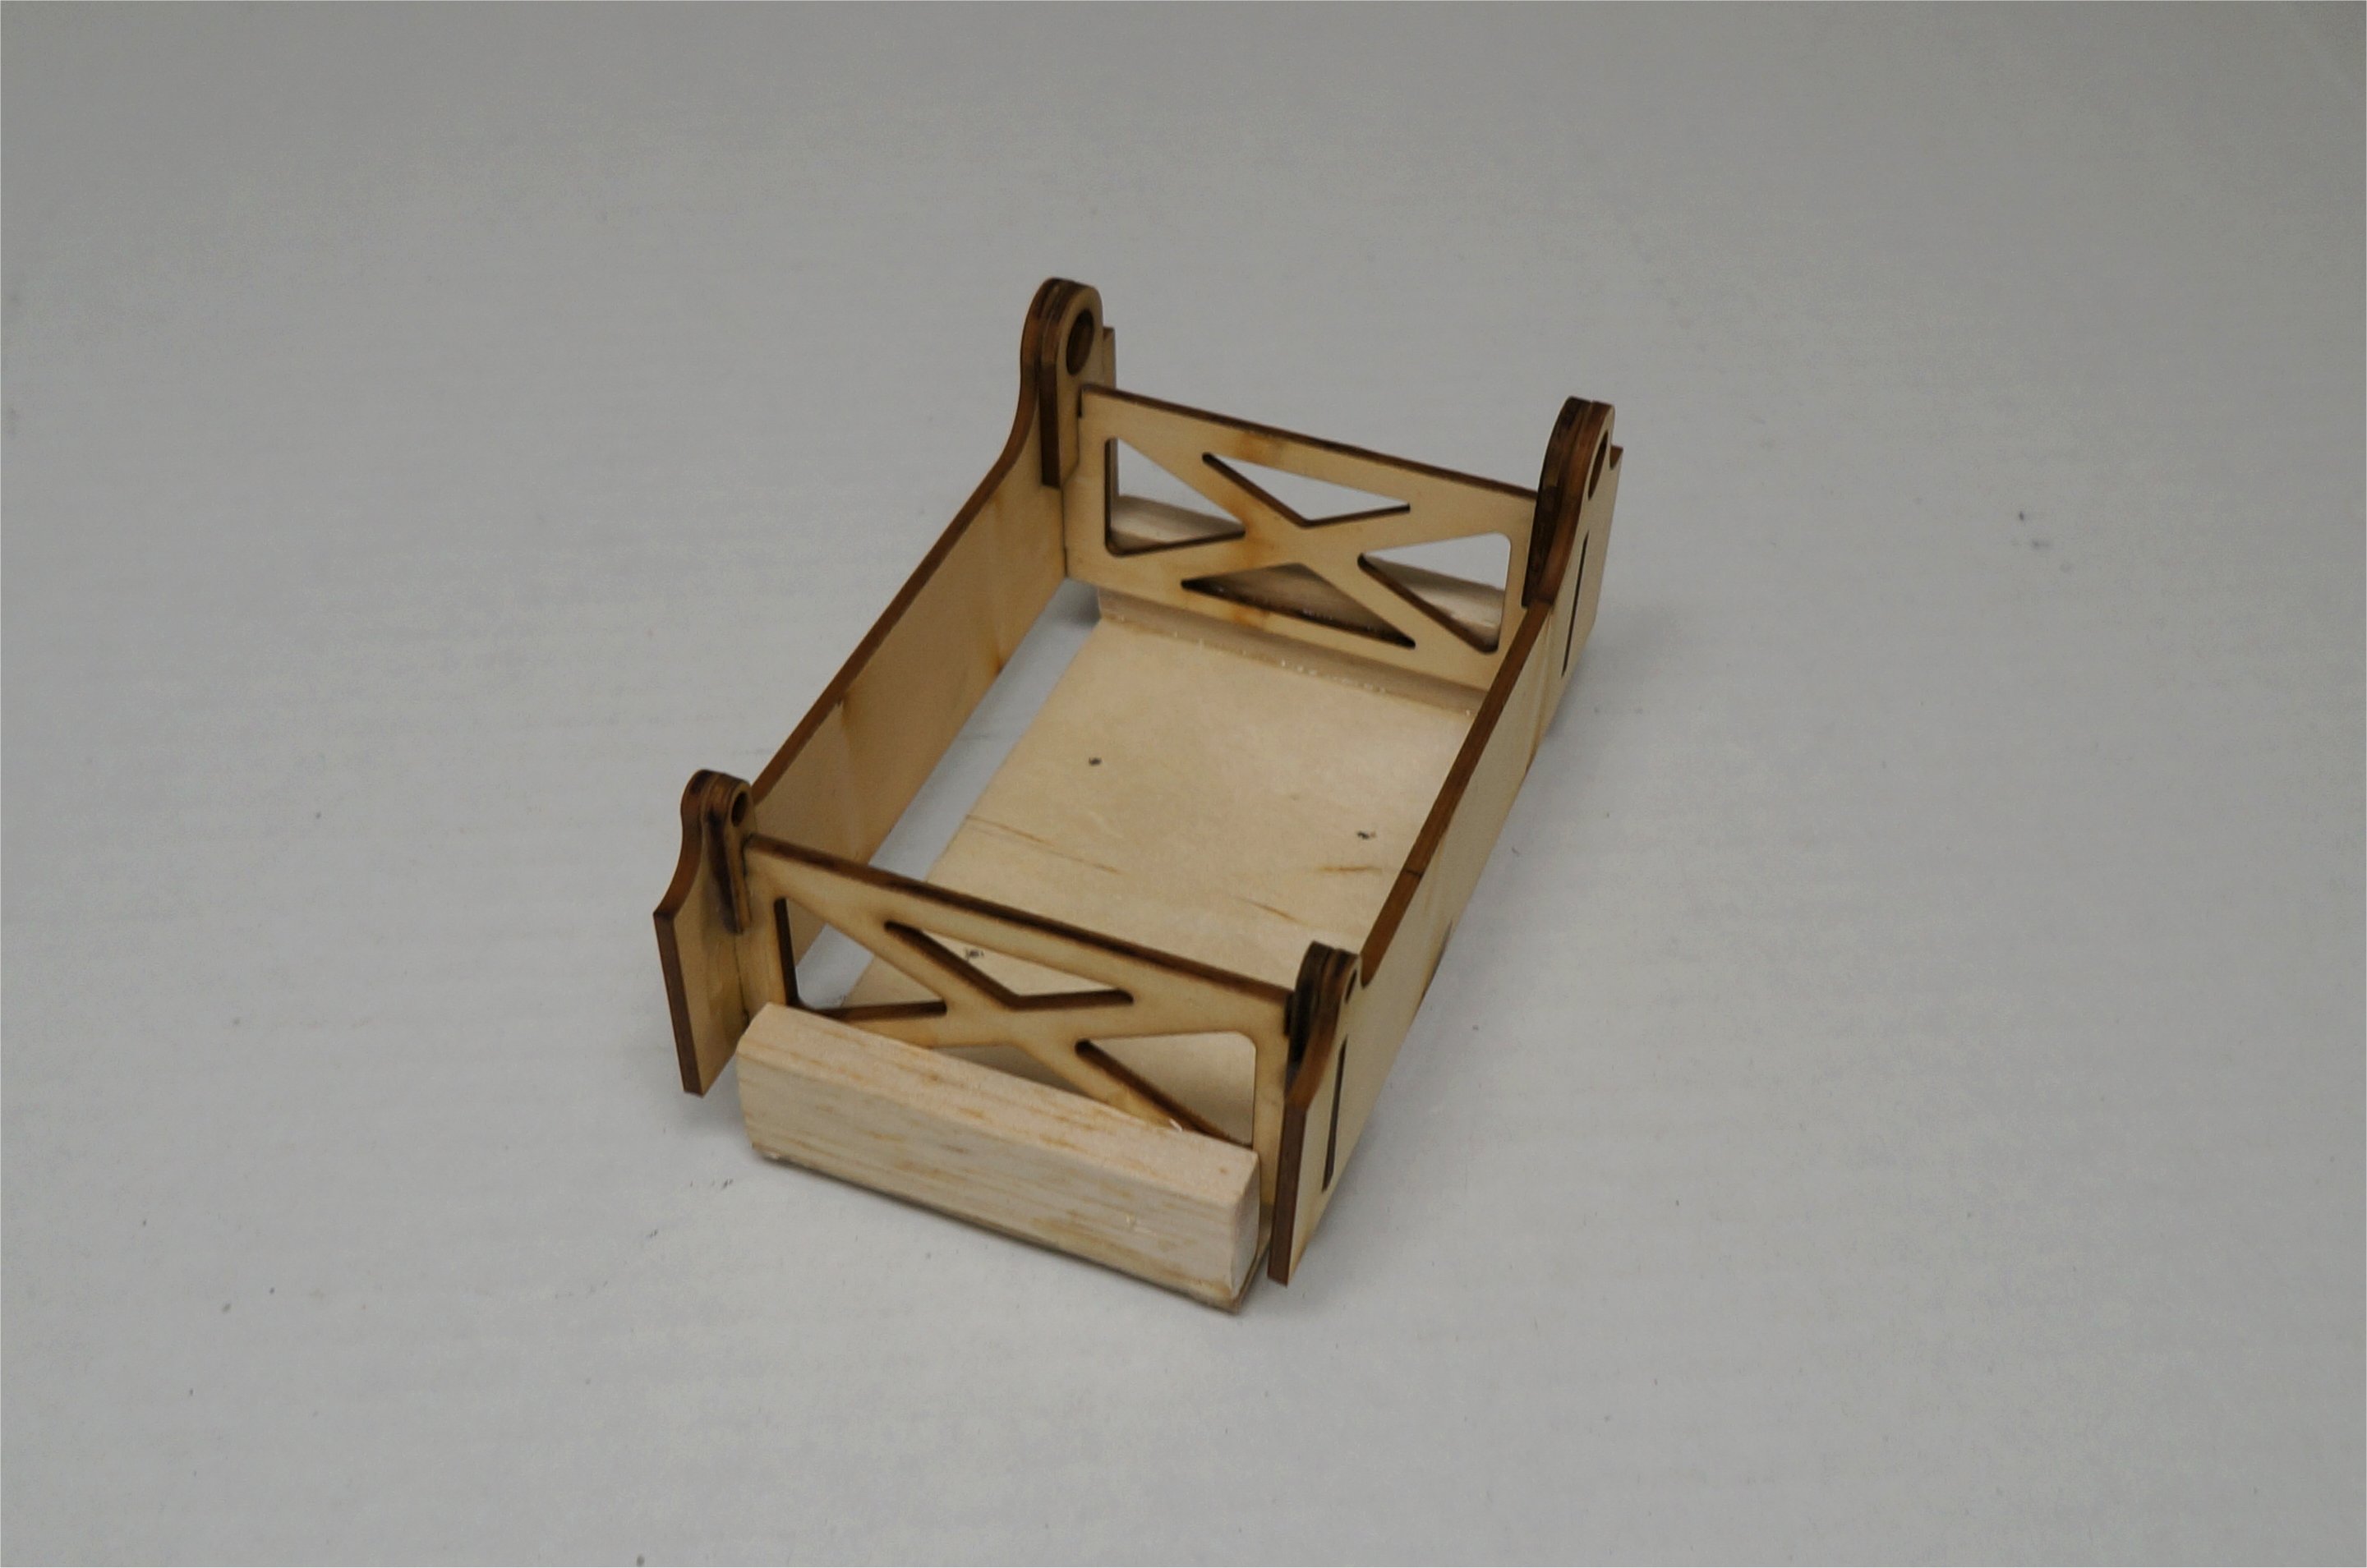
One thing I learned from my previous MT conversion was to build as much of the assembly as possible before gluing the two halves together. I also wanted a battery tray where I could simply drop in the batteries and secure them with a Velcro strap. Since my 5 sets of 3s 5AH packs were used on other projects and had no Velcro on them, it was a requirement to keep them that way.

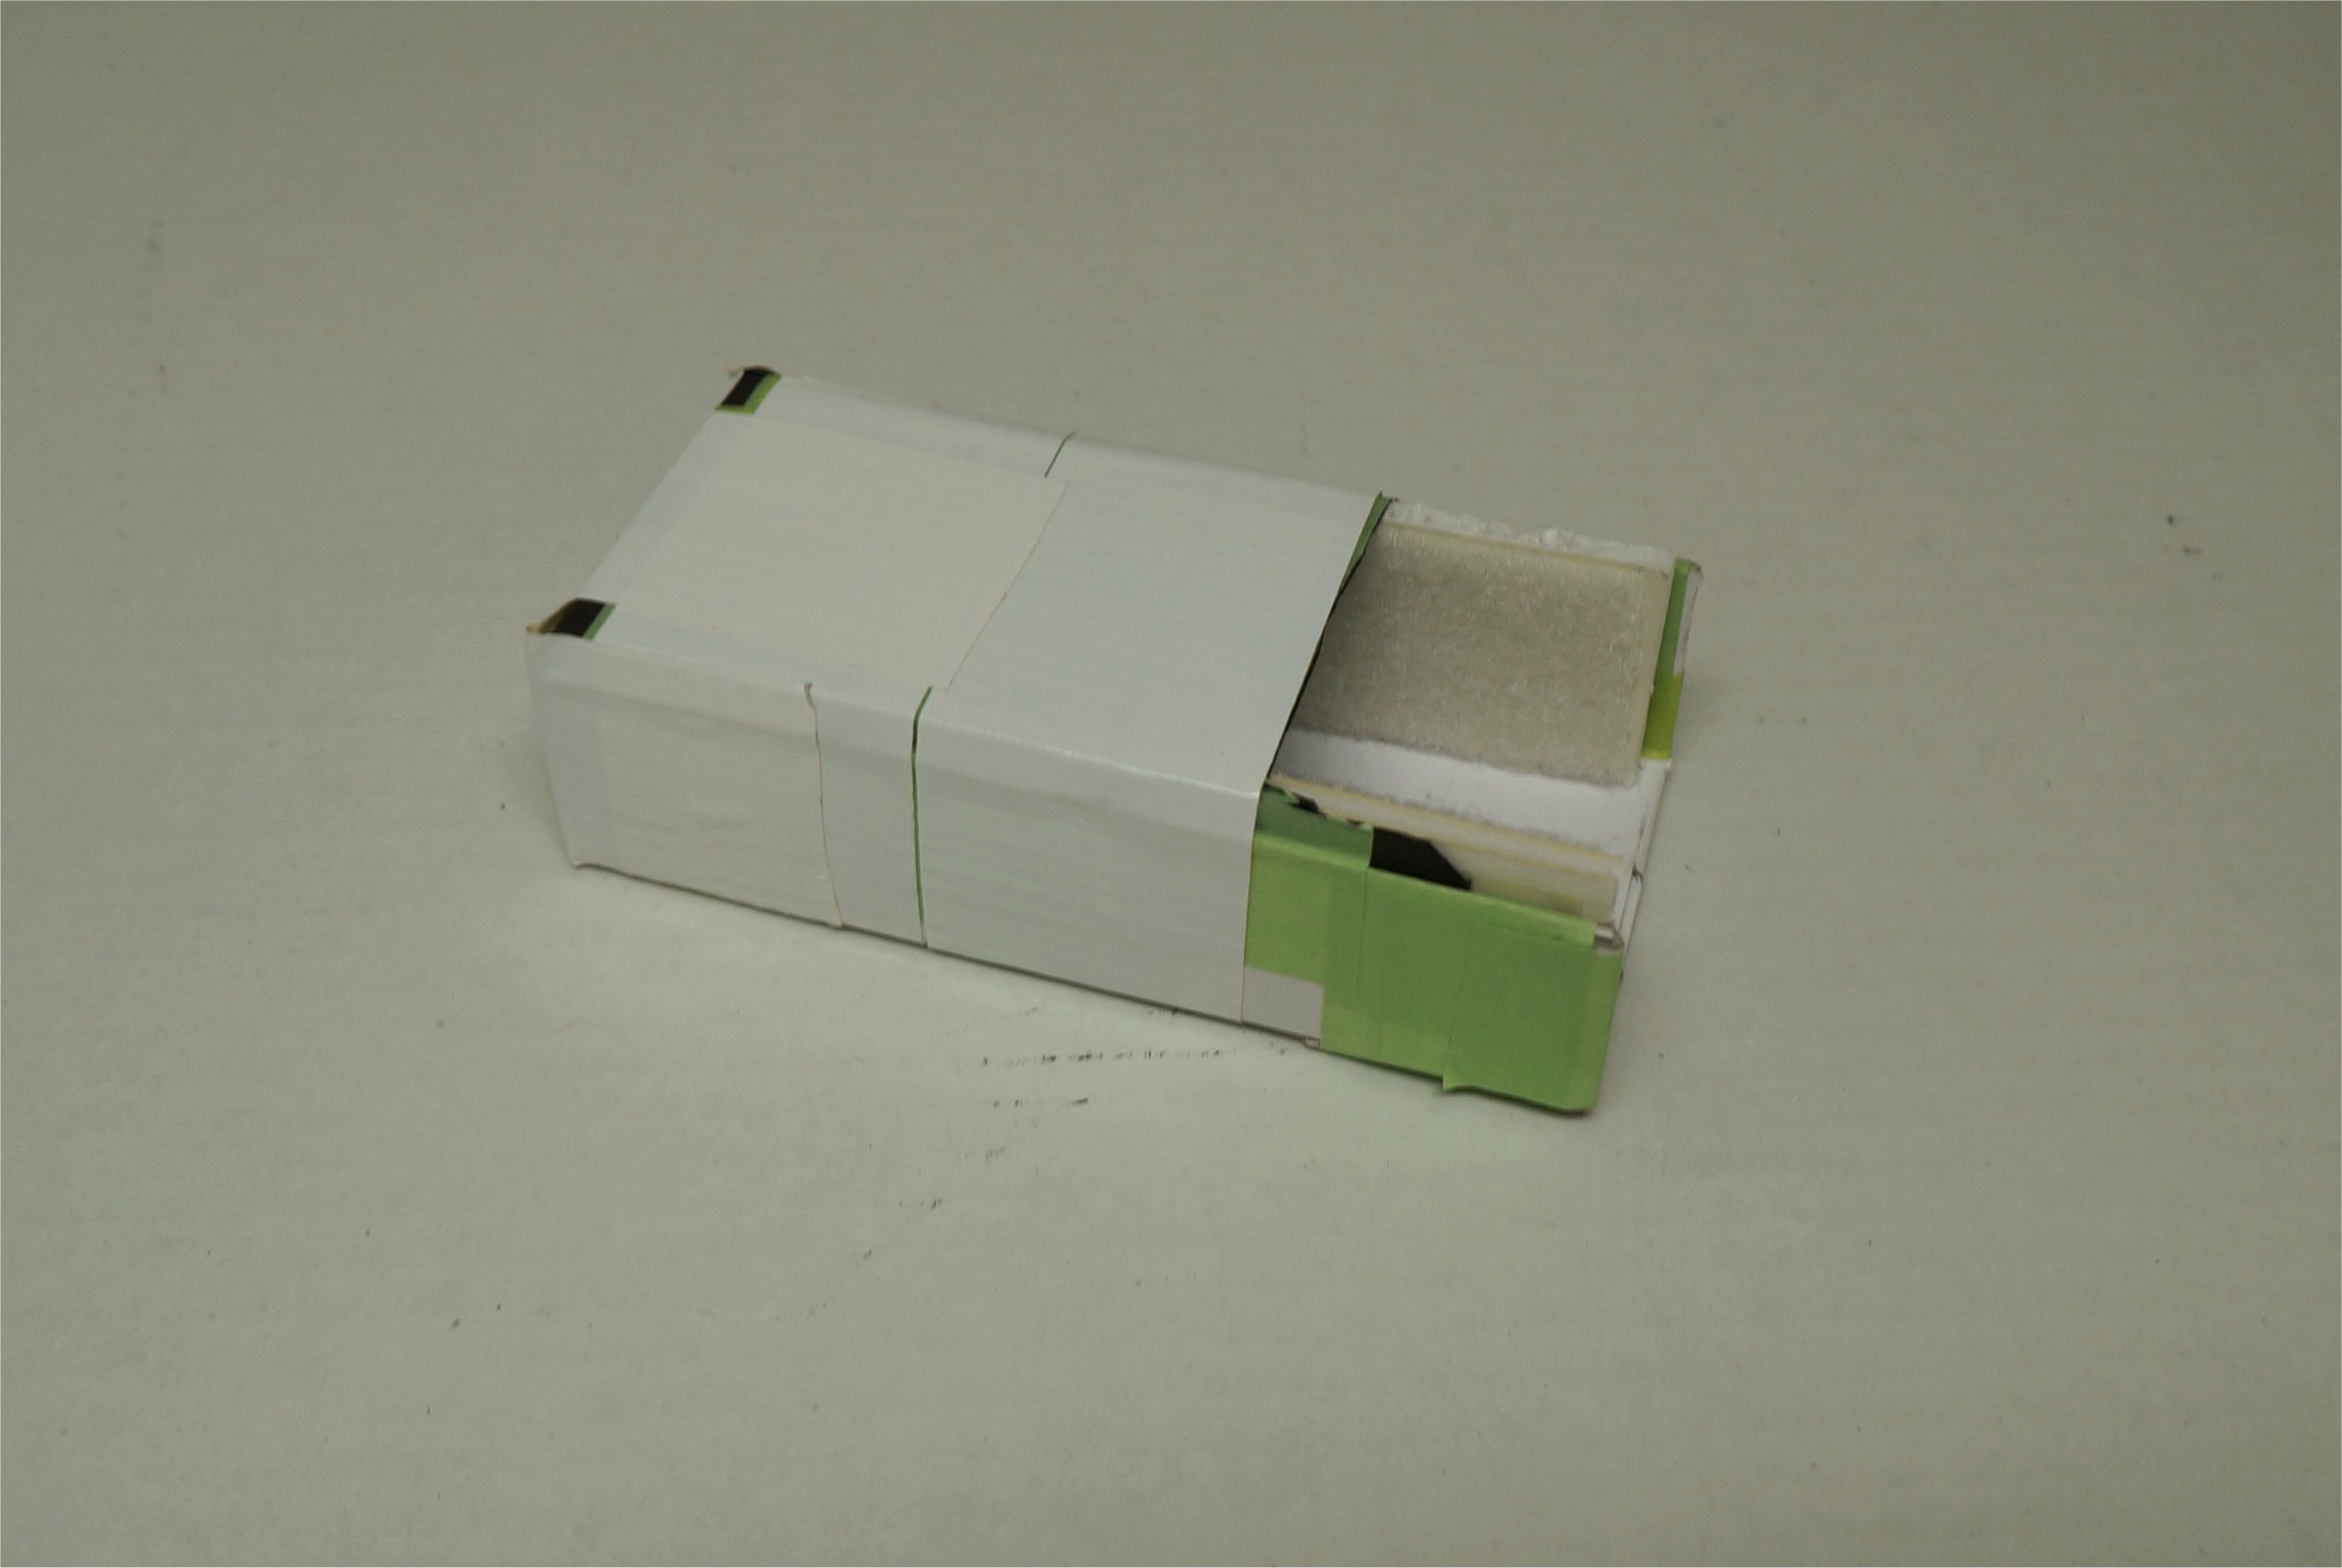
Many folks use 3D printed parts for this model but I simply use the stock plywood parts. Even my battery tray was made from a modified cardboard box that the batteries came in with some fuzzy Velcro to help the batteries slide into place.

When placing the battery tray, the goal was to not obstruct the air flow, from the top and bottom entry points, but to place it in the air flow path and across the batteries. Not shown in the pics are air entries into the front of the tray.

2 Likes

@GregCovey Great Plan of action. This way we are assembling XUAV Talon(1718).

1 Like

Mounting the Pixhawk vibration dampener was easy as long as you remember to leave enough space for the servo and ESC cable plugs. I added some balsa blocks on either end of the “cage” in case I wanted to mount components. I also found this Micro USB Extension at ReadyMadeRC.com so that I could more easily download new firmware and logs.

On my first MT QP, I wasn’t thrilled with my technique to keep it upright on the ground so I looked at the Nimbus VTOL carbon landing leg below. By making some small cuts in the foam under the canopy, I could mount the landing legs to create a level (or near level) tripod that really made the MT stand up straight without interfering with the canopy pod. The inside of the foam nose had some M4 t-nuts and plywood base.

At this point, the two halves are not glued together but simply press fit in place. I chose the right side of the fuselage to glue things in place like the flight controller “cage”, battery tray, and motor mount.

3 Likes

@GregCovey Sir, an anti-vibration mount is necessary for Mini Talon. Without an anti-vibration mount also X-UAV Talon is going well. I have one doubt when we are making fixed wings, Is the anti-vibration mount is completely or not? :thinking:

Thanks and regards
Mohan

1 Like

Mohan,

I almost always use the anti-vibration mount with my Pixhawk 1 flight controllers on VTOLs. This learned behavior goes back to my larger copter days. I would recommend it for Pixhawk 1. If you use a cube, it has built-in vibration dampening and a heater…better performance at a higher cost.

Cheers!

2 Likes

Sir, we are using cube black up to now, for XUAV Talons. I had seen your pictures, then i had doubts about the anti-vibration mount.

thank you for your confirmation,

Thank you
Mohan

1 Like

I doubled the thickness of the motor mount plywood so I could install some M4 t-nuts and make the motor removeable. This required cutting the slot in the fuselage a bit.

After testing the motor mount fit, I installed all 5 ESCs, X8R receiver, and two regulators (5v and 12v) in the fuselage halves before gluing them together. The forward flight motor spin direction was tested ahead of time but the quad ESCs used the 3-pin 3mm bullet connectors that can simply be swapped around to reverse the quad-x motor direction as needed.

My first experiment using the Chinese “jiao shui” glue was successful! The thinner viscosity and medium cure helps when gluing larger surfaces together. It is also inexpensive.

I installed the front gear to hold the body upright while the glue dried and the carbon tube let me know that things were well aligned.

4 Likes

After painting the tail fins, I installed the servos and linkages. I found some older RC Lander servos that fit snuggly into position so very little glue was used. The tail fins align themselves when inserted into the fuselage.

4 Likes

I installed the aileron servos and linkages. I used some Corona CS-929MG 12g servos that I had on hand. After testing each wing assembly, I installed the wings to the fuselage to make alignment of the quad bars easier. Of course, I forgot to apply my wing bottom decals (black strips) but I can do that later.

--------------------------- New Post --------------------------------

The 16mm carbon tubes measured 394mm or about 15.5". I can’t remember where I got them from other than old copter project for Tarot or DJI. They are high quality carbon and weigh almost nothing. For props, I used 10x5.5 carbon t-props from RC Timer. No chance of a spinner coming off.

I had cut and sanded the channels in the fuselage foam earlier in the project so the tubes would simply lie in place. Having the wings and props on helped me insure the alignment when gluing the tubes with Foam Tac. Initially, I put an aggressive 5 degree tilt on the motor angle which I would later relax to about half of that. The tilt keeps the MT nose up for dip-free transitions.

The motors were installed onto the pods and the wires were fed through to a long slot in the middle of the tube. I then soldered the 3mm bullet connectors onto the motor wires. The direction of rotation was tested before gluing the tubes in place. Although I can still get to the 3-pin 3mm bullet connectors, it was definitely easier to have this all sorted before gluing the tubes to the body.

--------------------------- New Post --------------------------------

My initial hover test in QSTABILIZE mode of my new mini Talon VTOL was successful. I balanced it at 55mm from the LE. The current draw was about 24A at a voltage of 22.2v for 533 watts. This compares closely to my original mini Talon VTOL.

It took about 2oz of lead weight on the FPV pod to balance at 55mm. After the video, I added the APC 10x6 e-prop to the tail which took another 1.0oz of lead on the nose to balance. Currently, I need 3.0oz of camera weight (probably more since the lead weight is at the tip) before I need to start adding a little weight to the tail…which is much farther from the CG so less is needed.

--------------------------- New Post --------------------------------

I received my Micro USB Extension from ReadyMadeRC.com and the form factor was even better than their site photo so it must have been re-designed. The extension cable really helps on projects like this one where the Pixhawk is in a tight space. I use it to update firmware or grab logs, otherwise, I use the 3DR SiK wireless telemetry.

--------------------------- New Post --------------------------------

Here are some photos my wife took from additional hover testing. I also posted my Voltage/Current graph for calculating hover power. It’s time to mount the forward flight prop and look at adding some air exit vents.

5 Likes

Hi Greg,
congratulations on the first hovering of your beautiful Mini Talon .
Thanks for the informative report.
What is the total weight ? (Because 530 watts seems like a lot. Mine hovers at 360-380 watts at 2300 Gramm = 80,50 oz )
Rolf

Hi Rolf,

Thanks, I’ll have to weight it yet. I had no focus on keeping it light. I simply used spare parts for fun and the motors and ESCs are very powerful for the application. Also, this is still an uncalibrated 3DR-style Power Module.

I will weigh it just to compare. I’m more interested in the forward flight current draw since it only hovers for short periods.

Cheers!

Then of course we can’t compare anything yet

Me too :smiley:

Cheers

My original MT weighed 1.93kg (4.25lbs) with the Mobius FPV setup and the 4s 6AH battery weighed 0.624kg (1.375lbs) for an all up weight of 2.55kg (5.625lbs).

My second MT conversion from spare parts weighs 2.18kg (4.80lbs) with 85g (0.3oz) of lead on the nose and the 6s 5.2AH battery weighed 680g (24oz) for an all up weight of 2.86kg (6.3lbs).

So my 2nd MT conversion is more weight than my first conversion with heavier motors and ESCs, but it cost me nothing and should take some good abuse flying it next summer. I have 4 sets of batteries for it along with any spares to keep it going. Likewise, my first conversion has many spares and I love to fly it in either calm or windy conditions.

Below is the APC 10x6 e-prop installed on the SunnySky x3508 motor (same as quad motors) using an M6 nylon lock nut. To hold the battery from sliding backwards, a simple Velcro strap folds into place.

2 Likes

I added my video downlink to the MT canopy. It was a simply Mobius setup using the stock camera holder with an ImmersionRC 600mw 5.8GHz transmitter and Far Vew Pagoda 2 antenna. I think the main advantage of the Pagoda over a clover leaf antenna is better reverse polarization rejection.

I found some M3 Thumb Screws on eBay that make for a nice tool-less access to the battery compartment. My two 3s 5.2AH packs slip into place in the battery holder and are then held with a flip over piece of Velcro. The batteries sit at an angle downward to the nose of the plane so they won’t slide around.

2 Likes

I finally got a chance to maiden my new mini Talon 2 quadplane that I built over the winter months from spare parts.

I ran into an issue with compass calibration as it would hover ok but it would not stay put in QLOITER mode. So I recalibrated the compass at the field using QGC on my tablet and it then hovered fine in QLOITER mode.

Next, it took a while to complete the transition to FBWA because I didn’t have enough speed without increasing my throttle to around 3/4 full. My APC 10x6 prop for forward flight will get changed to a 10x8 on the next test flight.

My ARSPD_FBW_MIN is set to17m/s and my ARSPD_FBW_MAX is set to 25m/s. At 3/4 throttle, I was only traveling at 18m/s instead of my desired 22-23m/s. My original MT QP is a rocket compared to this slower one so I’ll look to get some more speed from the SunnySky X3508-16 700Kv motor. My cruising speed power level was 374 watts and the motor is rated for 340 watts continuous power so I may need an upgrade. Time will tell…

For the most part, it flew and came back to fly again. Overall, it was a successful maiden flight and needs a tweak or two.

-------------------------- New Post --------------------------------

I’m used to using Mauch Power Modules and forgot that I was using an uncalibrated 3DR type PM so disregard the current measurements above as the PM was reading high. The voltage reading was pretty good. I calibrated my PM and installed an APC 10x8 prop for the next test flight.

3 Likes

Interesting and useful discussion, I appreciate your work! :+1:

1 Like

Hi Sebastian,

Thanks and welcome to the APM VTOL forum!

I hope to test my APC 10x8 prop today for faster forward flight. Using the same motor for forward flight and hovering was simply a choice of available spare parts rather than a design on ecalc. It may not work but it’s easy to try a few things before spending money on a new motor.

Cheers!

1 Like

The 10x8 prop test revealed that the 350 watt SunnySky motor didn’t have enough power to fly the MT QP fast enough. My original MT QP conversion now uses a 700 watt Turnigy Aerodrive SK3 3542-1250kv Brushless Outrunner Motor on 4s with a 10x6 prop so I will likely buy an equivalent motor to run on 6s. Currently, I am looking at the Turnigy Aerodrive SK3 3548-840kv Brushless Outrunner Motor and other alternatives.

1 Like