I have been asked to get this sensor working with ardupilot. it’s ideal for low level alerts on water tanks, so would be ideal for crop sprayers

first you need to add a servo connections to the wires coming from the sensor, you can either crimp these on to the existing wires or just splice some servo wires on as i have done.

Its pinout is:
Yellow is signal,
Brown is VCC, the sensor supports from 5-24v
black is ground
Blue is output select, leave it disconnected if you want the output to go high or connect it to the black wire for it to go low.
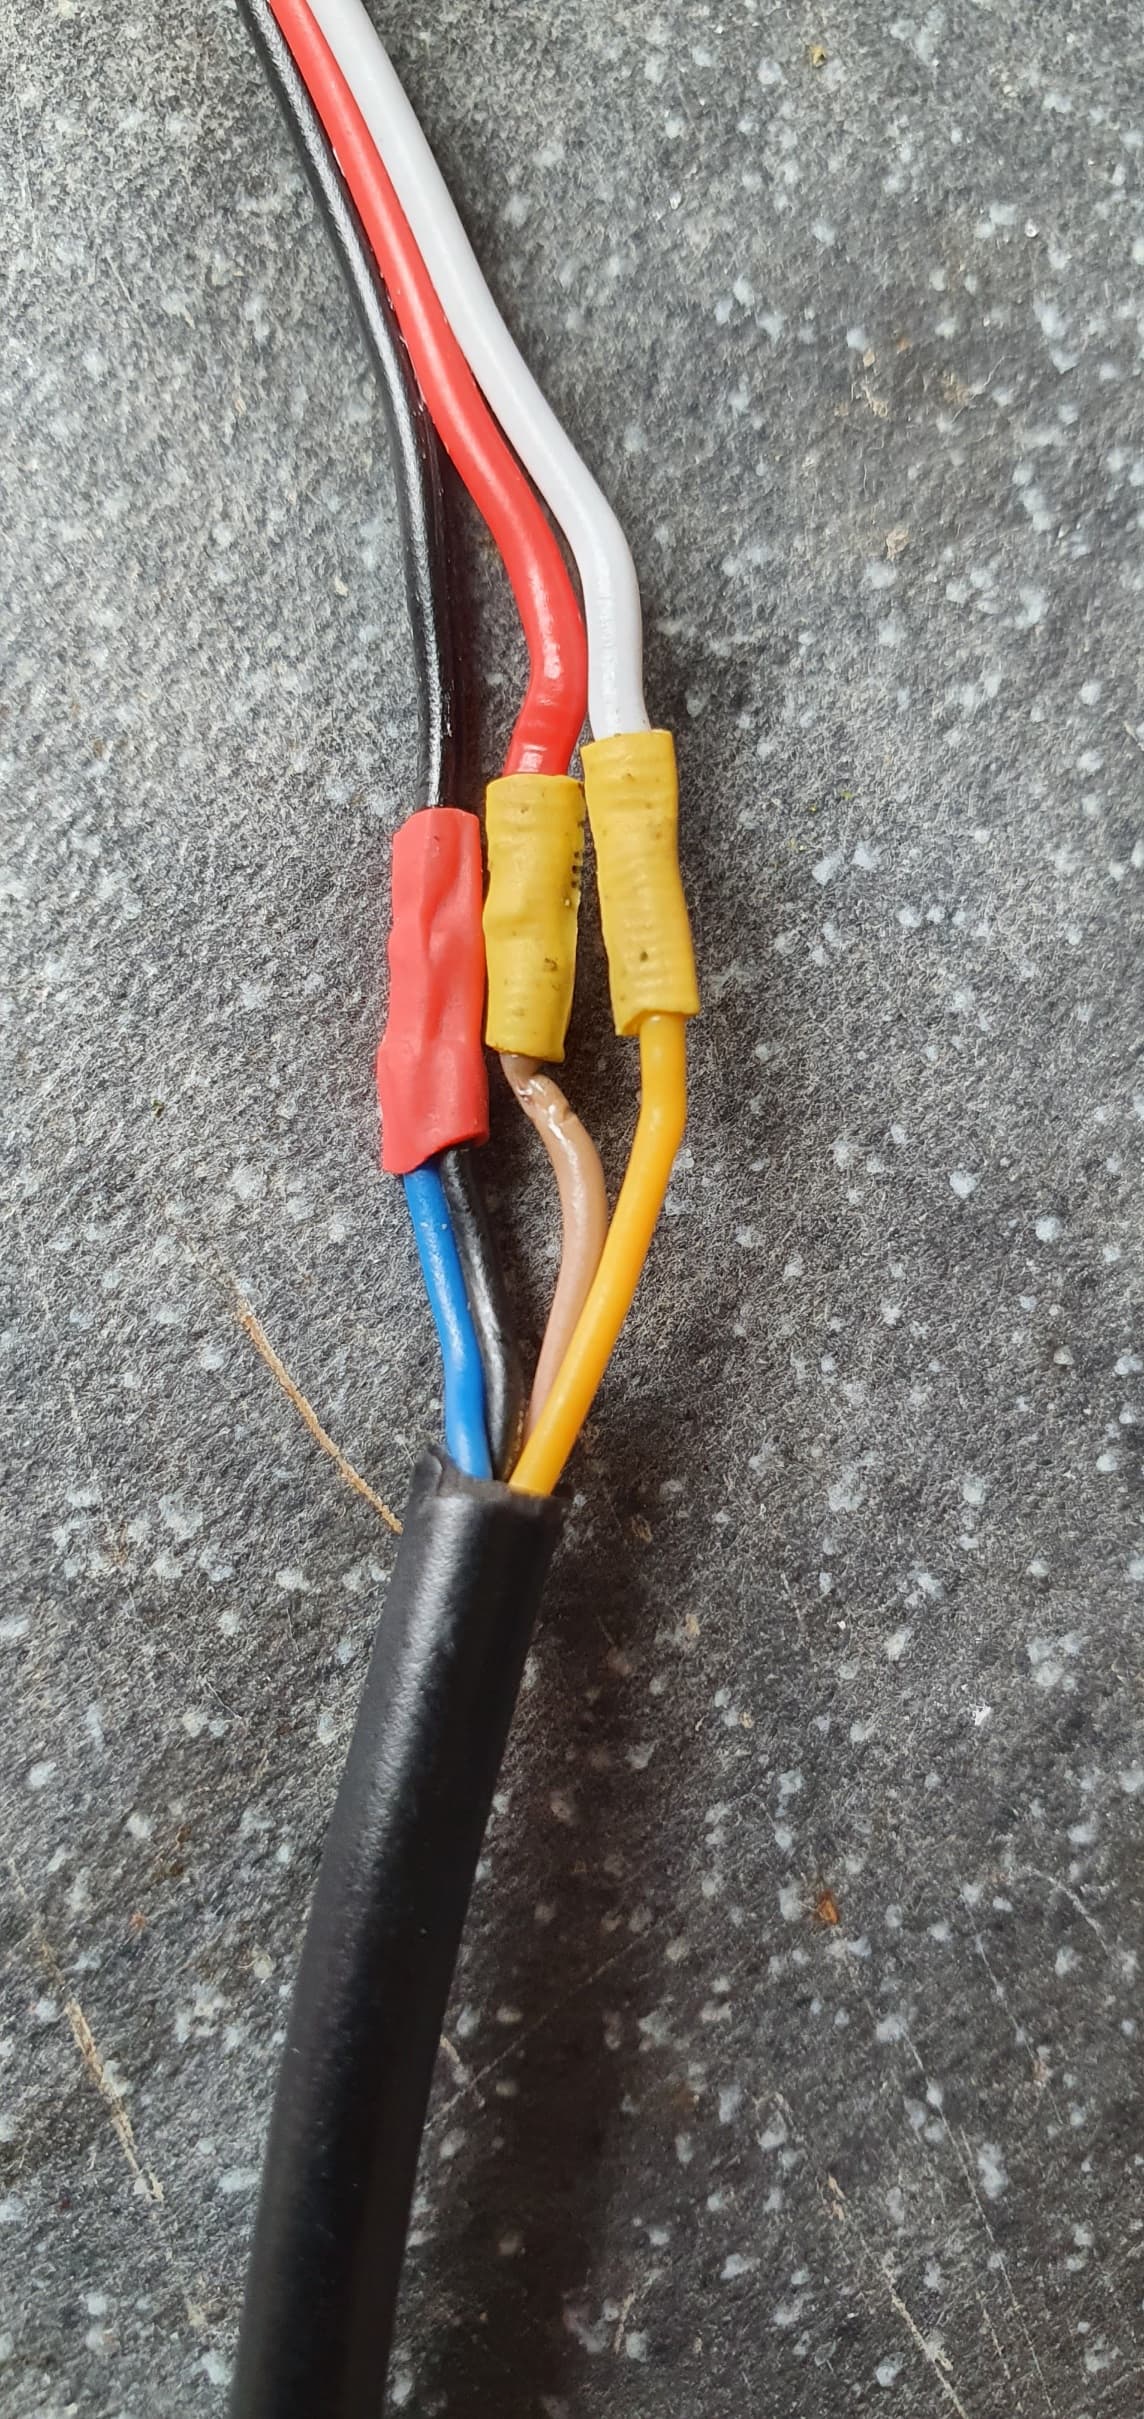
to get it working with ardupilot we want to:
Connect blue and black together and connect to the ground wire of the servo connector.
Connect the brown wire to the red servo wire.
Connect the yellow wire to the white signal wire.
once its wired connect it to AUX1 assuming your using a pixhawk and connect a 5v supply to the servo pins, if you dont have an auxiliary 5v for testing you can bridge the 5v pin from the rc out to the 5v pin of any of the aux or rc out pins to temporally patch power over while on USB for testing.

now startup your flight controller, connect with mission planner and go to the parameters page
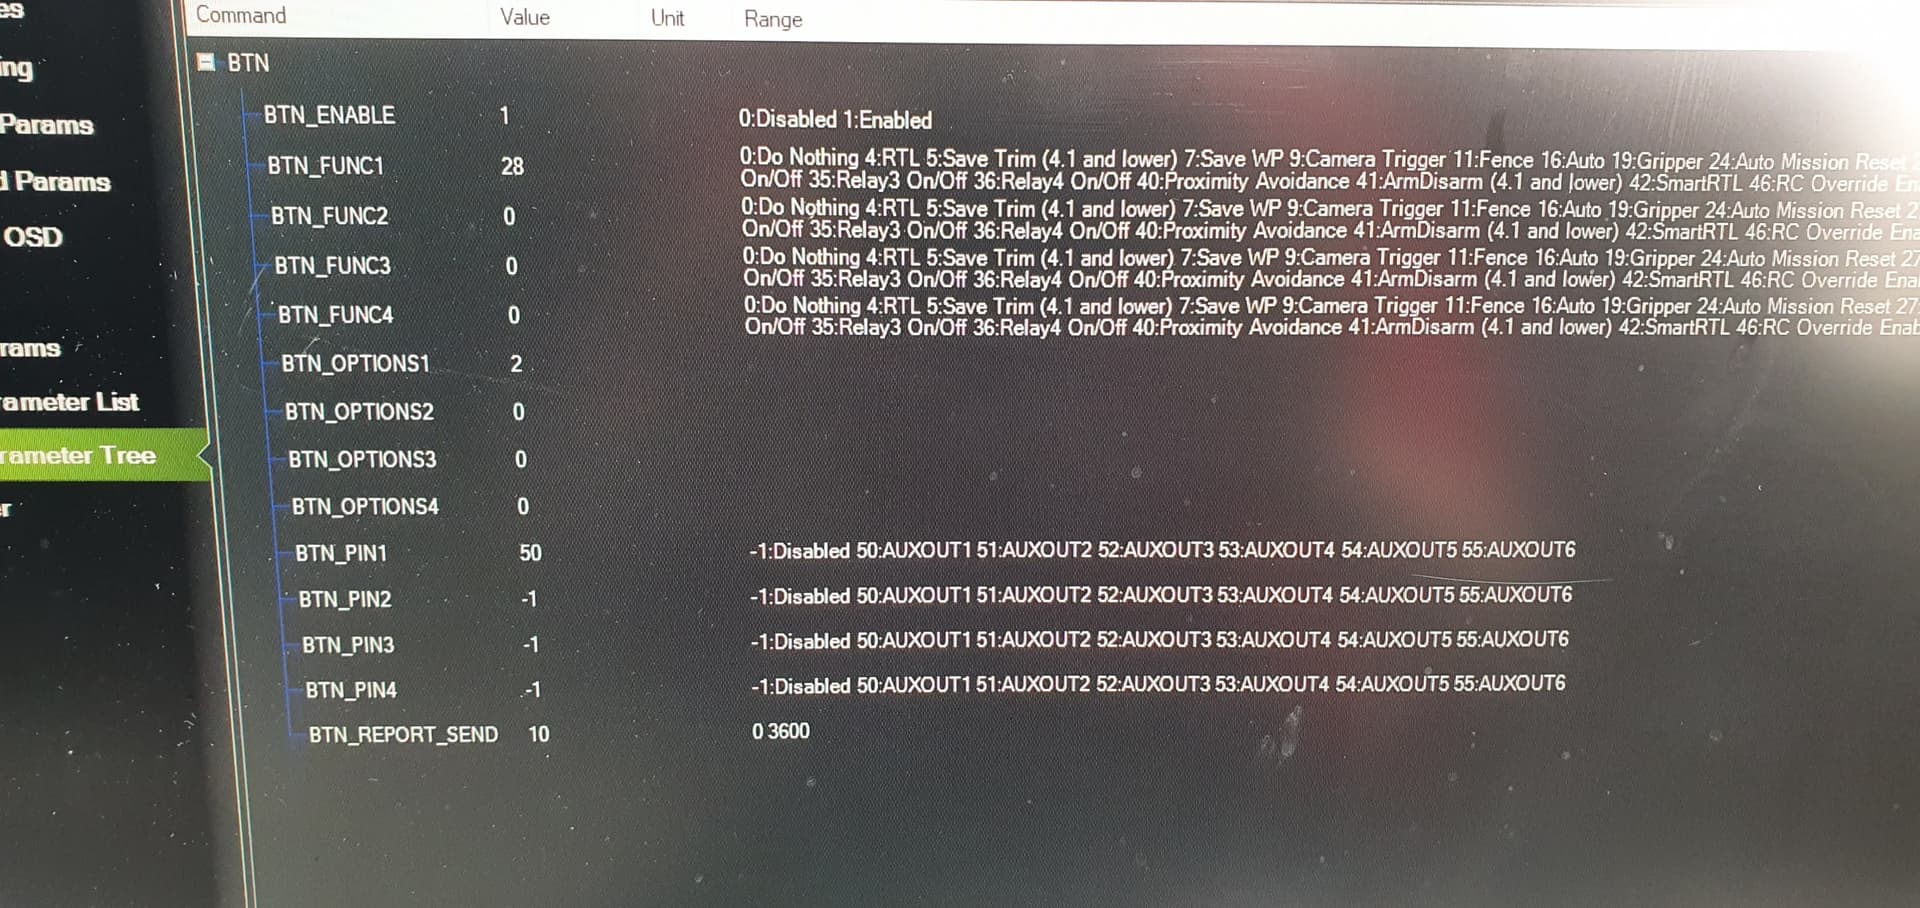
SET:
BTN_ENABLE = 1
refresh the parameters to get the new options to show.
BTN_FUNC1 = 0 if your using lua to detect changes. im just setting it to 28 for relay so it shows on messages.
BTN_FUNC1 = 30 to make the pixhawk beep when its triggered.
BTN_OPTIONS1 = 0 if you want it to trigger when no water is detected.
BTN_OPTIONS1 = 2 if you want it to trigger when water is detected.
BTN_PIN1 = 50 , if using AUX1 on a pixhawk
SERVO09_FUNCTION = -1 to set it to gpio.
save parameters and reboot and it should work, you should see the button triggering on mission planner messages.

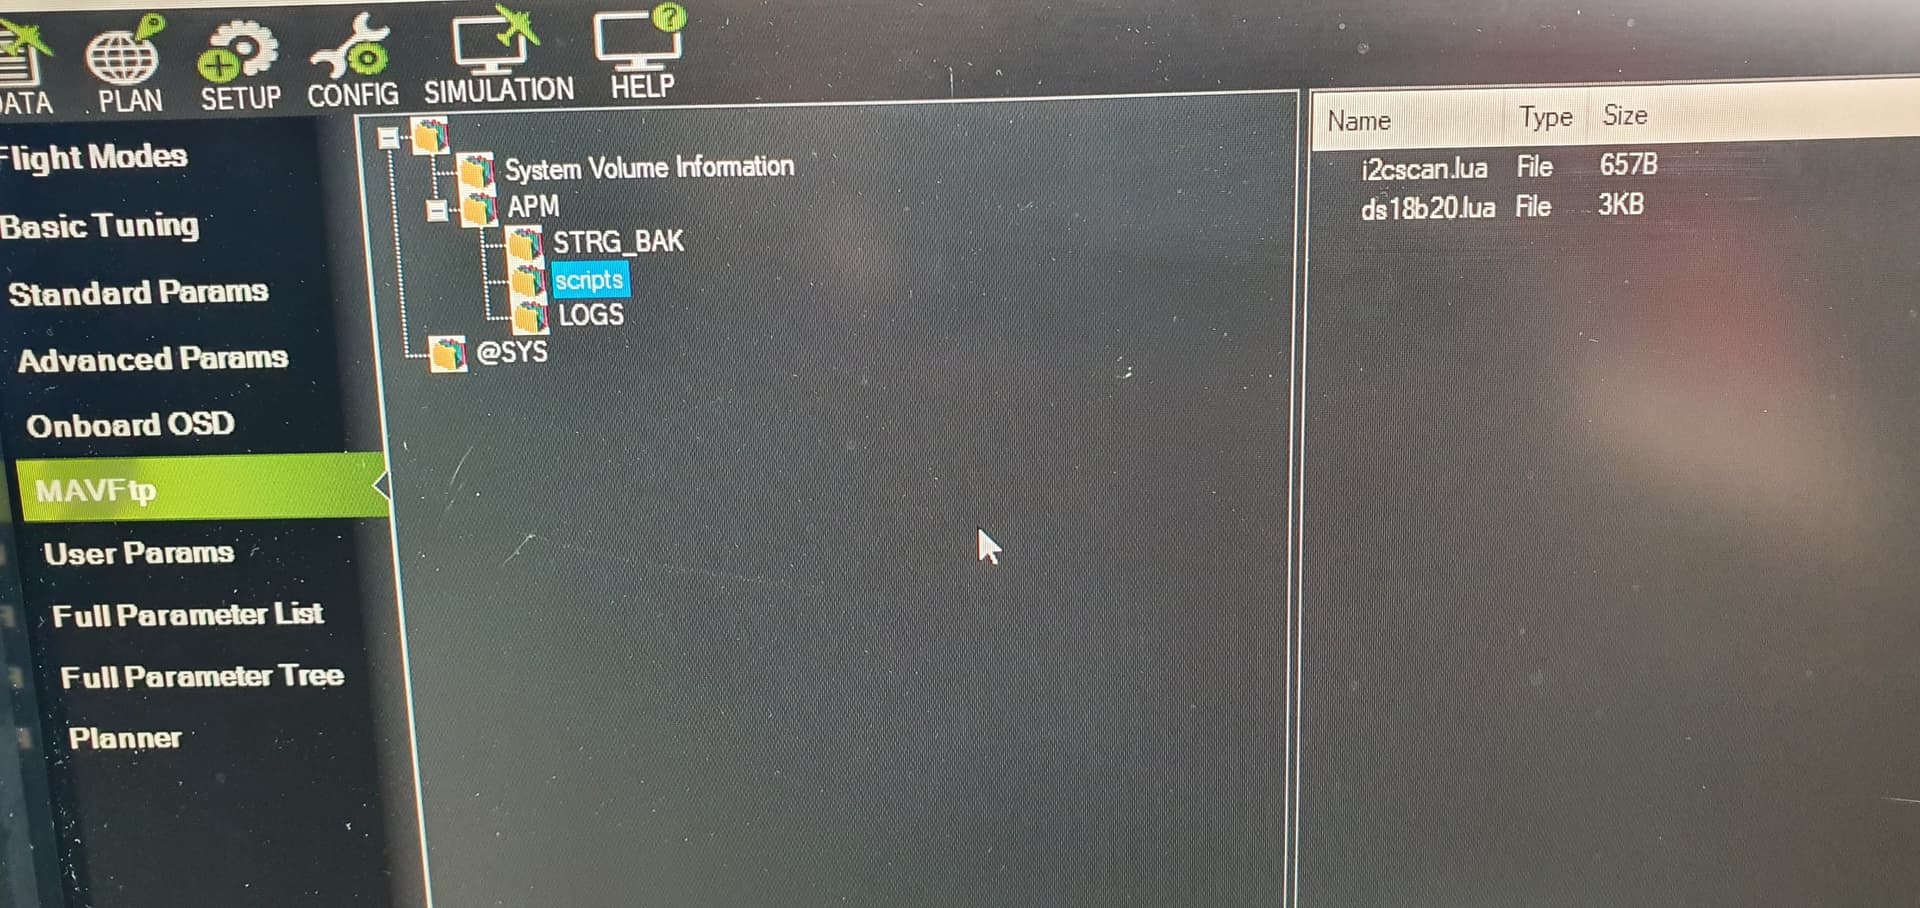
if you want to send alerts to the ground station when the sensor is triggered then use this lua example script.