X-UAV "Clouds" maiden flight - full auto take-off - Arduplane 3.7

https://youtu.be/tiwk2vEyQu8

This is the maiden flight of the latest X-UAV model : “Clouds”. It is a V-Tail fixed wing platform, similar to their previous model “Talon”.
It runs Arduplane 3.7 on a Pixhawk1 (I try to get a Pixhawk2 for months without any success…Frustrating).
I was supposed to have a flight buddy who would throw the plane while I would hold the Taranis, in order to first maiden it in FBWA. As he cancelled on the last minute and I really wanted to fly the thing, I decided to burn a few steps and try directly this fixed wing alone by programming an auto take-off (hand launched : that means that the following parameters have been set:
•TKOFF_THR_MINACC was set pretty low to 5
•TKOFF_THR_DELAY was set to zero because it is a front propelled fixed wing. Don’t do this with a pusher airplane or you might shred your hands !
•TKOFF_THR_MINSPD was set to zero

I have a digital airspeed sensor installed but it was obviously not yet calibrated since this was the first flight. However the EKF managed to fly it through its auto mission correctly on the first try.

I still find amazing how Ardupilot works great, even after dozens of builds I’ve done with it. Tridge and Randy are just two geniuses (and all other dev I don’t know).

2 Likes

Very nice ! Very nice ! Very nice ! Very nice ! Very nice ! Very nice !

Nice build Hugues!
Do you have any details on current consumption and propulsion setup you used? I’ve seen some flying with around 4.5A on 6S at around 50kmh. It would be interesting to know what the cruise current is at 80kmh, and the overall battery/payload she can carry.

The propulsion setup is:
TMotor 2814/770Kv with 9" props and 6S battery. You will ask why 6S ? because 9" props are the maximum prop size you can have without touching the ground. I tested the setup here:
https://youtu.be/YAFJJnHktCo

I did not calibrate current measurement yet so can’t tell how many amps are consumed.

Cool thx for the link.

Only being able to use 9" props on a aircraft that size is a bit of a pain, but it can probably be optimized fairly well. Would be good to get an idea of current draw at faster cruise speeds whenever you get to calibrating the sensor (this would need to be prop pitch optimised).

As mentioned on DIYD this would be a prime candidate to make into a quadplane. Although you could do what everyone else seems to do for these conversions, namely place a CF tube/flat under the main wing join, parallel to the fuselage, I’d rather opt for the H-Quad setup, which means you can put the motors on CF tube/flat bars coming out of the fuselage itself. Something like this:

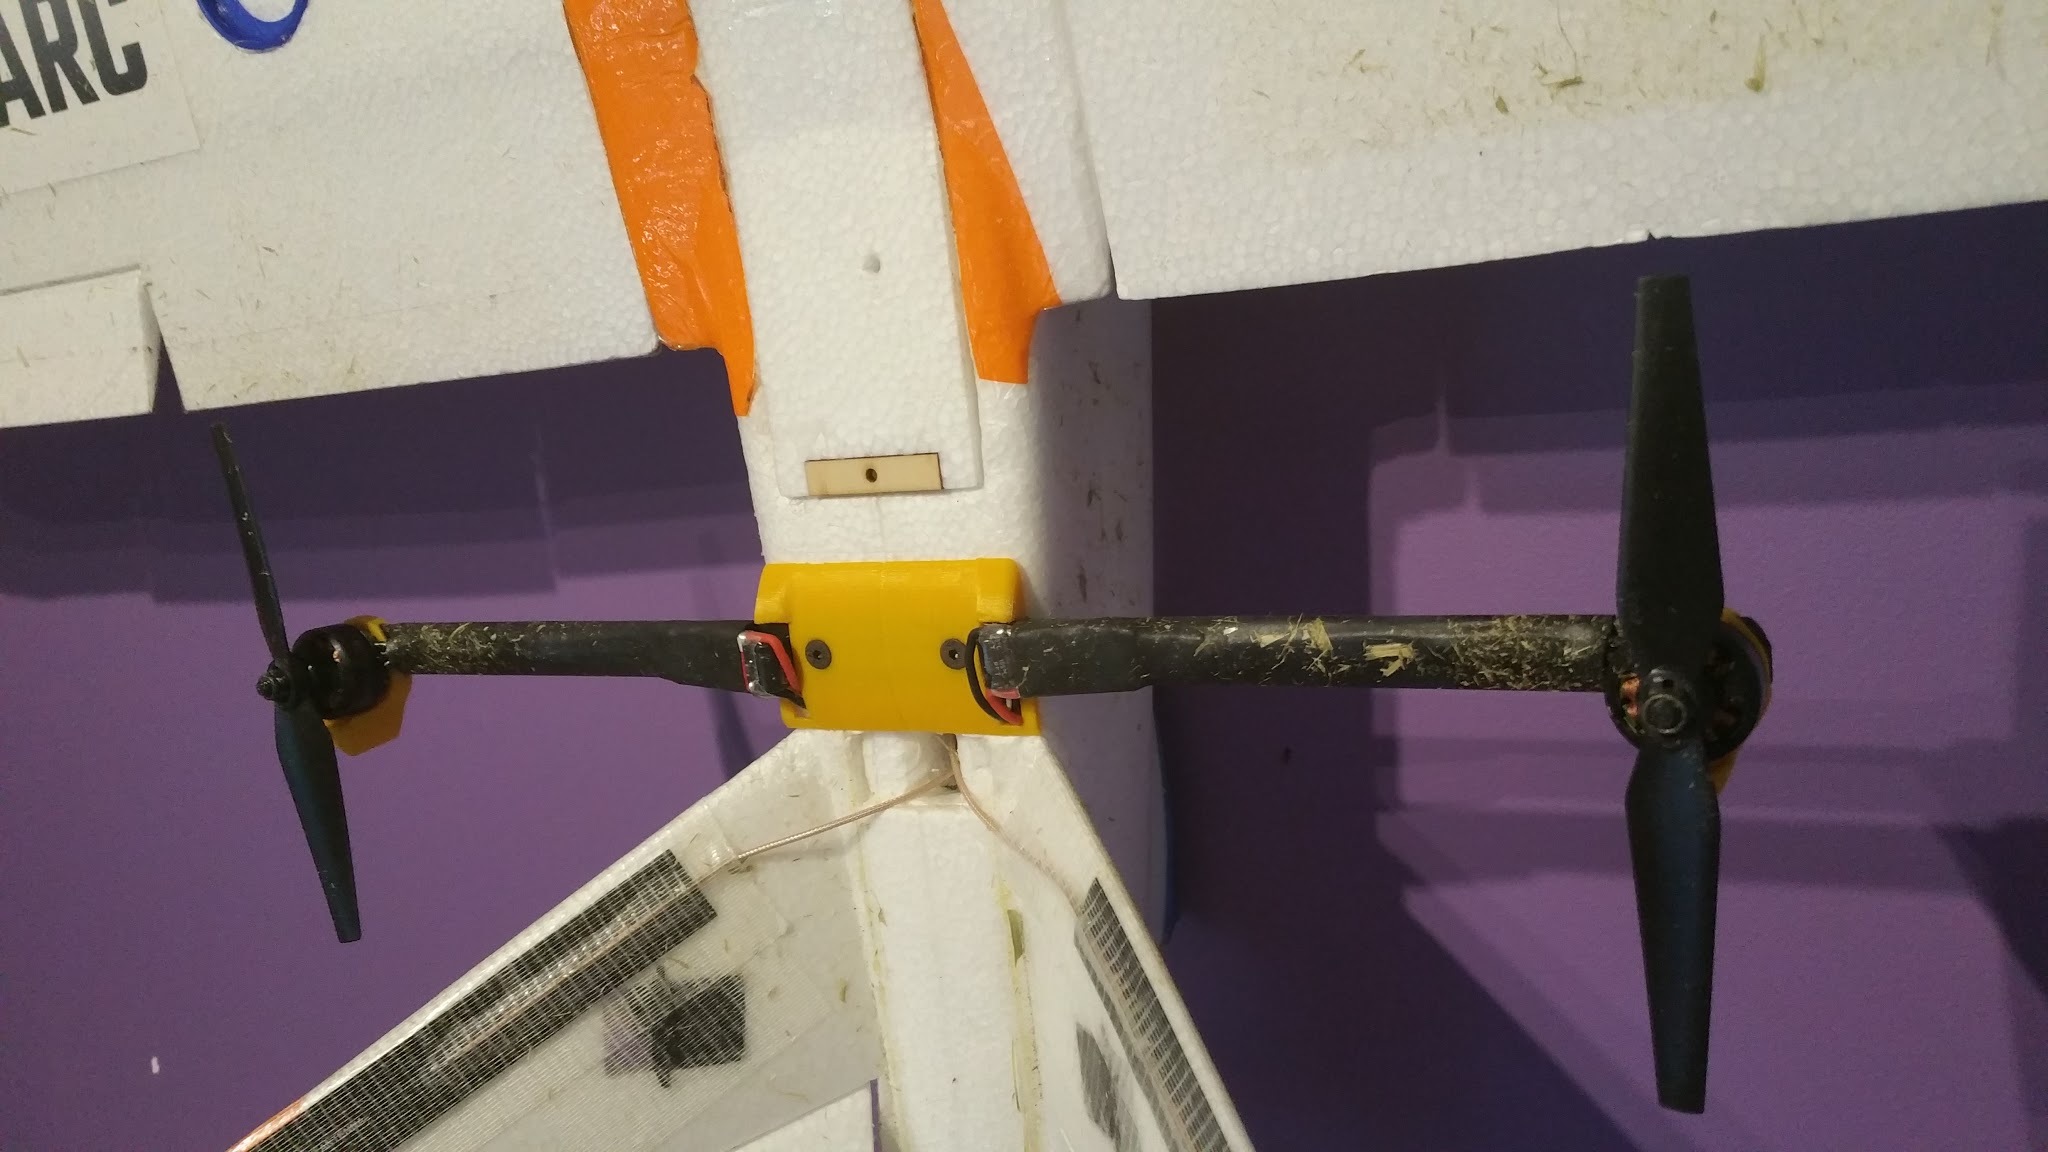
The main advantage of doing the arms like that is that the wings are not in any way loaded up in hover as the fuselage takes all of the hover lift directly. That means you don’t have any torque steering effects as the quad structure is much more rigid than on the wing. The other advantage is that the ESC’s and cabling lengths are less and are routed straight into the fuselage, saving weight and making it easier to setup. Also, depending on the mounting position, you can also make it de-mountable. We made two 3D prints and mounted one under and one on top of the fuselage foam like this. That’s two screws and 4 plugs per arm to disconnect, so it only takes a minute to convert back to normal (if you wanted to!).

As you can see on that photo we used a 3mm CF flat bar, then attached the motors directly via a angled shim (3D printed), with the cables laying on the CF bar and the ESC’s mounted on the inside of the arms. Then you just have to heat shrink it in such a way it stays as flat as possible. Note the frontal area with a CF flat bar is less than a round CF tube, and it means the motor/ESC mounting is much easier and more compact than using a tube with brackets etc. The length of the quad arms is also variable, but we found making it close to fuselage didn’t impact roll control much. You might say that mounting the quad arms sideways across the airflow creates more drag, but we found that by not disrupting airflow around the wing, by being able to place the arms out of the wing airflow, was actually better. Plus the arms act as mini canards if done right (ie you get some lift for your drag at least).

The other thing that is worth doing is making sure you have about 5-7degrees of forward pitch on your hover motors when they are mounted. We done this with the yellow 3D printed shim (with little airfoil behind it) and it makes a huge difference in hover with windvaning on, and in light to high wind. Like that the AoA of the main wing is greater, resulting in more lift being produced by the wings at low airpseeds in hover, plus it avoids the wing from producing downwards lift in wind and whilst hovering. Also together with forward motor assist in hover means that the windier it is the more the wings assist in lift whilst in hover, to the point that the aircraft might not descend in high wind in qloiter at all. :slight_smile:

Another thing that happens with a quadplane is that with quad assist on and setup correctly, it becomes very difficult for the aircraft to tip stall, because the quad motors produce enough lift at any forward speed to maintain desired attitude. This together with the quad motor forward pitch angle, makes for a very floaty and stall insensitive airframe.

As for quad propulsion, depending on the layout as a quad or octoquad, you can probably get away with relatively small motors and ESC, especially so if you only want short VTOL and hover times because you want longer forward flight times. Have a look at KDEdirect or Cobra motors for mini quad racing, you’ll be probably surprised to see dinky little 2206 motors doing some 1.7kg of lift on a 6’ prop each nowadays.

Another point is that if you do use VTOL, you can then tune the forward prop just for cruise and neglect static thrust for takeoff nearly altogether. (forward prop pitch for cruise should equal drag at that velocity and not produce any more thrust than that). You’ll find that optimizing the forward prop like that will result in less power used, and adding extra batteries in longer range and faster speeds than is possible without the quadplane conversion.

Let us know how you go if you try it. :wink:

5 Likes

Wow, thx for these extensive instructions. I appreciate it. I’ll have to read it multiple times to get all of the optimisation details you have thought about.

And already a few questions:
-do you then consider your design with the 3D printed parts better than with the tubes going through the fuselage ?
-Are 3mm thick flat arms rigid enough or is it designed on purpose to flex a little ?
-Can you share your STL files ? (or better, in 123D Autodesk object format)

more questions might follow…

  • After doing two versions of the through fuselage mounting of the quad arms we switched to mounting them on top. One of the reasons is that the foam itself needs to reinforced with the through fuselage design, as over time it simply fatigues from the alternating lift of the quad motors, plus on impact if they are mounted low on the fuselage. Every aircraft is different, but keeping the quad motors and props mostly out of the path of airflow for the wings is the main reason to mount them on top. So long you can mount them on a stiff part of the fuselage foam, and also equal distance from the aircraft CoG it should be fine.
  • In our case we only used 42cm long CF 3mm arms. At that length there is only a limited amount of bending, and we found that if setup as a x-quad in APM quadplane, the bending of the arms assisted yaw control by the accelerating motor lifting that arm in the direction of yaw. (yaw is typically not that great in a quadplane) You can of course make them larger and longer, but it really depends on your overall aircraft mass, but keeping them as small as possible makes it more efficient. The one in the photo is a mini-talon with 2.5kg, but those quad arms only weight 150g each, with motors/ESC,CF,Heat shrin/3D parts included.
  • I should be able to convert them, but you’d be better off designing your own to fit the CF spar you will use, and to make it as wide as your fuselage. Essentially they are just two flat plates, with the top one including a curve that helps distribute forces and reduce drag. and then two screw holes and two holes to route the ESC cables through.
    https://lh3.googleusercontent.com/-L60ouEoknOs/WMYYncI1wDI/AAAAAAAAIxE/QiTzhfWyDeEnvLvmCexp61xAv8hBdf0wQCL0B/h1152/8705871507224678195%3Faccount_id%3D1
    The left one is the one mounted inside and the right one on top. Note you only need to make it 1.5mm thick underneath and 2.5mm thick above the CF bar. The top curve should be able to distribute the forces and keep a low profile at the same time. Try to put the two screws as far apart as possible to distribute the load.
  • With the motor selection, if you’re trying to get long forward flight times go for the smallest quad motor setup that gives you enough lift plus at least 50-70% more for quad control. A smaller higher kV motor with smaller prop is better than a larger prop/larger motor/lower kV if your intention is to have efficient forward winged flight. Our typical flight profile is about 60 minutes of flying but only 60 seconds of VTOL hover for takeoff and landing, so those systems should be proportional. There’s no point to do efficient hover with a quadplane, you might as well use a quad. :wink:

Hope that helps.

1 Like

Oh yeah, great info. Thx

Very nice, I also have an X-UAV “Clouds” and I am planning an automatic takeoff task when I switch to Auto mode and the aircraft’s motor does not start.
Here are some of the parameters I set.
TKOFF_THR_MINACC=0
TKOFF_THR_DELAY=0
TKOFF_THR_MINSPD=5
TECS_PITCH_MAX=20
Look forward to your wonderful reply!

Hi Jiangua,

I see your parameters. If you hand launch, you should have MINACC at least 5 or more (and MINSPD could be zero).

@JeffBloggs Hello Sam, im from Melbourne Victoria. i would like to replicate your mini talon vtol build. Seems like a very exciting thing to do. however,im very new to this hobby and lacks the experience. my first build (about 3 months ago) was a pixhawk1 quadcopter, it was a bit of a painful build as im starting from scratch and no one was really there personally to help me out. everything i knew about drones, i learned in watching youtube videos or reading forums by people kind enough to share their knowledge. i have never build a plane before so this one would be very challenging for me, and i get excited thinking about it. =) i’ve done a little bit of research for the mini talon build and this are the specs that i have came up with:

  • sunnysky 2216 1250kv
  • 9x5 to 9x6 props for 3s, or 8x5 to 8x6 for 4s batt
  • 3s or 4s lipo 5200-8000mah
  • 30-40amp esc
  • video transmitter (optional for FPV)
  • pixhawk1

for the vtol mod i will just follow the specifications you wrote in this thread. Would you be able to share your STL files for the fuselage mount and the motor mount? And at what KV are the motors for the quad? Thank you very for sharing your awesome build too! learned a lot already!

@Hugues
hi Hugues, thanks also for sharing. liked and subscribed. =)

Hi Paul
Hey, I think you are in luck! We’re actually in the process of completing the build documentation that will include all the STL’s and part’s etc to replicate our “Mozzie” quadplane based on the Mini Talon.We’ll be writing a blog here on ardupilot as well as share the links to the doc website within the next week or so. I’ll post back here once we have.
Regards
Sam

2 Likes

Hi Jeff, any updates on this one? cheers

Hello Jeff: I followed your work and tempted to build your lovely Mozzie, all detailed build looks impressive and great long endurance in a little quadplane looks impressive :open_mouth: 
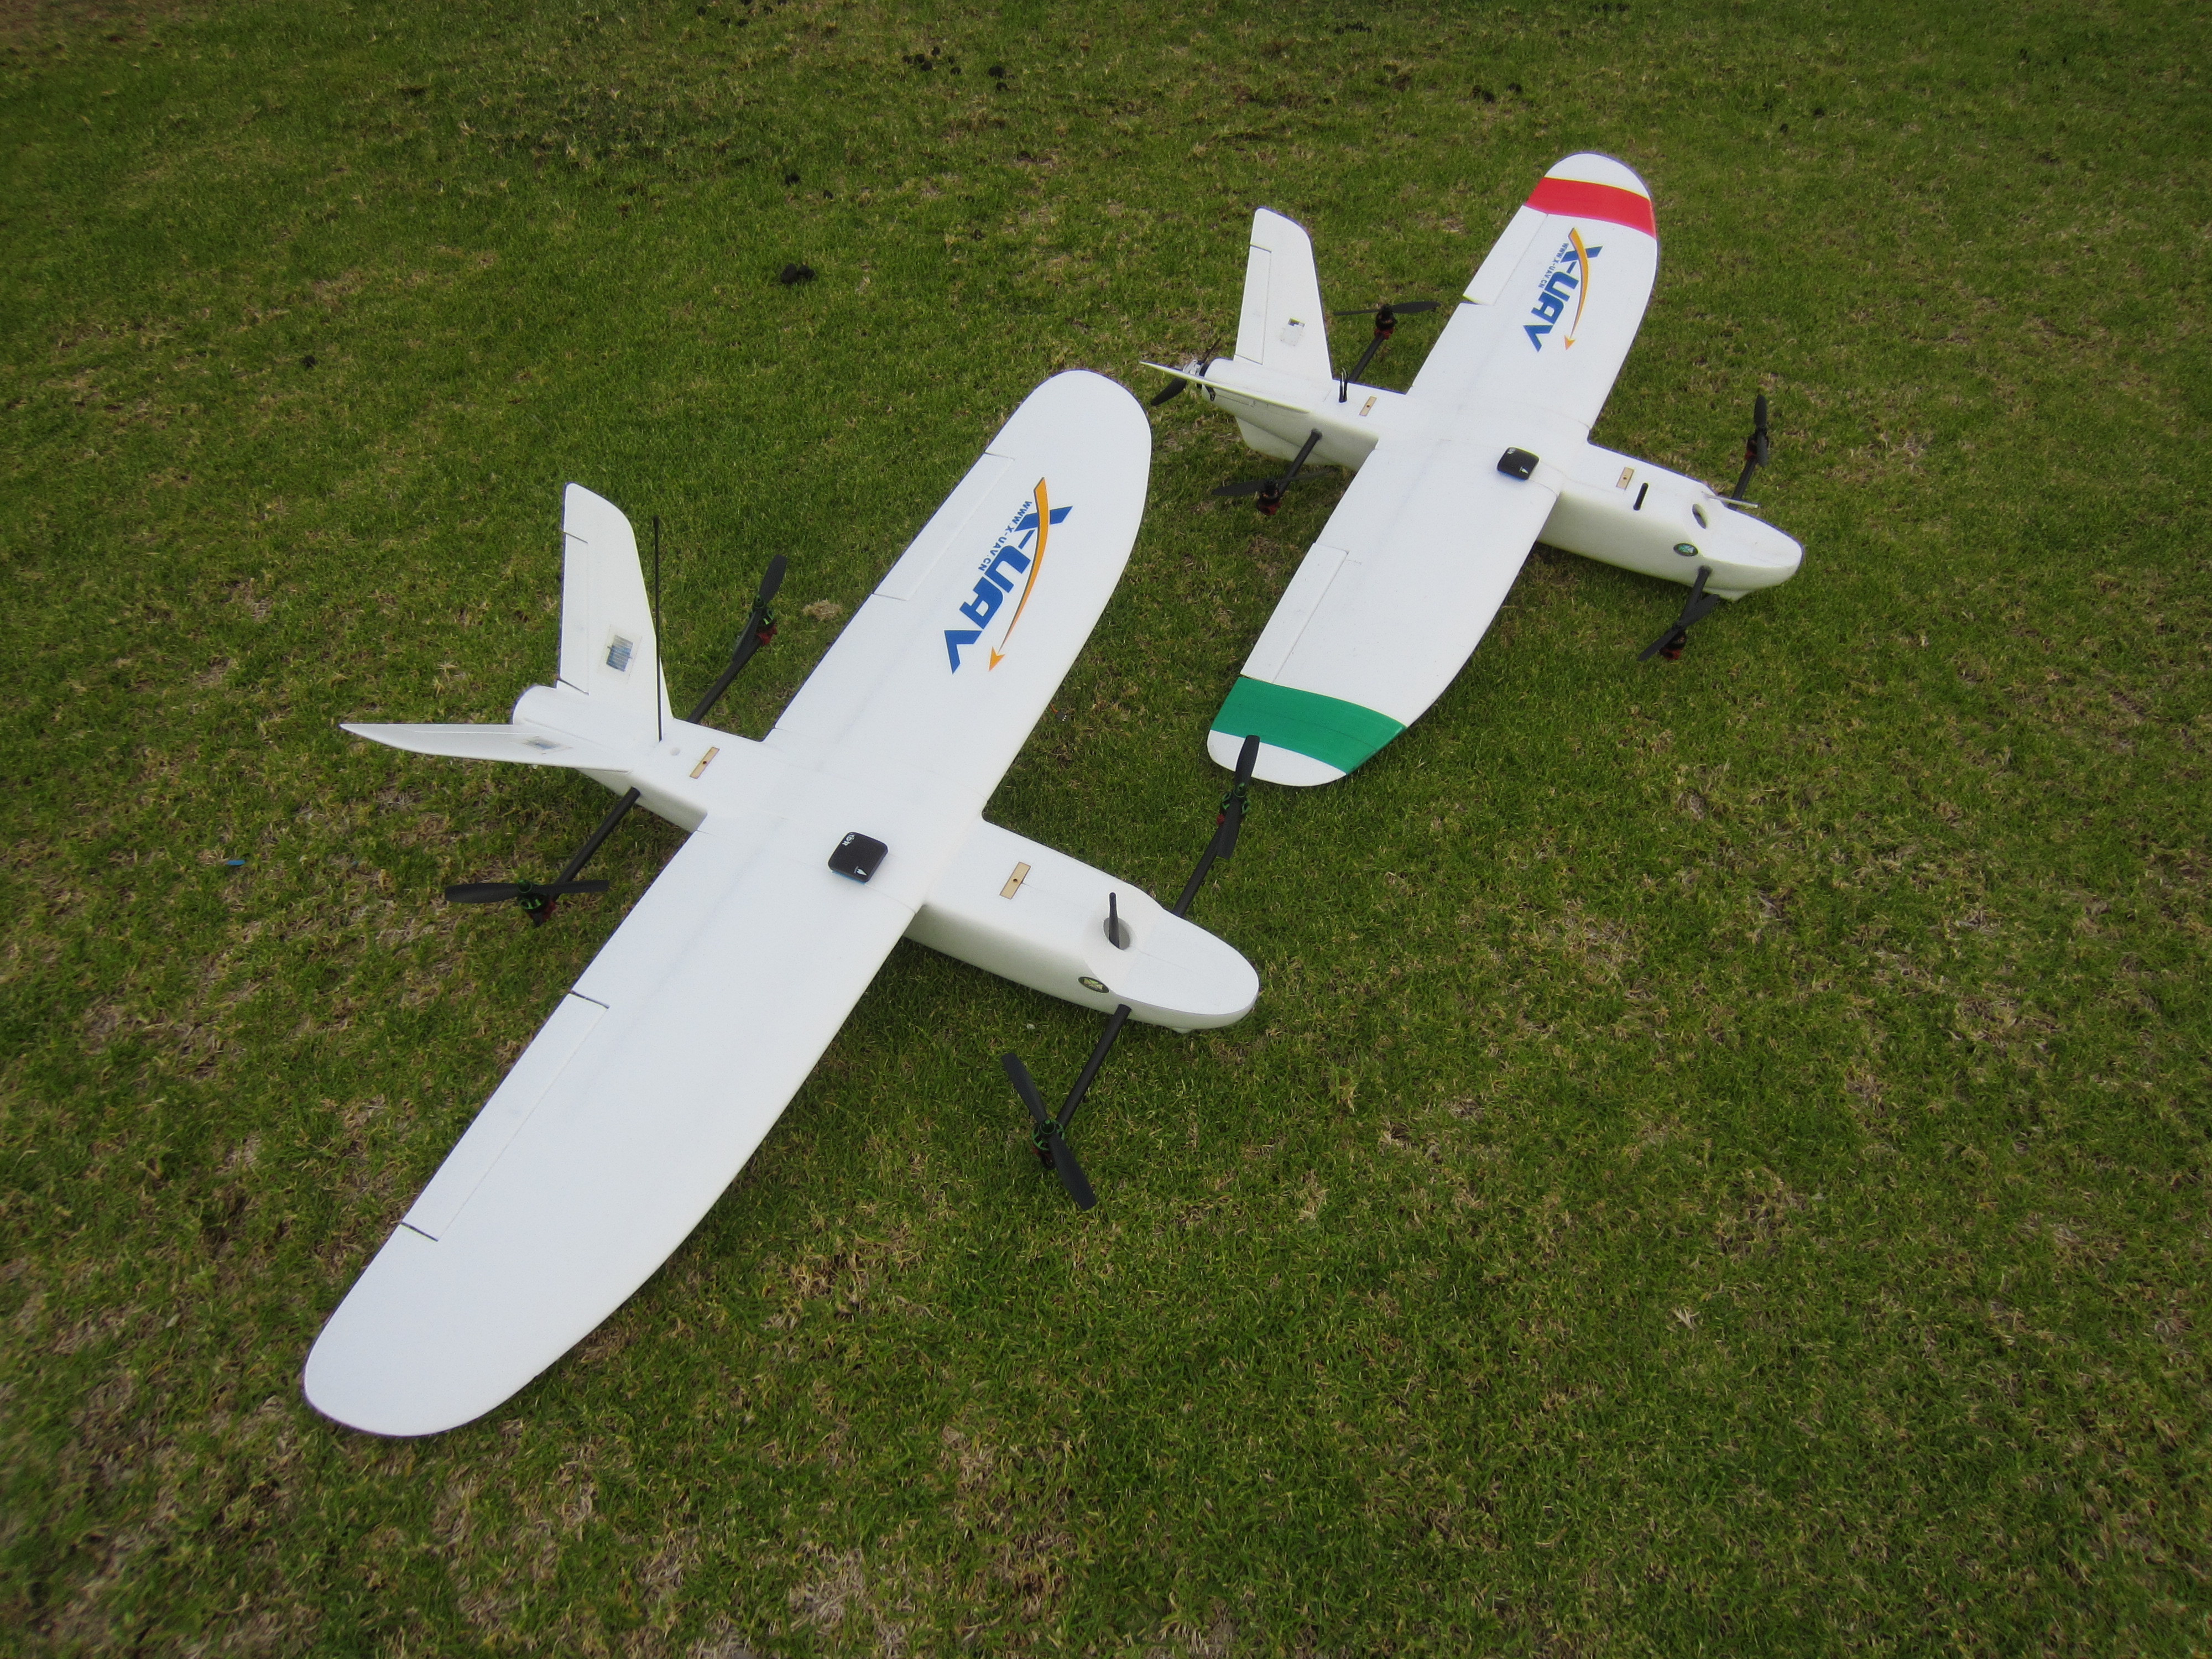
, watching your big Talon inspired me to convert my old Skywalker 1660 perhaps with detached quad to fly the two ways as another possibility,
Some questions:
Did you made a post about the big Talon with quad description and Plane weight?
I don´t understand well how We can help with the proyect in the instructions (my bad english) Is buying the mini Talon to Bangoog?, a donate button?.
Thank’s, love your work :smiley:

Hi Cala!
It’s been a while that I’ve been here. The only talon we have converted is the mini talon, as that had the best performance to weight, and we didn’t need anything large for our imaging setup (piW and Picam). The instructions can be found here: http://mozzie.readthedocs.io/en/latest/Overview.html

In regards to supporting the further development of the Mozzie and other yet to be released projects, you can either help improve the documentation and build by doing a pull request for that information to be included via git or simply purchase items from the shopping list using the links provided, if it is cost effective for you to buy and ship it that way. Any purchase you make via the links will give us affiliate points that will reduce the cost of our next purchase there, without costing you anything extra. (We are essentially getting paid a commission for advertising their products)
Regards Sam

1 Like

Thank´s again. Is my case too, I´m only carry one or two mobius and fpv (that loose lot of weight latest years with racing drones) and love long endurance but little vehicles, Mozzie looks perfect :smiley: ; 2nd in my wishlist, I never use Rpi, but try to find Joe and learn to use it, but only at home :wink:

Hello Friends, please help me, the motor won’t start un Auto mode I reinstalled the firmware several times, more than two at least and the failure continues, the problem is not corrected.

I had less problems with my previous auto pilot, since I put the pixhawk cube I have many problems.

Have you checked the settings of the parameters for an auto take off ?:
For a hand launch, mine have been set like this:
•TKOFF_THR_MINACC was set pretty low to 5
•TKOFF_THR_DELAY was set to zero because it is a front propelled fixed wing. Don’t do this with a pusher airplane or you might shred your hands !
•TKOFF_THR_MINSPD was set to zero

Also did you arm the autopilot with the hardware arming button before launching ?