The current on this setup is so low that it continues to amaze me! Any more speed and this wing is flying like a rocket! I think the power system will work well with the added weight and drag of the quad assembly. Time will tell…
Very good Sir, thanks to share with us . . .
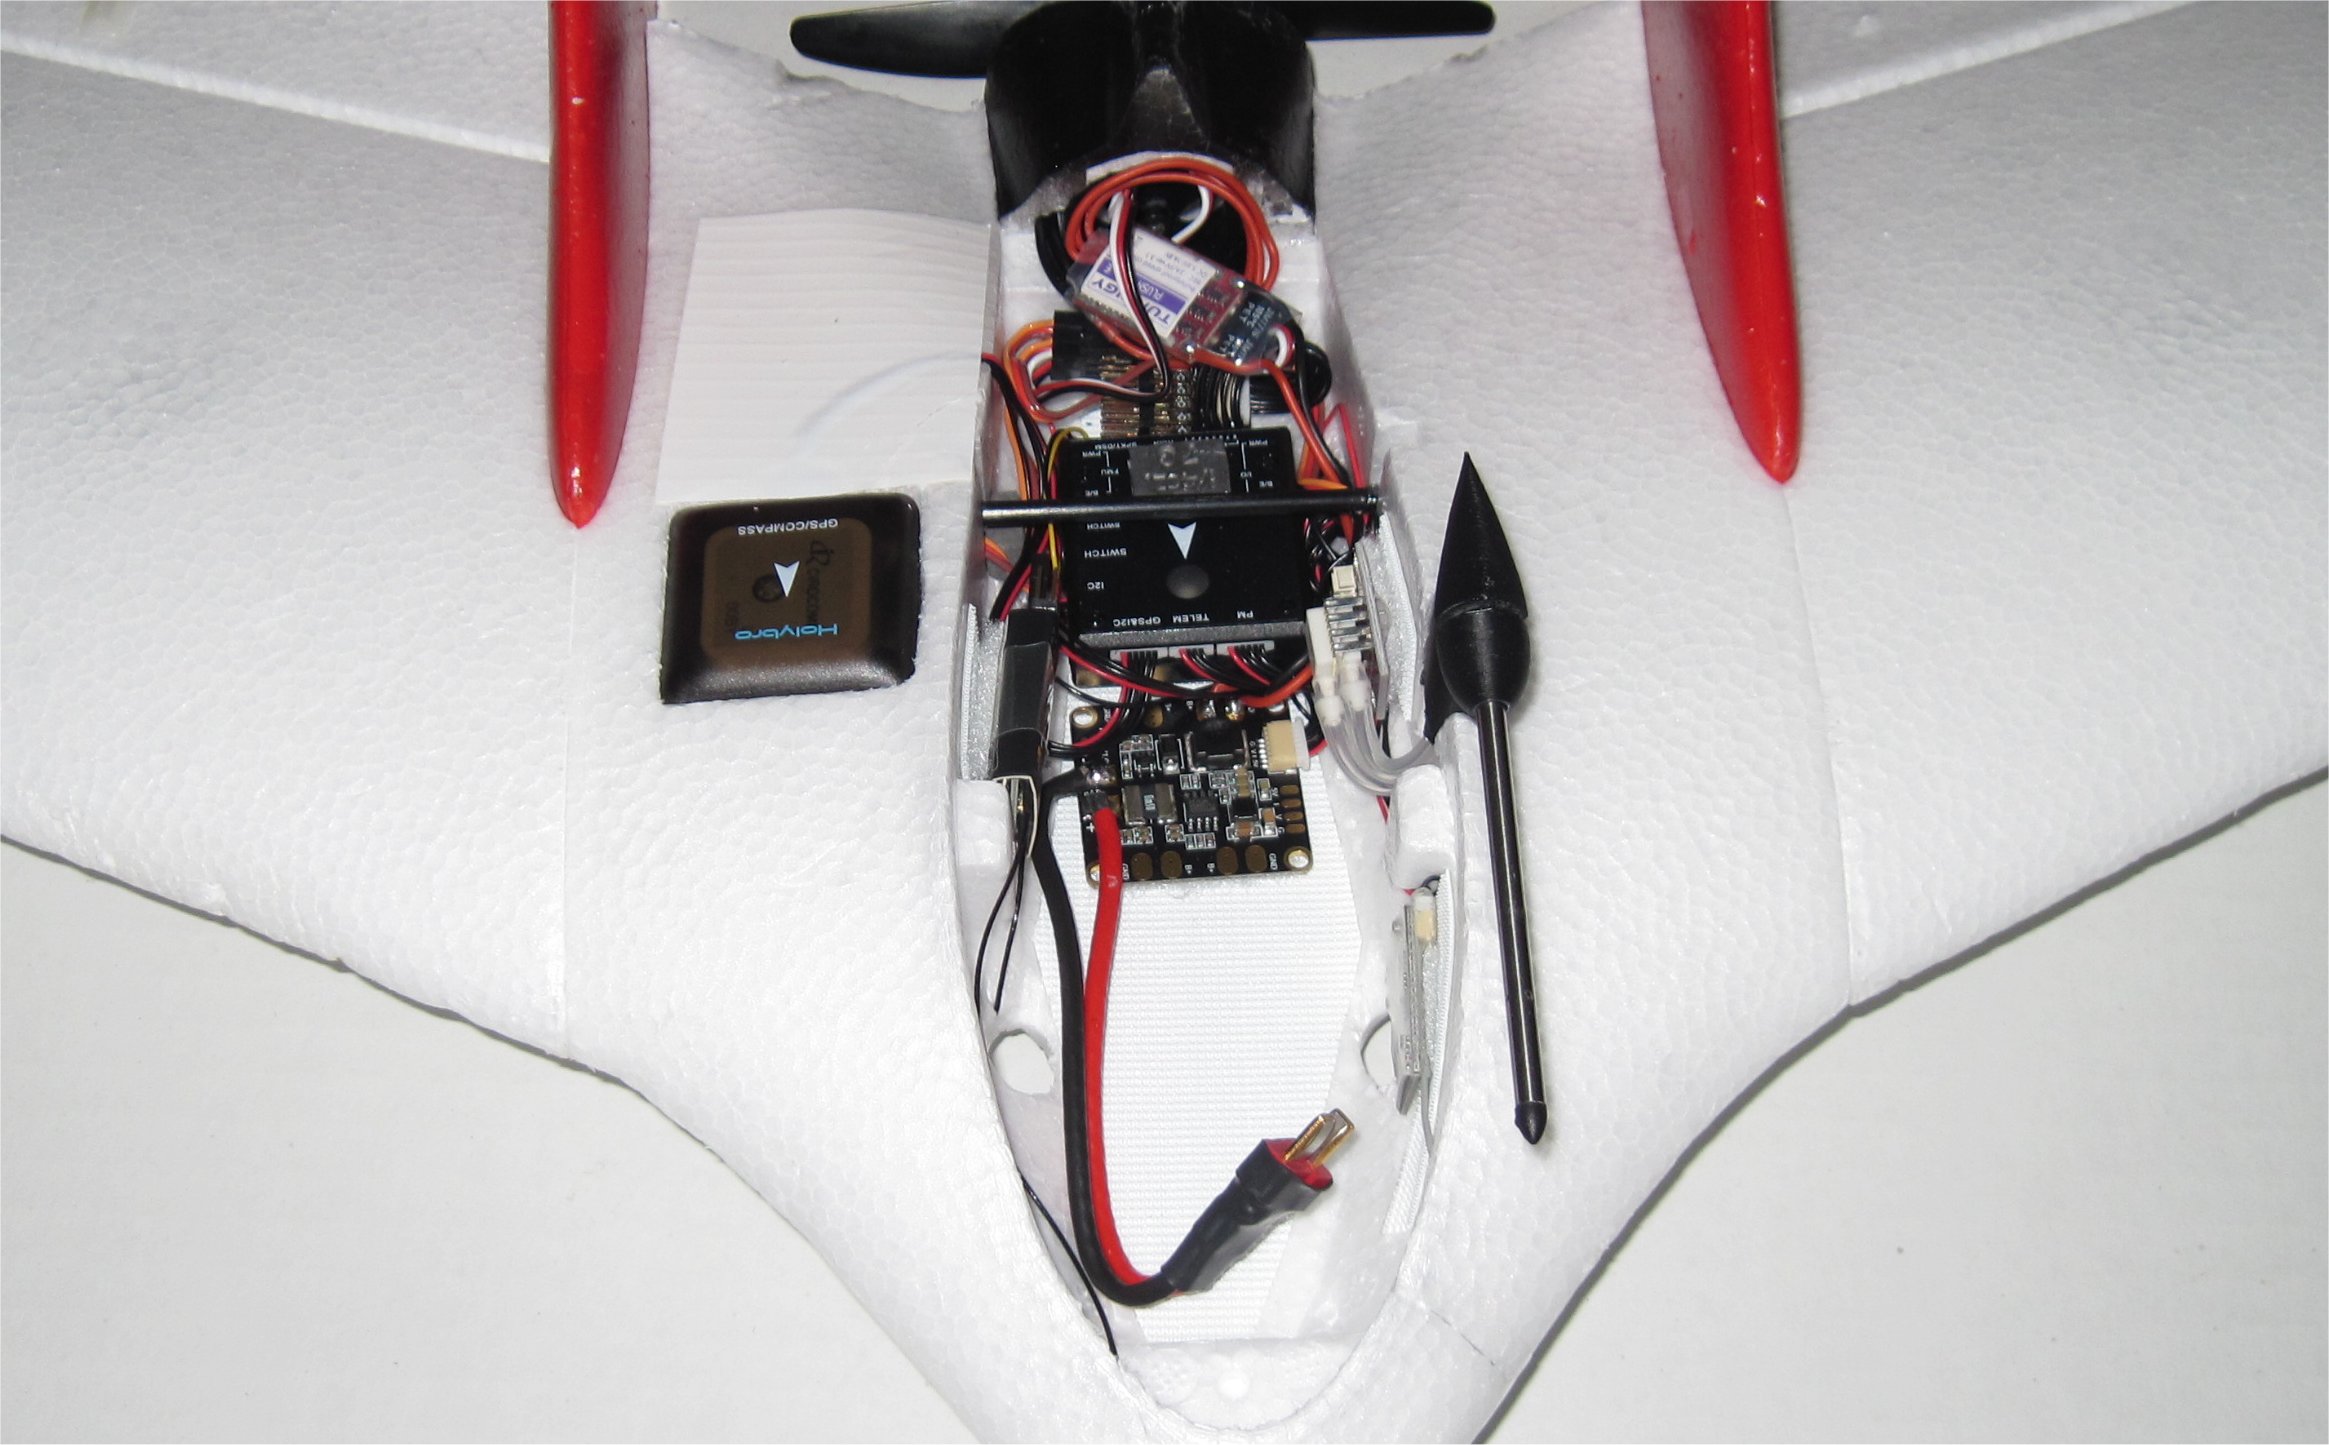
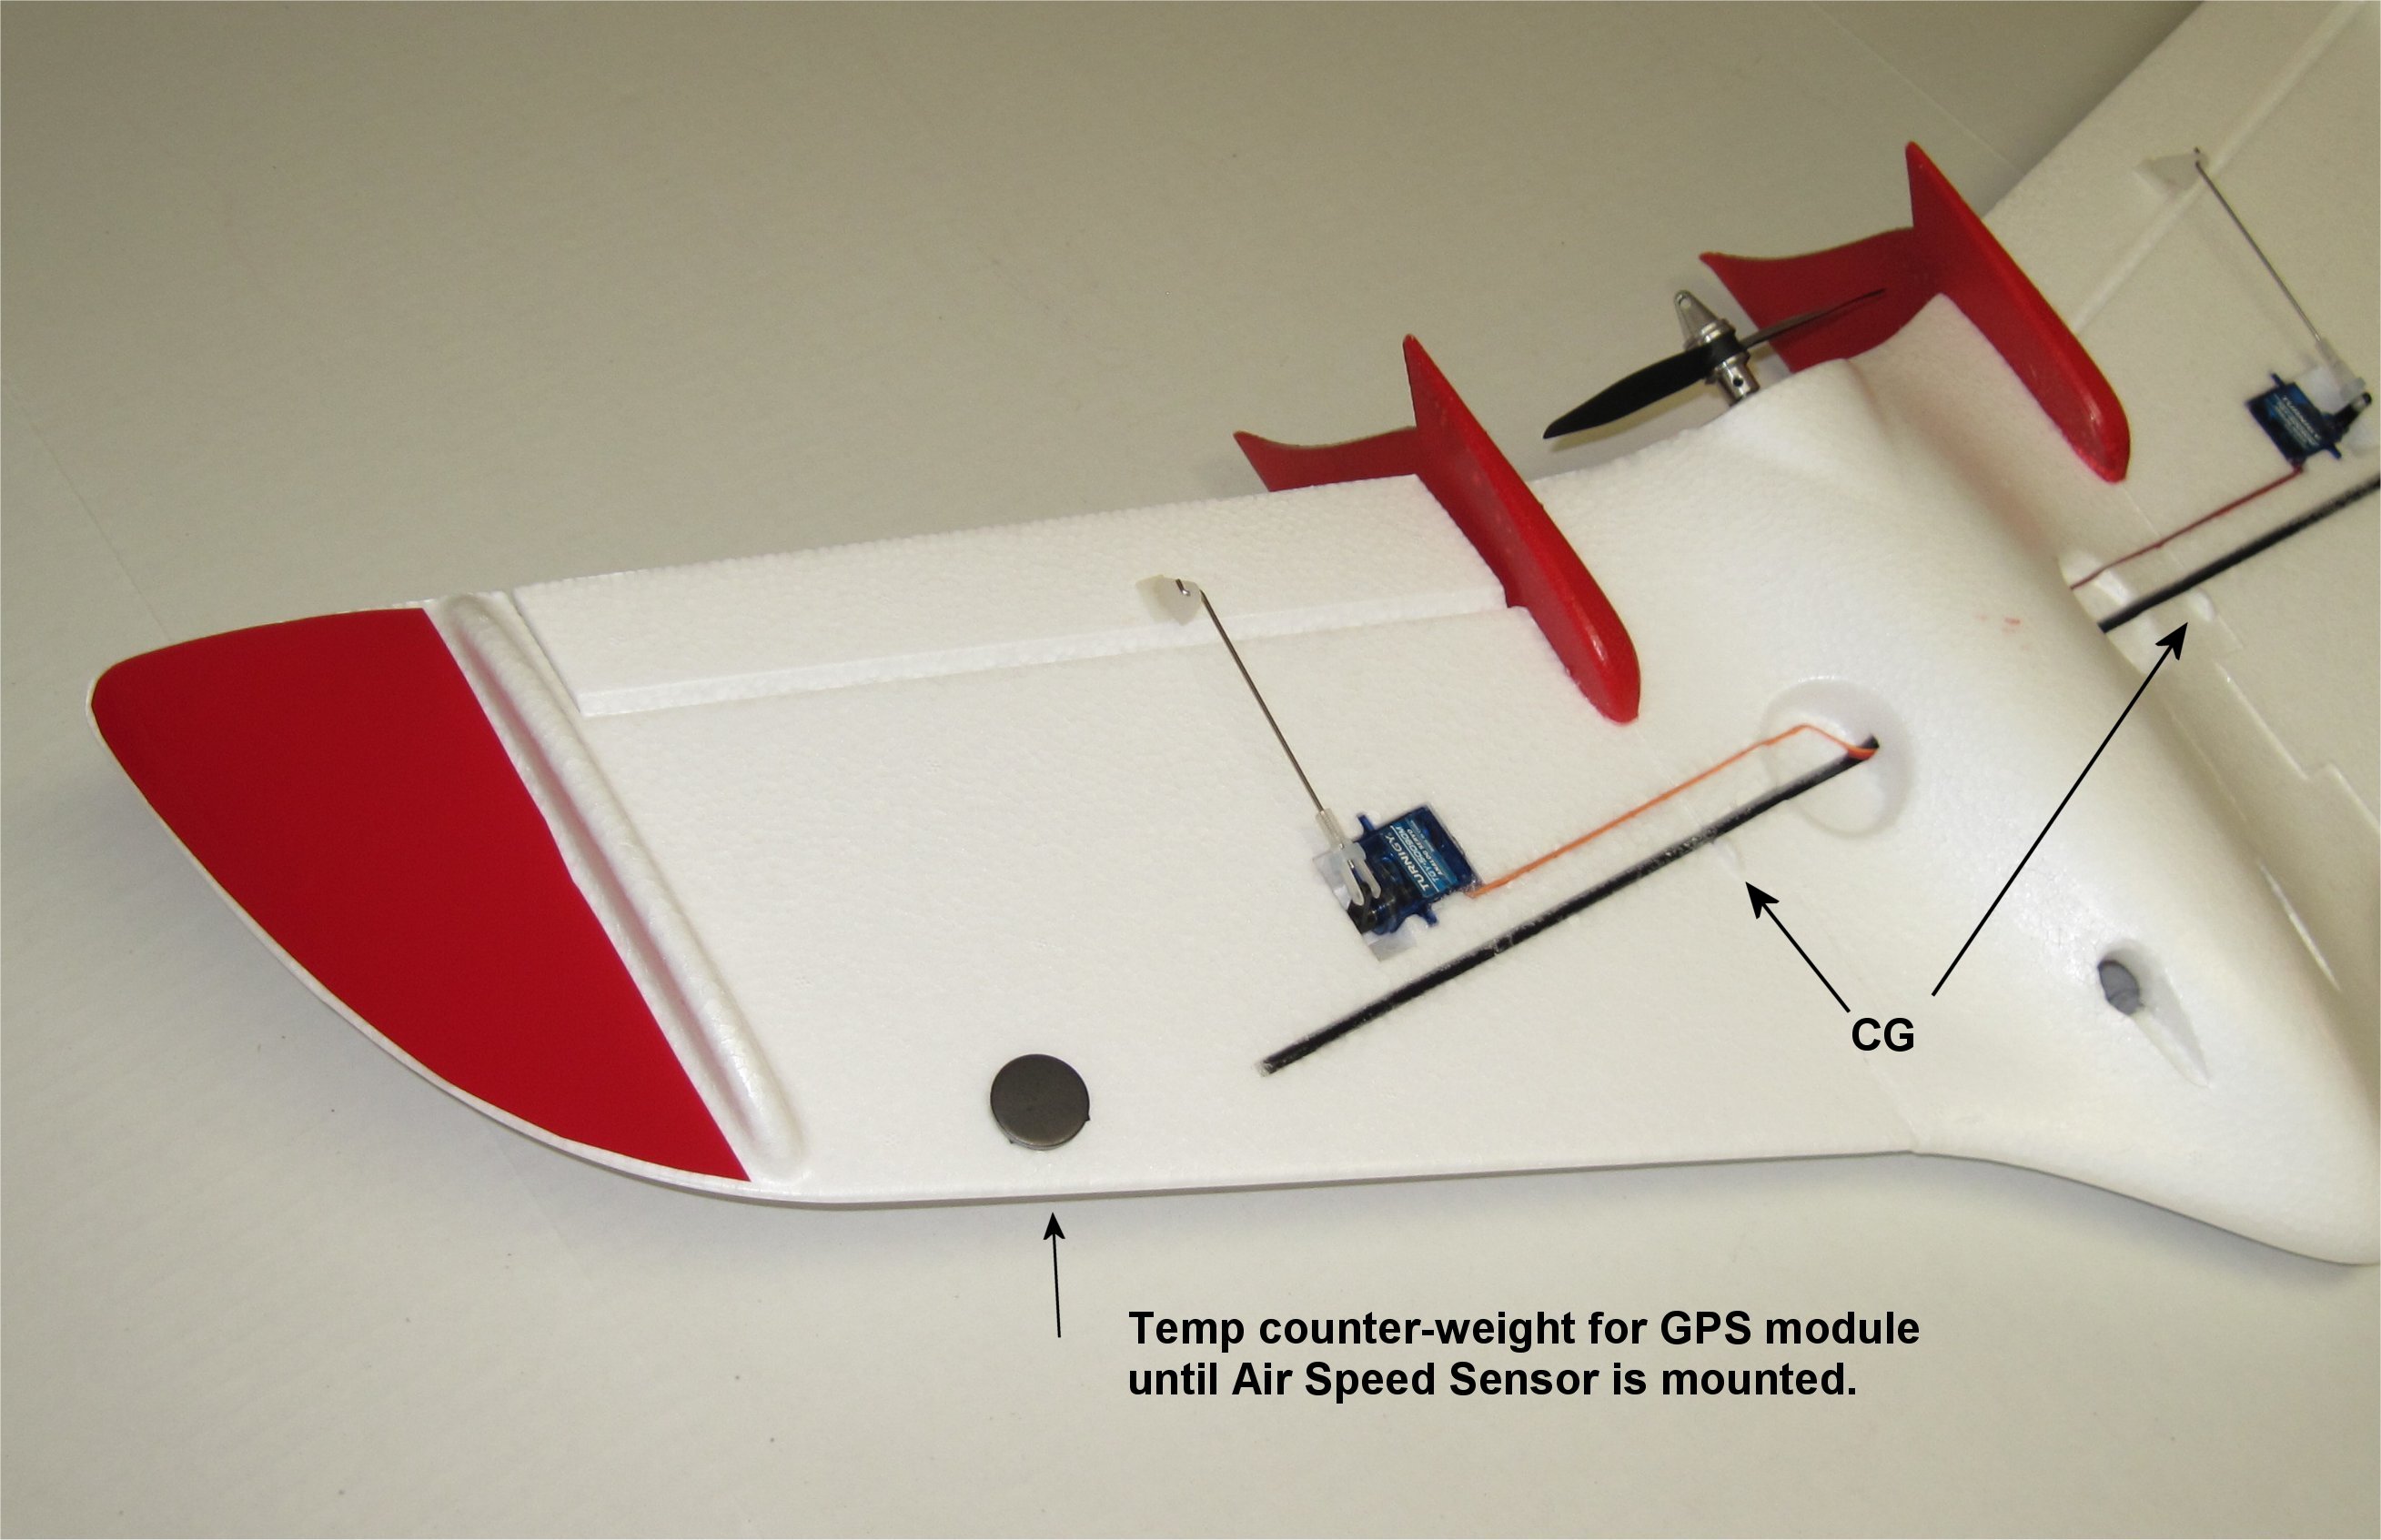
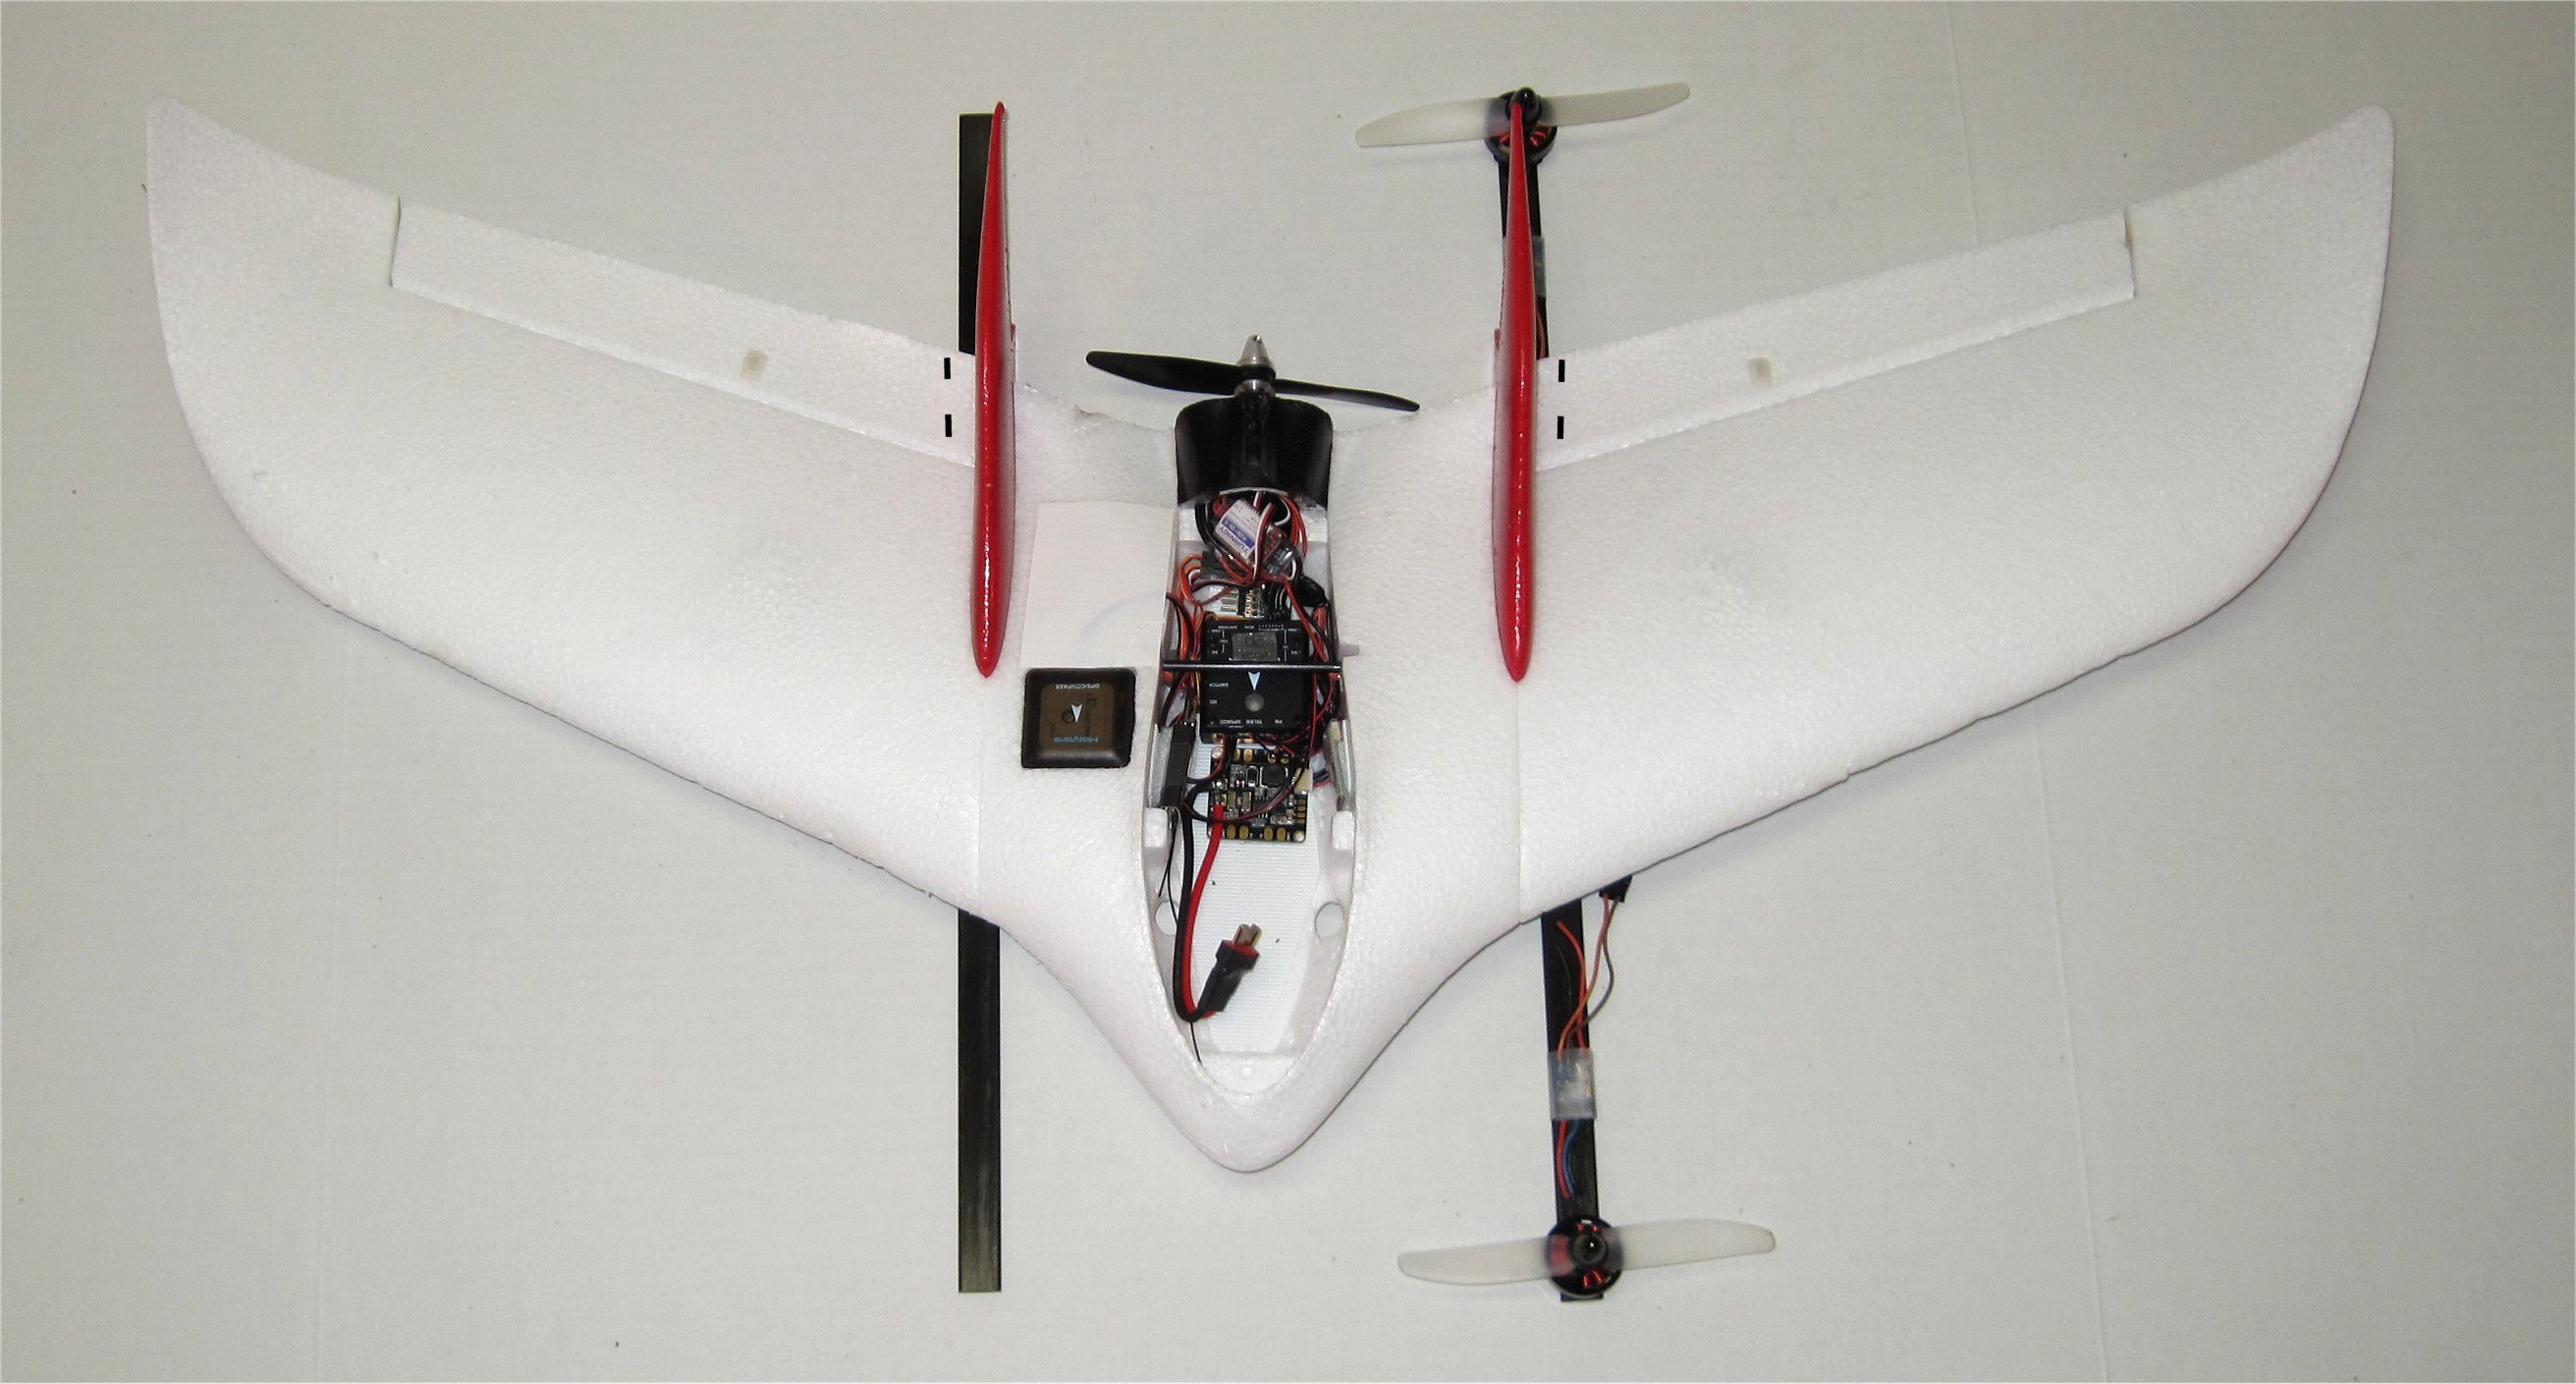
I installed my Digital Air Speed Sensor by first moving my mini Telemetry module forward and then putting the sensor board in its place. It was the first cable I needed to make because the two Molex connectors were different sizes. Since the cable could plug into the PixFalcon, I ended up soldering the other end to the I2C pads that are provided on the digital AS sensor board. The PixFalcon has a second I2C port connector so you don’t need to share with the GPS/Compass cable or add the I2C hub.
The Omnimac 3DR Pitot Tube Mount was not designed for my particular tube so I needed to modify both the Pitot tube and cover to make it fit. A little fun with the Dremel tool and some sandpaper was needed. This required cutting the tube ends shorter and sanding the plastic hub smaller to fit inside the 3D printed mount.

Mr. Greg Sir,
What was cg in percentage at your last low current flight test .
I really like this compact build. Looking forward to your quad conversion 
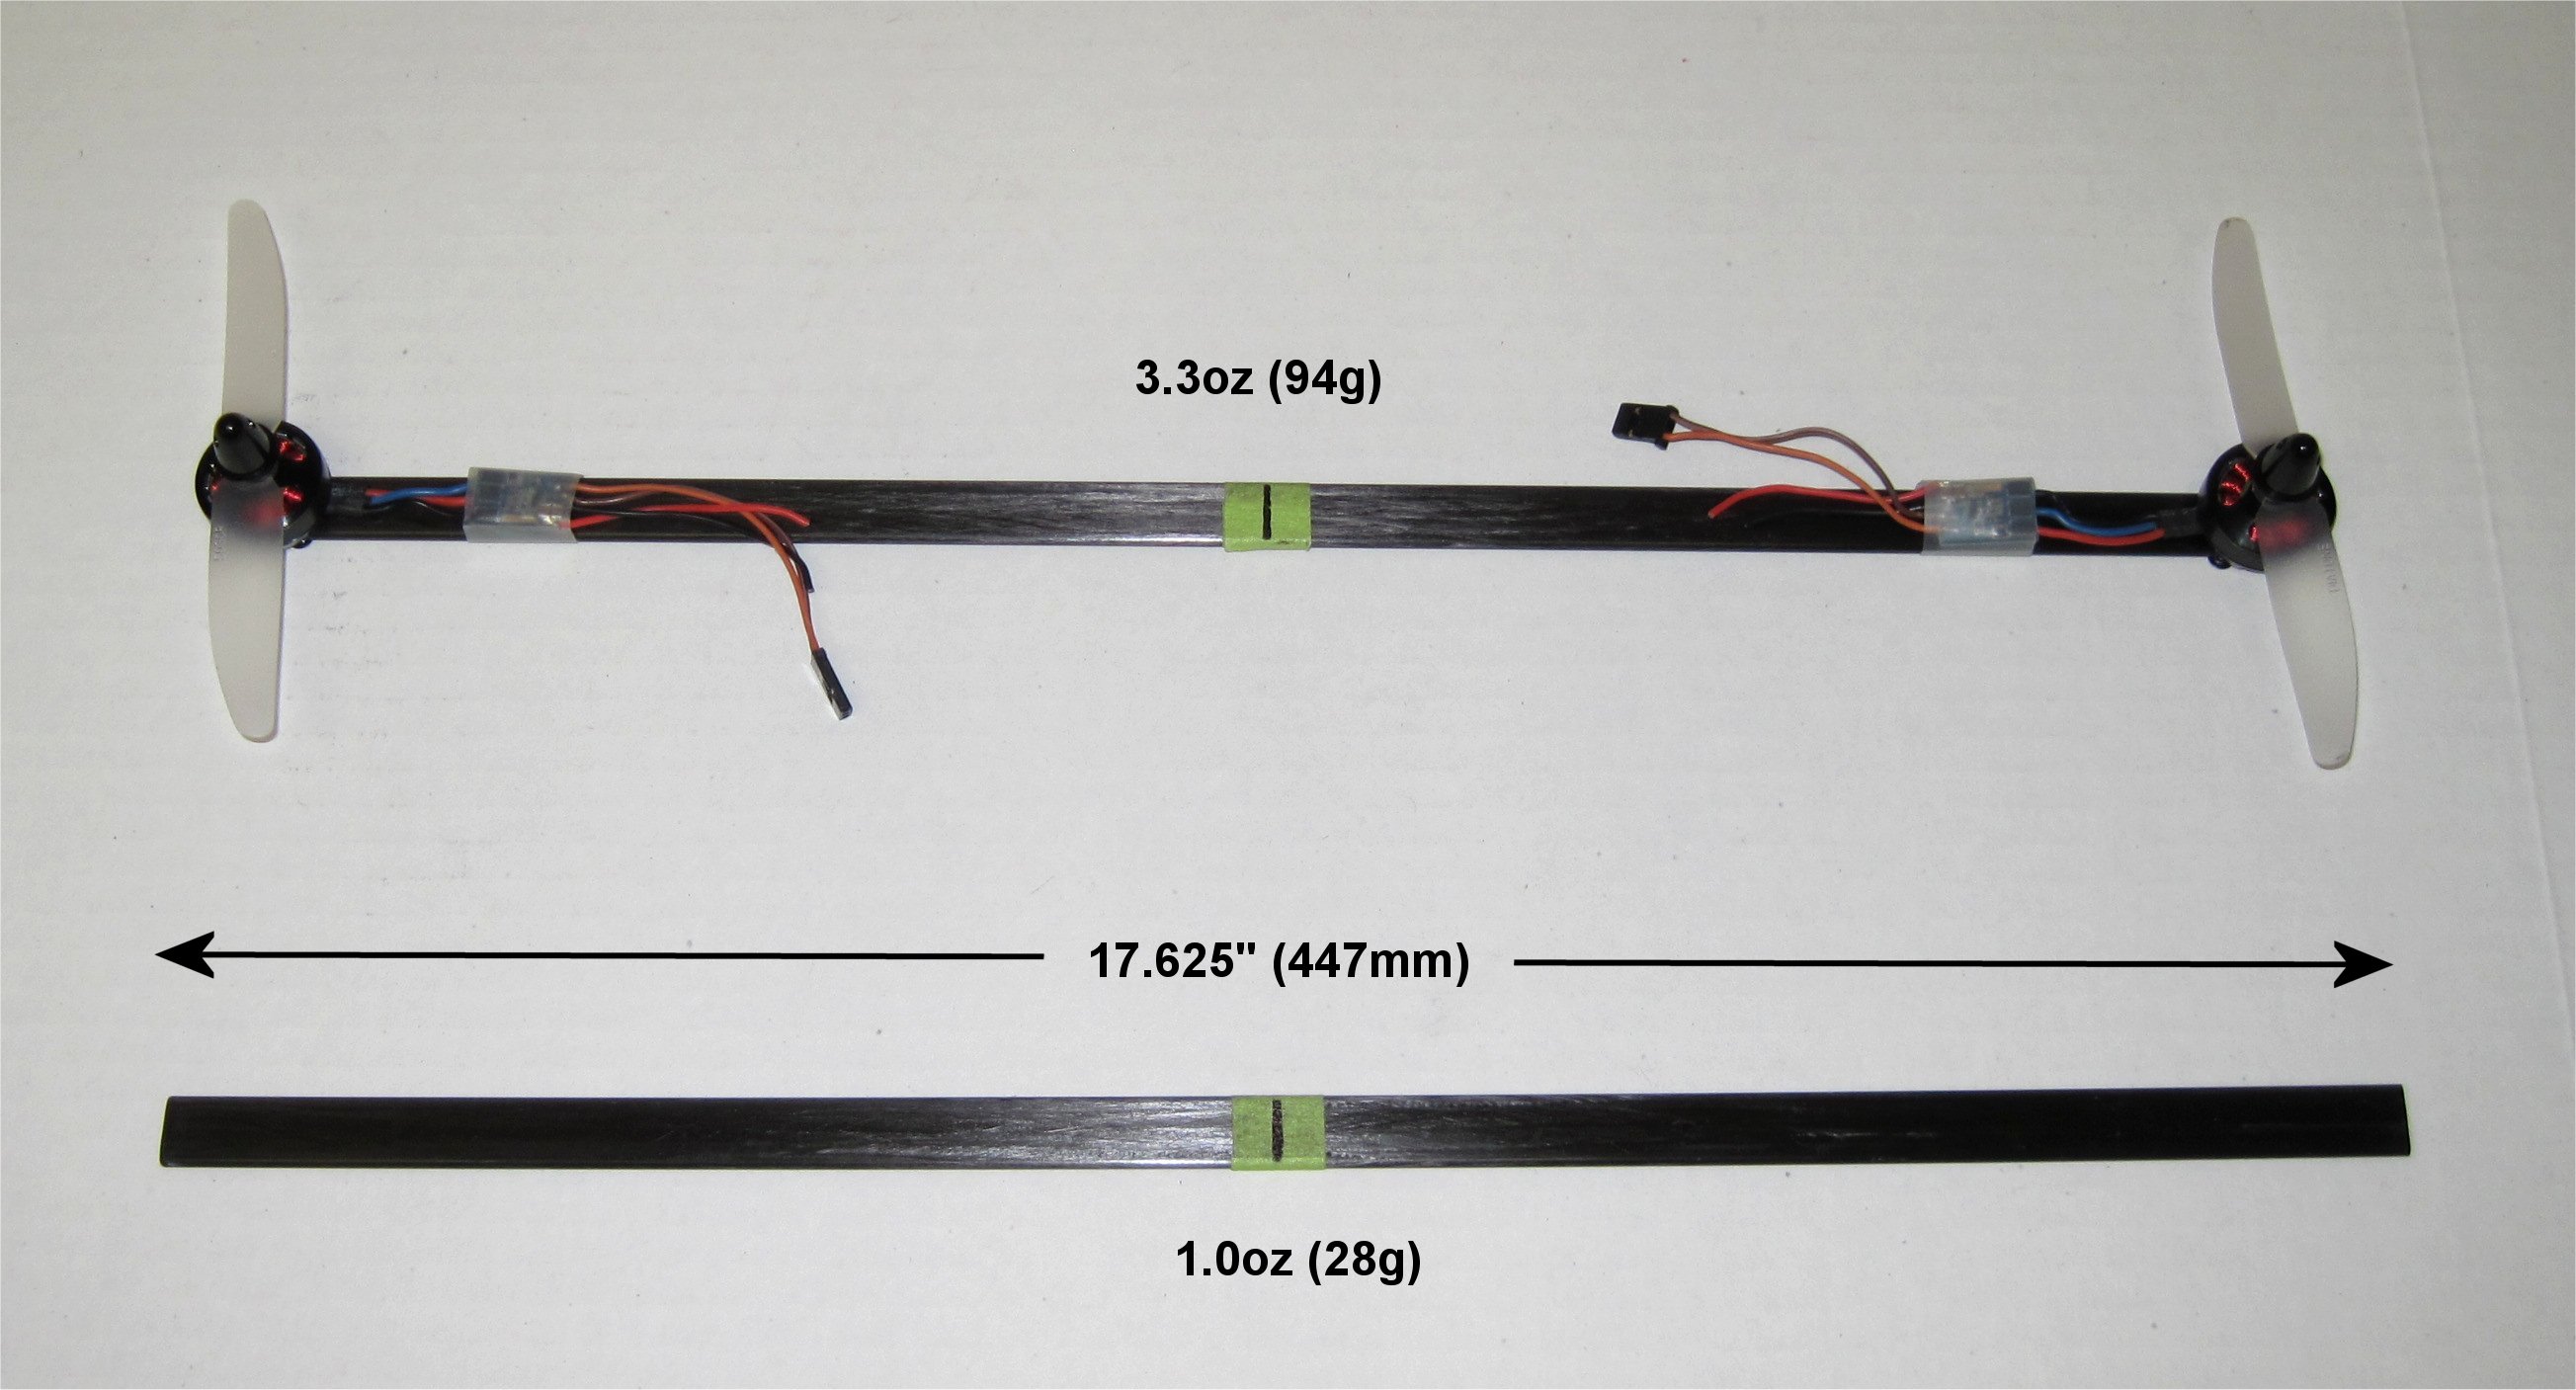
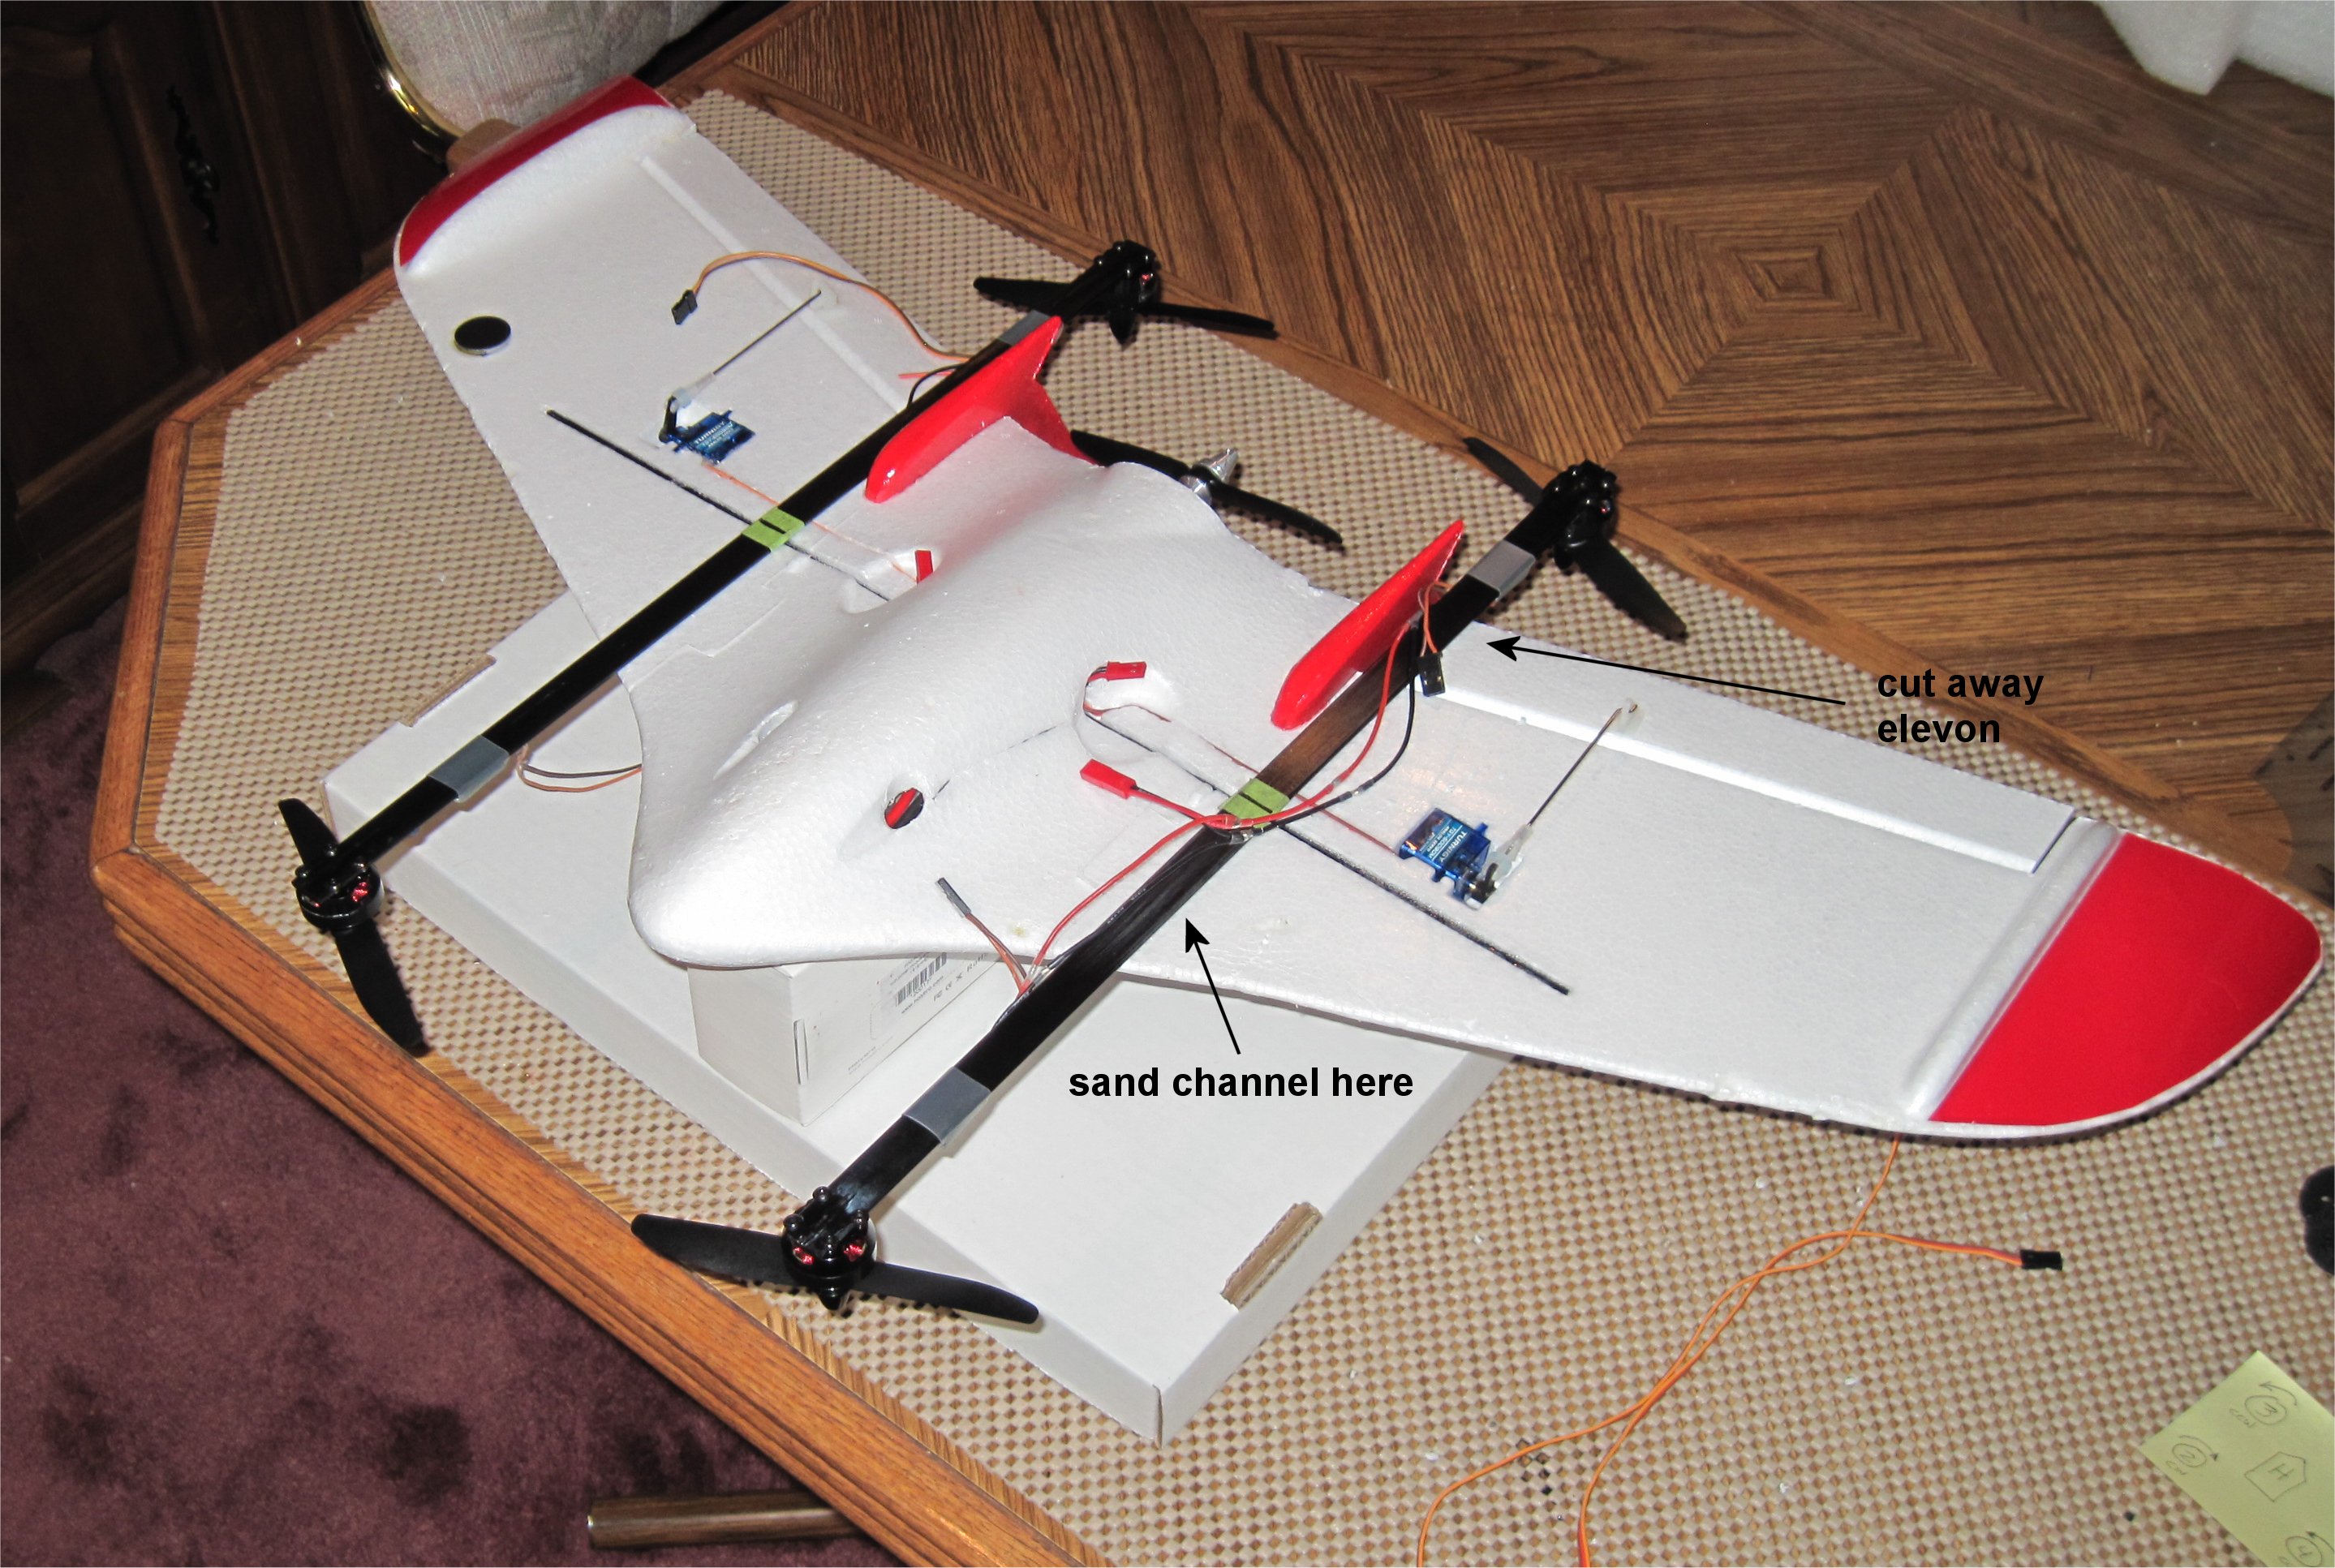
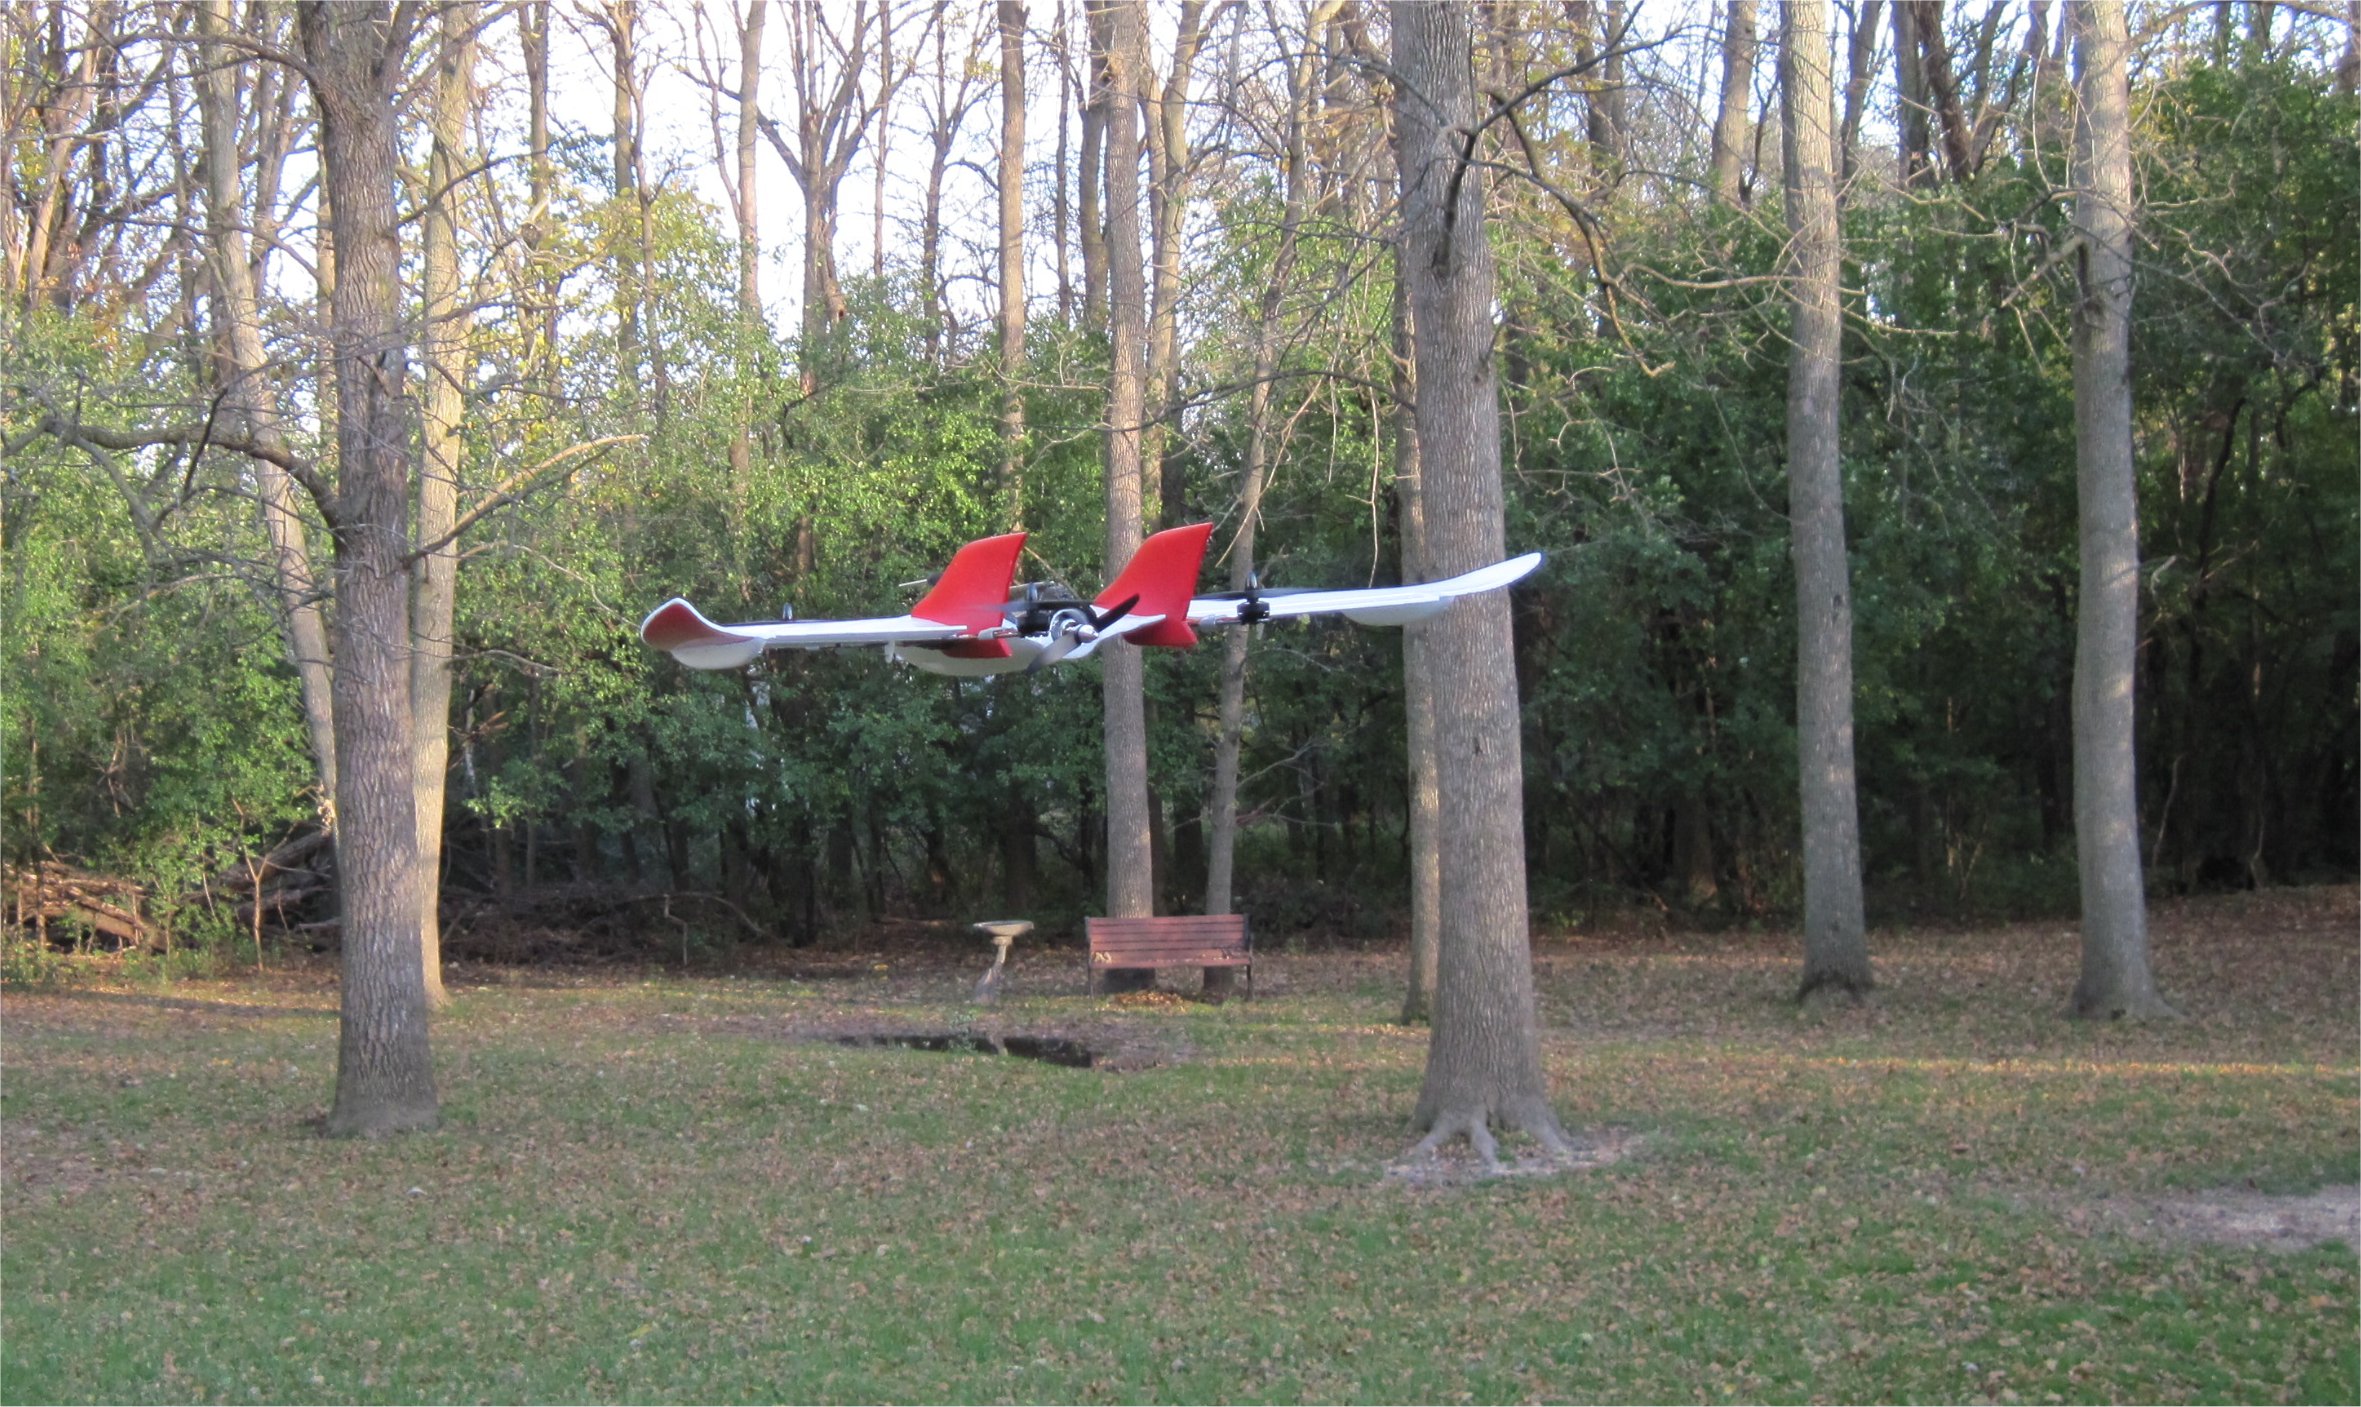
I finished mounting the motors and ESCs on one of the carbon flat rods after first cutting it the length. Shown below is the placement that I intend to use. A small inside section of the elevon will be cut free and help hold the assembly using Foam-Tac. It should have little to no effect on the pitch or roll.
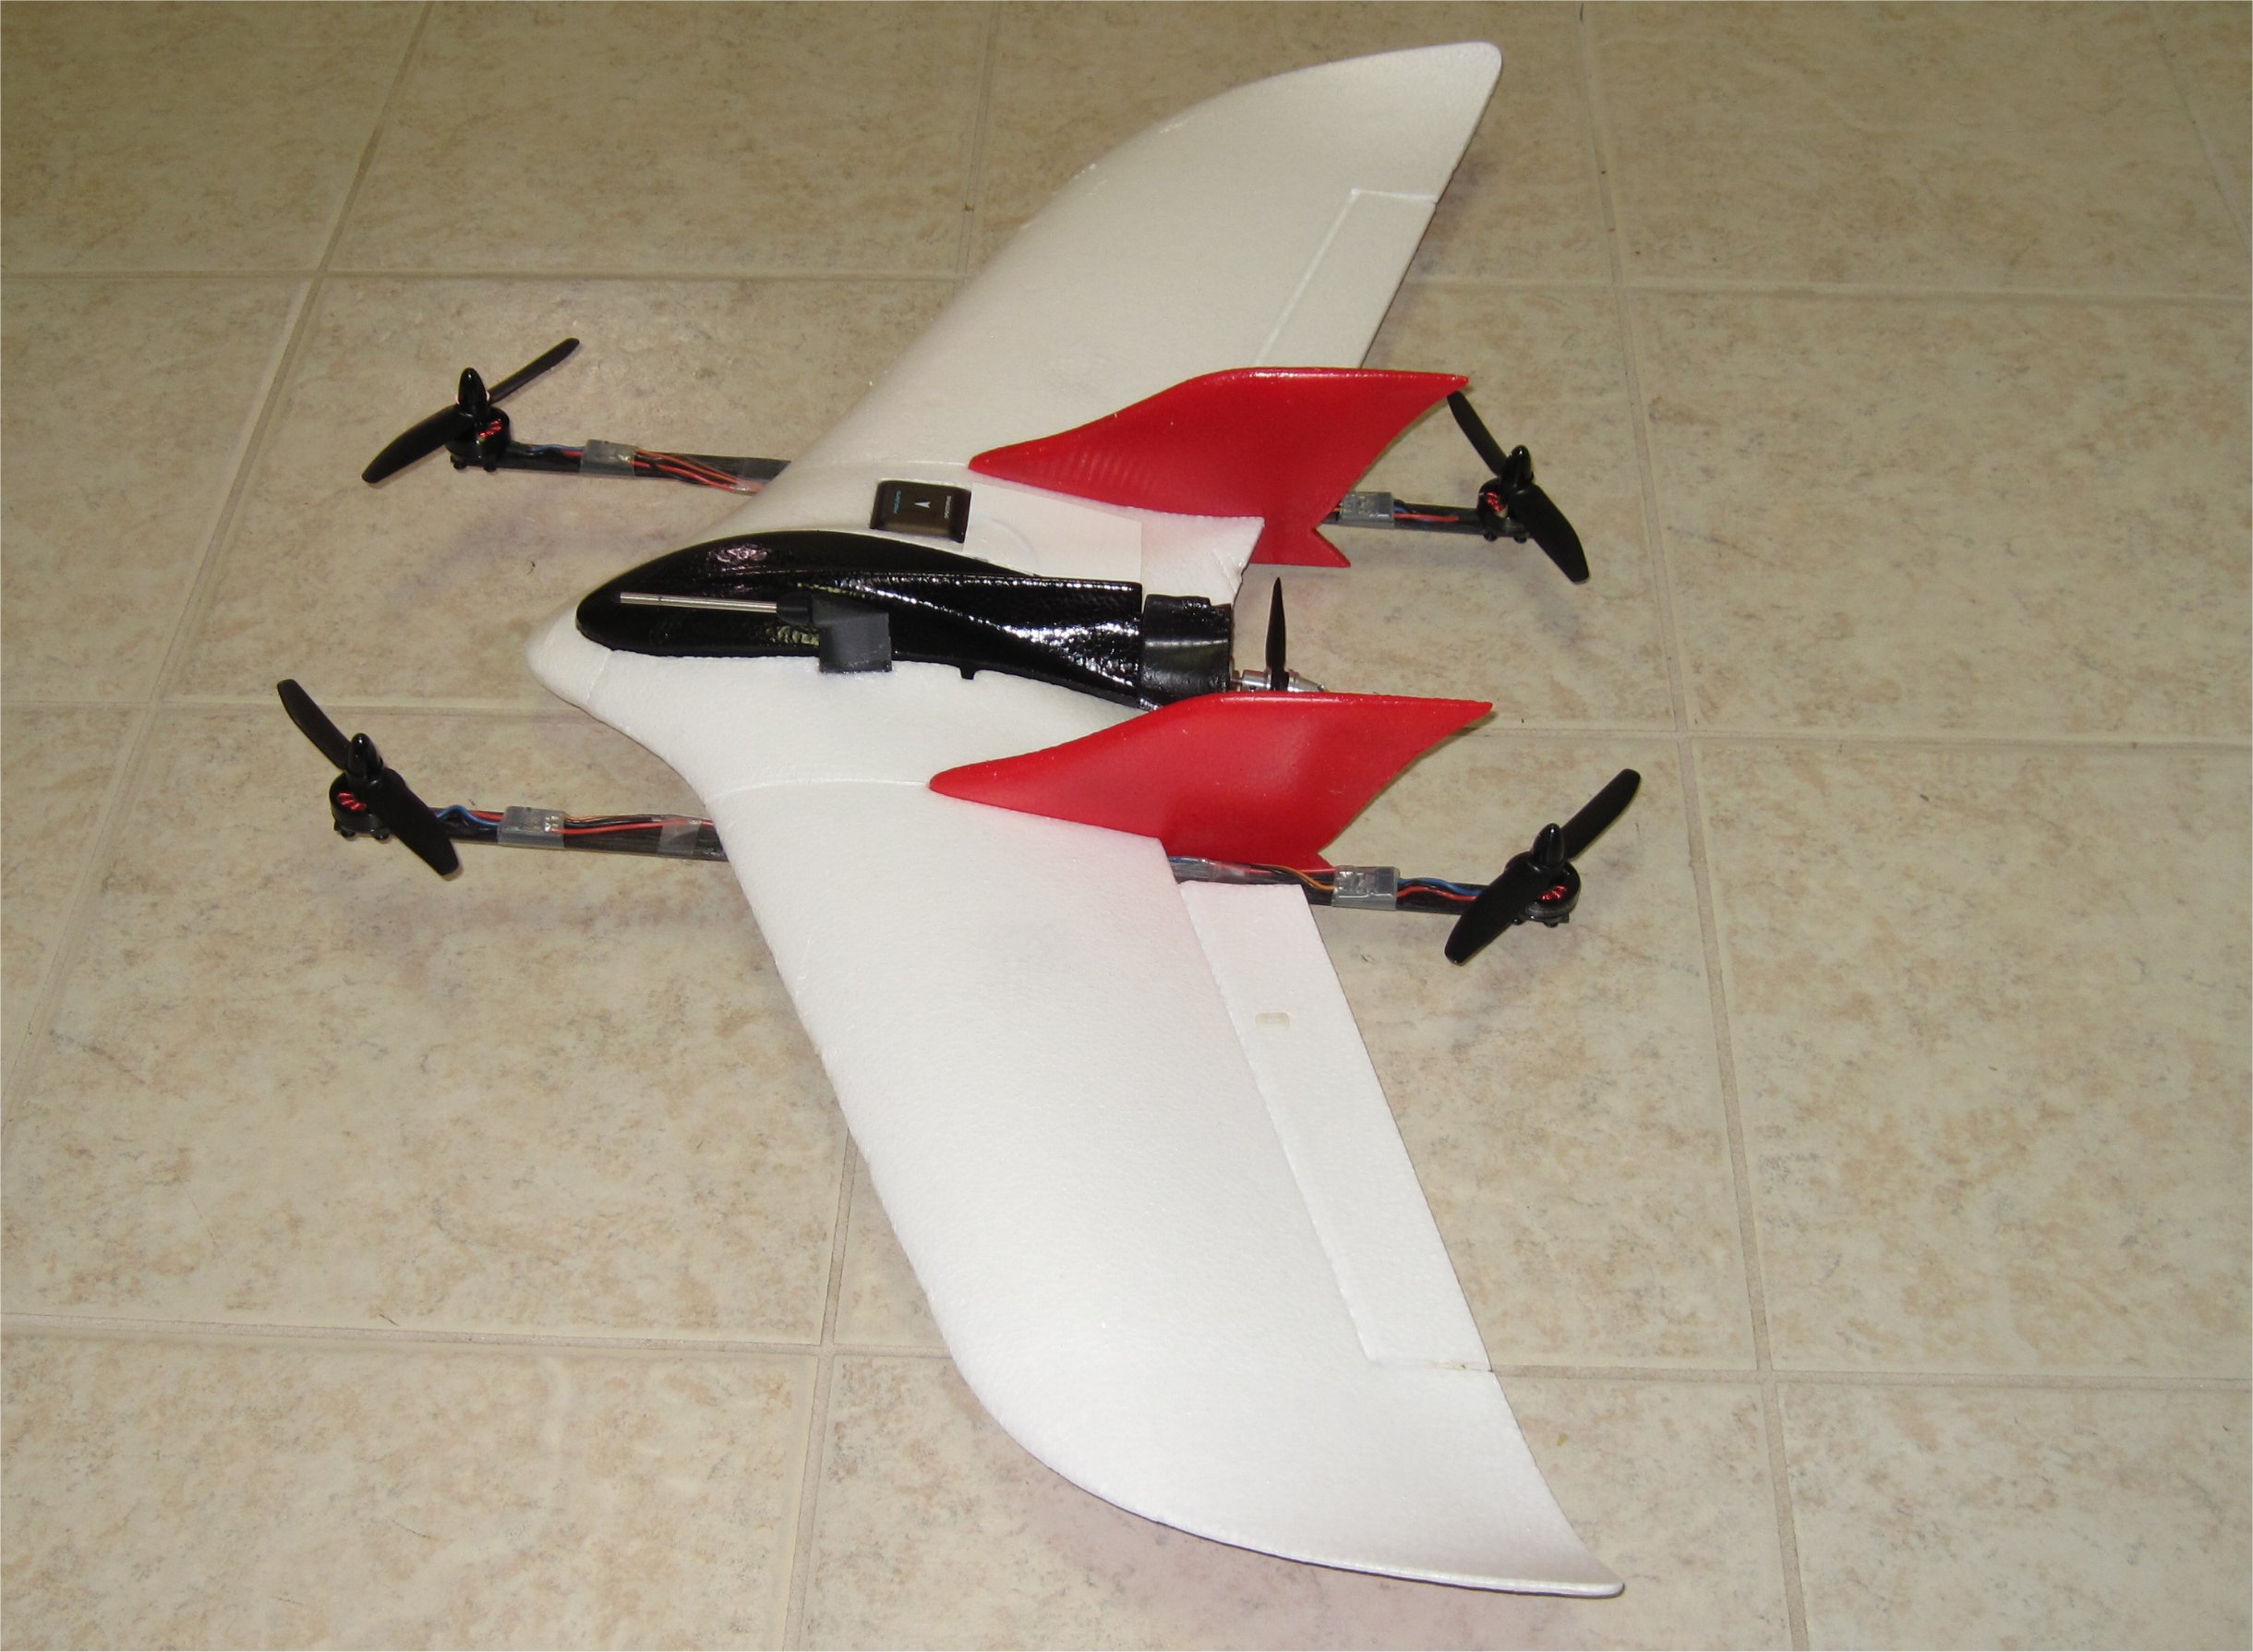
The Wing Z-84 is RTF without the quad assembly at 15oz using the 3s 1300mAh Lipo pack. With the two quad bars, the additional weight is 6.6oz for a total QuadPlane weight of 21.6oz (612g). This was more than I expected so we’ll see if the quad motors can lift the wing properly with some power to spare.
I will work on my wiring harness next before actually gluing the flat carbon rods to the body. I may also have some fun testing my new AS sensor in CRUISE mode if the weather decides to get better. Our cold and windy pre-winter season has arrived…a.k.a. the Building Season.
2 Likes
Hello Sir, waiting for your update . . . . Have you done copter test . . . Hope you will share your experience of problems and solution with this new fram . . . Good luck
I finished my two quad booms and got one of the wire harnesses finished before taking photos. The Z-84 wing bottom is not perfectly flat so some sanding is needed to create a shallow channel near the leading edge. This allows the flat carbon rod to sit perfectly flat. I also cut away a section of the elevons.
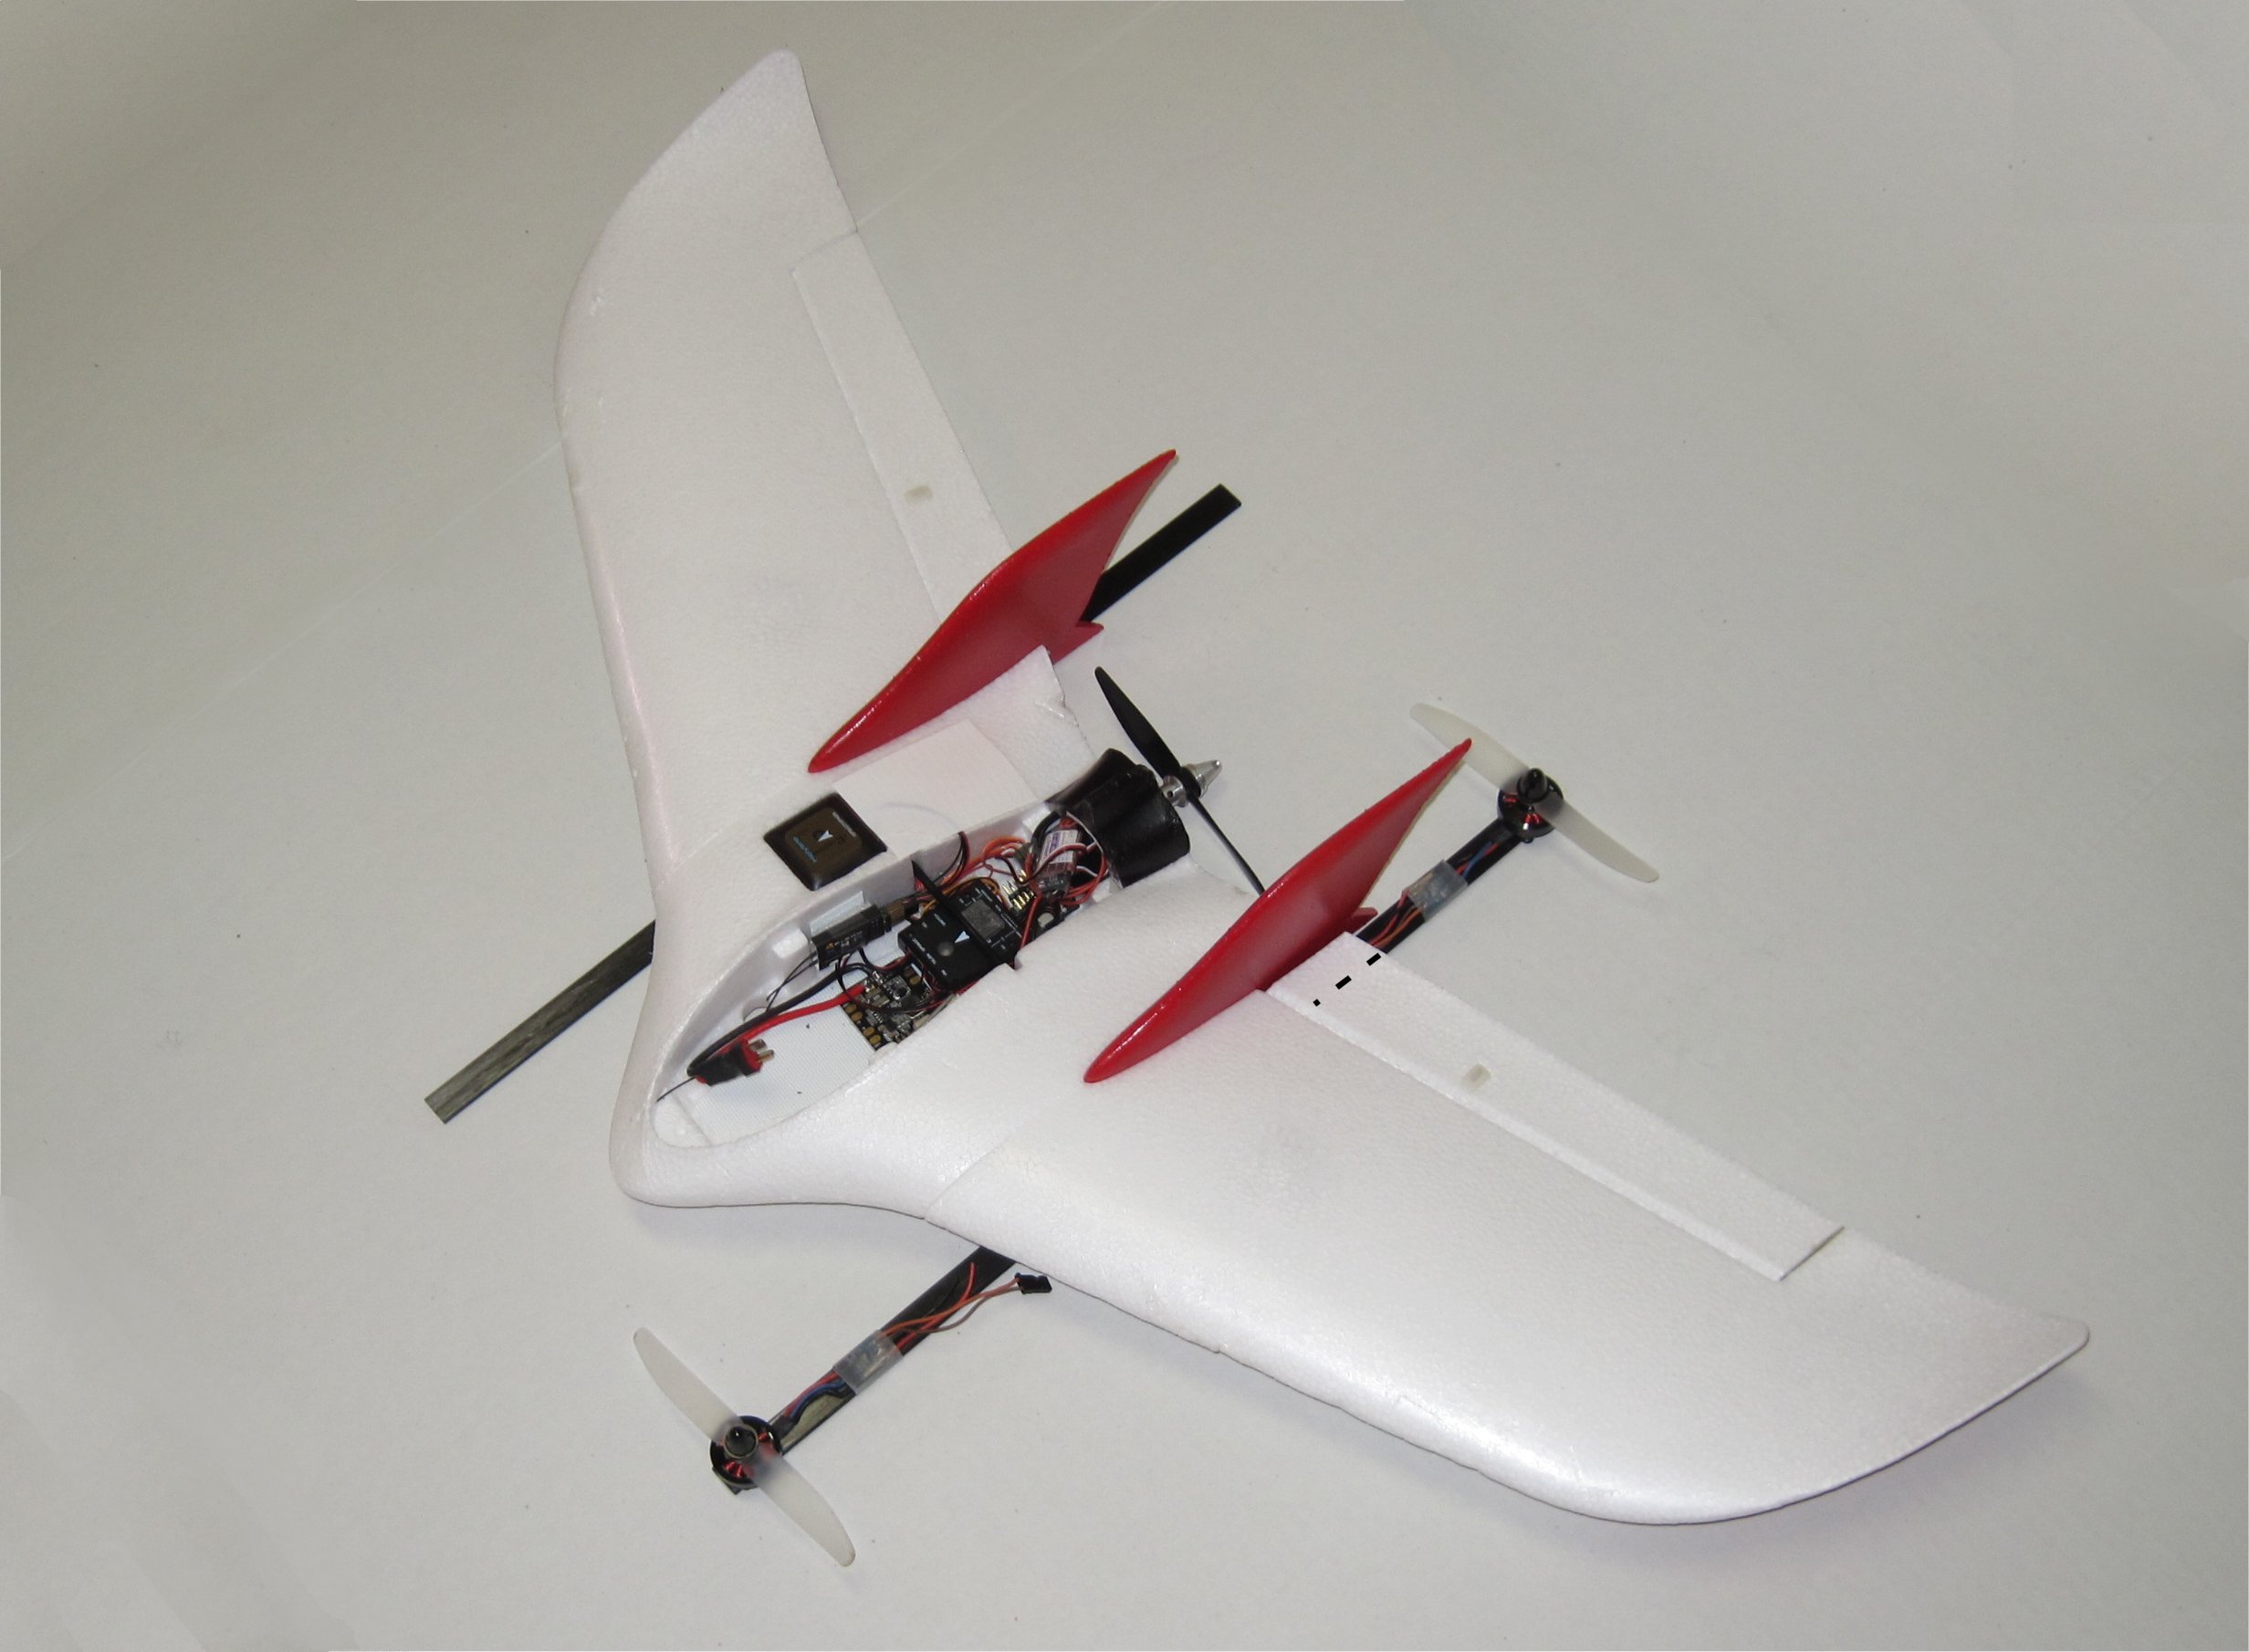
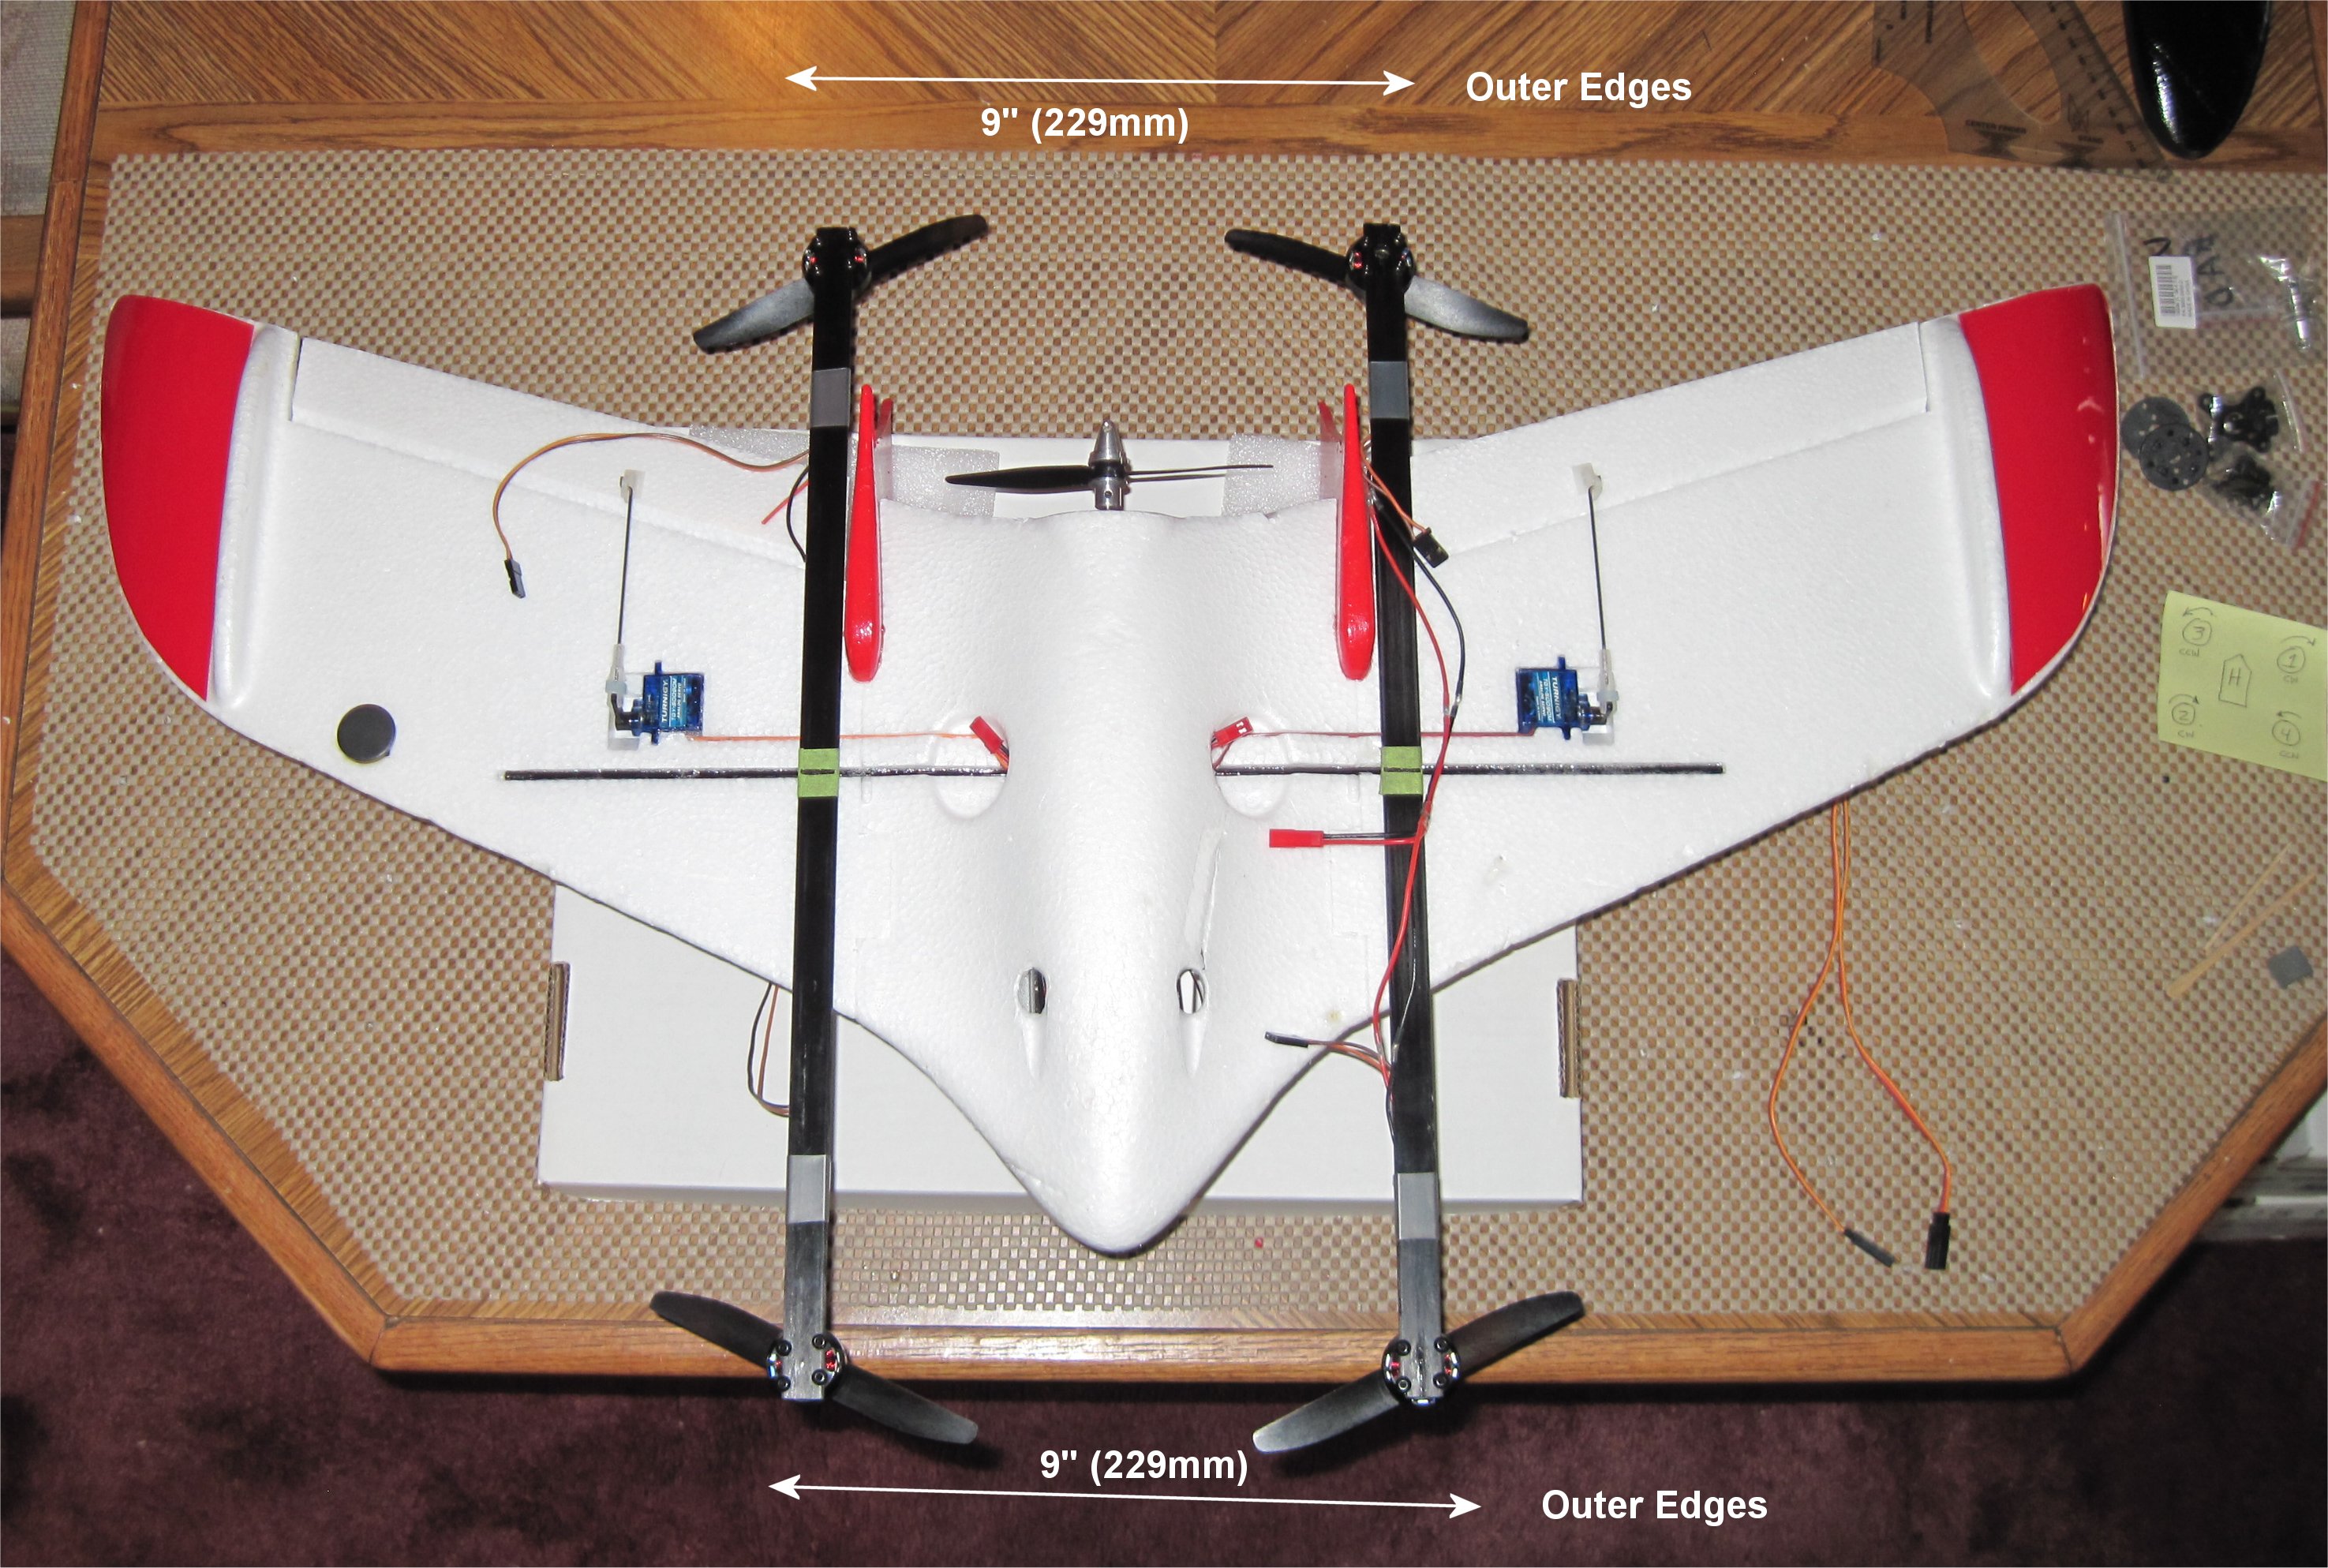
Since the photos were taken, I finished my second wire harness so I plan to glue the quad booms tomorrow using Foam-Tac. The booms ended up being 9" (229mm) apart on the outer edges.
2 Likes
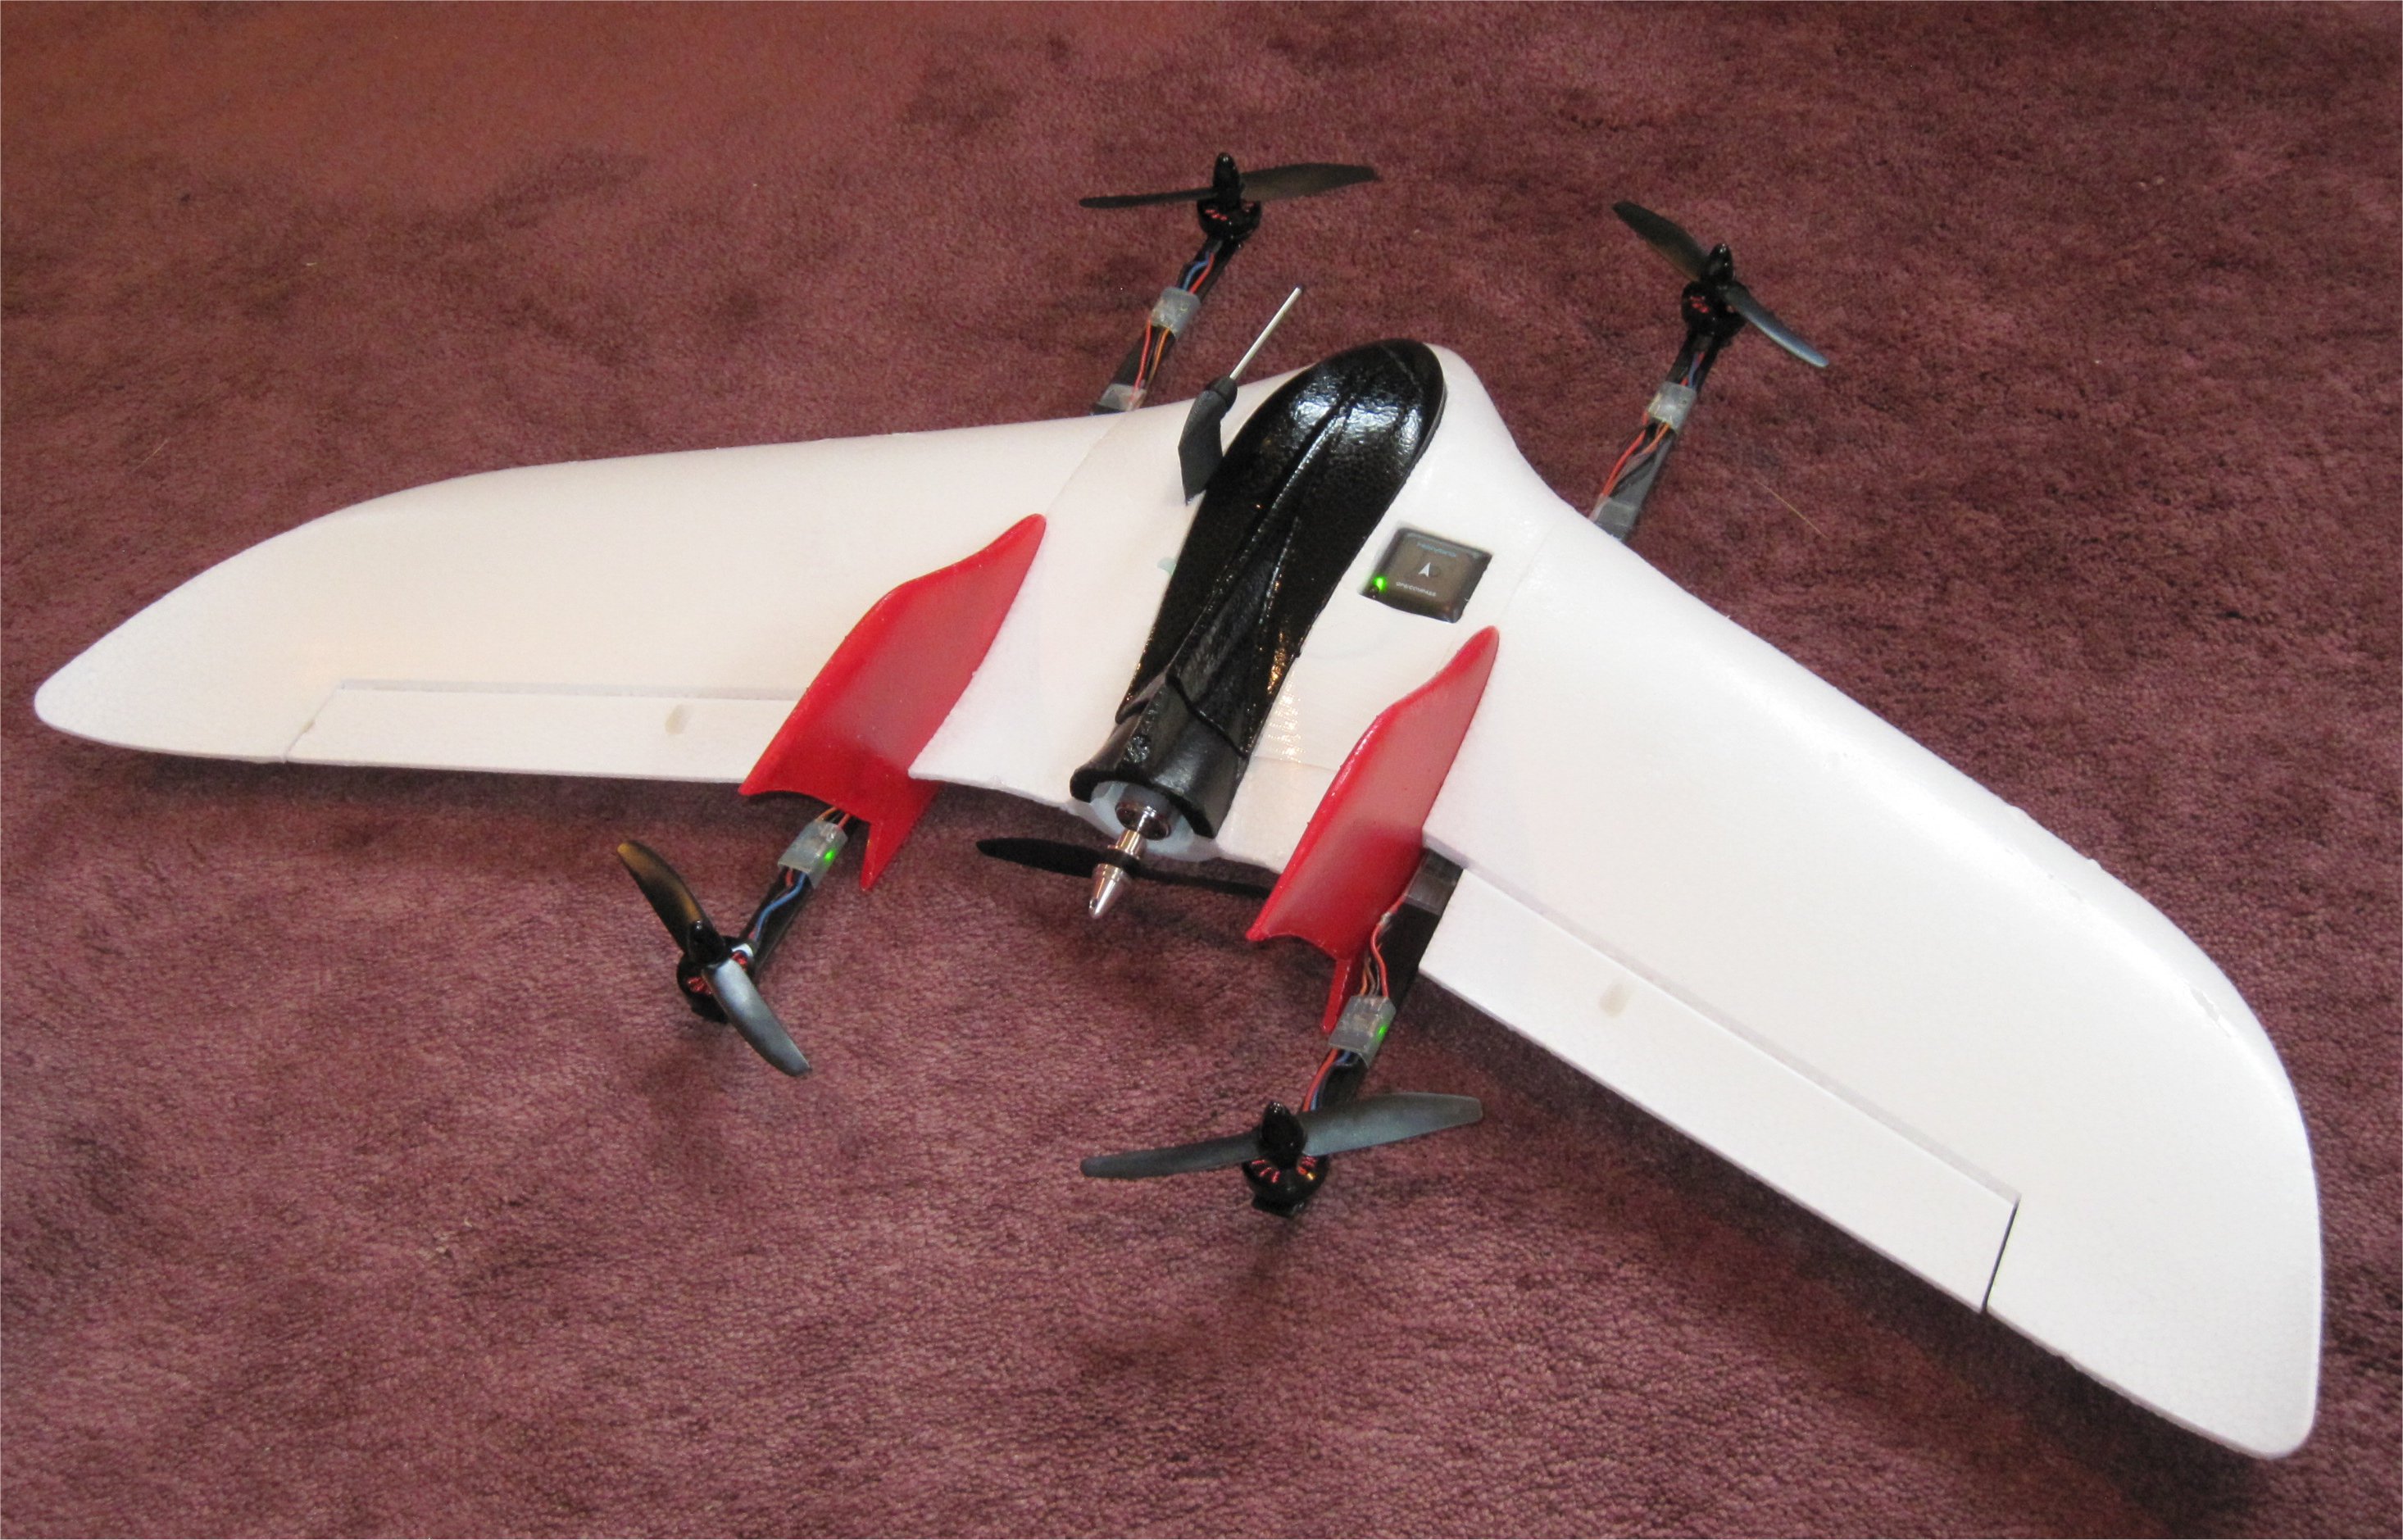
I glued my quad booms in place with Foam-Tac and they seemed strong after only 4 hours of drying so I finished my wire connections as well. For my initial testing, I just taped the wires down with 3M Blenderm surgical tape. The finger holes for launching are no longer needed so it will be a good place to fill with excess wire. I ran the motor test in Mission Planner with success and bypassed the arm checking to test QSTABILIZE on the carpet for transmitter stick direction.
My Wing Z-84 is ready to test hover but the weather in upstate NY is raining and windy. Good weather to watch football on TV! It looks to be dry mid-week but today is Daylight Savings Time so it is now dark when I get home from work. Maybe I can test hover in my backyard with the porch light on! 

6 Likes
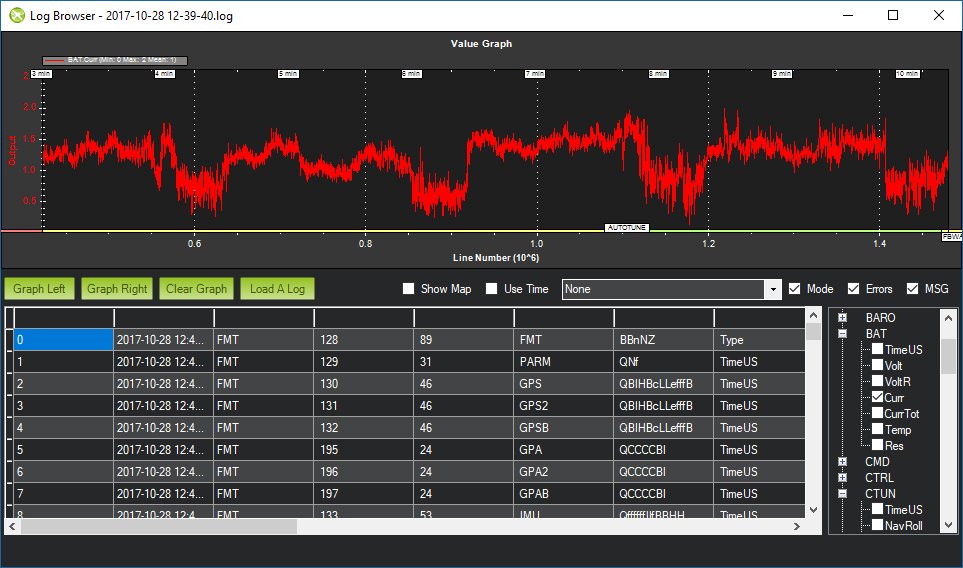
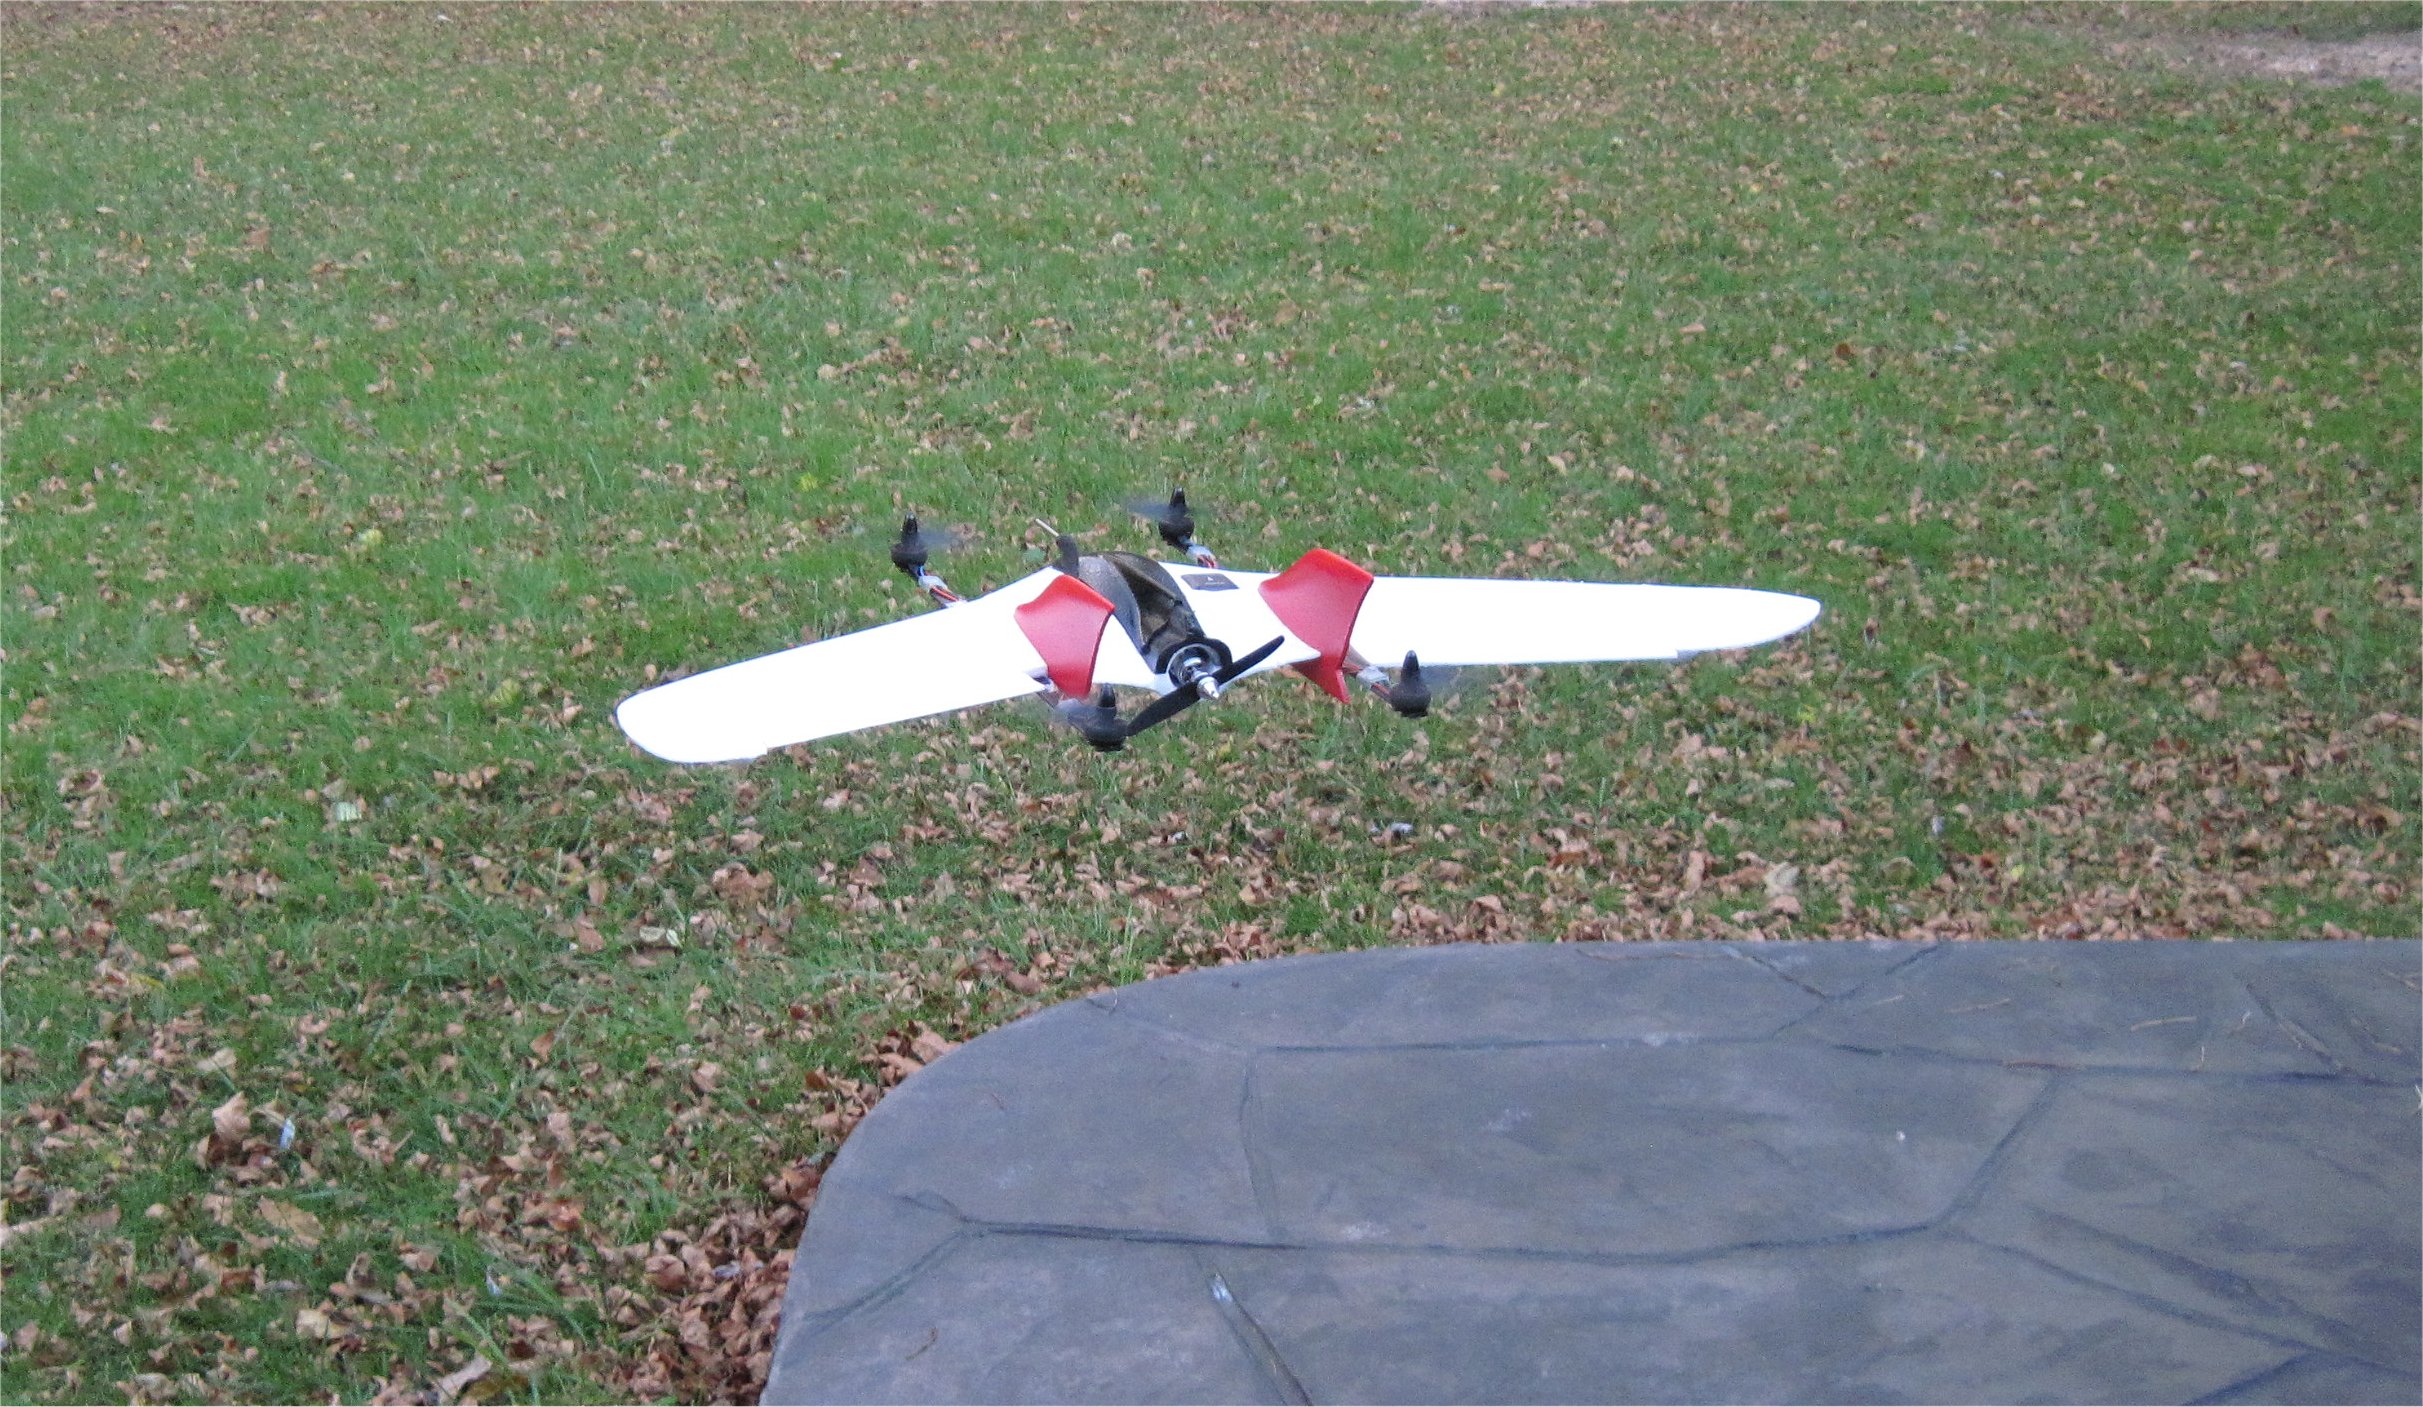
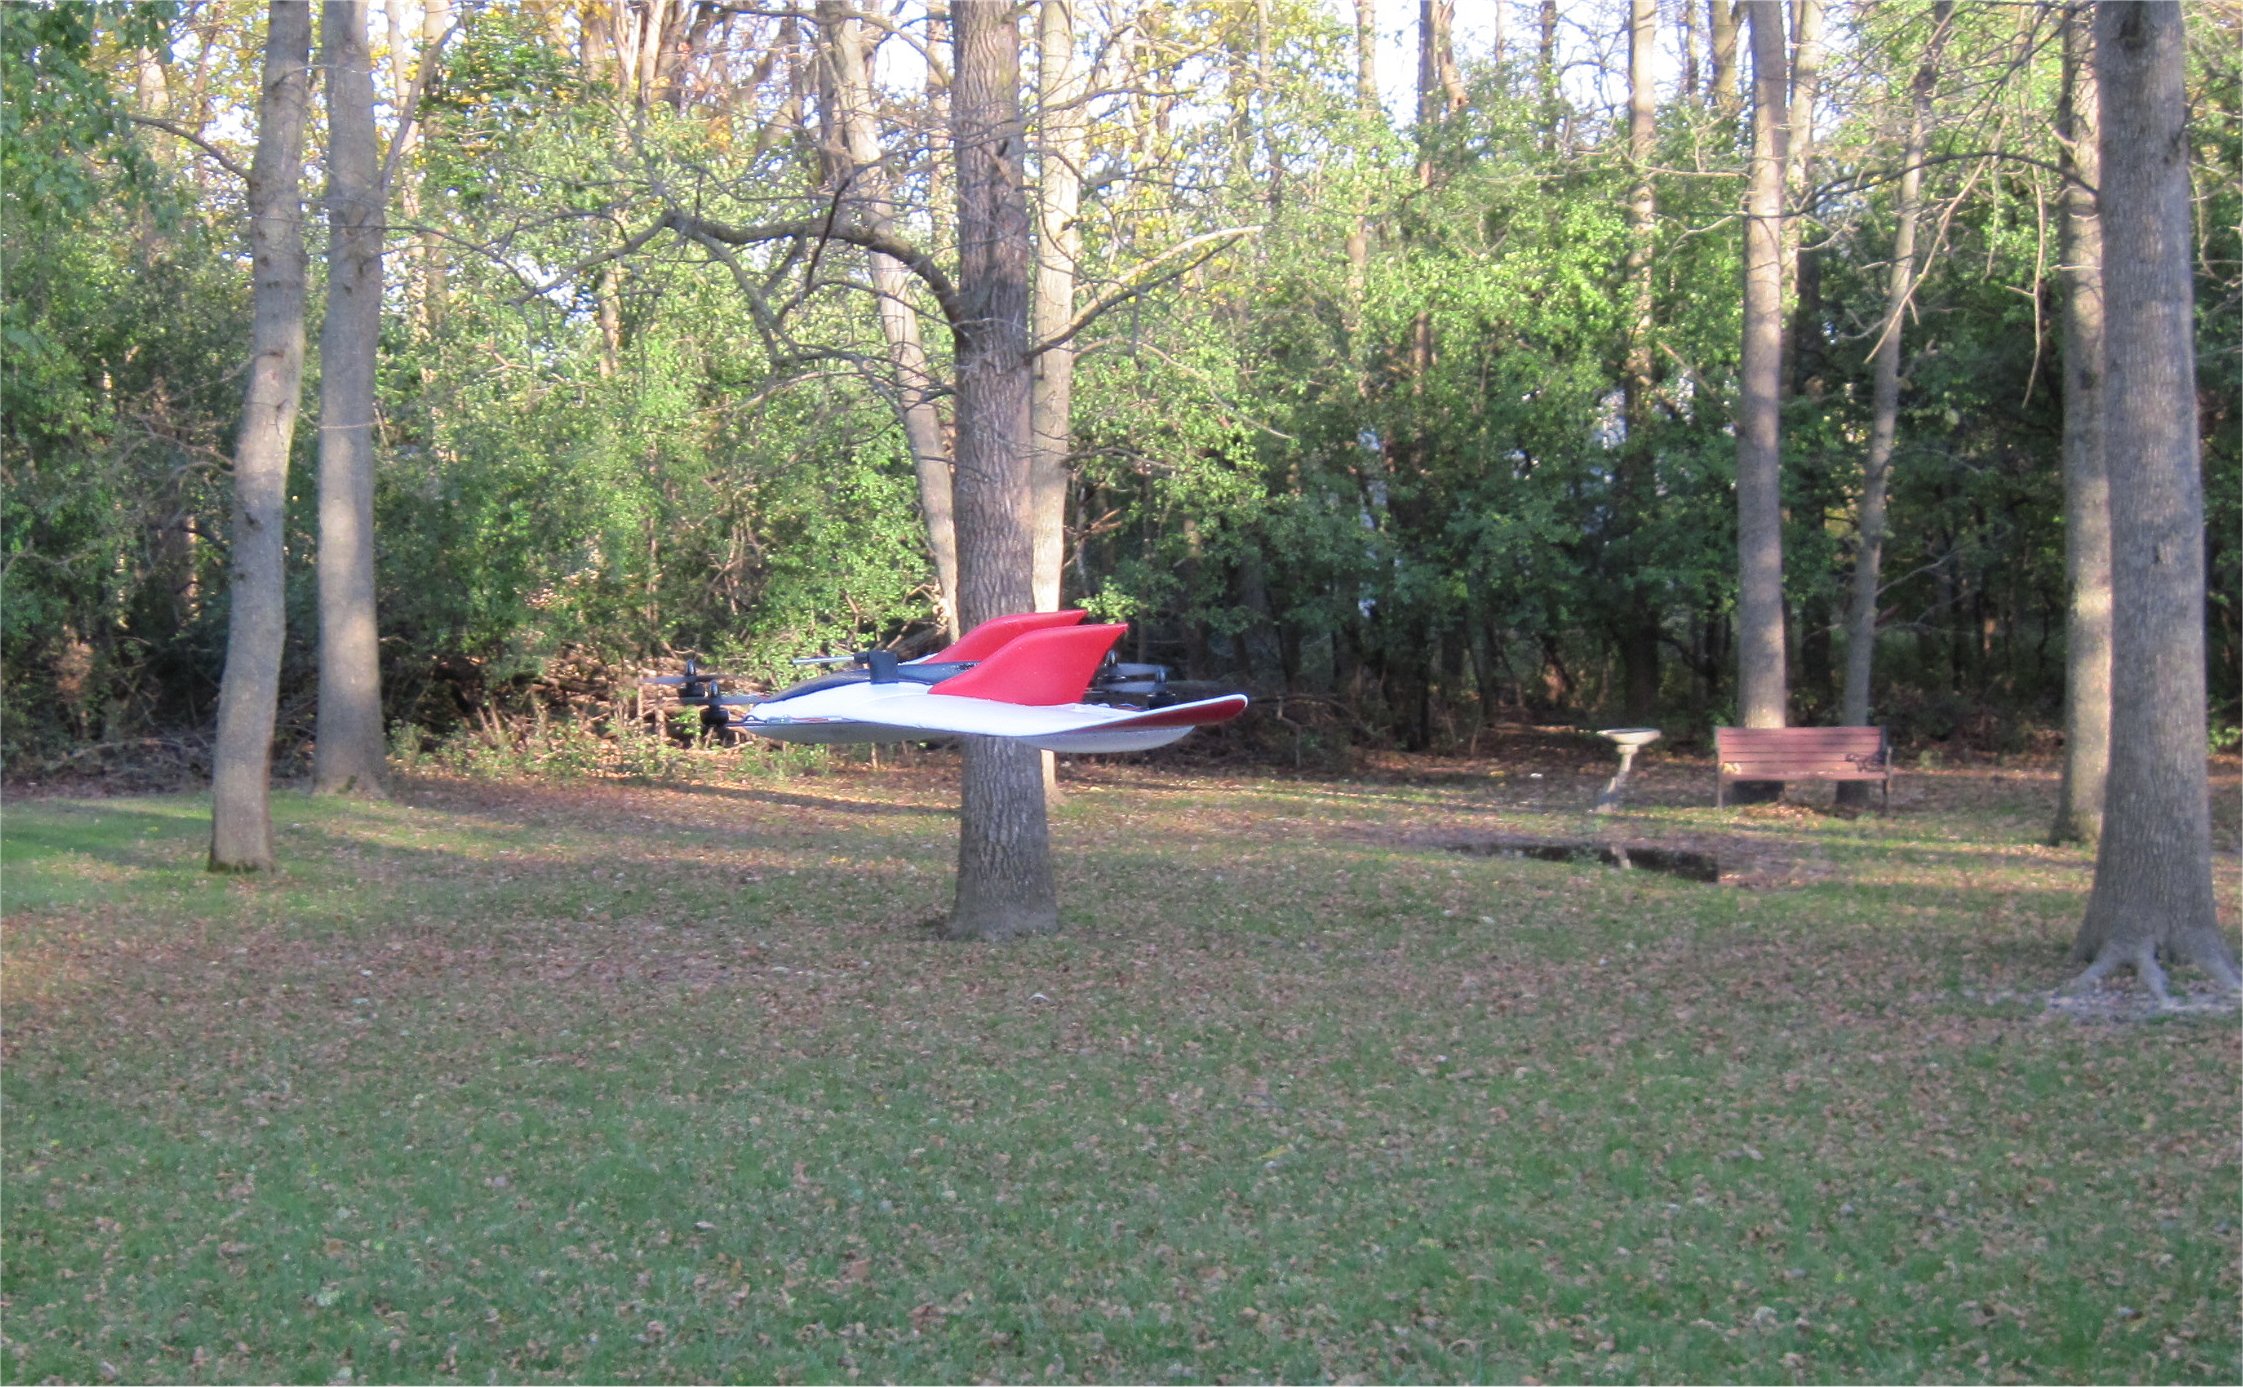
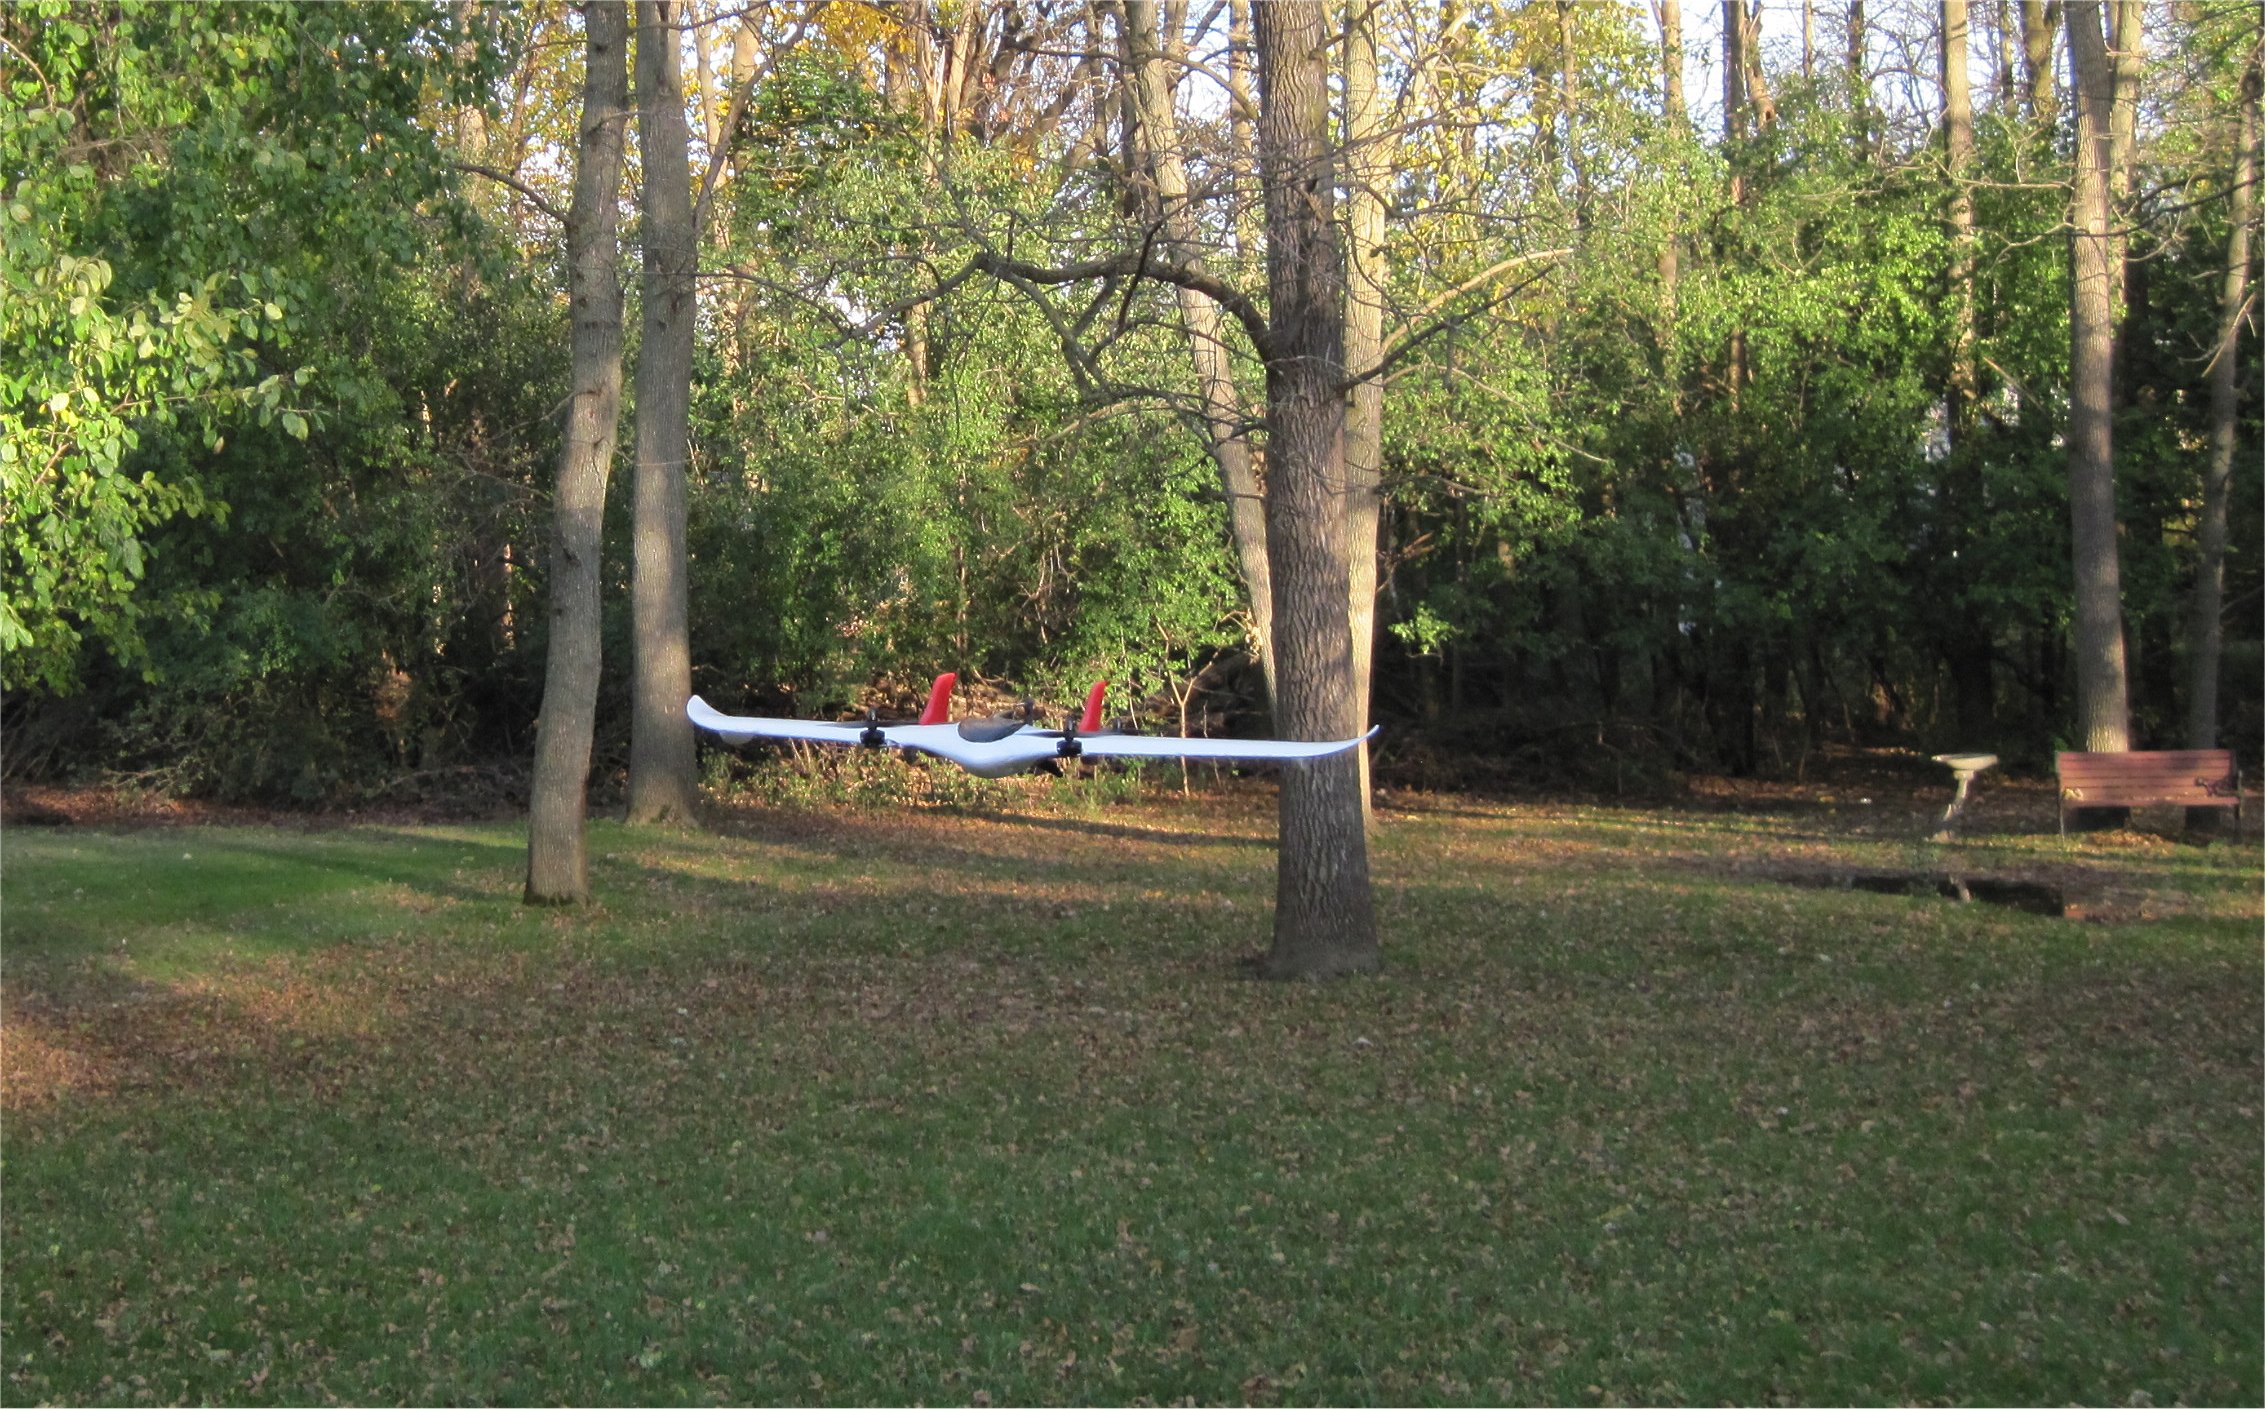
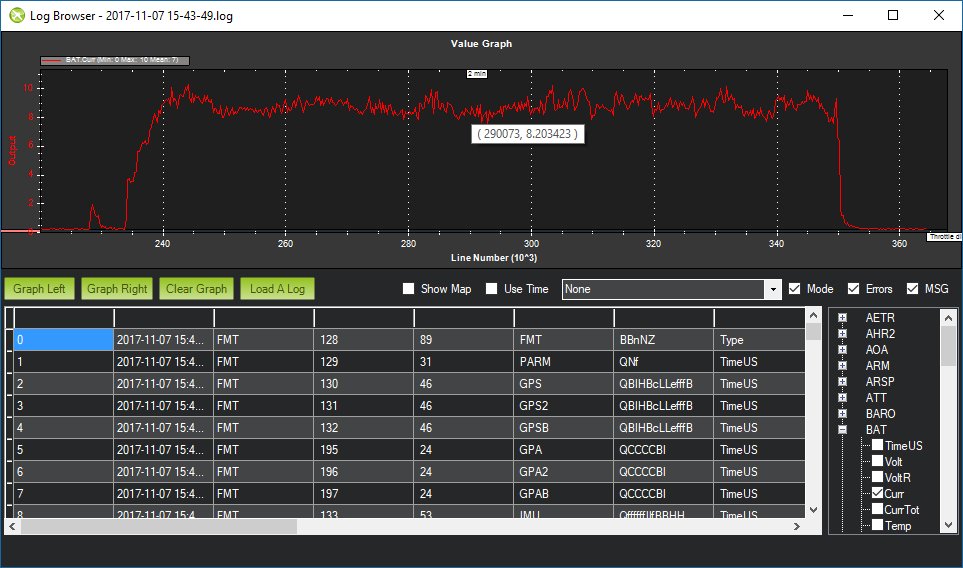
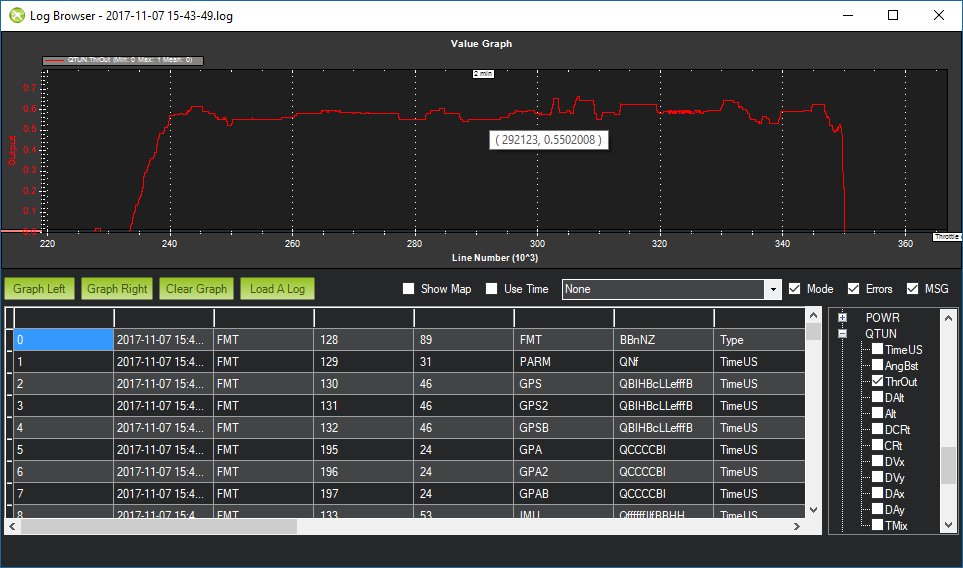
My initial hover testing went very well after changing the 5x3 props to 3-blade versions since I didn’t have any 6" props. I’m not sure what the Kv the quad motors are because they are not labeled and are several years old. The 3-blade Ideal Flying Fish props have a unique look and sounded great! I’ll check the logs but I think I was around half throttle in QSTABILIZE mode.
4 Likes
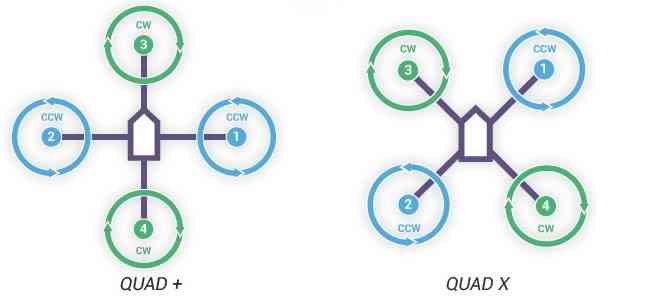
Congratulations Sir . . . . . Which Type of Fram you used in param Q_FRAME_TYPE = ? . . .
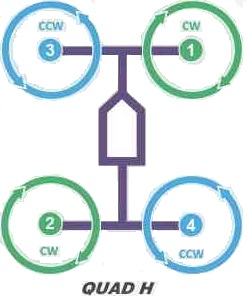
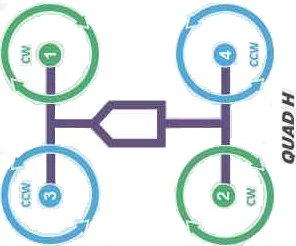
Thanks, I’m using an H-frame. I’ll post my latest .param file tonight.
Isn’t an H-frame the wrong type, for struts running lengthwise? A right yaw for example would lift the front left and rear right motor, creating a thust vector against the desired turn.
It’s the same in either orientation as long as the motor rotations are correct for the forward direction. As you can see in the hover photos, the yaw works great!
Here is my current .param file. I’ll add it to the first post as well. My hover current looked to be around 8 amps at 55% throttle so I’ll stick with this setup for further testing.
WingZ84_Hover1.param (16.2 KB)
Curious to what your current all up weight is?
Hi,
The Wing Z-84 is RTF as a Quadplane at 21.6oz (612g) using the 4oz (113g) 3s 30C 1300mAh pack.
Winter has arrived in upstate NY with some snow and cold temperatures so my test flying will be put on hold. We are currently preparing for the Thanksgiving Holiday which means my planes and projects have been moved to a storage room. It’s both a happy and sad holiday for me. 
2 Likes
Hi @GregCovey
Maybe also you can test mini pack of four LiIon batteries  maybe can get more flight time.
Unfortunately, the 12-amp HUG ESCs that I used from my old 230mm quad say, “2 and 3S Capable (no 4S please)” in the specifications.
Since the hover current is only around 8 amps, maybe a 3s Li-ion battery or Multistar pack would provide increased flight time. My 30C 1300mAh pack was simply chosen for size and weight. It was a good starting point.