TAP-J competed in the Japan Innovation Challenge (JIC) a couple of weeks ago and below are some details about the competition and how it went for us. It was quite an experience because of the tough weather conditions (it rained 2 out of 3 days) but also a lot of fun because of all the new technology we used compared to previous years.
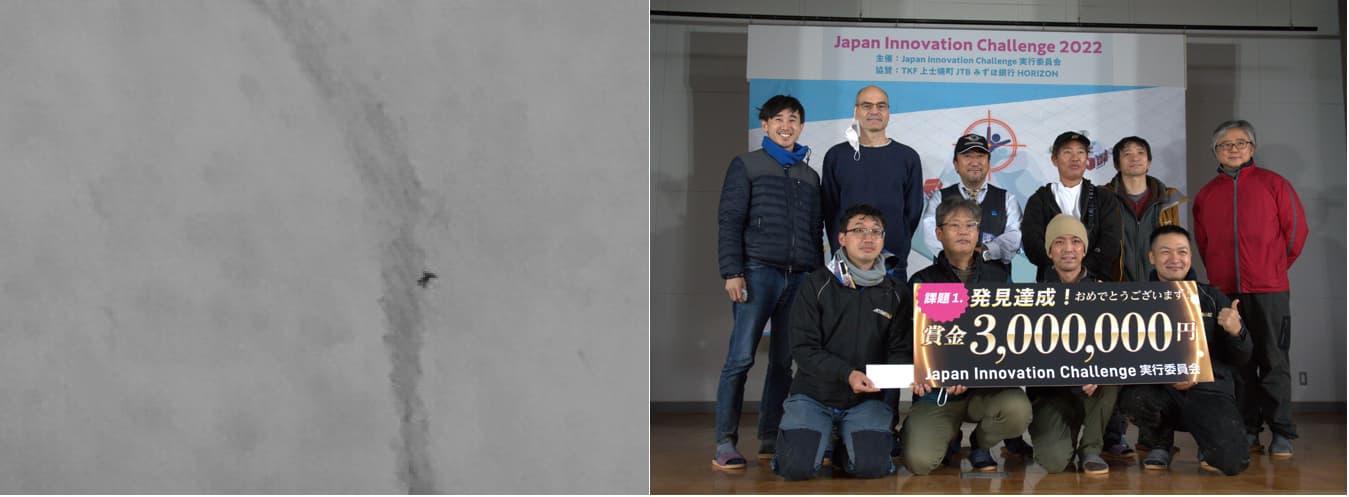
The executive summary is for the first time the team competed in all 3 stages of the competition (Search, Delivery and Retrieval) and came away with 3 million yen in prize money (about $20K USD). The image on the left from our search drone’s thermal camera of the mannequin hidden in the woods. We calculated its location to within 6m. No other teams came away with any prize money.
What is JIC?
The competition is held each year over 3 days in Kamishihoro city in northern Japan.
Each day teams compete in 3 somewhat separate challenges.
-
Stage1: Search. The organisers hide 5 mannequins within a 1km^2 area of the total competition area. Teams are given the coordinates of this search area and they then have 90min to locate as many mannequins as possible. This stage takes place between 6pm and 9pm but the drones must be setup by 2pm and cannot be touched again until after the stage is complete (you can’t even touch the vehicle after it has returned in order to download the images). Prize is 3 million yen (20K USD)
-
Stage2: Delivery. The organisers provide the lat, lon location of a mannequin and the teams are given 30min to deliver a 3kg rescue package to between 3m and 8m (too close is also a fail!). This takes place between 10pm and 12am but again the vehicles must be setup by 2pm. Prize is 2 million yen (13K USD)
-
Stage3: Rescue. The organisers provide the lat,lon location of a 50kg mannequin and teams have 5 hours to retrieve it and bring it back to the start area. The mannequin must be handled gently so that onboard IMUs do not receive more than 1G of shock. This takes place between 11am and 4pm. Prize is 20 million yen (130K USD)
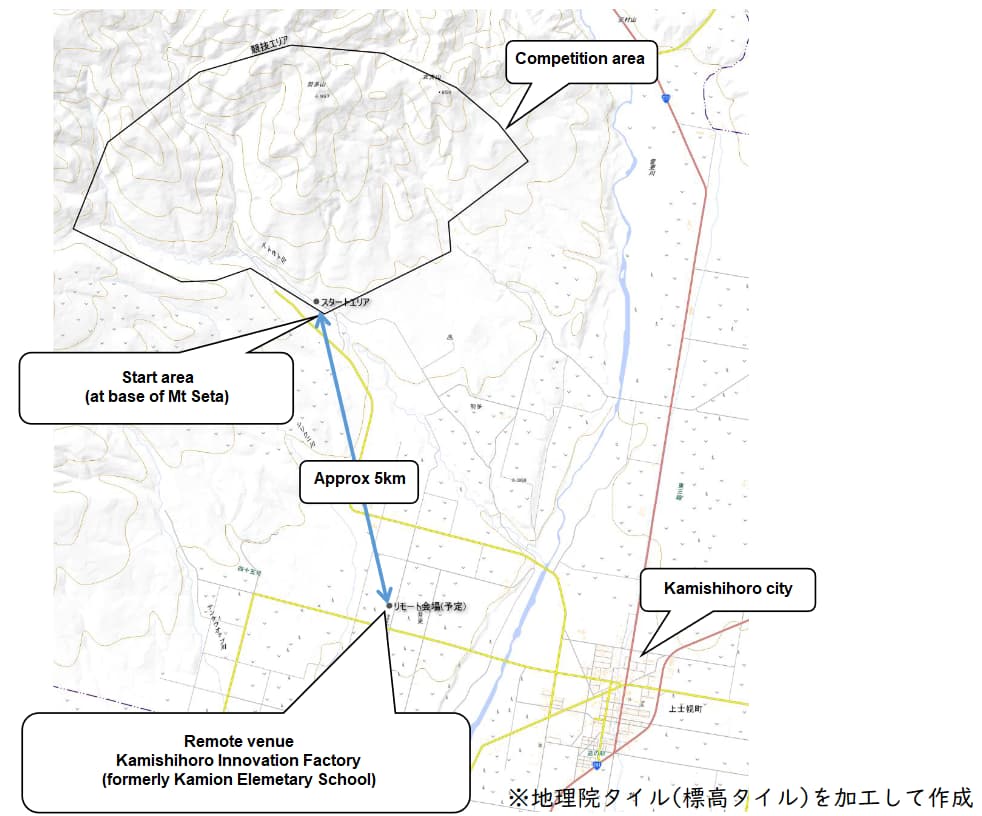
The facilities consist of 3 areas:
- The Competiion area is where the mannequins are and is very mountainous with elevations >250m above the Start area
- The Start area is where the drones and rovers start from
- The Remote area is where the operators must be during the Stage 1 and 2 (search and deliver). For stage3 (rescue) the operators are at the start area. This Remote operation requirement was new this year and led to only 4 teams competing compared to 13 in the previous years.
TAP-J’s vehicles
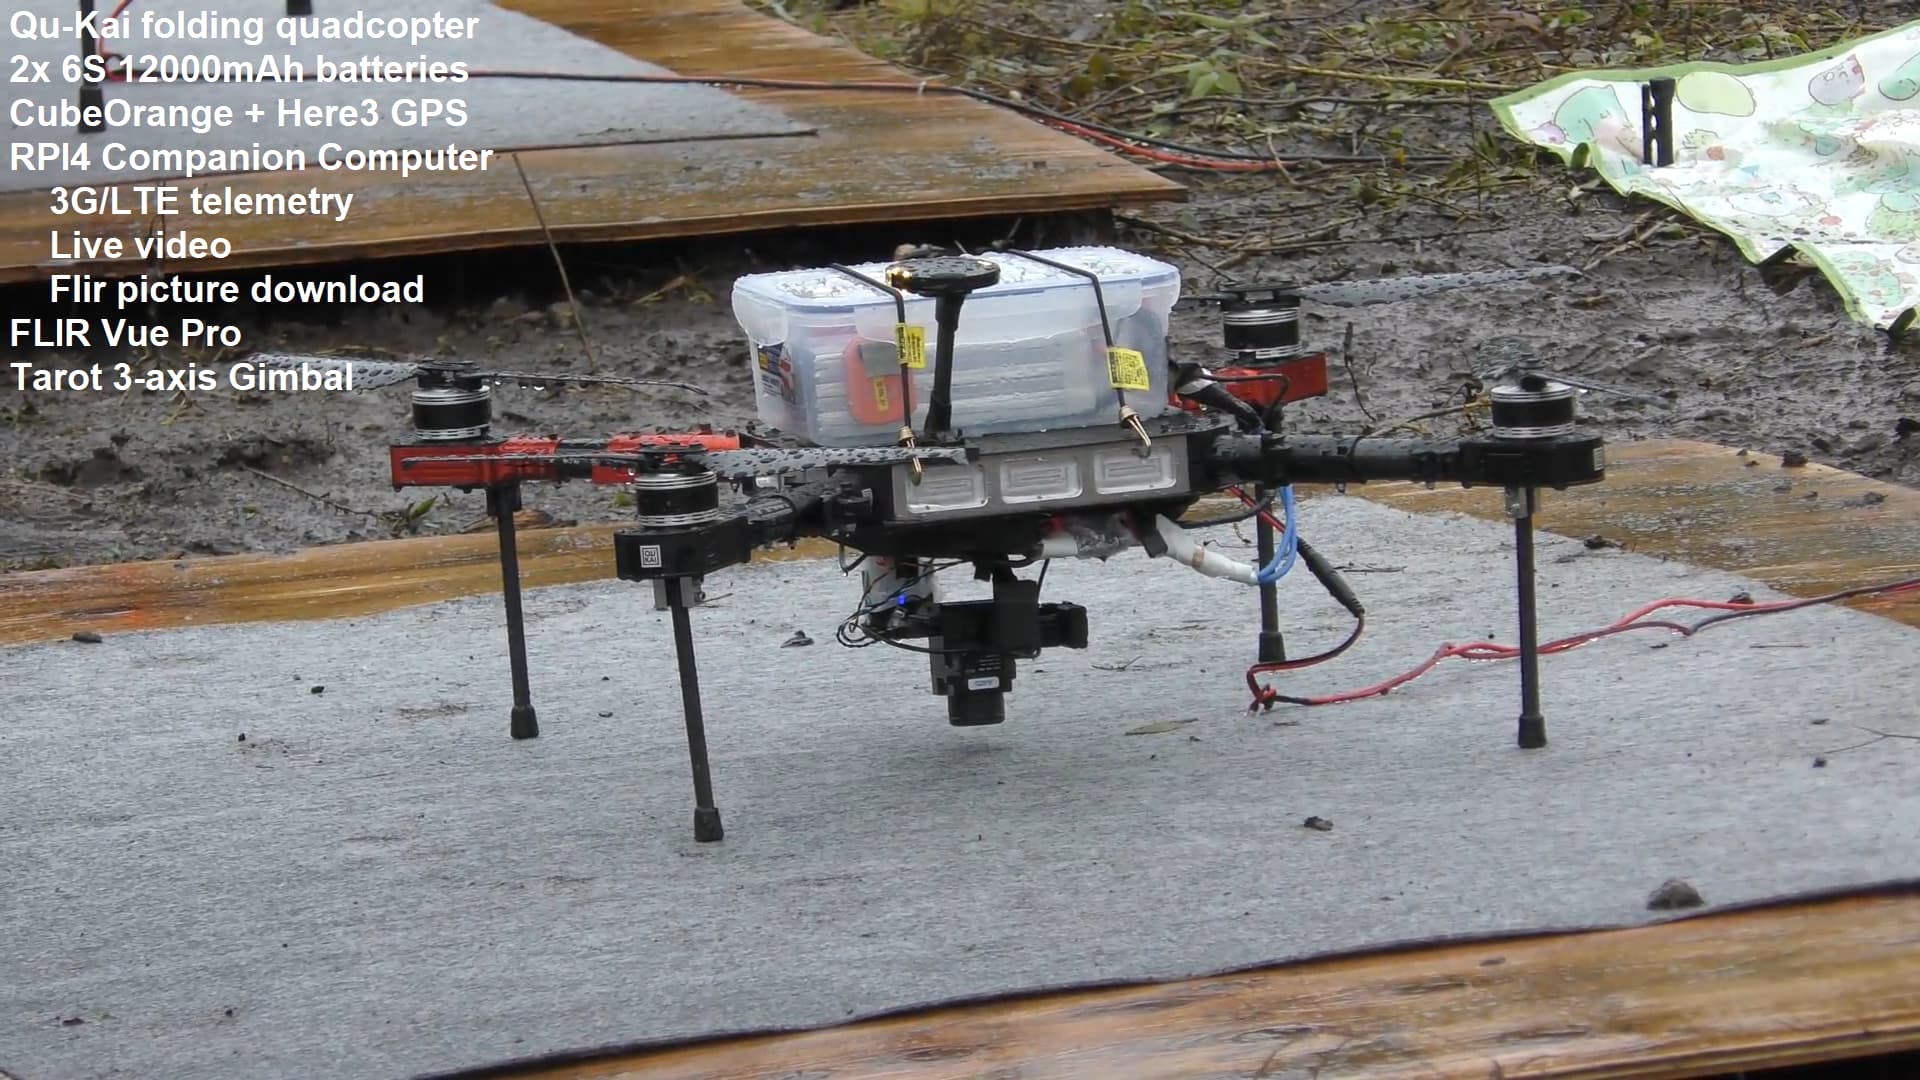
For the search (see video) we used a Qu-Kai folding quadcopter with a Flir Vue thermal camera. It flew fine but was loaded down with so much equipment that its flight time was relatively short (our search mission was only 7.1km). The organisers almost always put the mannequins within 50m of a path though so we were able to design a mission with a high chance of success (and we succeeded!)
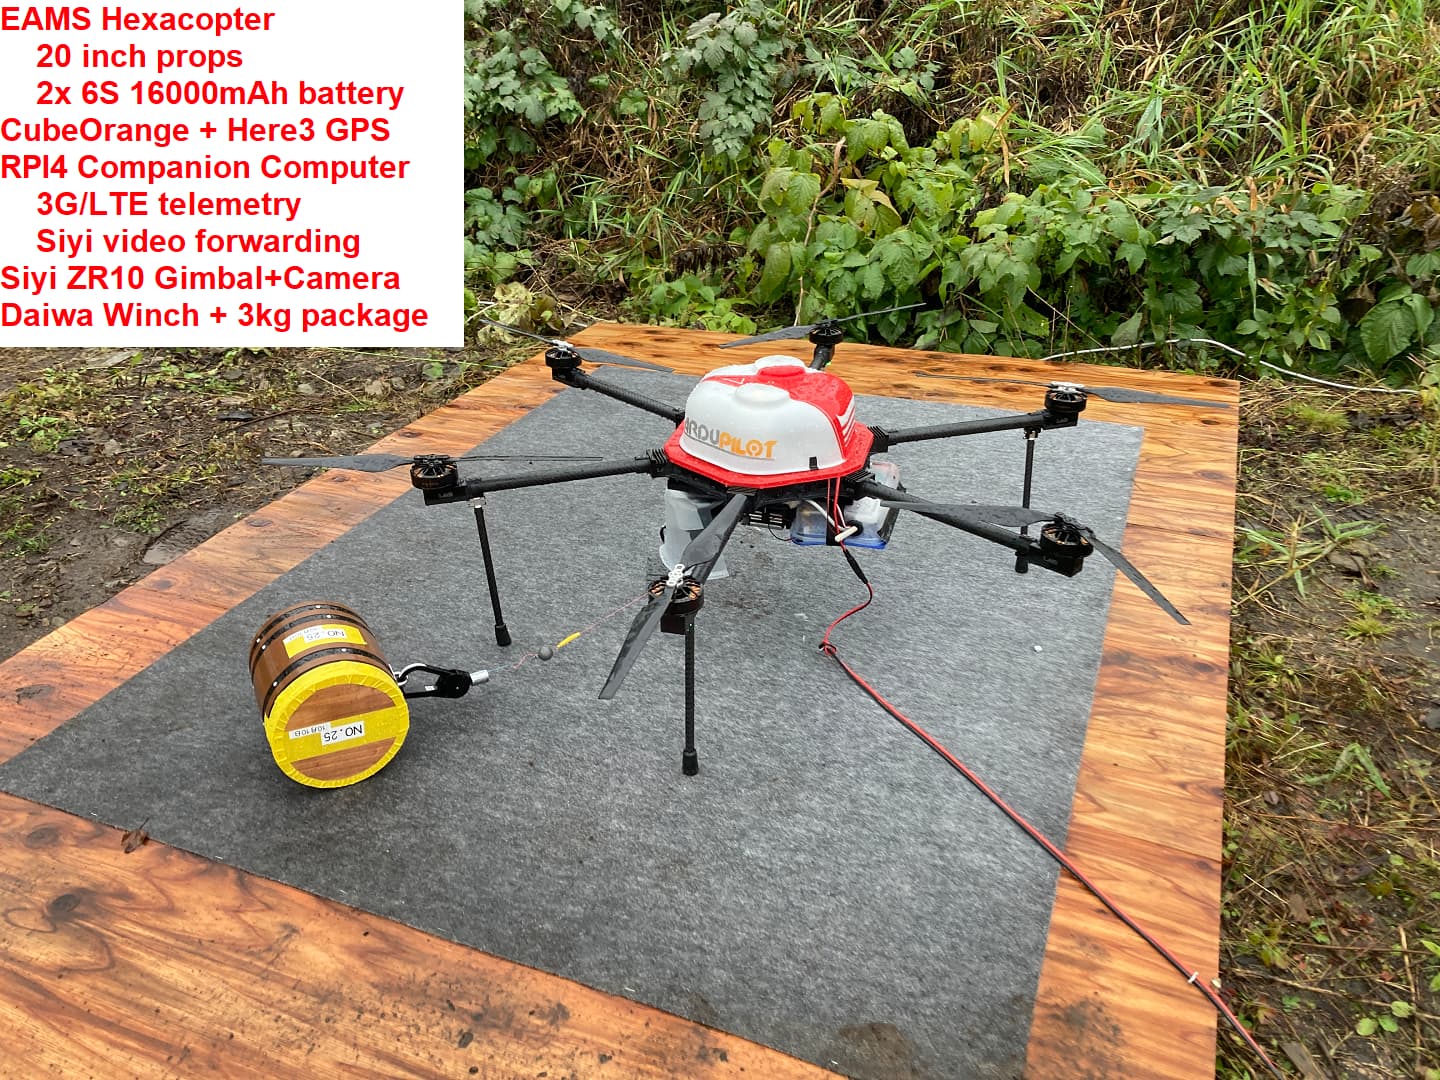
For the delivery (see video) we used an EAMS Robotics hexacopter with a Daiwa winch. We’ve used this vehicle every year with good success. This year sadly though the winch didn’t lower the package for reasons we still need to determine.
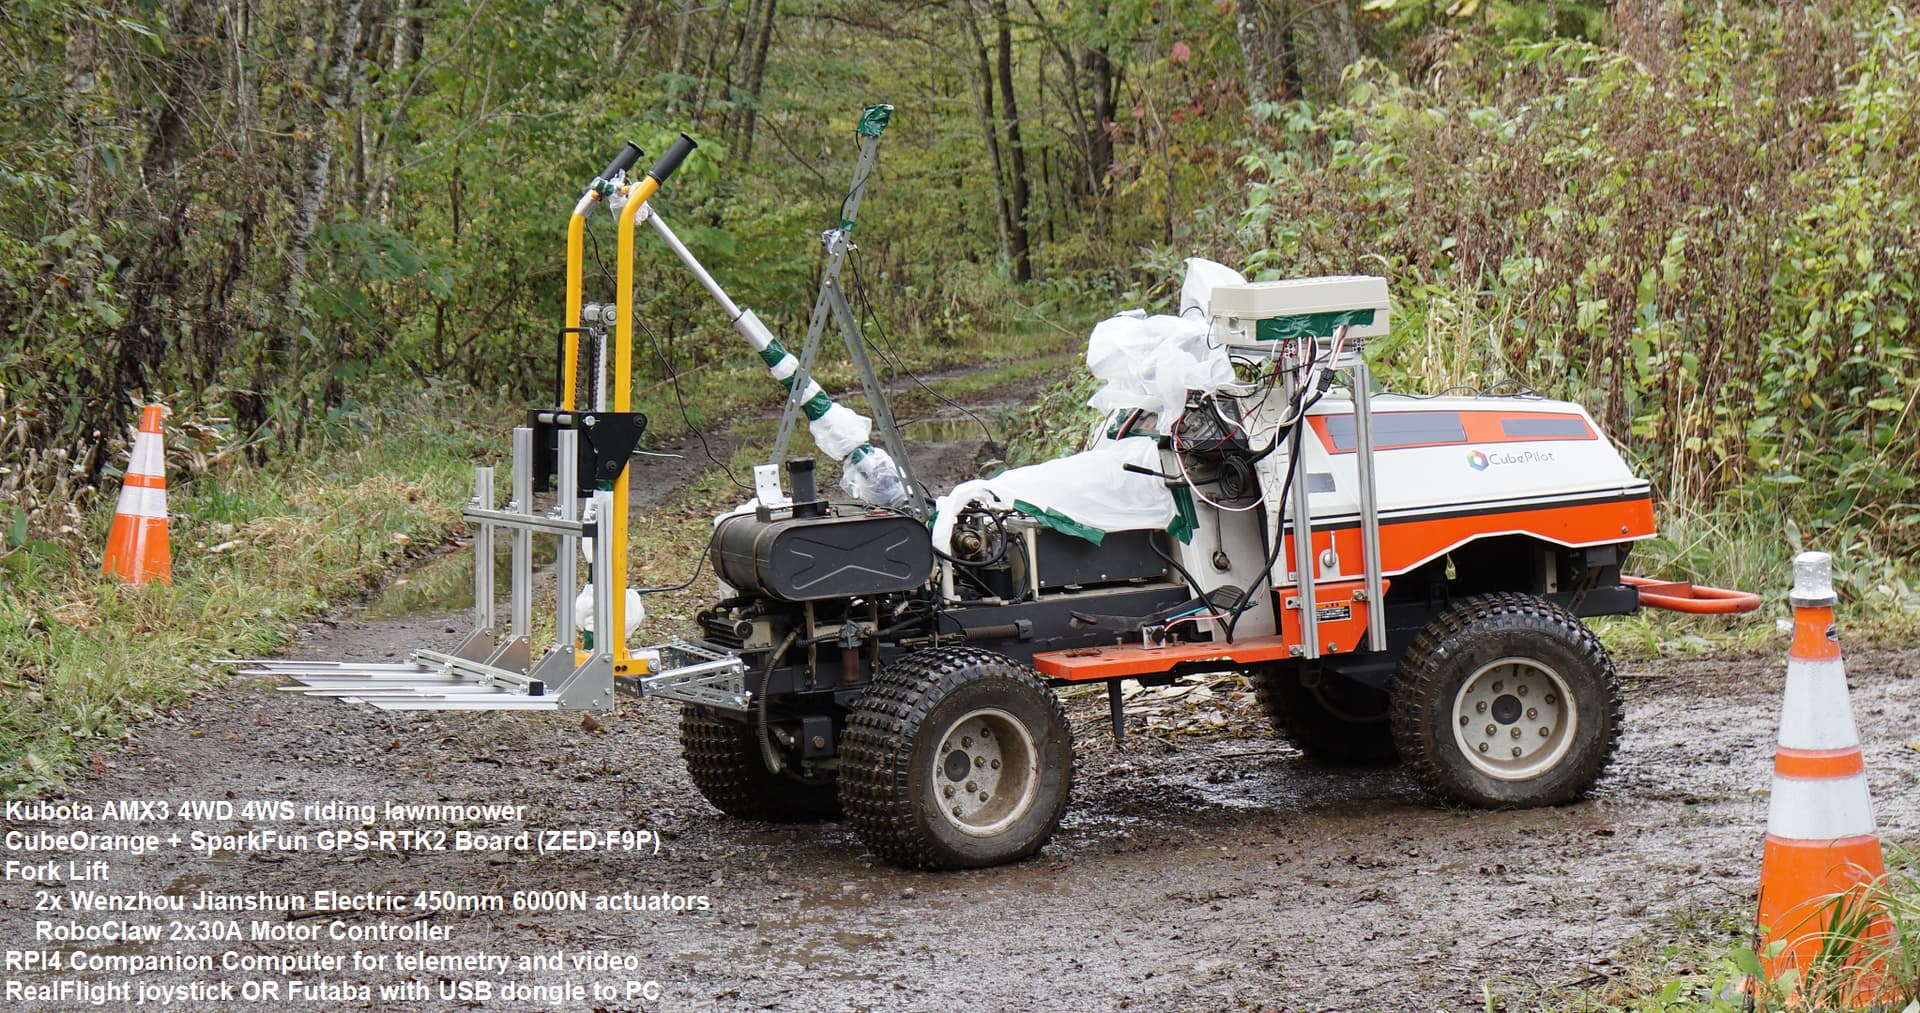
For the retrieval we had two Rovers, one was built by Tokyo University Professor Kaizu based on a Kubota
AMX3 riding lawn mower with a custom fork lift on the back (see video) The fork lift can be angled forward/back and also lowered or raised. To retrieve the mannequin it is first angled forward and lowered, the rover moves forward to push the lift under the mannequin’s body. The lift is then rotated back and lifted up and the mannequin is carried home. This vehicle has incredible power but as you’ll see from the video even it got stuck on a huge log on the final day.
The 2nd rover was built by AttracLab using Misumi “aluminimum extrusions” and various other custom parts (see video). The front of the horizontal plate can be raised and lowered using linear actuators and there is also a noose at the front connected to a winch. The way it works is the plate is lowered and the mannequin’s feet are scooped in, the noose is then tightened and pulled which drags the mannequin into the body of the rover. It is somewhat miraculous that this rover got over the logs and through the brush to the mannequin despite its relatively small tracks.
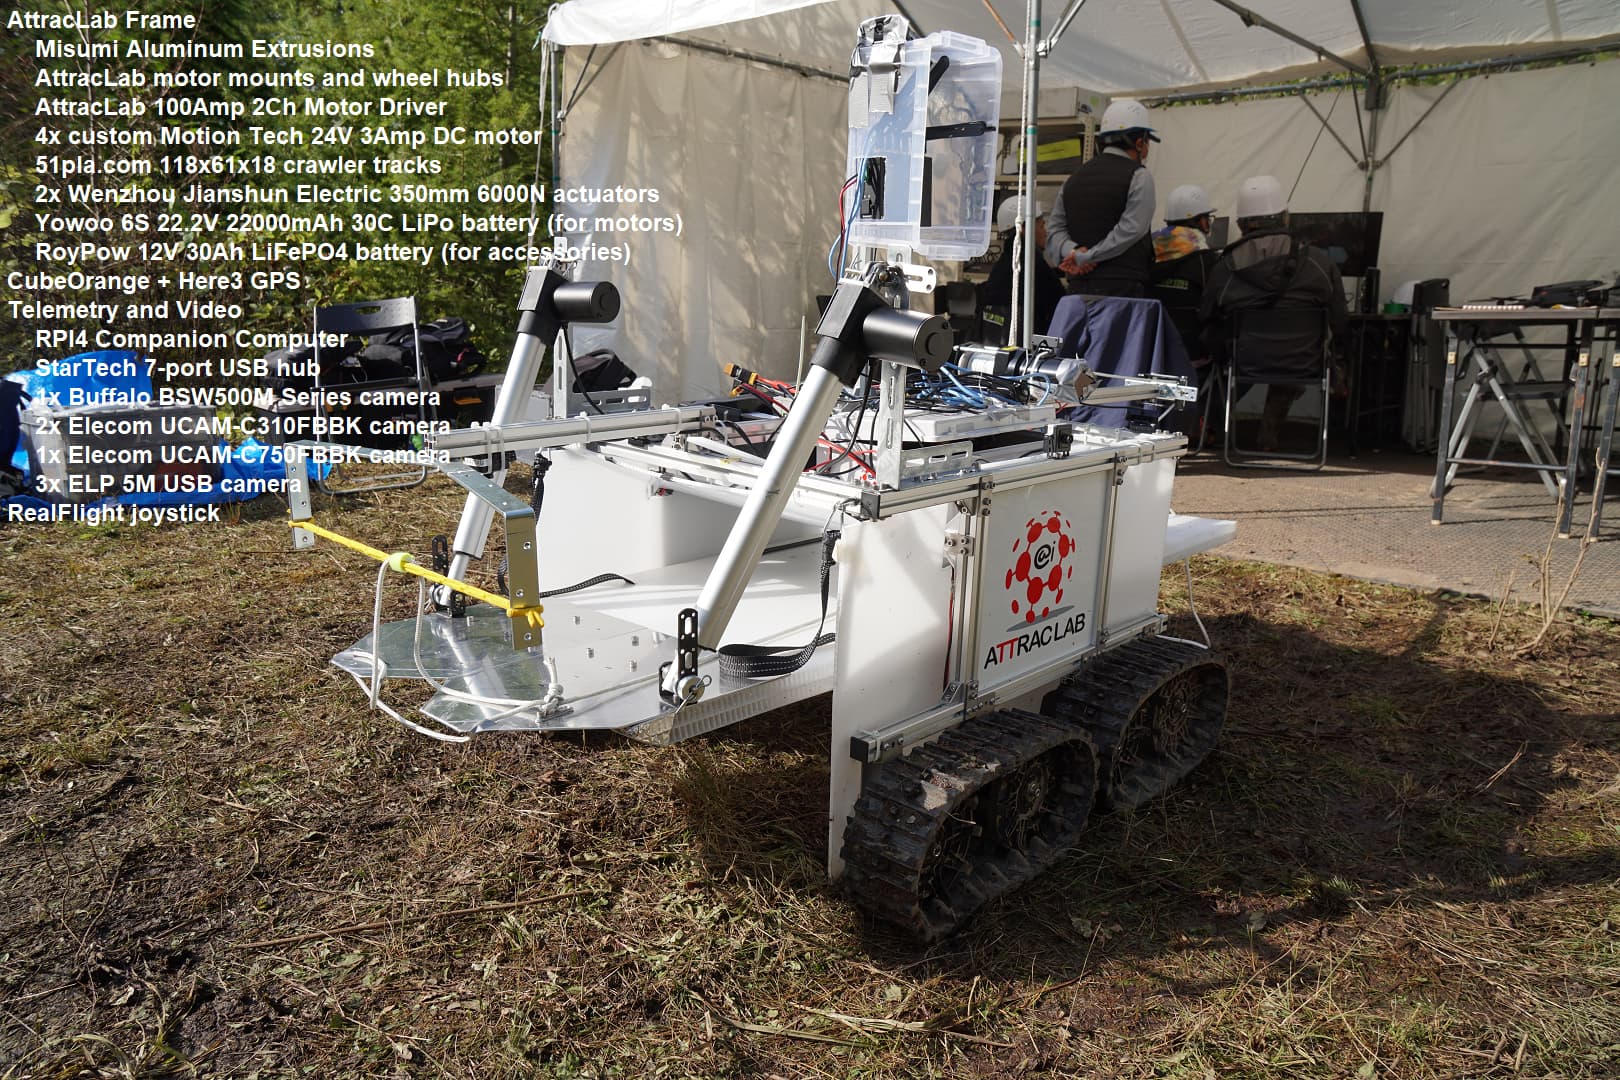
As you’ll see from the videos (Prof Kaizu’s rover, AttracLab rover) both rovers got very close to the mannequin but neither was able to scoop it up because of the very difficult terrain.
New technology
Beyond the two rovers, the team came up with a bunch of new technology most of which is open source
- Kawamura-san’s 3G/LTE telemetry and live video system built on WebRTC, SoftEther VPN and two AWS EC2 servers. This allowed us to turn on/off various video feeds and adjust their quality in order to optimise the bandwidth available. The components are all readily available open source although we don’t have an RPI image that people can just download to get it working.
- External power supply to keep the batteries charged on the launch pad.
- SIYI ZR10 gimbal driver. This was on the delivery vehicle and the plan was to use it during the final placement of the package but sadly we lost telemetry contact with the vehicle during this critical phase.
- Gimbal POI Lua script returns the lat,lon of what the gimbal is looking at although we did not end up using this
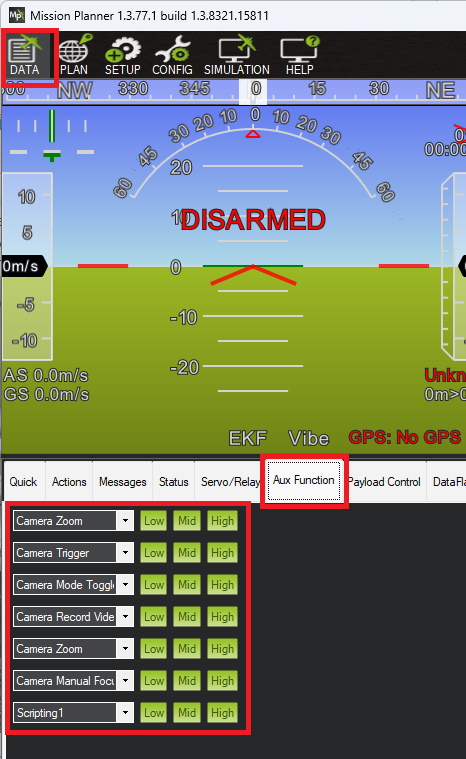
- Mission Planner Aux Function tab for easier control of camera without an RC
Next Year
We got so close to rescuing the mannequin that I expect we will try again next year with updated vehicles. Perhaps a larger version of the AttracLab rover with active suspension. Perhaps we could put linear actuators on each of 4 wheel to allow raising/lowering each corner of the vehicle to ease getting over the logs. Maybe multiple hanging claws would help us pick up the mannequin instead of the sled design we used this year.
For the search phase I’d very much like to replace the FLIR Vue + Tarot gimbal with an all-in-one gimbal+camera unit.
For the delivery, as mentioned above, I’d like to try without using a winch at all. Instead just dangle the package on a 30m cord from the bottom of the drone and use Package Place (as we did this year).