Honestly, I don’t remember having any battery issues in the field. I don’t remember if the battery is charging or not. My combined flight times were probably two half hour flights as I get tired easy these days. If you want low latency for FPV flying, you can disable the Hypersmooth feature during flight but still invoke it during post before extracting a video. For me, I always have it on since it keeps the monitor image steady.
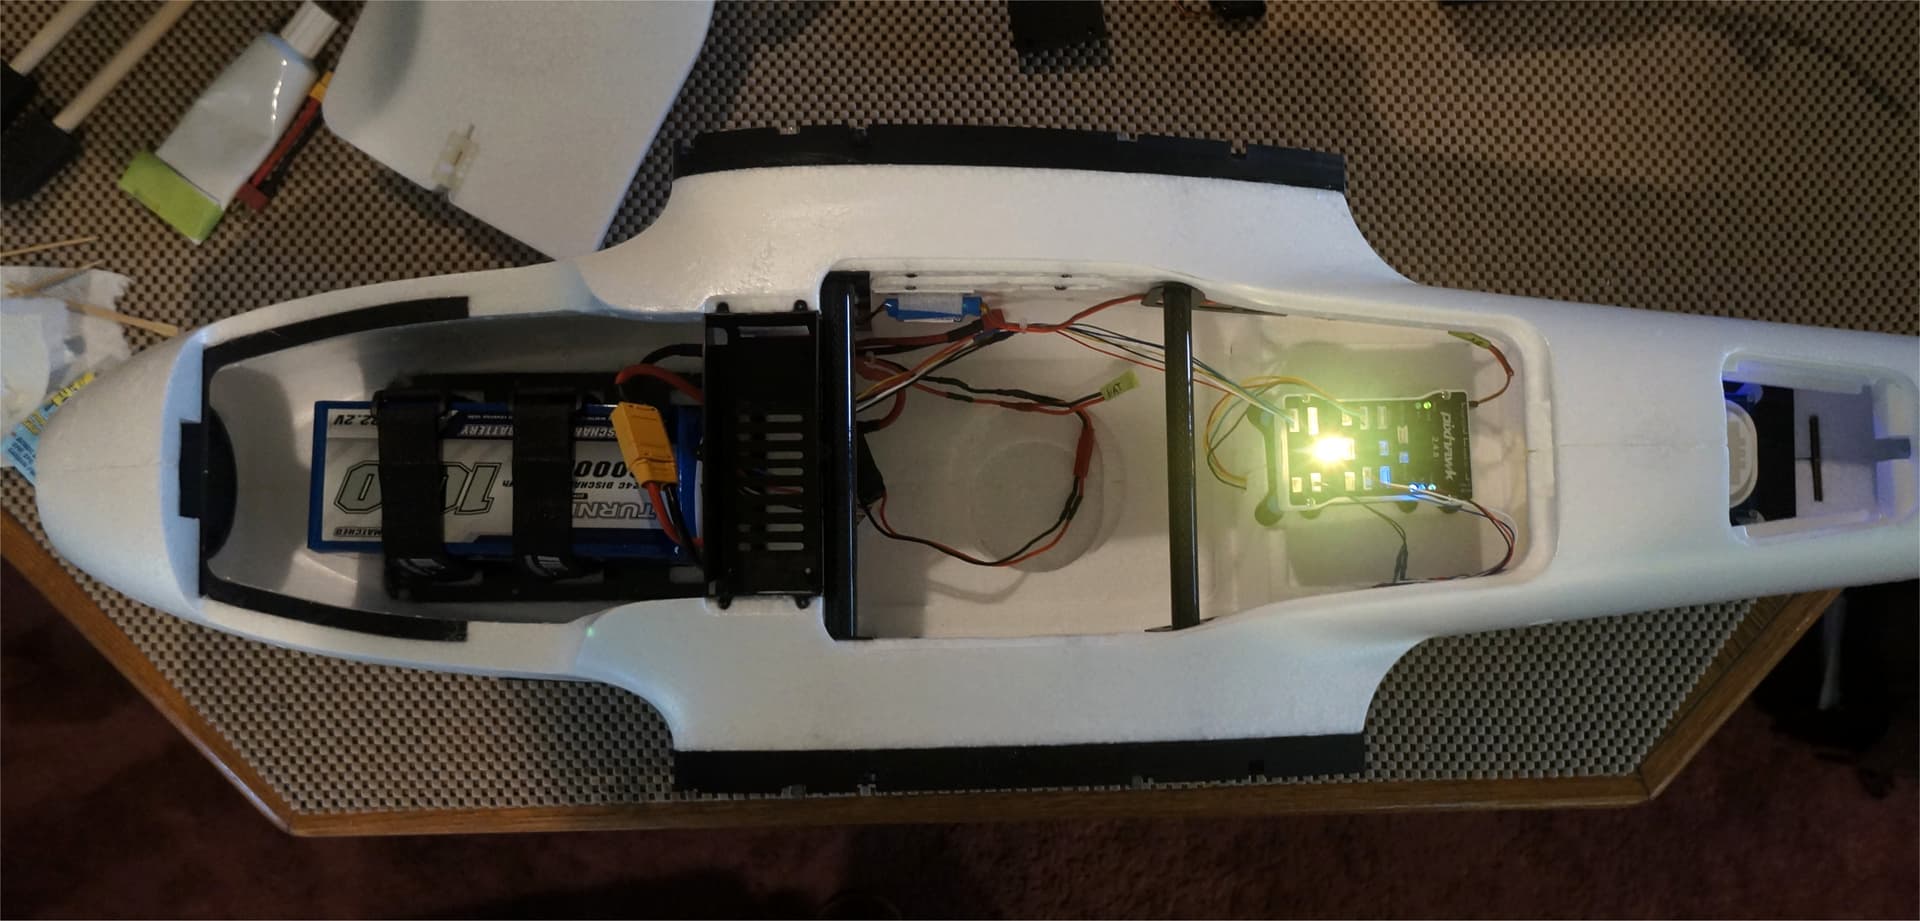
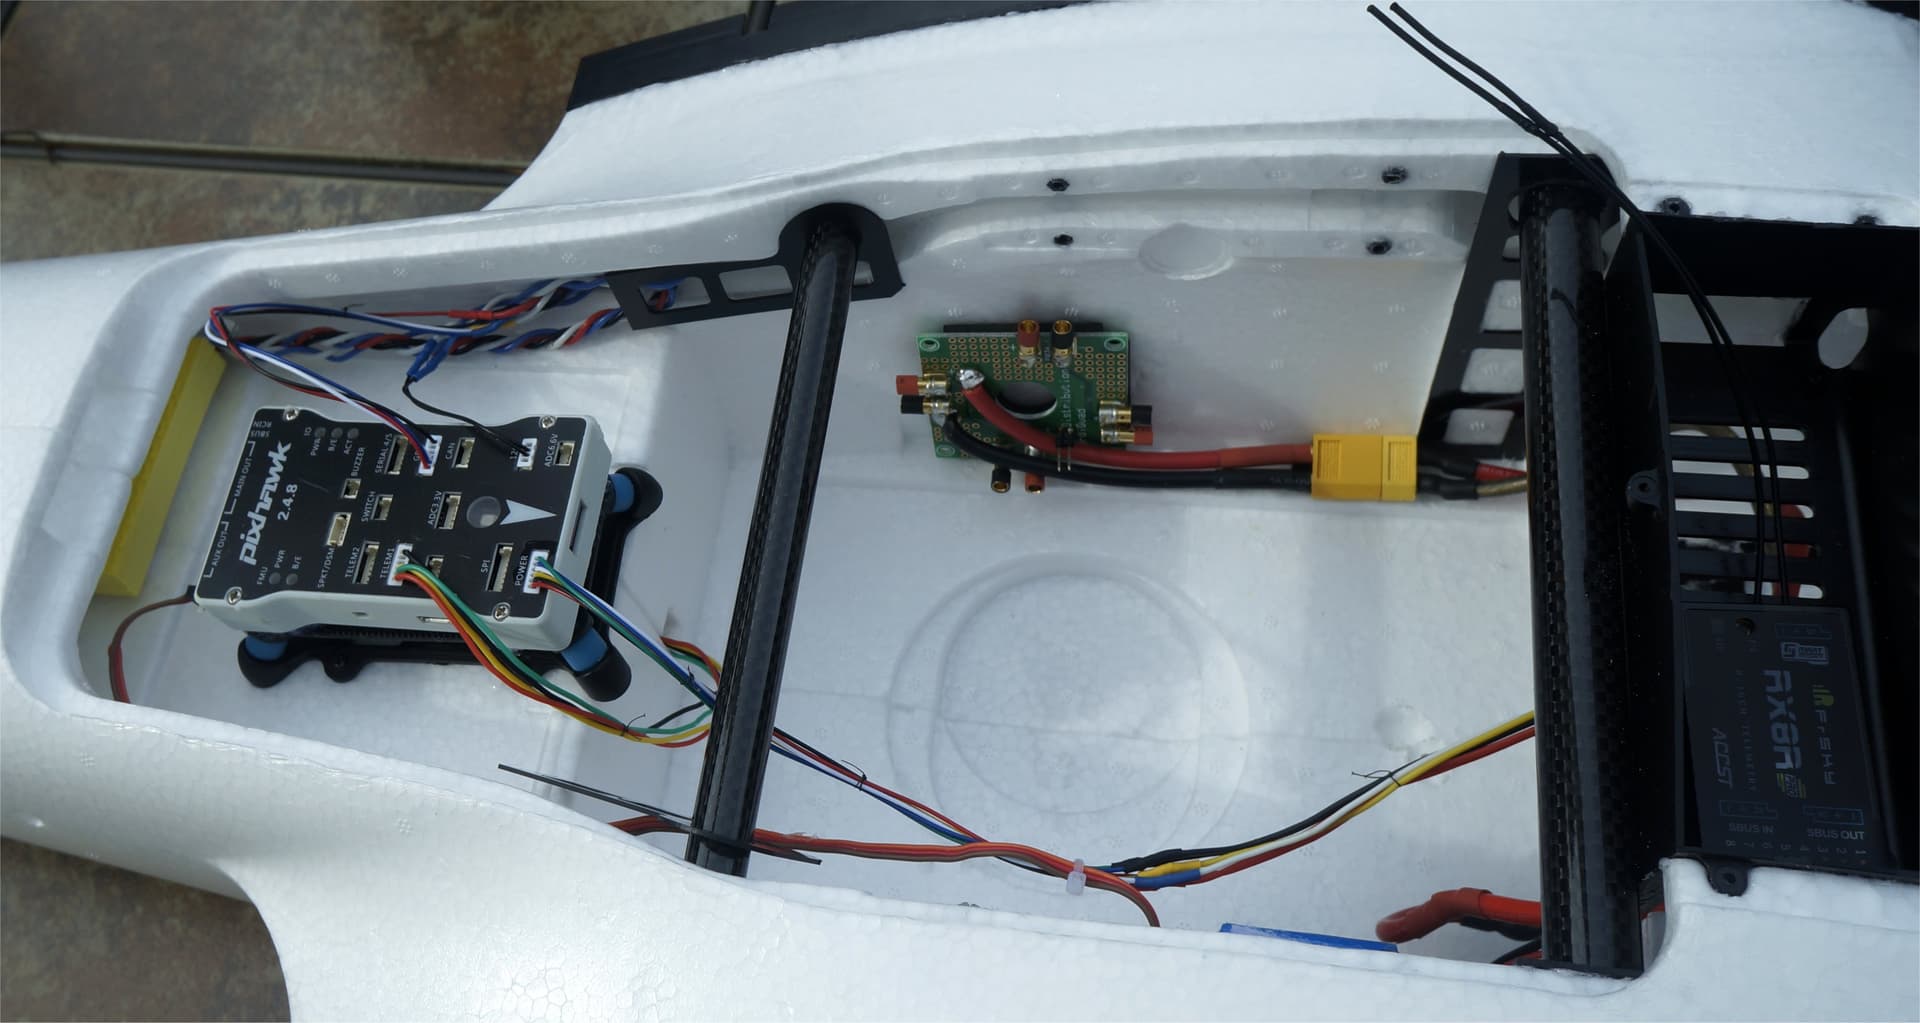
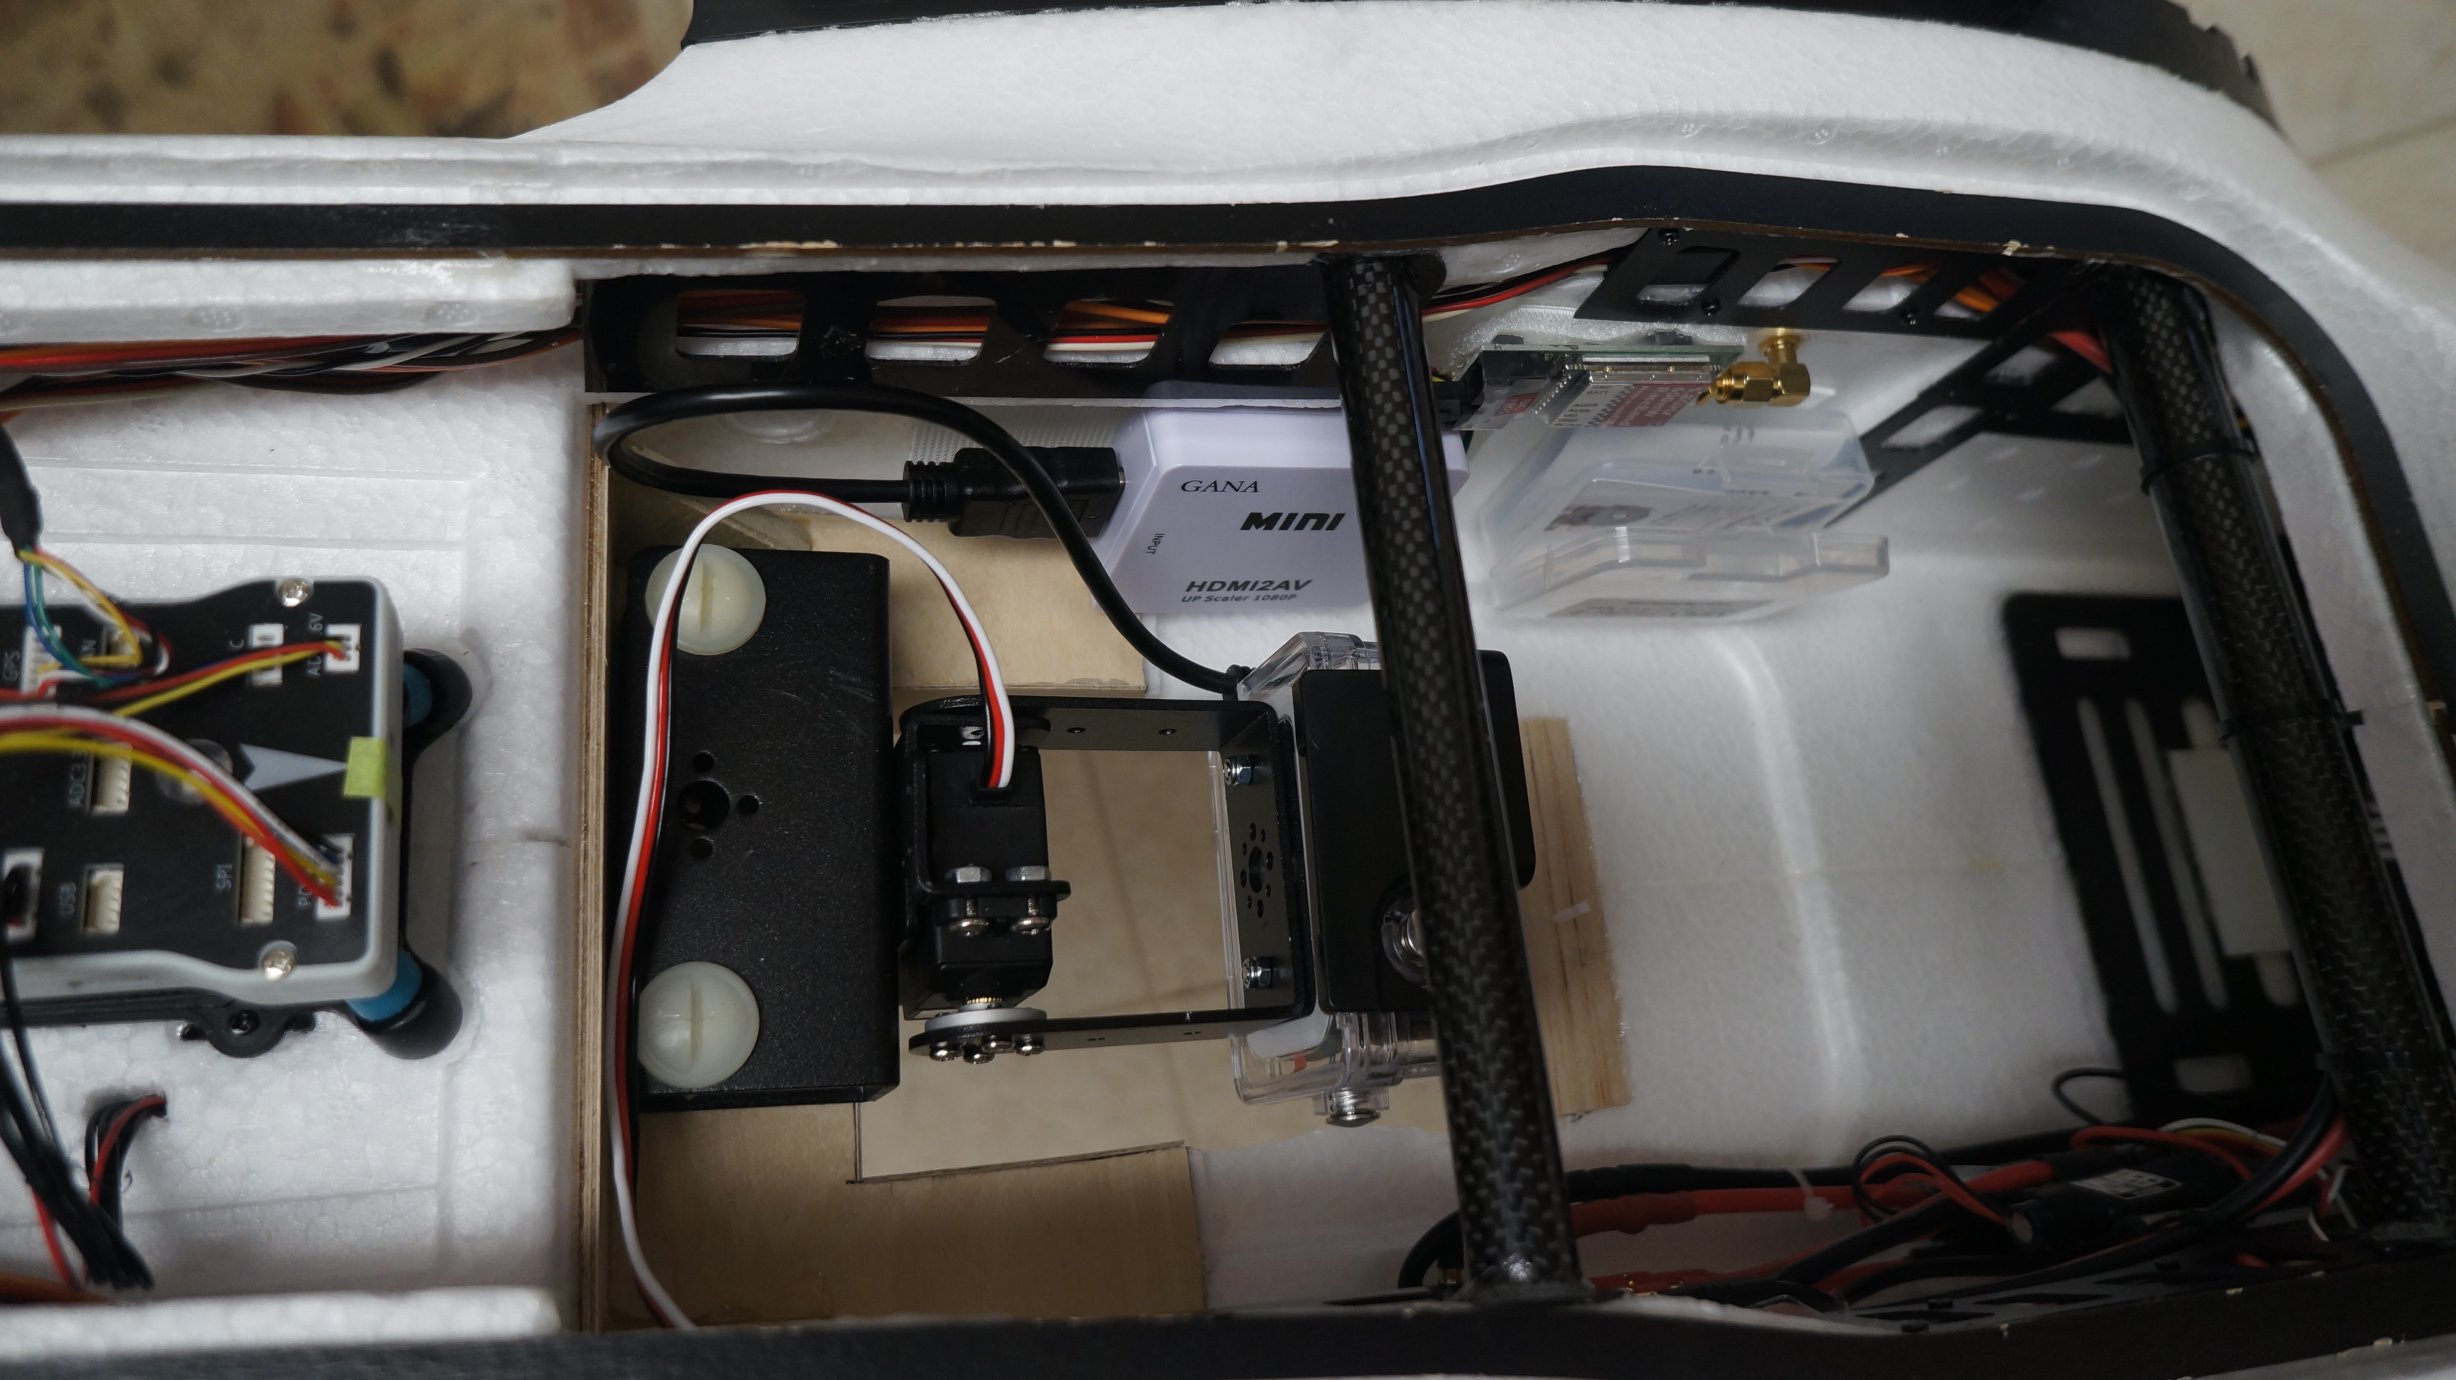
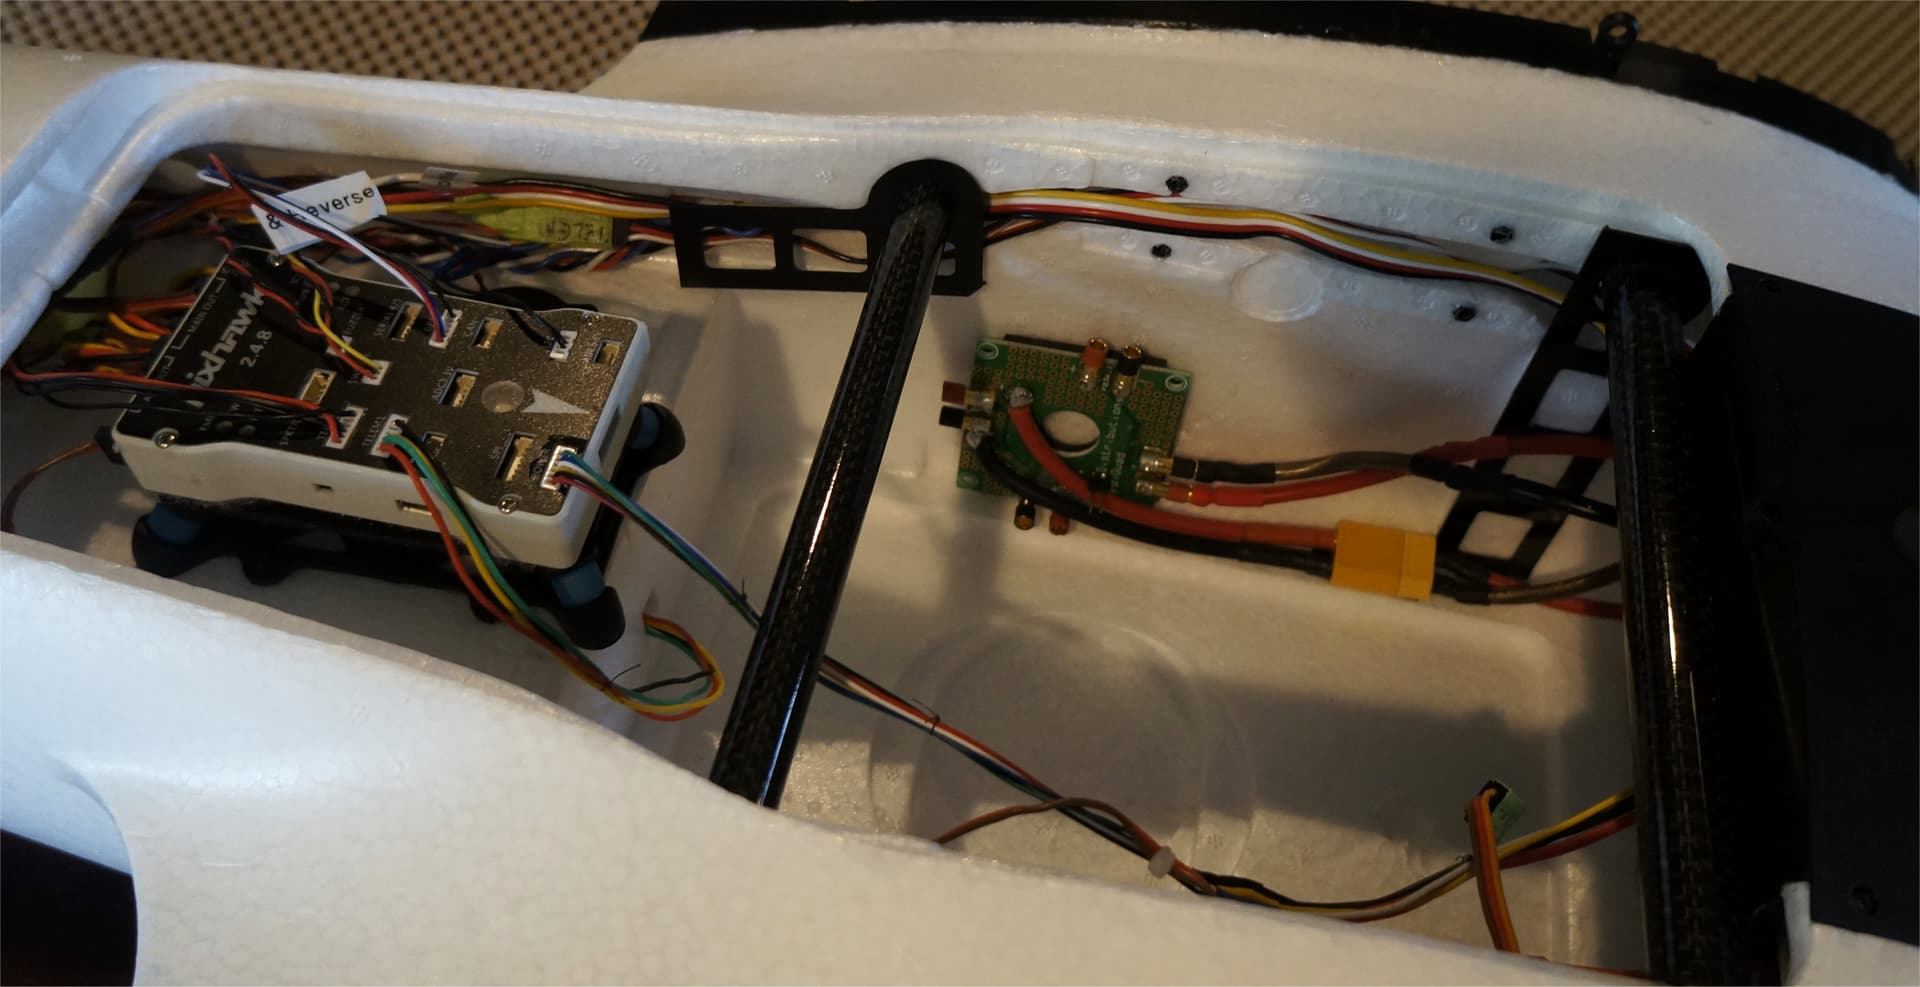
To calibrate my new compass, I put some things in the plane to make it easier and one thing led to another. Before I knew it, I had the NEO M9N unit and pixhawk mounted. I then mounted the 3DR telemetry unit to create a wireless compass calibration and later added my Mauch Power Module. I’m still waiting for my power distribution board but it will be similar to what I have used in the past.
Initially, I’ll see if I can balance the Striver with my 1.32kg (47oz) Turnigy 6s 12C-24C 10AH Lipo pack. It will help me reduce weight and hopefully provide a 30 minute flight time.
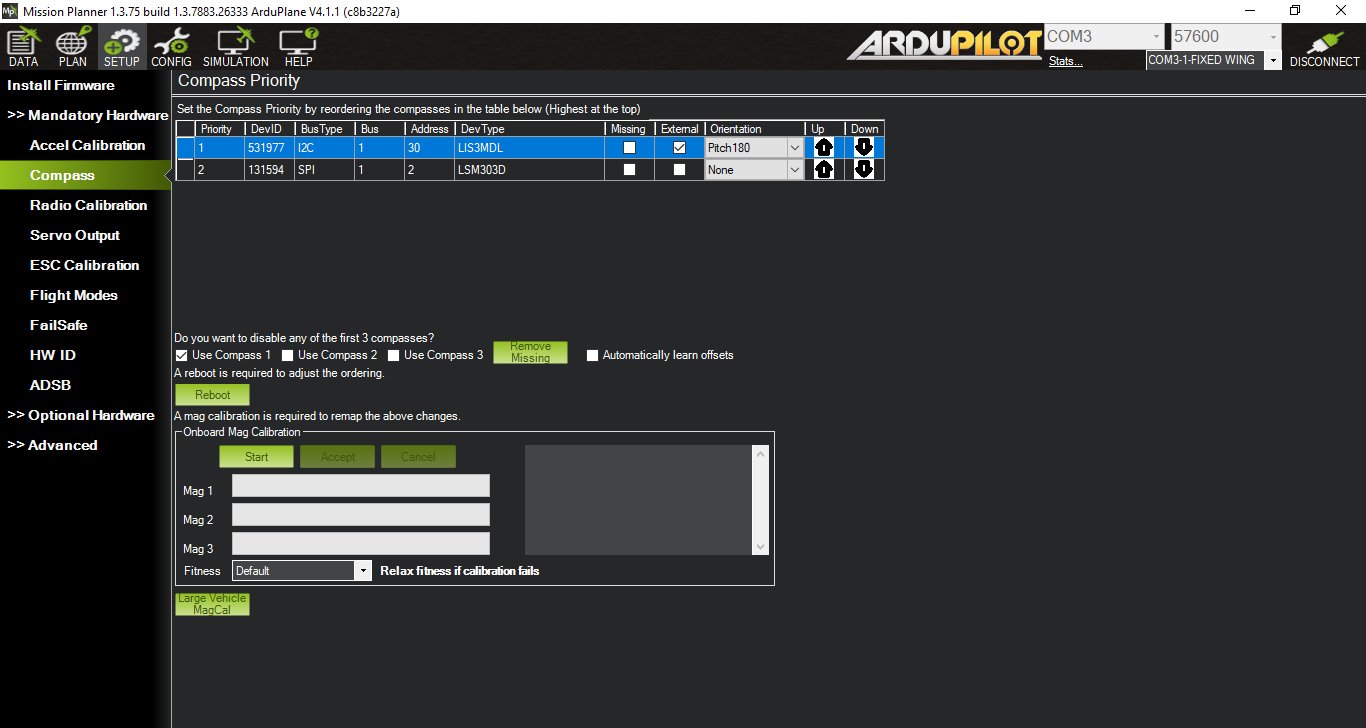
I loaded the Pixhawk with ArduPlane v4.1.1 and now use Mission Planner v1.3.75. I noticed some interesting things that I was not used to seeing. First, the parameter polling is faster using some FPV packet transfer instead of the individual parameter poll. Very nice! Second, the compass calibration and orientation appeared to be automatic! My LIS3MDL magnetometer is working very well. I did an Onboard Mag Calibration because I wasn’t sure if I still needed to and it worked first time. So, no issues with the new X series version NEO-M9N or v4.1.1 firmware.
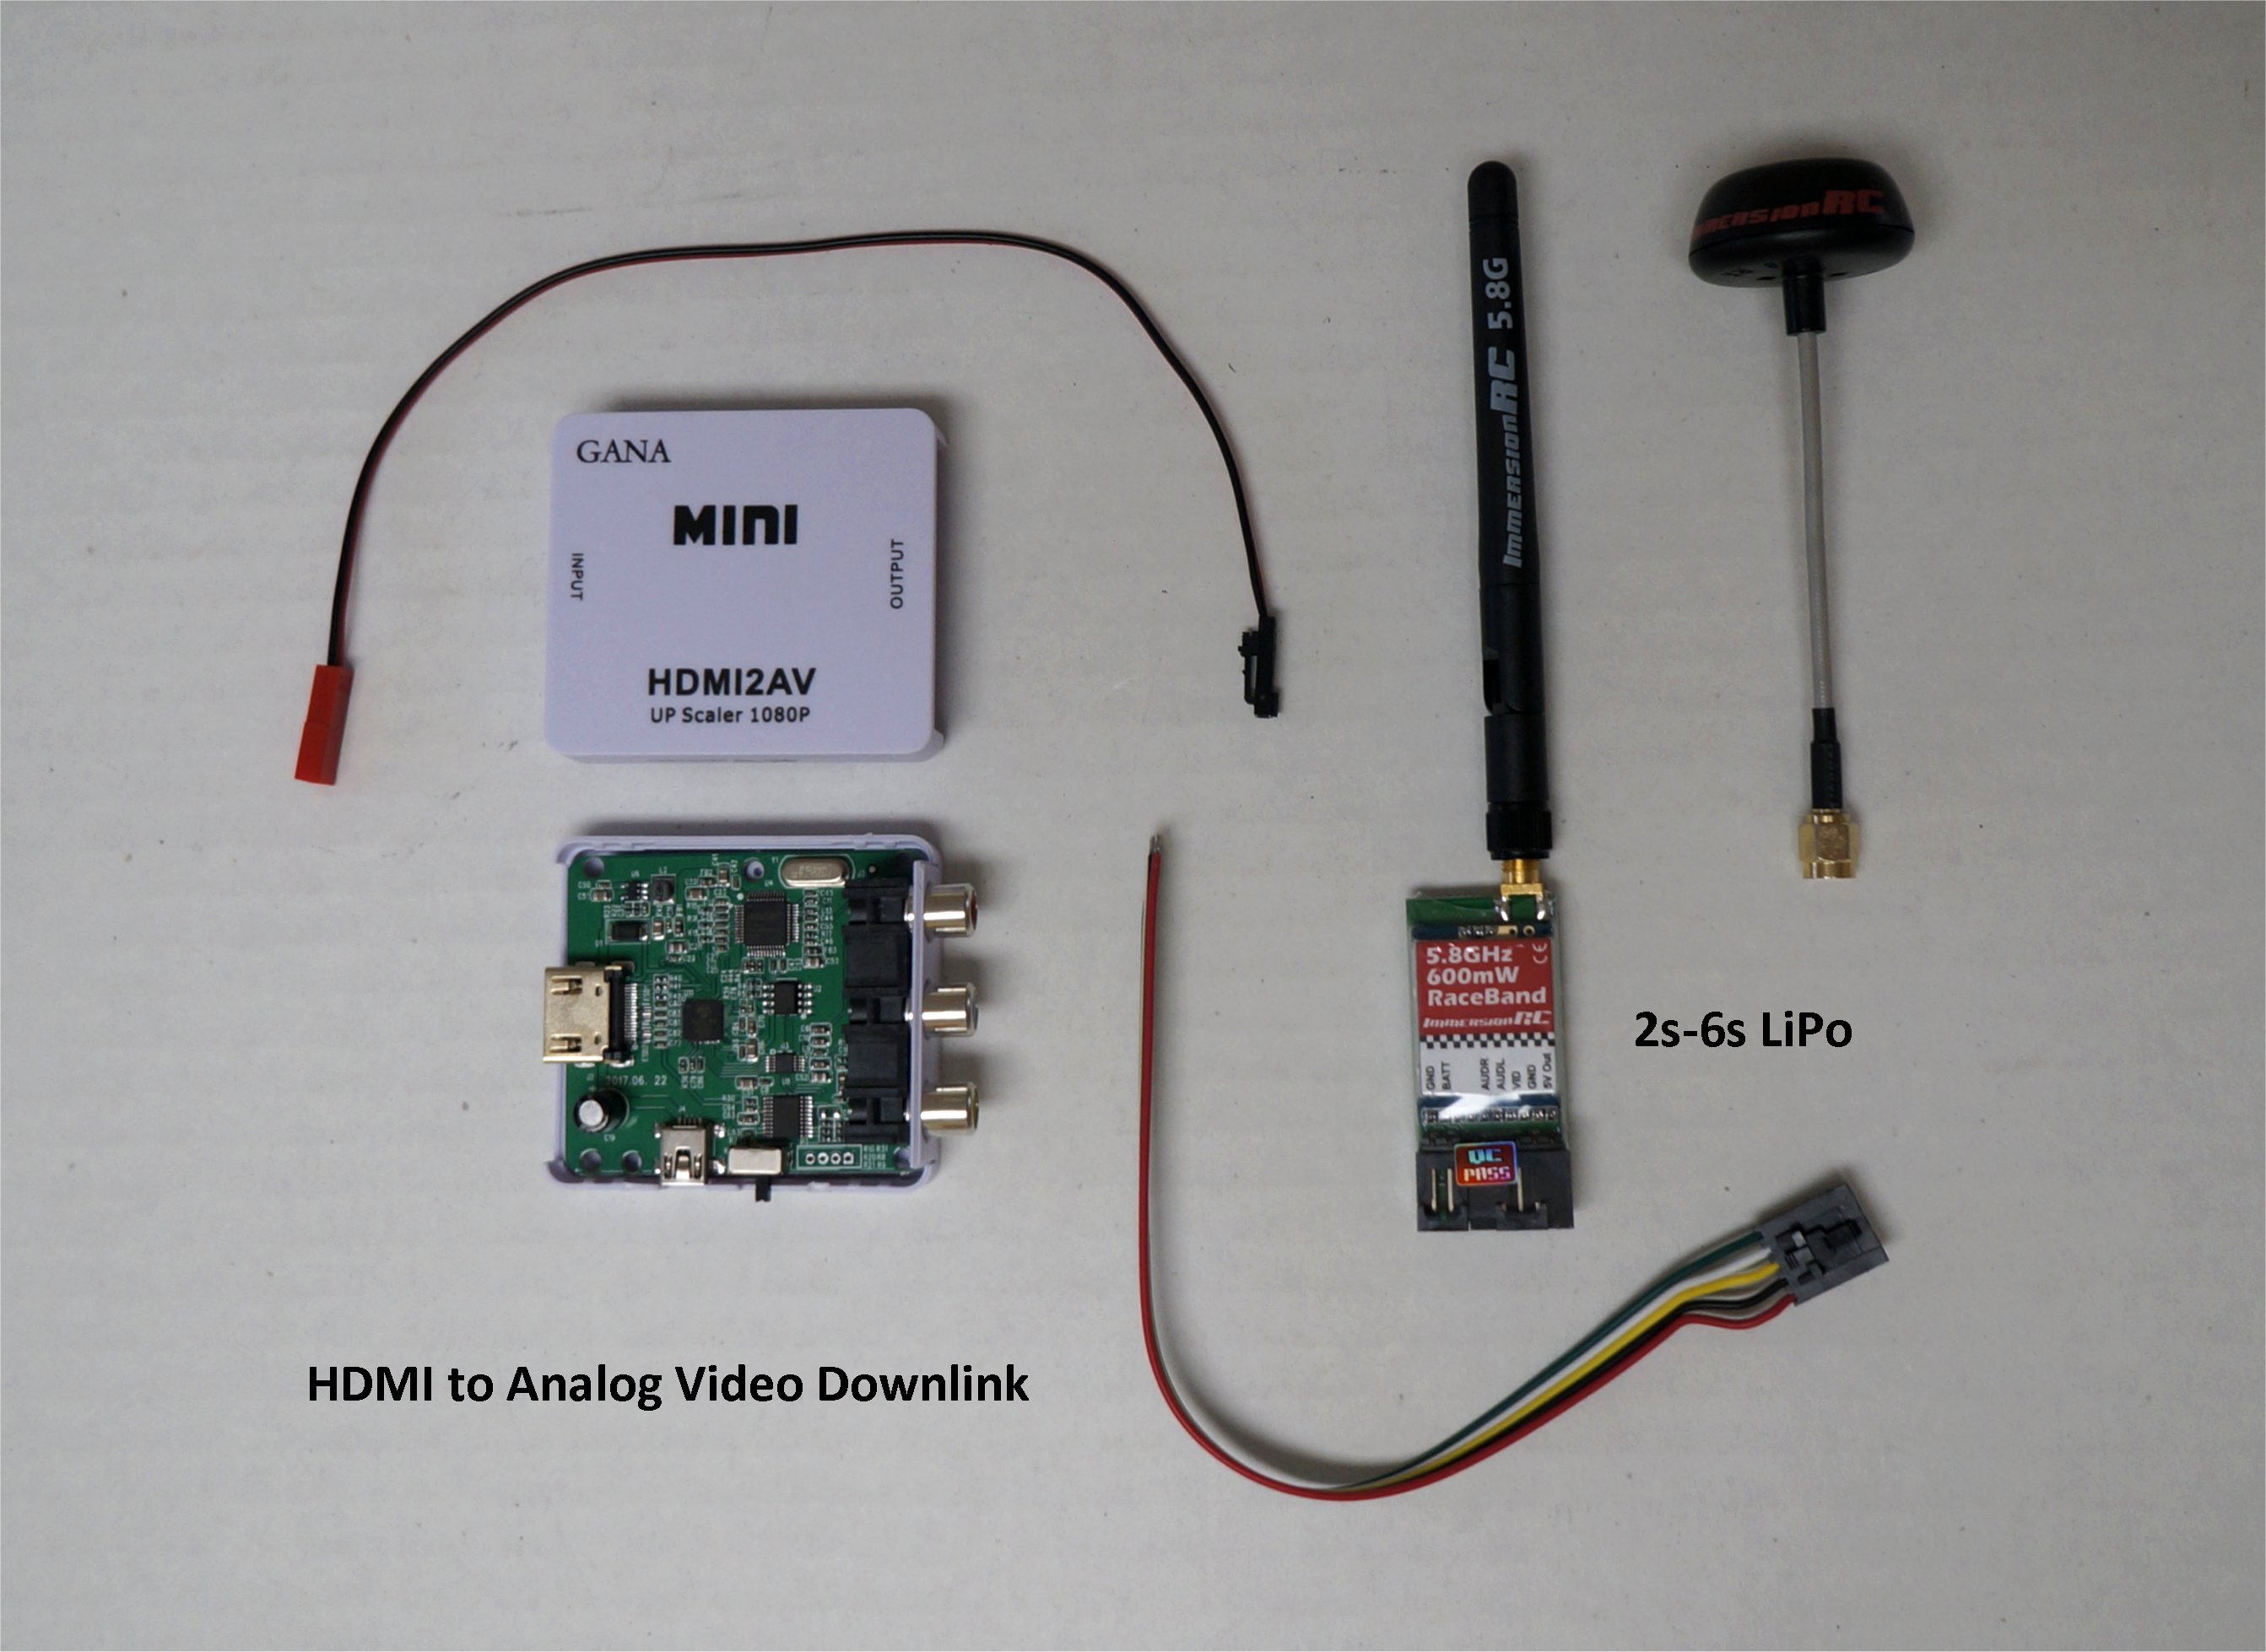
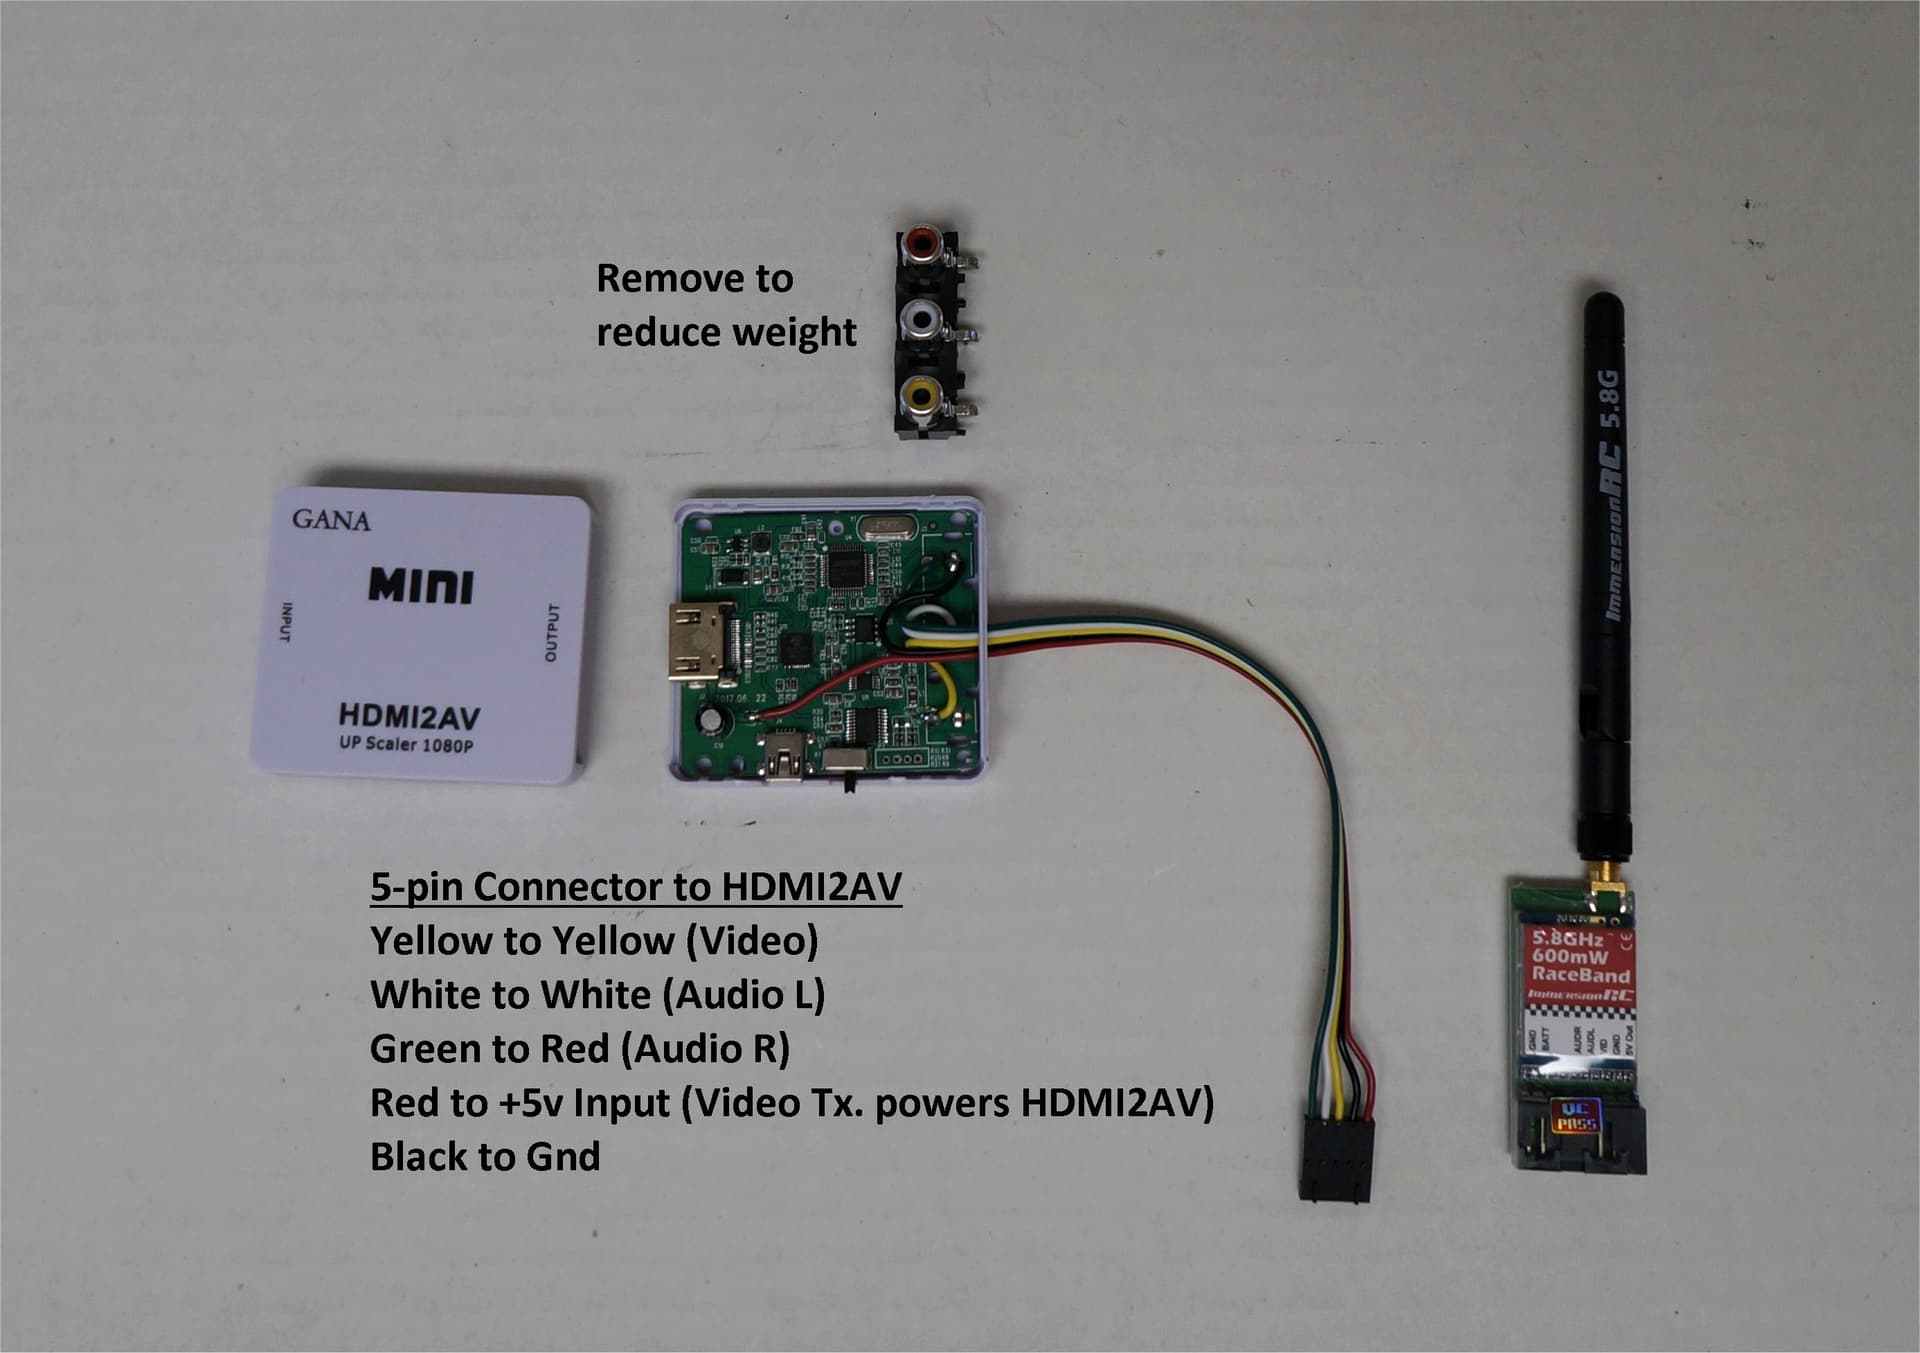
Since a gimbal is not needed, I actually intend to use an old but never been used RCDevice RCD3015. If memory serves me, the 5-pin adapter with the MinimOSD or just the loose harness is an easy and quick integration for a HUD overlay on the monitor or goggles, then to a VTx. Anyway, the GANA will serve as an option for other builds, whenever I get there.
Thanks! Keep in mind that many HDMI signals are proprietary and different from others. I know the GANA works with a GoPro H7 but I believe that my old RCD 3015 from Banggood did not. I can’t remember for sure so try it first. I know the $10 GANA convertor on Amazon works well.
> The RCD 3015 unit is compatible with SONY NEX-5N, 5R, 5T, 6N, 7N, A5000, A6000 and GoPro3.
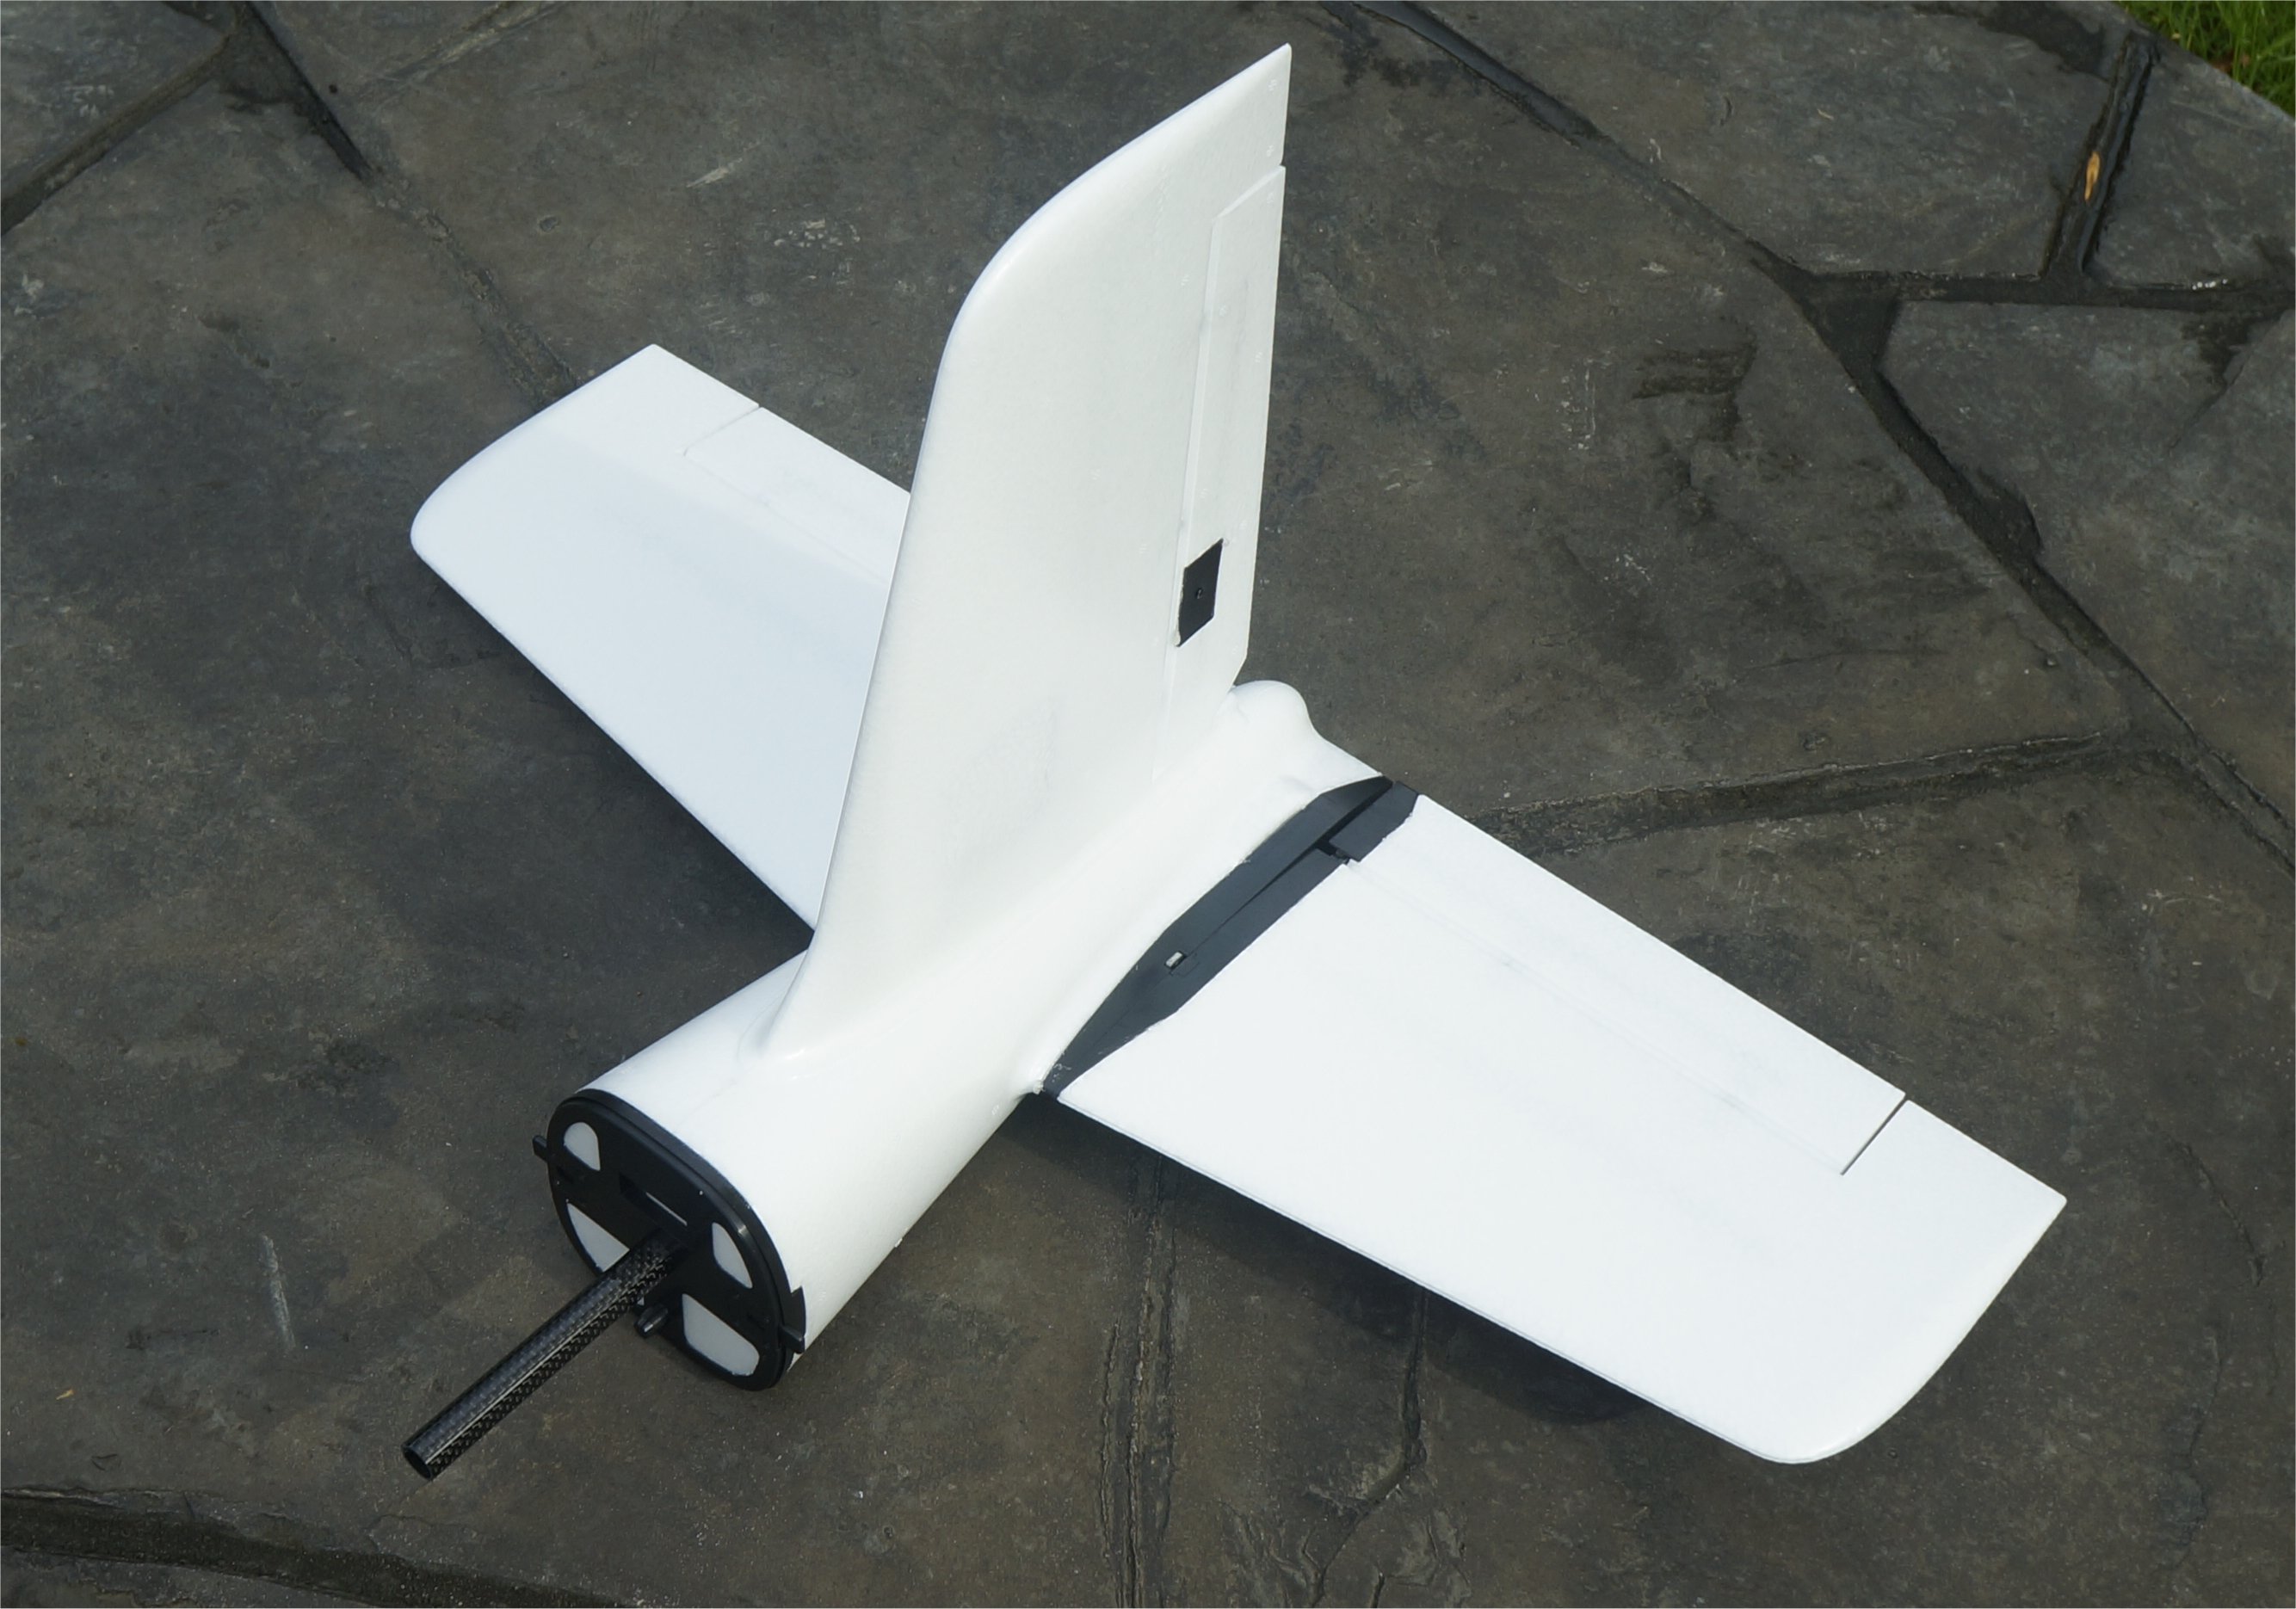
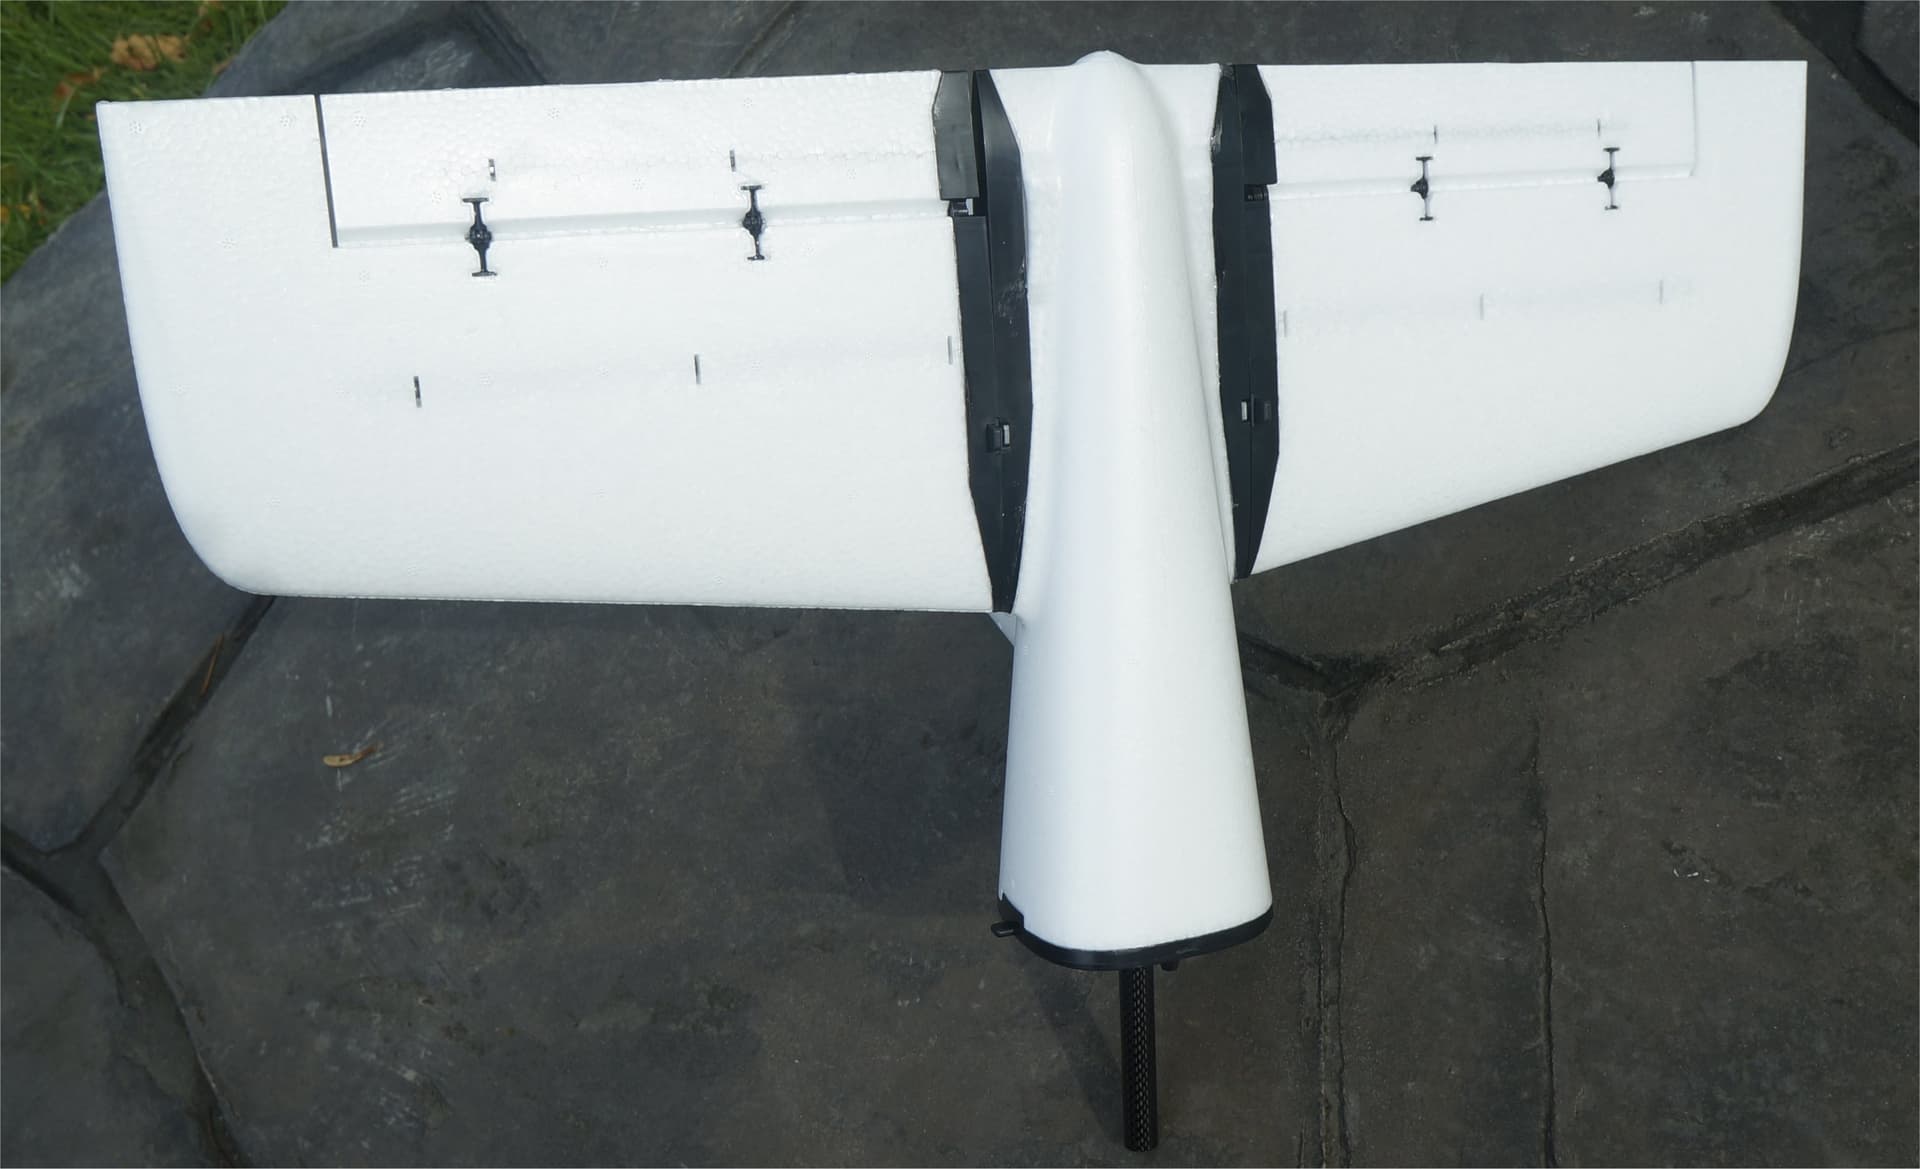
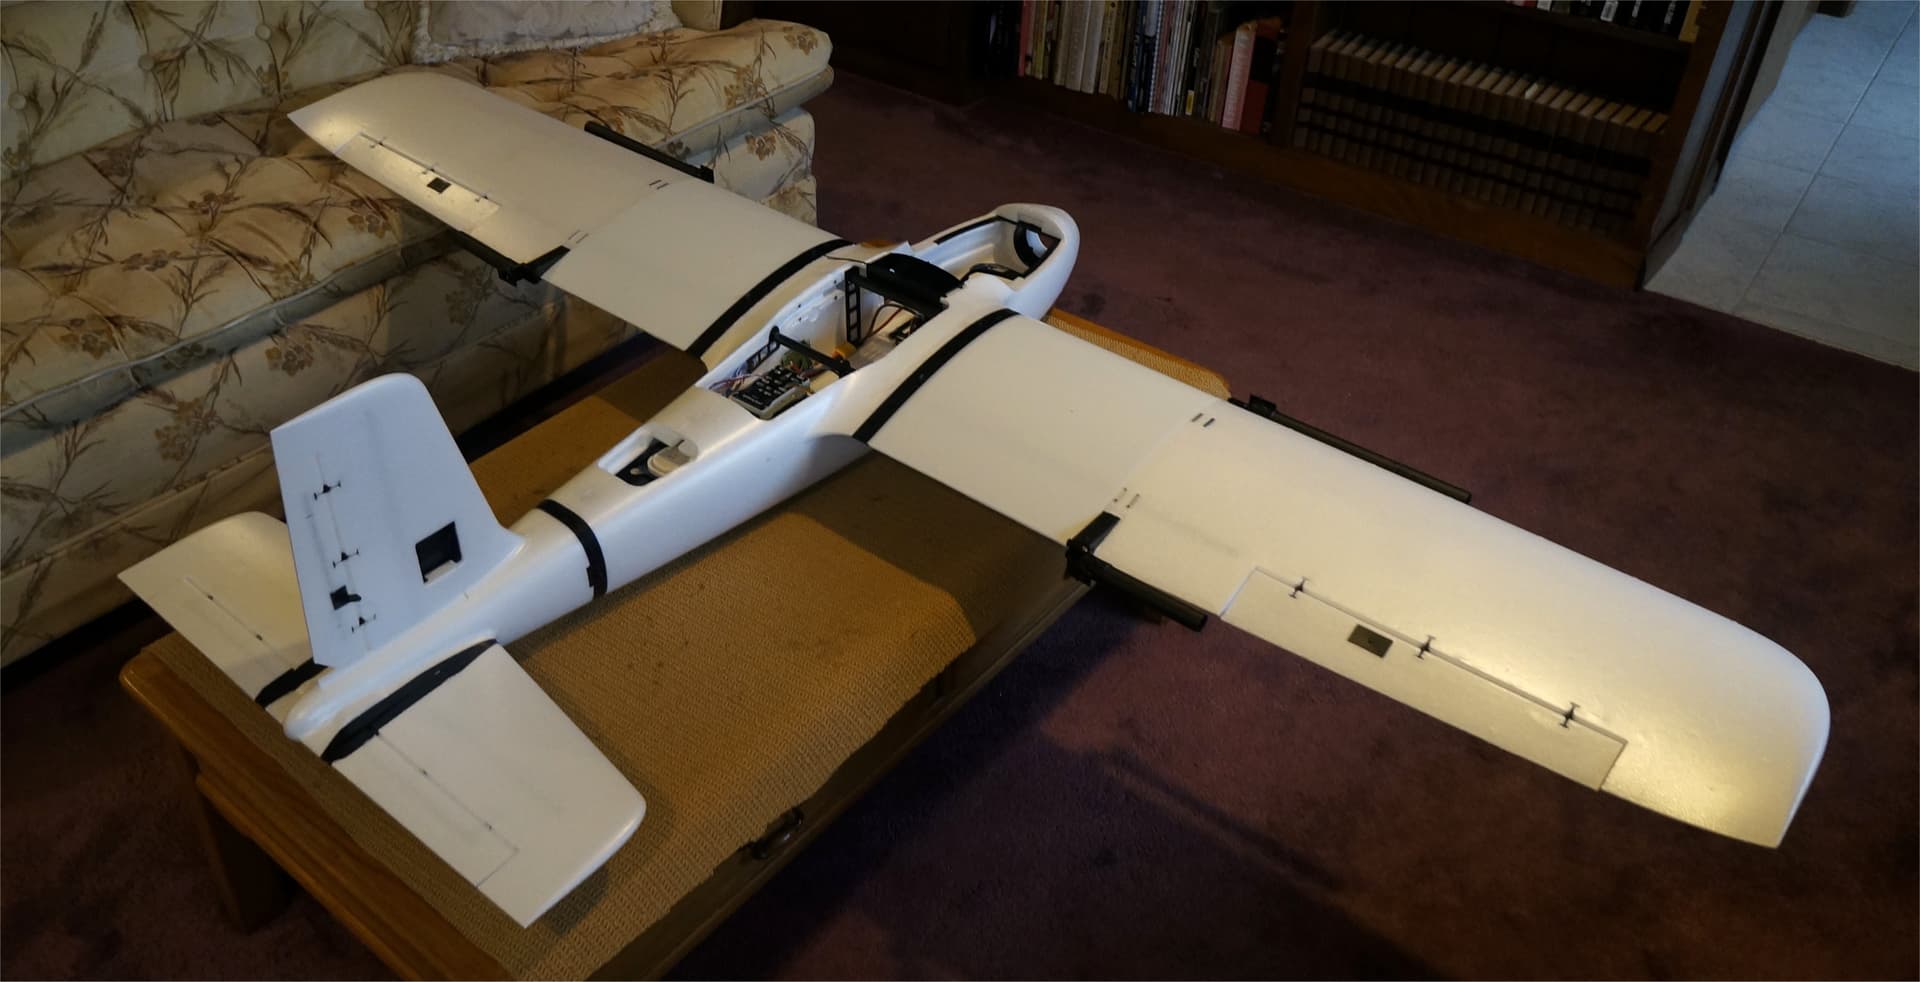
I completed video #3 which is all about the tail section. Some nice areas of the design are the tool-free assembly, quick-release latches, glue and screw control horns, and real hinges on the control surfaces. All the parts fit perfectly!
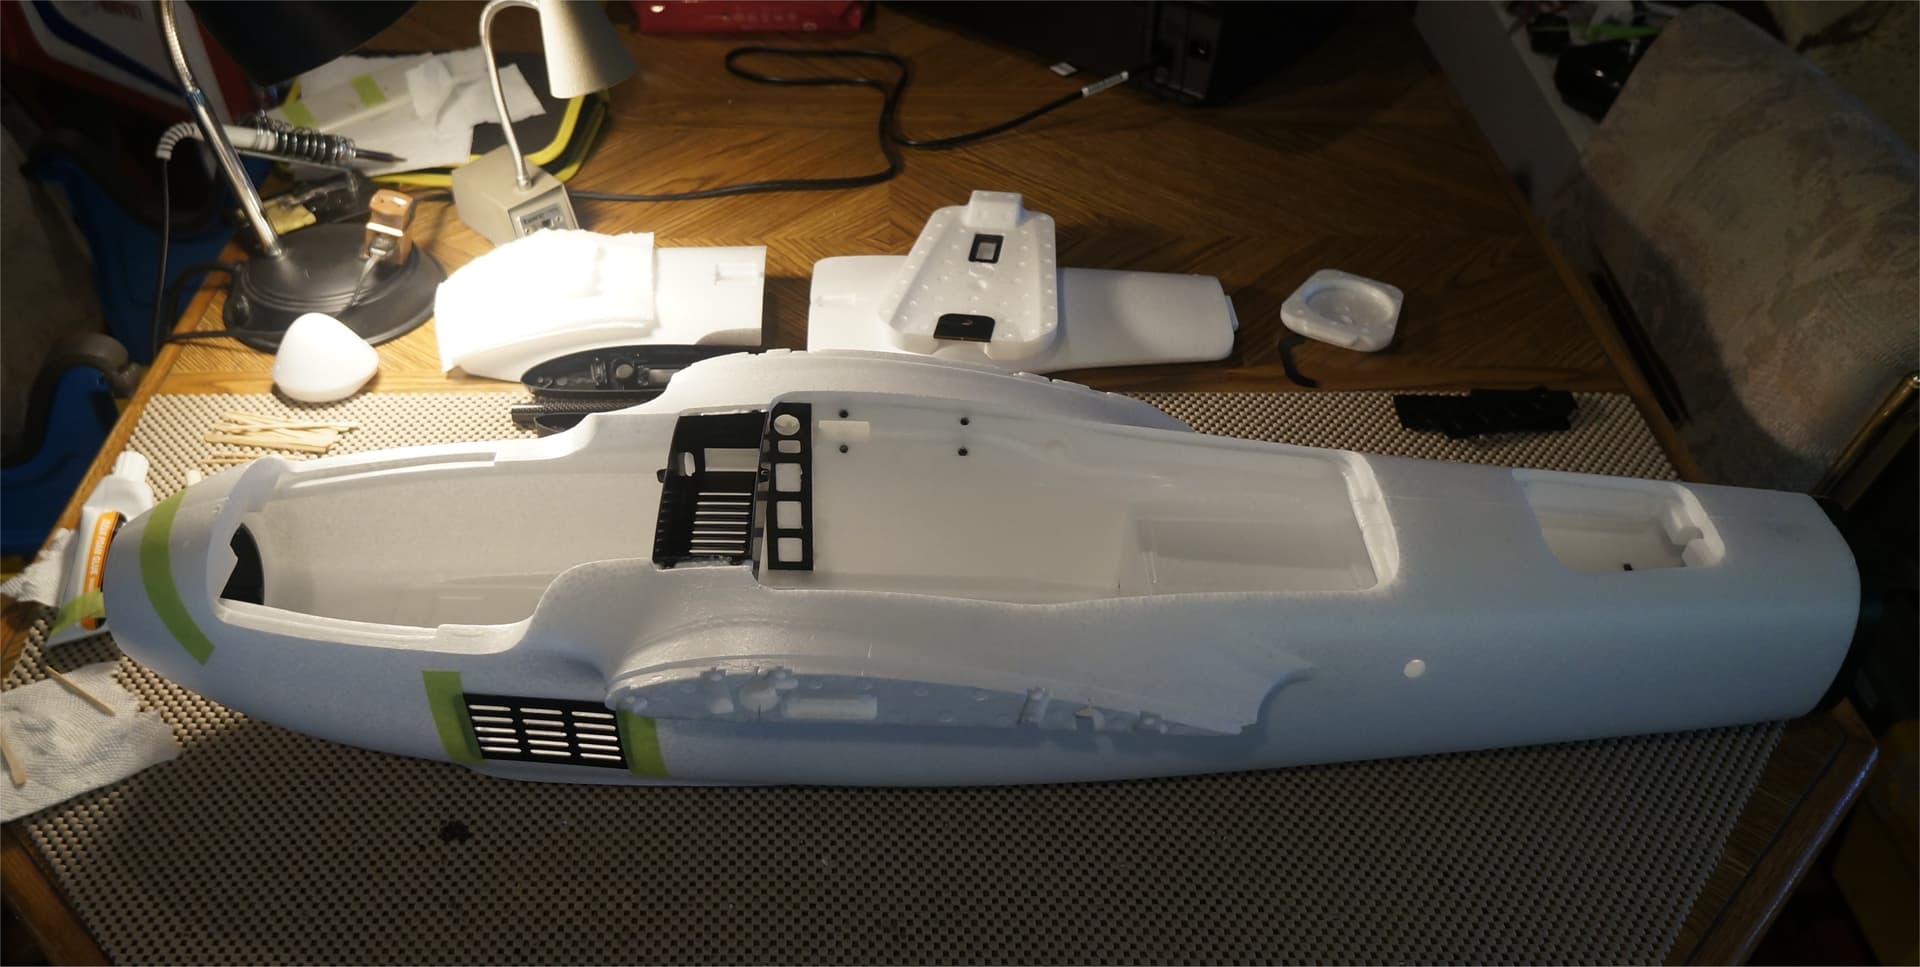
In order to test the upcoming servos, I got carried away and installed my wiring harness, power distribution board, some BECs, and a FrSky RX8R Pro receiver. My wire harness and Mauch BEC was from a previous assembly. Since the wire harness already supports the right wing power, the Power Distribution board is only for the left wing and forward flight motor.
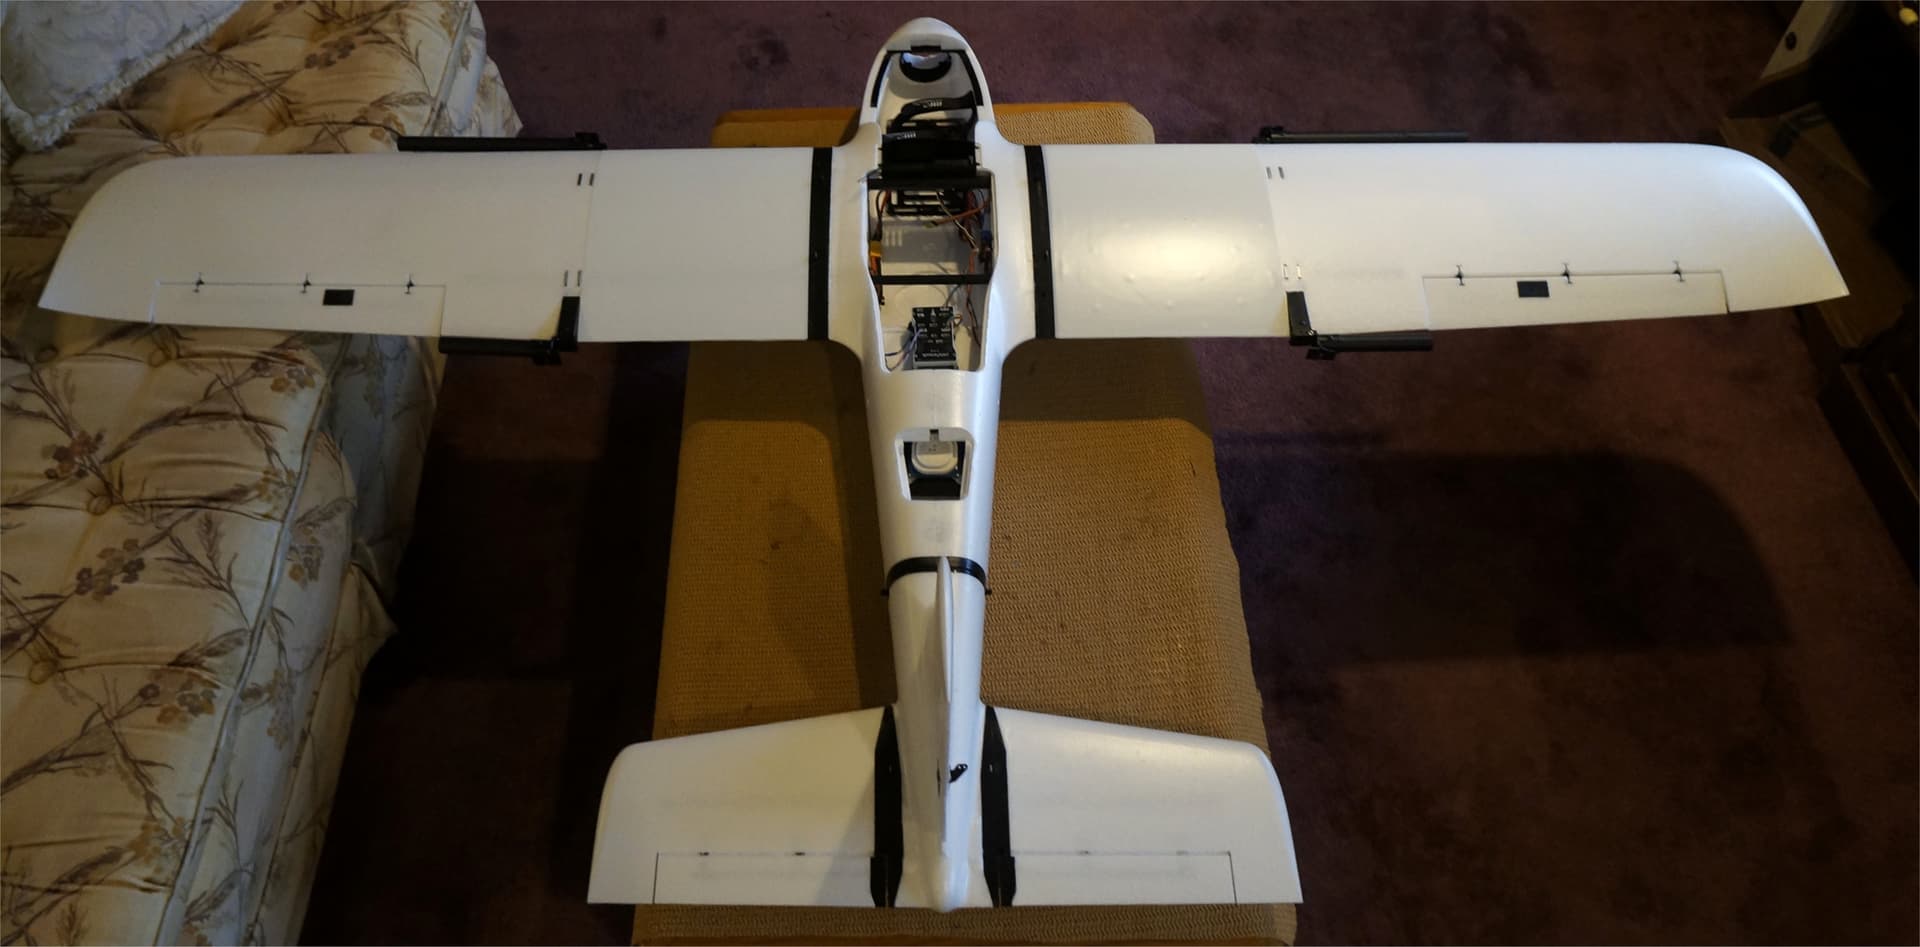
I also decided to use similar setup and placement on the Striver as I did on the Fighter. The redundant XM+ receiver will be in one wing and an AS sensor in the other, as before. My two antennas from the RX8R Pro receiver will come out the Striver black plastic top cover as designed.
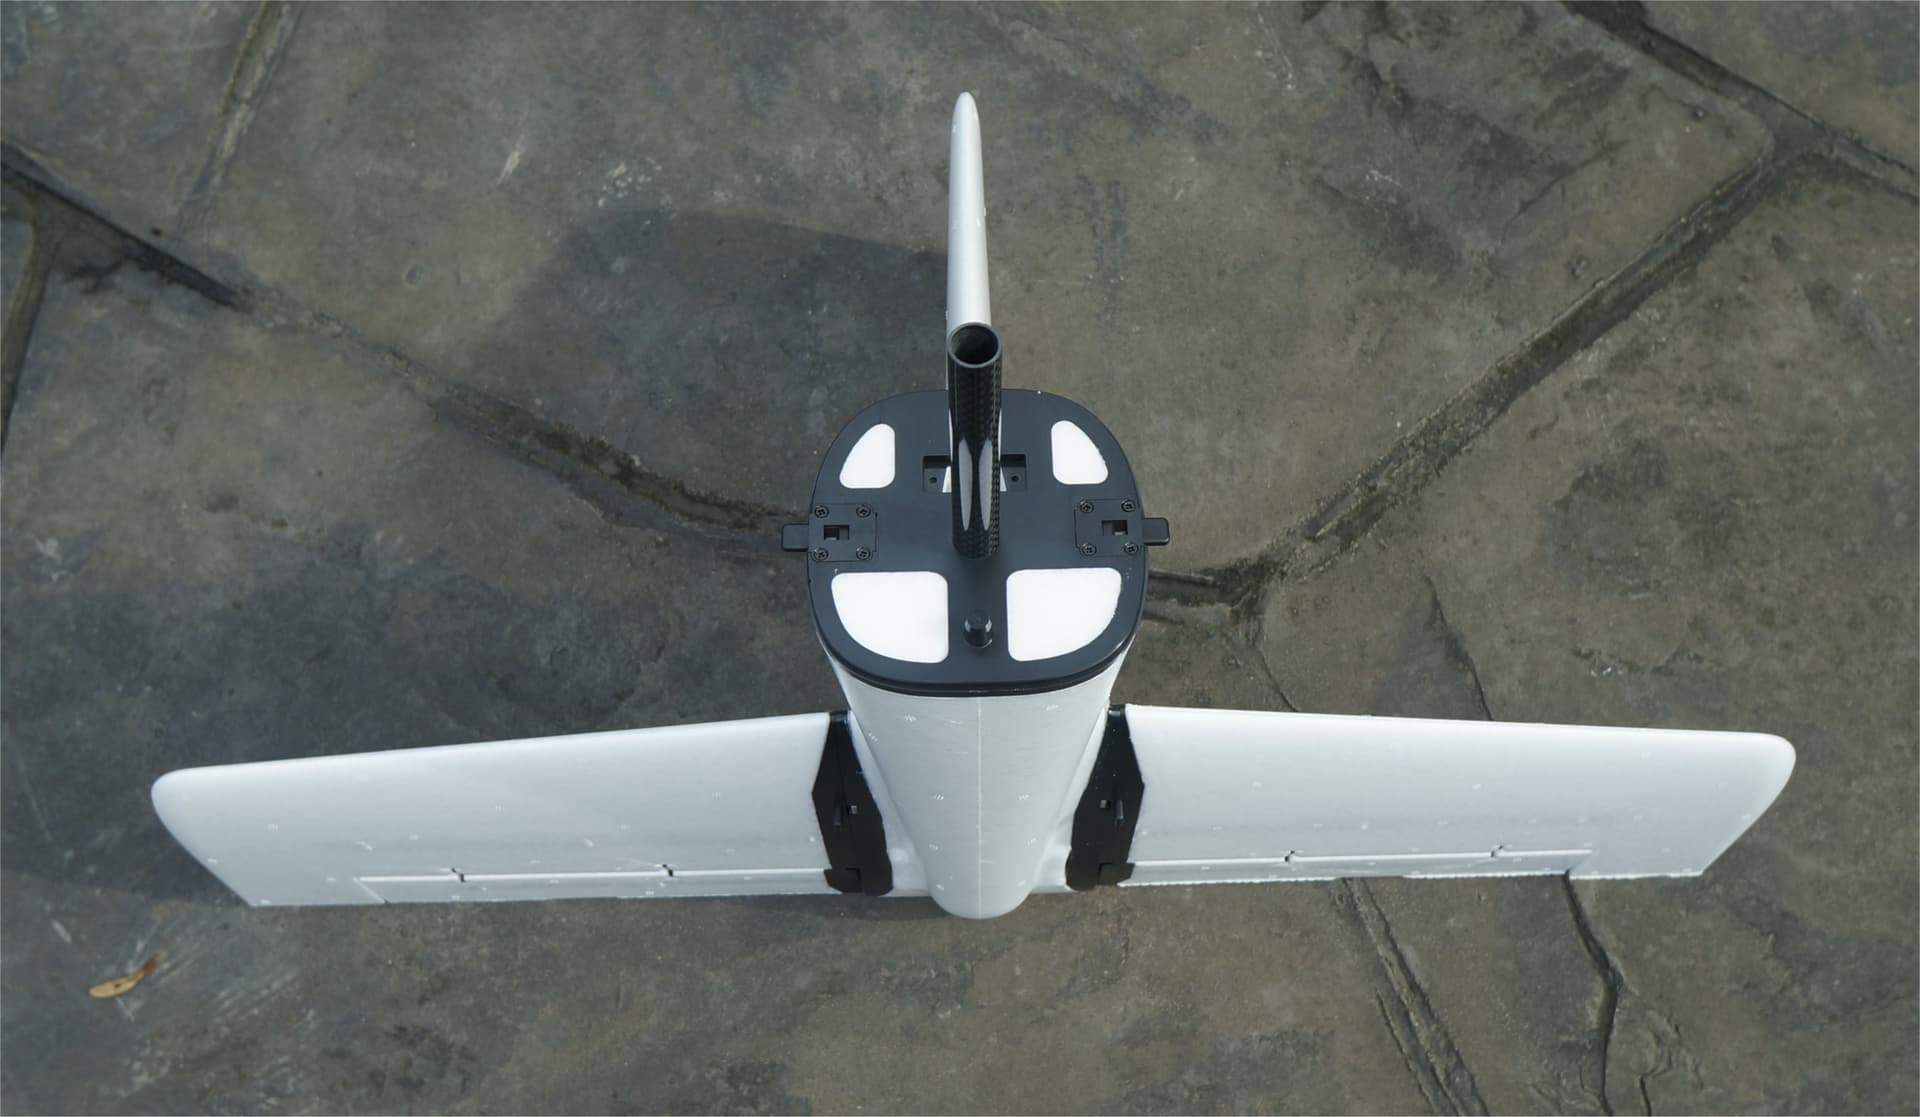
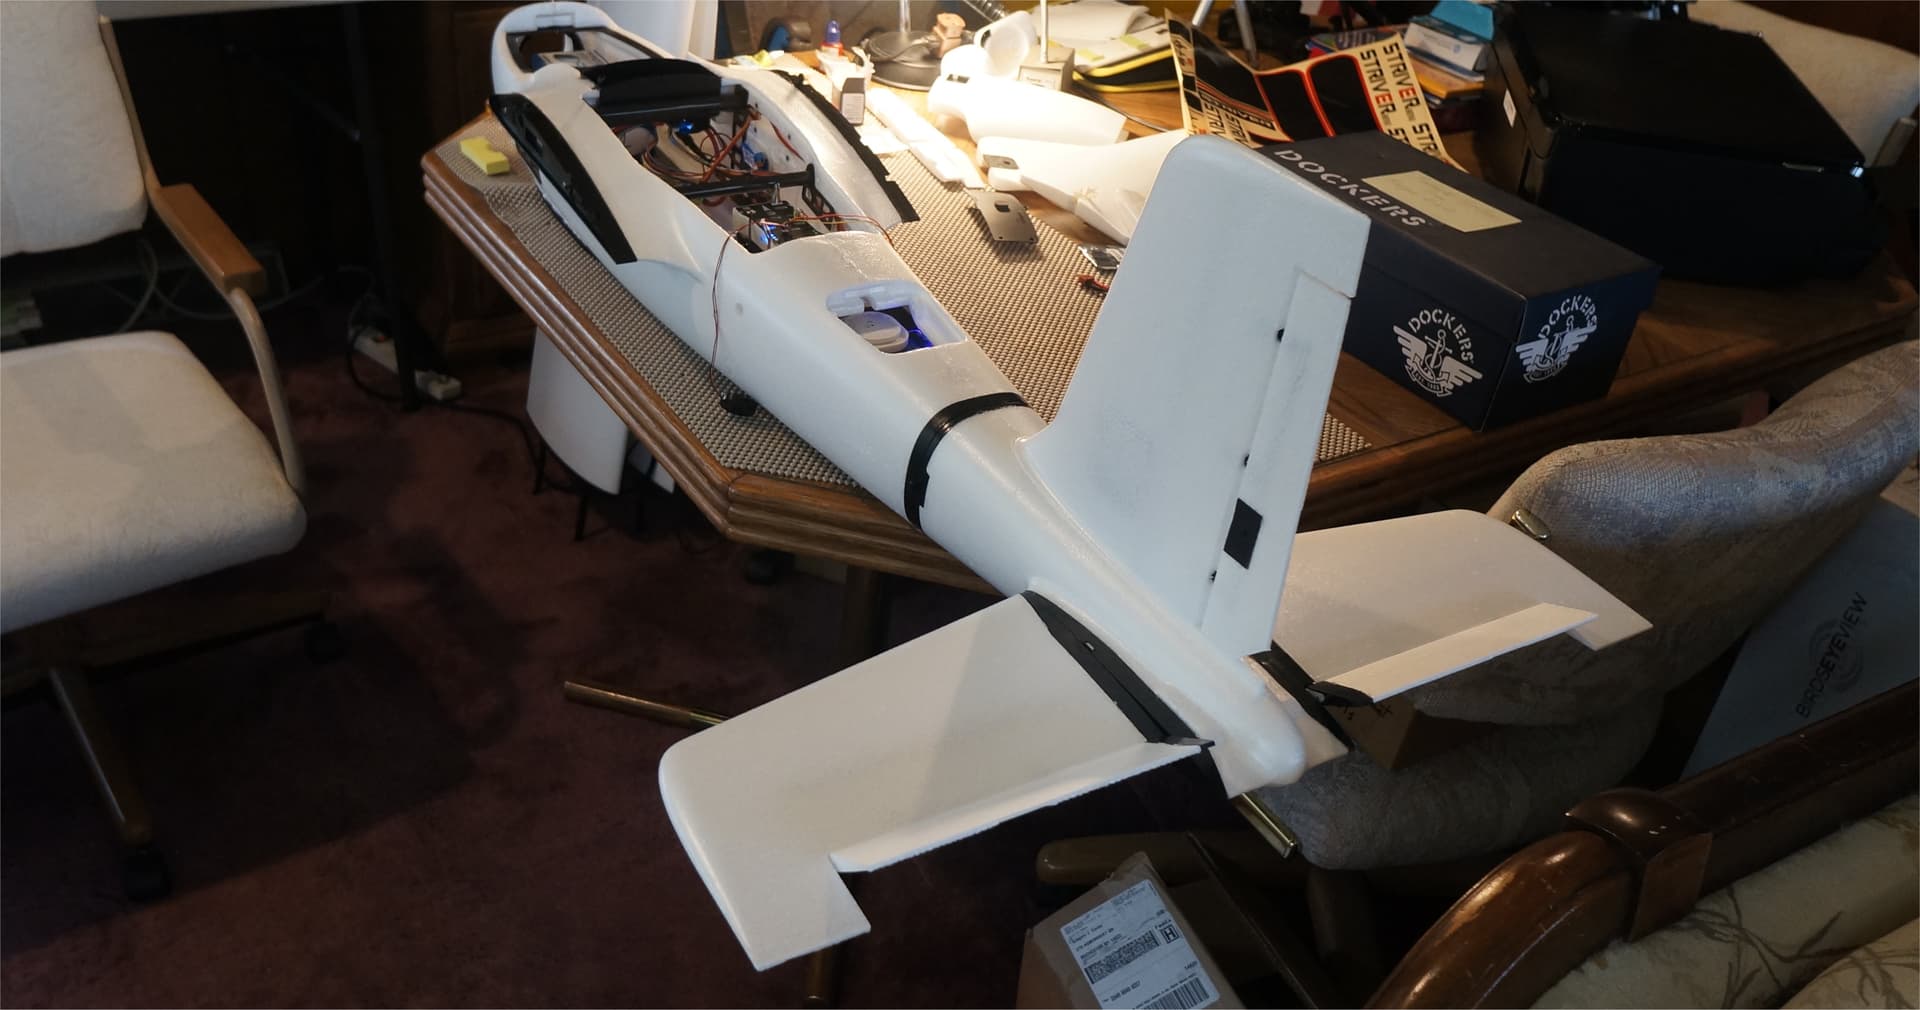
In video #4, the wings were assembled and Mylar sheets applied for added strength. It was a good time to test the fit of the wings and tail onto the fuselage. Everything fit well and locked into place.
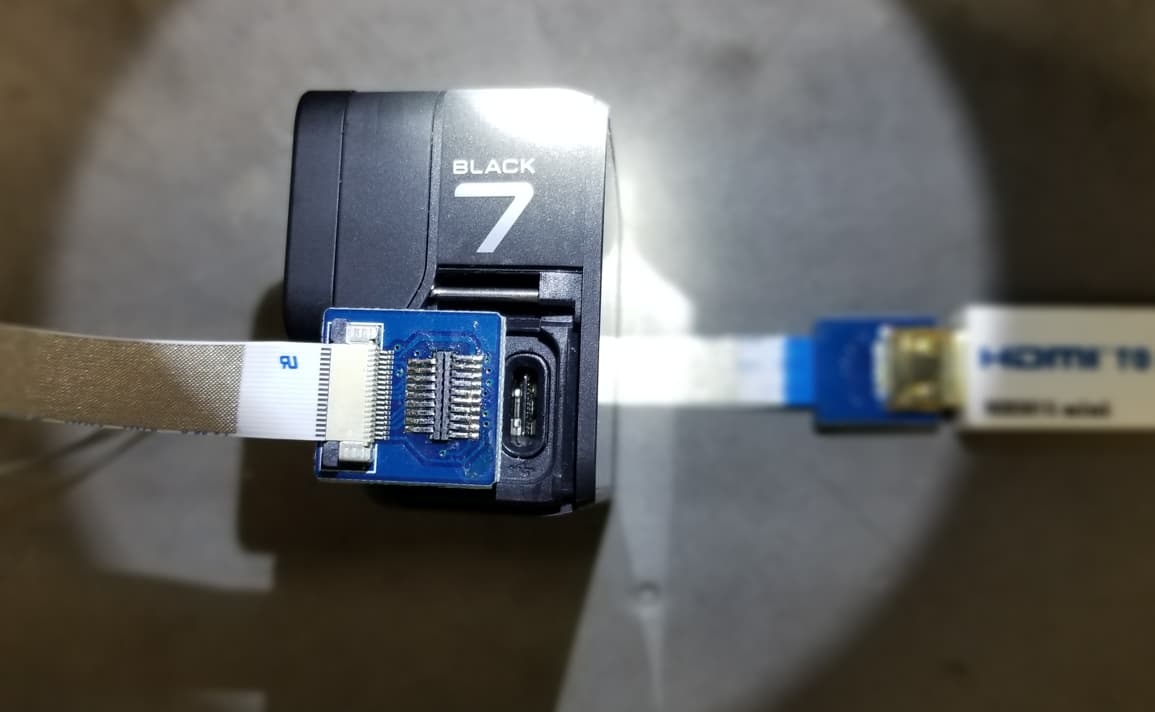
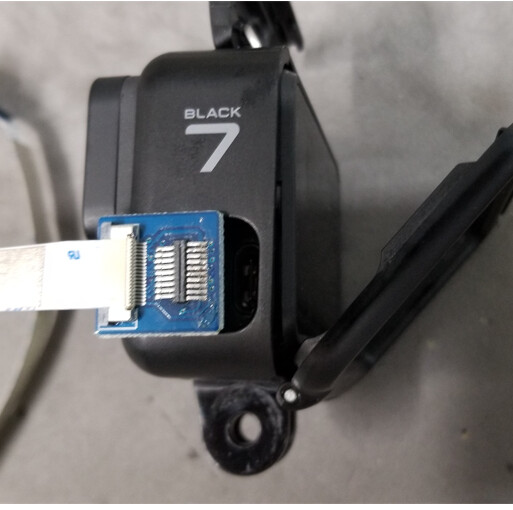
@GregCovey I got hold of a GPH7B and used the RCD 3015 ribbon that comes with it shows the video on my old Samsung HD TV. This is the same one I’ve used during initial setups in the past to confirm video view before connecting to the VTx. Of course, the true test will be going through the converter but from all indications, it should work.
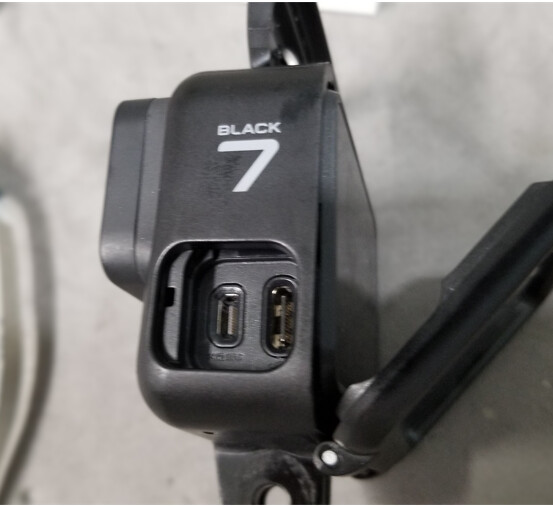
After removing the side door, the greater challenge will be, if I decide the need to keep the battery charged during flight, is to either grind down the PC board enough to plug a regular USB-C cable or pare down the coating around the USB-C plug.
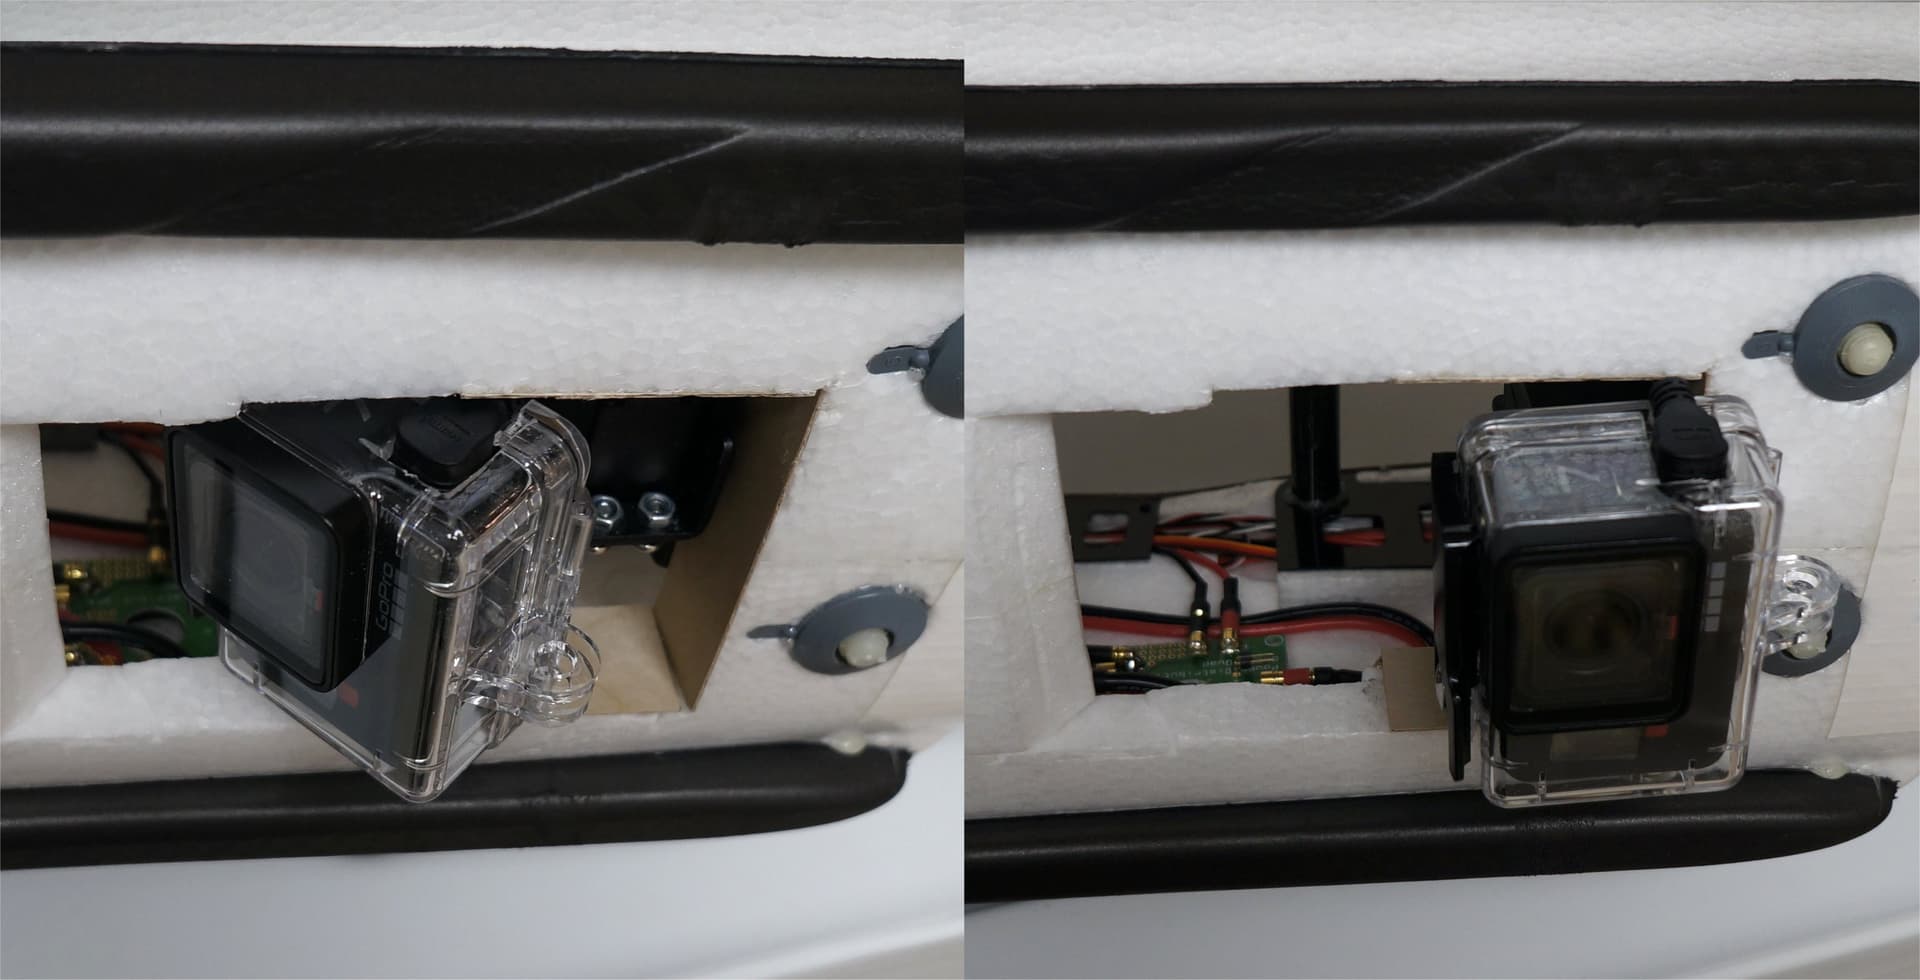
On my pan/tilt setup, the camera protrudes from the belly so I wanted some added protection for unplanned landings. The water-proof case works well with a few mods that wreak the seal but make it easy to mount and dismount.
I don’t have the waterproof case but it looks like I’ll need to do some grinding on the housing. Mine will also protrude through the belly of the VTBird.
After connecting my RX8R Pro receiver to the Pixhawk, I completed the tail connector and servo installation. Both the tail and fuselage 9-pin D connectors used the servo wires provided in the kit. I ran the servo wires under the ground plane of the X Series NEO M9N GPS module and still had plenty of length to attached the ends to the Pixhawk. The Pixhawk servo power (MAIN and AUX) is supplied by a Castle CC BEC.
I calibrated the Horus X10 transmitter in Mission Planner and then set one of the Flight Mode knob positions for MANUAL. I could then get full swing on both elevator halves and the rudder using the transmitter sticks. It was a good milestone to check out a large chunk of the system.
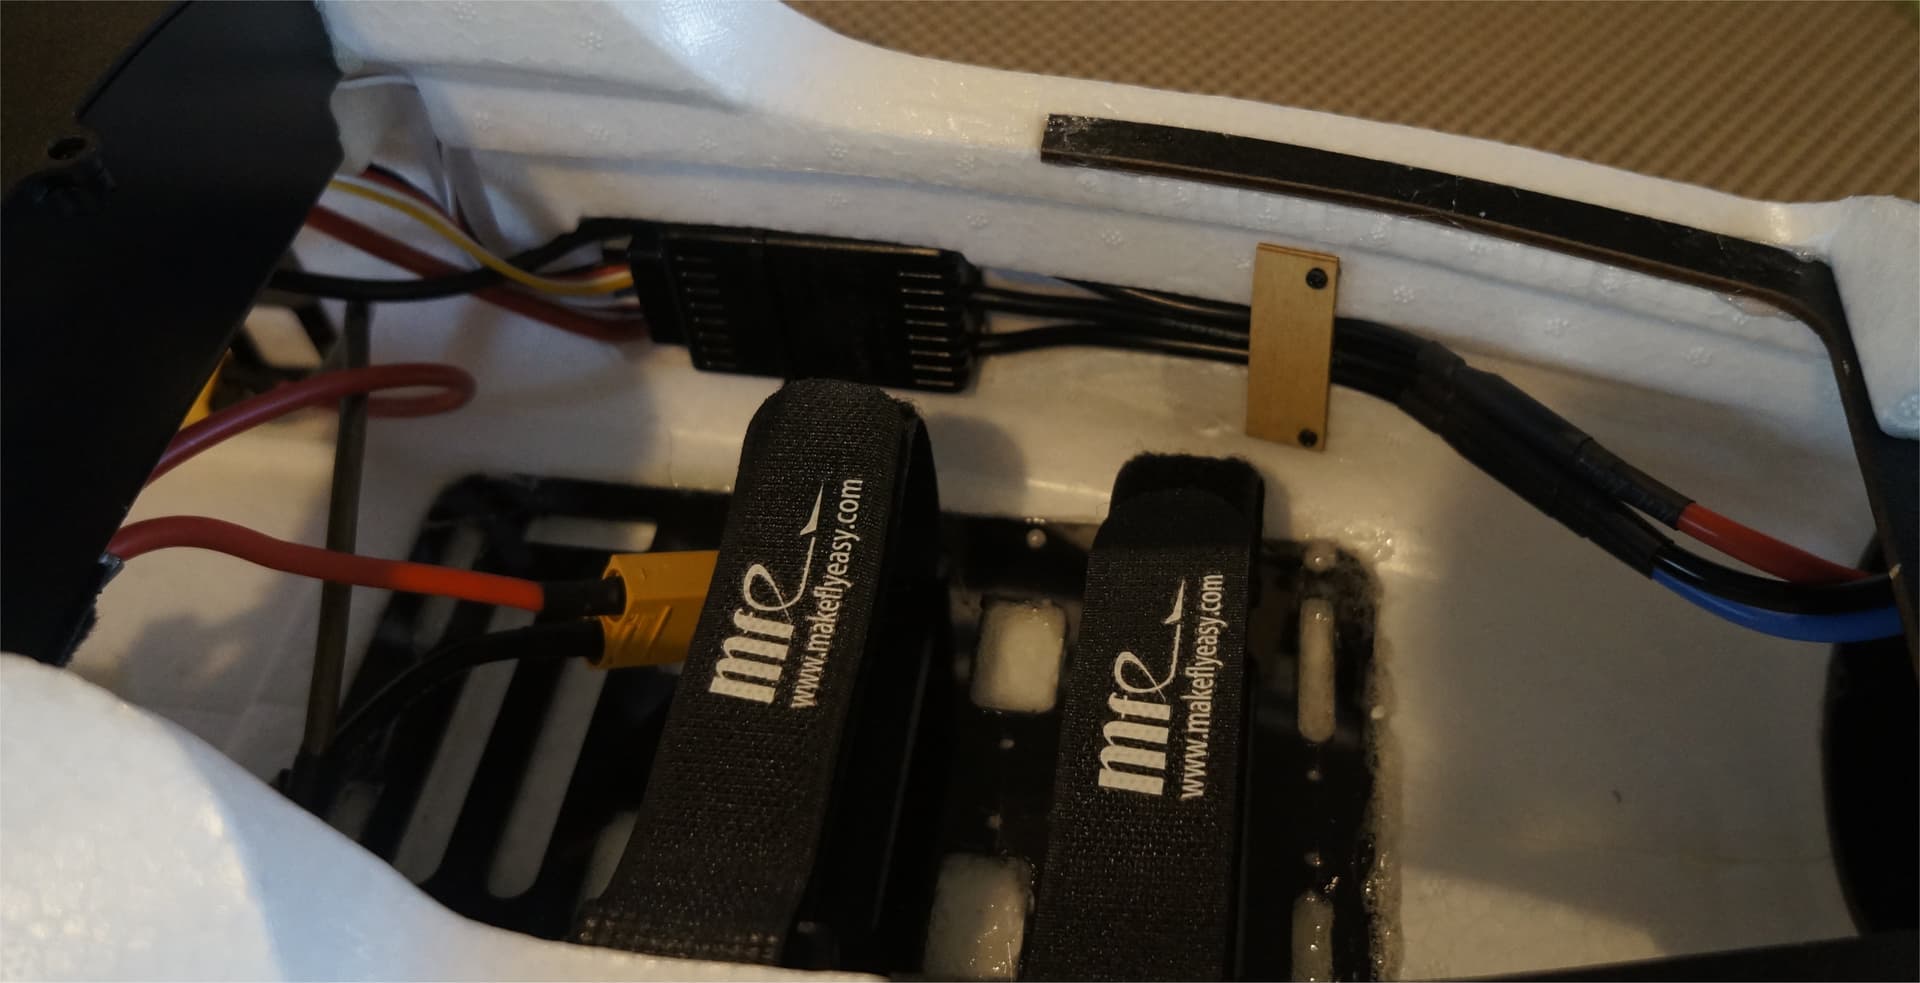
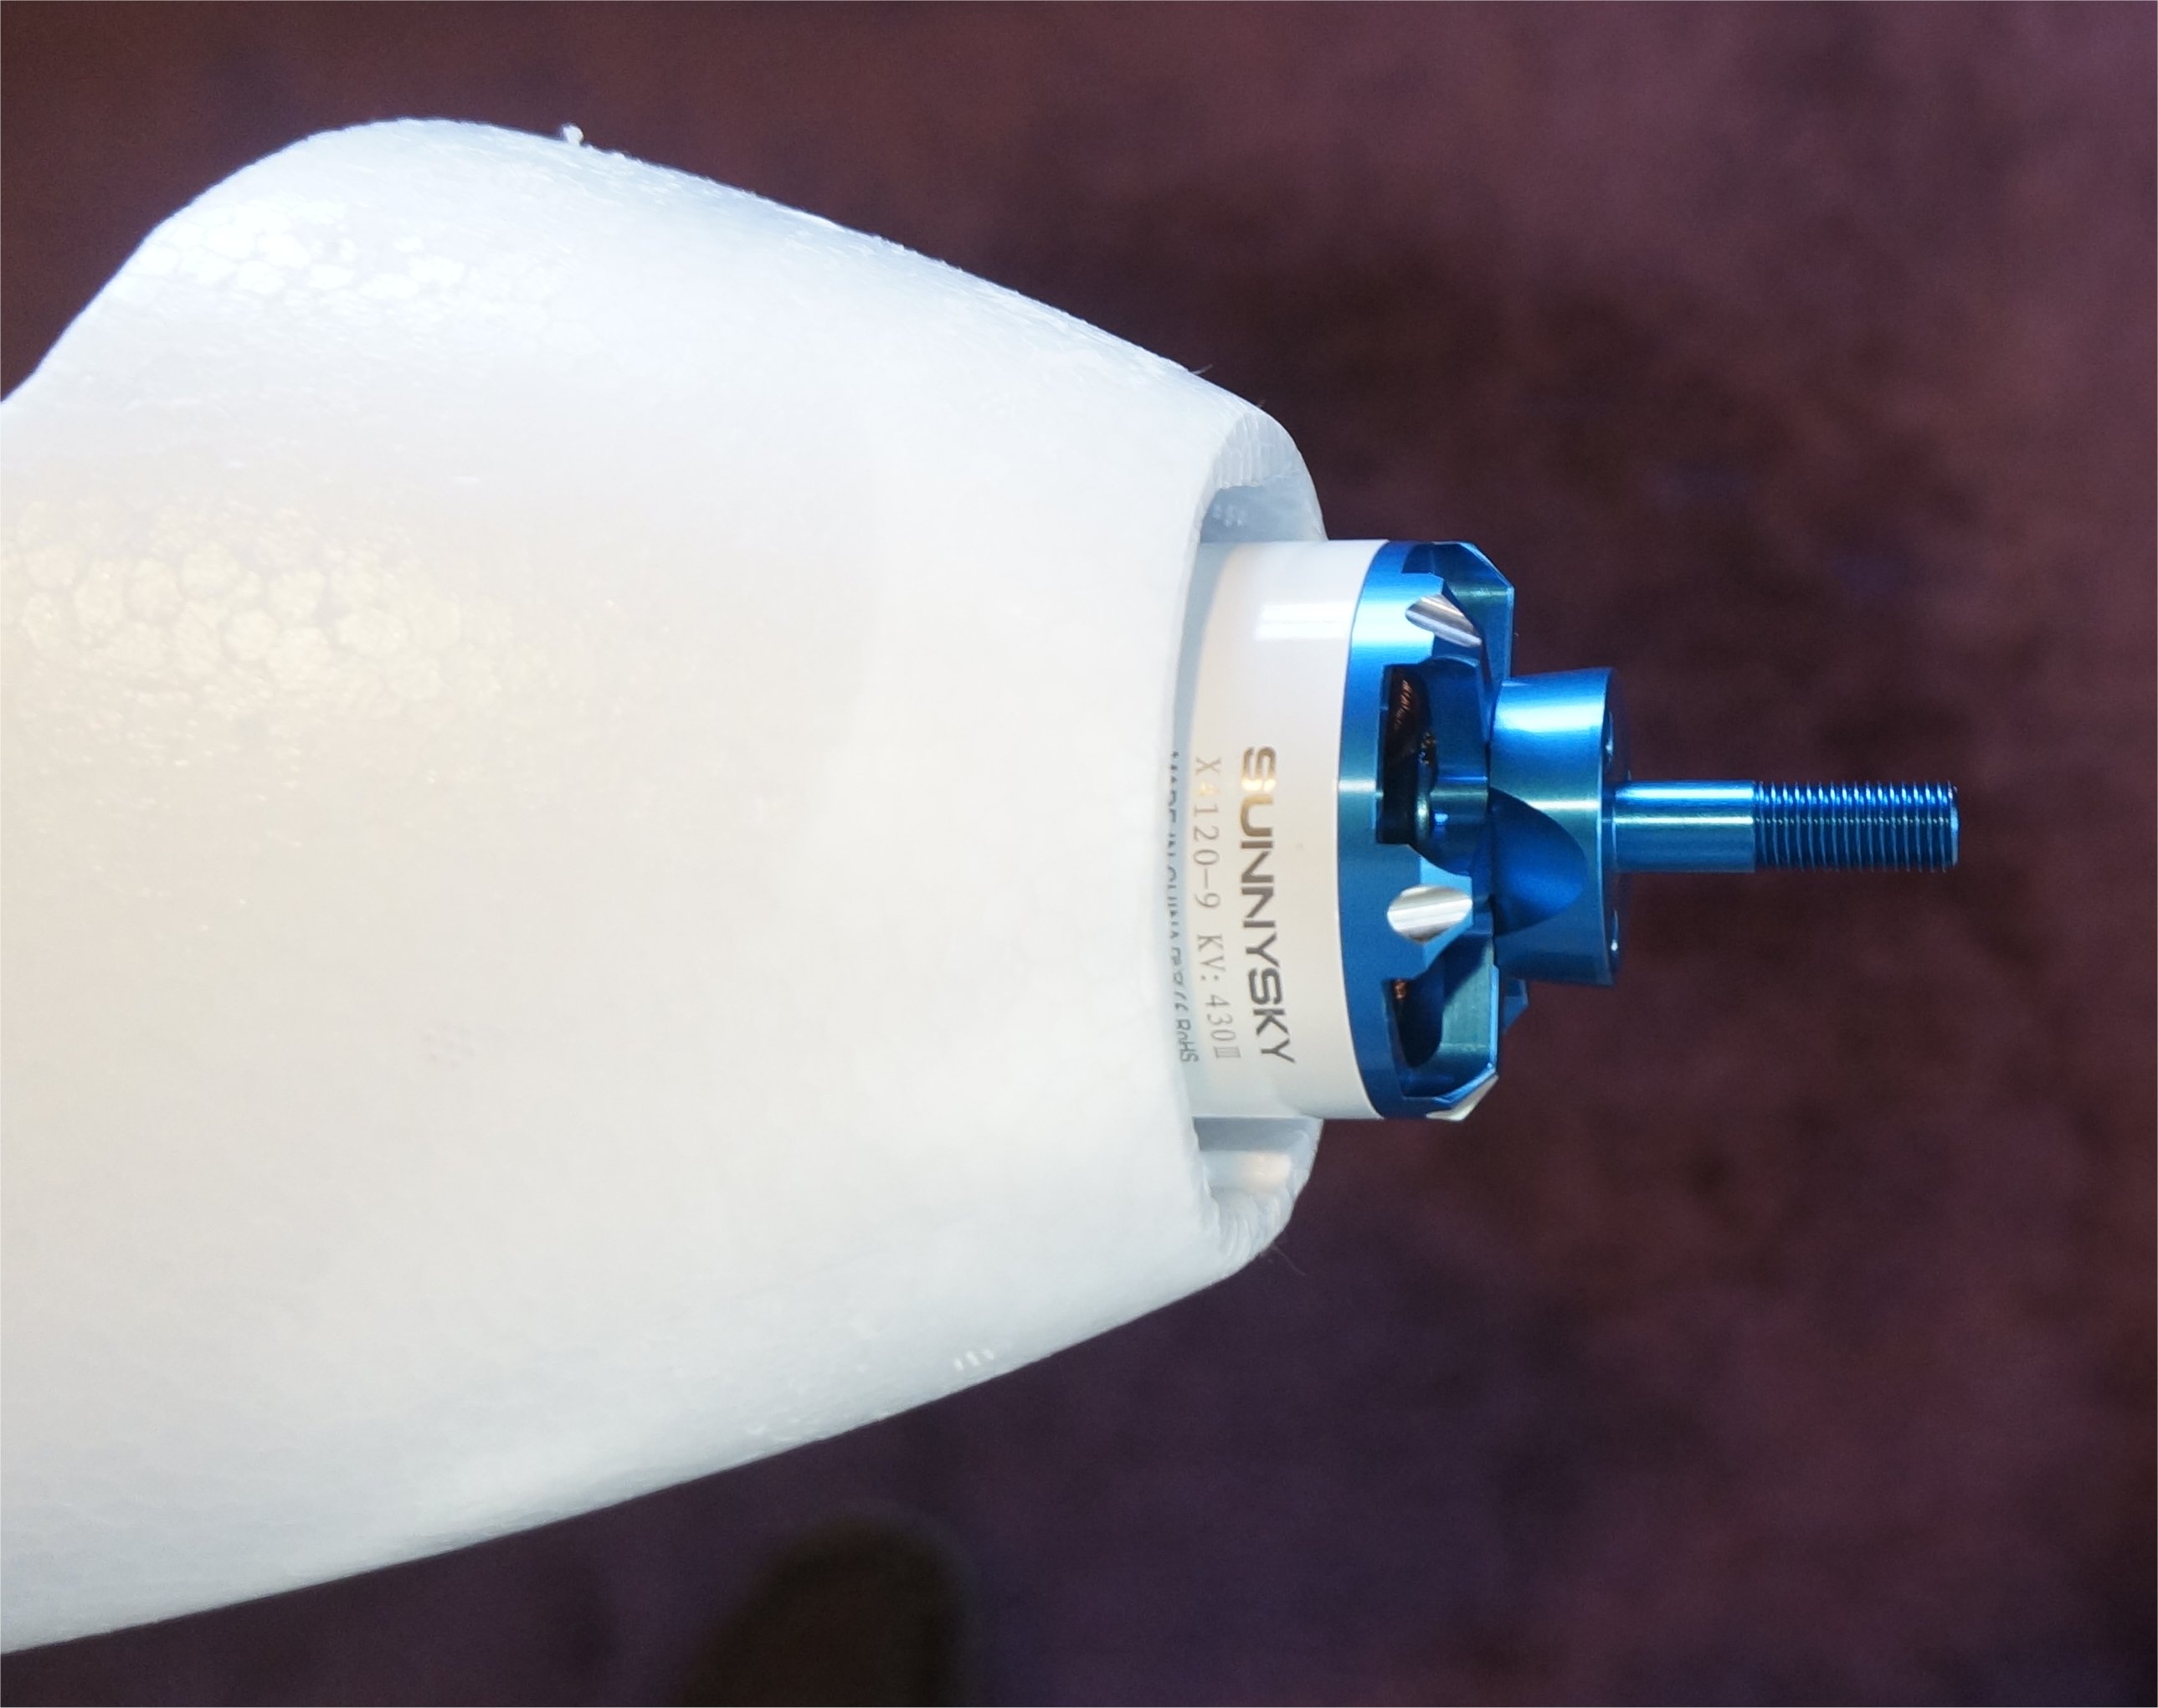
I installed the forward flight motor and ESC next. I used the MFE recommended parts below. I tested the rotation of the motor/ESC for CCW and then isolated the BEC 5v line with the unused reverse rotation control as shown in the video. I didn’t have any issues installing the ESC or motor. I used a single tywrap to secure the ESC to the side plate and added a hold down bracket for the motor wires.
Happy to report that the RCD 3015 works with the Hero 7. Latency is quite noticeable with stabilization on. Though not critical at the moment but next thing is to mod a USB-C cable to provide additional power to keep the battery topped off.
I did order a GANA as well for a second installation so I can just move the Hero 7.
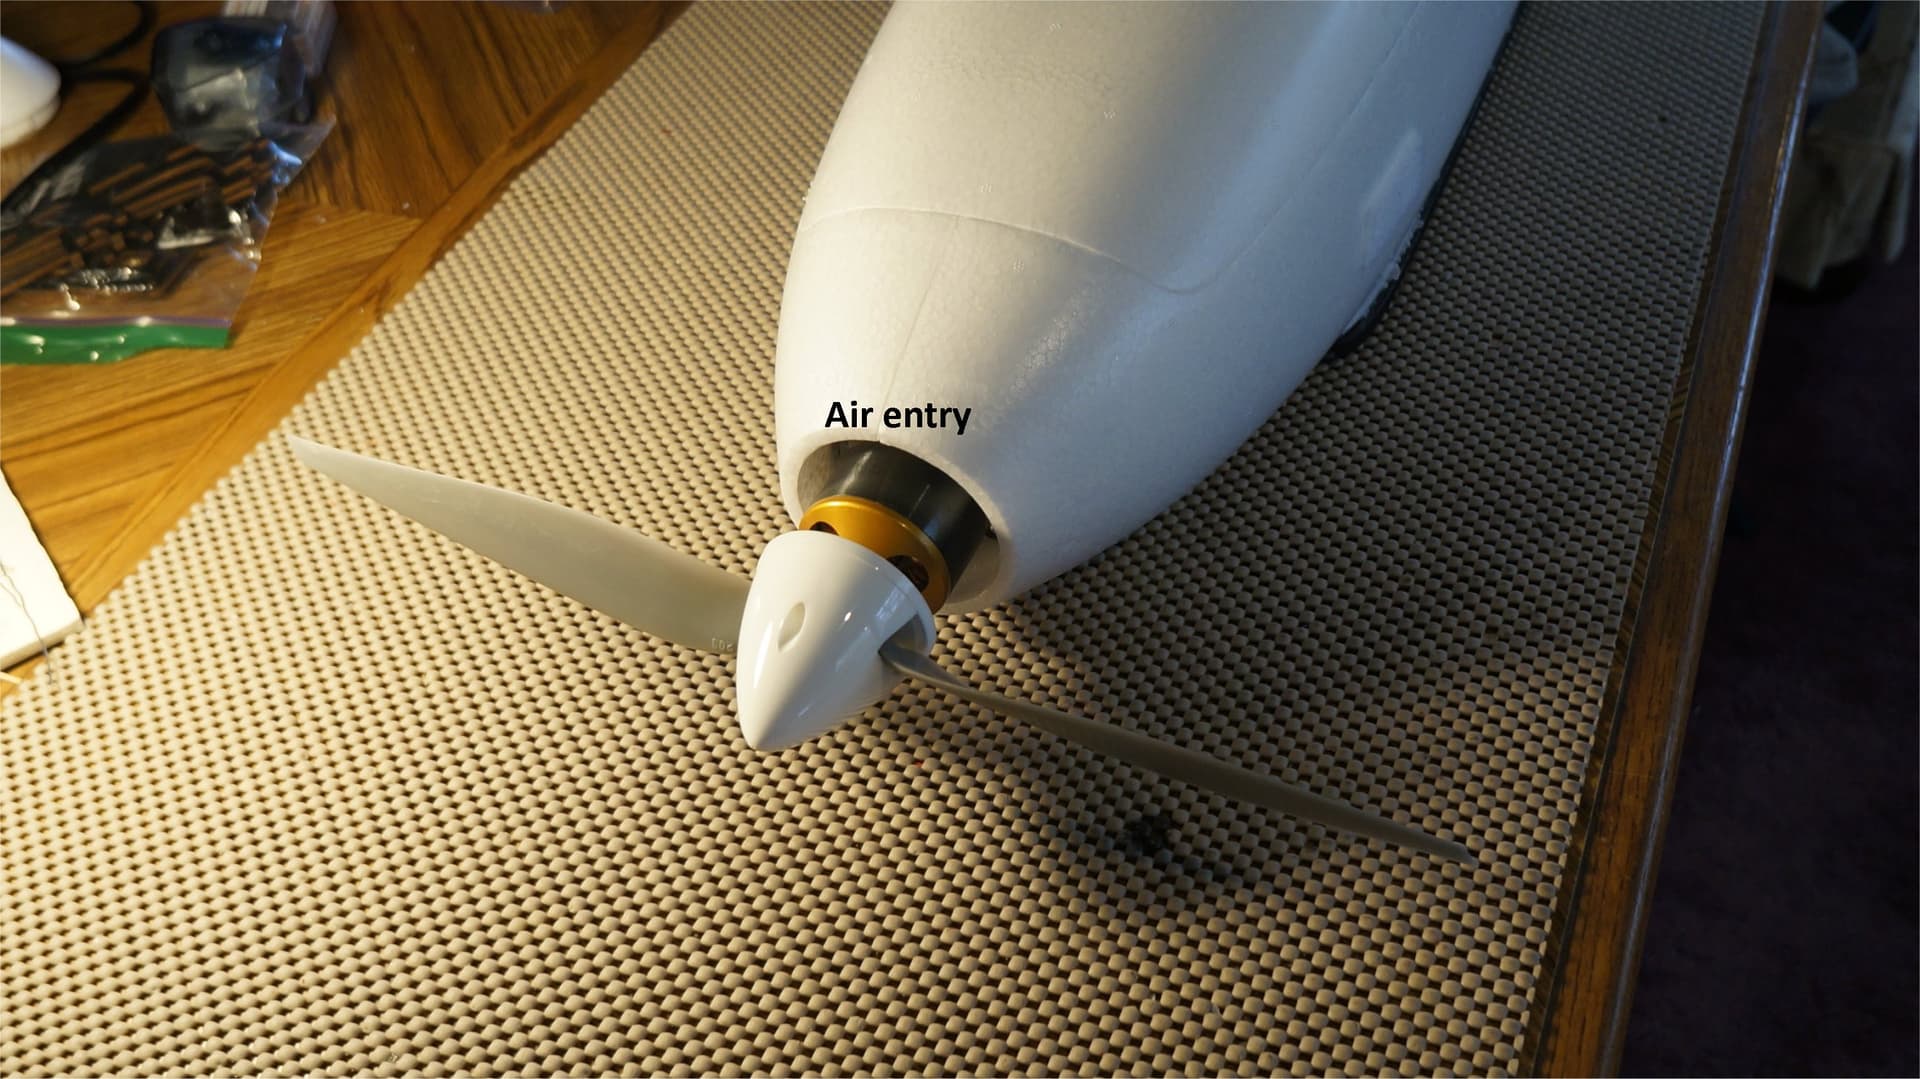
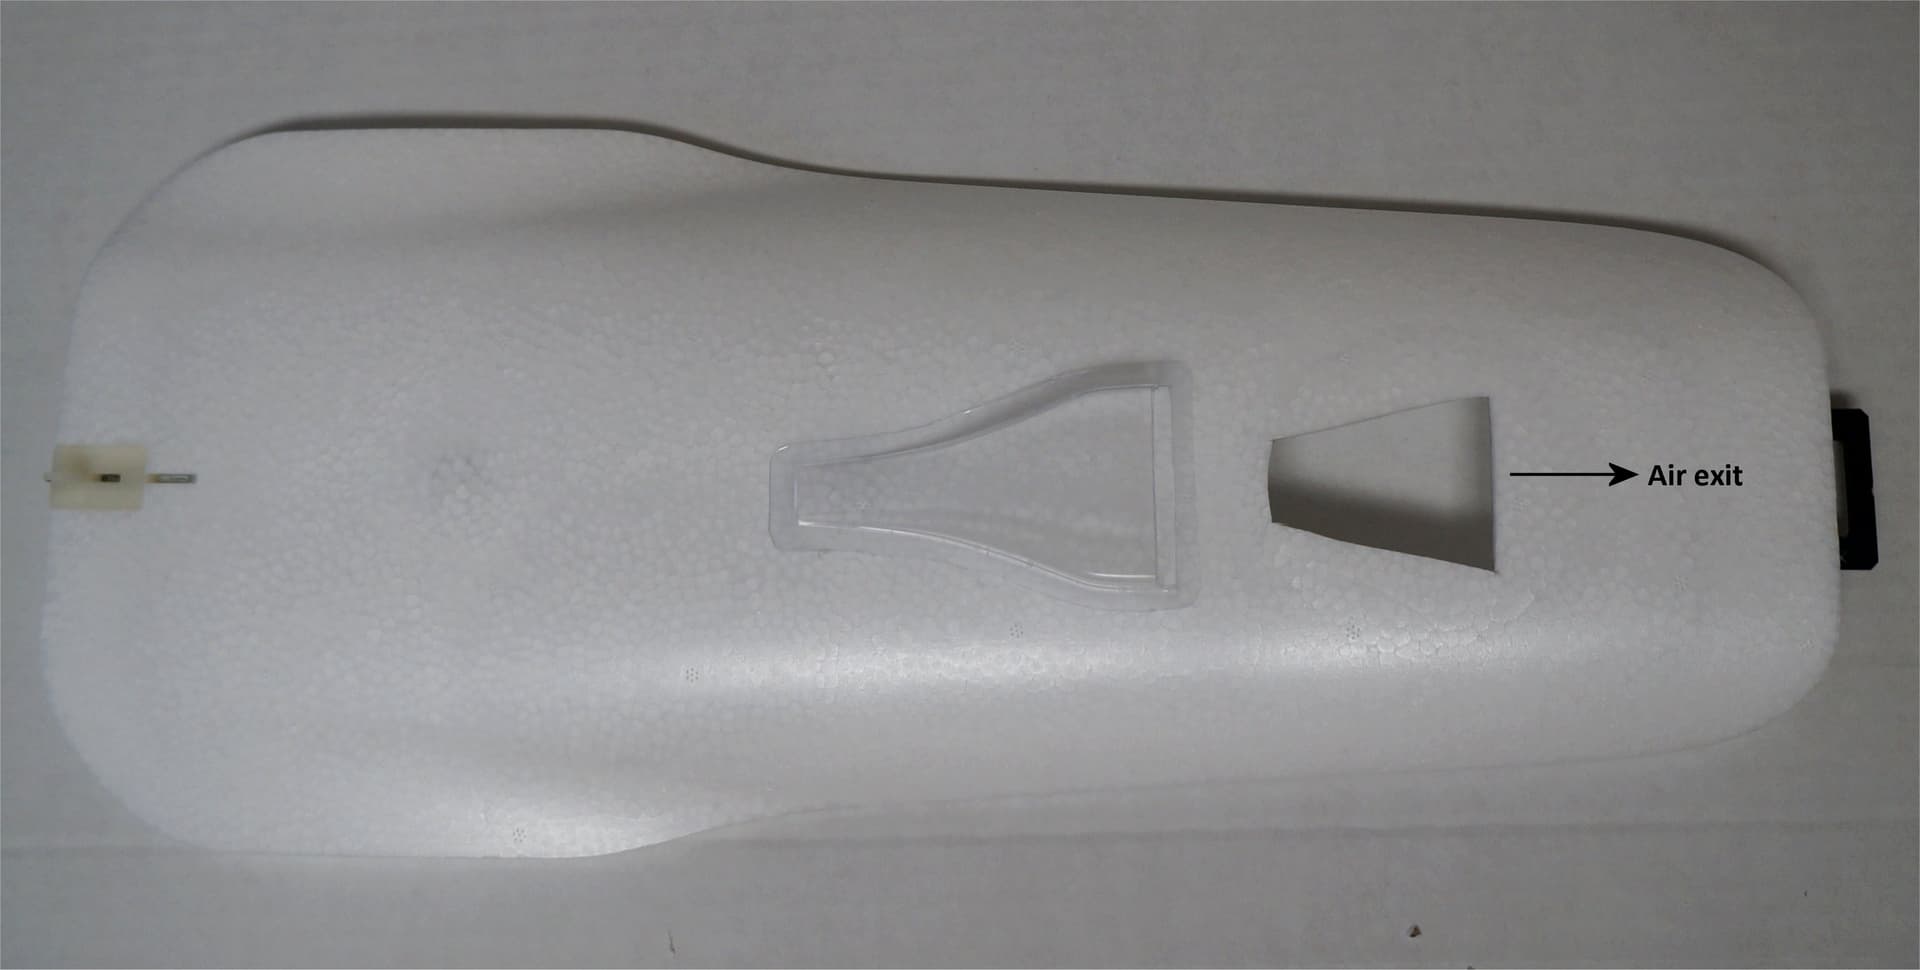
Make sure that front motor esc gets sufficient airflow, I was flying for around 30 mins with my freeman and then it overheated and kicked into low rpm mode, thankfully Q_assist airspeed kicked in and I was able to land safely.
Just a thought.
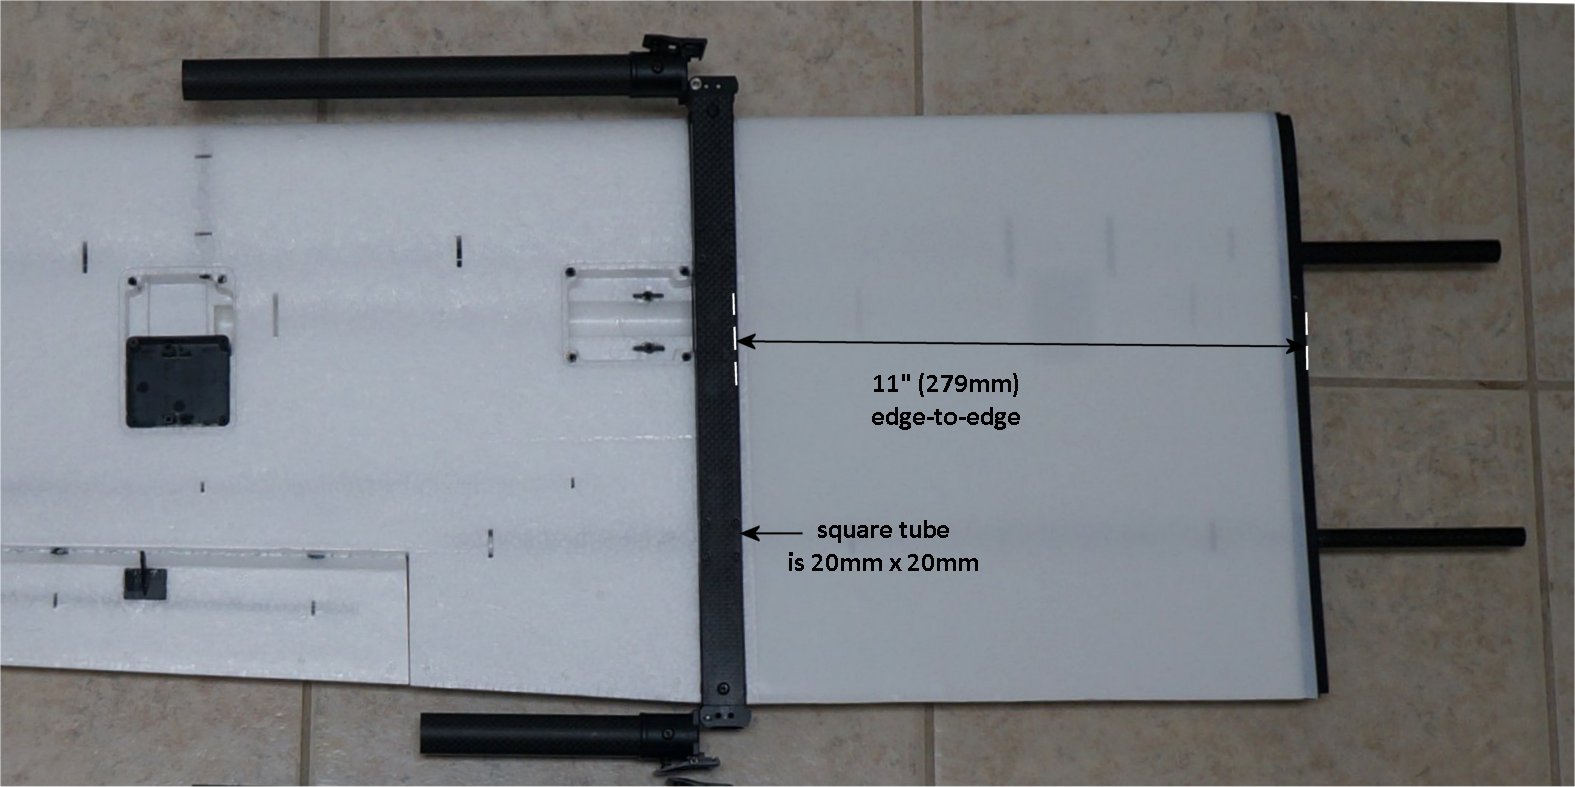
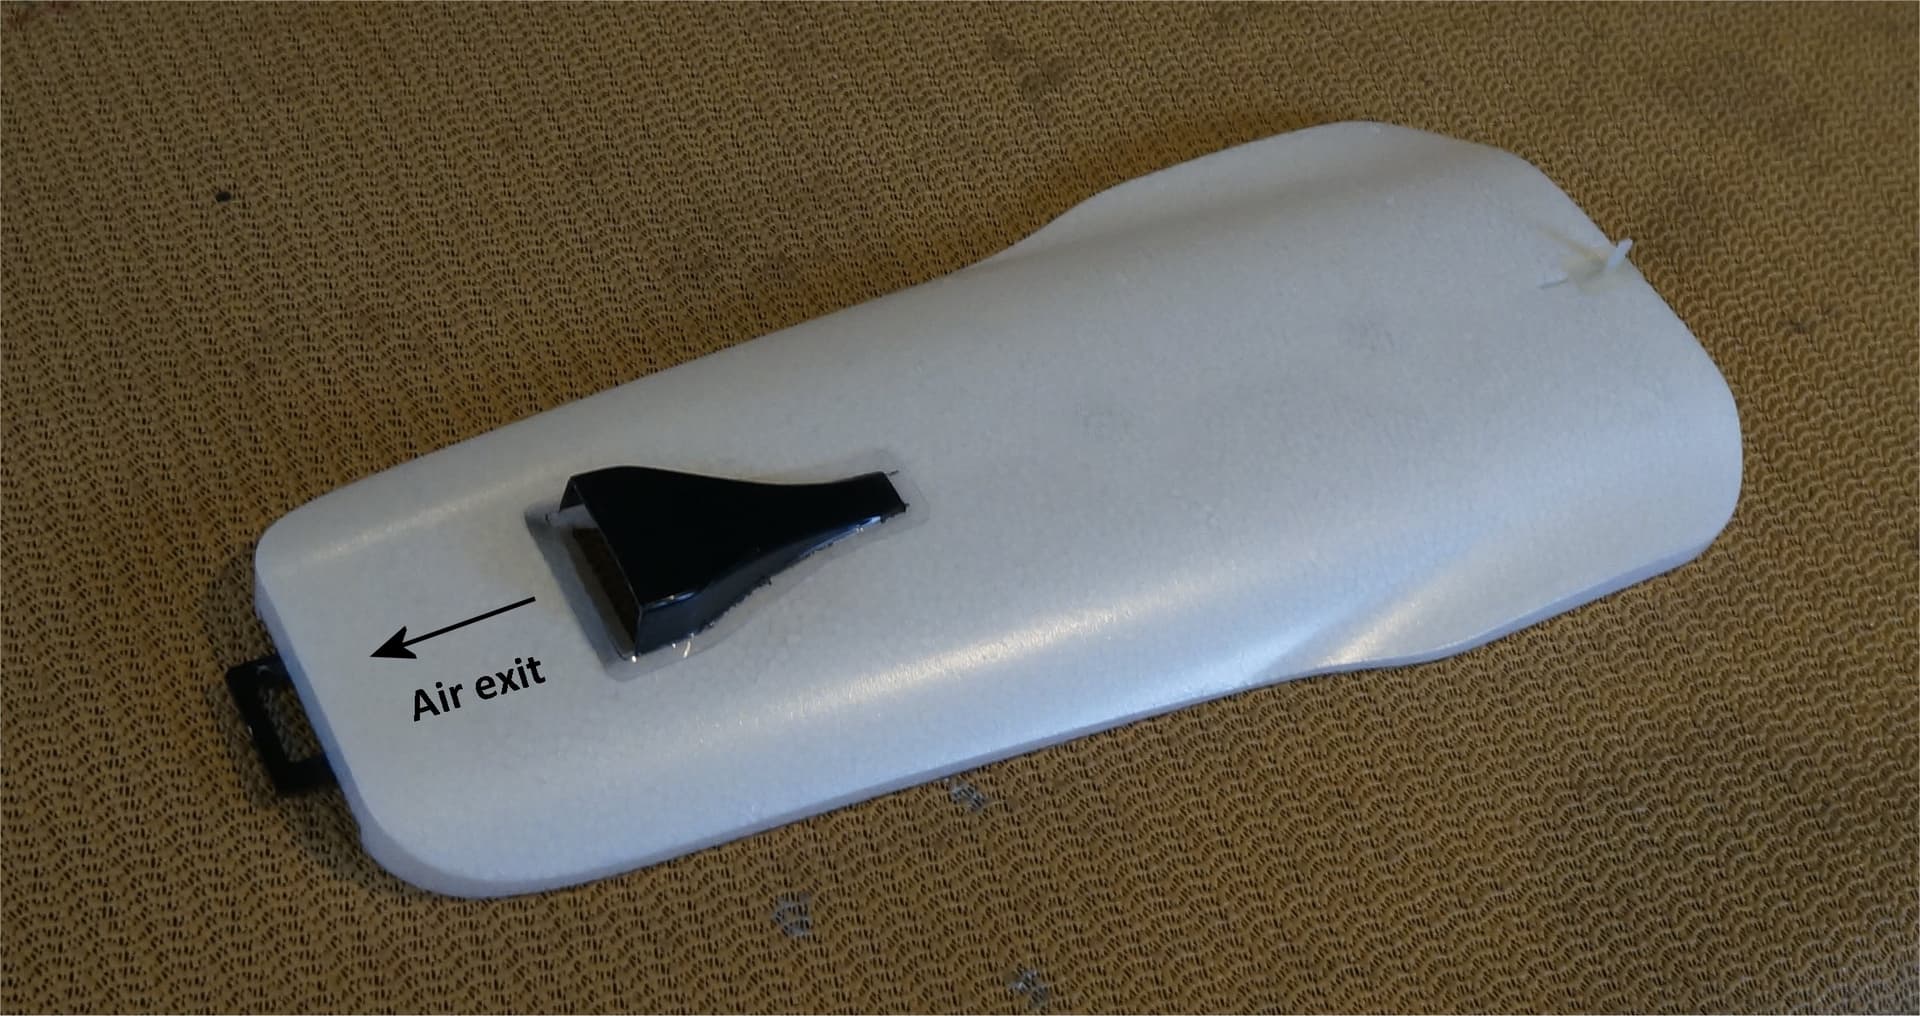
MFE seems to have addressed this by adding a grate on the side of the Striver (as shown below) to mount your ESC into. The Fighter did not have this design. Be sure to mount the fin side of the ESC facing the grate.
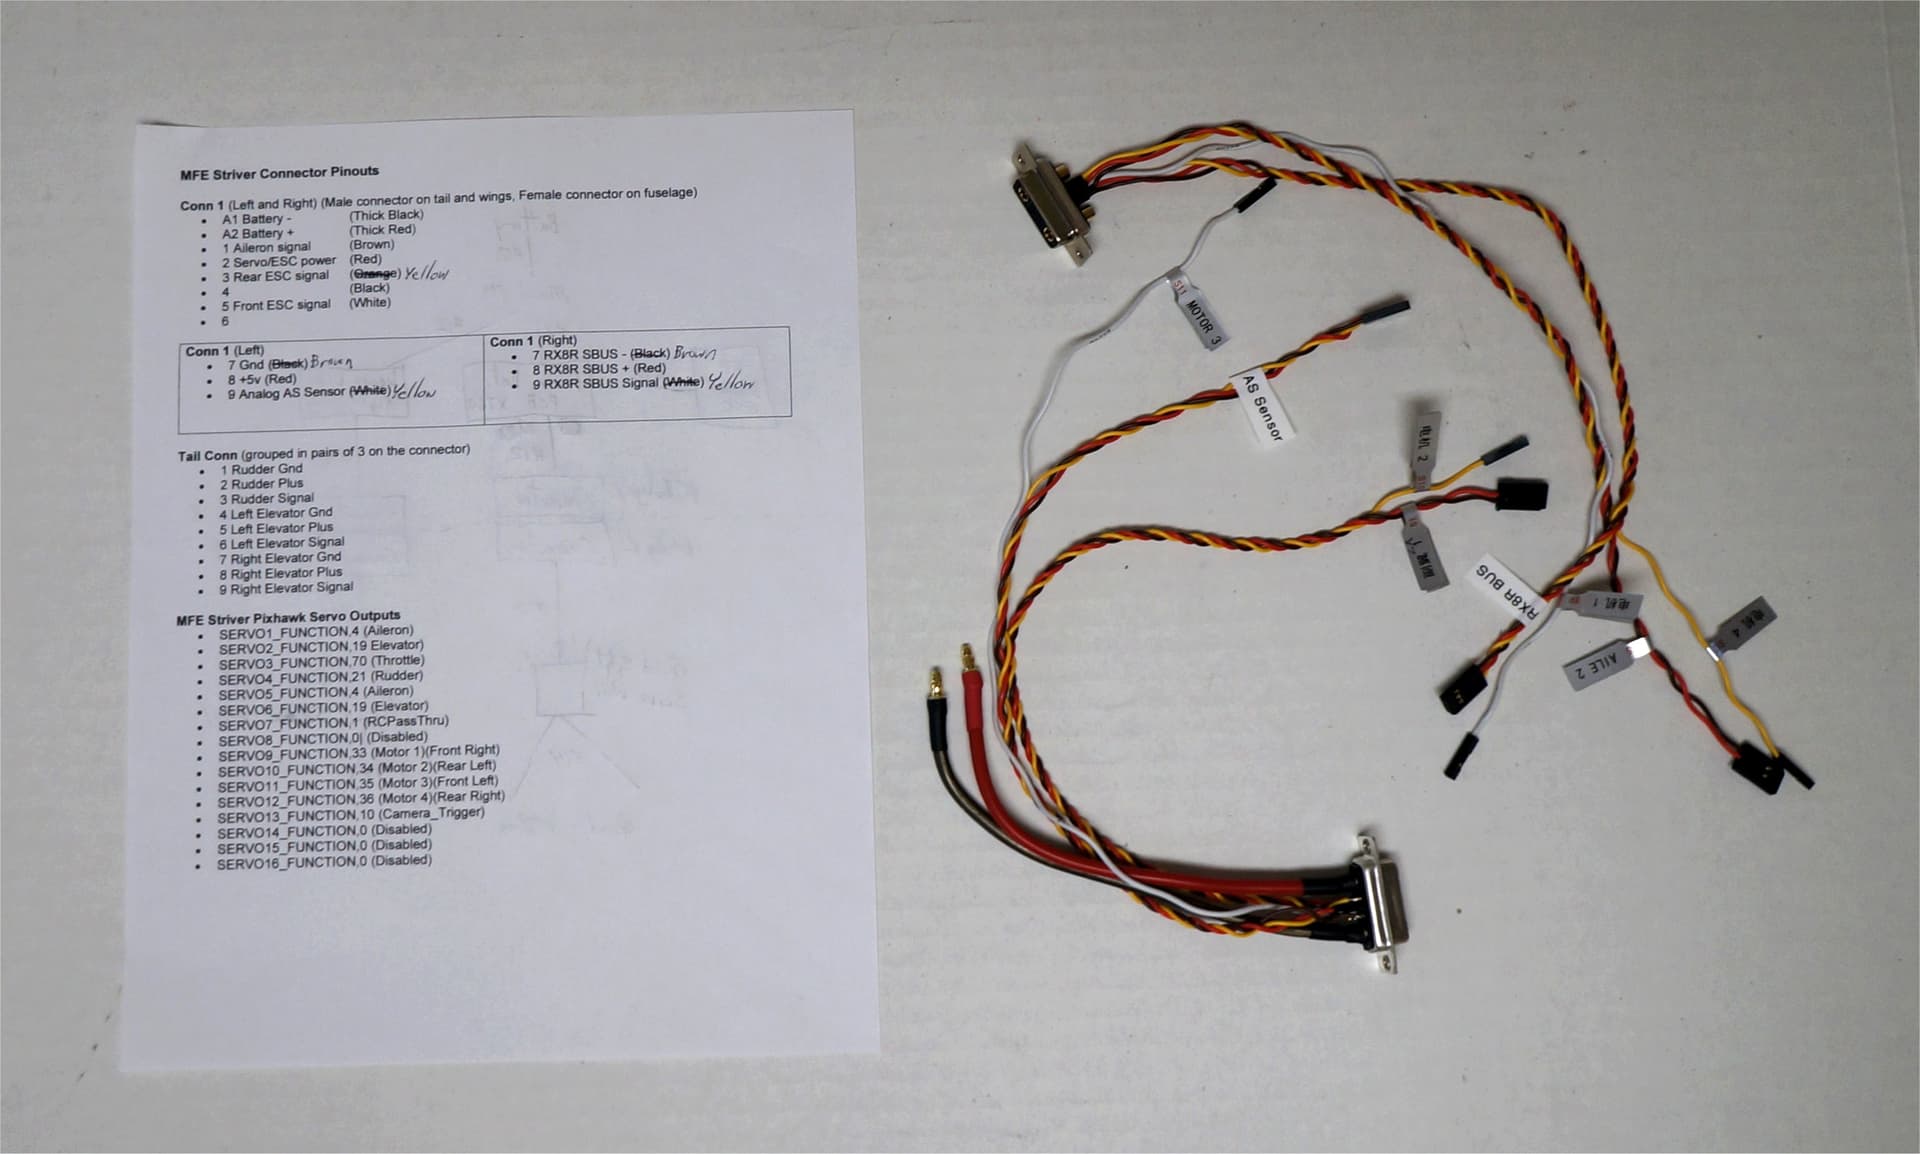
I started my least favorite part of the assembly; the wing connector wiring. I survived the Freeman and the Fighter assemblies so I’ll push through the Striver in small chunks. My pin assignments on the connectors may not match the MFE videos but my SERVOx_FUNCTION definitions are similar and make the stickers correct going to the Pixhawk flight controller.
MFE Striver Connector Pinouts
Conn 1 (Left and Right) (Male connector on tail and wings, Female connector on fuselage)
A1 Battery - (#12 Black)
A2 Battery + (#12 Red)
1 Aileron signal (Brown)
2 Servo/ESC power (Red)
3 Rear ESC signal (Yellow)
4
5 Front ESC signal (White)
6
Conn 1 (Left)
7 Gnd (Brown)
8 +5v (Red)
9 Analog AS Sensor (Yellow)
Conn 1 (Right)
7 RX8R SBUS - (Brown)
8 RX8R SBUS + (Red)
9 RX8R SBUS Signal (Yellow)
Tail Conn (grouped in pairs of 3 on the connector)
1 Rudder Gnd
2 Rudder Plus
3 Rudder Signal
4 Left Elevator Gnd
5 Left Elevator Plus
6 Left Elevator Signal
7 Right Elevator Gnd
8 Right Elevator Plus
9 Right Elevator Signal
MFE Striver Pixhawk Servo Outputs
SERVO1_FUNCTION,4 (Aileron)
SERVO2_FUNCTION,19 Elevator)
SERVO3_FUNCTION,70 (Throttle)
SERVO4_FUNCTION,21 (Rudder)
SERVO5_FUNCTION,4 (Aileron)
SERVO6_FUNCTION,19 (Elevator)
SERVO7_FUNCTION,1 (RCPassThru)
SERVO8_FUNCTION,0| (Disabled)
SERVO9_FUNCTION,33 (Motor 1)(Front Right)
SERVO10_FUNCTION,34 (Motor 2)(Rear Left)
SERVO11_FUNCTION,35 (Motor 3)(Front Left)
SERVO12_FUNCTION,36 (Motor 4)(Rear Right)
SERVO13_FUNCTION,10 (Camera_Trigger)
SERVO14_FUNCTION,0 (Disabled)
SERVO15_FUNCTION,0 (Disabled)
SERVO16_FUNCTION,0 (Disabled)
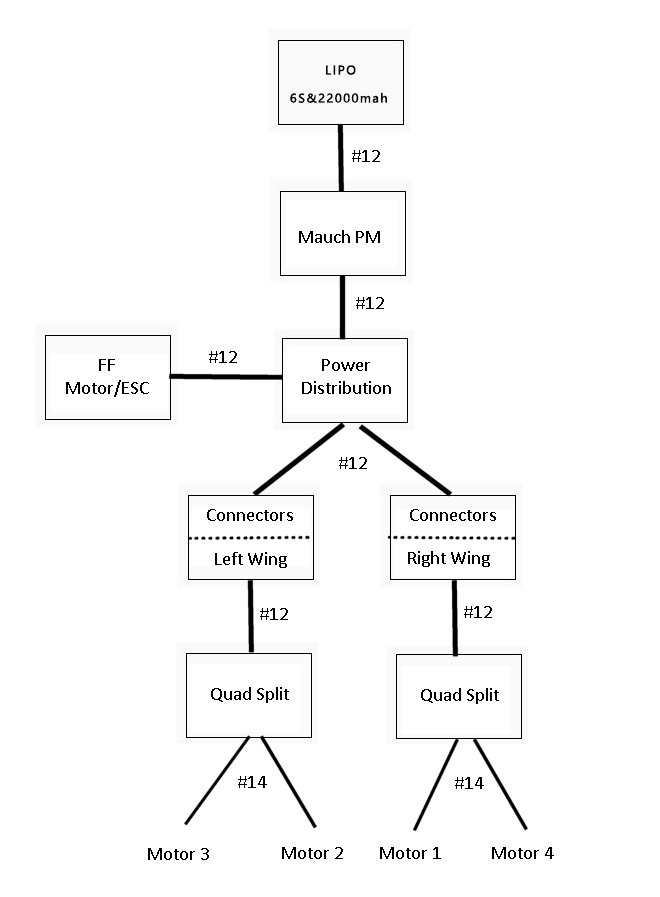
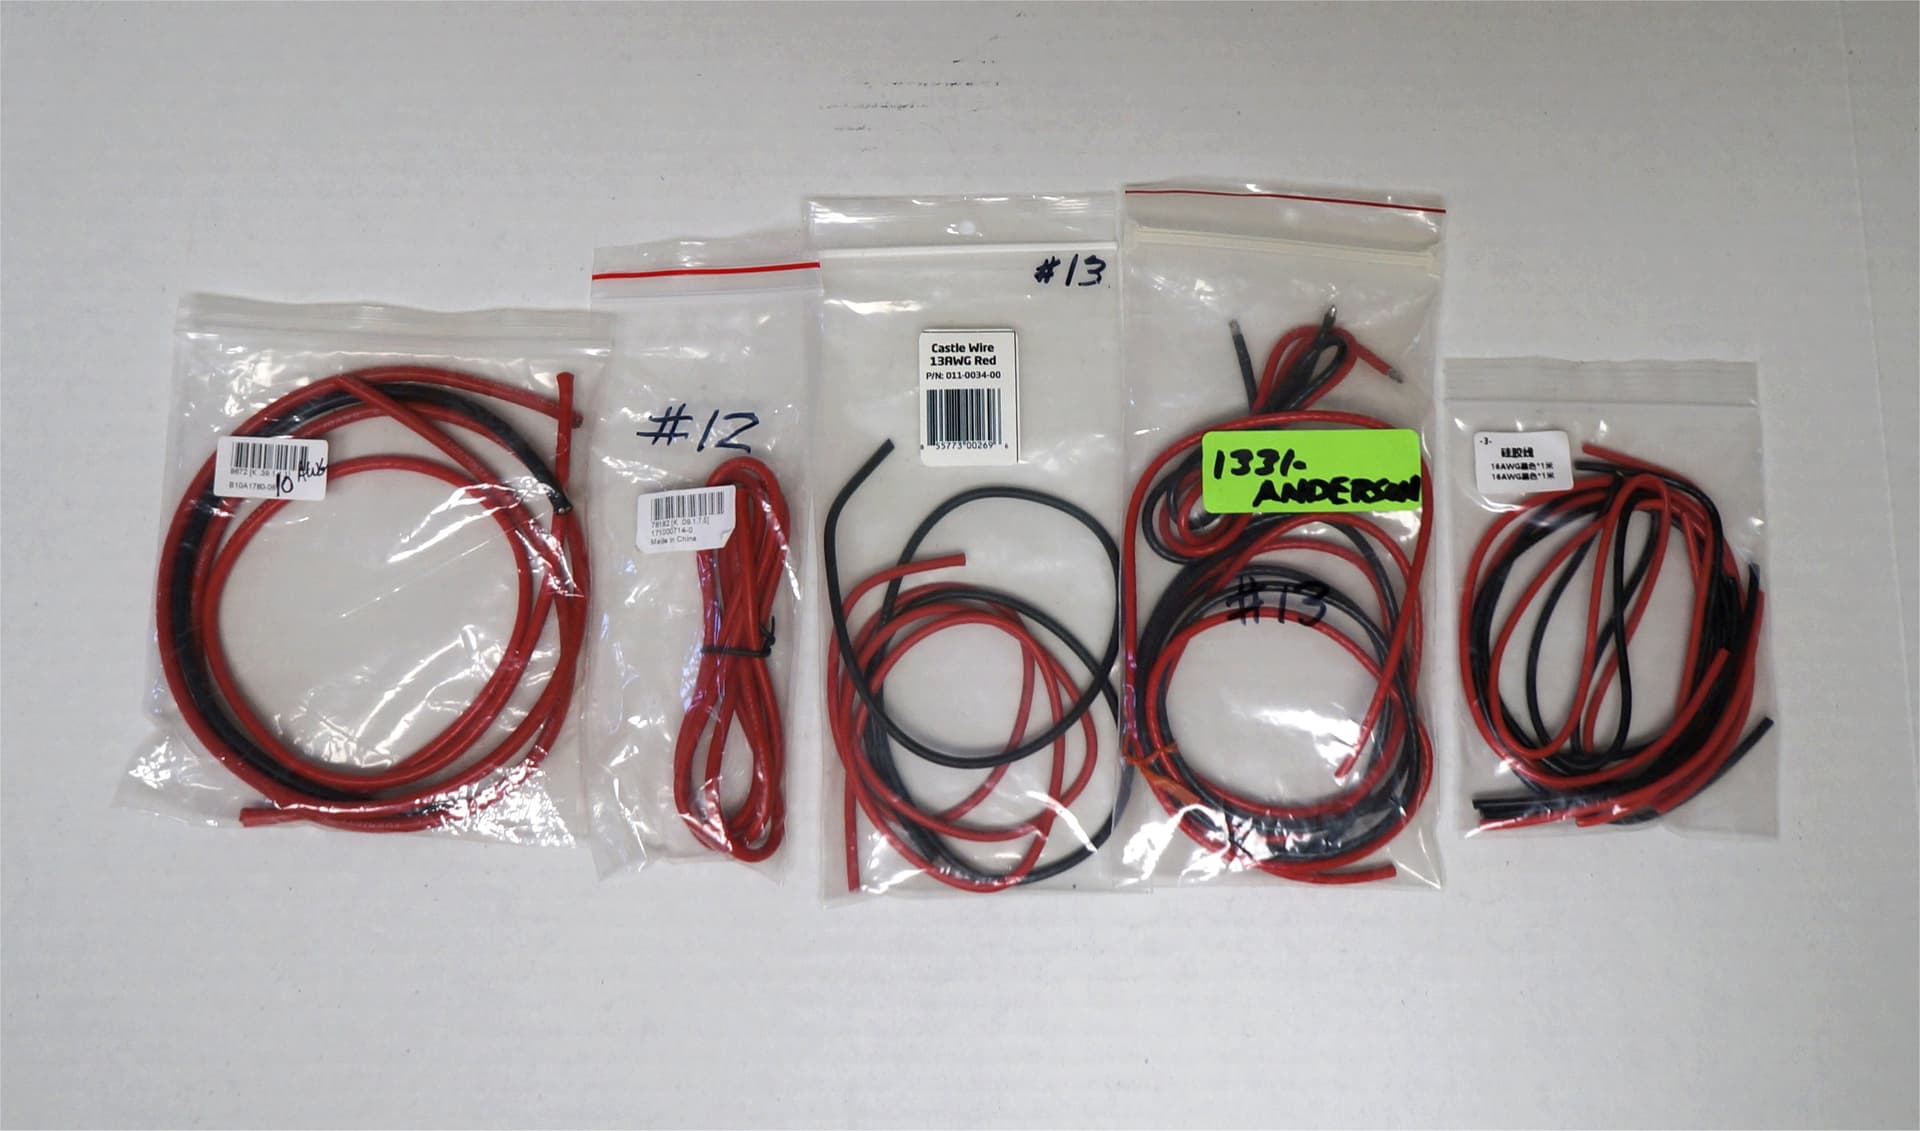
I created a block diagram to show the wire gauges used along my power path. MFE doesn’t provide all the cables you need, especially if you add connectors for pins to a redundant receiver and AS sensor along the wings. Fortunately, many places sell good quality noodle wire in various gauges. Here are a few.