A few days ago, Luisvale published an article on Pixhack V5 in the blog, which aroused heated discussion. It brings troubles to ArduPilot. We are sorry about that, but we also thank the developers who support us. To reduce misunderstandings, let’s introduce CUAV first.
As an important partner of ArduPilot, CUAV has always supported the development of ArduPilot and has been contributing to it. We complimentary Pixhack V5 to thank the ArduPilot team for their selfless dedication and no additional terms.
Let’s make a more systematic understanding of Pixhack V5.
Pixahack V5 is an advanced autopilot designed and manufactured by CUAV. The motherboard is based on FMUv5(open by the PX4 team) and is completely different from the FMUv3 open hardware design.
Quick Summary
Main FMU Processor: STM32F765
32 Bit Arm® Cortex®-M7, 216MHz, 2MB memory, 512KB RAM
IO Processor: STM32F100
32 Bit Arm® Cortex®-M3, 24MHz, 8KB SRAM
On-board sensors:
Accelerometer/Gyroscope: ICM-20689
Accelerometer/Gyroscope: BMI055
Magnetometer: IST8310
Barometer: MS5611
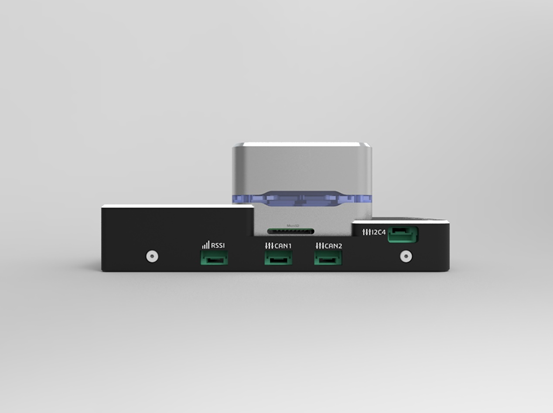
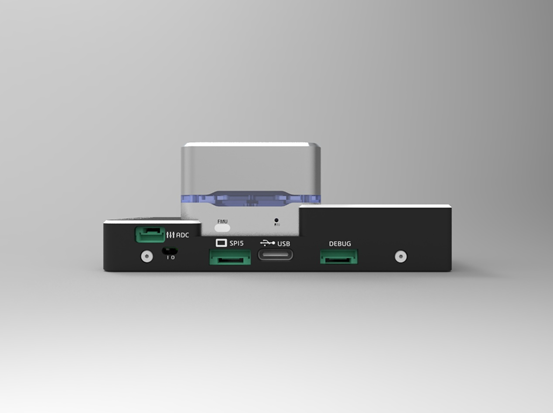
Interfaces:
8-14 PWM outputs (6 from IO, 8 from FMU)
3 dedicated PWM/Capture inputs on FMU
Dedicated R/C input for CPPM
Dedicated R/C input for ppm/DSM and S.Bus
analog / PWM RSSI input
S.Bus servo output
5 general purpose serial ports
4 I2C ports
4 SPI buses
2 CANBuses with serial ESC
Analog inputs for voltage / current of 2 batteries
Power System:
Power: 4.3~5.4V
USB Input: 4.75~5.25V
Servo Rail Input: 0~36V
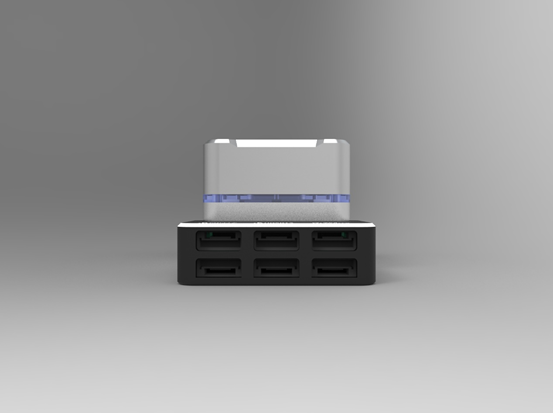
Weight and Dimensions:
Weight: 90g
Dimensions: 44x84x12mm
Other Characteristics:
Operating temperature: -20 ~ 80°C (Measured value)
Pixhack V5 boldly adopted a new STM32F7 processor with up to 216MHZ main frequency and contains 2MB FLASH/512K RAM. Higher frequency, larger RAM and better performance bring more possibilities. And more stable ICM-20689, BMI050 and IST8310 were used to improve the adaptability of different temperatures. More external interfaces provide wider space for more hardware access and secondary development. In order to meet the highly integrated trend of the times, Pixhack V5 adopts a new V5 core platform, which opens up the imagination space for users’ personalized customization needs and the integrated external devices.
Finally, let’s talk about the most controversial appearance.
Some netizens say “isn’t it cloning COBE?”. But we think the more accurate expression should be inheritance of Pixhack V2/V3.It inherited the design of pixhack flight controlor, placed the main interfaces at the left and right sides, and put the new interfaces on both sides of the front and back. CUAV has been designed with independent IMU and built-in shock absorber since 2014,until now. The jst_gh connector was used earlier than the ■■■■■■■■■ pinouts standard, so that Pixhack V5 could only use the standard protocol on a completely new interface. If you look closely, you will find that pixhack v5 is different from cobe on either the baseboard or the core platform.
CUAV has established a good connection with the Pixhawk trademark holder Lorenz Meier, and maintains communication and cooperation in the development of px4fum-v5_default firmware. But we do not stop here. we has a large number of ArduPilot fans, so we also hope to call ArduPilot for fans and contribute to ArduPilot.
Thanks again for the contribution of the ArduPilot team, for the fans who have always supported us, and for those who have different voices.
Learn more about pixhack v5: https://docs.px4.io/en/flight_controller/pixhack_v5.html
Learn more about cuav: www.cuav.net