Hey @Yuri_Rage, I got them talking - made the cable for attachment to GPS1, and everything fell into place. I’ll need some help with the tuning, but hope to absorb a bunch this weekend.
Again, thanks for all you contribute to this forum! Cd…
Hey @Yuri_Rage, I got them talking - made the cable for attachment to GPS1, and everything fell into place. I’ll need some help with the tuning, but hope to absorb a bunch this weekend.
Again, thanks for all you contribute to this forum! Cd…
Your attachment point to the hydro drive is fine, just remove the spring below it and you’re on your way. See you this weekend!
Forgot to mention - you found the exact UART Mapping I needed - I focused too much on the drawing above the map. . . cd
UART Mapping
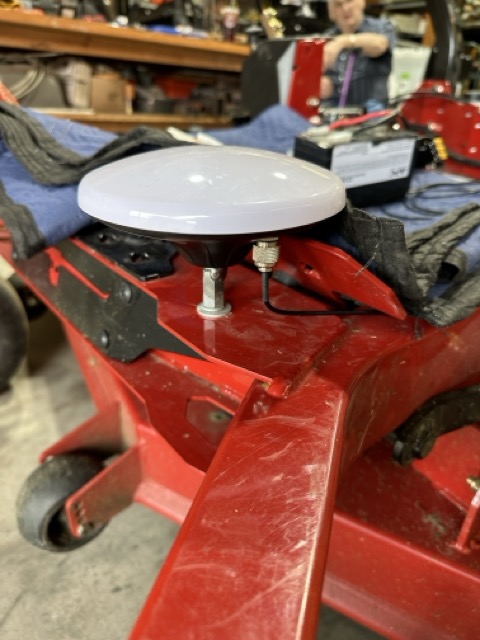
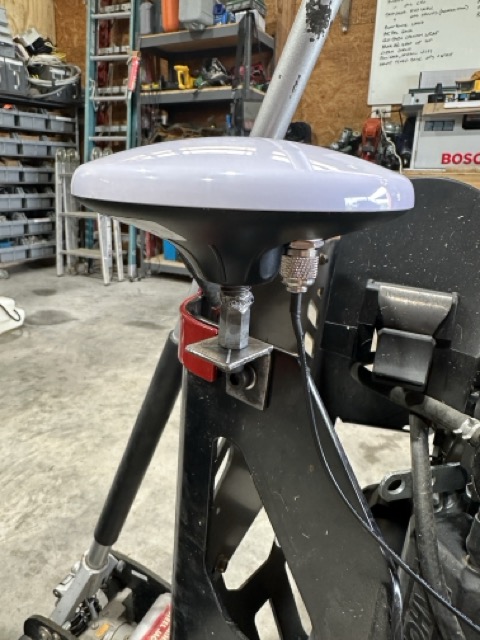
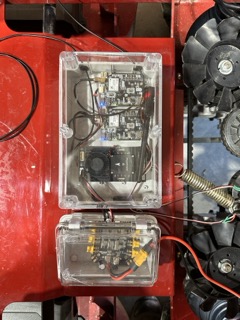
Removed the fuel tank to get closer to mount points, but found better locations. Installed GPS antennas. Have power to big servos directly from 12->24v converter.
Now routing wires, considering the interlocks, and configuring yaw settings!
Hey Chris, it looks like you are making great progress. The mower is coming together! That Toro makes a really good platform.
Also I wanted to mention that I ordered a long range remote “kill switch” on Amazon that I will be installing on my mower in addition to the “kill switch” operated by the RC transmitter. I have run into situations where the power was interrupted to the receiver and/or the flight controller. To have an independent switch as a backup seems justified.
https://www.amazon.com/gp/product/B09B6MRMNL/ref=ppx_yo_dt_b_asin_title_o00_s00?ie=UTF8&th=1
Forgot to add, one of my design goals is to use existing holes, wiring, linkages as possible. Turns out the safety interlock “looks” reasonably adaptable to our use case.
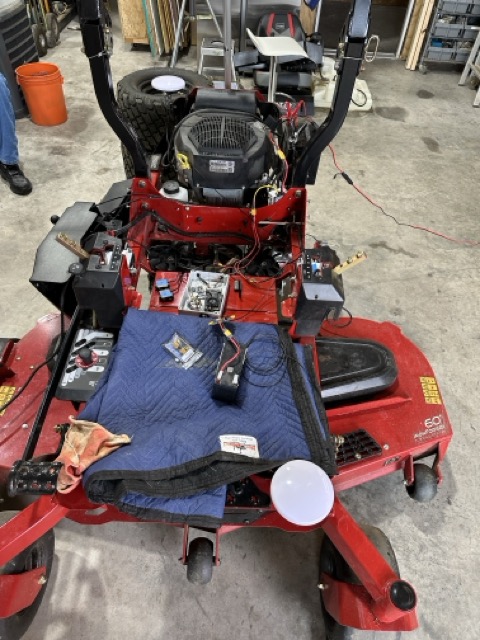
I’ve pulled the seat, removed the fuel tank, and plan to mount my controllers, gps radios where the fuel tank used to reside. I’ve ordered a tank aka @Swebre2023 ’s cub cadet rig to push some weight forward of cg now that I won’t be onboard.
Telemetry antenna mount is next (ok, one of the “nexts”)…cd
You’ll wanna test that little guy pretty thoroughly before relying on it. We’ve found that many of those cheap remote relay devices can be either very range limited or unreliable.
Not to downplay the importance of safeties…the concept is sound! Just a word of caution about the specific hardware.
I wish I had an off the shelf solution for you (if this one doesn’t pan out). Happy to hear suggestions there!
Thanks for the heads up! I’ll let you know how it works out. My RC remote kill switch is my first line of defense. I just feel I need another layer of safety besides the manual kill switches on the mower itself.
I’m starting down the path of integrating my Radiomaster TX16S into my build. Updated firmware on the transmitter yesterday, and may have a chance to bind with the receiver later today. Will review the config docs again - still need to config for R2D2 I’m thinking. . . Smashed my pwr controller with a rogue drill bit, so have another PSM on the way. Gas tank tabs encroached too much on the footbed to get a good mount, so ordered another (in red!) that’s only 5 gal.
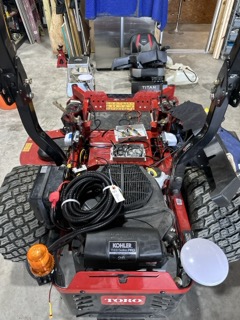
It’s great to see the pictures! It just takes a lot of labor hours and determination to build one of these mowers. Once you get your RC transmitter/receiver integrated with the flight controller and the servos mounted, it really starts to come to life.
It’s looking great!
I sneaked out to the shop this afternoon, and upgraded my ELRS receiver to the current firmware and binding name. Then, bound my transmitter to my receiver - was hard to know when it worked, but solid light = goodness, and on my transmitter, a cryptic version popped up below the “bind” statement.
My question now, is how do I know when my receiver is connected to my Flight Controller? Is there a screen that displays or helps troubleshoot the RC to FC connections? My transmitter (Radiomaster) has a “C” in the upper right part of the screen that means I have a successful bind between transmitter and receiver.
However, calibration test of radio in Mission Planner no worky.
Lots going on right now, so may delay my work a bit. No rush on questions above - thanks in advance. . .cd
Well that sounds like the Pixhawk6 and the receiver are not recognizing each other. The electrical connection would be the first thing I would suggest checking. The wire from the receiver should be plugged in the the bottom edge of the Pixhawk6 servo rail in the first slot labeled RC IN. That slot should be for any SBUS or PPM receiver. Also make sure the wire is not plugged in upside down.
Also check the simple things like making sure your pixhawk6 is connected through mission planner via your radio link to the laptop. Ardupilot should auto detect the receiver being attached when it boots up.
https://ardupilot.org/rover/docs/common-radio-control-calibration.html
True for SBus/PPM, and a few other simple protocols, but not so for ExpressLRS.
The ELRS receiver must be plugged into a serial port, and that serial port must be configured for protocol 23. Links below:
Ardupilot Setup - ExpressLRS
Crossfire and ELRS RC Systems — Rover documentation (ardupilot.org)
The messages screen in Mission Planner will show some connection info (“decoding xxx protocol”, etc), and as you’ve surmised, the Radio Calibration screen is likely the best indication that things are talking.
Since you’re using a color touchscreen radio and ExpressLRS, highly recommend enabling Yaapu telemetry when you have some time to dive into the setup procedure. It isn’t quite as daunting as it first seems, and the amount of information that appears at your fingertips is astounding.
Thanks Yuri, I also learned something important!
You probably also ought to set the bit under RC_OPTIONS for using 420kbaud, as well.
And of course, ensure wiring is TX-RX and RX-TX. Most common mistake!
Latest config - still no talking between ELRS and Telem3/Ser5.
cd-params.param (14.7 KB)
Switching to guns (ty-wrap gun that is…)
That looks about right. Double check that wiring! Also maybe see if you can get into the ELRS configurator and set the baud rate for your receiver to 420k (which should be default). If that proves challenging, try unchecking the bit for it in RC_OPTIONS and use 115k as set by SERIAL5_BAUD (which might have been pre-configured on your receiver). The baud rate must match the receiver’s setting (and the RC_OPTIONS bitmask overrides SERIALx_BAUD).
Once you get up and running, use Ch5 for arming (and only arming). It’s a quirk of ELRS.
Some helpful links:
Pixhawk RPi CM ports: https://docs.holybro.com/autopilot/pixhawk-baseboards/pixhawk-rpi-cm4-baseboard/connections-and-ports
Express / Ardupilot setup advice - above from, @Yuri_Rage
Education in Crossfire: Crossfire and ELRS RC Systems — Rover documentation
And this, which I’ll follow and test this eve - looks sound except the Pixhawk RPi CM4 UART port I’m using is TELEM3. . . Pixhawk 6x + Radiomaster Boxer +Radiomaster ERLS RP3 V2 - #5 by RicK_971 - Pixhawk - Discussion Forum for PX4, Pixhawk, QGroundControl, MAVSDK, MAVLink
Also, will have 2 extra push arms for the HappyModel 400s - let me know if you need them…from sendcutsend.com