Issues after upgrading to V4.3.3

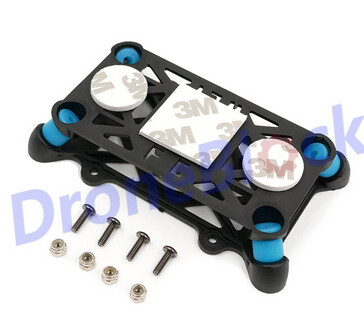
Can you get a close-up shot of how you’ve mounted the pixhawk? Is it on antivibration foam blocks?
These antivibration mounts do a good job with those flight controllers and that frame - something with the angled dampers is best.
image

You will also get some improvement by mounting the ESCs centrally and running long motor wires. Keep the power wires as short as possible.
This reduces the weight out at the end of the arms (inertia), and also removes that tape that the prop wash will be hitting and beating like a drum.

I’m drawing a separation line here, you should try and work on those physical issues then come back to the parameters later.
I know it’s tempting to just set some parameters and quickly go see what effect it has, but especially with that frame you will get the most value out of taking your time and solving the physical issues properly, or the parameters will never be right.
You will get the most satisfaction when everything works properly too.


Looking at the latest log,
You can definitely set

INS_HNTCH_ENABLE,1 // set this then refresh params to see the rest
INS_HNTCH_MODE,1
INS_HNTCH_REF,0.23
INS_HNTCH_FREQ,112
INS_HNTCH_BW,60
INS_HNTCH_FM_RAT,0.7
INS_HNTCH_HMNCS,3

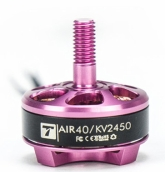
Those new props made a difference to the frequency.

You will need to do some flight in AltHold to allow the hover throttle to learn, I think it should end up about 0.34

Now it’s looking like you’ve got a 1HZ oscillation which is probably just due to the very low PIDs.
That flight controller and frame should be OK with these PIDs, so try setting them and do a takeoff in Stabilise mode and land immediately if oscillations are worse. If it seems OK then switch to AltHold for a while and just do some gentle pitch and roll.

ATC_ANG_RLL_P,6.0
ATC_ANG_PIT_P,6.0
ATC_RAT_RLL_P,0.10
ATC_RAT_RLL_I,0.10
ATC_RAT_RLL_D,0.005
ATC_RAT_PIT_P,0.10
ATC_RAT_PIT_I,0.10
ATC_RAT_PIT_D,0.005
1 Like

Hello,
It is not mounted with an anti-vibration mount. I will surely make this change by mounting Pixhawk on this mount. (However, I always wondered why a similar mount is not made/required for Cube orange type controllers)
I can shorten ESC Cables, but these are not the final ones to be used in the end product. So, I have made it so that it is easily replaceable using bullet connectors connection through power distribution (Moreover, different frames require a different lengths of cables. That’s why it is long.) Regarding Tape, I can remove the tape and put a zip tie/cable tie to fix the ESC mounting.

So, my agenda will now be as follows (correct me if there is anything wrong or change in order): -

  1. Mount Pixhawk on an Anti-vibration mount
  2. Shorten the ESC cable if possible
  3. Use ties clip and ties esc in as away from prop dia as possible
  4. Take a normal flight and check the vibrations (Here, I would like to know which parameters to be checked from the Logs to understand the vibrations? Is it “VIBE”)
  5. If the vibrations are better, apply Harmonic Notch Filter parameter settings and take flight in stabilize mode (single flight)
  6. Hover Learn - Take off in stabilize mode and then switch to Althold for hover throttle learn (multiple flights)
  7. Once hover learn is done, change the PIDs as suggested.

Additionally, I want information on 2 things.
a. If you see, I did not get the satellites before takeoff. But as we’re trying to stabilize mode. I ignored it. However, there is no reason to not get a single satellite as it was a full blue sky in open ground. Ofcourse waited for some time for it to come up and tried rebooting the system. Any solution for this?

b. I want to calibrate my voltage sensor/power module. As I am really not happy with the voltage value I am getting. How to do that? (Checking with the multimeter and then changing a value in the Mission planner? and doing this multiple times?)

Thanks for your quick response.

The Cube and some other flight controllers have internal damping for the IMUs. In some cases they even require external antivibration measures.

Yes, check in logs for X, Y and Z vibrations under VIBE.
Anything over 15 is headed into the danger zone.
Over 20 is definitely going to cause trouble, even if it’s just making tuning difficult, right up to severe instability and unexpected behaviours.

Steps 4, 5 and 6 can be combined. Do set all the parameters I mentioned including the harmonic notch filter before you do the next flight.
Just do one test flight to see if all those things work as expected. If the copter is stable enough then stay in AltHold for some time to allow hover thrust to learn.
We can examine the resulting log and refine things after that flight.

Set FENCE_ENABLE,1 and check the other fence parameters to suit your self, usually just altitude and radius.
This will not allow you to arm in any mode until there is a good 3D Fix and Home can be set.
It seems to take a long time, but really no different than waiting in any GPS-assited mode until it allows arming.
In time it will seem like no issue at all, and you will value the security of knowing Home can be set before you fly.

Also try GPS_GNSS_MODE,65 to see if that works better than 5

Yes, accurately measure the battery voltage and type that in via MissionPlanner / Setup / Optional / Battery Monitor
Change the sensor to Other then type in the measured battery voltage
image

If you can use a voltage source that is the lowest battery voltage you will ever see, for example see if you have a lipo battery with less cells than you normally use, or a very depleted lipo.
There’s no point calibrating this voltage at a very high level - that’s not when the failsafes happen. It’s more important for the low voltage range to be accurate.

1 Like

Hello
I carried out a flight with no settings changed. I made a few physical changes. Removed that tape and settled esc in a better position. Mounted FCB on anti-vibration mount. The bolt location on the plate is not matching with the mount holes so it is on cable ties but tight (bottom mounting part only). For all this, I wanted to check the vibrations first.
On the first flight, I observed high vibration but doubted how is that possible and carried out another flight where I observed that the vibrations reduced lower than the 16th April result.

New files are uploaded.

The concern here is something different. Every time I tried to take off, the drone was tilting back and then took off. In trying the same, it flipped backward twice (no damage though). This was not happening on 16th April. I have checked out the balancing and it is really fine-balanced.
Any idea about this flip kind of issue during take-off?

Thanks

Update to ArduCopter 4.3.6 before doing anything else

I agree but I avoided doing this mainly because of the changes in the issues. This thread we are Resolving this since V4.3.3. I think basically if it was flying fine in v4.3.3 yesterday. It should fly in the same way today. so planned to finish all the settings and then upgrade it to the latest one. Ofcourse, I understand that the versions are good upgradation eliminating a few errors and smoothening it to work.
Another pain was, the last time I upgraded and I was left with no settings. I think Save to File helps to save all the parameters and Load Pre saved will load the saved one to write it out.

No, no need to save and load parameters the firmware update automaticaly preserves and/or updates the parameters.
If you load old parameters in new firmware, you bypass the automated parameter update and break things

That where I am uncomfortable.
Last time I upgraded to 4.3.3 and the parameters were all changed.
Curious to know, are we supposed to tune and change pids after every upgrade?

No, the automated parameter update does change the parameters automaticaly for you. So that the behavihour stays the same.

If you manualy load old paramters, … you potentially cause undesired/unintedend behaviour changes.

Hello,
Logs have been updated after HNTCH Settings and flew in alt hold for hover learn. Kindly check and update.
One thing to understand is, how long we need to test/fly it in alt-hold mode.

If you can help, my motor bullet caps get loose after one or two flights. Not all. But sometimes one or two. Prop doesn’t come out but after a flight, I can find bullets to be a little loose than before. This should not happen because the propeller rotates clockwise and bullets get tight in an anti-clockwise rotation. Any solution for this?
Thanks

Vibrations are now low which is great. And there’s no crazy motor oscillations.
There’s still problems with stability but I think that is because the PIDs are so low for this sized copter.
We’ve been going backwards and forwards in this whole thread - raise this, lower that - and I believe it’s all been confusing and ineffective because of the vibrations.
There is still a strange vibration issue to solve →

There is a strange 28Hz to 58Hz noisy frequency range that wont be caused directly by motors and props. Motors are up around the 90 to 130Hz range, which matches what we expect for that size prop(10inch) . Maybe it is some sort of resonance or there’s something else not secured properly.
Since this is a relatively low frequency you really need to find what is causing it and fix it, or it will continue to affect control. It cant be filtered out with software (HNOTCH) without also affecting control and stability.

Have you got a couple of photos of the flight controller, wiring and the whole copter?

Get nylock nuts to hold on the props.
image
I’ve used ordinary steel ones from the hardware shop, or can get nice anodized aluminium ones from the places that sell the brushless motors.
If your motors have these collets
image
then change the motors - these collets will give you endless trouble. They do not suit a multirotor.
Get motors that have the shaft and thread as part of the bell housing, or some motor with a positive fixing of the prop, similar to this one, and always use nylock nuts.
image
If you need to buy new motors, shout out and we can help with the selection.

I would like to see these PIDs in action after you’ve done the fixes above, I think they should work reasonably well.

ATC_ANG_RLL_P,6.0
ATC_ANG_PIT_P,6.0
ATC_RAT_RLL_P,0.11
ATC_RAT_RLL_I,0.11
ATC_RAT_RLL_D,0.0055
ATC_RAT_PIT_P,0.11
ATC_RAT_PIT_I,0.11
ATC_RAT_PIT_D,0.0055

Hello,
The higher vibrations mainly at the end of the flight is due to landing. As it reduces the altitude and gets in contact with some tiny dry bushes. I too checked the vibrations but ignoring that landing or take off vibration where it have mostly got the dry grass due to propwash.

Only thing is, it take off with a little back tilt and I have to counter it a little during the take off.

Also to note that my propellers are 8 inch size.

Our motors have the straight shaft but now we may need a block nut to tighten.

I will share the photographs today.

For how long am I supposed to perform althold hover?

Reconnect to mission palnner and go to Initial parameters and set 8 inch as you prop size, press Calculate and accept the changes.
Ensure INS_ACCEL_FILTER stays at 10

The hover thrust learning can take from a few seconds to a couple of minutes - it depends on how stable your copter is and how close the hover thrust is to being correct.

1 Like

I changed the settings to 8 inches with no changes in ins accel filter.

Used a car mat (temporary solution) to check if the take-off vibrations have any positive effect of the same. I feel it has reduced to some extent. Please check.

9:21 log - check from time - 9:33 am to 9:35 am (only stabilize mode flight to observe the 8 inch changes)
10:07 log - check from time - 10:16 am to 10:22 am (Stabilize and then Althold for hover train)

Do you mean as a launch pad?

I would try running Autotune on one axis at a time
AUTOTUNE_AXES,1
then
AUTOTUNE_AXES,2
and see what it comes up with.
If everything goes well, run Autotune on Yaw too. It’s not as critical.
When Autotune seems to finish, I just “reposition” and land before disarming - I dont switch out of Autotune mode until after disarmed. This is easiest.
Then you can select a flight mode and test.
Autotune logs are not too useful to see.

Yes. As a launching pad. Just to make it a little flat ground and let it not touch the tiny dry grass.

So, I am, not supposed to set the pids previously suggested by you?

For autotune, is it like tuning one then land, tuning 2 and then land! Nice. I had no idea.

I will be using default aggressiveness 0.1.

Will it show up on the screen that autotune is over? Otherwise how would I know.

For yaw autotune, what should be the angle towards wind blowing direction?

For flight mode, I am worried of ekf velocity variance error in loiter mode. It force lands the drone under ekf failsafe and some time that crashes too.

In case i have 2 batteries one lipo amd one liion. Different weight and and characteristics. Will there be any effect of this in autotune? Like, tuning in liion and then flying in lipo or vice versa.

Lets just go in a small step with PIDs and see how that goes before Autotune

ATC_ANG_RLL_P,5.0
ATC_ANG_PIT_P,5.0
ATC_RAT_RLL_P,0.10
ATC_RAT_RLL_I,0.10
ATC_RAT_RLL_D,0.003
ATC_RAT_PIT_P,0.10
ATC_RAT_PIT_I,0.10
ATC_RAT_PIT_D,0.003

If you have telemetry to the transmitter or ground station, Messages will show autotune progress and when it’s finished. Visually the copter will stop twitching.
Autotune moves around a lot so you will need a big wide open area and you will have to reposition the copter quite a bit. If tuning is good, the copter wanders less.

You cant effectively swap a Lipo and Liion battery on a multirotor where the battery is so close to the flight controller - the Liion has larger and vastly different magnetic fields and you will have to constantly recalibrate compasses.
Even just refitting a Liion battery in a fractionally different position or orientation can make a significant difference. Some copters built for endurance do use a Liion battery, but they will also have a system that accurately positions the Liion battery pack, and it wont ever be swapped with a Lipo.
Get a second Lipo battery.

ekf velocity variance error will be because of poor GPS signal - Ardupilot compares where it thinks it is based on accelerometer and gyro data, and the GPS reported position.
Set FENCE_ENABLE,1 to ensure there is a good 3D Fix and Home can be set before you can arm and fly. It can take quite some time before you can arm, but you get used to it and it is a lot safer.

1 Like

In your photos
The wires cant be taped down to the flight controller. All wires need to avoid touching the flight controller case at all costs. The wires need to be secured to the frame, just so there is enough flex between where they are secured and the connector at the flight controller. But not so loose as the wires are flapping around too much in the prop wash.

Also the servo wires to ESCs - pull the middle red wire from those connectors. Insulate or terminate each one properly to avoid those red wires coming in contact with anything else or each other.

With the receiver, keep it’s antenna wires separated, about 90 degrees apart.
It can do yaapu telemetry if you have a suitable tranmitter to run openTX. After this tuning exercise you can work on that.

I tried to perform AutoTune and it took a little time to do something. When it started it just came down to ground from 8 to 9 meter altitude.
Log uploaded. Kindly suggest to me if something is missing or done wrong. Also, let me know what altitude is good to go for autotuning.
Thanks

8 to 10 meters is perfect

1 Like