Okay, sorry I meant to post this earlier. Looking back on my notes, Here’s what I have:
Tracing the wires back from the foot pedal I discovered:
-
White Wire is the Thrust Motor Enable. Connect to Ground for enable.
-
Brown is throttle control. Needs a good filtered 0-5v for speed control. Miliamp draw.
-
Green is L Turn. Requires between +5V->+12V. No speed control.
-
Yellow is R Turn. Requires between +5V->+12V. No speed control.
-
I haven’t tried +12v on both steering lines simultaneously. Could be bad.
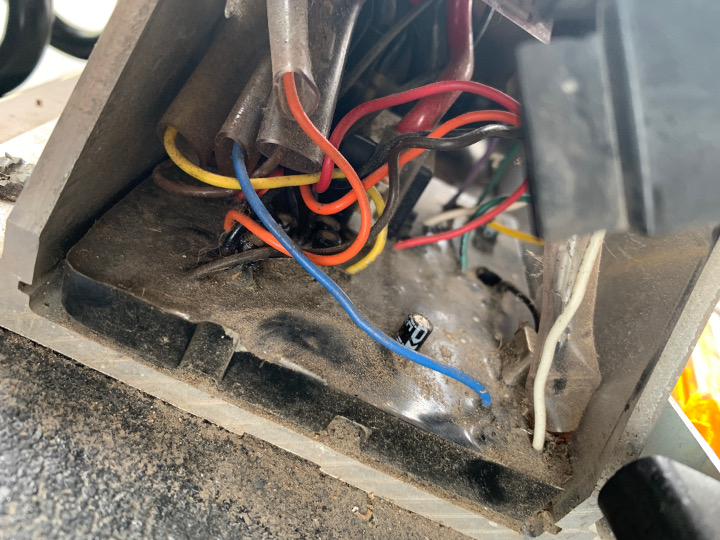
The wire colors on mine are the same inside the motor base as at the foot control. (but not inside the upper pod, those are different.)
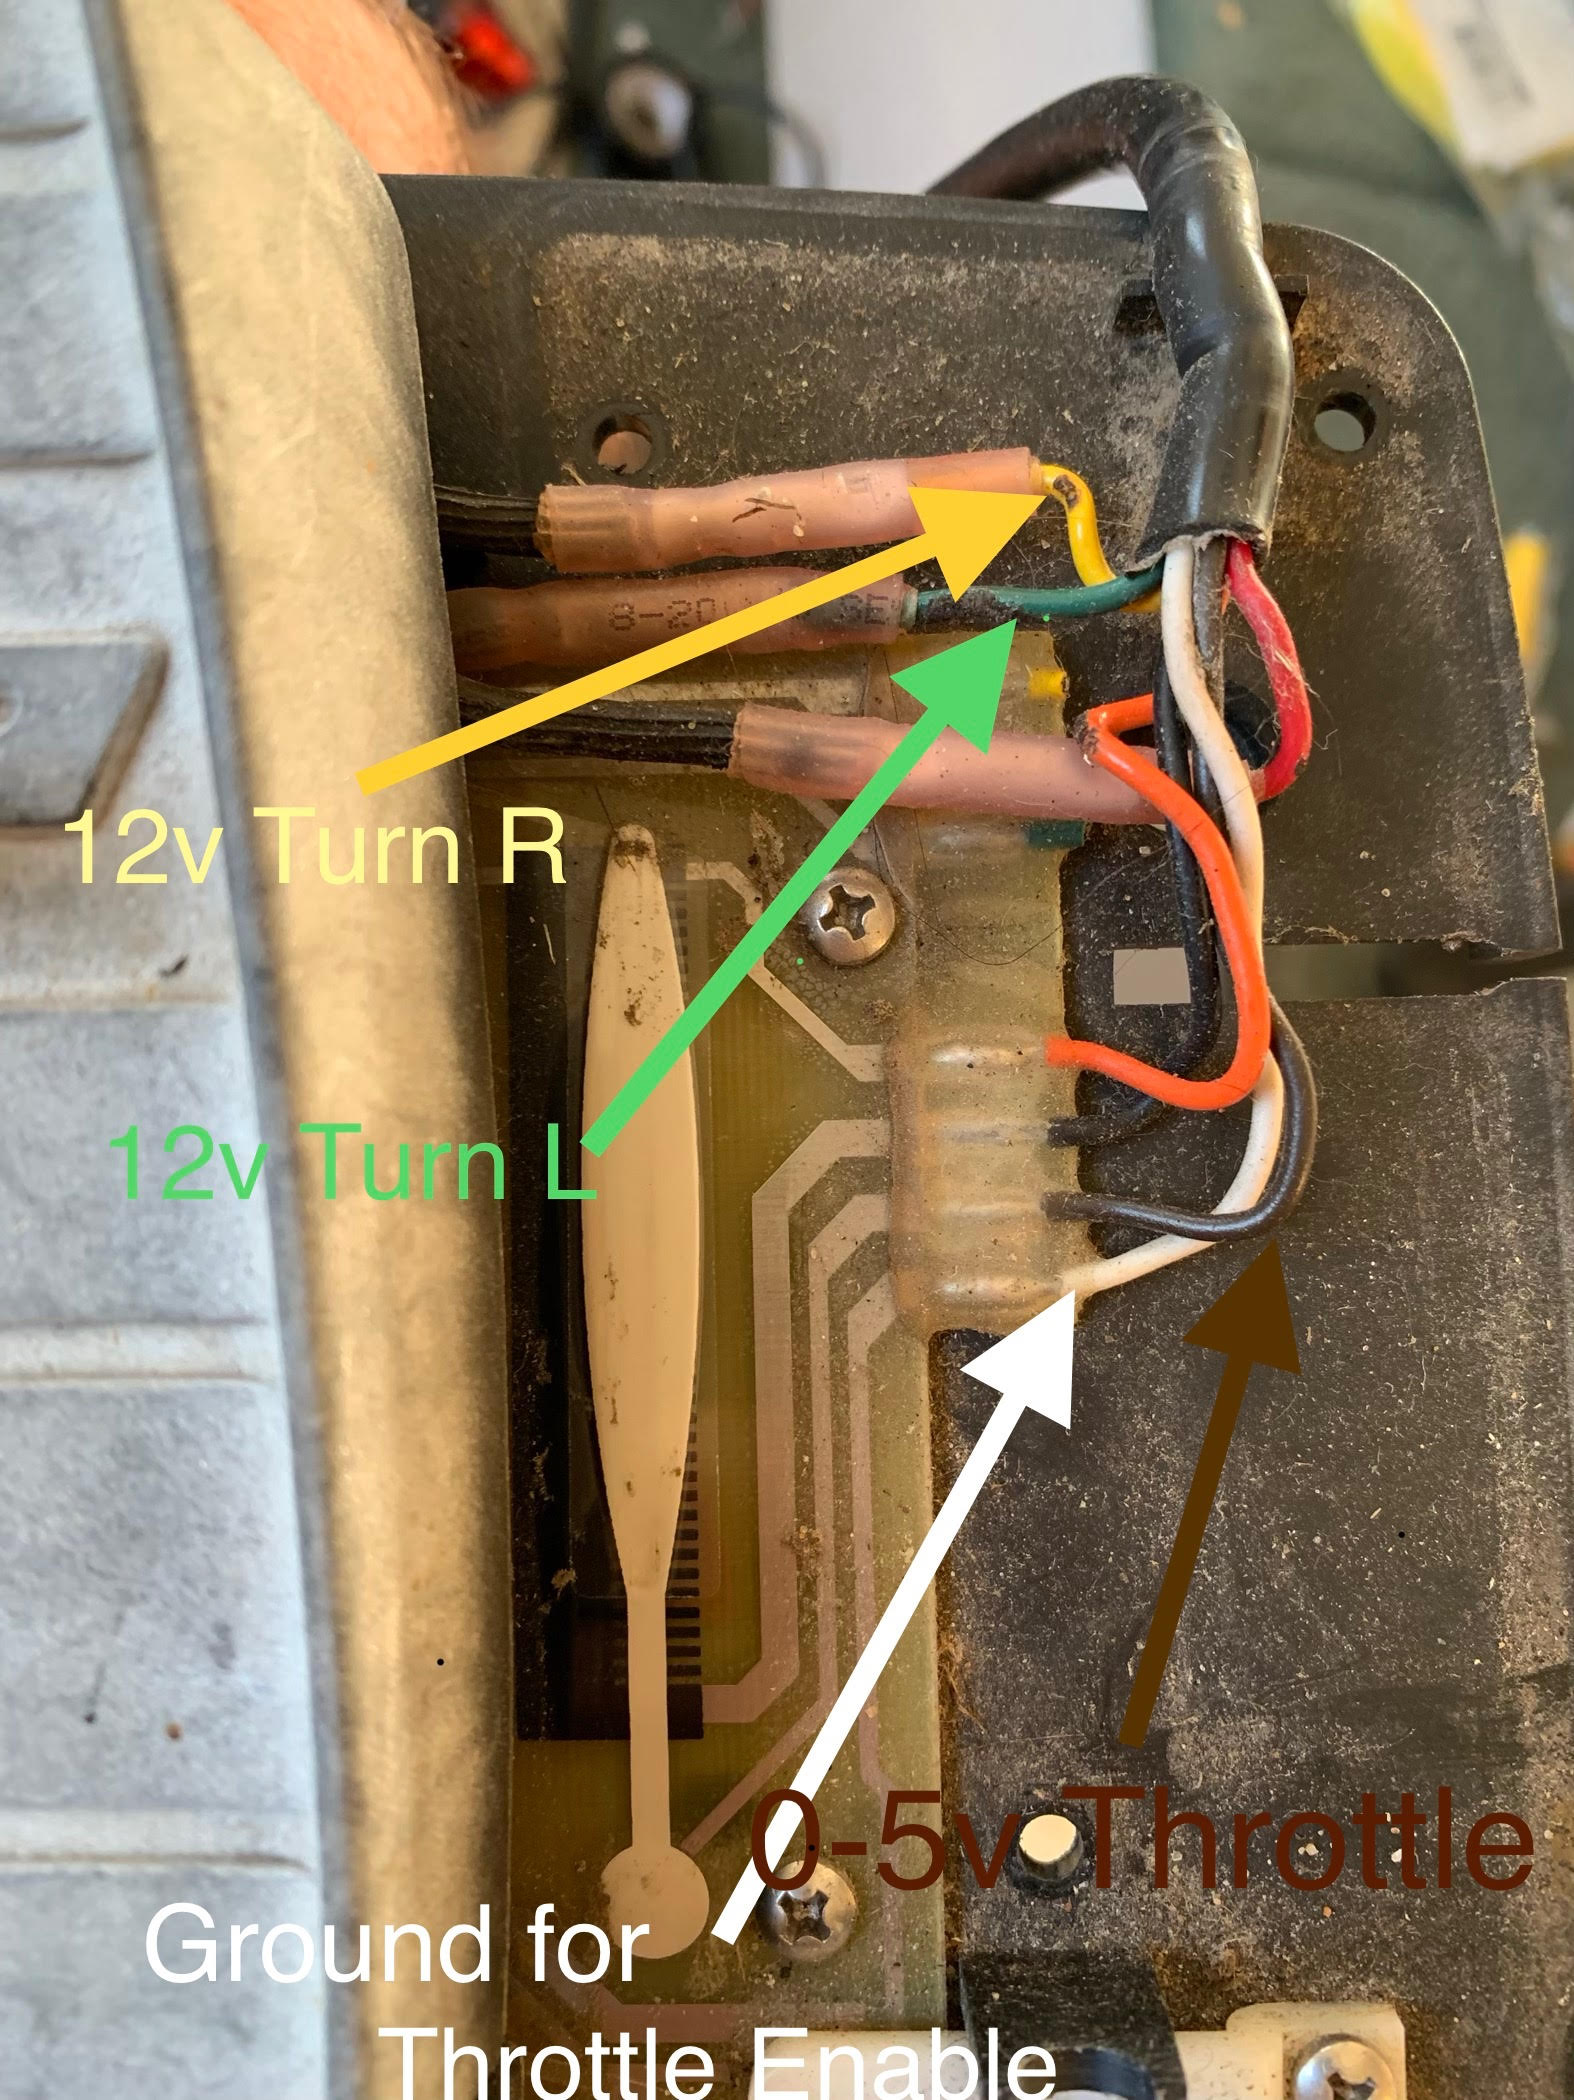
Here’s a picture of the inside of the motor base. You’ll need to splice into all of the wire colors mentioned above. I was able to re-purpose all of the existing wires that ran to the original compass module for power, Ground + the 3 control wires. I rewired the existing “autopilot enable” switch on the motor housing to ground the white wire then its in the on position.
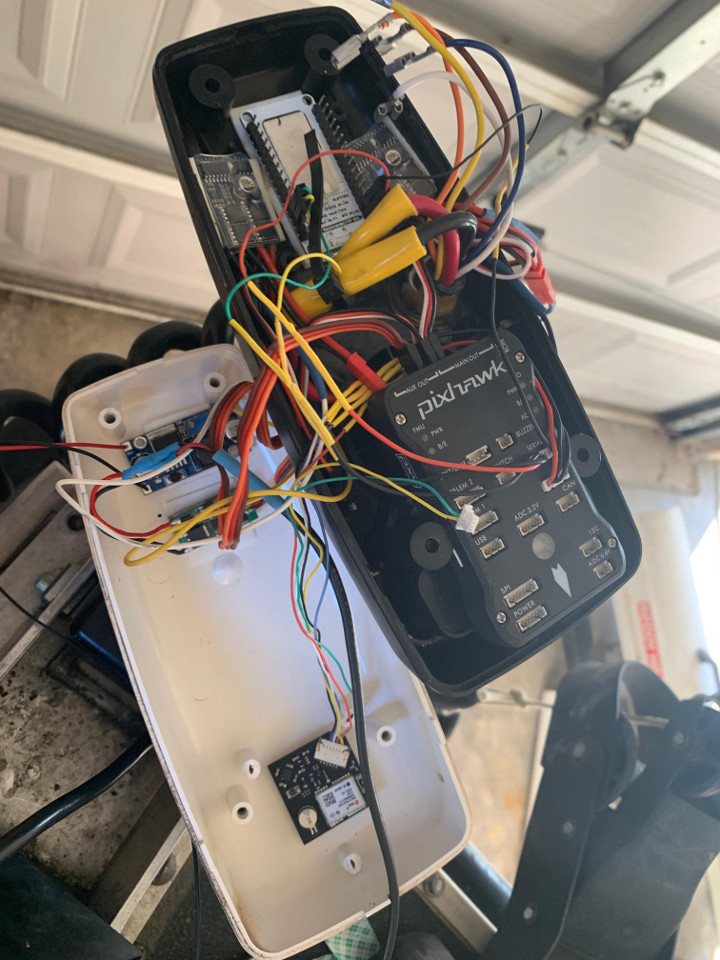
For wireless control implementation I’m using a nodeMCU for WIFI connectivity to a tablet + the typical radio control. One issue I ran into is that the RC radio and nodeMCU have to be at exact ends of the pod because of radio interference. Luckily the pod was just big enough.
I’m using two buck converters. One to generate a filtered +12v (possibly not needed), and another for +5v (essentially a BEC, but they’re cheaper if you call them a buck converter).
For steering control I’m using a 10a, no brake forward+reverse brushed speed controller (Forward=R, Backwards=L). No extra ground wire was needed. 10A Speed controller
Throttle was a bit trickier. I thought I’d be able to use another brushed speed controller, but I couldn’t get the output stable enough even after trying multiple filters, so I ended up using this: PWM to Voltage converter
After all of that, here was a dry layout of everything (Some component changes were made after this was taken, but it’s the best overall overall pic I have)
And here is the final product after corrosionX and potting:
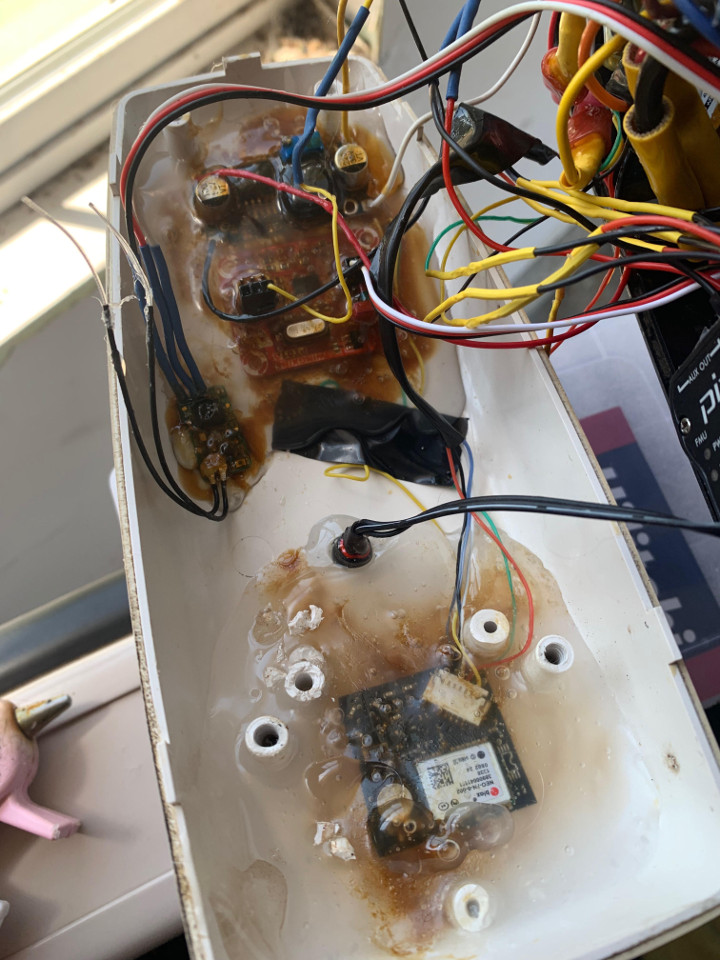
I don’t know how it will hold up in the sun, but I hosed everything down with corrosionX and then used a heat gun to melt (A ton of) hot glue over the top. It’s messy, but so far it’s been trouble free.