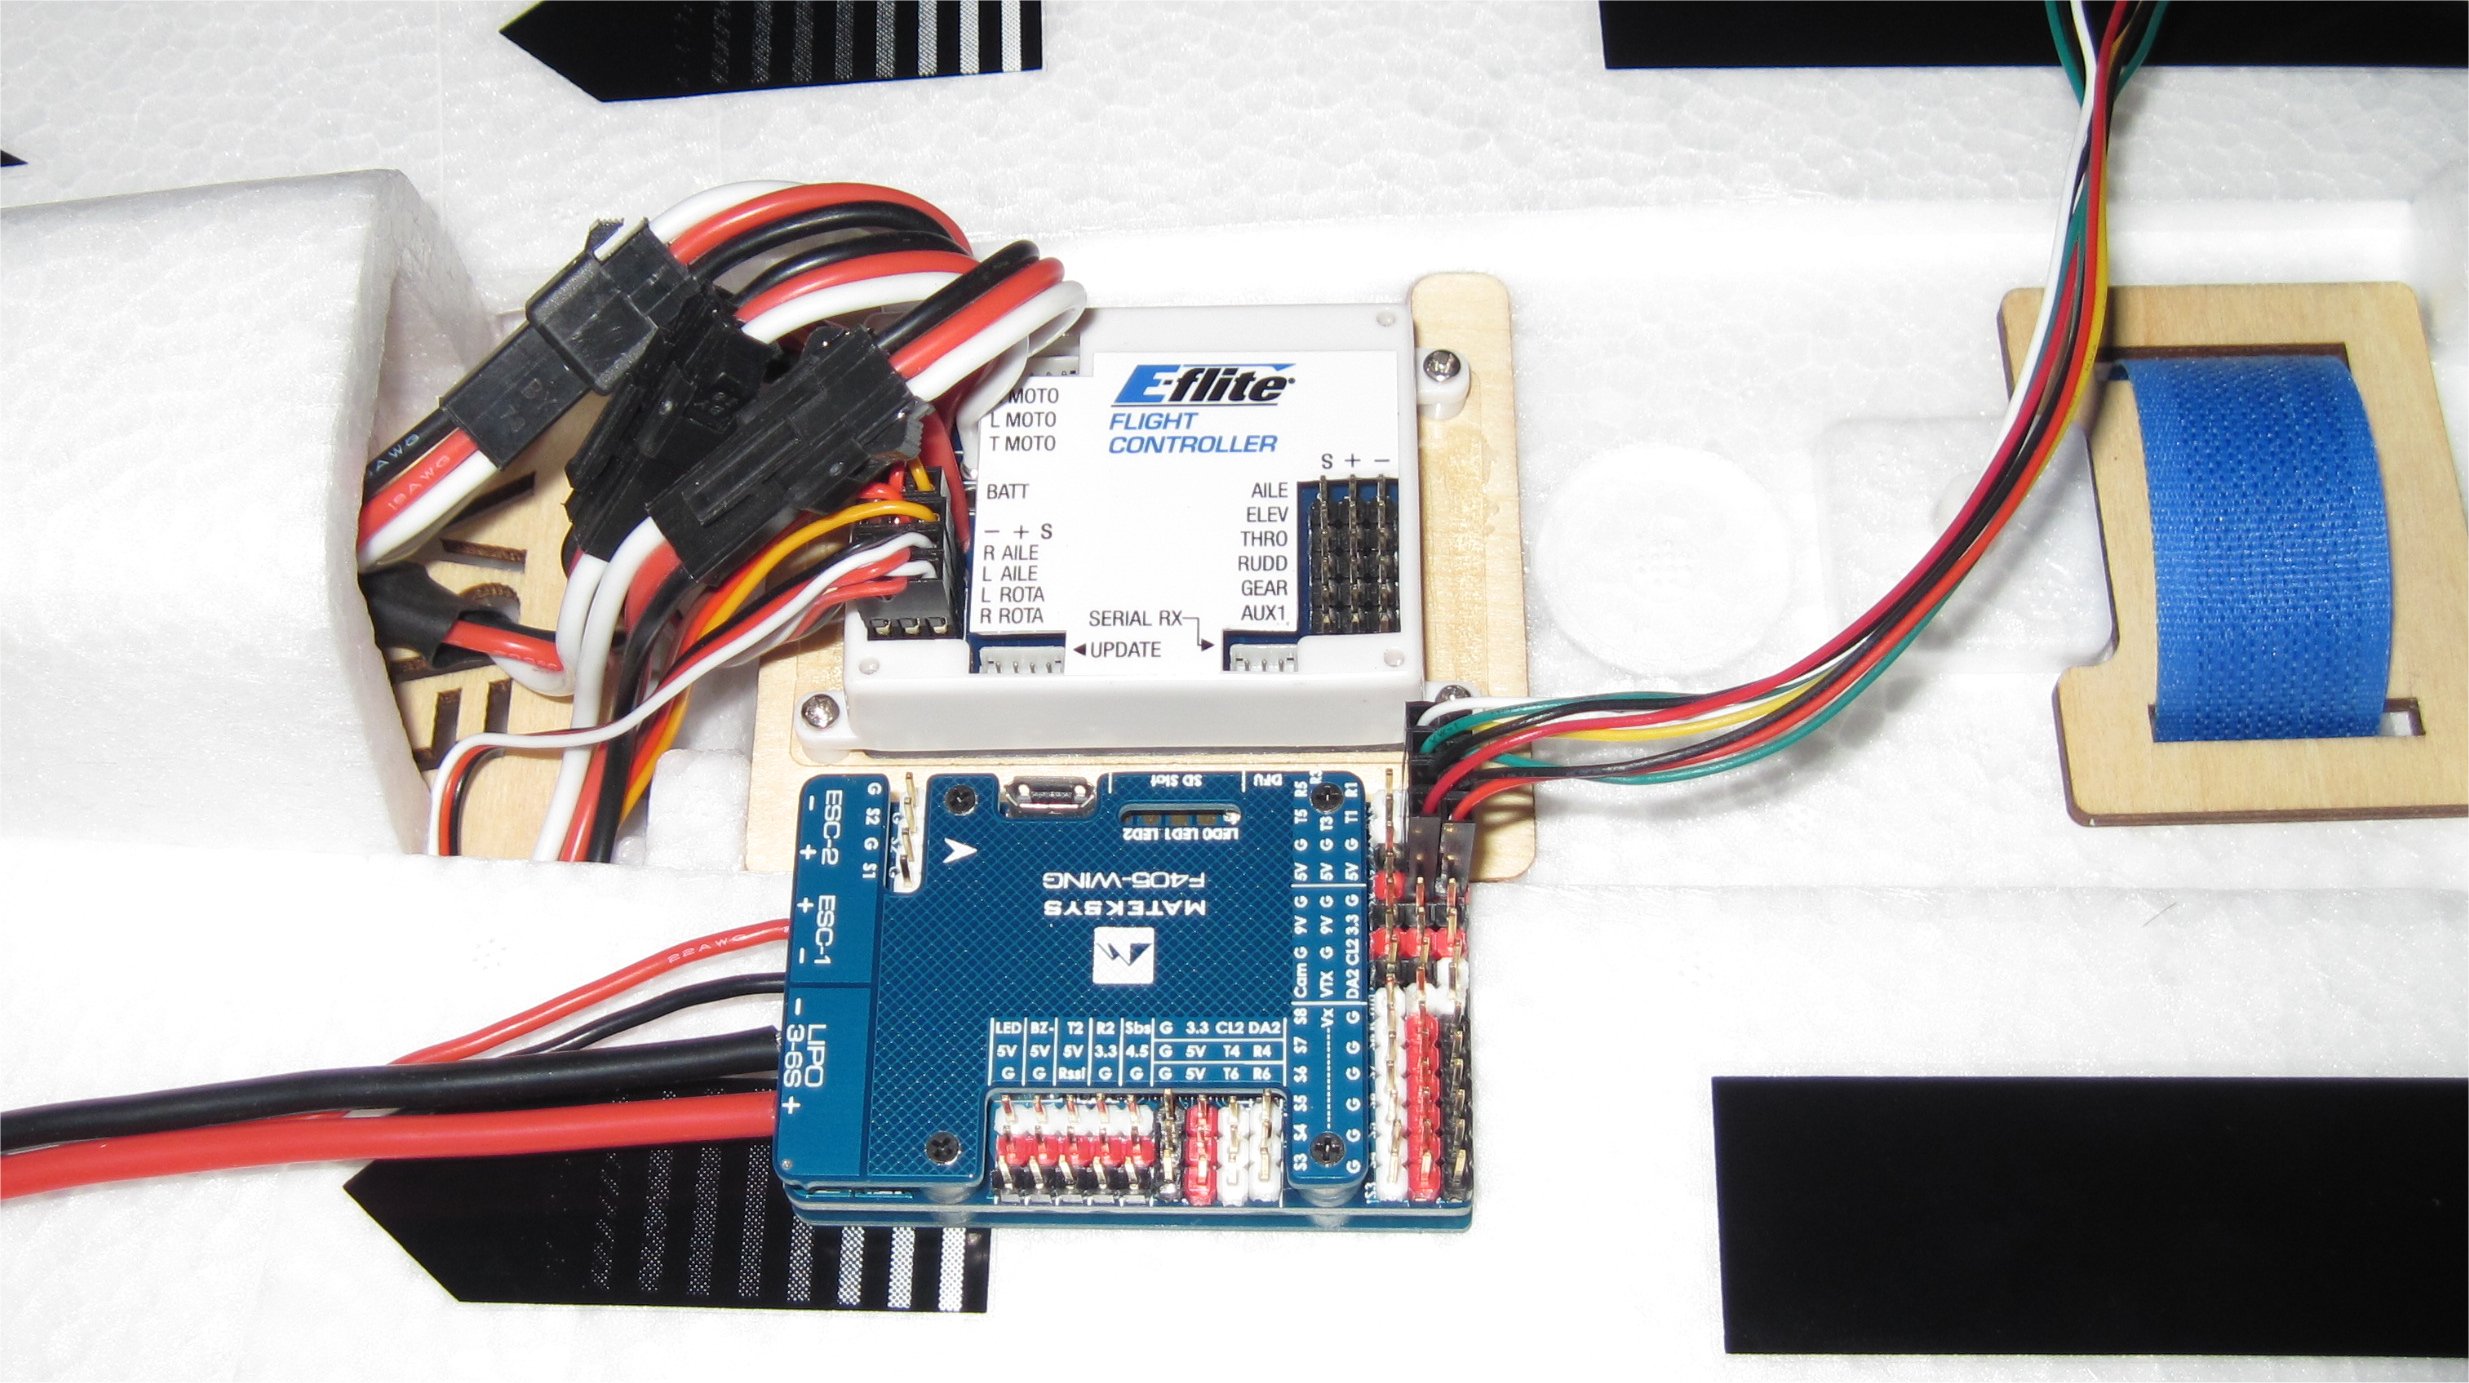
The application below for the Matek F405 Wing looked interesting so I decided to create a conversion thread. On top of the added integration, it has the 7 outputs needed to convert the Convergence VTOL to APM. The mini Pix layout below still has the lowest combo price but it is limited to 6 outputs and is not always the best fit using JST GH connectors and less integration. The PixFalcon option does have 8 outputs but it is twice as expensive and not as integrated as the Matek.
My goal for this project is to replace the stock E-flite Flight Controller with a Matek F405 Wing controller and then add the appropriate FPV gear with OSD.
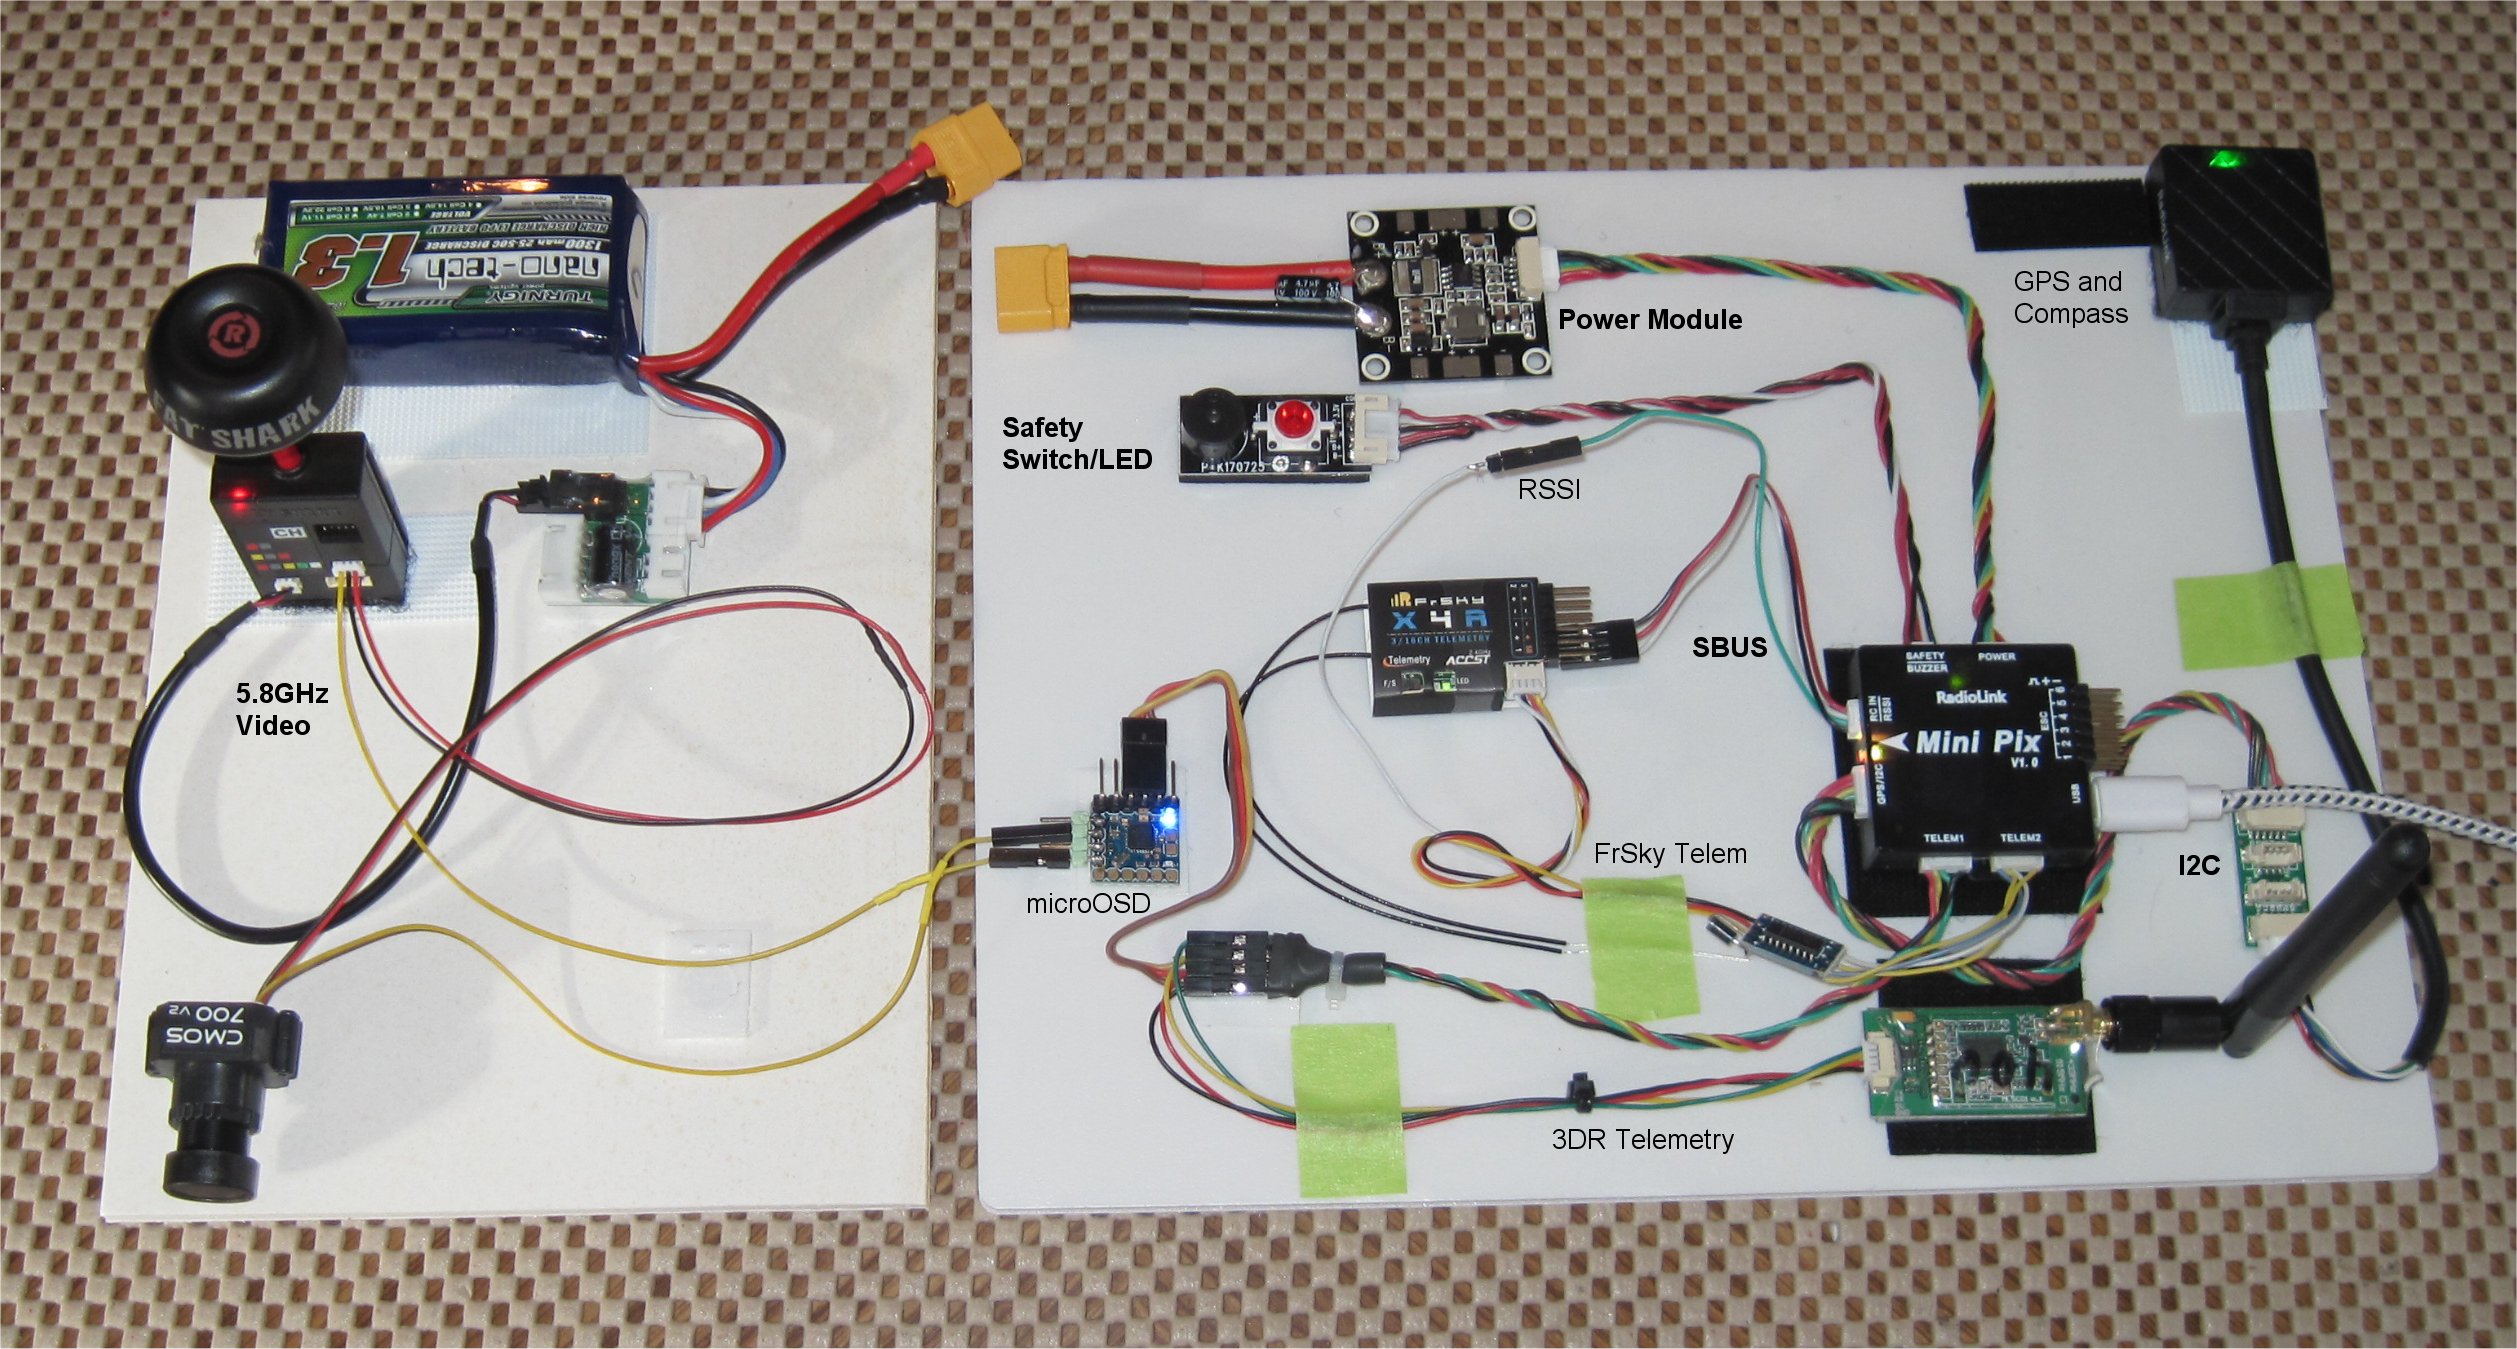
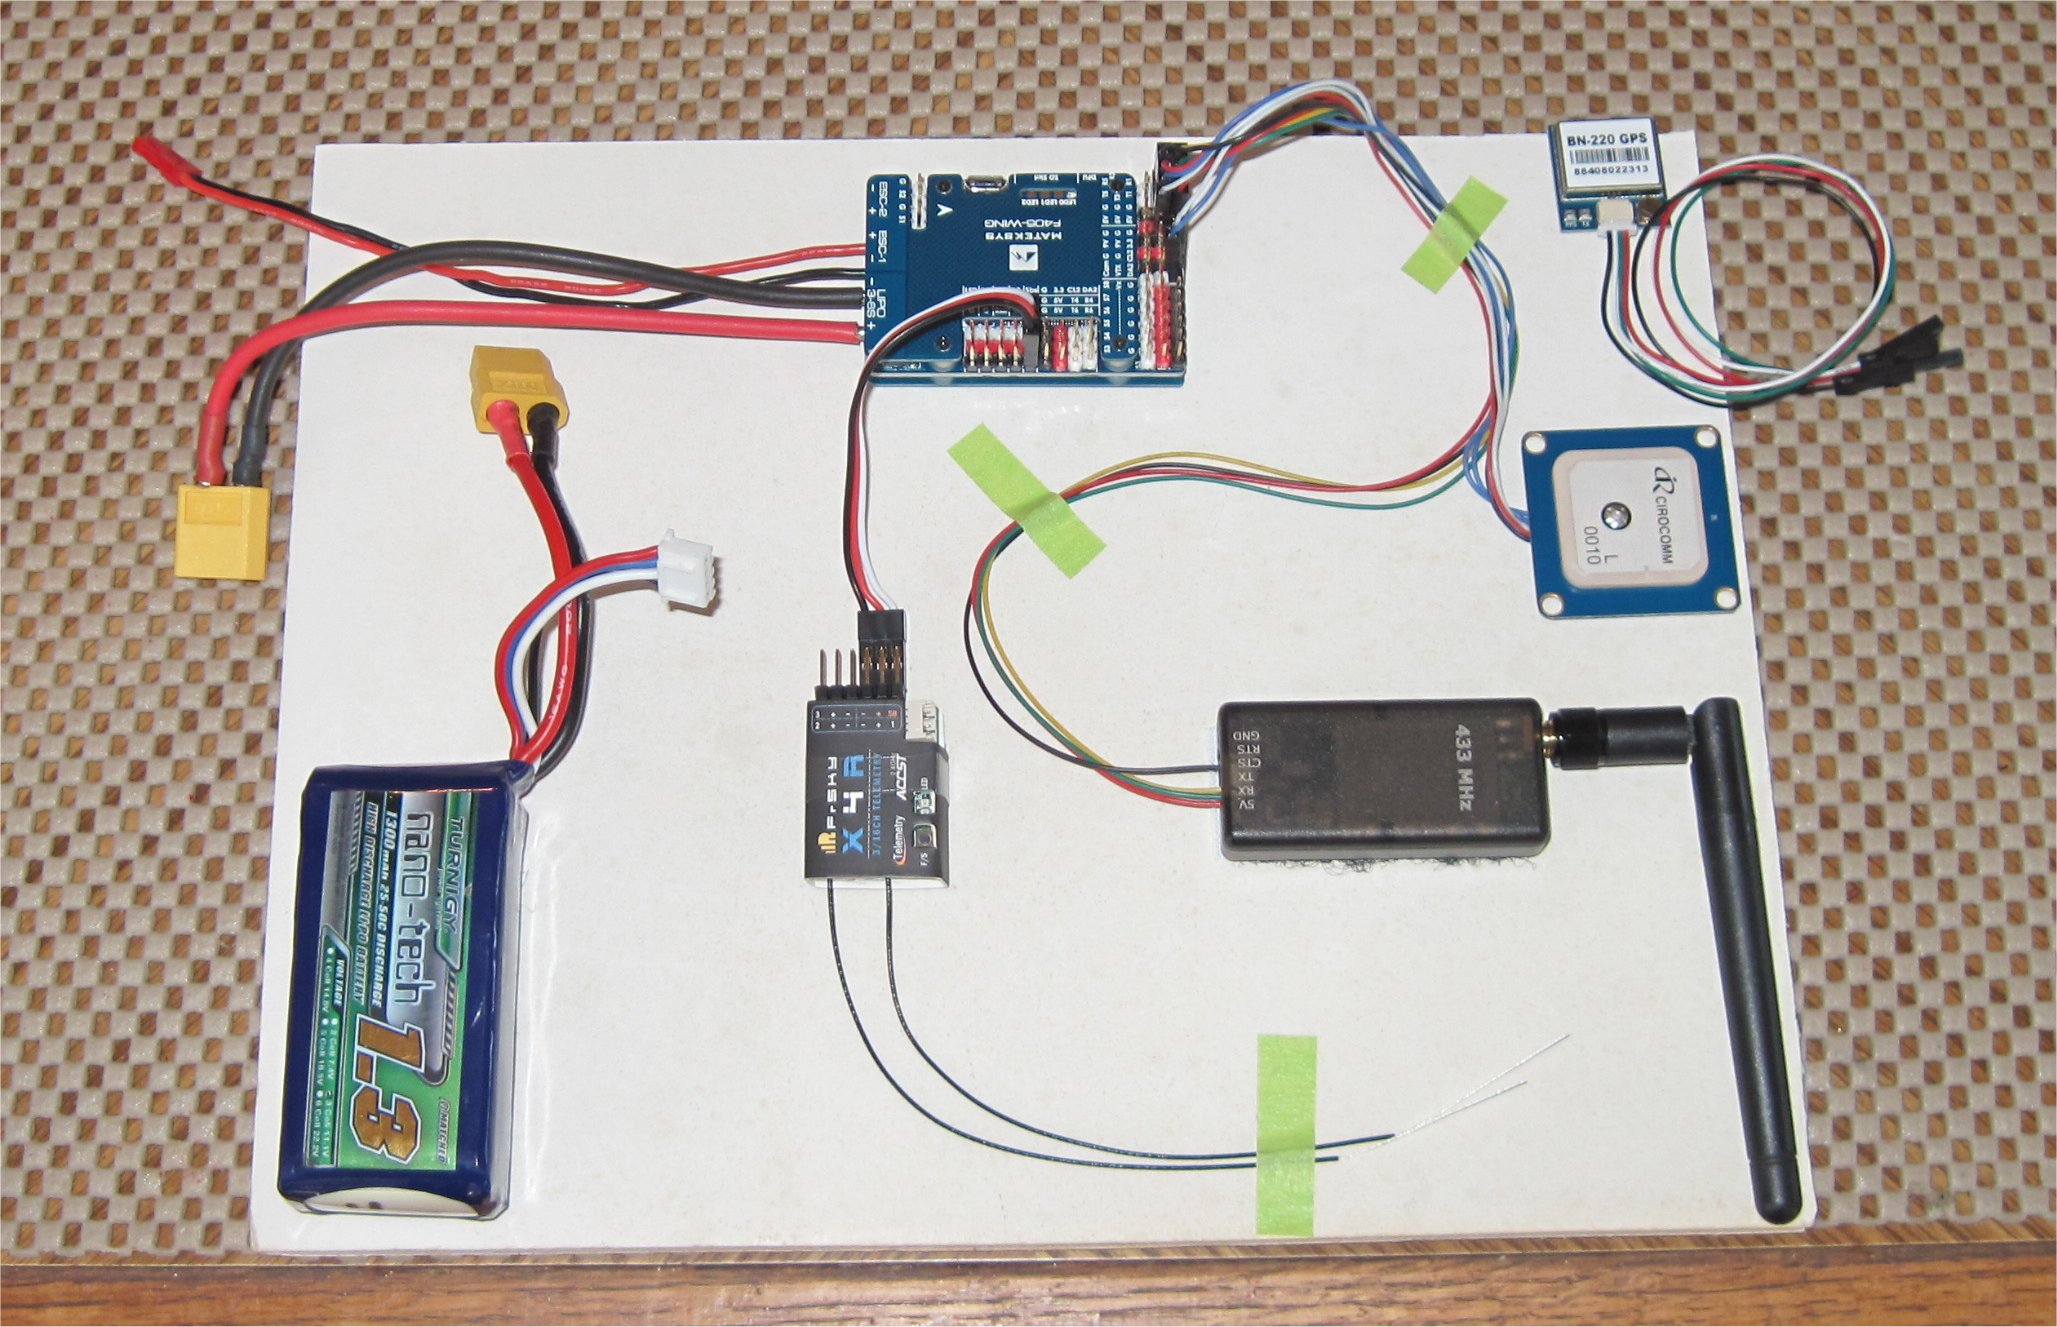
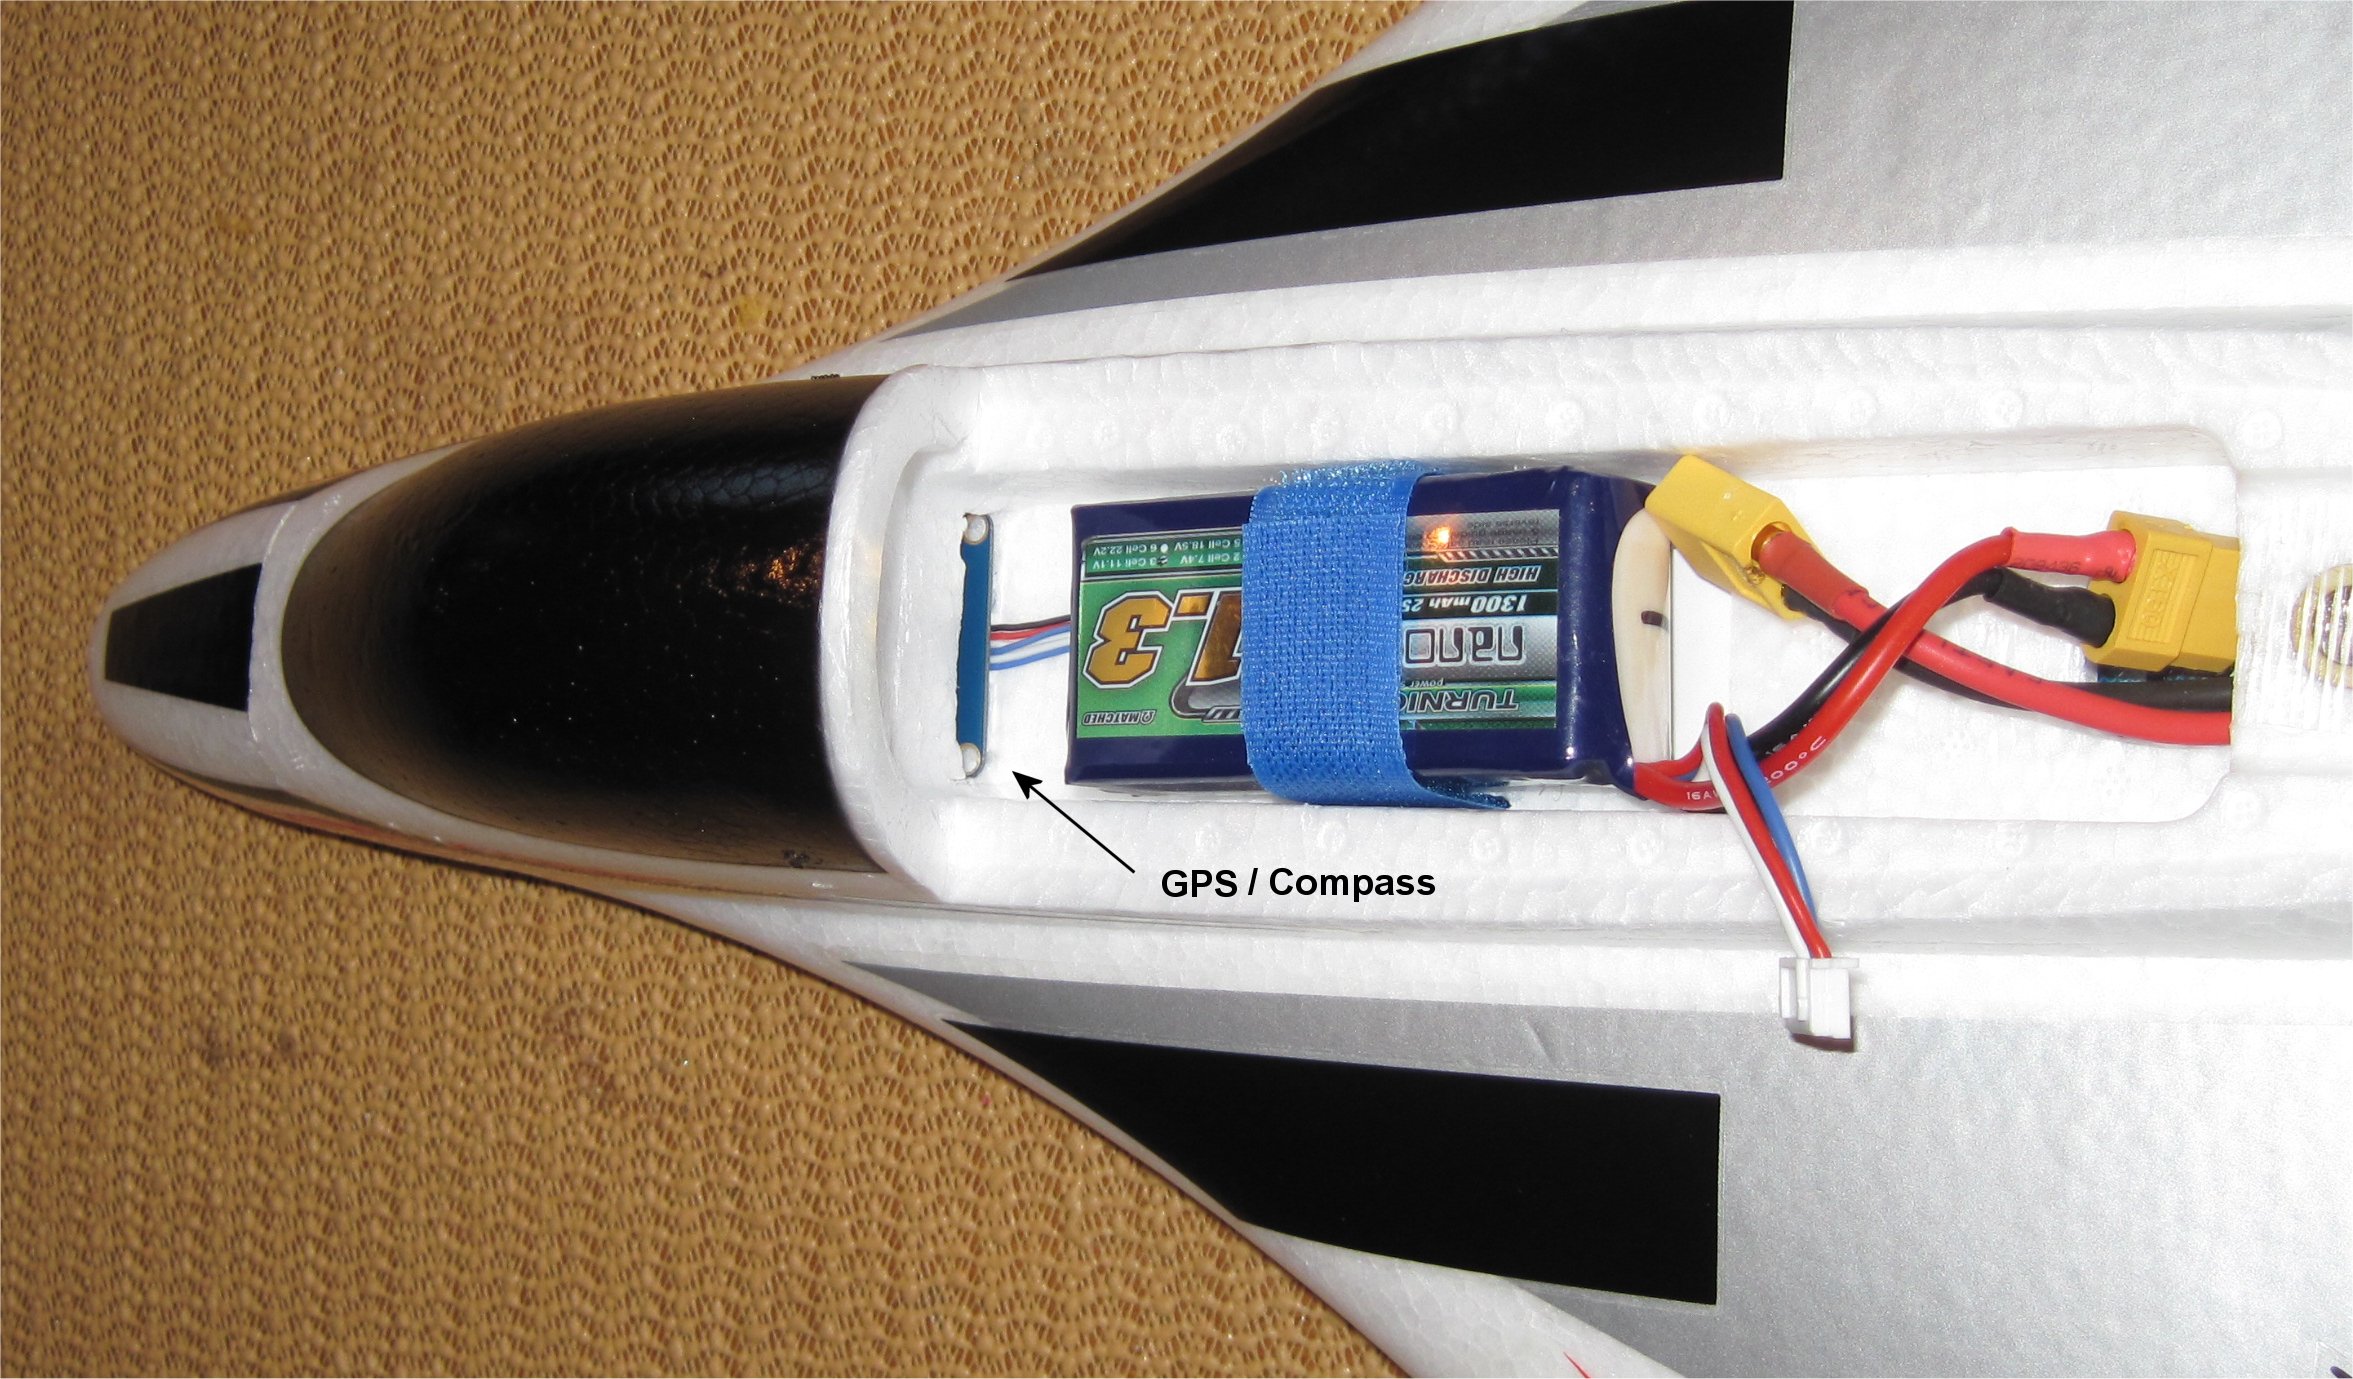
When setting up a new controller, I like to get things working first on a poster board before installing it in the target vehicle. In this manner, I loaded the latest APM Plane 3.10 build with ChibiOS and then got the GPS, receiver, and telemetry working. Since my original target was a plane, I had been using the small and inexpensive BN-220 GPS for only $9. However, a copter or VTOL needs a compass so I changed to a mini M8N from RTFQ that I had on hand. You could also use a BS-880 GPS/Compass module for about $20.
If you haven’t used STM32 controllers before then you’ll want to install the DFU drivers so you can install firmware for the first time on the Matek F405 Wing. One of most comprehensive write-ups I have seen on installing STM32 VCP and DFU drivers for Windows10 is in the Installing Betaflight Wiki page below. You can then use the Betaflight Firmware Flasher or Mission Planner to install the APM Plane firmware.
The first time you install firmware on the Matek F405 Wing, use the firmware that includes the bootloader (arduplane_with_bl.hex). All subsequent updates can use the smaller (arduplane.apj) file.
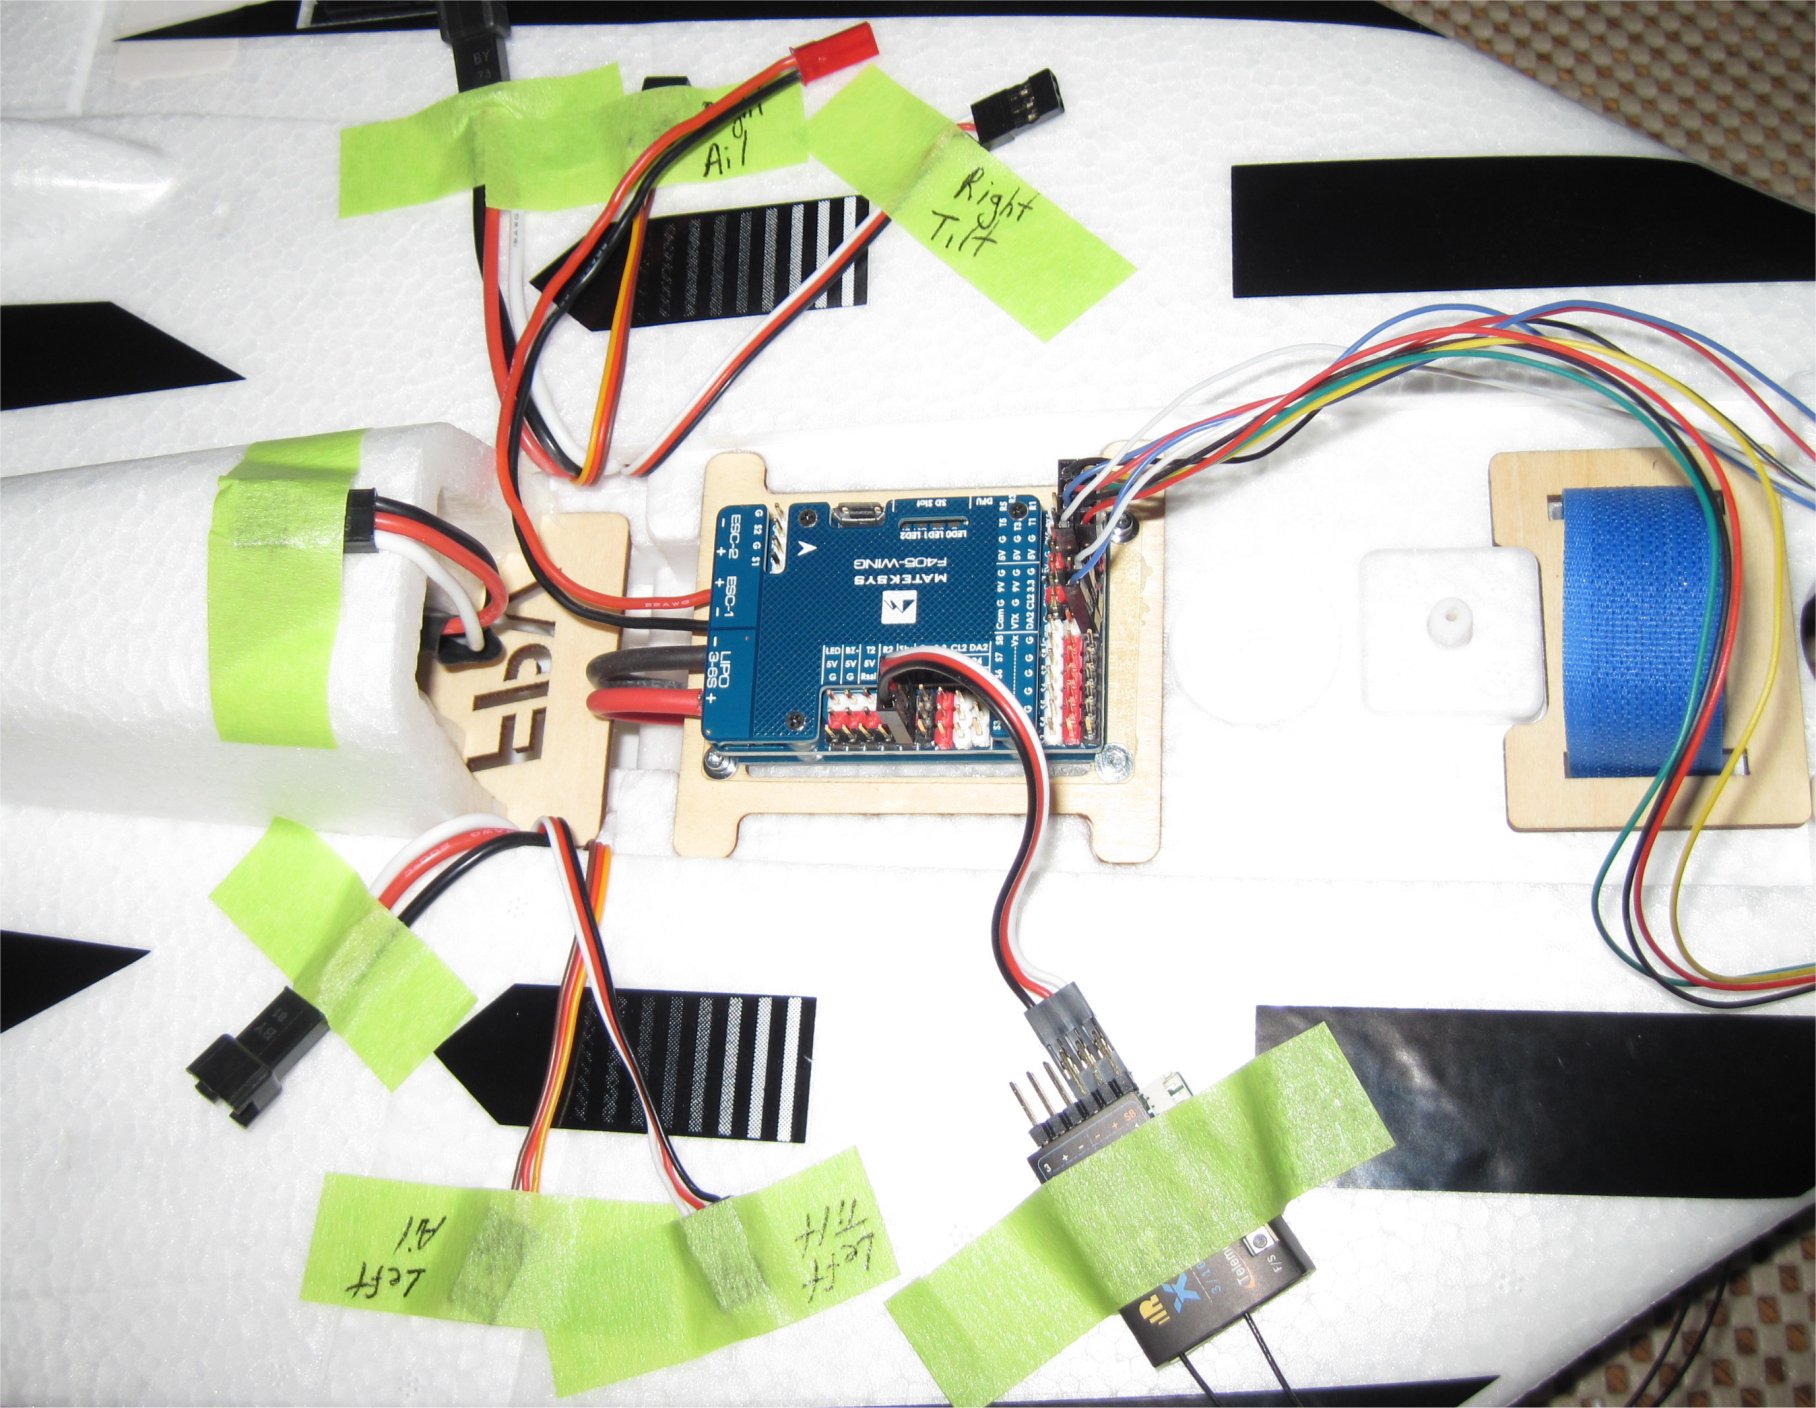
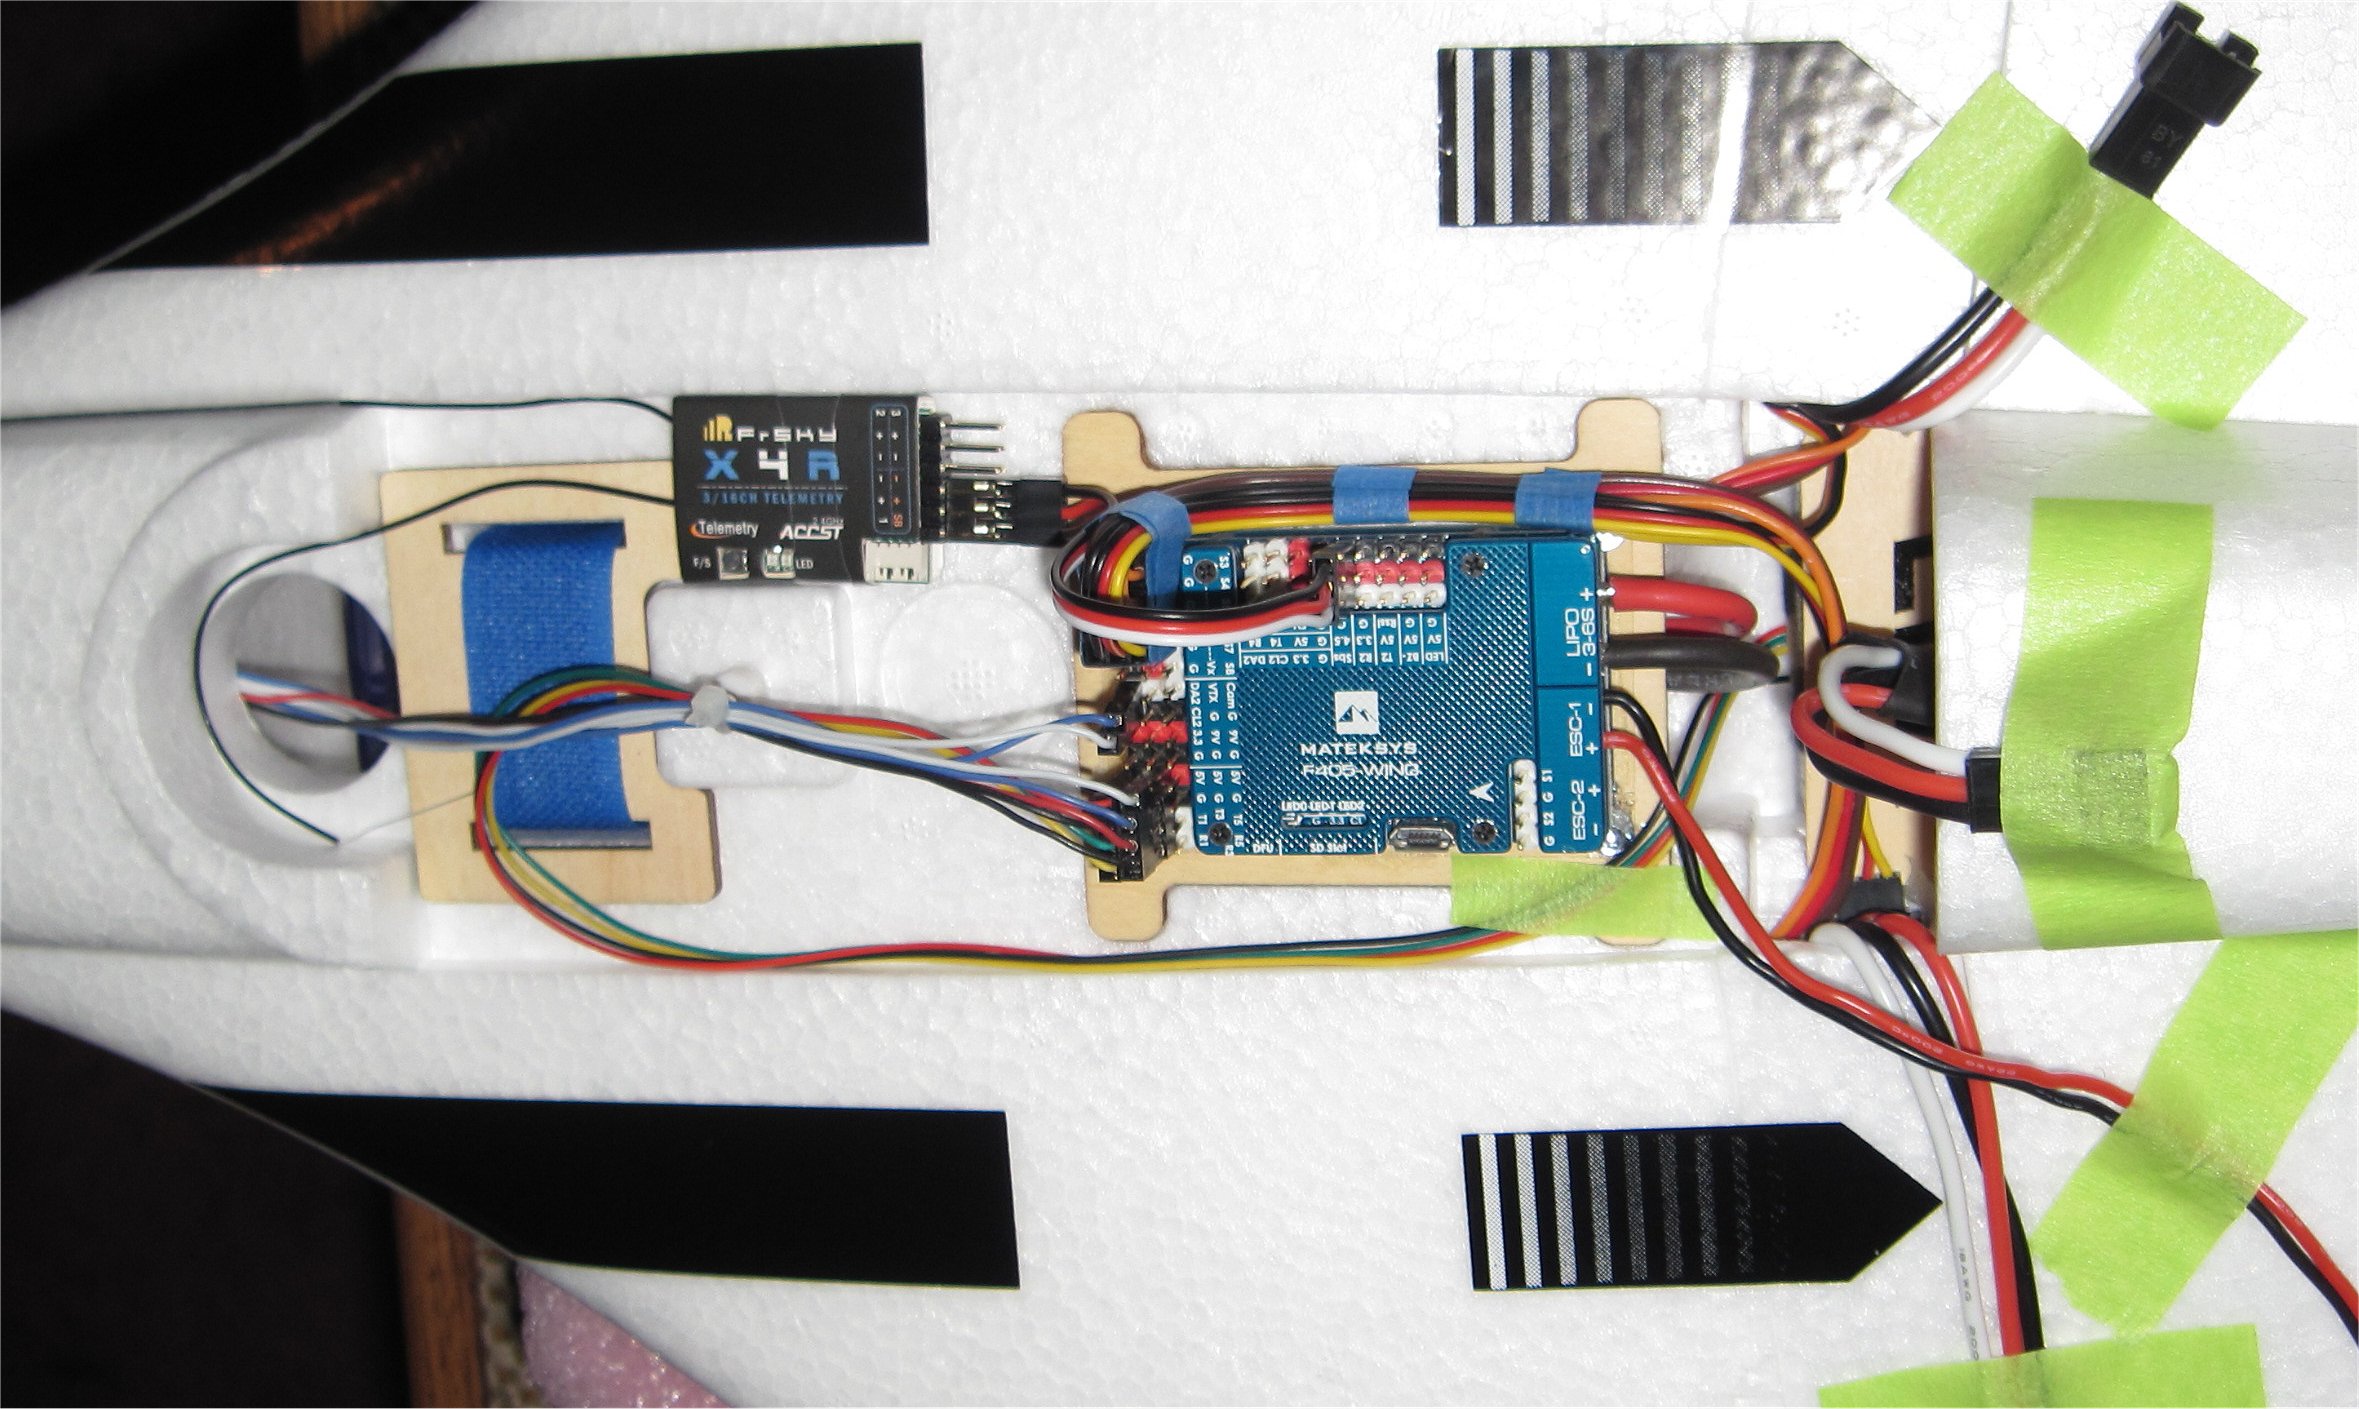
To mount the Matek FC, I used the same holes that held the E-flite FC in place. I used a Dremel sander to put a flat spot in each of the four corners of the Matek FC and simply secured it in place with small wood screws. The #1 x 3/8" wood screws were meant to secure servos in place so they had built-in washers to help secure the FC.
Lastly, I put a dab of Beacon Foam Tac near each screw where it met the wood to keep them from coming loose with vibration. The 3-layer Matek design with its top and bottom covers provide the vibration dampening.
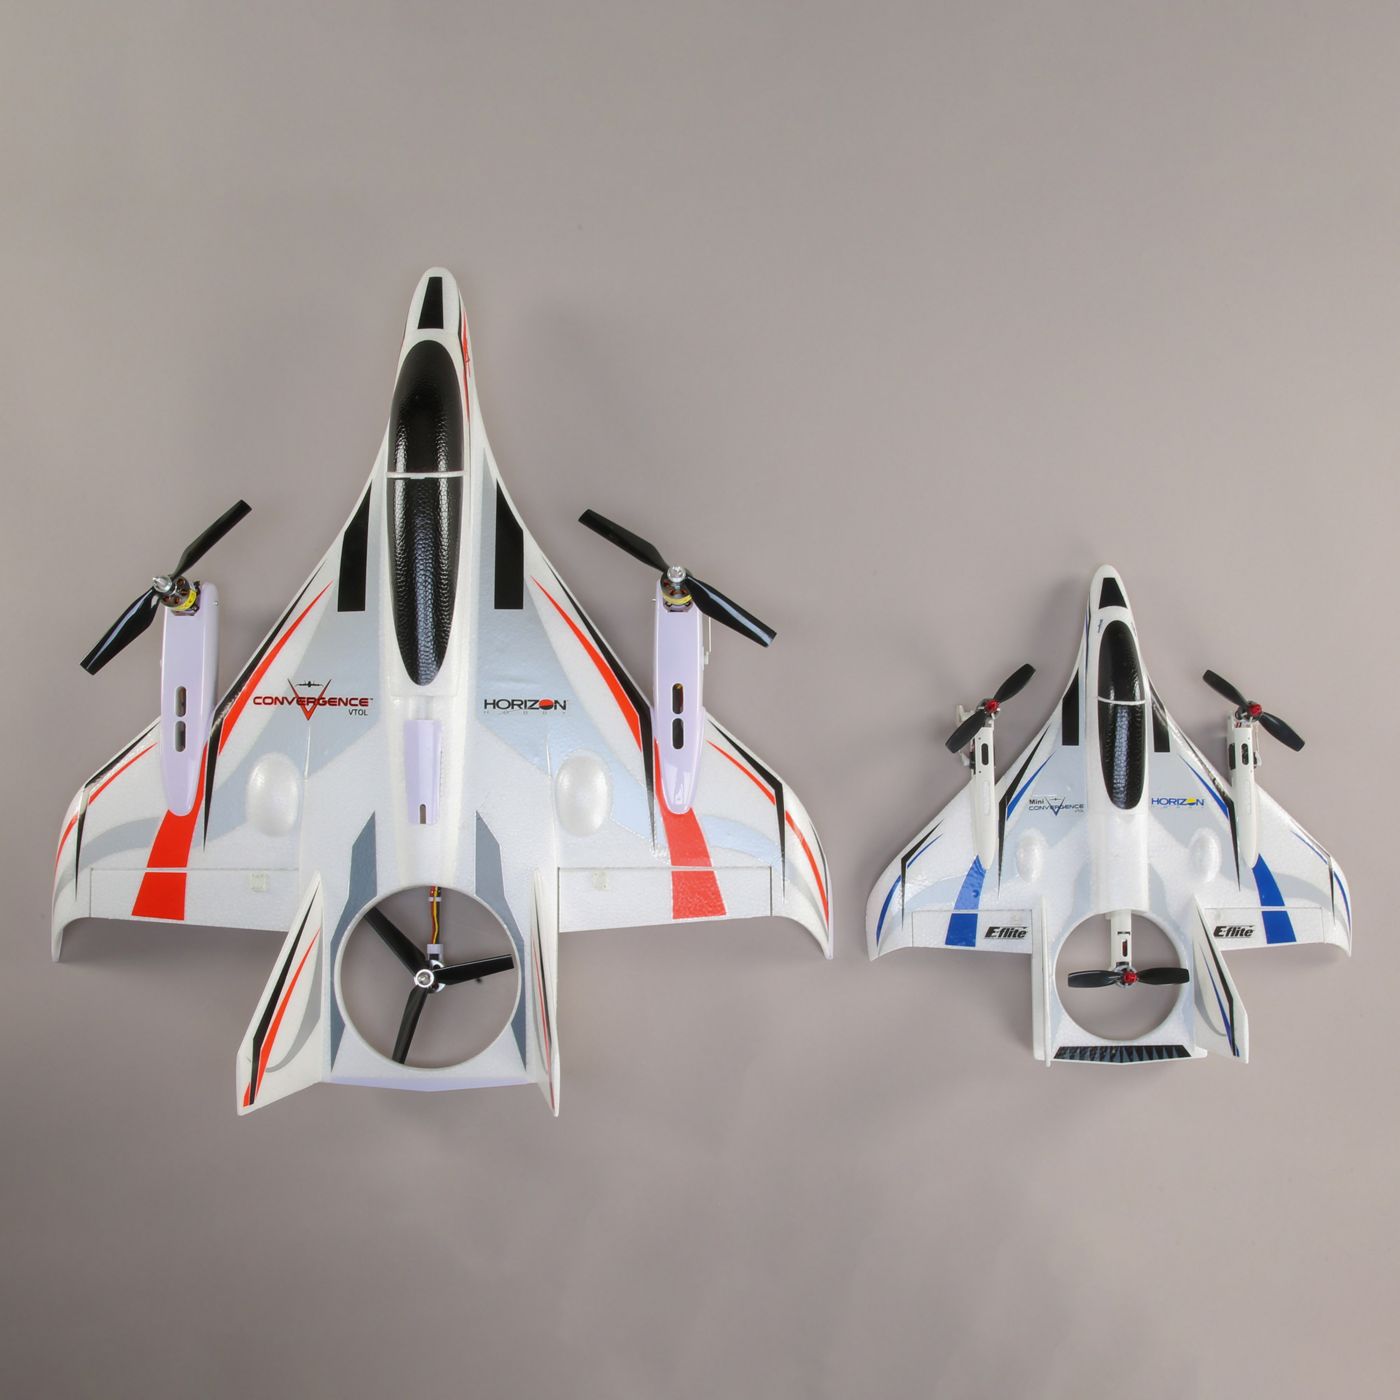
Swapping out the flight controller won’t change the flight time or all up weight from stock form. It might add a little weight from the GPS/Compass module and telemetry unit but not by much. The main benefit is in having APM autonomous flight capabilities over the E-flite controller. I don’t have any stock experience with the Convergence as I just bought it but you can read more about it on the rather lengthy RC Groups thread.
I borrowed some nice placement ideas from the PX4 Conversion using a Pixfalcon. I mounted my GPS/Compass module inside the nose foam by simply cutting a slot with an exacto knife and pressing it into place. I also placed the 3DR SiK telemetry unit in the video transmitter bay since it fit nicely after a simple cutout for the antenna.
I then wired up, using 6" servo extensions, the four channels for elevons and tilt motors as follows:
S3 - Left Elevon
S4 - Right Elevon
S5 - Left Motor Tilt
S6 - Right Motor Tilt
The tilt rotor set up in Mission Planner was quite easy using the APM Wiki and I will post my .param file soon. I have been testing the setup with the plane upside down and will change the FC orientation soon. All that is left is to hook up the three motors to power, S1, S2, and S7. Fun stuff!
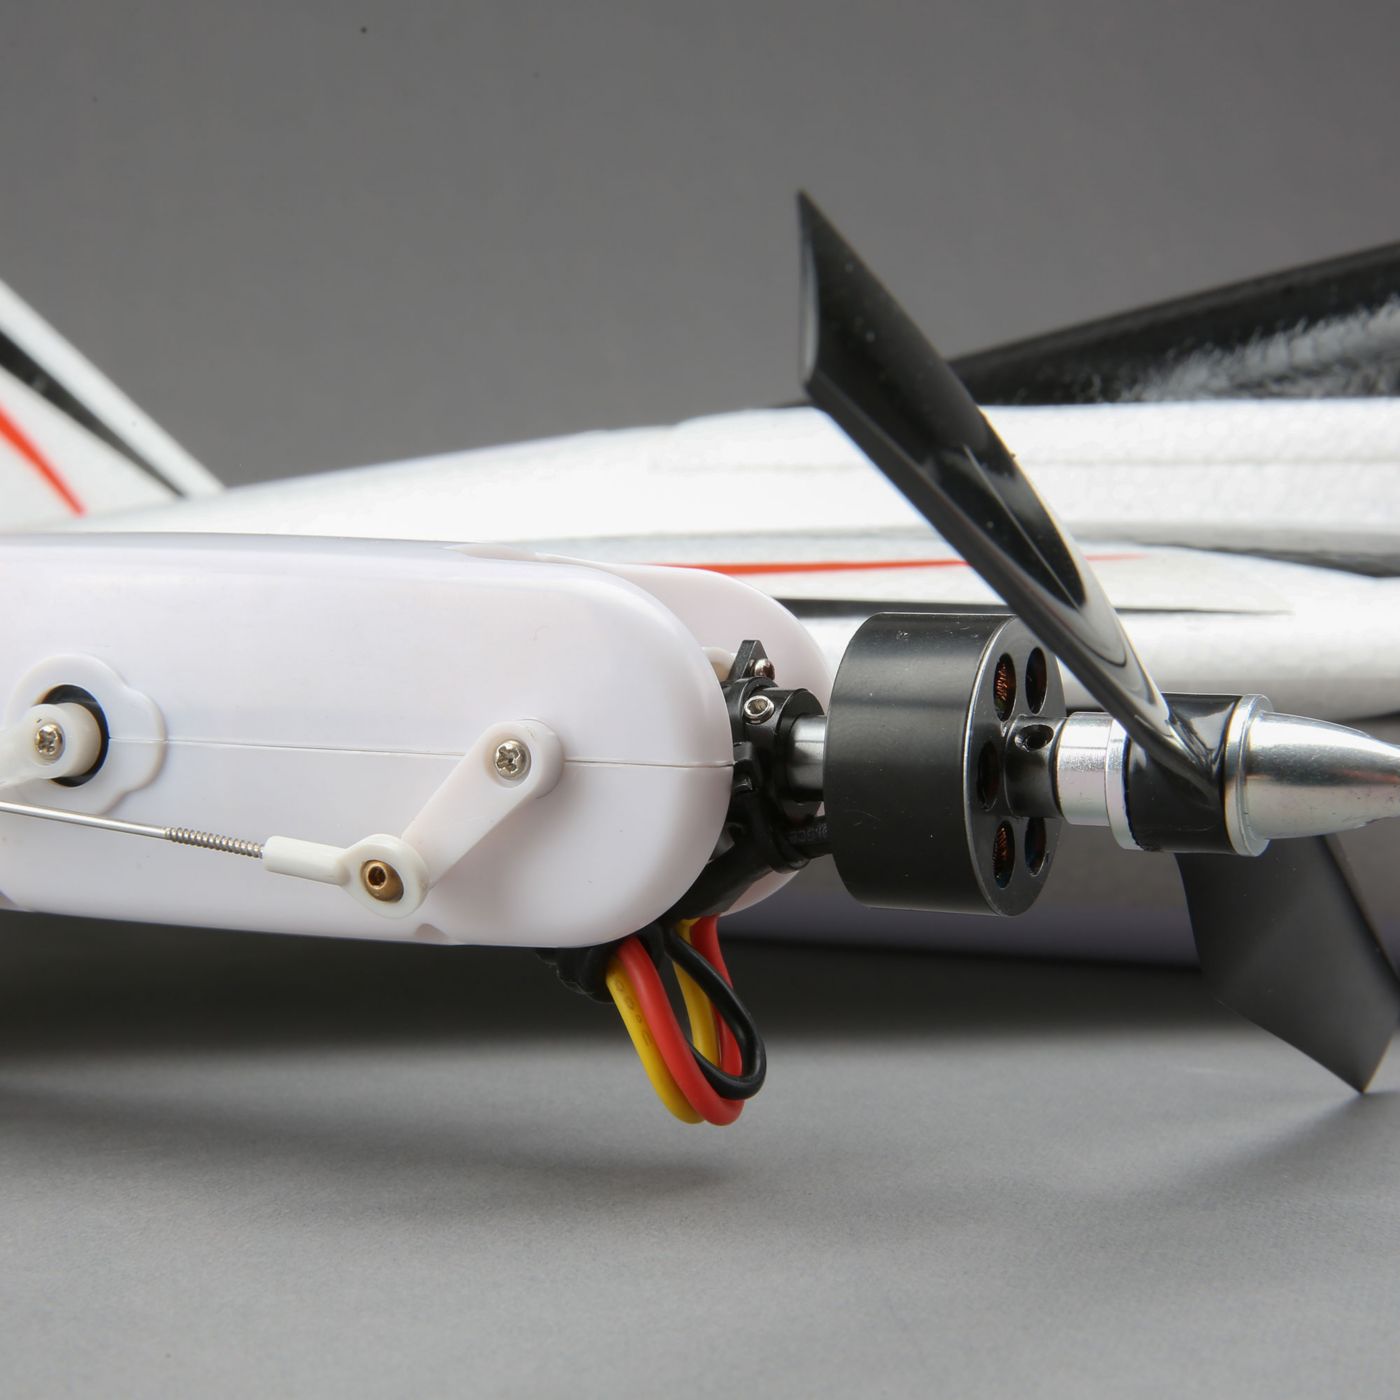
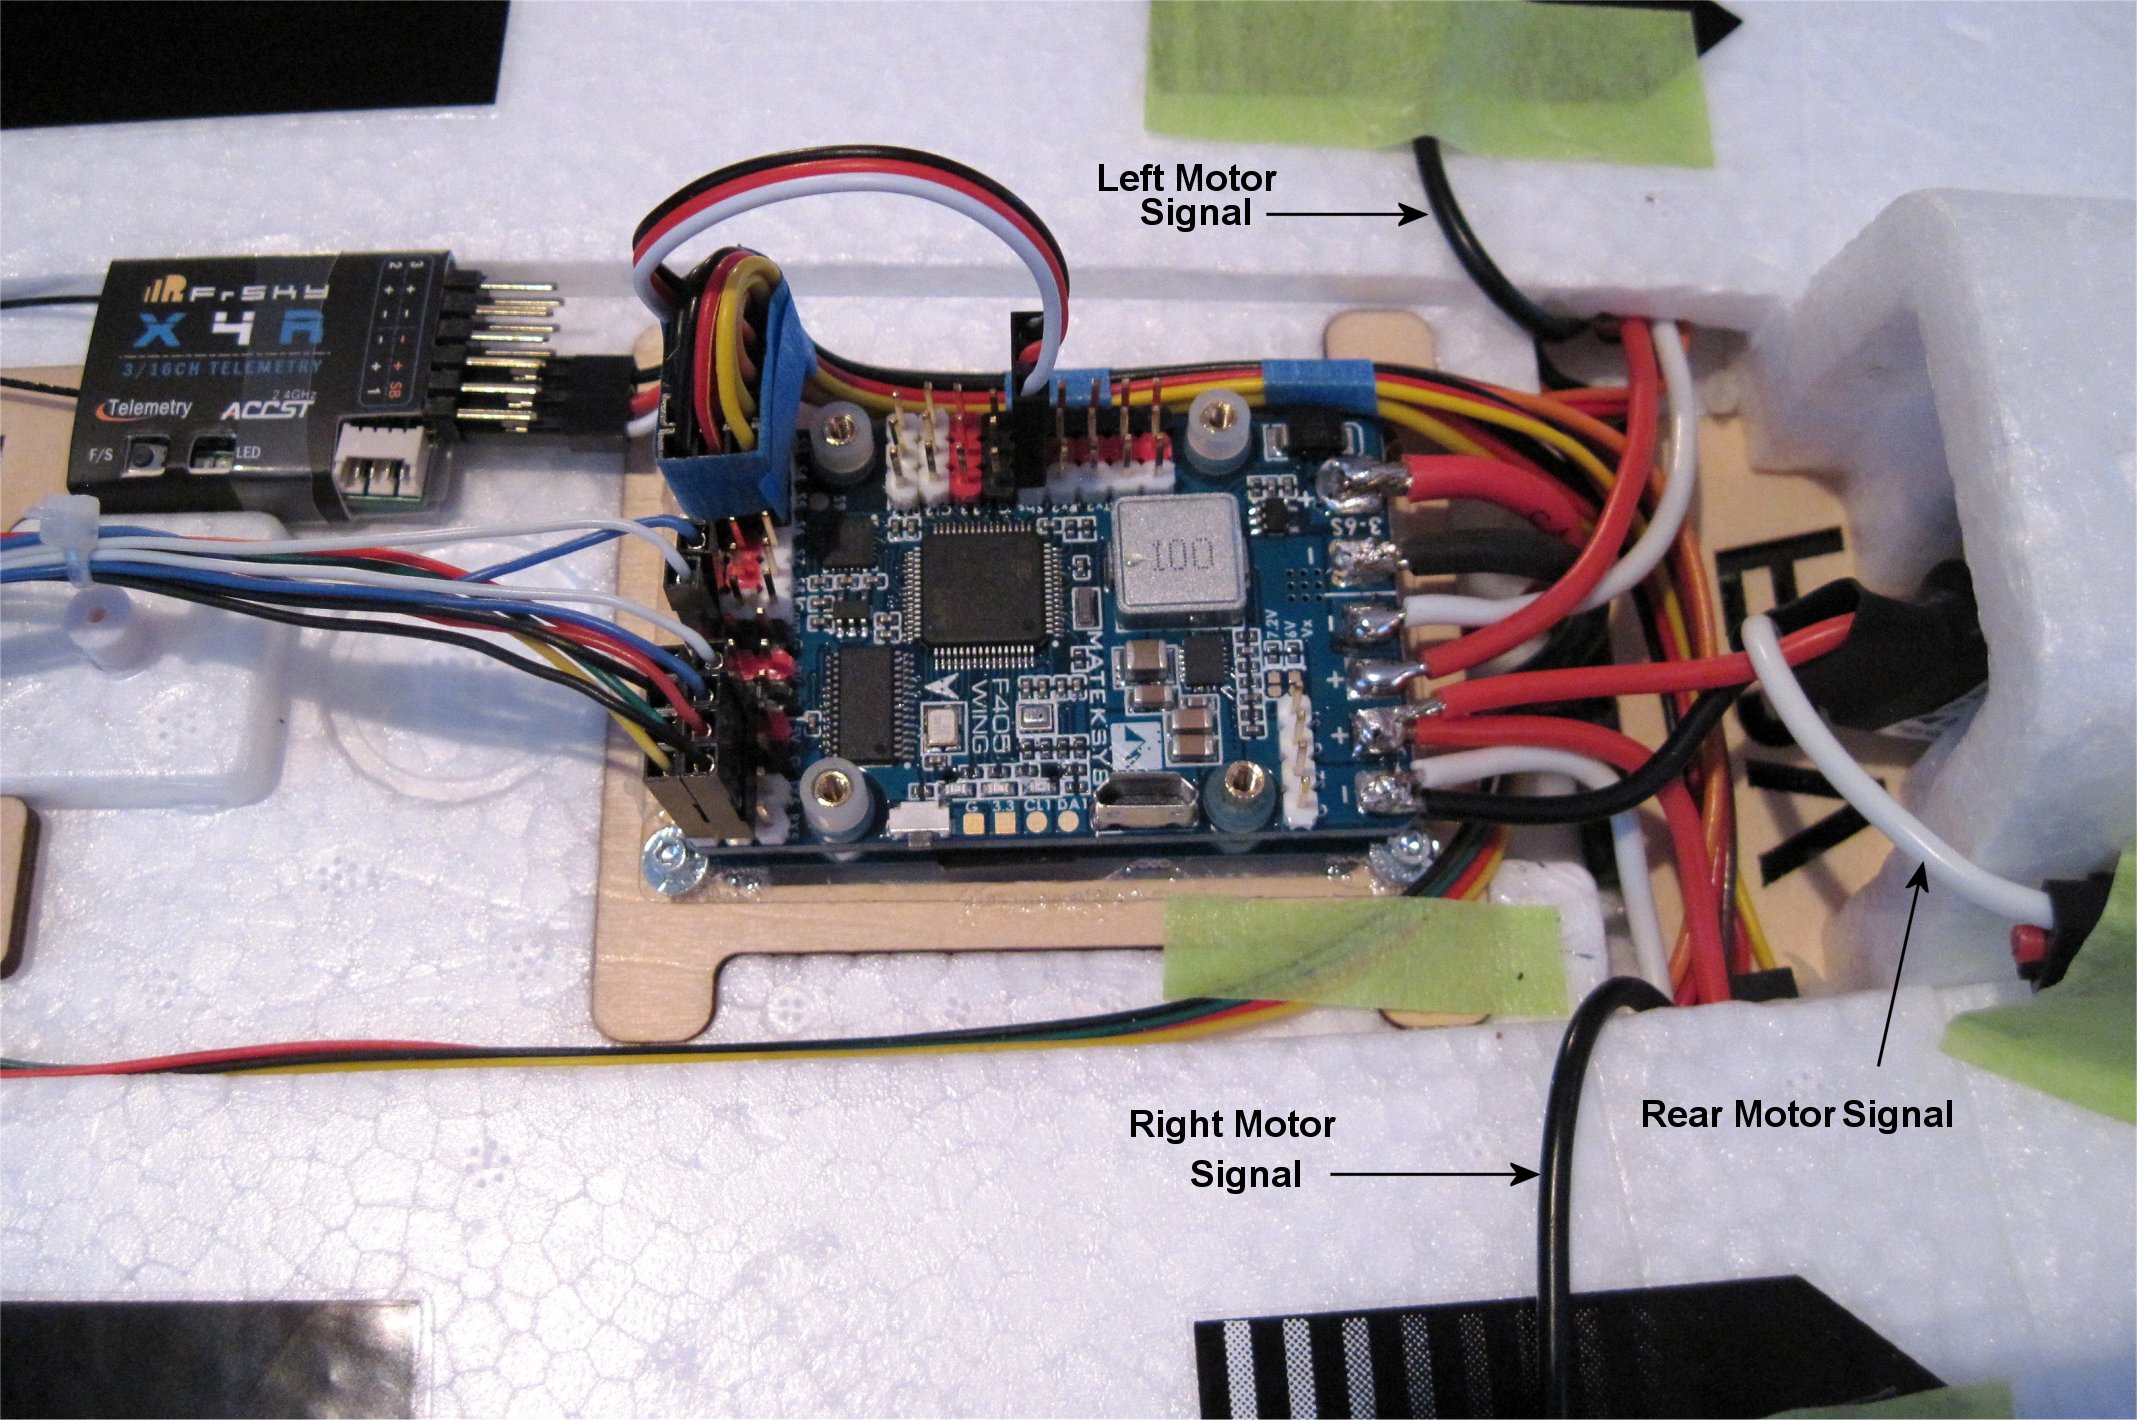
On an old tip from @tridge, I realized that the left and right motor ESC wires had the white and black colors reversed at the E-flite controller connector. The controller wires and rear motor ESC were correct but the left and right front motor ESCs in the wing were reversed.
So you can see on my wiring images below that the wing ESCs used the white wires for ground, red wires for battery V+, and black wires for PWM signal control. The rear motor ESC was correct. This can be confirmed from the first image in this thread when the stock E-flite controller was still connected.
I finished by extending the PWM signal wires with Dupont connectors and securing the top cover back in place using the four tiny screws. The motors are connected as follows.
S1 - Right Motor ESC
S2 - Left Motor ESC
S7 - Rear Motor ESC
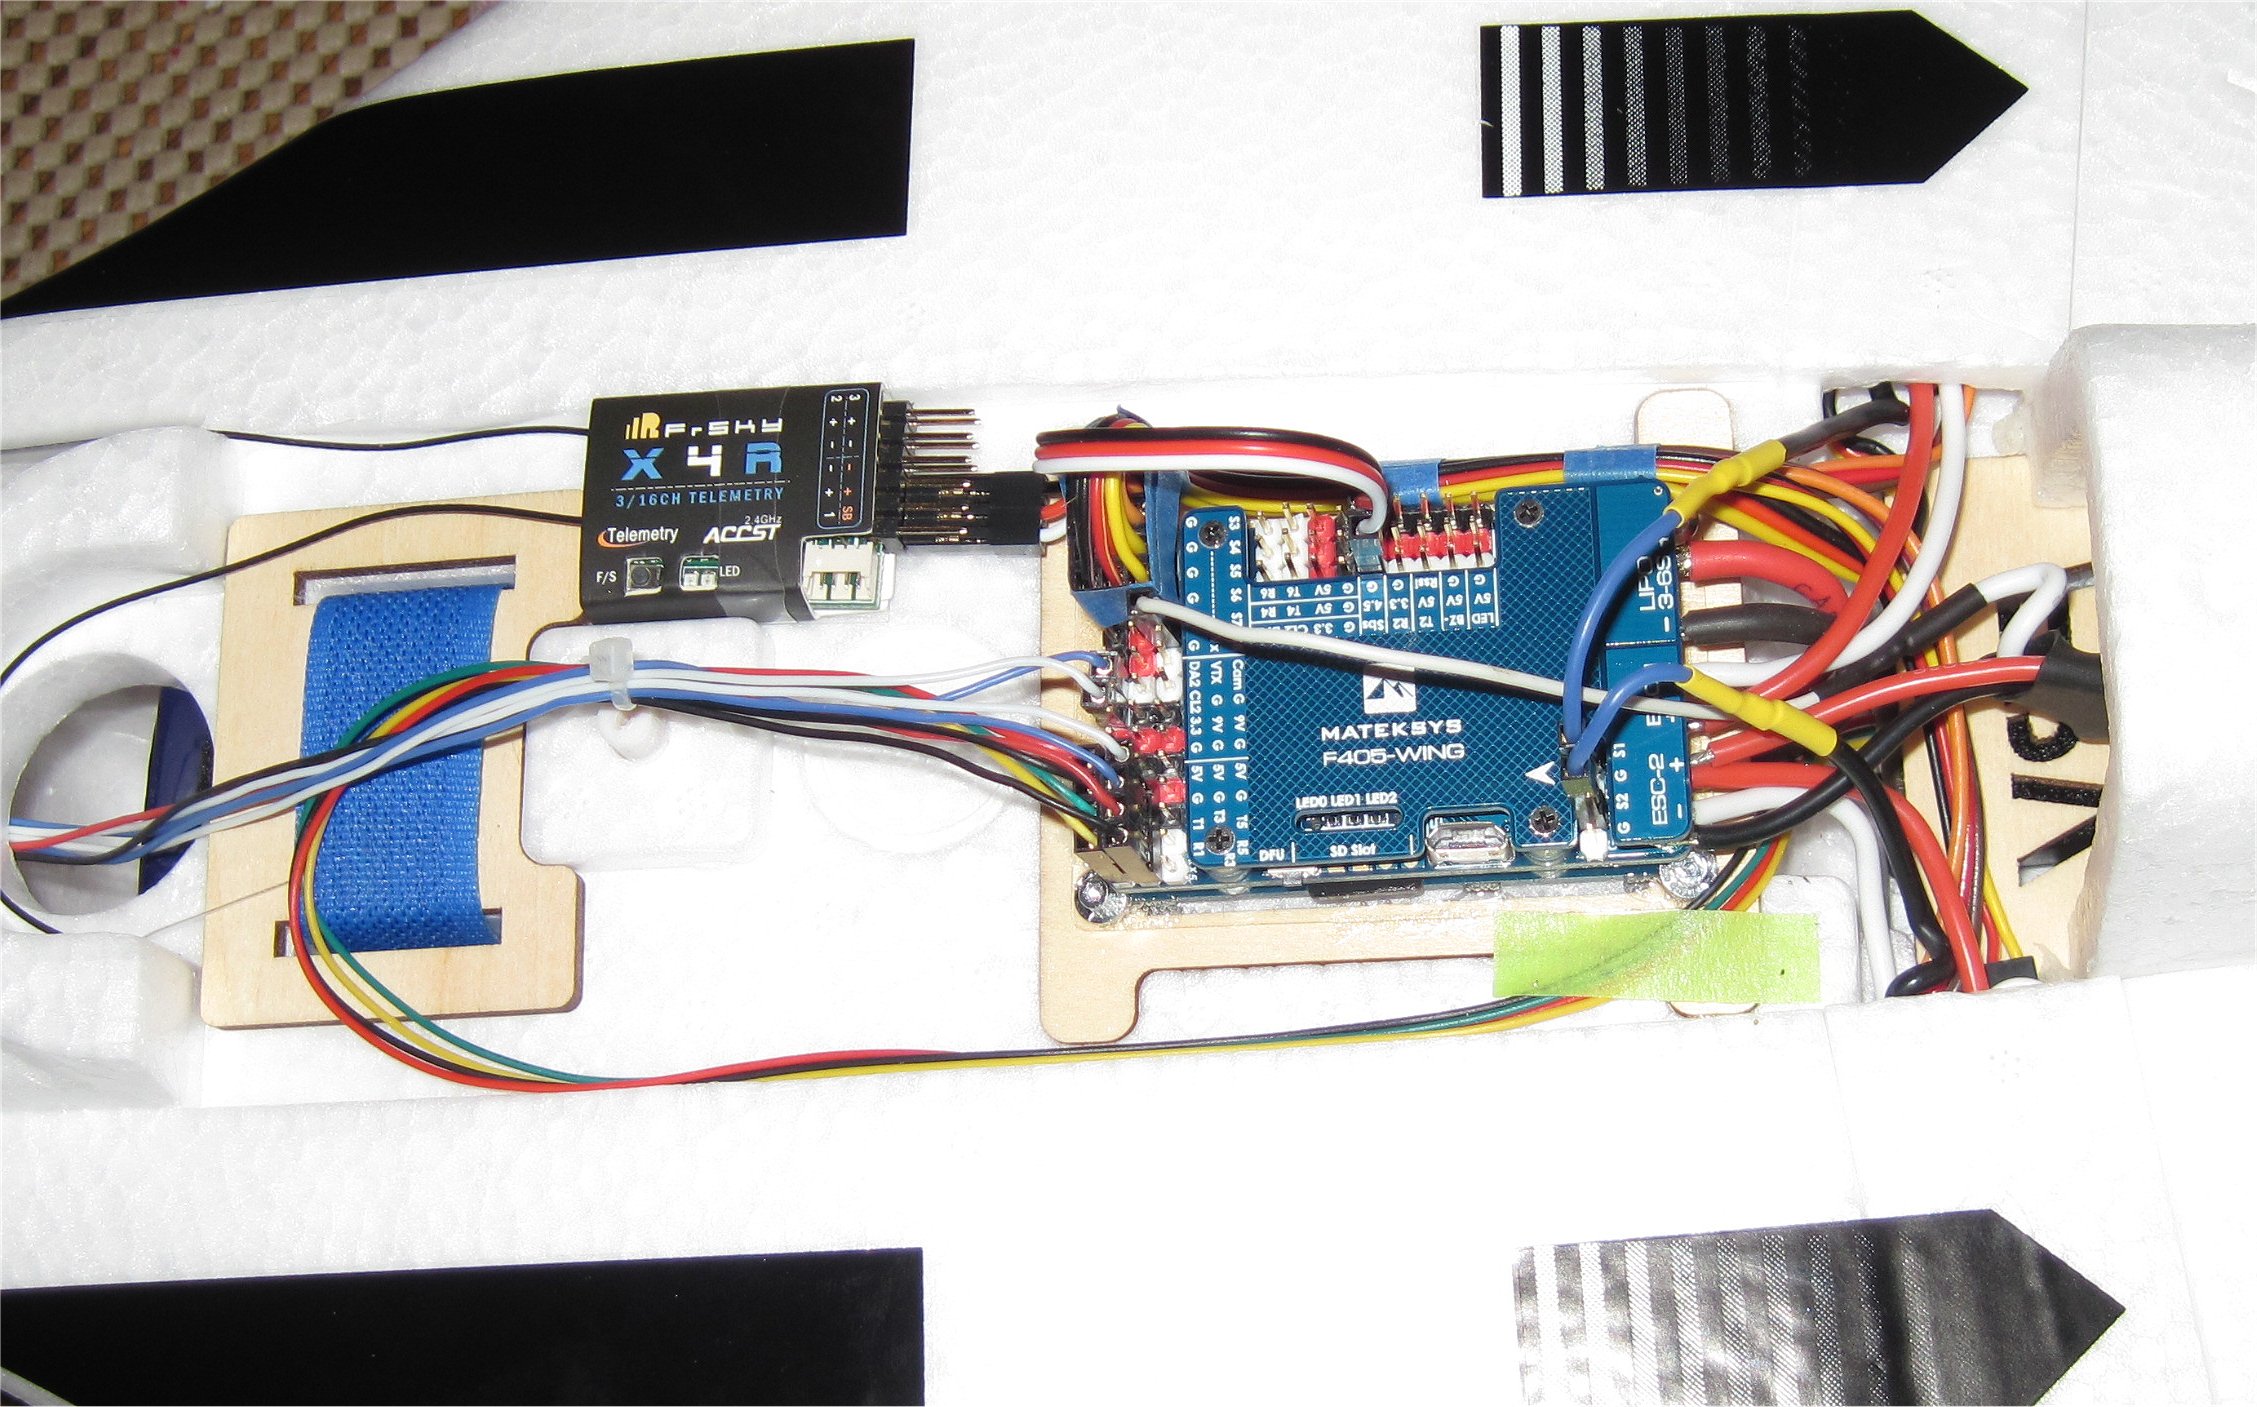
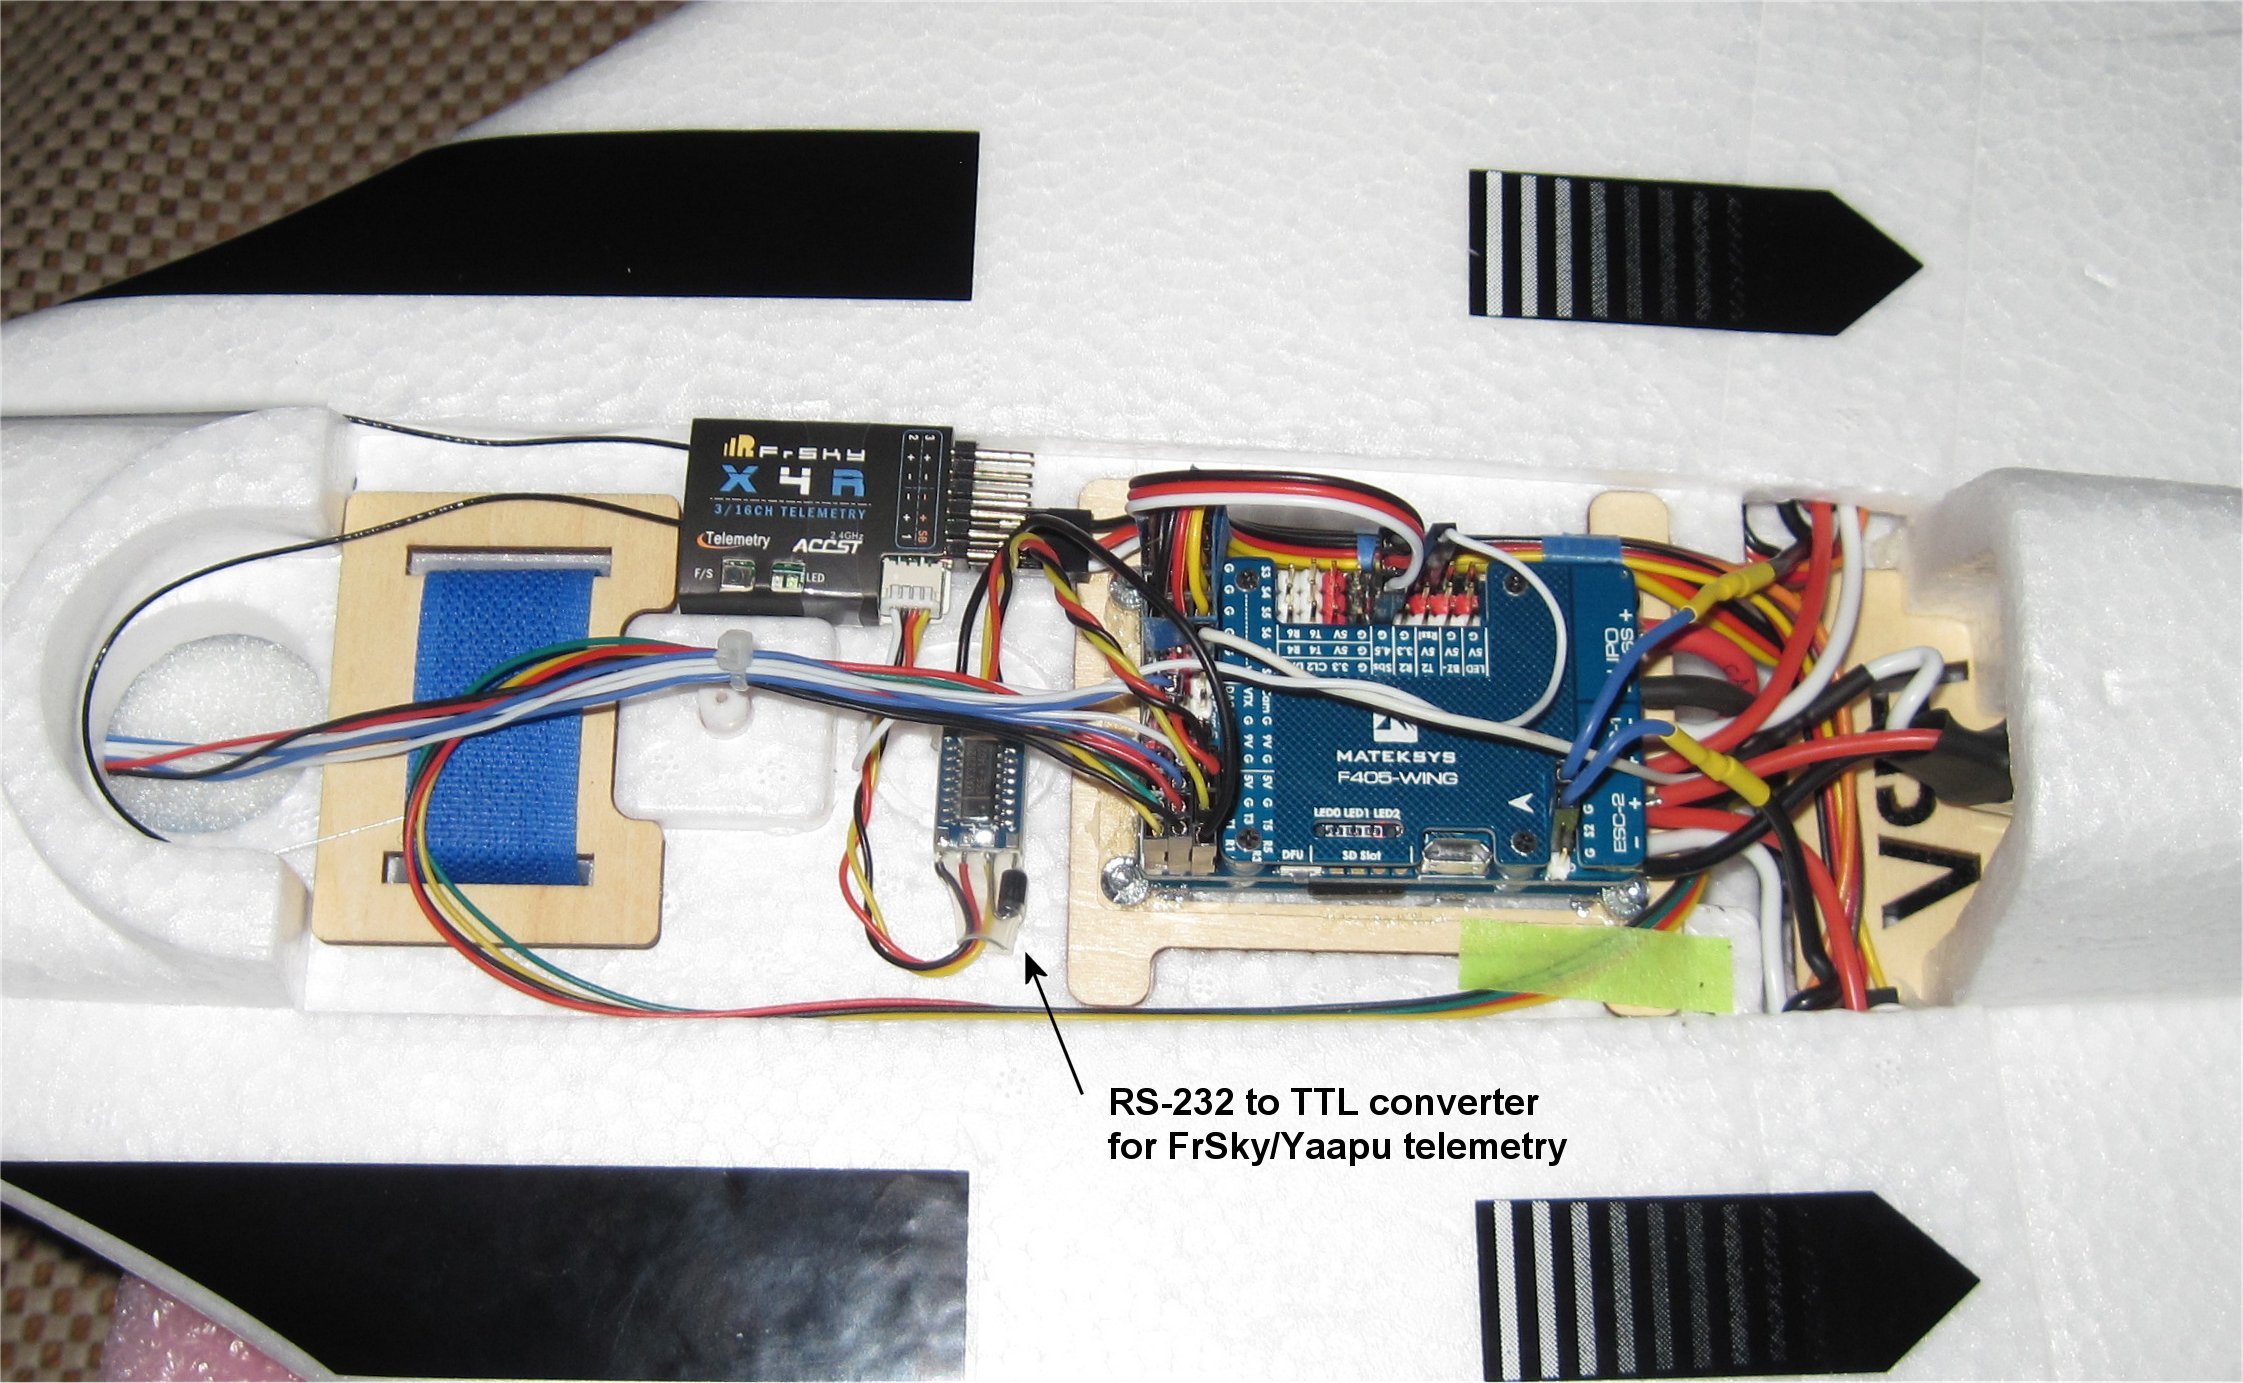
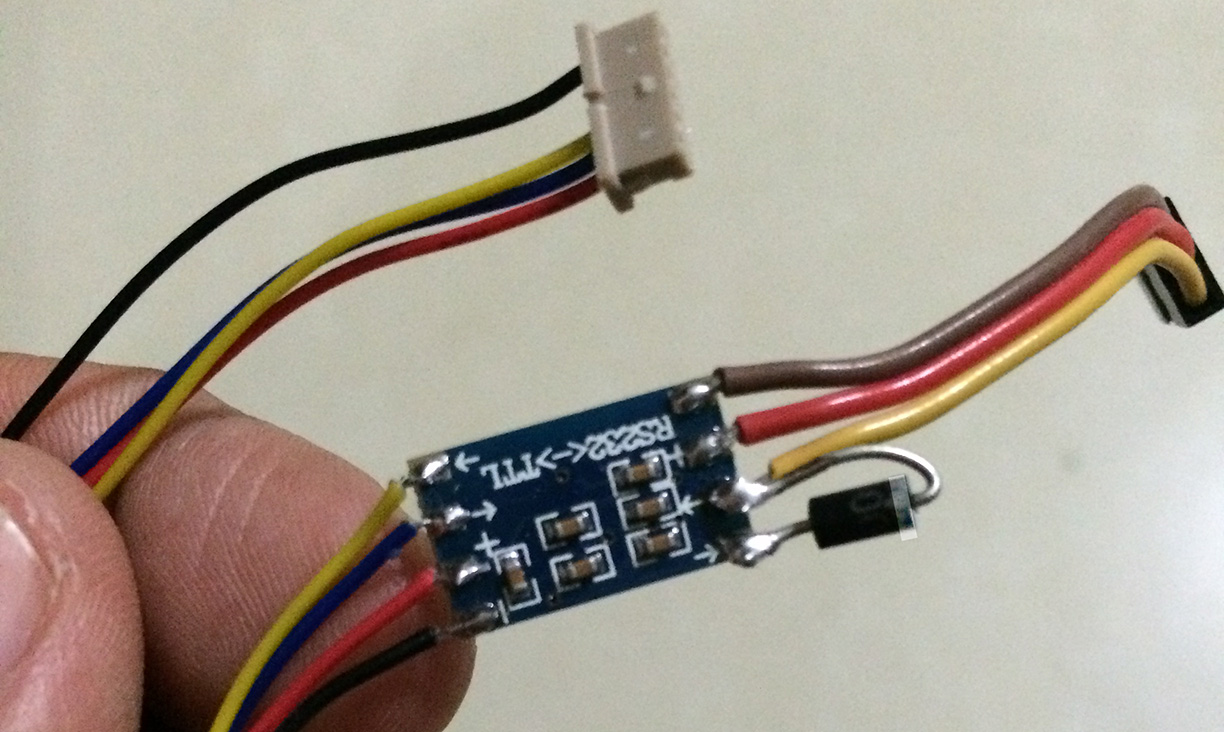
I decided to add one more thing before I put the bottom hatch back in place. I made an inexpensive RS-232 to TTL Converter for adding the FrSky/Yaapu telemetry to Serial 5…which then had the protocol set to 10 for Passthrough.
The bottom wiring image and details below are compliments of RC Group member athertop (Paul). The board is an inexpensive RS-232 to TTL converter. You can buy 10 for $1.50. There is also a cheap diode needed. It’s a less expensive alternative to the $20 Craft and Theory cable. You simply solder on the connectors needed. For my FrSky X4R, the 4-pin S.Port connector comes with it.
Greg, I probably told you before, but I tell you again I really-really like reading your project’s reports.It is like reading National Geographic, Great Pictures , well though system integration and clear and documented test flights.
Bravo !! Keep on
I agree with him! I want to build one now! I am looking for a vehicle like the convergence that I can convert… Or I may build the mini sky hunter! Not sure yet!
Many people report a 6 minute flight using 3s 30C 2200mAh LiPo packs. Another has reported 8 minutes using a 3s 30C 2800mAh pack. Most people fly the stock Convergence leaving plenty left in the pack because it will automatically revert to copter mode and land when the pack gets low. The stock E-flite controller doesn’t have a GPS or Return To Home feature like in APM.
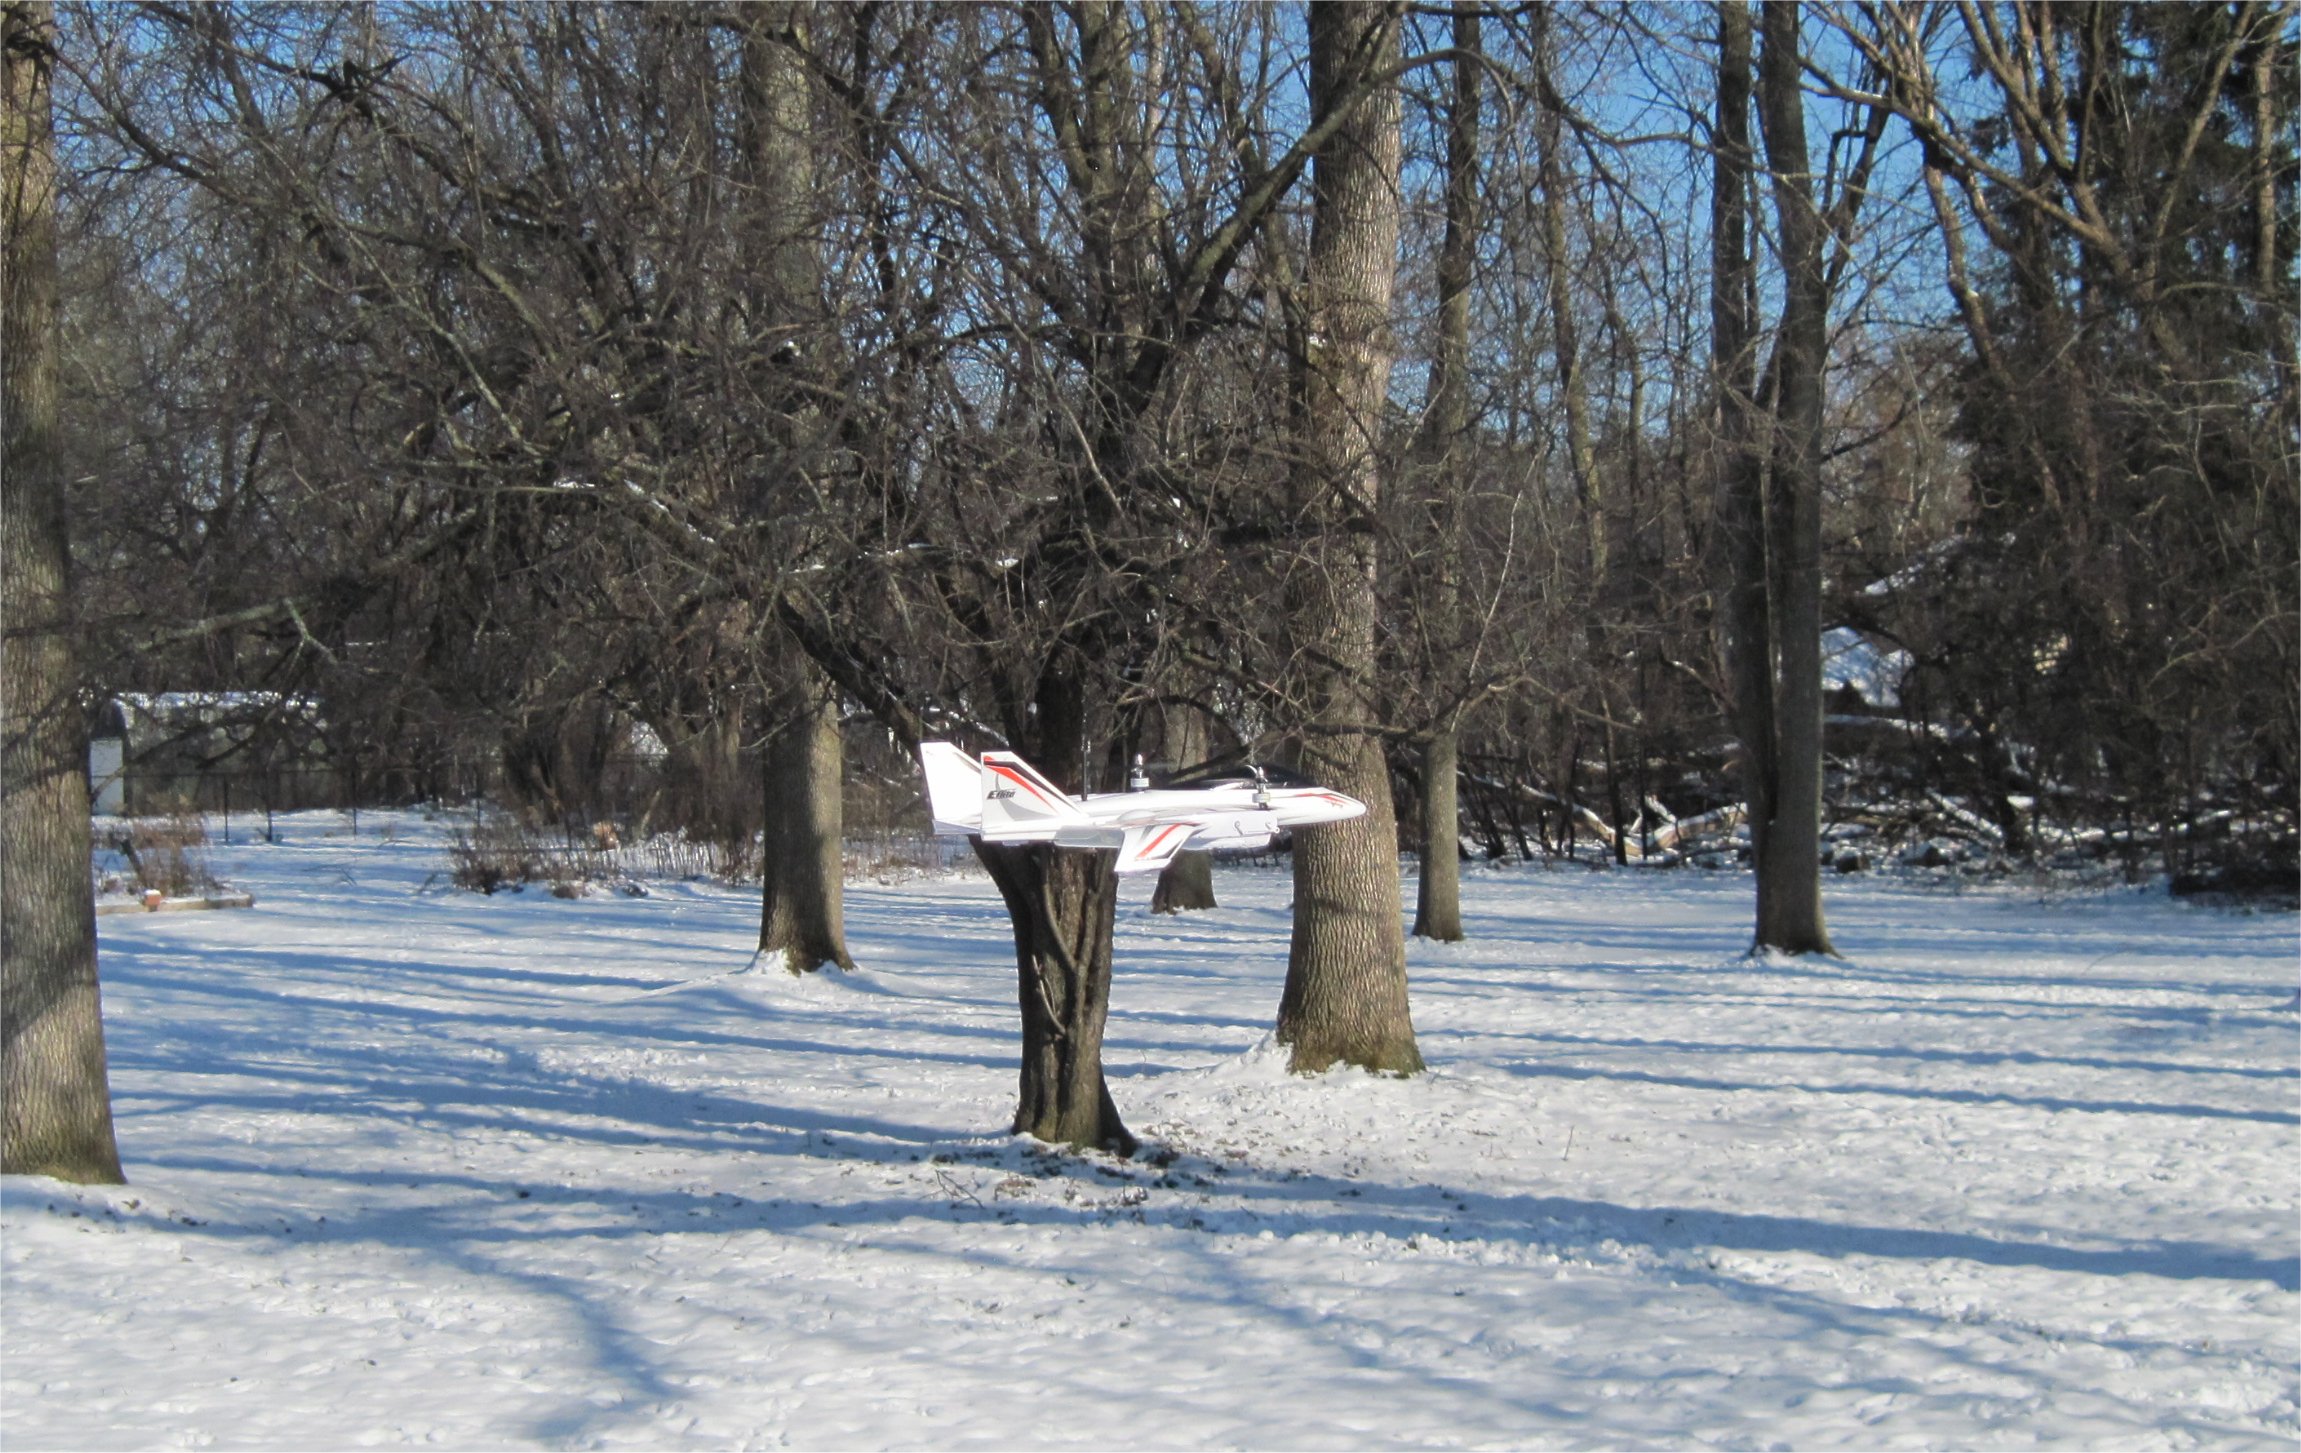
My first hover test with the Matek Convergence was successful! In the winter months, I tend to risk more than I would normally do in the summer months so initial test flying on snow and ice in your backyard is not recommended.
I attached my initial .param file since the hover setup was successful. Obviously, I need to do more testing but today was a sunny Sunday so I pushed my luck. I did, however, retrieve more good tips from @tridge that helped with the initial setup.
This is my Matek servo setup for the .param file below
S1 - Right Motor ESC
S2 - Left Motor ESC
S3 - Left Elevon
S4 - Right Elevon
S5 - Left Motor Tilt
S6 - Right Motor Tilt
S7 - Rear Motor ESC
No, not yet. My initial PIDs came from Randy Mackay’s Default file below. The initial conversions when the tilt rotor feature was first implemented used full size Pixhawks or smaller PixFalcons.
I have that project in the works also…same setup…busy with cellular telemetry right now, so hope to co-opt your params when you have finished the transition tuning…
btw, I am from Austin, how do you grow white grass like that?
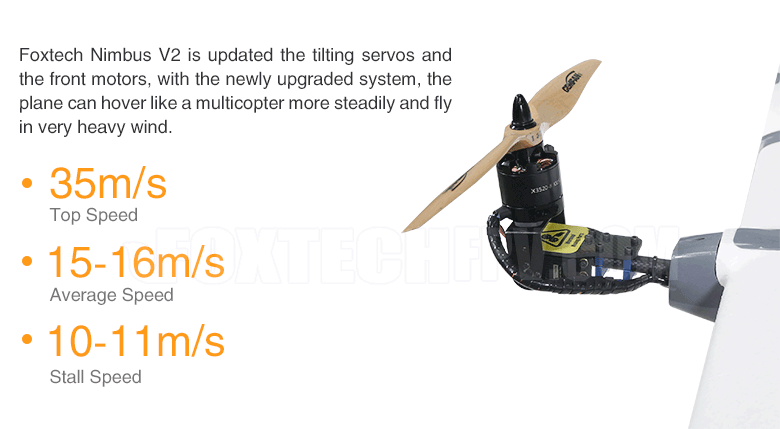
The Nimbus uses a direct robot servo arm and the Convergence uses linkage between the servo and motor mount swivel. It has a little slop but doesn’t seem to be too bad. Some folks have replaced the stock linkage with Dubro ball links and such but I haven’t seen the need to tinker yet.
Contratulations @GregCovey for this job! Simply amazing… I’ve one problem: I’ve been trying to use Frsky Passthrough telemetry with Matek 405wing and a Frsky R9 with no success at all. I’m using the same TTL converter and it’s working fine in a Pixhawk. I’ve tried all UARTS and nothing. How have you been able to do it?
The target is using it with Yaapu LUA in my Horus.
Thanks!
Thanks! My Convergence conversion uses a FrSky X4R, not the R9M.
I recently started looking at my R9M and R9MM combo that I got during the promotion at the end of 2018. I was able to update both modules using the FrSky STK tool without issue. I used the newest firmware (181228) from 12/30/2018. This needs to be upgraded on both ends to the same release. Note that upgrading the R9MM required a short servo extension with a few pins swapped for easy plug-in.
So far, I can bind the receiver, which is much like any other FrSky receiver. I have tested the SBUS outputs using a FrSky SBUS Decoder and also the normal FrSky telemetry on my Taranis X9D+. Currently, I don’t have a spare Pixhawk/PX4 flight controller to test the PassThrough telemetry and I haven’t decided which project to use the R9M on. It may go into my ZOHD nano Talon or Wing Z-84 since these new applications support my new Titan 4s 3500mAh Li-Ion pack.
All this doesn’t really help your issue so perhaps I can ask a few questions. What R9 receiver are you using? Have you updated to the latest firmware and re-bound the receiver? Which port are you using on the Matek F405 Wing for pass-through telemetry?


 congrats on getting this going! Did you have to do much tuning?