I want to display sensor data send from my Arduino to Mission Planner.
In the Mavlink Inspector I can see the data but how to display it on the quick tab?
So far I think that the data from the Pixhwak gets displayed there but is there a way to display the sensor data without getting into the MP code and build a customized version of the MP?
Thanks for your advice!
Currently I’m using RAW_PRESSURE messages and I want to display several sensor values, do you think it is also possible with NAMED_FLOAT messages?
Did I get it right that Mission Planner only shows the vehicle 1 messages on the quick tab?
Thanks a lot that’s really very helpful!
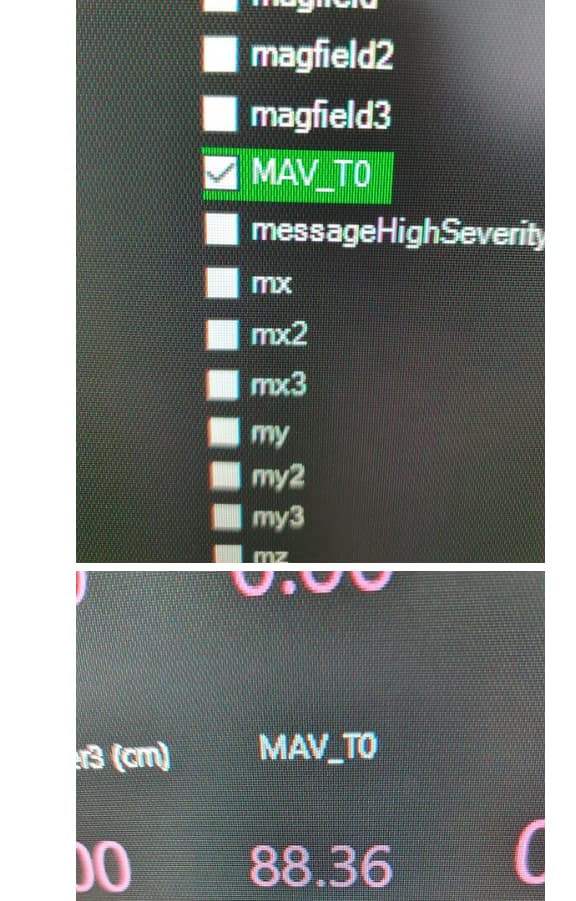
In my view I can not choose MAV_… will it appear automatically by sending named_float messages from my companion computer?
Update:
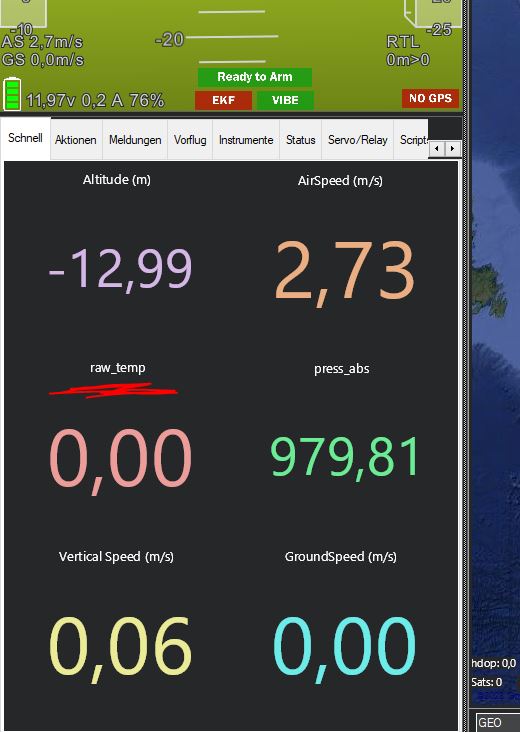
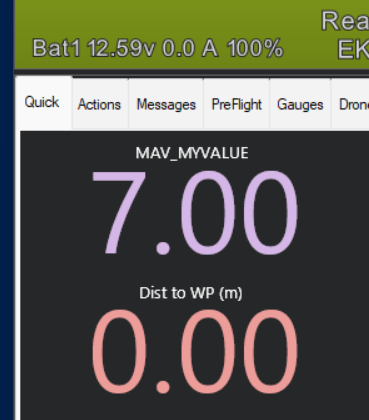
I could display the name of my variable but the value is 0,00… The Mavlink Inspector shows the true value (wich is 123,45)… Should I configure something else in MP?
Your message is likely malformed. It could be your use of the colloquial comma rather than decimal point. Or it could be that you are sending the value in the wrong part of the data frame.
@Eosbandi could you provide me your code please? @Yuri_Rage
Maybe it’s helpful to show you my code, if I change the value from 129.8 to 129,8 I get an error message:
Now I see what’s wrong. you sending a message with sysid 2 and component Id 2. Mission Planner handles different components separately. Use your drop-down below the connect button and select your component to display data from it. Note: this will display ONLY data from the selected component.
If you want to display the data alongside with the flight controller you have to send messages with the same sysid and component id as the flight controller.
This is not the best solution because it will generate some false packet errors on non sequential packet sequence numbers, but at least it will work.
For the best solution communicate onboard with a LUA script and send data to the GCS from the script.
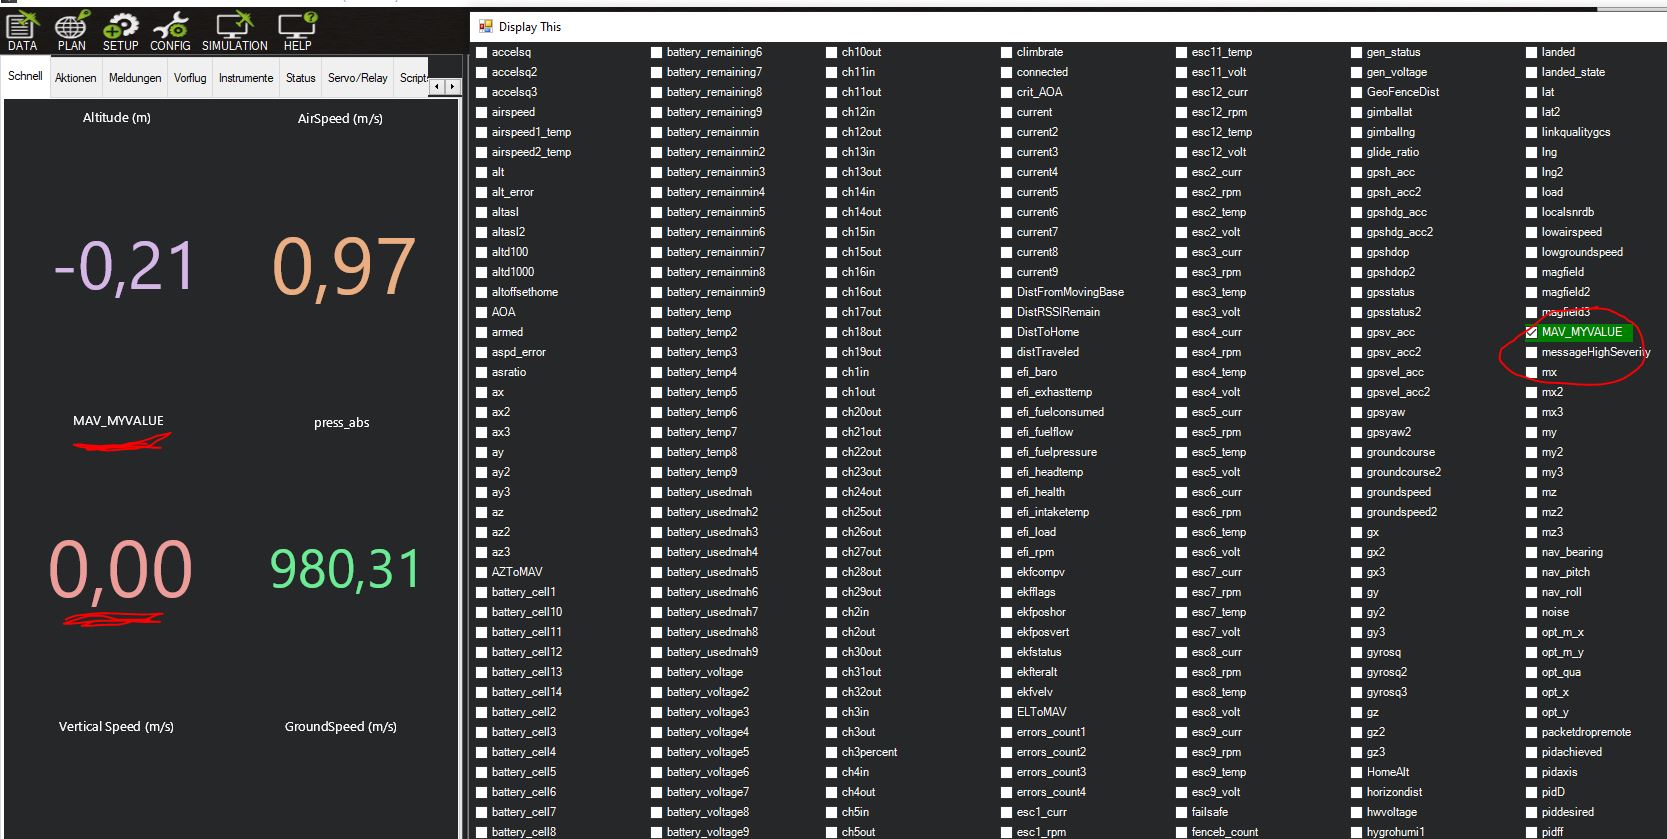
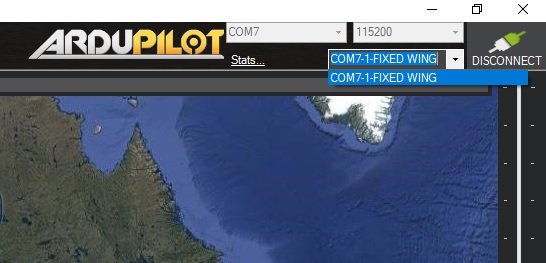
Unfortunately my drop down menu doesn’t show me different components (see attached image).
I changed the sysis and compid to 1 (same as the FC) but that didn’t help since there was no data on the quick tab also the variable can’t be choosen.
This is very confusing…
But you think with the LUA script it will be possible to display both, the FC and the companion computer on quick tab?
If you send the message from another sysid then you should send heartbeat messages as well.
There are one semi solution : You can send your messages with sysid=flight controller sysid and with component id = 0 (ALL) this will show up in the drop down
> If you want to display the data alongside with the flight controller you have to send messages with the same sysid and component id as the flight controller.
Sorry I was wrong with this one, the FC will not forward messages it got with it’s own sysid and compid.
Regarding LUA, YURI have an excellent tutorial in this topic.
local RUN_INTERVAL_MS = 50  -- 50ms == 20 Hz
local MAX_BUFFER = 128 -- prevent Lua timeout

local port = serial:find_serial(0)
local bad_frames = 0

port:begin(uint32_t(115200))
port:set_flow_control(0)

function update()
    local bytes = {}
    while port:available() > 0 do
        bytes[#bytes+1] = port:read()
        if #bytes > MAX_BUFFER then
            return update, RUN_INTERVAL_MS
        end
    end

    if #bytes ~= 4 then
        return update, RUN_INTERVAL_MS
    end

    if bytes[1] ~= 0xFF or bytes[4] ~= bytes[2] ~ bytes[3] then
        bad_frames = bad_frames + 1
        gcs:send_named_float('BAD_FR', bad_frames)
        return update, RUN_INTERVAL_MS
    end

    gcs:send_named_float('VAL', bytes[2] << 8 | bytes[3])
    gcs:send_named_float('BAD_FR', bad_frames)

    return update, RUN_INTERVAL_MS
end

return update()
@Yuri_Rage Thanks a lot for your help!! That’s highly appreciated!!
And yes of course I will work more to improve my CS knowledge, that is also a helpful advice!
@Eosbandi Also big thanks to you and your efforts!!