Install and update pi framework
- If you’re at the Raspberry Pi desktop, select Accessories > Terminal from the Raspberry menu.
- Run
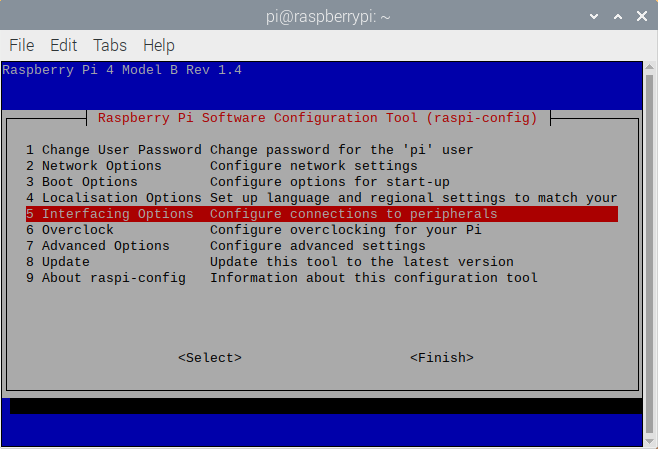
sudo raspi-config. - Use the cursor keys to highlight Interfacing Options, then hit Enter:
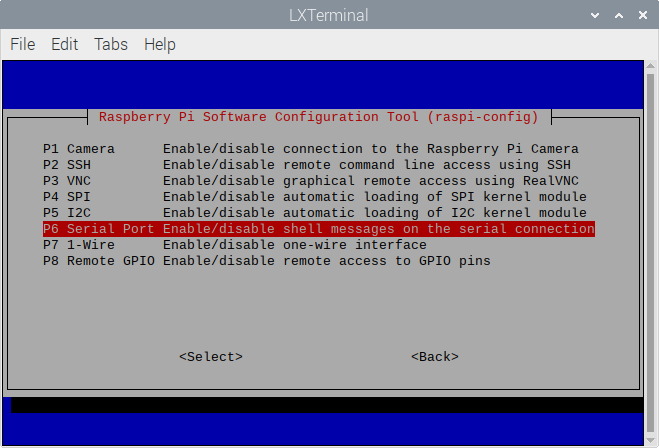
- Now highlight Serial Port and hit Enter:
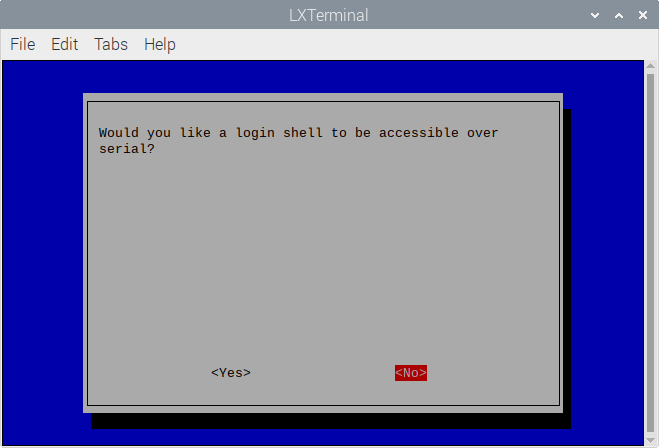
- When you are asked Would you like a login shell to be accessible over serial? select No and hit Enter:
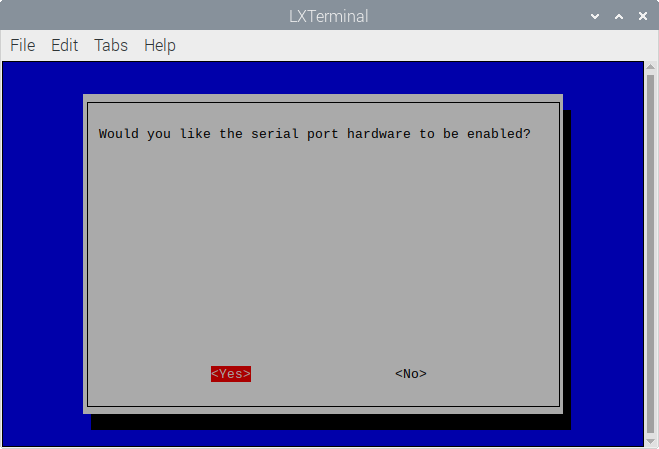
- When you are asked Would you like the serial port hardware to be enabled? select Yes and hit Enter:
-
Select Finish.
-
The raspi-config utility will offer to restart the Pi — accept its suggestion.
-
Attach to a cellular network
The SIM7600G-H 4G Hat can be controlled using AT commands issued through a command-line serial console tool which communicates with the Hat’s cellular module. We’ll use Minicom here, but if you prefer to use an alternative tool, such as Screen, that’s fine. At the command line or in a desktop Terminal run:
sudo apt update

sudo apt install minicom -y
Enter minicom -D /dev/ttyUSB2 to open a connection to the modem. If Minicom postsif an error indicating that /dev/ttyUSB2 is inaccessible, please [check your SIM7600G-H 4G Hat setup]
Just hit Enter after keying in each of the following commands. Wait for the modem to respond before moving on to the next command.
AT+CGDCONT=1,"IP","super"

AT+COPS?
You should see something like +COPS: 0,0,“Vodafone UK Twilio”,7 which tells you which network you’re connecting through. You should also see the Hat’s NET light flashing
If you can’t see what you are typing press ctrl+a and the e.
- Connect to the Internet
Now you know you have a cellular connection, you can connect to the Internet. You need to install the PPP (Point-to-Point Protocol) software the PI will use to establish the connection, and to configure it. First run the following commands at the command line:
`sudo apt install ppp -y`

sudo cp /etc/ppp/peers/provider /etc/ppp/peers/provider.bak

sudo nano /etc/ppp/peers/provider
In the same file, look for lines like these and update them so they match what’s shown here:
connect '/usr/sbin/chat -s -v -f /etc/chatscripts/gprs -T super'

/dev/ttyUSB2
The last line above is the value you determined earlier
To initiate an Internet connection, at the command line or in a desktop terminal run:
sudo pon
You’ll see a stack of lines displayed at the command line.
Note: If you want pi to connect to internet automatically:
- Open terminal and type :
**sudo nano /etc/rc.local** - Put below commands before exit0
sudo systemctl disable ModemManager.service
**sudo pon**
- Press ctrl+x => y (to save the buffer) => enter
VOILLLAAA You are connected to the internet
To install mavproxy run the following commands one by one
* **sudo apt-get install python3-dev python3-opencv python3-wxgtk4.0 python3-pip python3-matplotlib python3-lxml python3-pygame**
* **pip3 install PyYAML mavproxy --user**
* **echo 'export PATH="$PATH:$HOME/.local/bin"' >> ~/.bashrc**
* **pip3 install mavproxy pymavlink --user –upgrade**
restart the shell and boom it’s installed
Installing zerotier:::
- open terminal and type
  * curl https://raw.githubusercontent.com/zerotier/ZeroTierOne/master/doc/contact%40zerotier.com.gpg | gpg --dearmor | sudo tee /usr/share/keyrings/zerotierone-archive-keyring.gpg >/dev/null
  * RELEASE=$(lsb_release -cs)
  * echo "deb [signed-by=/usr/share/keyrings/zerotierone-archive-keyring.gpg] http://download.zerotier.com/debian/$RELEASE $RELEASE main" | sudo tee /etc/apt/sources.list.d/zerotier.list
  * Create one file ,named mp.sh, in home folder
  * sudo apt update
  * sudo apt install zerotier-one
  * sudo systemctl disable zerotier-one.service
  * sudo cd /lib/system/system
  * sudo nano mav.service
    * [Unit]
    * Description=MAVLink Router
    * Wants=zerotier-one.service
    * After=network-online.target zerotier-one.service
    * [Service]
    * Type=oneshot
    * User=resp
    * ExecStart=/home/resp/mp.sh(blank file)
    * ExecStop=
    * ExecReload=
    * Restart=on-failure
    * [Install]
    * WantedBy=multi-user.target
  * Ctrl+x => y => enter
  * Open new terminal
  * Sudo systemctl enable mav.service
  * Sudo systemctl daemon-reload
  * Sudo systemctl start mav.service
  * Reboot
Everything should be working right now
Only thing left is a connect script for mavproxy with device master port and udpin out.