I have a problem when setting the Amperes per Volt value in Battery monitor 2. I write the appropriate value but it is not fixed, when I open it again it is empty.
I have the same problem. I’m using:
Cube orange
(2) Mauch HS-200-LV sensors
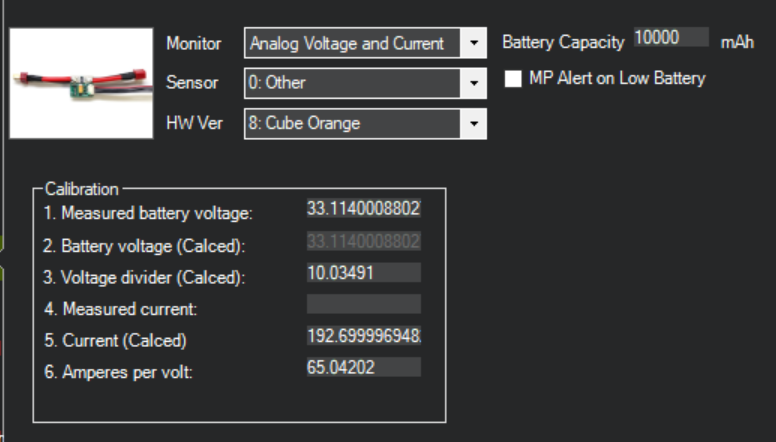
In the Arudpilot configuration instructions: it is clear how to setup the firs battery monitor, although options have changed. I’ve now selected to use CubeOrange:
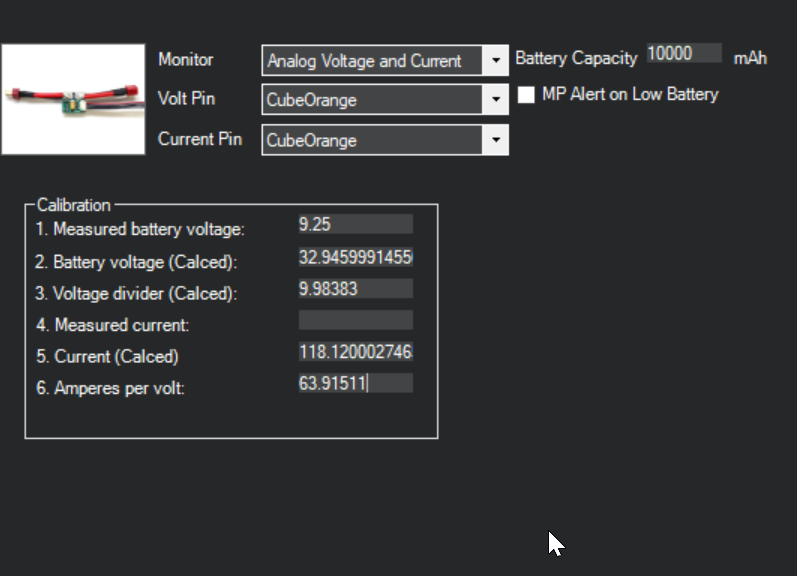
However, when I go to setup Battery Monitor 2, the options are different. for “Volt pin,” I now have options for CubeOrange, which I have selected. However, above it, and by default, “Pixhawk2_PM2/Cube Orange PM” was selected upon adding the 2nd battery monitor. Should I have changed this? I noticed the current pretty doubled when I did…
When I enter the values (as shown) according to the instructions for “voltage divider” and “amperes per volt” it accepts them, but then when I shut down the flight controller or reconnect, the amperes per volt is missing. Am I doing something wrong?
Simply put the actual battery voltage is below the set voltage in the settings.
(Also been using the Mauch PM in the past)
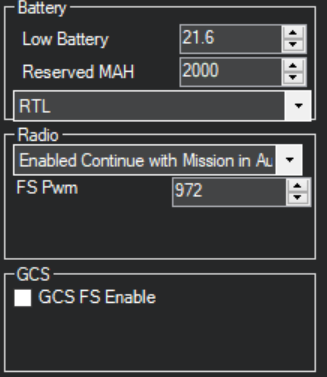
Have you set the BATT_LOW_VOLT value to suit your battery?
When you’re saying "
Do you mean you can’t arm ? Or is this in reference of the motor test function within MP or QCS?
In regards to the earlier remark about the “Amperes per Volt” field on the battery monitor setup page → Yes, this number may disappear as it is only used for the amp /voltage calculation. Once you hit the enter button the calculations are done and result saved. After this that value is no longer needed.
Yes, I can’t arm. I even tried unchecking the battery failsafe option under the failsafe options to see if it changed anything. I’ve checked my batteries… They’re charged plenty.
Pleased to hear it worked.
The FS_THR is just relating throttle failsafe if I’m not mistaken.
Did you have the throttle stick up when trying to arm?
…other reasons can be the RC calibration hasn’t been done…or throttle is reversed, I.e. controller things throttle is up whilst in fact it is down.
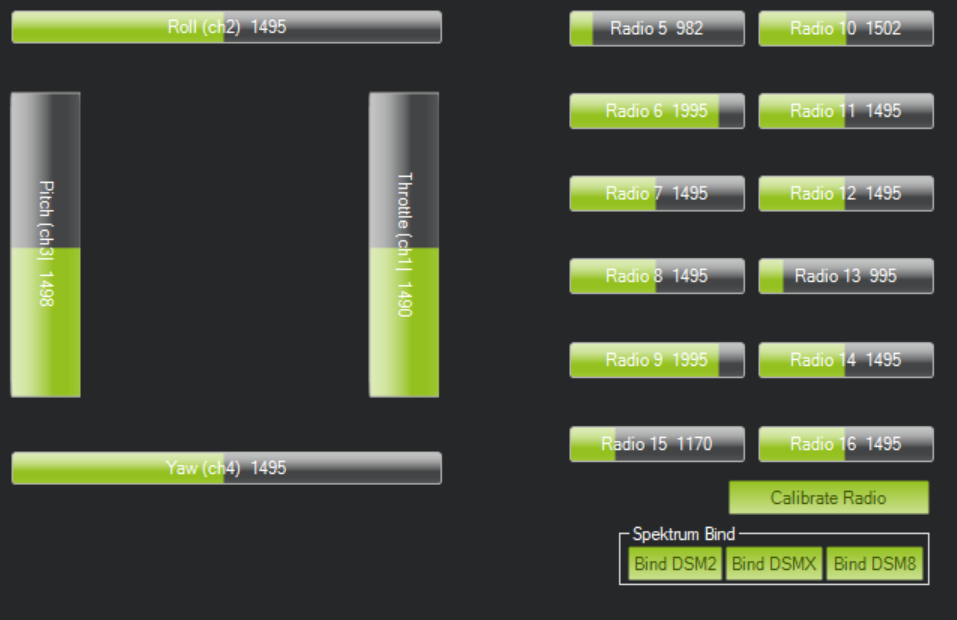
No, I don’t have the throttle stick all the way up when trying to arm. I have calibrated the RC, and when I check what my pwm’s are coming in at on Mission Planner, they are above the FS Pwm limit of 972:
I’m using FRSky receivers (redundant X8R’s) and radio is set to use no pulses as the failsafe signalling option. As far as I can tell, my FS_THR_ value is well above the failsafe pwm limit, so I don’t know why this isn’t letting me arm…?
Some receivers have their own failsafe setting and can interfere with the way ardupilot works…try turning transmitter off whilst looking at the radio calibration screen of MP - as you’ve done in image above. This might provide some glue as to what’s going on.
Just noticed in your picture above the value for throttle is centred. Do you have your throttle stick to mechanically auto-centre on your transmitter? Or was this just by coincidence in the middle position when that screen shot was taken?
Just to clarify: Is your problem related to a drone, fixed wing aircraft or ground vehicle?
My throttle stick mechanically centers. This is on a drone.
I’m still unable to arm. I may be back with more questions after trying to solve it. Still low voltage warning. I want the warning to work, so haven’t tried completely disabling it yet.
That’s why you can’t arm. - Throttle needs to be low unless flying. You can’t have such setup on an aircraft.
Please check the instructions of you RC and see how you can change that. ( Some require a spring to be removed, other have a mechanical switch which allows throttle stick to be in low position)
And set PILOT_THR_BHV,7 when using a spring-centered throttle.
For me that is the best way for a multirotor to be configured. If you change to Stabilize mode in an emergency then you are naturally at hover throttle instead of “drop like a stone” throttle.
I’m still getting a low voltage warning. My throttle stick settings have been correct and still are. I’m needing a solution to a low voltage warning when my voltage is showing higher than the kimit set for the warning to appear. I have not changed any settings other than adding a redundant power module and second battery, so I do not think this is related to my throttle settings, which have always worked fine.
I finally figured this out. Embarrassingly, after trying everything I could think of, then posting here, then trying anything and everything again, discovering a wire hanging from my copter. After searching around I realized it came disconnected from one of my FLVSS sensors, which then connects to the receiver’s smart port. So I was not getting any bettery information from my battery monitor 1, and was reporting the voltage as zero from that battery.
So the lesson learned is to check the wiring carefully.