Here is something interesting… Your RC4 (rudder) min is:
RC4_MIN 982
Yet in the charts the lowest you get is 994ish
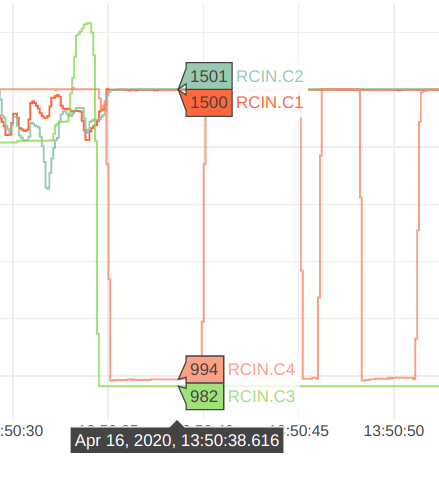
I would change your rc4 min to 995 then you will be assured to be below that for your disarming
Here is something interesting… Your RC4 (rudder) min is:
RC4_MIN 982
Yet in the charts the lowest you get is 994ish
I would change your rc4 min to 995 then you will be assured to be below that for your disarming
So on that note, good catch, thanks for that. I do have a question. Betaflight world, you set your radio to only broadcast 1000 to 2000 pwm signal. I was reading yesterday, the ardu wiki recommends 1100 to 1900 pwm. I know with ardu, we run the calibration so the autopilot see what the transmitter is actually sending. Should i set all the PWM signals to 1100 low, 1500 mid, 1900 high? Or just rerun the calibration?
Good sleuthing. I wish I knew how to read the logs. Always more to learn.
BTW, I’ve been off and on trying to get this thing flying since 2015 when i bought the kit and parts. This is the third, and hopefully last, pixhawk i need to buy. Had one Pixhawk, 3dr, just die, and the power module with a radiolink pixhawk failed and nearly caught the bird on fire.
Just rerun the calibration, however you can try with the setting I gave you. Should be a quick check. No Autotune need, Just hover in your backyard in alt/pos hold and then land and disarm
will do that in a few. I also set the Mot_bat_volt_max to 17.6,4.4v *4s, per the params note, and Volt min to 14
this stay at home order has reinvigorated my motivation to get this thing reliably flying.
Btw Dave and Leonard, Thanks for the assistance
https://1drv.ms/u/s!AuSRRT1z_xPZg_oe89WfeCIu7vBSdw?e=ogve8h
Okay, calibrated radio, Took off in stab, switched to althold, then poshold, moved back to the deck, landed in poshold, was able to disarm.
Thats better, I added the logs again to make sure everything looks better.
So, to tune this beast, what exactly do i need to do, step by step, like the for dummies books. Lol
If using regular lipos use 4.2V and not 4.4V pr cell for mot_bat_volt_max, and use 3.3V for _min.
Same as I described above. Have autotune on its own switch apart from the other modes (not the jumper 6 buttons).
Take off and get to where you want to autotune, flip into POShold. Then flip the autotune switch.
Once autotune finishes, turn the autotune switch off, then back on again. Land and disarm.
At that point the new PIDs will be saved
When
You can look in the logs too and see what values Autotune derived, even if you couldn’t disarm and save the new values. Then you can just plug them in manually.
Your tune should look something like this:
ATC_ACCEL_P_MAX,50000
ATC_ACCEL_R_MAX,50000
ATC_ANG_PIT_P,8
ATC_ANG_RLL_P,8
ATC_RAT_PIT_D,0.013
ATC_RAT_PIT_I,0.125
ATC_RAT_PIT_P,0.125
ATC_RAT_RLL_D,0.01
ATC_RAT_RLL_I,0.169
ATC_RAT_RLL_IMAX,0.5
ATC_RAT_RLL_P,0.169
You have not set up your MOT parameters, in particular voltage and PWM (requiring you to recalibrate your ESCs).
You should make sure your CG is correct.
https://ardupilot.org/copter/docs/tuning-process-instructions.html
Print it off and tick each line as you work through it. There are a lot of safety points in there that are from years of experience doing commercial tuning on everything from small (200g) aircraft to large (200kg+) aircraft.
You will also benefit from looking at setting up the harmonic notch once you have autotune worked out.
The good thing about being a Loadmaster in my former life, CG was my bread and butter. Without payload,i.e. GoPro 4 camera and gimbal, within 1/4" of Center of Mass.
I’ve been running through the Tuning Process Instructions as you suggested and using it as a punch ticket for the listed items.
Recalibrated ESC’s (Oneshot) The ESC’s are BLheli32 Wraith 32v1.1’s I do not have the telemetry wire connected. I chose not to connect to AUX for Dshot since i’m using the Holybro PM07 power board, its a much cleaner build, plus I have no plans for any SPORT flying of this craft. I assumed Oneshot PWM would be just fine for this application. I still get a benefit from the BLHeli firmware, no desyncs!
So I was looking at the charts, Tuning Process Instructions, and did my best guess at interpolation. I wish those pictures had grids, it would make it much easier to “chart pick” the charts for prop sized other than depicted.
I chart picked the following using a ruler:
MOT_THST_EXPO ~0.67
INS_GYRO_FILTER ~30
ATC_ACCEL_P_MAX or ATC_ACCEL_R_MAX ~93750
ATC_ACCEL_Y_MAX ~25000
MOT_BAT_VOLT_MAX,16.8 (12c 8000MAH 4SP1) I RUN DUAL 8K BATTERIES
MOT_BAT_VOLT_MIN,13.2 (12c 8000MAH 4SP1)
These are all the Defaults and work well:
MOT_SPIN_ARM,0.1
MOT_SPIN_MAX,0.95
MOT_SPIN_MIN,0.15
MOT_THST_EXPO,0.67 (Changed from default 0.65 after picking the chart)
MOT_THST_HOVER,0.314962 (Actual from MOT_THST_LEARN)
These are the values I was able to get the very first, and only, successful AUTOTUNE session i conducted on 10 April 2020.
ATC_ACCEL_P_MAX,69924.94
ATC_ACCEL_R_MAX,56276.46
ATC_ACCEL_Y_MAX,3754.706
ATC_ANG_LIM_TC,1
ATC_ANG_PIT_P,8.796495
ATC_ANG_RLL_P,8.419658
ATC_ANG_YAW_P,3.818716
ATC_ANGLE_BOOST,1
ATC_INPUT_TC,0.15
ATC_RAT_PIT_D,0.01407979
ATC_RAT_PIT_FF,0
ATC_RAT_PIT_FLTD,10
ATC_RAT_PIT_FLTE,0
ATC_RAT_PIT_FLTT,10
ATC_RAT_PIT_I,0.1318249
ATC_RAT_PIT_IMAX,0.5
ATC_RAT_PIT_P,0.1318249
ATC_RAT_RLL_D,0.008553668
ATC_RAT_RLL_FF,0
ATC_RAT_RLL_FLTD,10
ATC_RAT_RLL_FLTE,0
ATC_RAT_RLL_FLTT,10
ATC_RAT_RLL_I,0.1590351
ATC_RAT_RLL_IMAX,0.5
ATC_RAT_RLL_P,0.1590351
ATC_RAT_YAW_D,0
ATC_RAT_YAW_FF,0
ATC_RAT_YAW_FLTD,0
ATC_RAT_YAW_FLTE,1.536784
ATC_RAT_YAW_FLTT,20
ATC_RAT_YAW_I,0.1318924
ATC_RAT_YAW_IMAX,0.5
ATC_RAT_YAW_P,1.318924
Is this, from AUTOTUNE page, still accurate? My Hexa has 13" props
For large copters (with props at least 13inch or 33cm diameter) set the Rate Roll and Pitch filters to 10hz, these re: ATC_RAT_RLL_FLTT, ATC_RAT_RLL_FLTD, ATC_RAT_PIT_FLTT, ATC_RAT_PIT_FLTD.
It is recommended to enable battery voltage scaling of PID gains.
I assume that in Arducoper 4.+, that MOT_THST_BAT_MAX, and MOT_THST_BAT_MIN listed in the WIKI are now called MOT_BAT_VOLT_MAX and MOT_BAT_VOLT_MIN, which is not in the WIKI?
Conclusion:
I have set up AUTOTUNE to its own switch like Dave suggested.
I plan on going out this weekend for AUTOTUNE session 6.
For my own clarification of the flight portion of the tuning process, take off, PosHd, AUTOTUNE, once complete, set AUTOTUNE LOW, then HIGH, land while AUTOTUNE HIGH, DISARM…Viola! AUTOTUNE success?
I think that’s about it.
I’ll post to this thread again if i still cant get the settings to save.
Just FYI,
In Copter-3.3 (and higher) AutoTune can be setup as a flight-mode. Switching into or out of the AutoTune flight mode responds in the same way as raising or lowering a ch7/ch8 aux switch high assigned the AutoTune function.
Good to know. I am a creature of habit as most of us are. I have done a ton of AT’s on multiple crafts and have come up with what works perfect every time. So that what I try to share. Takes a lot of the unknowns out of the mix
Good luck this weekend and looking forward to your results
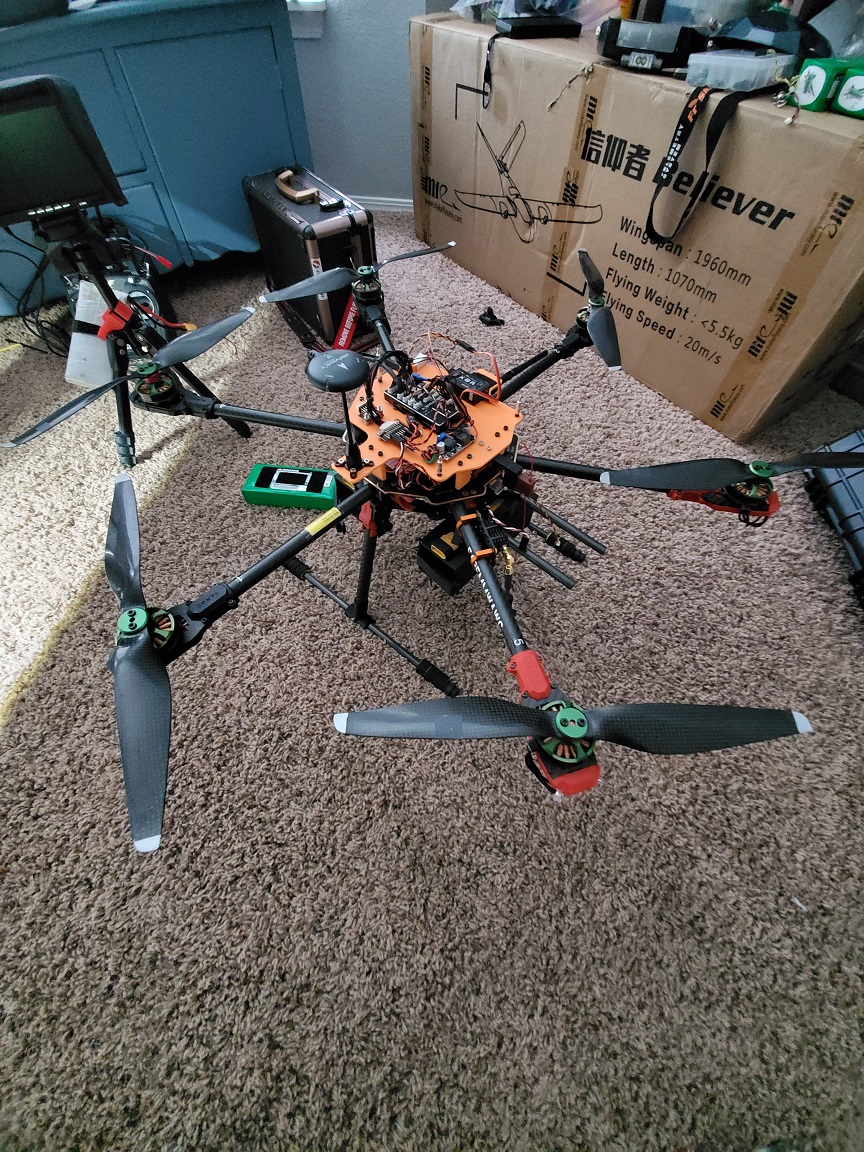
Since this has been the topic of discussion, I figured you might want to see it and know a little about it.This is the beast in all of the above postings. I made the 8K battery boxes, ADS-B Mount, the orange electronics plate, and other misc bits and bobs. My two favorite additions are the Electronics plate, eSun ProPLA Orange, and the Battery Boxes. The Electronics plate is printed at 100% infil and is 4mm thick. It is surprising light. I spaced the Plate 30mm off the Tarot top plate so that I could make all the motor and esc connections via xt30 connectors. The Holybro PM07 PDB Power module is mounted on the bottom of the plate. If any of you have or had a 680 Pro, you know how little space and how much of a pain it is to work on. 10 M3 screws on the top plate and all the electronics come off in one piece. Maintenance or repairs are now a snap.
Just so I know what to expect…
After Autotune completes, then I flip my Autotune switch from high to low then back to high… It’s not going to start autotuning again right? IT will only Autotune once per arm/disarming cycle? In other words, I won’t be fighting autotune as I land it?
After AT completes, (with tadada sound and GCS notification), you leave the switch as is, land and disarm.
If you refresh params, you will see the new values at the tuning Page.
Take off in stabilize and get ready to take over, to test the new tune.
Take a screenshot before the tune just to compare or revert to if something goes wrong
Ok, now I am confused again. Previously in this thread, it has been discussed, and I thought established that,
(this also correlates with the Autotune guidance in the documentation at: AutoTune — Copter documentation) where it says:
- When the tune completes the copter will change back to the original PID gains.
- Put the ch7/ch8 switch into the LOW position then back to the HIGH position to test the tuned PID gains.
- Put the ch7/ch8 switch into the LOW position to fly using the original PID gains.
- If you are happy with the autotuned PID gains, leave the ch7/ch8 switch in the HIGH position, land and disarm to save the PIDs permanently.
It was the original reason for this thread actually, because the original poster was having trouble getting the new PID’s to get saved…
That said, all the videos I’ve seen on YouTube do as you describe, and seems to work fine. It’s also how Randy Mackay does it in the video in the documentation at AutoTune — Copter documentation. At the end of his video, he describes landing with the switch in the high position to save or low position not to (like what you claim), So this is why the confusion. Unless I am misinterpreting, the video at AutoTune — Copter documentation doesn’t match the written instructions on the same page. Am I wrong?
I just want to clear it up, once and for all because I was about to Autotune and flip the switch back and forth once before landing, but I don’t want it going back into Autotune mode while I’m landing.
The instructions are correct, they both end up the same way. In your switch in autotune, land-disarm-save tune.
Confusion may rise by the fact that autotune may be selected as rc option, or a flight mode. Also you may get confused by the option to on and off autotune switch, in order to test your new tune mid-flight…
I personally, NEVER tested this option, or seen it working, neither I would suggest it to anyone.
Spare a few seconds, land and test your tunes
A! Not forget, as long as you move the sticks AT isn’t engage, so don’t worry that you might re enable AT as you land
Best,
Dimitris
My whole point of the post was simply this. I watched randy’s, Dennis Baldwins, Lee’s Painless 360 and a few others. I don’t know how, but I was able to do an initial tune, it was a little breezy, so i decided that on a really calm day, i would run a few tuning sessions and see if the PID values would change at all. This is where I ran into issues. For the life of me, I couldn’t get the craft to save the new pids. The problem I had, was that no matter what i did, arm fly autotune, set low, set high, and land, the craft refused to disarm. Through all of this, I’ve learned a great deal. I had planned on flying this weekend, the weather has not been cooperating, rain the last few days. I’m hoping that Monday or Tuesday this week I’ll be able to run the procedures once and for all, taking notes as I go. @Leonardthall and @smartdave have given me a wealth of incite and understanding on the Autotuning process and key set up features. I also found this spreadsheet from @xfacta, super helpful since the charts in the tuning wiki dont have gridlines to chart pick. New Tuning Instructions Wiki Page. Thanks @xfacta Shawn for doing the hard math and setting up the spreadsheet. Where did the formulas come from? I have an aeronautics degree and some of them look familiar.