ArduCopter Follow Mode

I am trying to follow a car detected by the drone’s camera. I have reliable lat, lon, alt or x,y,z (wrt drone’s home) target positions. How can I use the FOLLOW mode to keep following this target?

Note: the car does not have mavros messages sent out to use the traditional FOLLOW pipeline. Instead I will have to setup a ROS topic that publishes the target position. Any help as to how I can setup this FOLLOW mode on custom positions will be appreciated. Thanks

I see you asked on this thread as well, Follow Mode - Copter - #13 by bryashko

If you read carefully you will find that this type of mission can be achieved with precision landing as described by @rmackay9

Or if you want 3D, you can try this:

So I think I was looking more on the MAVROS side of implementation details, and here’s what I found. Please correct me if you find any faults:

  1. Manually fly the drone and bring the target in camera’s fov
  2. Put the drone in GUIDED mode using
serviceClient<mavros_msgs::SetMode> ("mavros/set_mode")
  1. Start sending waypoints to the drone using
    SET_POSITION_TARGET_LOCAL_NED
    by publishing to topic mavros/setpoint_position/global
  2. The above message is of GlobalPositionTarget type, which I will populate with waypoint lat, lon, alt.

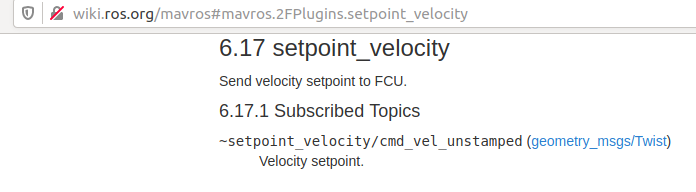
Question? Assuming the above is correct. Can I just populate the above message with just velocity (Vector3d)? (Instead of the lat, lon, alt)setpoint_position
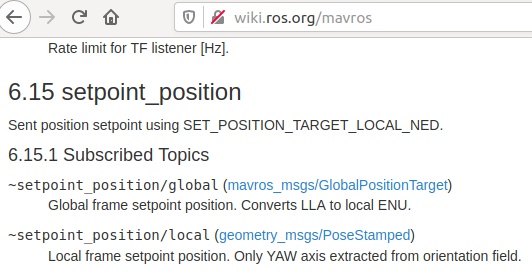
LINK to mavros setpoint position

or should I use setpoint_velocity

I think you may try on SITL and check as well with Mavlink Inspector from Mission Planner or QGround control. This way you can confirm is signal is in the correct pose and orientation.

That is one way to do it - specifying the location you want the vehicle to go to. Using position is actually not a particularly good way to do it, as the controllers tend to accelerate hard to get up to speed, then decelerate hard to stop on-point. Its recommended that you use the velocity control options you have if you’re going to do it that way.

Your better option is to investigate the onboard “follow” mode. Configure your quad to follow a specific system ID, then stream the position of that vehicle to the quad using GLOBAL_POSITION_INT. This ought to be much, much less work…

I strongly suggest you SITL this first. Altitude frames can be a problem.

Thanks. So I was able to get the drone to move by publishing to setpoint_velocity topic /mavros/setpoint_velocity/cmd_vel_unstamped.

The drone seemed to move East when I gave it some X velocity, and North when I gave it Y velocity. Aka it follow global ENU coordinates. Is this expected behavior? Can someone point me to the correct documentation.

Thank you for taking the time to respond to my queries.

Yeah … that was expected , depending on how you want to implement, there are some existing code for the ENU-NED transformation in MAVROS

ENU is fine for me, any documentation you can point me to that specifies this behavior?

Aka I am looking for documentation that states setpoint_velocity should be in ENU.

Thanks

I’m implementing follow me drone. Condition Yaw working fine, but negative X velocity from NED FRAME giving yaw added and therefore giving circular movement on jetson nano gazebo simulation. But on Intel CPU it’s working fine. I check dronekit and pymavlink library version is same.

from __future__ import with_statement
from __future__ import division
from __future__ import absolute_import
from os import sys, path
from io import open
sys.path.append(path.dirname(path.dirname(path.abspath(__file__))))

#-- Dependencies for video processing
import time
import math
import argparse
import cv2
import numpy as np
from imutils.video import FPS

#-- Dependencies for commanding the drone
from dronekit import connect, VehicleMode
from pymavlink import mavutil


#-- Function to control velocity of the drone
def send_local_ned_velocity(x, y, z):
    msg = vehicle.message_factory.set_position_target_local_ned_encode(
        0, 0, 0,
        mavutil.mavlink.MAV_FRAME_BODY_OFFSET_NED,
        0b0000111111000111,
        0, 0, 0,
        x, y, z,
        0, 0, 0,
        0, 0)
    vehicle.send_mavlink(msg)
    vehicle.flush()


def condition_yaw(heading):
    msg = vehicle.message_factory.command_long_encode(
    0, 0,    # target_system, target_component
    mavutil.mavlink.MAV_CMD_CONDITION_YAW, #command
    0, #confirmation
    1,    # param 1, yaw in degrees
    0,          # param 2, yaw speed deg/s
    heading,          # param 3, direction -1 ccw, 1 cw
    1, # param 4, relative offset 1, absolute angle 0
    0, 0, 0)    # param 5 ~ 7 not used
    # send command to vehicle

    vehicle.send_mavlink(msg)
    vehicle.flush()


#-- Connect to the drone
vehicle = connect('udp:127.0.0.1:14550', wait_ready=True)

cap = cv2.VideoCapture(0)
width=cap.get(cv2.CAP_PROP_FRAME_WIDTH)
height=cap.get(cv2.CAP_PROP_FRAME_HEIGHT)
tracker = cv2.legacy.TrackerMOSSE_create()
Hide quoted text


def drawBox(img, box, distance):
    x, y, w, h = int(box[0]), int(box[1]), int(box[2]), int(box[3])
    cv2.rectangle(img, (x, y), (x + w, y + h), (255, 0, 255), 2, cv2.LINE_AA)
    cv2.putText(img, "Estimated distance: {}cm".format(int(distance)), (75, 75), cv2.FONT_HERSHEY_SIMPLEX, 0.7,
                (255, 0, 255), 2)
    cv2.line(img, (int(width/2), int(height/2)), (int(x+w/2), int((y+h/2))), (255,255,255), 1)


while True:
    _, img = cap.read()
    # Convert BGR to HSV
    hsv = cv2.cvtColor(img, cv2.COLOR_BGR2HSV)
    # define range of blue color in HSV
    lower_blue = np.array([100,50,50])
    upper_blue = np.array([130,255,255])
    # Threshold the HSV image to get only blue colors
    mask = cv2.inRange (hsv, lower_blue, upper_blue)
    contours = cv2.findContours(mask.copy(),
                              cv2.RETR_EXTERNAL,
                              cv2.CHAIN_APPROX_SIMPLE)[-2]
   
    if len(contours)>0:
        contour = max(contours, key=cv2.contourArea)
        x, y, w, h = cv2.boundingRect(contour)
        cv2.rectangle(img,(x,y),(x+w, y+h),(0,255,0),2)
       
        #-- Initialize the tracker
        tracker.init(img, (x, y, w, h))
       
        distance = int(474 * (80 / w)) if w != 0 else 0
        #print(distance)

        #-- Draw the bounding box and estimated distance
        drawBox(img, [x, y, w, h], distance)
        errorx = abs((x + w/2)- width)
        errory = abs((y + h/2) - height)
        print(distance, errorx, errory)

        if distance > 120:
            send_local_ned_velocity(1, 0, 0)
           
        if distance < 100:
            send_local_ned_velocity(-1, 0, 0)
         
        #if int(errorx > 700):
            #condition_yaw(1)
        #if int(errorx < 500):
            #condition_yaw(-1)
           
        #if int(errory > 200):
        #    send_local_ned_velocity(0, 0, -1)
        #if int(errory < 100):
        #    send_local_ned_velocity(0, 0, 1)

        #-- Write video frame and display
       
        cv2.imshow('Image', img)
   
        k = cv2.waitKey(5)
        if k == 27:
            break

cap.release()
cv2.destroyAllWindows()