Hi,
This thread answers the question, “How far would you go for Yaapu Telemetry?” 
The Concept:

The Pieces:
- Getting the OrangeRx Module to Bind with a SkyViper
- Connecting the DT-06 to the Sonix WiFi AP
- Connecting Mission Planner to the DT-06 via a serial-to-usb FTDI Adapter
- Converting MavLink Messages to FrSky Passthrough
- Connecting it all Together
The Parts:
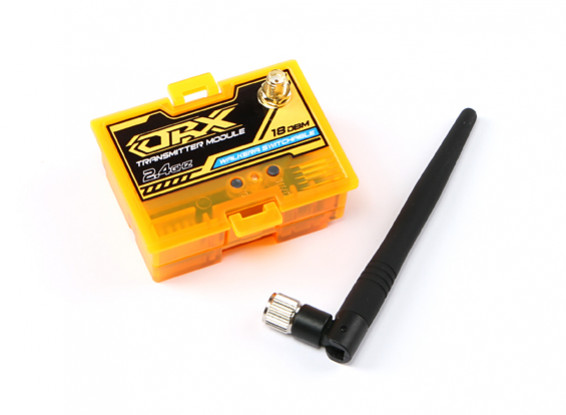
- OrangeRX DSMX/DSM2/Devo Compatible 2.4GHz Selectable Transmitter Module
- ESP8285 DT-06 WIFI to TTL serial port module
- Teensy 3.2
Firmwares:
The first four pieces are done so I am ready to connect things together. I’ll add setup information and details as I progress.
Piece 1) Getting the OrangeRx Module to Bind with a SkyViper
This part was a bit tricky, even with the help of several SkyViper threads like (Binding to Other Transmitters) and the SkyViper Dev WiKi. I recommend reading both sections.
I used the OrangeRX DSMX/DSM2/Devo Compatible 2.4GHz Selectable Transmitter Module from Hobby King. The one with the 8 DIP switches on the back. Only SW3 is On, all others are Off. This puts the module in Manual mode for DSM2. Other settings cause some crazy channel glitches. For example, they have a nice TAER to AETR channel map SW2. While it switches the channels to match the SkyViper, it causes problems on Ch3 and Ch4 so it is best to re-map channels on the Taranis Mixer screen in the OpenTx Companion.
The SkyViper model on the Taranis has the internal module disabled and the external module enabled. I used the following settings below. There is also a DSM2 setting on Open Tx but I don’t know what it does.
- Mode: PPM
- Channel Range: 1-7
- PPM frame: 22.5ms, 400us, negative
From Misson Planner:
- Set BRD_RADIO_PROT to 1
- Set BRD_RADIO_TELEM to 0
- Set TMODE_ENABLE to 0
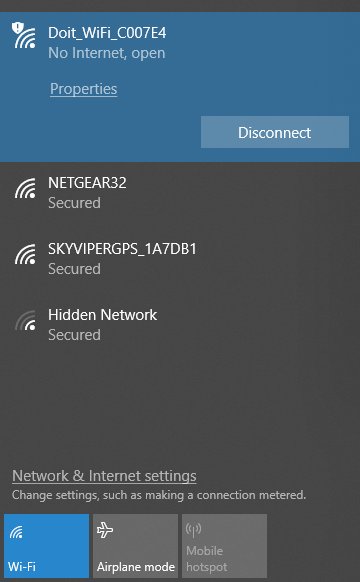
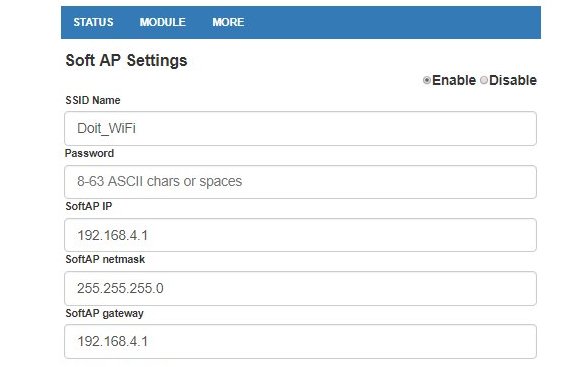
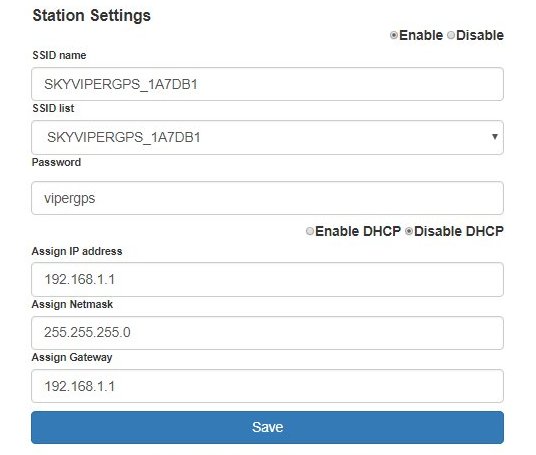
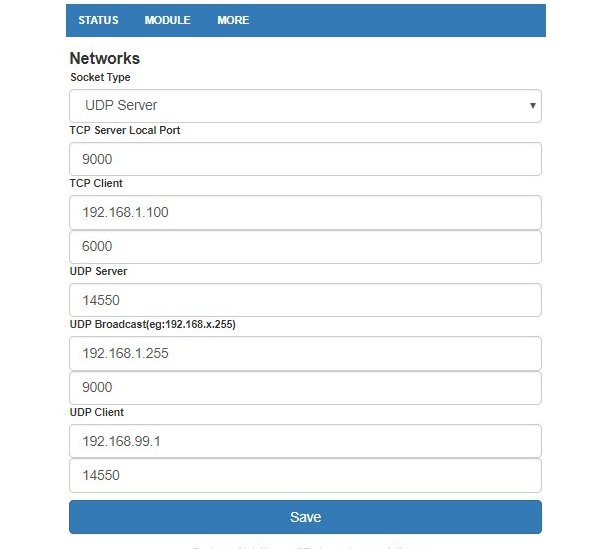
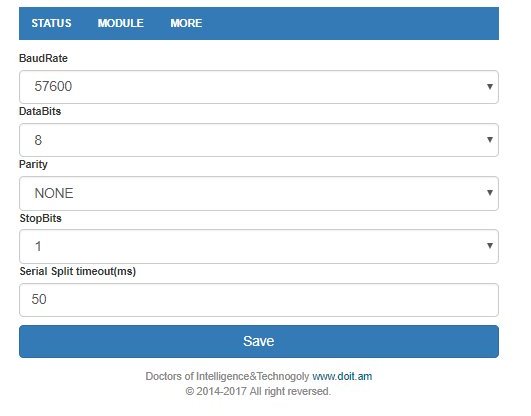
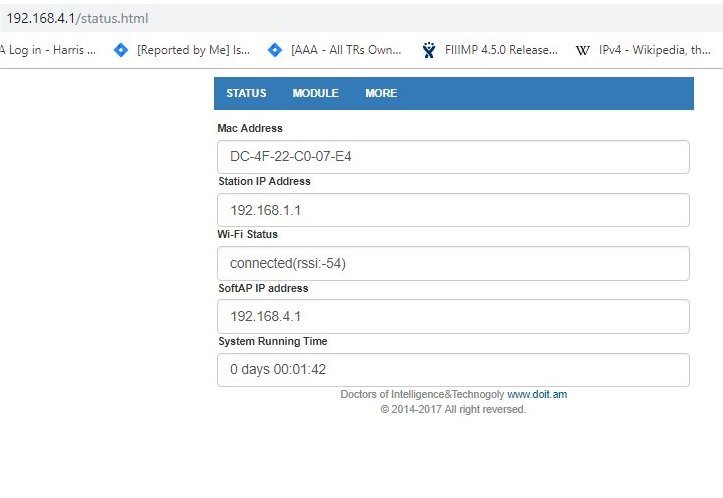
Piece 2) Connecting the DT-06 to the Sonix WiFi AP
The DT-06 ESP8285 module can be a WiFi Access Point (AP) or Station or Both. This allows you to set up the Station parameters to connect to the SkyViper Sonix AP via the DT-06 Web Server page. Here are my setup screens. The SoftAP screen is left unchanged. The Station Settings are set up for your SkyViper AP name, address, and password. No DHCP is needed. The Networks section is set up as a UDP Server to the SkyViper Sonix board. The Serial Interface is set up for MavLink comms, initially to the FTDI Adapter for testing but eventually to the Teensy for converting to FrSky Passthrough. The Serial Split timeout may need to be changed from the default 50 to 30 (or even 10) but it worked fine when connecting to Mission Planner via the FTDI adapter.
Piece 3) Connecting Mission Planner to the DT-06 via a serial-to-usb FTDI Adapter
My initial test of the DT-06 Station setup was to plug the serial interface into a FTDI adapter and then connect to Mission Planner via USB. This validates the DT-06 Station and Serial setups before moving on to the Teensy conversion.

Piece 4) Converting MavLink Messages to FrSky Passthrough
This part of the project was written for the Teensy 3.1/3.2 by Eric Stockenstrom. There is a thread about it on RC Groups below. All you really need to do is either compile his firmware for Ground Mode using Arduino or load my attached ZIP file (MavlinkToPassthru_v1.0.4.ino.hex) into the Teensy using the Teensy Loader Windows application.
Mavlink To FrSky Passthrough Converter
MavlinkToPassthru_v1.0.4.ino.zip (37.5 KB)
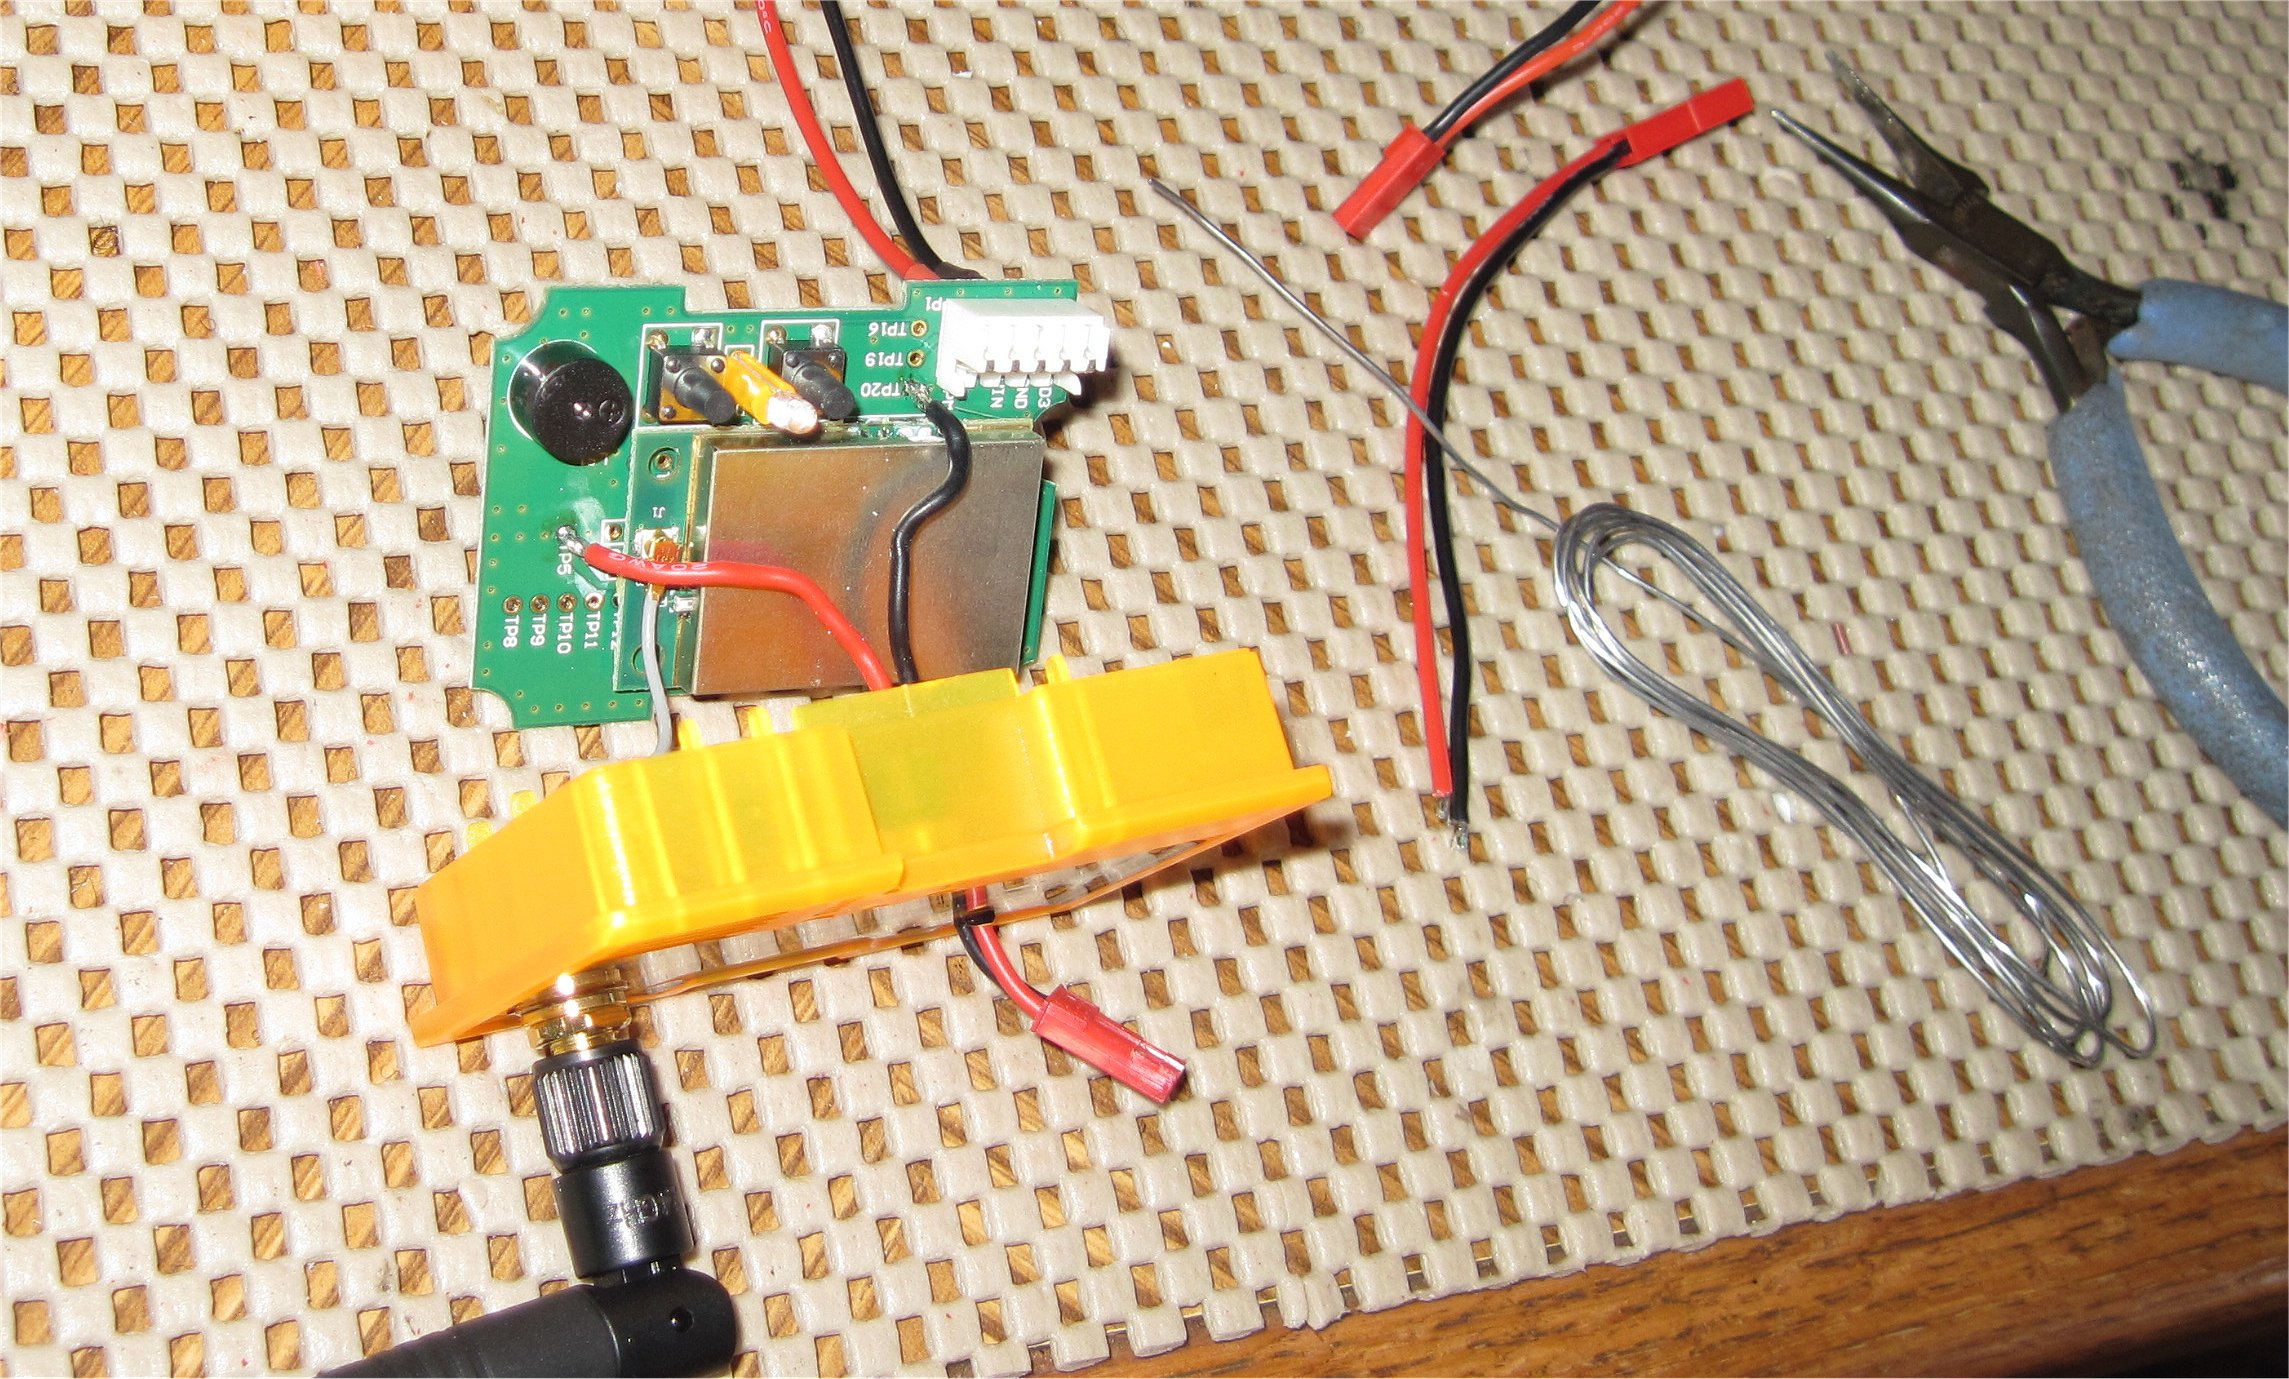
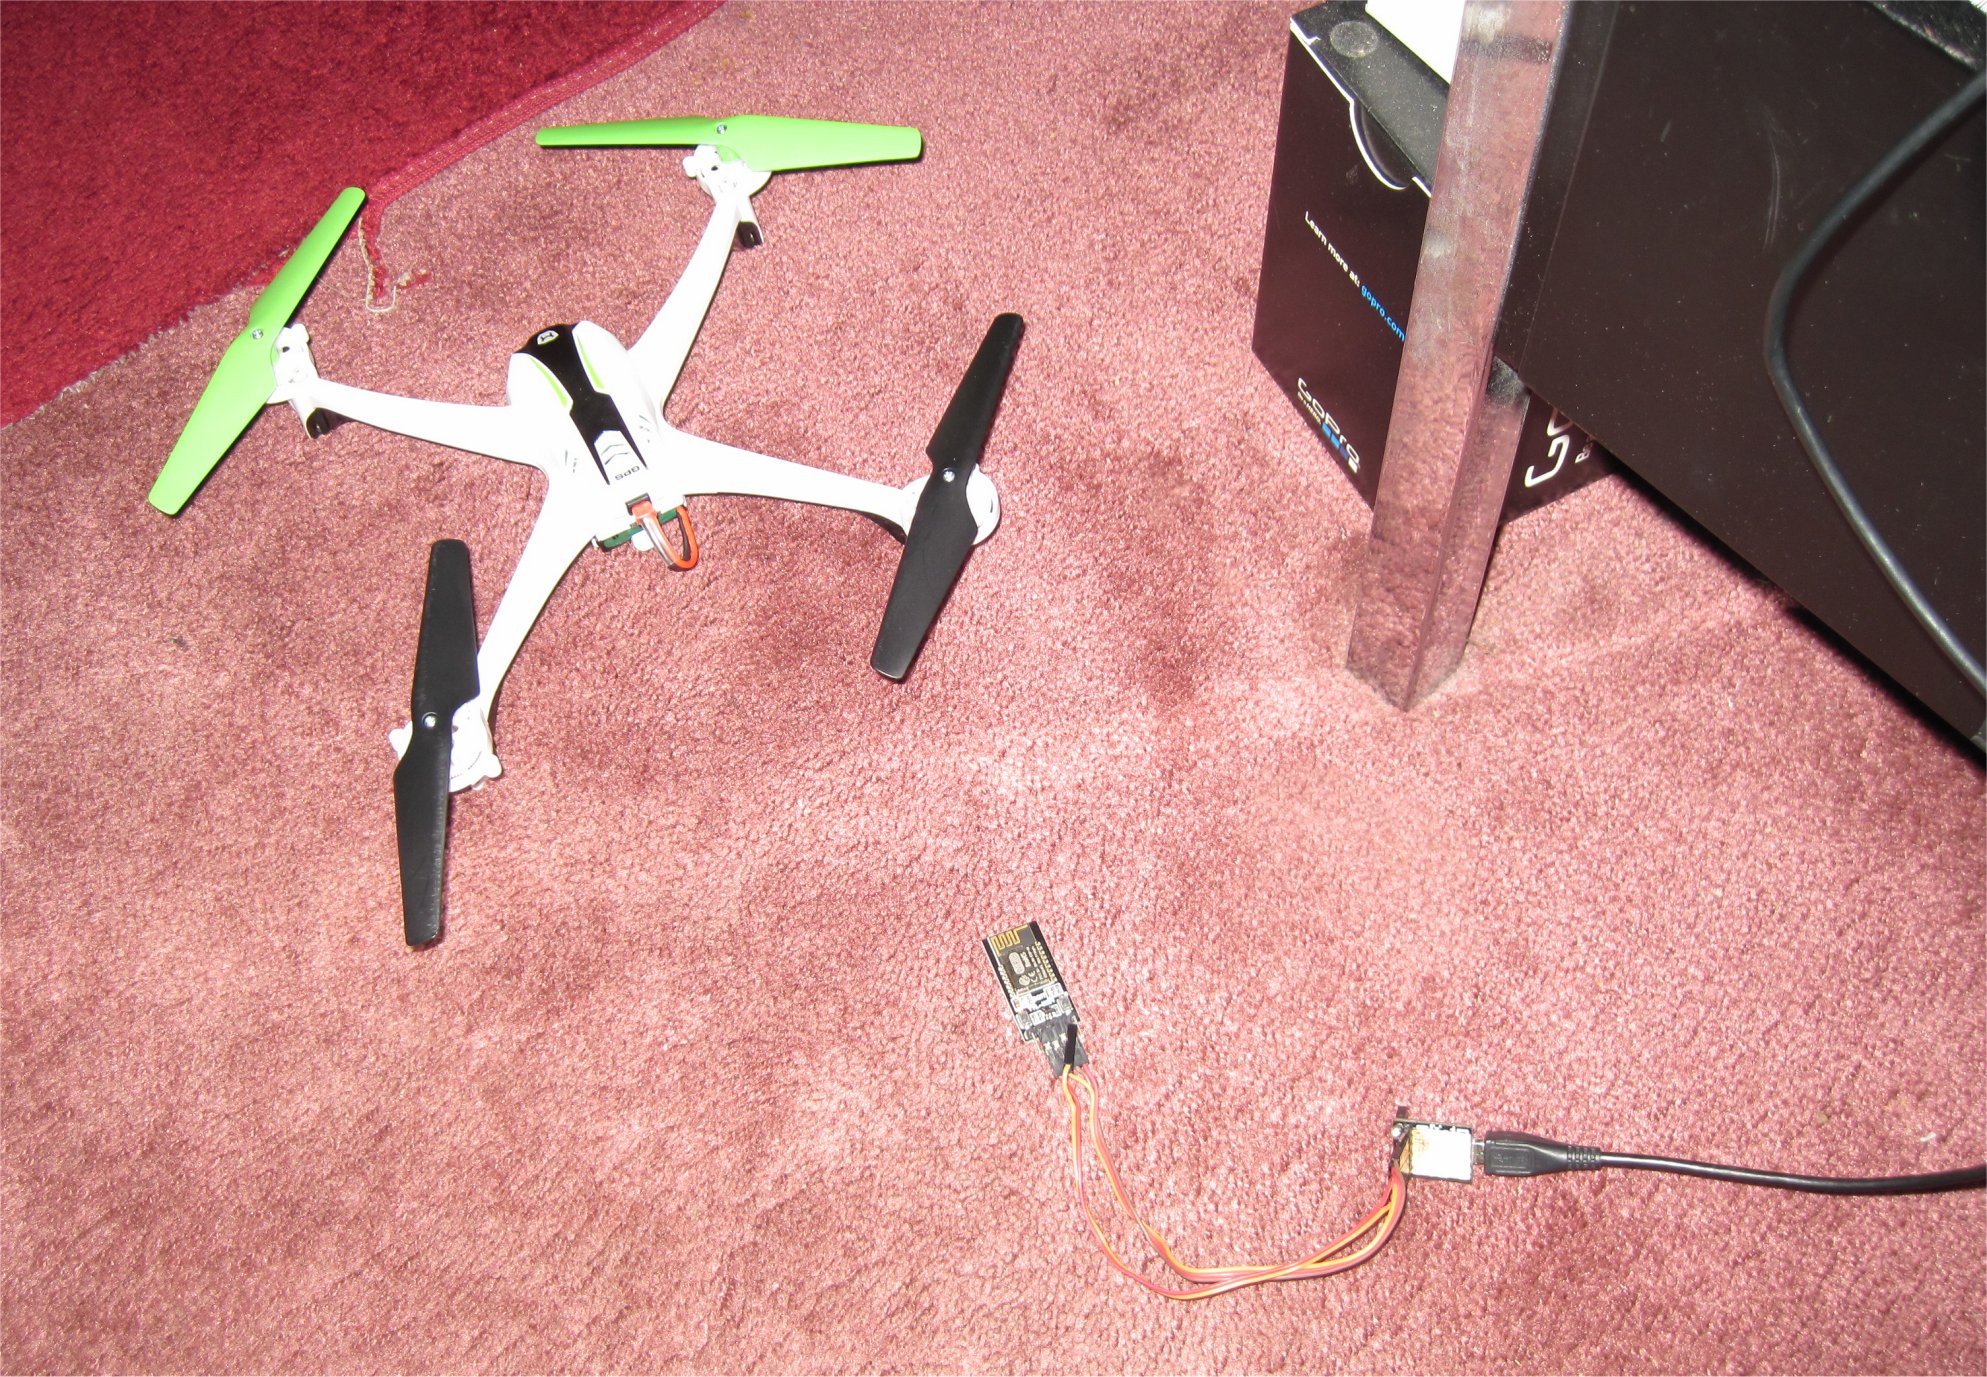
Piece 5) Connecting it all Together
My initial task here is to locate a 3.3v or 5v pad to power the DT-06 and Teensy 3.2.
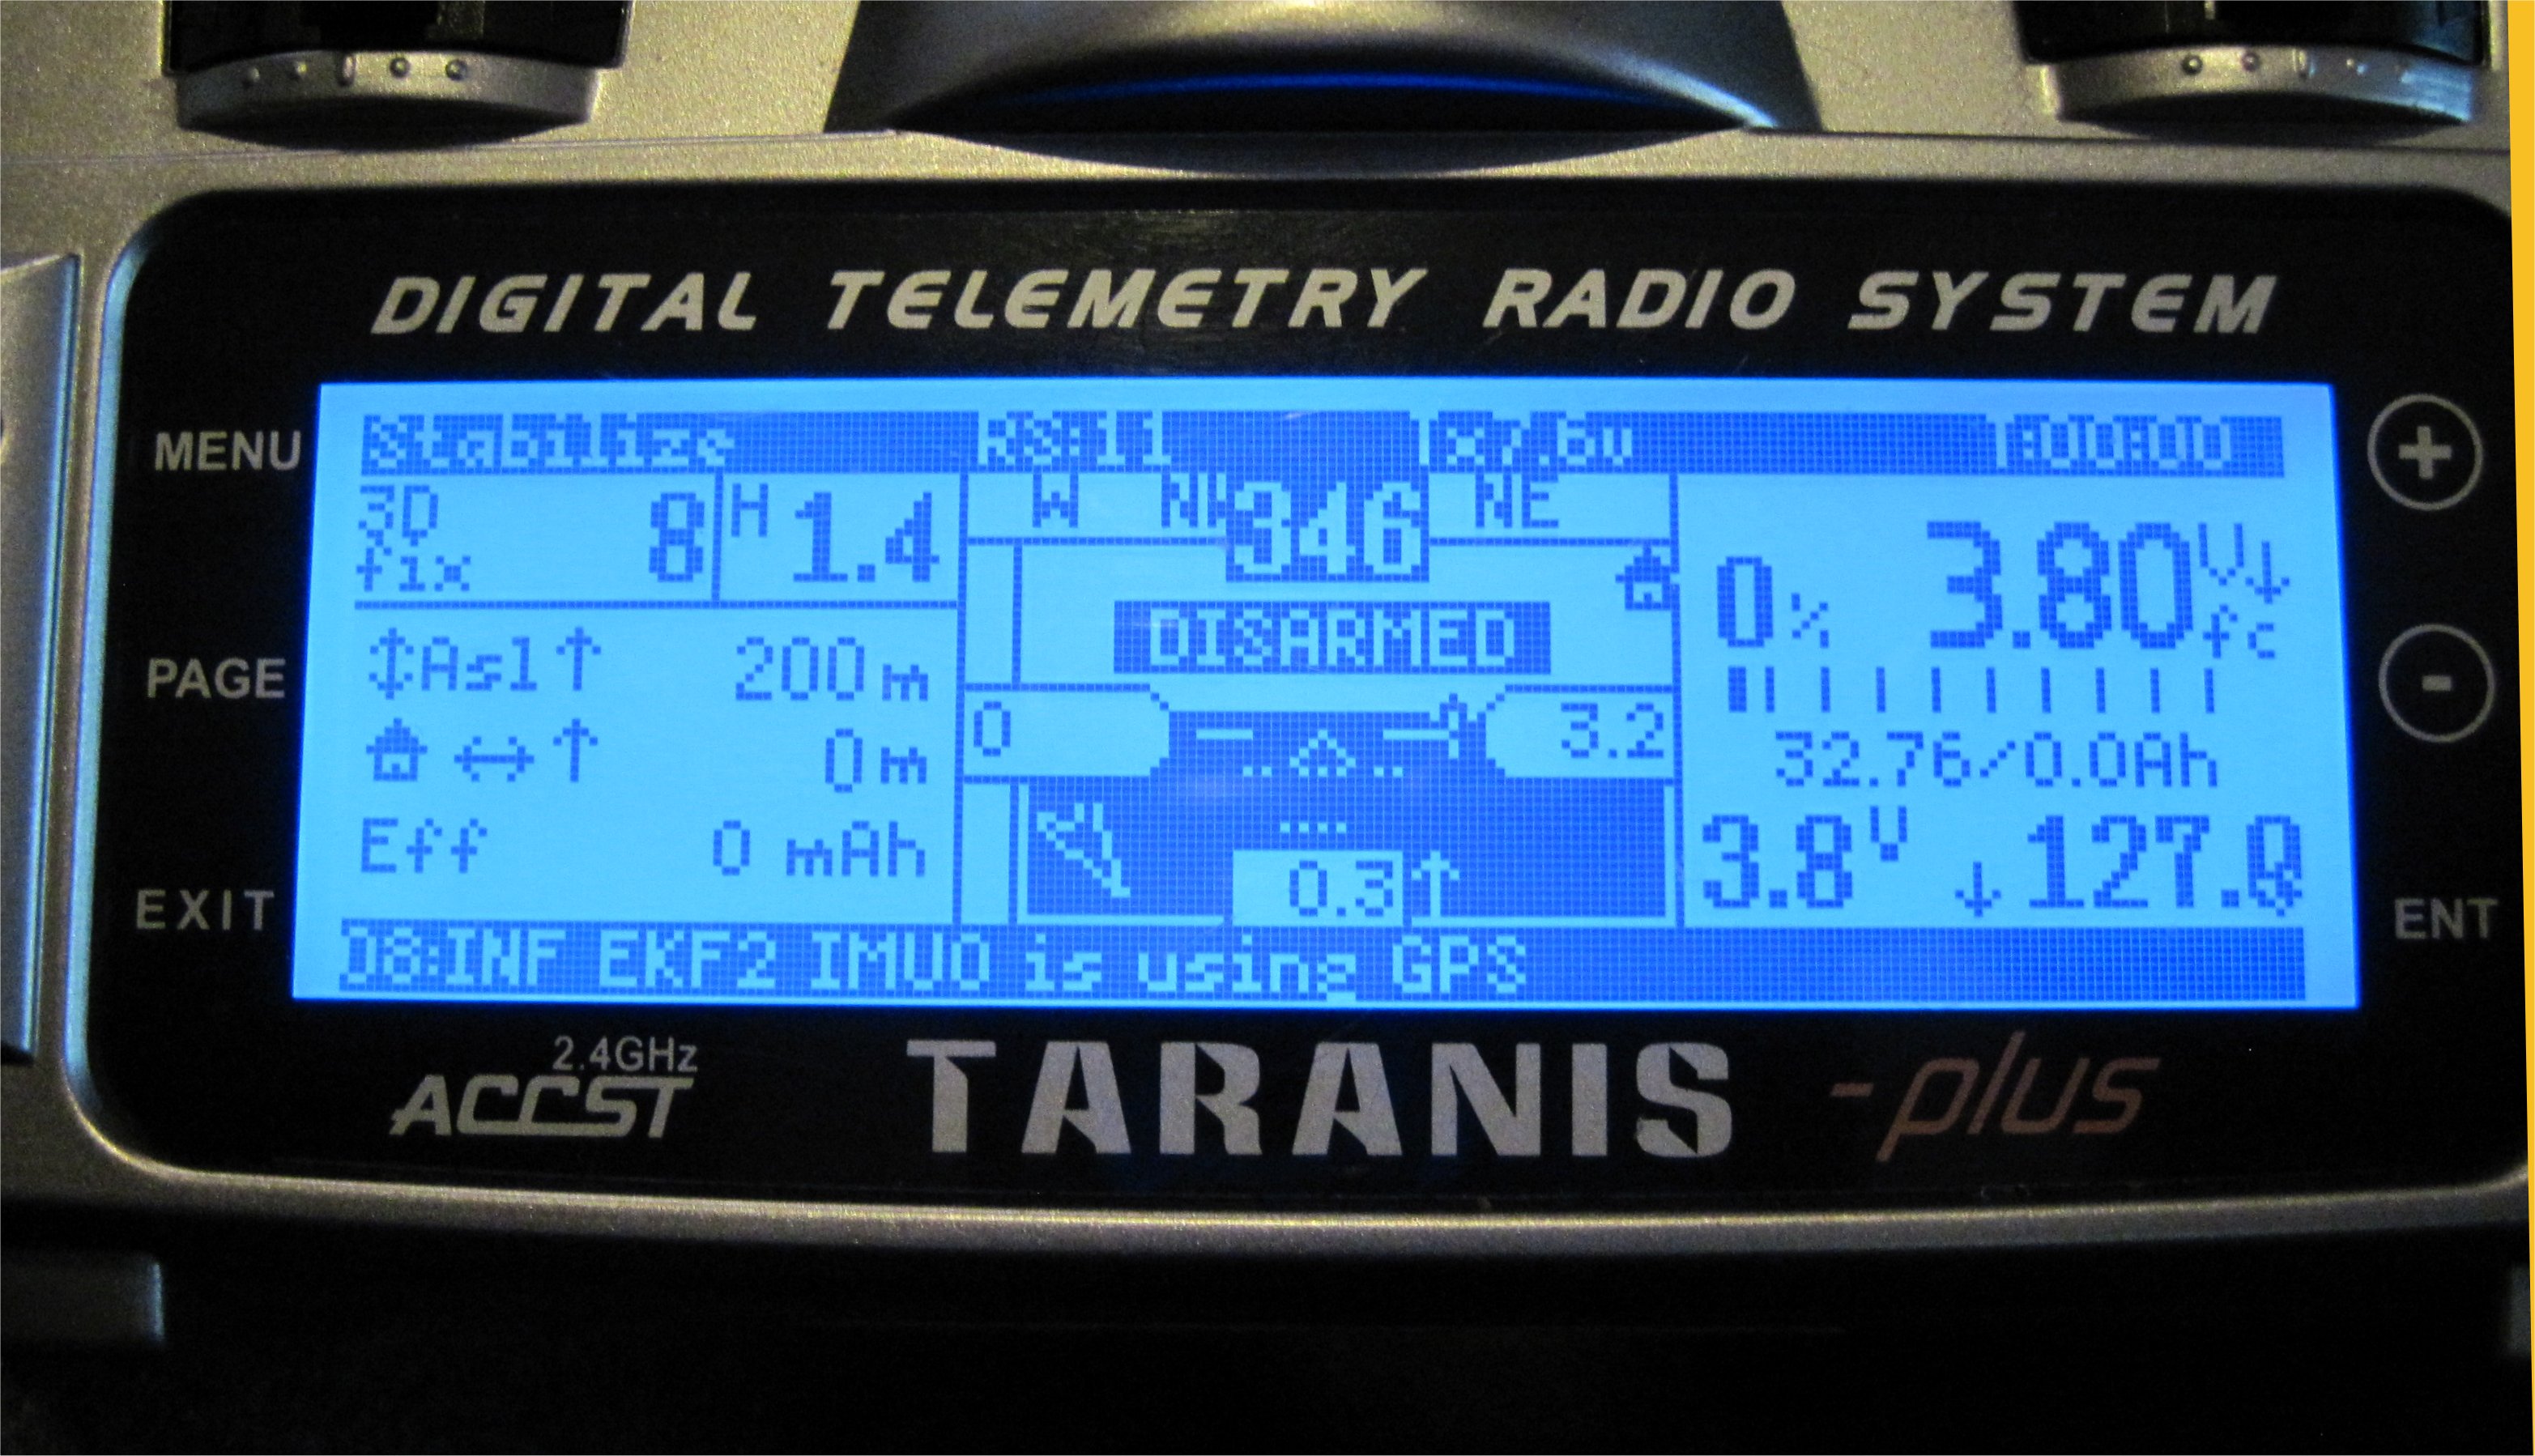
I have my first successful Yaapu telemetry working on the SkyViper. I found that inside the module, TP5 was 5v and TP20 was ground so I connected a red JST plug to them. Next, I need to look into the RSSI and see what is really being displayed. The standard build for “MavlinkToPassthru_v1.0.8.ino.TEENSY31.hex” doesn’t like the RS:11 and it may not even be an RSSI level. Fun stuff!