@yak-54 Many thanks for helping me solving some issues around dual battery monitoring settings inside the radio.
If you follow the instructions below, you can have everything up and running in no time. The instructions provided below should work with any ArduPilot flight controller.
HARDWARE REQUIRED AND WIRING WITH PIXHAWK
- Pixhawk 1 (2.4.8) – 2MB - Amazon.com
- FrySky X8R receiver with smart port support. - Amazon.com
- FrySky Yaapu Telemetry Converter Cable Pixhawk - Amazon.com
- FLVSS FrySky LiPo Battery Voltage Sensor. - https://amzn.to/3Gk6oxi
- FrySky Servo Channel Changer - SCC - FrSky - Lets you set the limits
STEP 1: The FrySky LiPo battery Voltage sensor comes with default ID e.g., 2. Each Voltage sensor must have a unique sensor ID. Using the Servo channel changer, you set one sensor to for example ID 2 and the other to ID 3. Follow the instructions here, how to change the ID’s. SCC - FrSky - Lets you set the limits
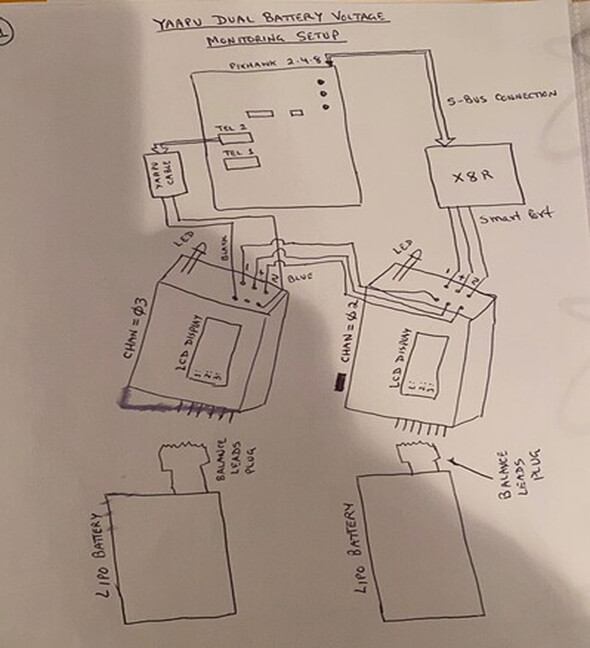
STEP 2: Connect the Yaapu telemetry converter to one of the serial ports. In our example we are using Serial Port 2. You can use any unused telemetry port such 1 or 4/5. Also, connect the X8R receiver to Pixhawk and run a cable from smart port to the voltage sensor as shown in the diagram below.
CAUTION 1:
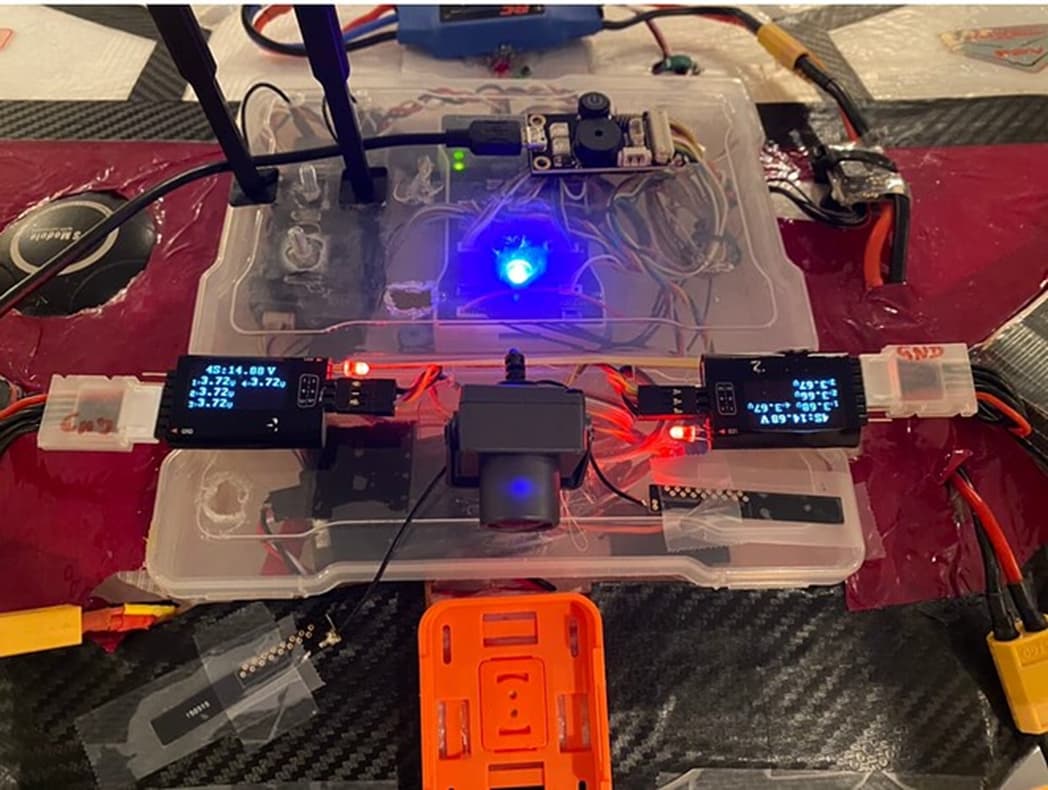
When you are connecting the LiPo battery balance connector to FLVSS FrySky LiPo Battery Voltage Sensor you MUST make sure battery Ground pin is connected to ground Pin marked on the sensor. If you plug the LiPo balance charge connector incorrectly, you may damage the sensor immediately. It is vey sensitive to reverse polarity.
STEP 3: MISSION PLANNER SETTINGS
Depending upon what serial port you have decided to use, set the following parameters in mission planner using full parameter command list. X = Serial Port #. e.g., 1
- SERIALX_baud = 57
- SERIALX_PROTOCOL = 10
- SERIALX_OPTIONS = 0
- RSSI_TYPE =3
- BRD_ALT_CONFIG = 0
DON’T FORGET TO REBOOT YOUR FC!
CAUTION 2:
In our setup we are using TWO IDENTCIAL (4S @ 3300 mAh) LiPo batteries connected in parallel (before Pixhawk Voltage regulator). Please NEVER connect two different types of LiPo batteries in parallel as one of the batteries will catch fire immediately. Both batteries should be of the same type (voltage) and ideally same current rating.
STEP 4: RADIO SETUP
Inside your radio when binding the X8R receiver with your radio, you must bind it in the following way:
- MODE D16 – select this.
- CH 1 to CH 8
- TELEMETRY OFF 1 – 8
Put radio in bind mode, hold down e.g., X8R bind button and power the RX.
Once binding is completed, power cycle the Rx.
STEP 5: INSTALLING YAAPU Scripts.
There is no point of repeating the instructions widely available on GitHub. Follow the instructions to install Yaap script and widgets on your radio.
- Yaapu script installation - Installation on Horus radios · yaapu/FrskyTelemetryScript Wiki · GitHub
- Widget Setup - How to run the Yaapu script on X10 and X12 as a Widget · yaapu/FrskyTelemetryScript Wiki · GitHub
STEP 6: ADDITIONAL STEPS NEEDED TO DISPLAY DUAL BATTERY CELL VOLTAGES
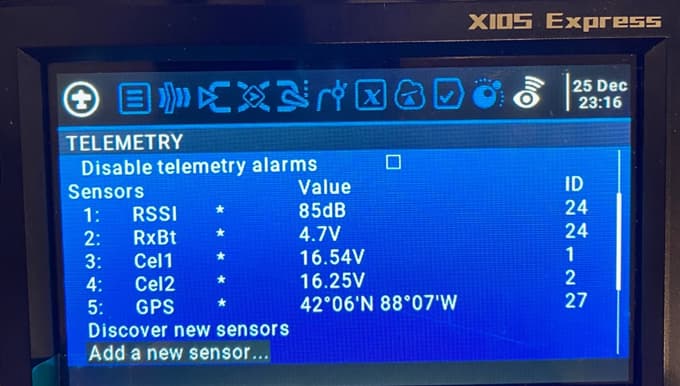
I am assuming that your radio has discovered both sensors. You can verify that by going to this section in your radio. By default, each battery name will be “Cels”, change to Cel1 and Cel2. This way its easy to identify them later.
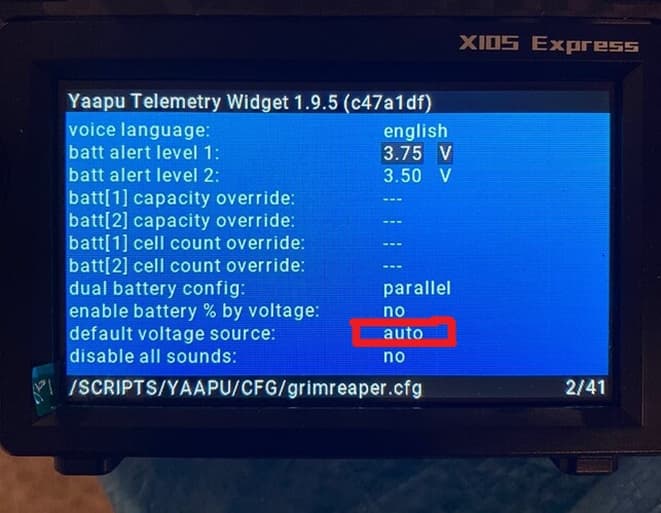
- Next go to the following section in your radio and change the value from “auto” to “FLVSS”
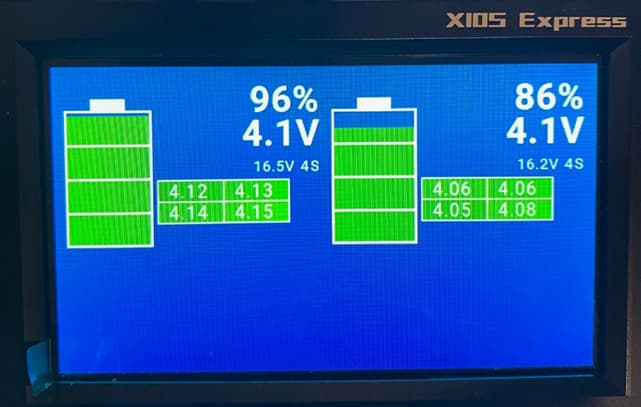
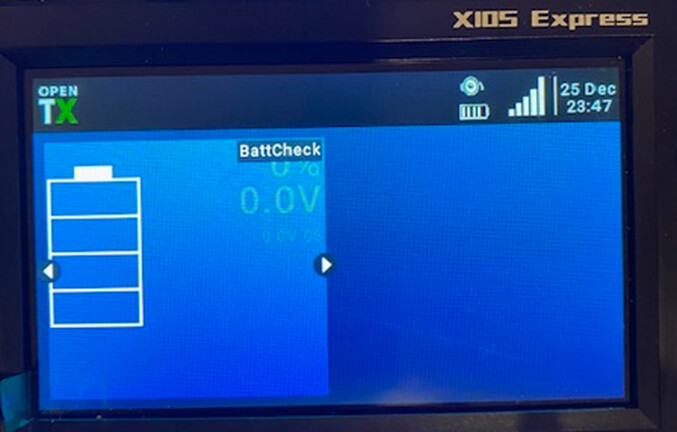
- Besides all the standard widgets you previously created, create a new one where the screen is split in two sections. You are going to display each battery/cell voltage inside each screen.
a) Select two split screen layouts.

b) Select BattCheck as the widget
c) Select Cel 1 or 2
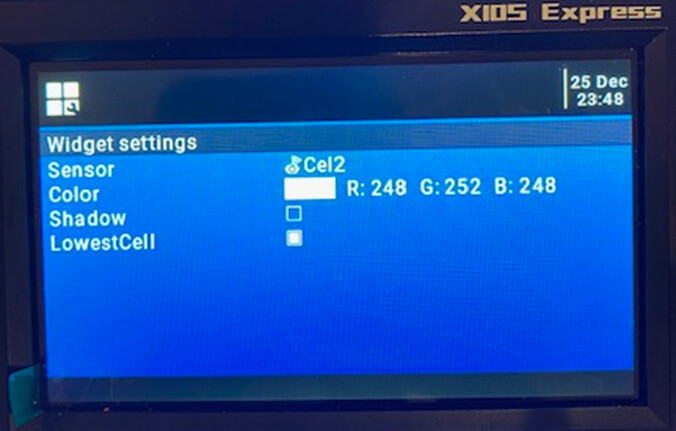
d) Go to 2nd screen now select the second battery.
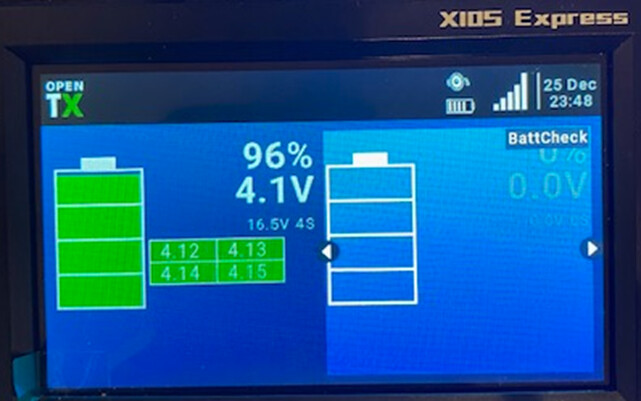
e) Once done, you will see both battery voltages.