At $150 or less (if you can catch a sale), the SkyViper 2450 GPS is a great platform to experiment with all things Copter: Under the hood it includes a full blown “micro Pixhawk” flight control board connected to a Ublox GPS, along with a companion computer running FreeRTOS with a server providing a web interface, and a rudimentary 720p camera.
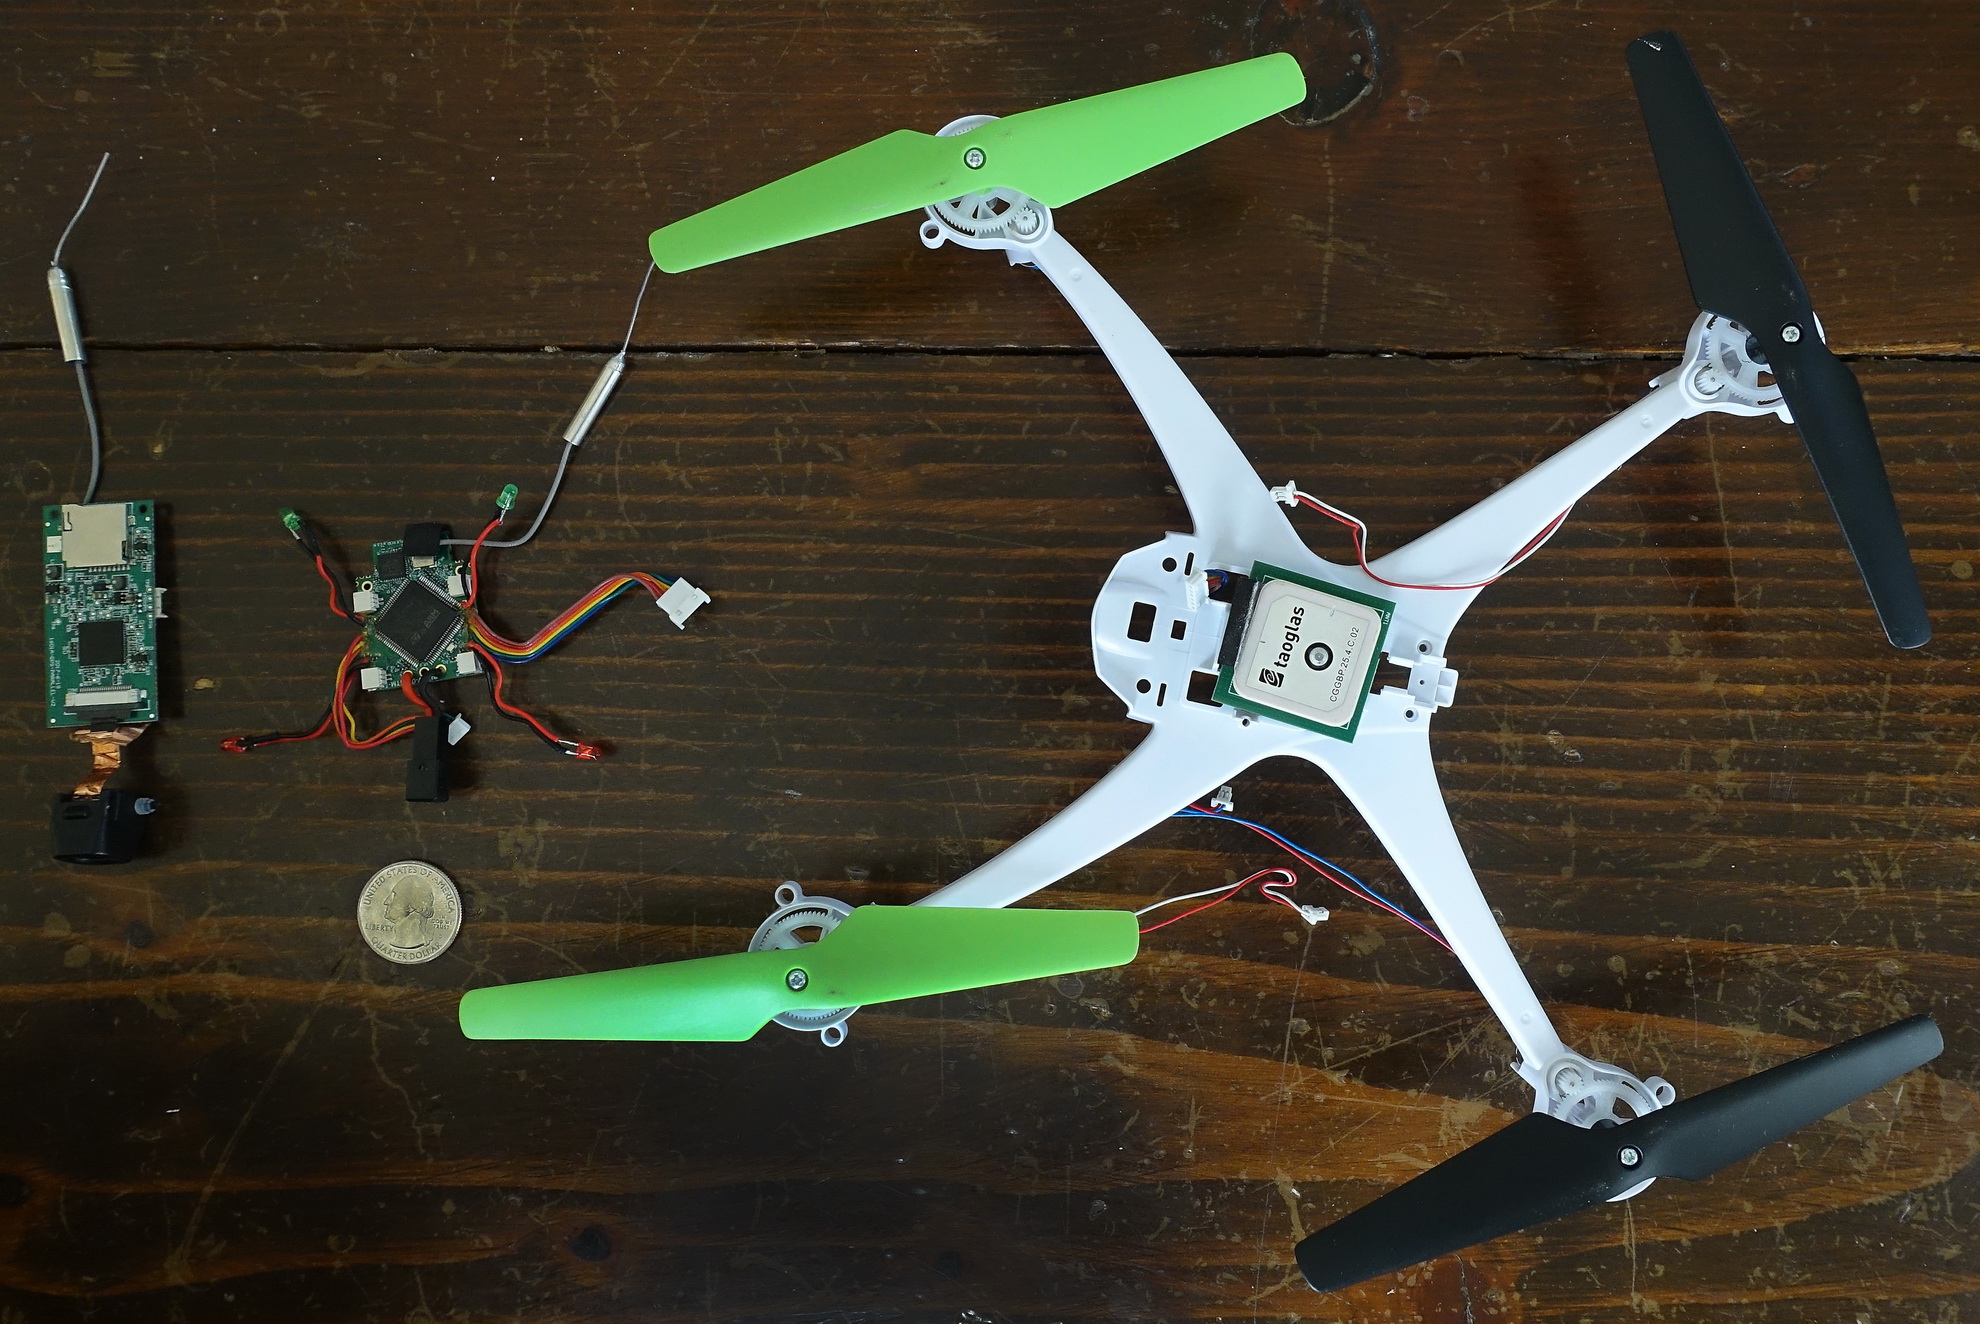
Under the hood, left to right: Sonix module with camera (metal shield removed), “micro” Pixhawk, GPS and compass board on top of Viper.
Randy was curious as to the possibility of using the Sonix Board as a companion computer and camera with any Pixhawk and so was I, so I had the perfect excuse to experiment with this last week-end. And see how this tiny board would do, hooked up to a larger test copter.
The first step was to extract the Sonix board from a SkyViper, which is straightforward and a matter of minutes:
- Detach the battery holder and undercarriage by removing 10 small screws
- Pry open the front right arm to slide out the antenna
- Remove two screws holding the board
- Disconnect the four wire connector
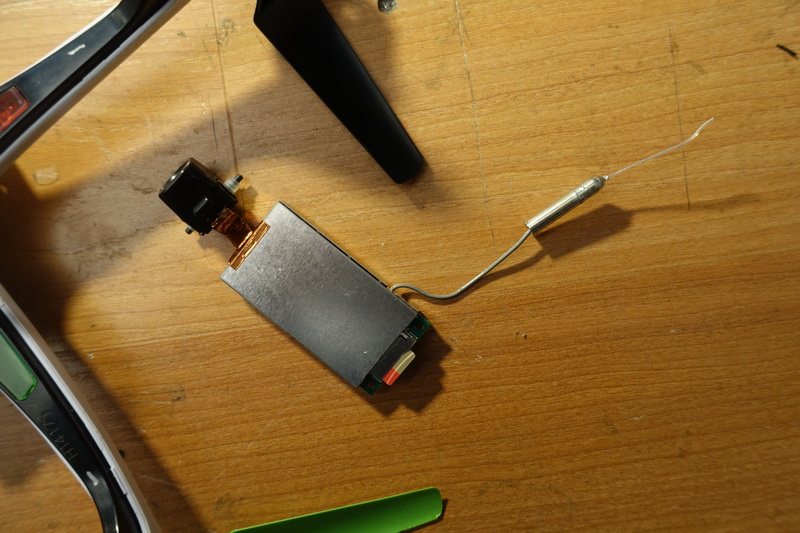
And there you have it, the Sonix board and camera, with its wifi antenna, in all of their combined 16 gram glory.
(Additional pictures documenting disassembly are at the end of this post. There are also close-ups of the board, the flight controller and the GPS in the viper discussion area, here).
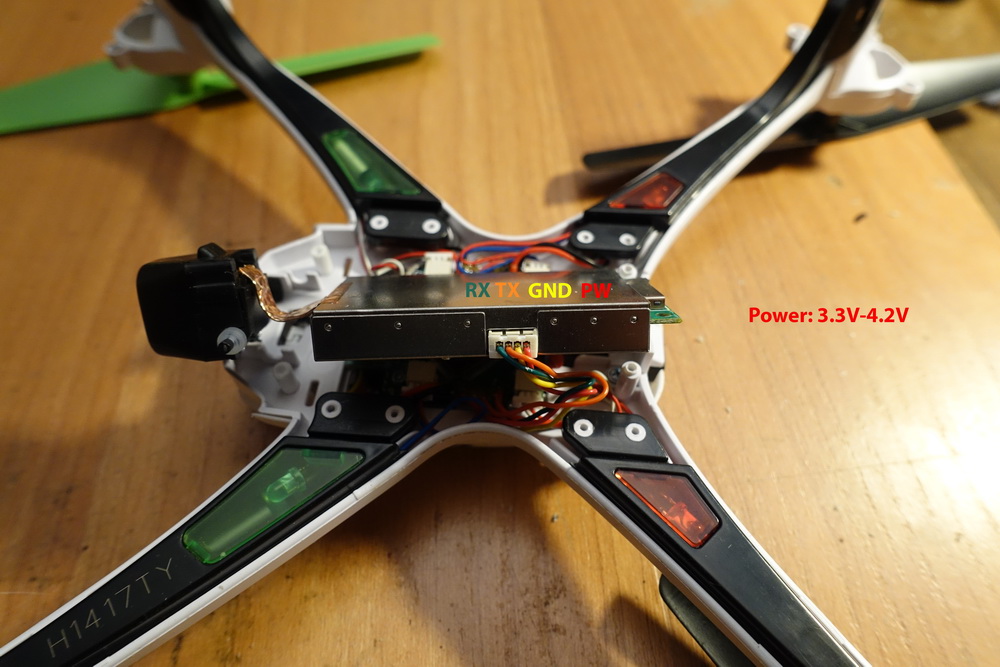
On the SkyViper the Sonix module communicates with the flight controller via Mavlink2 over serial at 62500 bps, so connecting to a serial telemetry port of a Pixhawk 1 (or 2) is straightforward: Connect Rx and Tx lines from the Sonix module to Tx and Rx lines (respectively) going to the Pixhawk serial port you choose, and the Ground and Power lines to a 3.3VDC power source. You can use a BEC like this one connected to your flight battery for that, or directly connect power lines to just about any standalone 1S battery.
Note that the 5v delivered from a Pixhawk telemetry port is too high to power the Sonix. It won’t kill it but may overheat it and be unreliable, so connecting the power lines directly to a Pixhawk telemetry port is not recommended. A 4v LDO could be used however, if you prefer that wiring option.
In my case I didn’t have any 4v LDO or 3.3v BEC nearby, so I simply used the 1S battery that comes with the Viper to power the Sonix module. I had a compatible 4 wire micro connector available, along with a six wire Pixhawk compatible connector, so I just made a custom cable, soldering the serial lines to the six wire telemetry connector (two control flow lines, and ground and power unused ), and the power/ground wires to a JST male battery connector to which I attached the Viper battery. Information about telemetry port pin assignments for Pixhawk is available here.
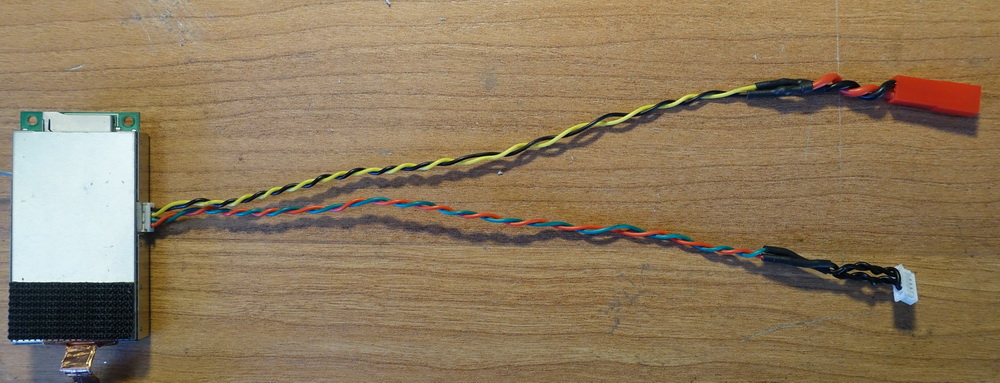
Custom cable: Power and ground pins removed on the telemetry connector, CTS/RTS disconnected but pins kept for additional mechanical strength.
Once connected there are just a few parameters to change for communication to work with a Pixhawk. With your favorite groundstation connected to your Pixhawk make sure the following parameters have the following values (replacing 2 with the telemetry port number you are using):
SERIAL2_BAUD 625000
SERIAL2_PROTOCOL 2 (mavlink2)
BRD_SER2_RTSCTS 0 (disabled)
LOG_BACKEND_TYPE 3
(Note: If you use Mission Planner to set this, simply enter 625000 for parameter)
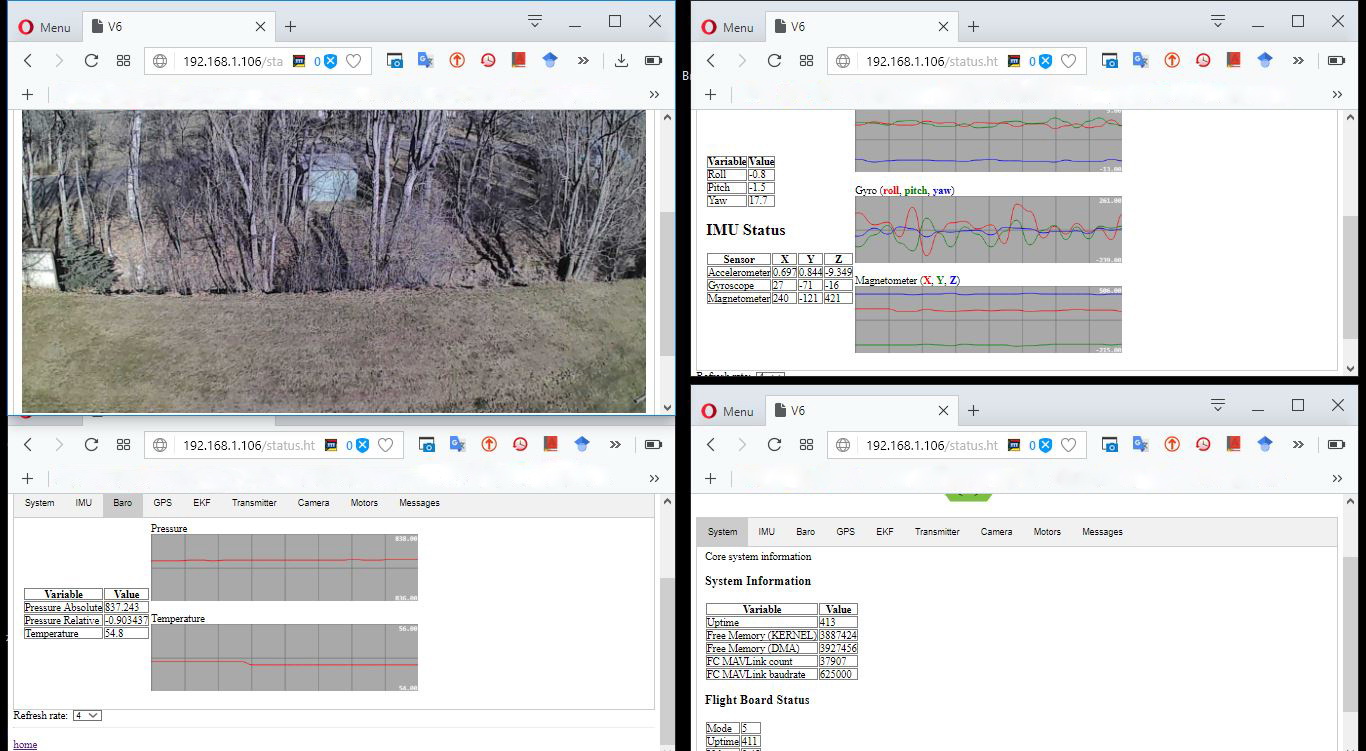
Power up the Pixhawk, and voila, you now have an extremely small companion computer with a web accessible camera (the camera is a very rudimentary one), that you can access via wifi from any computer through its web server. Your Pixhawk flight controller can also be accessed simultaneously by any ground station, via UDP on port 14450: I’ve successfully connected with Mavproxy, Mission Planner, and QGroundControl.
As a tiny companion computer with a digital camera, the Sonix board offers unprecedented functionality for its size. Whether you want to test new flight modes, run latest master, or perform some SITL testing. Or use the camera on a HUD ([with RTSP for instance]), for mission testing, for custom commands, or just for plain fun,.
Once hooked up to any Ardupilot compatible flight controller the interface can be used and customized to a great extent, with further development possible thanks to the FreeRTOS Linux based operating system running underneath. While you won’t run you latest and greatest TensorFlow developed neural network on it (the Sonix runs on a 400Mhz ARM9 with 16MB of flash, for starters), and videos you shoot won’t end up in Hollywood, it’s a fun little board for development with lots of possibilities, offering an additional control camera to boot.
Access mode and station mode
Of note also: In addition to the stock wifi access mode SkyVipers come configured with, the boards also allow wifi station mode configuration. With this option a skyviper can be made to join any existing network. This is quite handy if you want to use several skyvipers at the same time, for swarm testing for instance. Combine this functionality with configuring a wifi router with static DHCP (assigning a fixed IP address to any Skyviper by identifying it with its MAC address) and any Skyviper flight controller and companion computer is now a full citizen on your network as soon as you power it up.
Every camera output, for example, can be viewed simultaneously with a few mouse clicks (with browser plugin to display all at once), as shown below.

Six vipers, six cameras, simultaneously.
The same, with less clutter, can be also be used with vlc (from RTSP streams), resulting in a typical security camera mosaic. Swarming anyone?
In conclusion the Skyviper is a fantastic platform to experiment with. It’s also extremely crash resistant. Using the Sonix board by itself for use with existing copters could therefore end up being a testing platform favorite, depending on its availability as standalone. I’ve heard some talk that this may happen, but no confirmation yet.
A couple quick test flights with and without a gimbal
Given how lightweight the Viper and camera are and without sophisticated dampening and gimbal, videos from stock vipers have significant jello. So I was also curious as to how the camera and Sonix board would perform jello wise on one of my test copters, with and without a gimbal. I found out I had less jello on my test copter than with a stock viper (not surprising given its weight) when I simply attached the board to it, but it was still siginificant.
There are several simple ways to eliminate jello, using for instance wire cables, zip ties, or dampers. In my case the simplest way for a quick test was to use a few very soft vibration dampers that I’ve collected from old disassembled CD drives, so I made a small mount by cutting a piece of balsa and using a small plate I had lying around, stacking the dampeners with M2 screws.The Sonix module was then attached with industrial velcro.
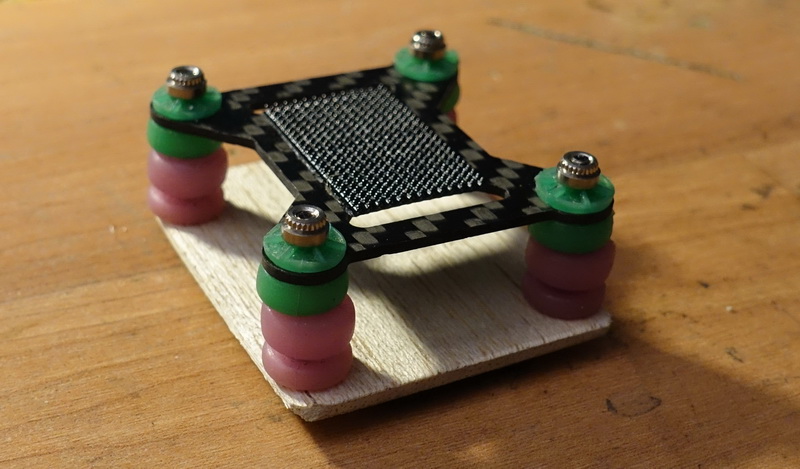
This pretty much eliminated all jello.
Gimbal mount
The smallest gimbal I have is a Zhyyun Tiny2, which works very well with Gopro cameras. It’s overkill size wise for the Sonix board and camera, but I thought it would be interesting to use it and see the result.
The form factor of the board is not well suited for this. I ended up cutting a piece of wood to the same rough dimensions as those of a GoPro 4, mortising an opening to fit the board horizontally. I also added weight on the side to roughly balance the load. A gopro is about 84g and without adding weight or re-tuning the gimbal may not work with a load significantly lighter, vibrating or being subject to unwanted resonance effects.
The test flight unfortunately ended up showing some jello, ouch! (although much less than with a Viper). This can probably be further eliminated with a more appropriate gimbal (like this one, possibly), or some further tuning and a bit more work on the mount for the Tiny2.
Additional disassembly pictures
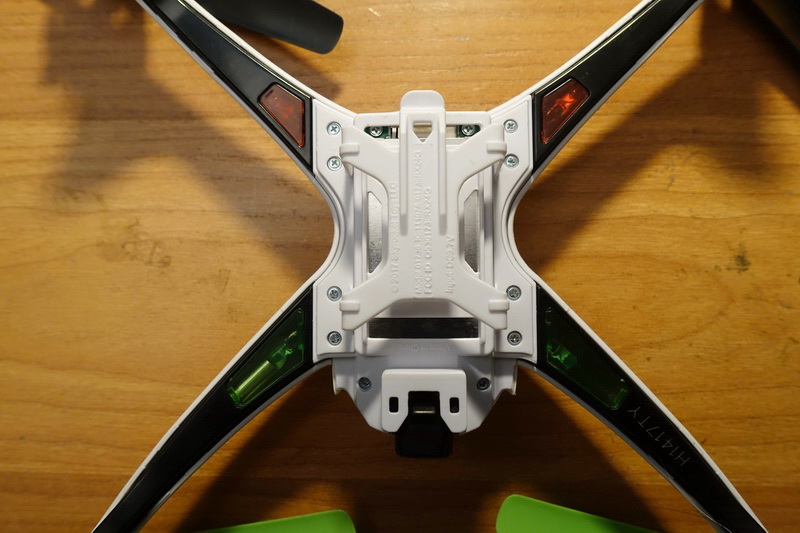
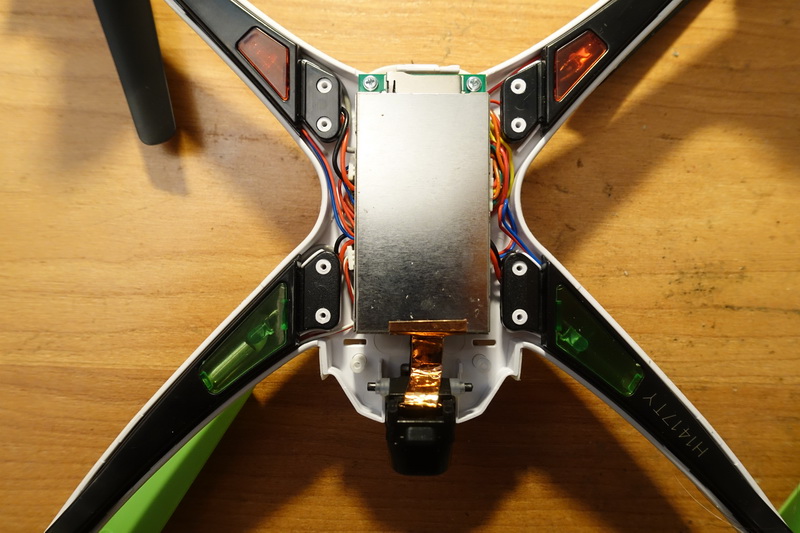
Viper underside.
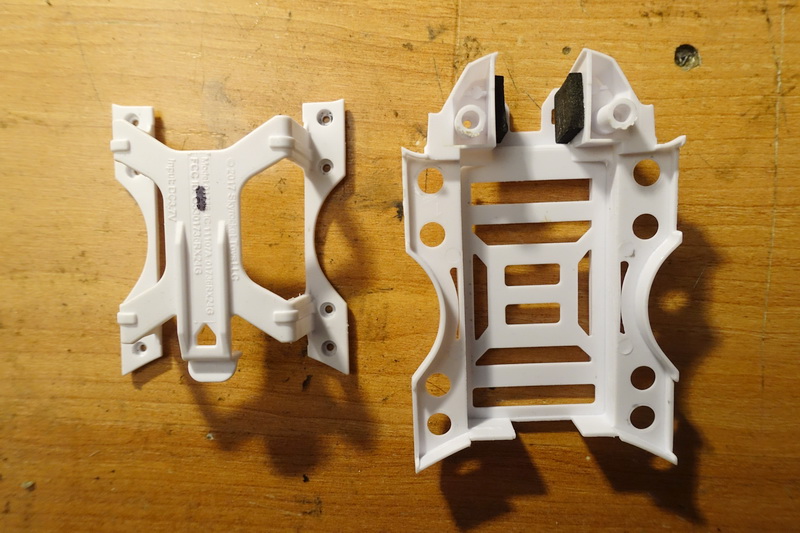
Battery holder and under carriage piece removed.
Sonix module and camera.
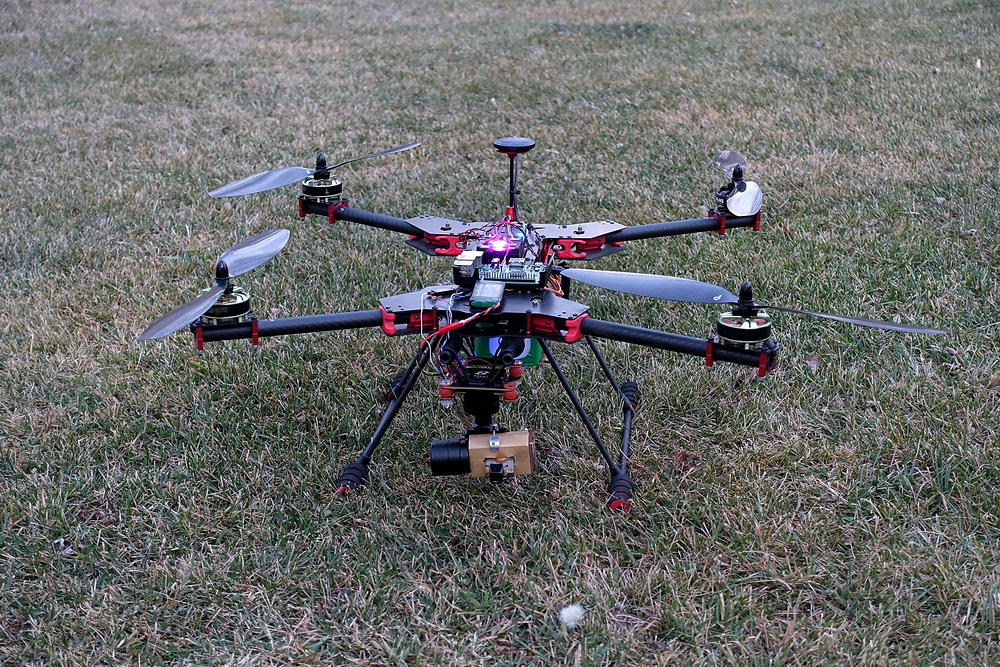
Test copter used, with Tiny2 gimbal and hacked holder for the Sonix module.
See also: SkyRocket and ArduPilot
