This tutorial covers how to export a map from QGIS into Mission Planner. It assumes you already have a map that you want in QGIS (in this case, I just grabbed a free georeferenced pdf).
Background
Planner has supported “inject GE” functionality for a long time, but it’s hidden away and has some quirks to it. From what I can gather, it was built around the specific way that Global Mapper exports tiles, which seems to conflict with the way that QGIS, ArcGIS, and Pix4D export XYZ tiles. I don’t know which is “right”, or if there even is a “right/wrong” standard, but the gist is that Mission Planner expects tiles to appear in folders numbered like this:
Z/X/Y.jpg
and the above-mentioned programs output as
Z/Y/X.jpg
This could be “fixed” in Mission Planner, but I think that “fix” is a strong word, as this would break functionality for anyone it was previously working for (don’t know how many of you are out there).
What I did instead was create a script that converts the naming and copies the files directly into the folder that Mission Planner pulls from. You don’t need to do anything in Mission Planner itself to install the tiles.
Copy Custom Map Script.zip (638 Bytes)
Extract the batch script out of this zip file and drag a folder of map tiles onto it, and wait for it to complete, and you’re done.
Detailed Steps
- Start with a map in QGIS that you want to export (making the map is beyond the scope of this tutorial). I am simply using a georeferenced pdf that I imported into QGIS.
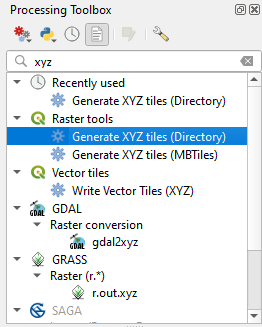
- In the Processing Toolbox, search for “XYZ” and select “Generate XYZ tiles (Directory)”
- Configure the output options
a. Set the extent. Use the button on the right to calculate the extent from a layer, or select Draw on Canvas to create an extent manually
b. Set minimum zoom to 0
c. Set maximum zoom to something like 13-16. This depends how detailed your map is, since the exported map can’t be any more detailed than that anyway. Setting this too high can cause the export to take a long time. Each extra zoom level takes 4x as long as the previous zoom level to generate. Experiment with this setting.
d. Set tile format to JPG
e. Quality 100
f. Output directory. Put this wherever you like. I chose Desktop. You will delete it later.
g. Click Run
- Wait for the run to complete
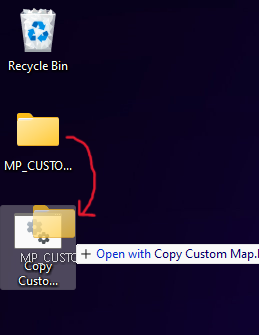
- Place the above script in the folder above where you exported your tiles.
- Drag the exported folder onto the batch script
- Wait for the script to complete. Your map is now installed in Mission Planner.
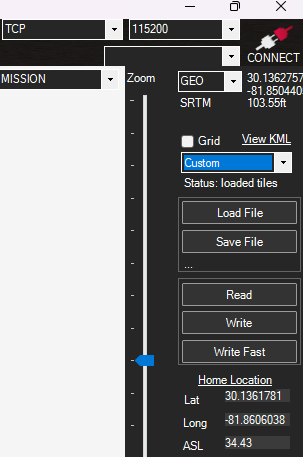
- Open Mission Planner, go to the Plan page, and select “Custom” as the map type.
- You should now be able to see your custom map on the Plan and Fly pages (you’ll need to be zoomed and panned to the right area obviously).


