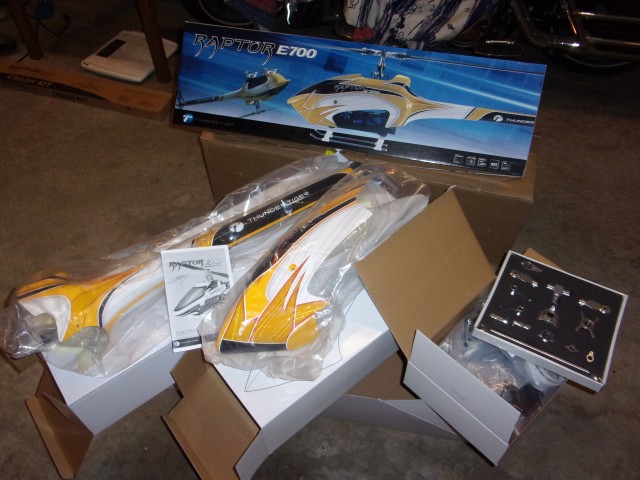
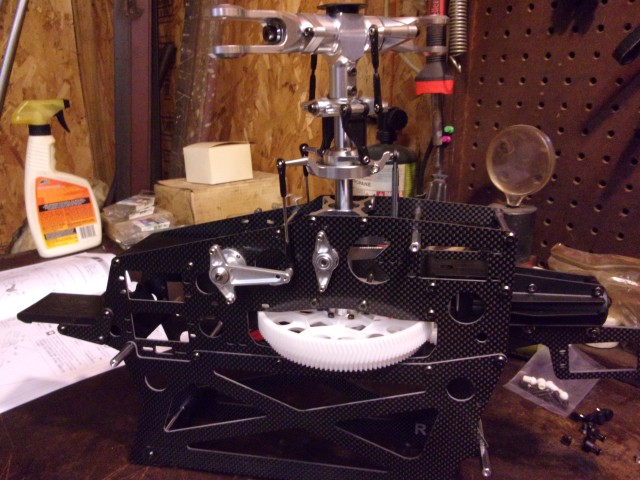
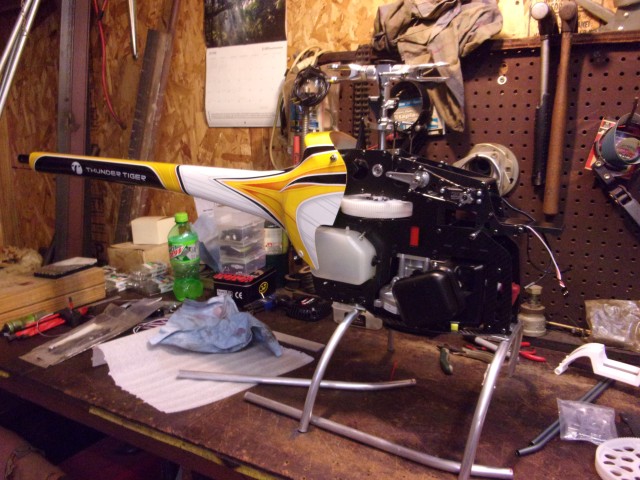
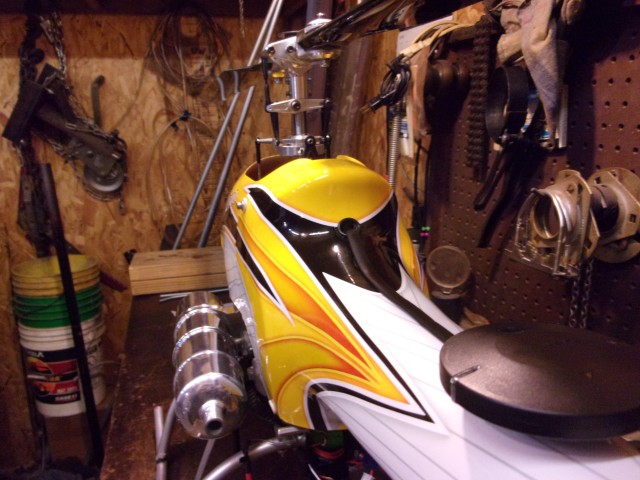
Well, I got this thing from Thunder Tiger and attempting to turn it into a UAV helicopter. I’m not even sure where a person would stuff everything in it with a Pixhawk for electric power. Two of the cyclic servos are directly underneath the FBL unit tray where the Pixhawk has to go. The ESC tray is where the MavLink radio and FPV transmitter will go.
The canopy would be so crammed full of big wires for 12S power that I don’t know if the Pixhawk would even work right due to a big electric motor being an inch away from it, two servos directly below it, and a 160A ESC just in front of it.
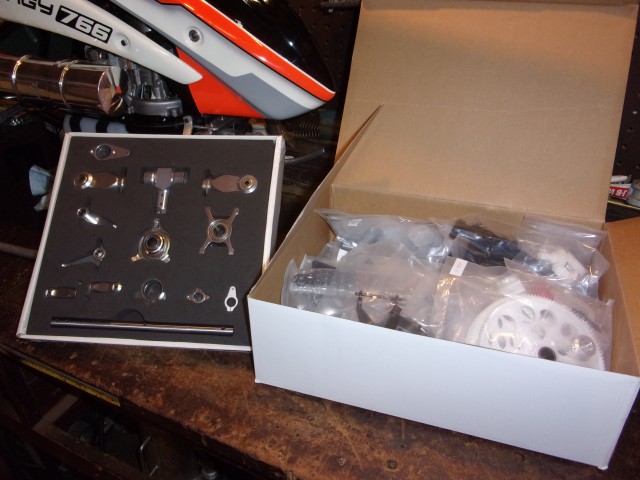
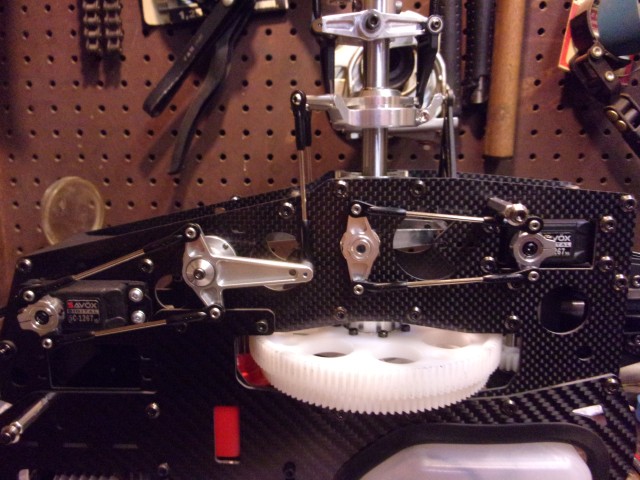
Everything is nicely packaged in the kit and it’s all very high quality stuff. Reverse direction swashplate (swash goes down to increase pitch), 135 deg swash layout, and no anti-rotation guide, instead uses an A-frame.
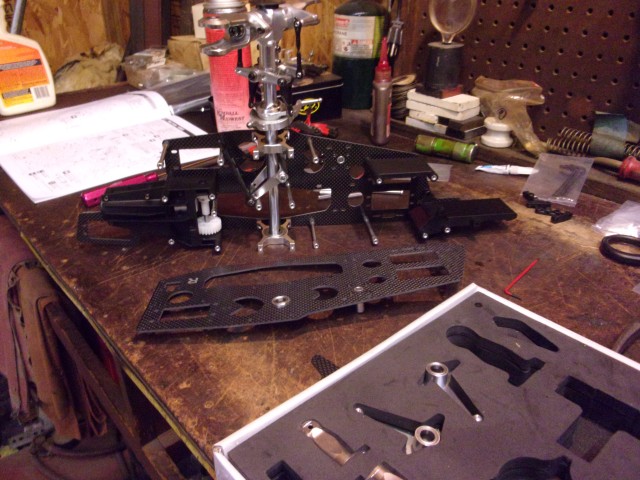
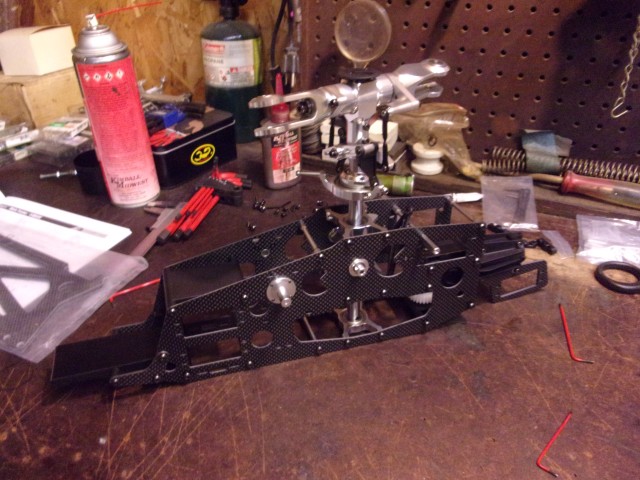
Some photos of the frames going together
Lower frame sides installed:
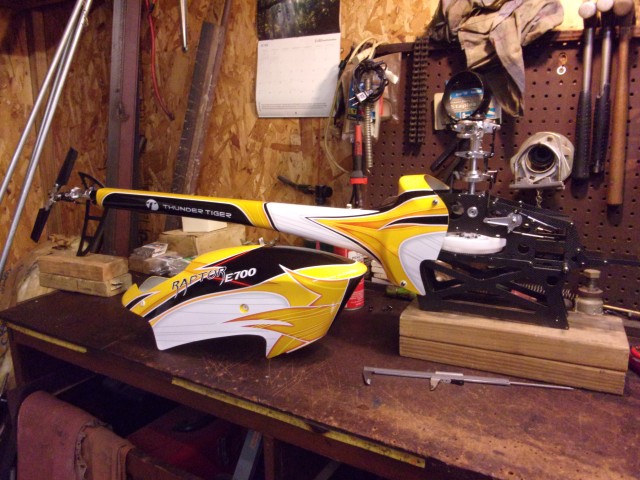
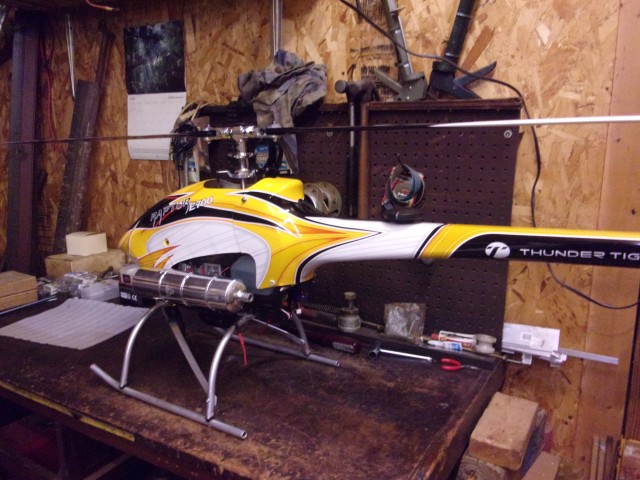
Thankfully it’s not going to be electric powered. This one is getting a Zenoah G230RC gas engine. The lower frames will be replaced with different ones to accommodate the engine mount. The canopy space will be clean without a rats nets of wires and just the connections to the Pixhawk to deal with. The gas conversion kit comes with an extra tray to mount the flight systems/servo power battery in back of the engine. So that will be handy.
Extending the cable for the Here GPS will allow it be mounted nicely on top of the tail fairing, just in back of the cabin. There’s no sense to mounting those things way back on the tail boom with a gas engine because there’s no real magnetic fields to worry about.
Overall, not as happy with the layout of the frame on this Raptor as I am with the big Synergy. The landing gear on this heli is bolted into plastic instead of CNC machined aluminum crossmembers like the Synergy has. So it won’t be be able to carry very heavy payloads hung on the landing gear. I could machine some billet pieces for the landing gear mount and toss the plastic into the garbage can. And I may do that eventually. But initially at least, I’ll be using this heli only for testing.
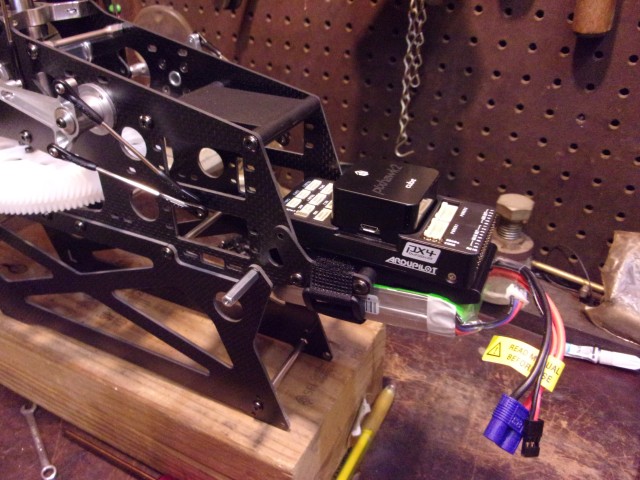
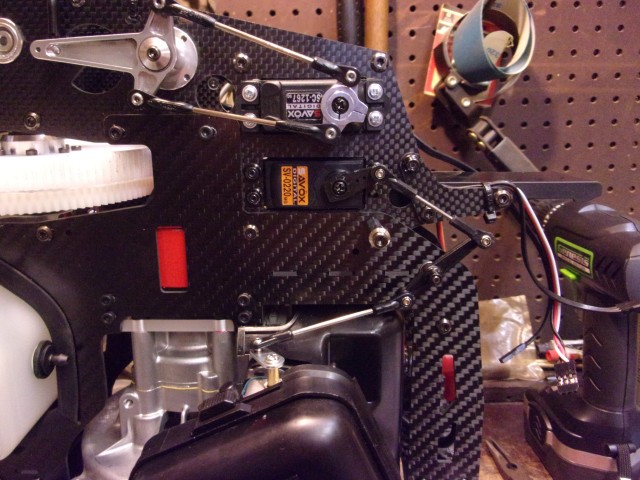
I’m calling this a Thunder Tiger G700 now, since it’s getting a Zenoah powerplant. The original plan involved putting the PH2.1 on the FBL unit tray. That’s not going to work. The PH 2.1 is like trying to mount three FBL units in the space where one is supposed to go. Or may four FBL units. It’s easily twice as long, and twice as high as a typical FBL unit and can’t even get the canopy on the heli with the PH 2.1 on the FBL unit tray.
So the new plan is to mount it on the ESC tray. The ESC tray required some modification to get it to fit there - had to cut the rear two ears off it or it hung off the front of the tray a couple cm, and then had the same problem - couldn’t get the canopy on the heli. Cutting those ears off allowed it to be moved back. The servo connections have to face to the front because there’s three servos that go directly in back of it.
This leaves the upper FBL unit tray open to mount the power module and MavLink radio. The RC receiver will now go in the tray behind the engine and below the main fuel tank in the rear of the heli. Since the electronics power battery was going to go there, now that will be mounted underneath the ESC tray and its mass used to damp vibration for the Pixhawk
This newest plan still should be able to retain the stock look without having wires hanging all over the place and stuff strapped on the side. Although not totally stock because the lower frames are taller to fit the Zenoah in it - gas and nitro engine conversions are pretty popular on these heli’s. Even Nick Maxwell, former TT team pilot flies a nitro-converted E700. Or would it then become a N700?
Oh yeah, one other minor detail… the original idea to put my G230RC in it has been scrapped. That engine is going in my 600. This one is getting a TRM VX300SE stroker. We’re going to put a little more Thunder in the Tiger with some serious power. And she’s going to swing Rail 716’s. I decided this heli will look pretty cool streaking across the sky at 200 km/h and it’s gonna need a little more under the hood.
The FBL unit tray will already fit in the back where the two frame spacers are. The hole spacing is the same, I’m pretty sure. That would be a better location for a small controller if using electric power, as it would then be away from the motor.
One of the problems the small sized controllers have is that they typically have wire connections hanging out the ends and both sides. Which really doesn’t help much for room in a tight space. But in this case I don’t think will be an issue mounting it on the rear.
I’m hoping to be able to use the internal compasses in the PH2.1 mounted on that lower tray.
Not yet. Still waiting for some parts to install the gas engine. And writing some code to support the 135/140 swashplates, which ArduPilot currently does not support.
I have to write a new mixer for the swashplate used on the E700. The problem is in the way ArduPilot does the math in the current three-servo CCPM mixer. It assumes a constant radius for the control links, which 135/140 swashplates do not have. So setting the servo positions for servos 1 and 2 to -45 and +45 does not work.
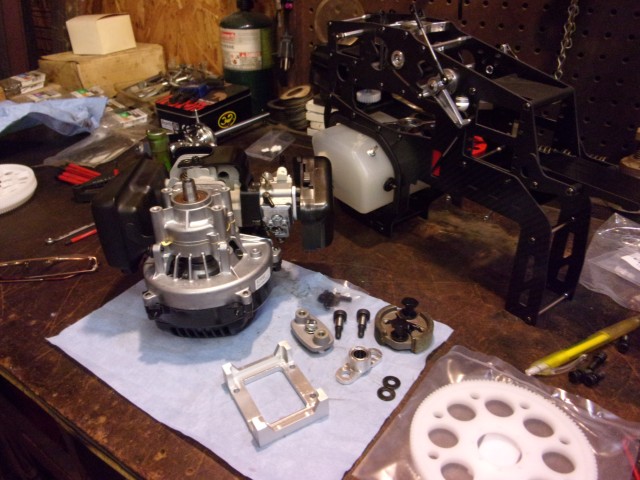
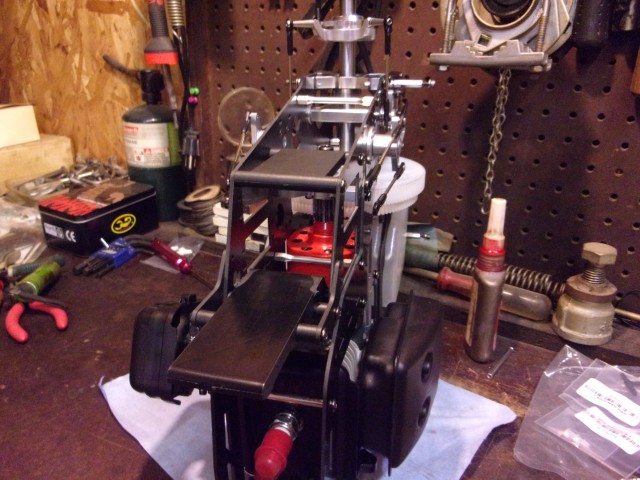
Got around to working on the TT G700 a bit. Managed to get the clutch and motor mount put together. And replaced the stock herringbone gear with a Mod 1.0 straight cut.
Everything fits in the frame pretty nice. Although have to cut some clearance slots in the upper frames for the clutch bell. And the transmission backlash is too tight. So have to take it back apart and slot the holes in the frames a bit so I can adjust the gears.
Fuel tank is 660cc. At the weight of this heli I’d expect about 23.5 cc/min fuel burn so should be able to get 25 minutes flight time with a little reserve fuel left. Although not at first for breaking in the engine - it will be set rich for the first couple gallons of gas.
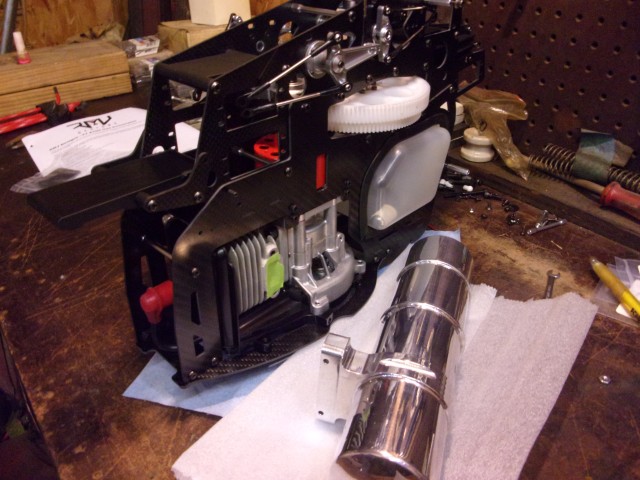
Just have the stock muffler on it right now to keep dirt or whatever out of the exhaust port and cylinder while I’m working on it. I have a TRM Power Pipe for it.
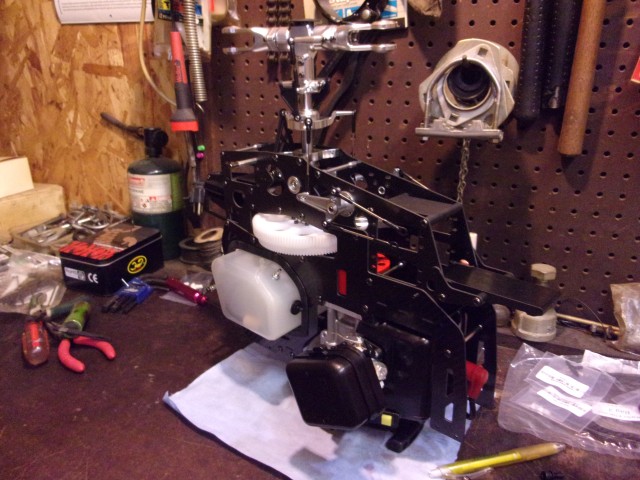
Coming along slowly on the Thunder Tiger build. I got the transmission gears clearanced properly, aligned the engine with the clutch, and locked everything down tight. The frame is very rigid using the engine’s crankcase for a stressed member of the frame and I think it will be a very well balanced heli with the piston engine layout.
The kit even includes a heat deflector shield, that doubles as a frame crossmember, to keep engine heat from getting to the flight electronics.
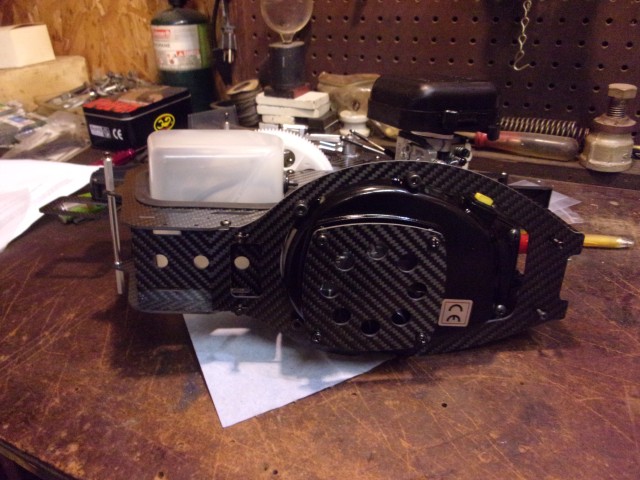
View of the bottom of the frame. I will install aluminum crossmembers right away for landing gear mount and payload bar. These engines are not fun to start with a recoil starter because of the compression ratio. It’s usually either get the rope yanked out of your hand or fling the heli across the field if you really give a good pull. So I removed the recoil torture device and it will be electric start only. I installed the (included in the kit) cooling fan intake cover in place of the recoil starter.
The bottom frame member even has a cutout for the ignition kill switch. This is normally not used unless there is a throttle problem that prevents the heli from shutting down and the engine needs to be killed using the ignition kill switch.
Just below the fuel tank you can see the extra tray that comes with the gas engine conversion kit. This is where the RC receiver will mount. There’s about 30mm of room between the bottom of the fuel tank and the tray. So actually a 2S 5000 battery will easily fit in there as well.
It will soon be ready to start accepting servos and electronics.
I made aluminum plates to mount the landing gear. And they are bolted to billet aluminum blocks in the frame. The plastic pieces were scrapped.
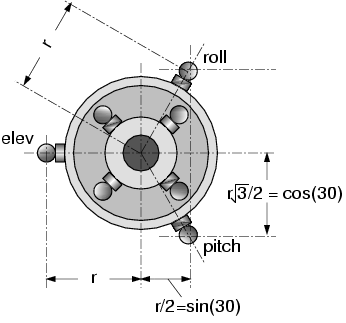
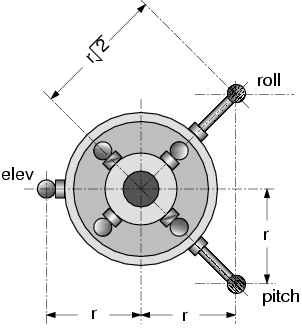
One of the really neat features of the Thunder Tiger is the swash linkages. It uses a 135 layout so ArduPilot’s current mixer does not work with it, as ArduPilot’s mixer assumes a constant radius from the mainshaft to the swash links. So I wrote a new mixer to support this swashplate. It uses a non-scaled 1:1 ratio for a “pure” input to the swash in any direction.
You slide a 3mm shaft thru the pitman arms to lock them, front and rear. This places the linkage in the ideal geometry for the head. If the swash linkages and pitch links are adjusted right, it automatically levels the swash and sets the head to zero pitch with the pitman arms locked.
The servo horns have a core that splines onto the output shaft of the servo. The horn itself can rotate freely on the core. So fire up your servos and set them all to center at 1500 pwm. Lock down the horns to the core with the set screws and clamps. Voila! The head is set perfectly, swash leveled, zero pitch, no adjustments needed in the ArduPilot software to set servo trims or H_COL_MID. Simply set H_COL_MAX/MIN to the desired maximum and minimum pitch and you’re ready to go.
Made some more progress on the Thunder Tiger. Have it on its feet now. And servos installed and extension cables made for the tail and elevator servos. I wanted to retain the tail fairing and I will be able to. I have to make a cutout to accomodate the fuel tank on the right side.
Still have to install the throttle servo and linkage to the carb. It installs in the hole just below the pitch servo.
Don’t have the skids on the landing gear yet either. I’ve decided the flight systems power battery will go in the tray under the fuel tank and the engine governor will install on the tray above the Pixhawk 2.1.
I make my landing gears so it puts a slight amount of forward rake to the frame to give more tail rotor clearance for UAV. I’ve landed in areas before where there’s long grass and had the grass wrap around the tail rotor shaft. The heli not only looks better setting on the ground, the more tail rotor clearance you have for UAV, the better it is.
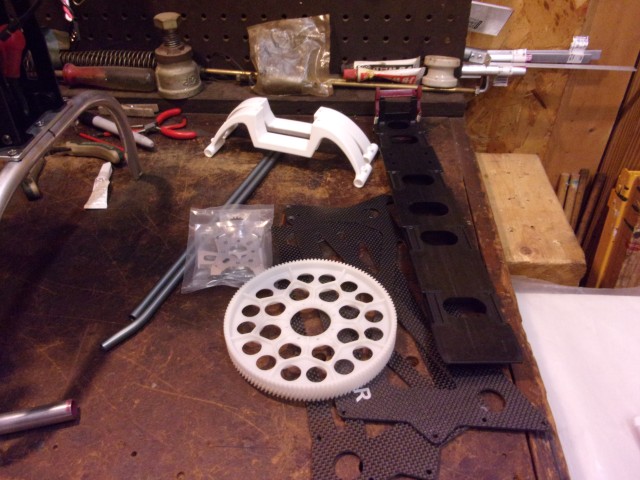
This is all the parts from the electric kit that aren’t used with a gas engine conversion. Not much, really. Lower frame sides, battery tray. motor mount and main gear. The stock landing gear would not be used regardless for a UAV heli.
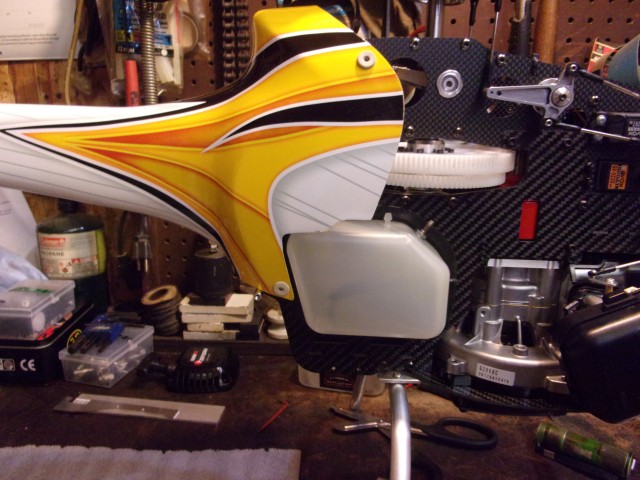
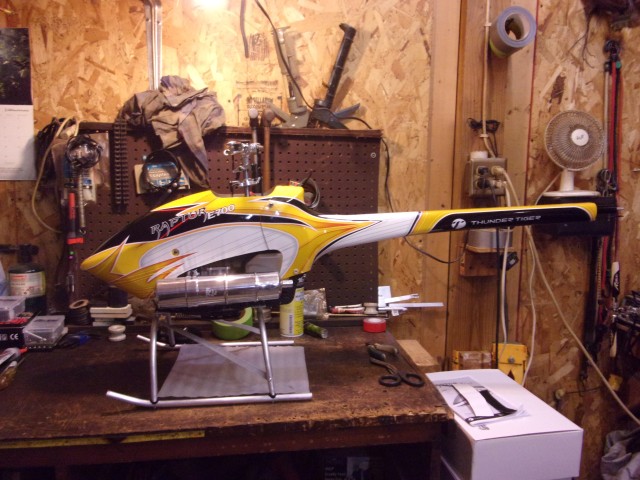
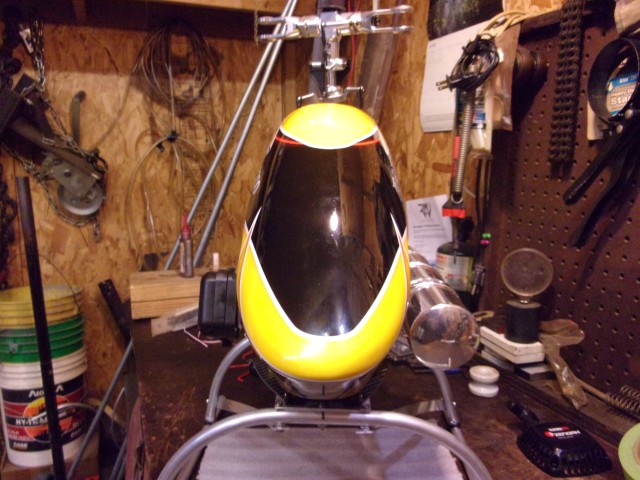
Test fit of the canopy with everything in place, after modification to fit the piston power configuration. It fits pretty nice and the fuselage paint lines match up pretty good.
Plenty of room for the Pixhawk 2.1 under there, without touching the canopy.
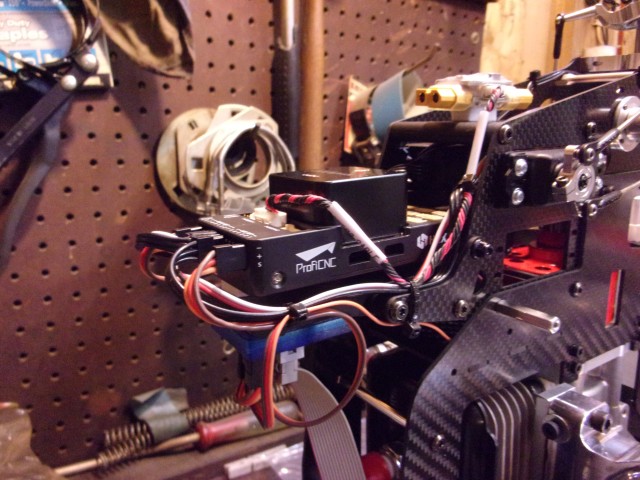
Have many things hooked to the PH2.1 now. All the servos are hooked up. Engine governor is hooked up. Speed sensor for the governor installed. My governor programmer plugs into the data port on the governor and is easy to get at after removing the canopy. Channel 9 is used for the idleups that will be programmed into the governor so that goes to the Aux 1 pins on the PH2.1.
The rest of the electronics installation still to do:
make up servo cable to hook the RC receiver’s S.Bus to the RC IN
make up a longer GPS cable - out of Cat 5. Why don’t they use Cat 5 in the first place?
make up a telemetry cable - the right cable does not come with the PH2.1 if you are using the V1 telemetry radios. Which a lot of people still use.
run power from the PH2.1’s power module to the flight systems battery, which will be in the tray in the rear of the heli - have to make a EC3 to XT60 cable for that
power to the servo rail will come off the load side of the PH2.1’s power module - all we use it for in a heli is monitoring the flight systems power voltage. Even for an electric that little power module is not even close to being big enough to handle 150-200 amps in a heli.
So the only cable that comes with the PH2.1 that’s usable is the one from the power module to the PH2.1’s power port. Even if they did include a telemetry cable for the V1 radios, it wouldn’t be long enough. By the time you twist the ones included to prevent cross-talk on the servo wiring it’s only 5" long. That might work on little quadcopters. But it don’t work on a heli. You have to get that radio far enough away from the servos, and make sure the wiring to it is not run parallel with any servo wiring, or the servos will be so twitchy the heli will be all over the sky.
Why don’t they just include a roll of wire, the plugs and pins and users can make up their own cables? Like 95% of the time, that’s what we end up doing anyway. Any of the cables included barely reach off the Pixhawk’s mounting tray - clearly designed for little quads, and not larger vehicles like heli’s
The new H3-140 swashplate type works fine. I didn’t mention it in the video but I also coded elevator to collective compensation to correct for collective interaction at full collective pitch. Or if the user desires can set a elevator to collective mix to automatically feed in collective on down elevator when accelerating the heli, etc… The param to set it is H_ELEVATOR_COMP.
And I coded aileron to collective compensation to correct for collective interaction on aileron input at full collective range.
These features are standard in FBL units. ArduPilot has never had it before. It only works on H3-140 swashplates at this point. If we eventually scrap the universal swashplate setup with adjustable servo positions and define swashplate mixes like FBL units do, these features can be applied to the other swashplate types as well.
Edit:
Added Note: the servo position params are totally ignored by the H3-140 swash type. Those are only still used by the so-called universal setup, that is not really universal.
As long as I now have the Pixhawk fired up, I went thru the governor and throttle curve setup as well
Make up some more cables for GPS unit and telemetry radios, plumb the fuel system, go thru all the settings to verify them, and this heli is very close to a first start up and ground run for engine breakin.
It flies. Actually pretty nice for being untuned. Using the same throttle curve I use for the 766G and it’s pretty close - 1,530 rpm headspeed. Vibes less than 10 on all three axes with the PH2.1 mounted to the ESC tray with three blocks of the foam tape that comes with it.
I flew the Raptor 700 Gas again this morning and tuned the rate PID’s, which took about 10 minutes. Tuning the PID’s greatly improved its handling qualities, providing some damping for the control inputs. I tried it in Stabilize and the attitude controller works nicely.
I’m using the internal compasses in the PH2.1 and no problems with magnetic interference from the pitch and aileron servos directly to the rear of the unit. Which I’ve found to be pretty typical of engine powered helicopters - they just don’t have the huge magnetic fields that electric powered vehicles have. The engine’s magneto is way down at the bottom of the aircraft and just doesn’t cause any interference for the compasses.
At only 14.2 lbs takeoff weight, full of gas, this is a very powerful helicopter. I don’t believe in running extremely low headspeed because it really hurts the performance of a heli. With piston engines that need to run above the peak of their torque curve you actually get better fuel burn running the head faster than what will give best flight time with an electric.
1,590mm main rotor diameter @ 1,550 rpm gives 423 fps blade tip speed. In Idle2 @ 1,900 rpm I have 520 fps (355 mph) blade tip speed - about in the same category as full-size light utility heli’s. At only 0.66 lbs/sq ft disc loading it easily has the power to hit 100 mph sustained in level flight.
The engine’s hp peak is at 13,500 rpm. 1,900 rpm headspeed puts it right at the peak of the hp curve with the 7.058:1 gear ratio. With close to 6hp under the hood this heli will not have any problems keeping up to the some of the fastest RC aircraft out there
Some final photos of this heli project. It is now tuned and flies beautifully. Has gobs of power. And just sips fuel. I flew it for 10 minutes 14 seconds on the flight timer this morning, starting with a full tank, plus about 7 minutes of ground idling making various settings, and what’s gone from the fuel tank is all it used. Most of the flying this morning was hovering and tossing it around to check the rate controller. Although I did fly a couple circuits and figure 8’s with it at about 25 m/s in Stabilize over the field after I got it tuned. Tried both Alt Hold and Loiter and it worked perfectly.
I re-installed the recoil starter for backup in case the electric starter doesn’t work. The payload bar will go on the belly - bolts are built into the landing gear to bolt it on, but no plans to add an aux fuel tank at this time, which only takes about 5 minutes to install. The fuel system is already configured for it.
Couple little details left like putting some rubber bumpers on the front of the landing gear skids, and add a tailpipe to the muffler to blow the exhaust downward.
HI Chris,
interesting project.
I have no experience other than electric powered Helis. I am surprised that everything will stay cool enough with that enclosed Heli.
Looks really nice!!
Fred, it’s a RC format fan-cooled engine. The cylinder and head is shrouded, the fan pulls air in the bottom of the engine and it exits the exhaust port side of the cylinder as shown in post 8. Pretty much identical to how piston engines in full-size heli’s are cooled.