So I have two great guys working on training documentation for the 3D printing. Both are fresh eyes on this but I wanted to give them a basic template to start with. This is just a first draft but should help others as well to the basic process we are using. When I get a more complete draft I will update it here. These technicians will be writing the documentation that will be living on our LMS, LearnNewTech.org. (Not live yet)
Steps For 3D Printer Setup
1. Unpack and organize parts so all are visible
2. Read Manual provided by Jeff or download @ https://www.support.longer3d.com/_files/ugd/6b06a4_29115bfd8142443392b24a285d50847a.pdf
3. Make sure the power switch is set to 115v on the power supply
4. Put together the 3D printer following the manual and youtube videos: Longer LK5 Pro - 3D Printer - Unbox & Setup and How to Install FDM 3D Printer, Only 10 Steps - Longer LK5 Pro
5. Leveling your bed is by far the hardest thing for newbies to grasp. Page 11 of the manual has some good diagrams. Good infographic: https://external-preview.redd.it/NO0wAH20AGJvvF1ZUsLA89Qh_Irdb57T3PL4JoT1uqs.jpg?auto=webp&s=2191f0285a9e78b1cfa555c661a83141a1eaad28 Great Video and gcode to help bed level and understand what you are doing: Bed Level - CHEPclub
6. Load the test filament-don’t expect great results from this stuff. There should be a load filament option in the menu, or just set the extruder to 205C, squeeze the extruder spring, and feed filament in until it extrudes from the hot nozzle.
7. Make sure the microSD card is installed in the LK5-pro and pick any print gcode and get started. =)
If that completes successfully you can move on to setting up OctoPrint and Klipper Fimware on the Raspberry PI.
Steps for OctoPrint and Klipper install here:
Install the 3D Printed Screen Rotator.
The stock hot end (Nozzle, Heat Block, Heater, Thermistor, Heat Break, Heat Sync, Fan, Bowden PTFE Tube) includes Teflon (PTFE) tubing all the way down touching the nozzle. Normally this isn’t an issue because PLA and others are printed at 200Cish. We print LW-PLA at 250C or the max temp that the manufacturer recommends. This is because soon after that temp Teflon starts to off gas and you can get Teflon poisoning. This is too close for my comfort and to have in my home. This is why we opted to go with all-metal hot ends for these longer LK5-PROs. It moves the Bowden PTFE tube up to the top of the heatsink where it stays nice and cool. (I can touch the top of my heatsink) We will also be testing “Volcano hot ends” that have a longer heat zone, this should allow for a lighter foam. In your kits you have an off brand “Micro Swiss” Upgrade (Casey) and V6 Upgrade (Matt). I will help write the documentation for the Volcano upgrade. We are doing this so that if supply is low, people have options. If you find good documentation during your research, please save it and keep it organized. Half the battle is saving the research we find so that we can use it later and share it later.
During the hot end upgrade process you will also be installing your 3D-Touch Bed level sensors.
BIGTREETECH (Or Micro Swiss) All Metal Hot End Upgrade:
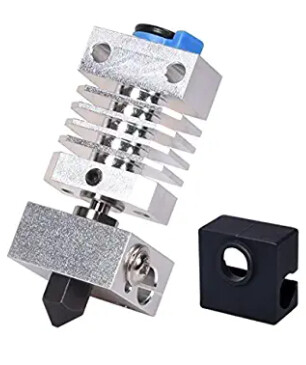
This is the easiest as all you have to do is install the hot end in place of the old stock hot end. You can use the heater and thermistor that is already there. The 3D-Touch sensor installs on the left side where the two bolts keep the fan housing attached. There is a 3D printed part that the sensor gets installed on. Then run the wire to the board and attach.
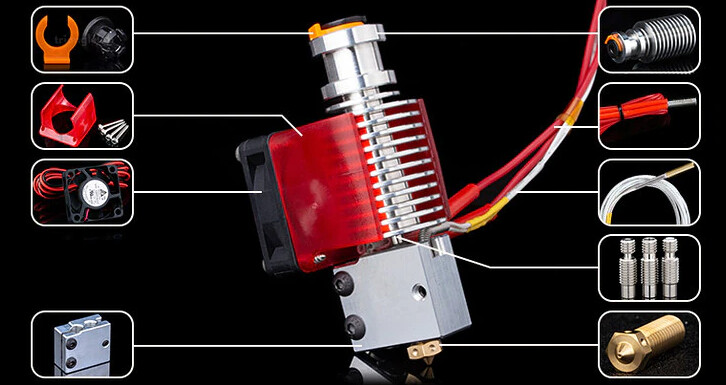
Trianglelab All Metal V6 Hot End Upgrade:
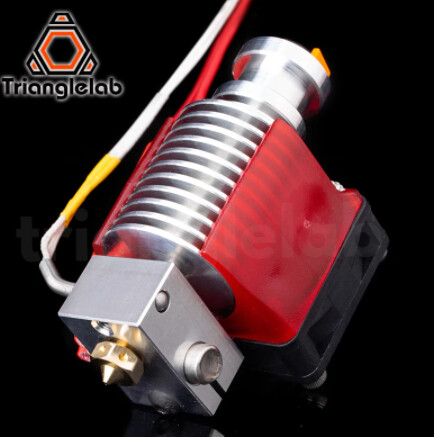
Requires replacing the whole hot end assembly with 3D printed parts and new fans. We will be using a V2 Petsfang with single 5015 fan + heatsink fan. What Files 2 Print Modular v2 and Modular Titan Direct - Google Drive
Volcano Hot End Upgrade:
Requires replacing the whole hot end assembly with 3D printed parts and new fans. We will be using a Volcano Petsfang with single 5015 fan + heatsink fan. What Files 2 Print Modular v2 and Modular Titan Direct - Google Drive
Calibration:
Once you get the hot end and BL-Touch installed it is calibration time! Go through this tab by tab: https://teachingtechyt.github.io/calibration.html Take notes as you find things that are difficult or unclear on his site.
When you get to eStep calibration it is called Rotational Calibration in Klipper: https://github.com/Klipper3d/klipper/blob/master/docs/Rotation_Distance.md#calibrating-rotation_distance-on-extruders
Then Run "Probe_Calibrate"
Then Run "Manual Bed Level"
Then Run "Bed_Mesh"
This procedure needs to be done anytime the Hot_End is adjusted or messed with.
Software:
Slicer Cura: Ultimaker Cura: Powerful, easy-to-use 3D printing software
Models - https://thangs.com/
Our OSAR model: Thangs | The fastest growing 3D community | Geometric Search