MAVProxy tools for terrain planning
One of the obstacles in adopting the terrain planner described above is that it is complicated to configure and run. There are many steps, custom terrain maps must be created and it is too easy to make inadvertent errors regarding the choice and consistency of map datum and other coordinate conventions.
As an intermediate step to a full integration of the off-board terrain navigation into ArduPilot, I’ve started to put together some tools in a MAVProxy module to make it easier to use a terrain planner. The module terrainnav uses a version of the ETHZ planner fully implemented in Python. It is not as fast as the C++ version, but fast enough for prototyping and generating waypoint missions over maps around 10km square.The other advantage is that it depends on a version of the OMPL Python bindings that may be installed with pip, so there are no C++ compile steps required to get up and running. The next version of OMPL (1.7) looks like it may contain a state space model suitable for airplane planning, and the hope is that it will be a drop-in replacement for some of the time critical sections of the current library.
Install
The terrain_nav_py Python package for the planner may be found here: GitHub - srmainwaring/terrain_nav_py. It can be installed by cloning the repo and installing with pip (using a virtual environment is recommended):
# clone and install
git clone https://github.com/srmainwaring/terrain_nav_py.git
cd terrain_nav_py/
python -m pip install .
# run the tests
pytest .
Alternatively the package can be installed directly from GitHub:
python -m pip install git+https://github.com/srmainwaring/terrain_nav_py.git
The installer should work for Python 3.10, 3.11, 3.12 on macOS and Ubuntu, either arm64 or x86_64. The CI tests run for Ubuntu 22.04 and 24.04.
The source install is useful to understand the planner in detail and experiment with various options not exposed in the MAVProxy tools.
The MAVProxy module may be found in this PR:
It will need to be installed from source:
git clone https://github.com/srmainwaring/MAVProxy.git -b prs/pr-terrain-nav
pip install -U .
Or use the -e flag if an editable install is required for stepping through in a debugger.
Usage
Start a SITL session with a quadplane. Here’s an example that sets the home position the the Brecon Beacons National Trust car park (no real flying allowed sadly…)
sim_vehicle.py --debug -v ArduPlane -f quadplane --custom-location="51.872565163811664, -3.4788544705811075, 452, 0" --console --map
Load the terrainnav module
FBWA> module load terrainnav
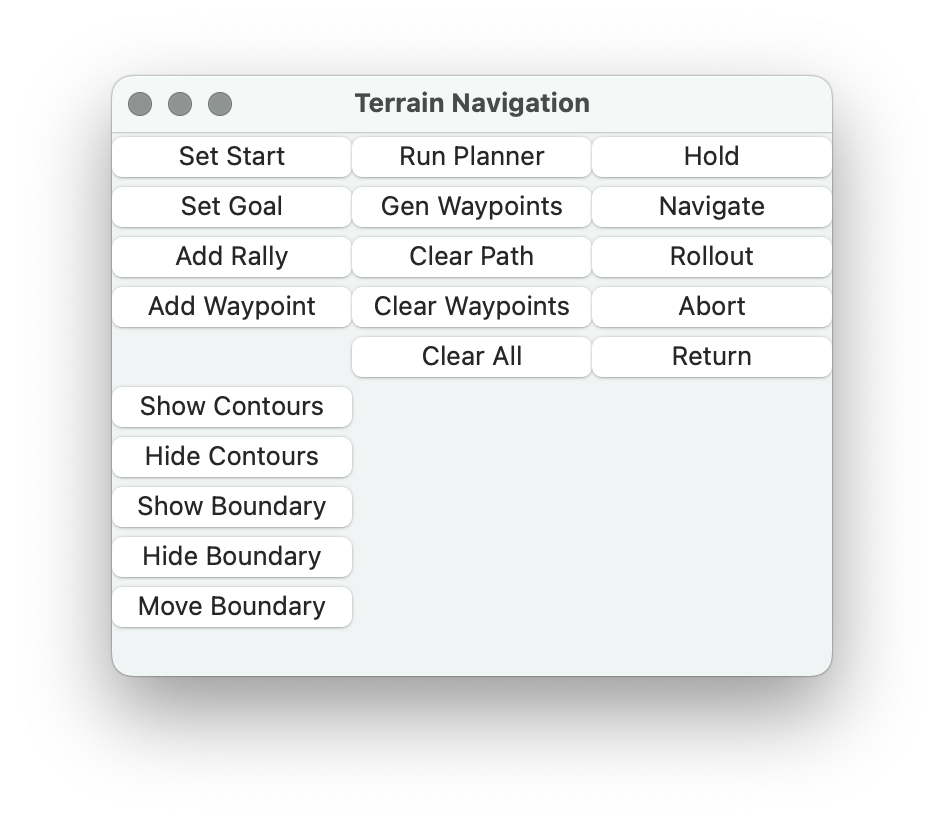
Not all the buttons are functional, the navigation buttons (Hold, Navigate, etc) and Add Rally and Add Waypoint buttons are for a later version supporting an off-board controller.
Show Contours / Hide Contours toggle the display of terrain contours based on the SRTM1 or SRTM30 terrain data made available by the existing terrain module.

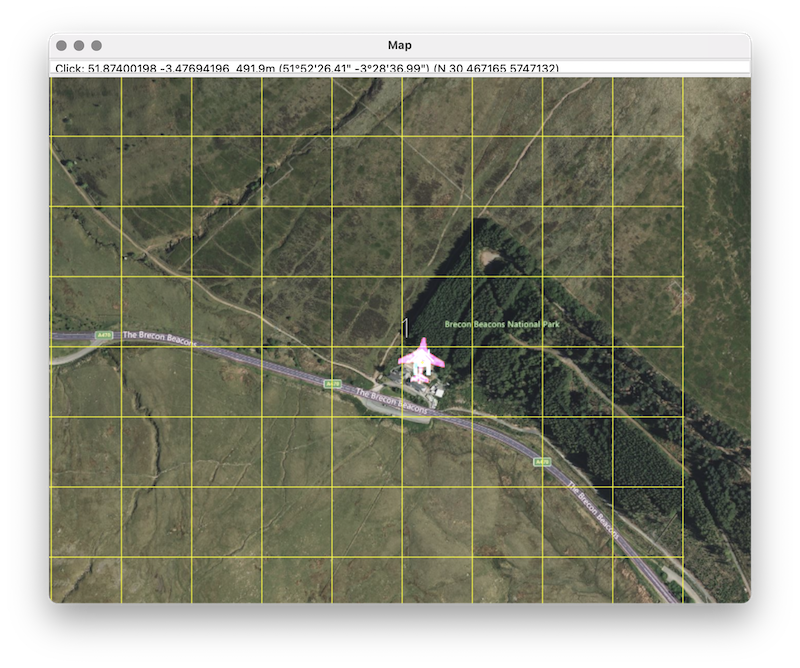
Click a location in the map and click Set Start to select a start location. If the circle does not clear the surrounding terrain the circle will be red:
Select an alternative location until the start circle is green.
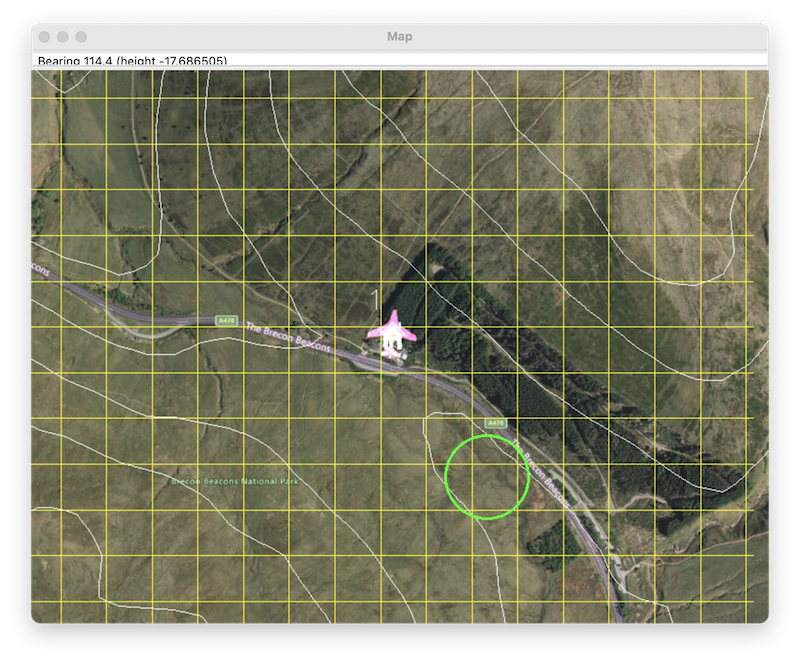
The terrain contours help to locate a suitable start position.
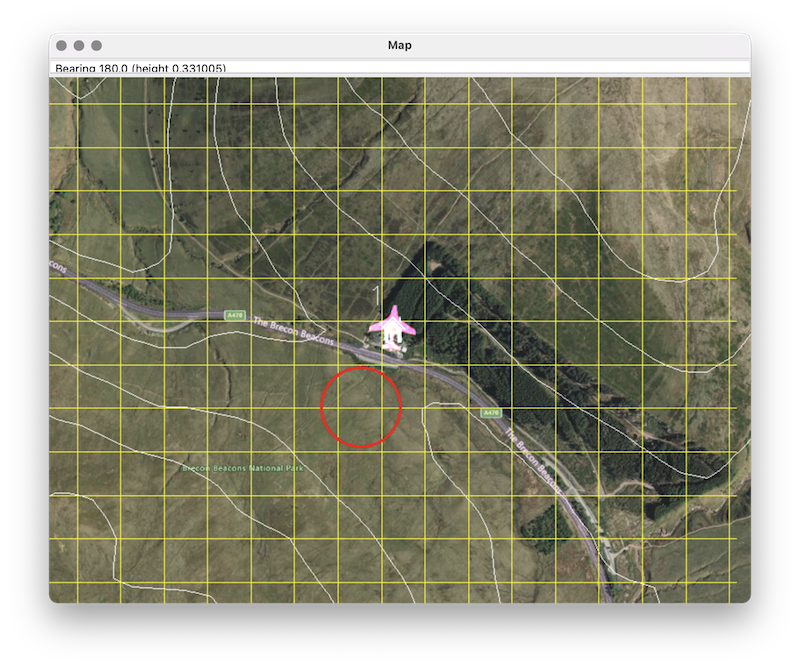
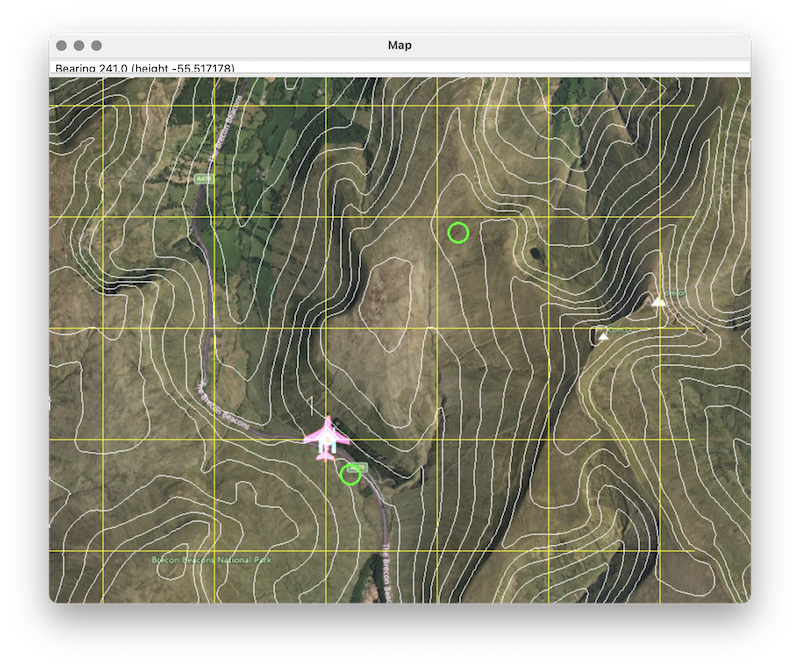
Zoom out on the map and repeat with a goal location:
The planner searches within a pre-determined area which can be seen by clicking the Show Boundary button.
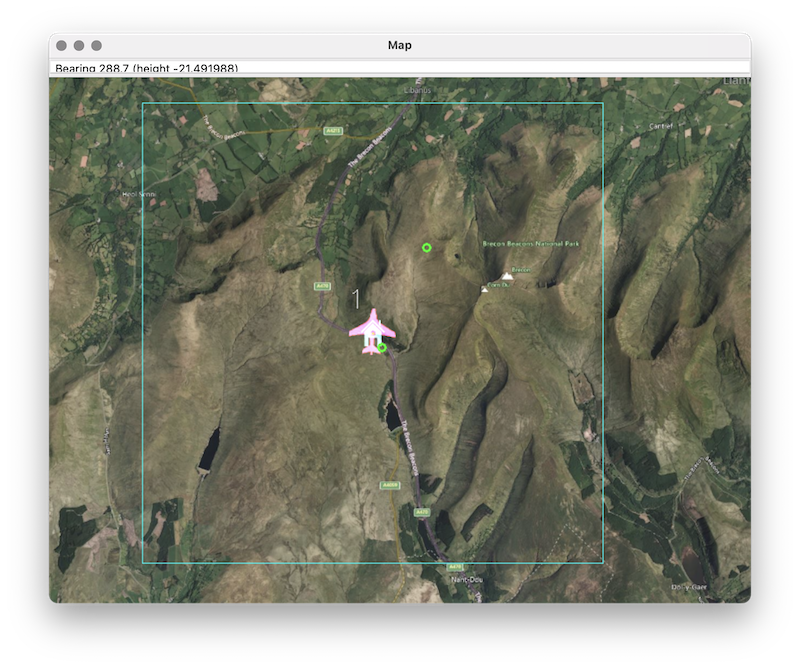
Both the start and goal positions must lie completely inside the boundary. The planner region (called the workspace in the OMPL documents) is initially centred on the vehicle home position, but may be re-centred by clicking the map and using the Move Boundary button. Moving the search region can sometimes help the planner find a solution if one of the end points is near the boundary edge.
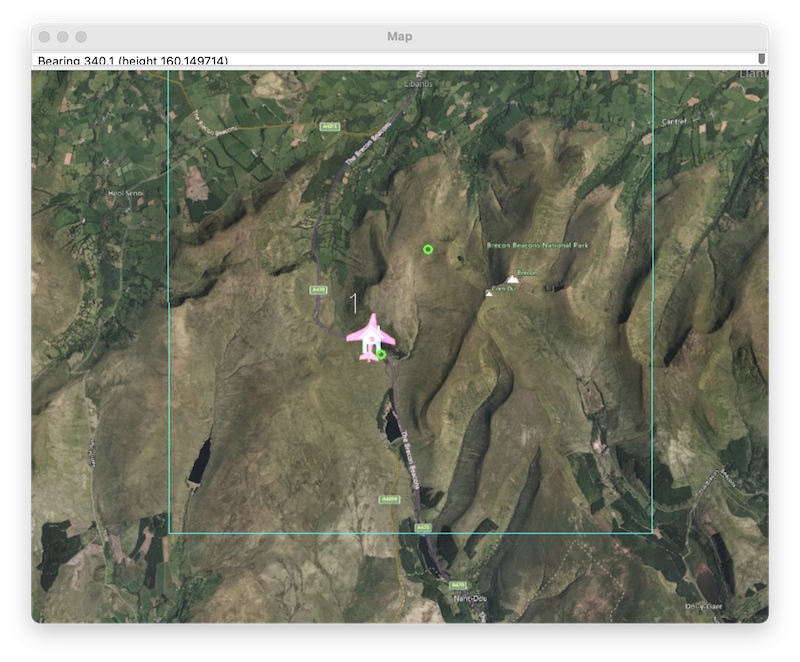
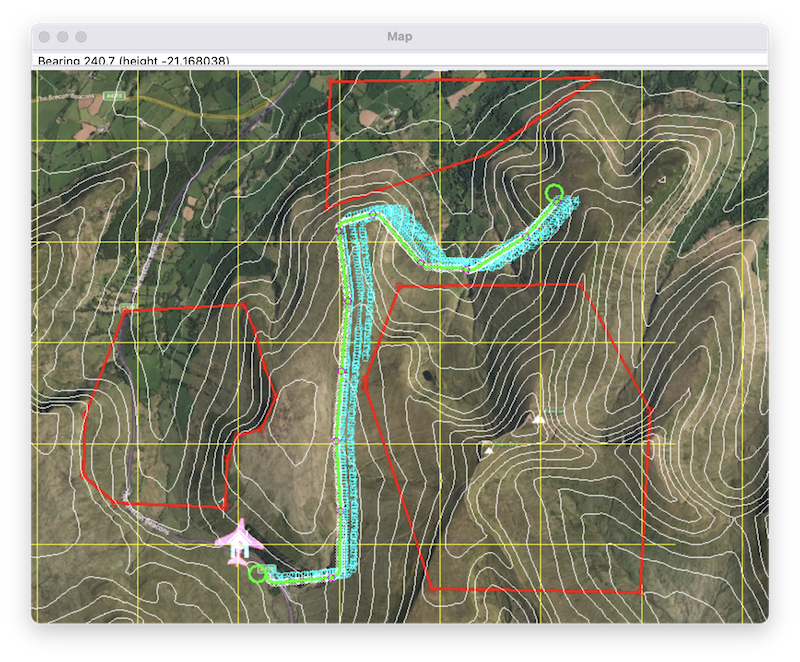
Click Run Planner to solve for a valid path between the start and goal.
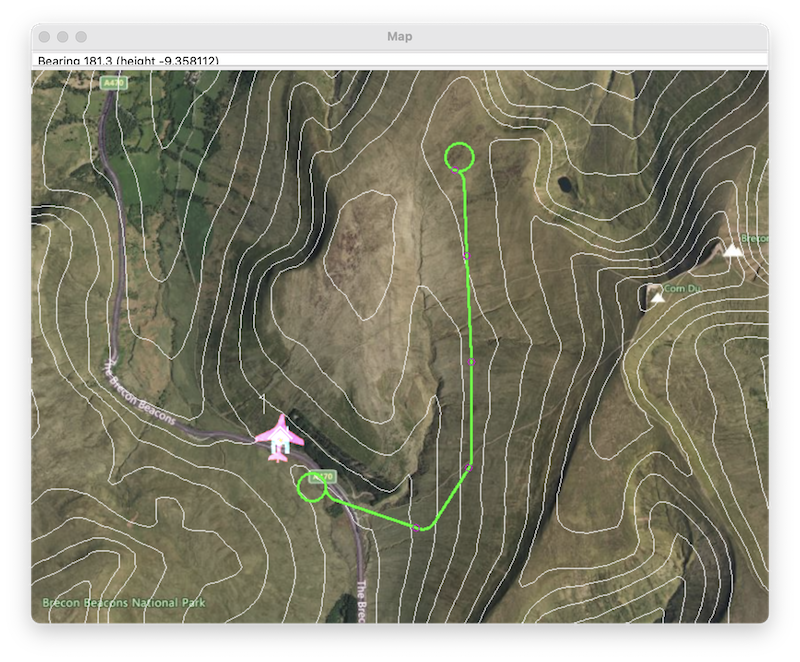
If the path clears the terrain it is coloured green, otherwise red. The small magenta circles along the path denote the states that are connected by the Dubins paths. If the planner cannot find a solution the states representing the best approximation are shown, but no path is generated.
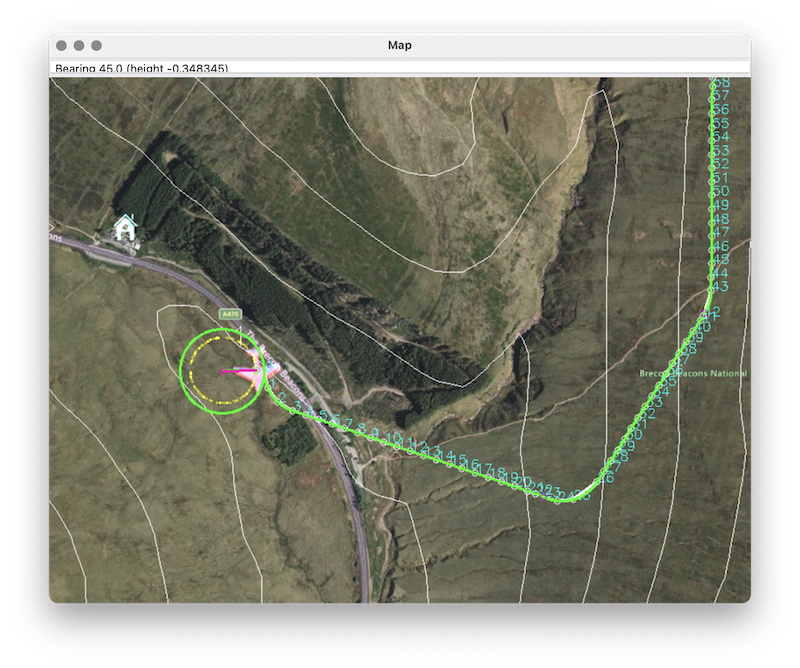
The Gen Waypoint button samples the path and creates a series of waypoints that are sent to the vehicle.


To fly the mission, place the plane in QLOITER, arm and takeoff:
FBWA> QLOITER
QLOITER> arm throttle
# takeoff
QLOITER> rc 3 1800
# hover at around 60m
QLOITER> rc 3 1500
Then use the Fly To map command to place the plane in a loiter at the start circle:
Finally switch to AUTO to follow the path:
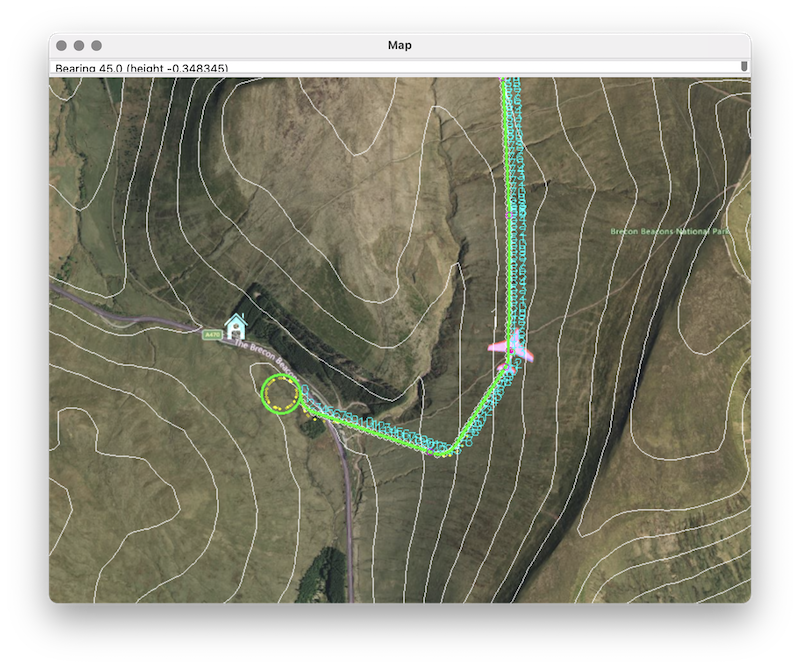
The mission has no terminal loiter, and the plane will then attempt a simple RTL, which does not usually end well in steep terrain.
These and other shortcomings will be addressed as work continues.
Update
One of the benefits of using a Python version of the planner is that extensions to the state validity checker are straightforward: for example adding exclusion polygon fences.