A guide to using the ETHZ Autonomous System Lab terrain_navigation library in ArduPilot using ROS 2 and the AP_DDS library. This is a work in progress being developed jointly with @rfriedman and Jaeyoung Lim (ETHZ ASL).
Overview
The terrain planner enables low altitude navigation in steep terrain for fixed wing vehicles. The extension to ArduPilot involves porting the terrain navigation library to ROS 2, replacing the existing mavros interface with DDS, and adding support to ArduPilot Plane for off-board path guidance.
Motivation
Open PRs
- Plane: handle guided path requests in GUIDED mode #26328
- DDS: add guided path external control and implement for plane #26339
- AP_DDS: publish gps global origin #26409
Work in progress
The two branches below incorporate open PRs and extensions to the terrain navigation library and ArduPilot to replace all mavros nodes with calls into ArduPilot DDS. In some cases this can be done simply by remapping topics, in others it is necessary to run a small bridge node (mavros_dds_bridge.py) that carries out forwarding of services and mapping messages between the systems. Eventually the bridge should be deprecated as ROS 2 message types and services for aerial vehicles are standardised.
- GitHub - srmainwaring/ardupilot at wips/wip-terrain-nav
- GitHub - srmainwaring/terrain-navigation at wips/wip-combined
Installation
ArduPilot with ROS 2
Follow the ArduPilot Dev wiki instructions to set up an ArduPilot ROS 2 SITL environment and verify that the ArduPilot DDS node, topics and services are visible in the ROS 2 CLI. Once working, switch the ardupilot branch to GitHub - srmainwaring/ardupilot at wips/wip-terrain-nav and rebuild. There should be additional topics /ap/gps_global_origin/filtered and /ap/mode available.
% ros2 node info /ardupilot_dds
/ardupilot_dds
  Subscribers:
    /ap/cmd_gps_pose: ardupilot_msgs/msg/GlobalPosition
    /ap/cmd_vel: geometry_msgs/msg/TwistStamped
    /ap/joy: sensor_msgs/msg/Joy
    /ap/tf: tf2_msgs/msg/TFMessage
  Publishers:
    /ap/battery/battery0: sensor_msgs/msg/BatteryState
    /ap/clock: rosgraph_msgs/msg/Clock
    /ap/geopose/filtered: geographic_msgs/msg/GeoPoseStamped
    /ap/gps_global_origin/filtered: geographic_msgs/msg/GeoPointStamped
    /ap/imu/experimental/data: sensor_msgs/msg/Imu
    /ap/mode: ardupilot_msgs/msg/Mode
    /ap/navsat/navsat0: sensor_msgs/msg/NavSatFix
    /ap/pose/filtered: geometry_msgs/msg/PoseStamped
    /ap/tf_static: tf2_msgs/msg/TFMessage
    /ap/time: builtin_interfaces/msg/Time
    /ap/twist/filtered: geometry_msgs/msg/TwistStamped
  Service Servers:
    /ap/arm_motors: ardupilot_msgs/srv/ArmMotors
    /ap/mode_switch: ardupilot_msgs/srv/ModeSwitch
  Service Clients:

  Action Servers:

  Action Clients:
Terrain navigation
Follow the instructions in the ros2 branch of the terrain_navigation README to clone and build the library and dependencies in the same colcon workspace used in the step above for ArduPilot with ROS 2.
Add the remote for the work-in-progess branch of terrain_navigation: GitHub - srmainwaring/terrain-navigation at wips/wip-combined and switch to the wips/wip-combined branch, then rebuild the workspace.
Usage
A number of terminals are required to run the planner and simulation. In each one ensure to source the workspace before running any ROS commands.
Launch ArduPilot SITL with DDS and a micro-ROS agent (UDP) for a quadplane:
ros2 launch terrain_navigation_ros ardupilot.launch.py
Run an interactive MAVProxy session connected to the SITL instance:
mavproxy.py --master 127.0.0.1:14550 --console --map
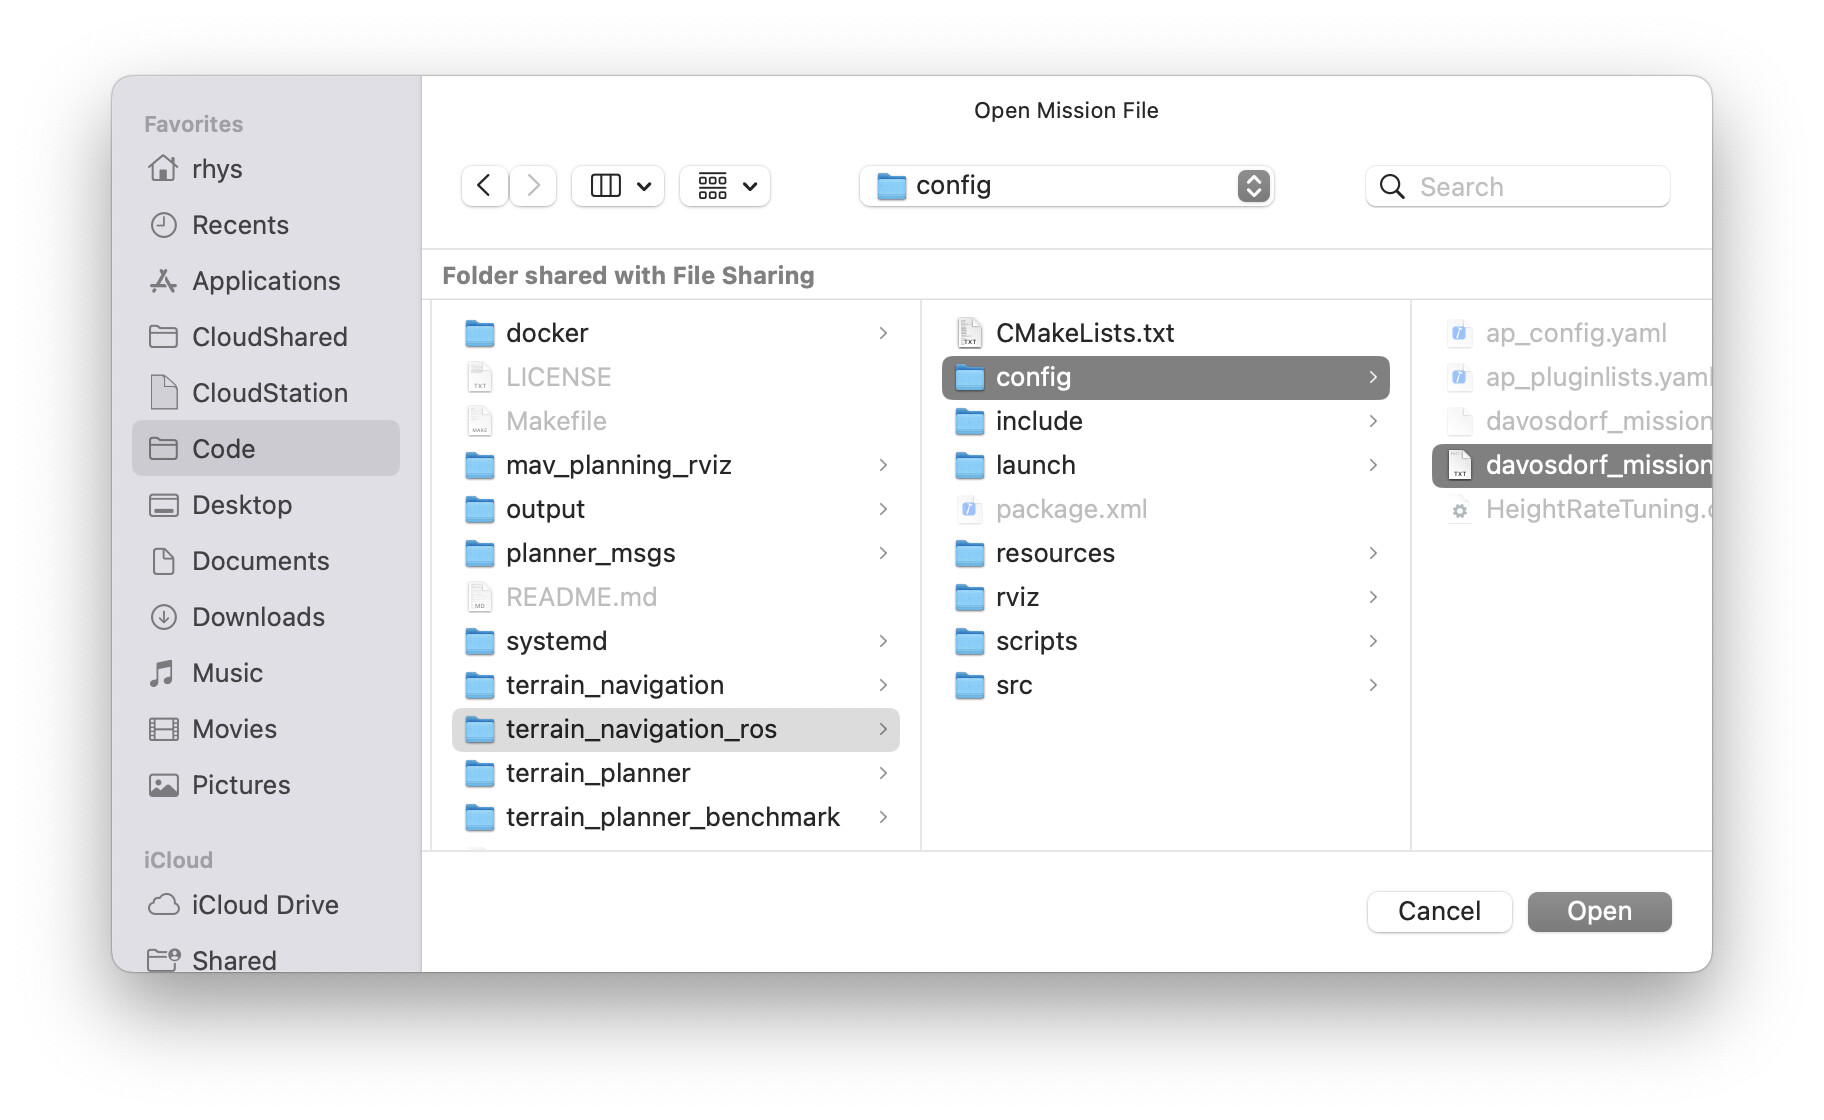
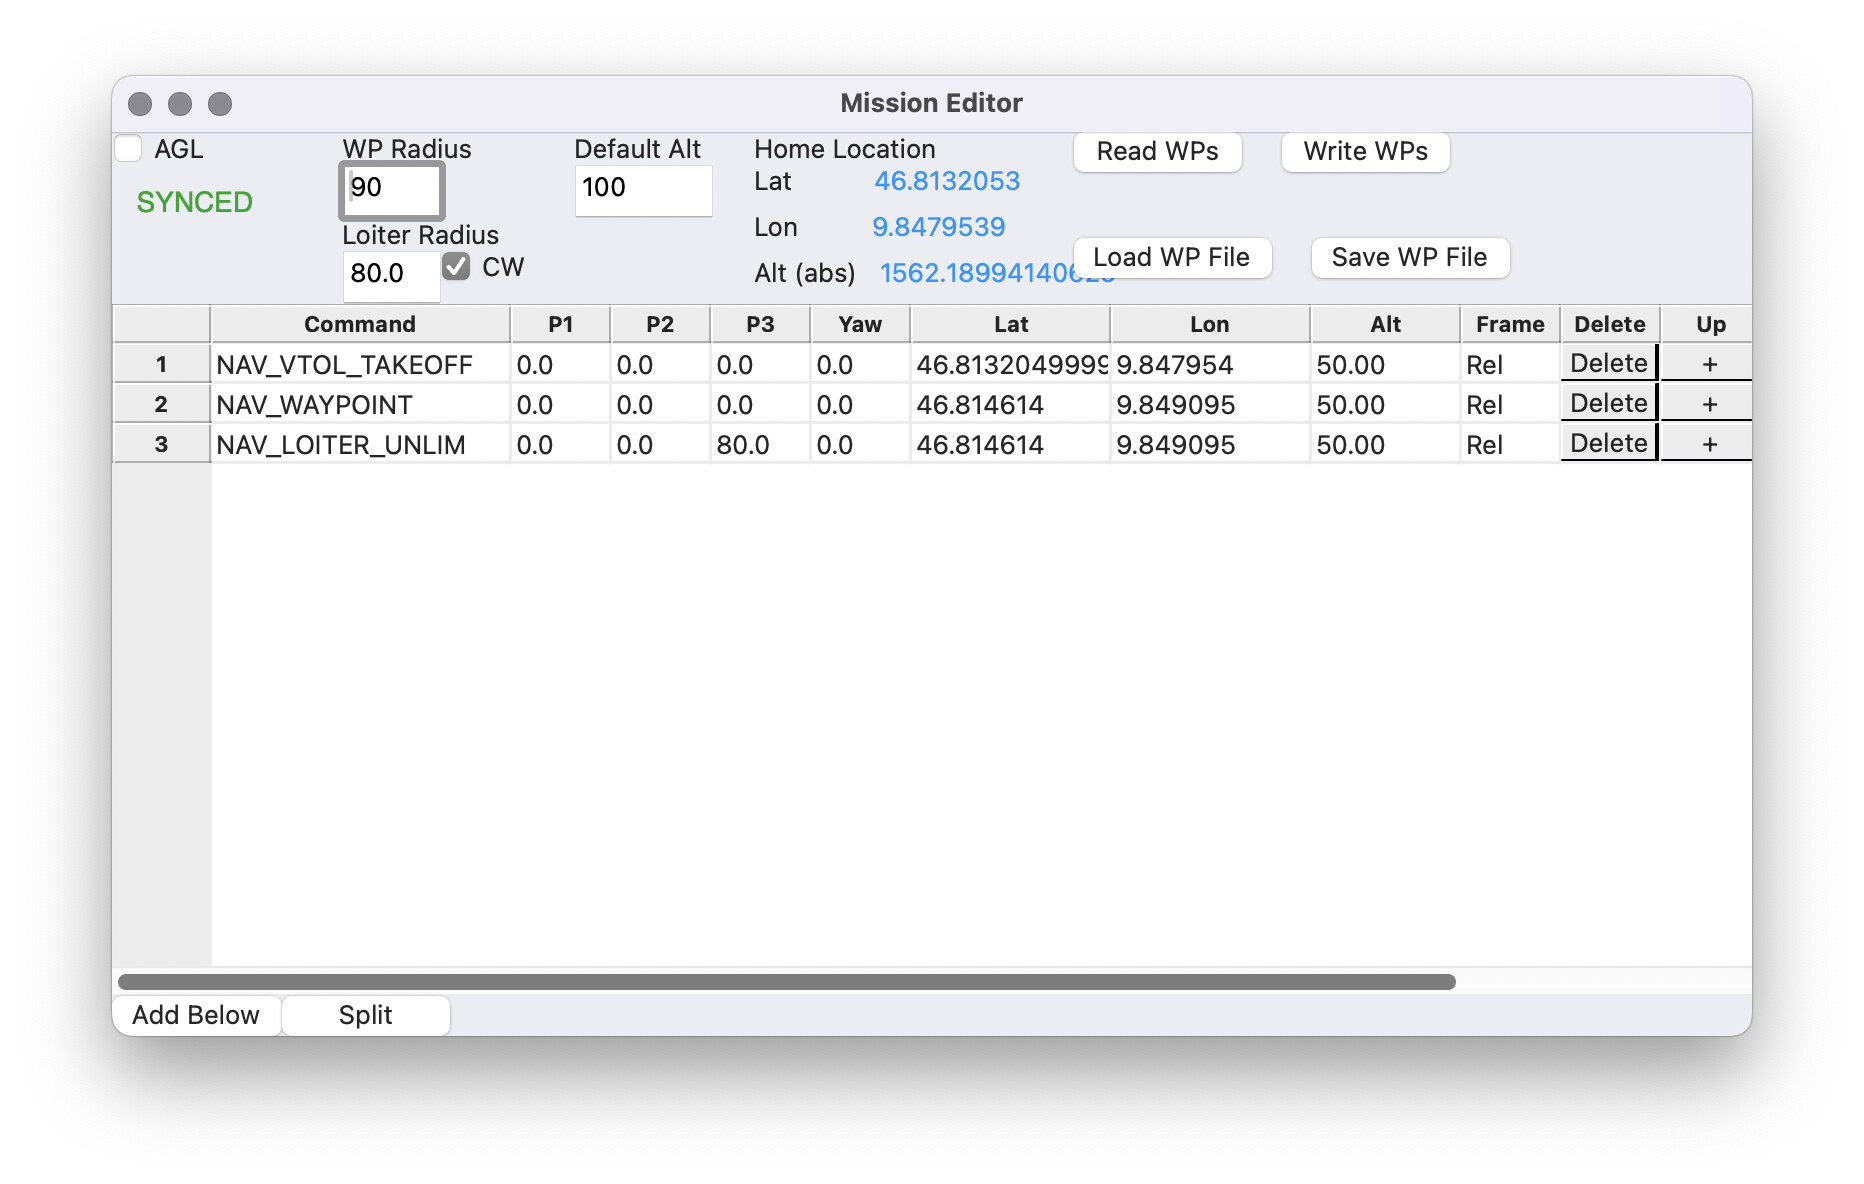
Open the mission editor and load the mission:
~/ros_ws/src/terrain-navigation/terrain_navigation_ros/config/davosdorf_mission.txt
Arm the plane and switch to AUTO:
FBWA>
FBWA> arm throttle
FBWA> auto
AUTO>
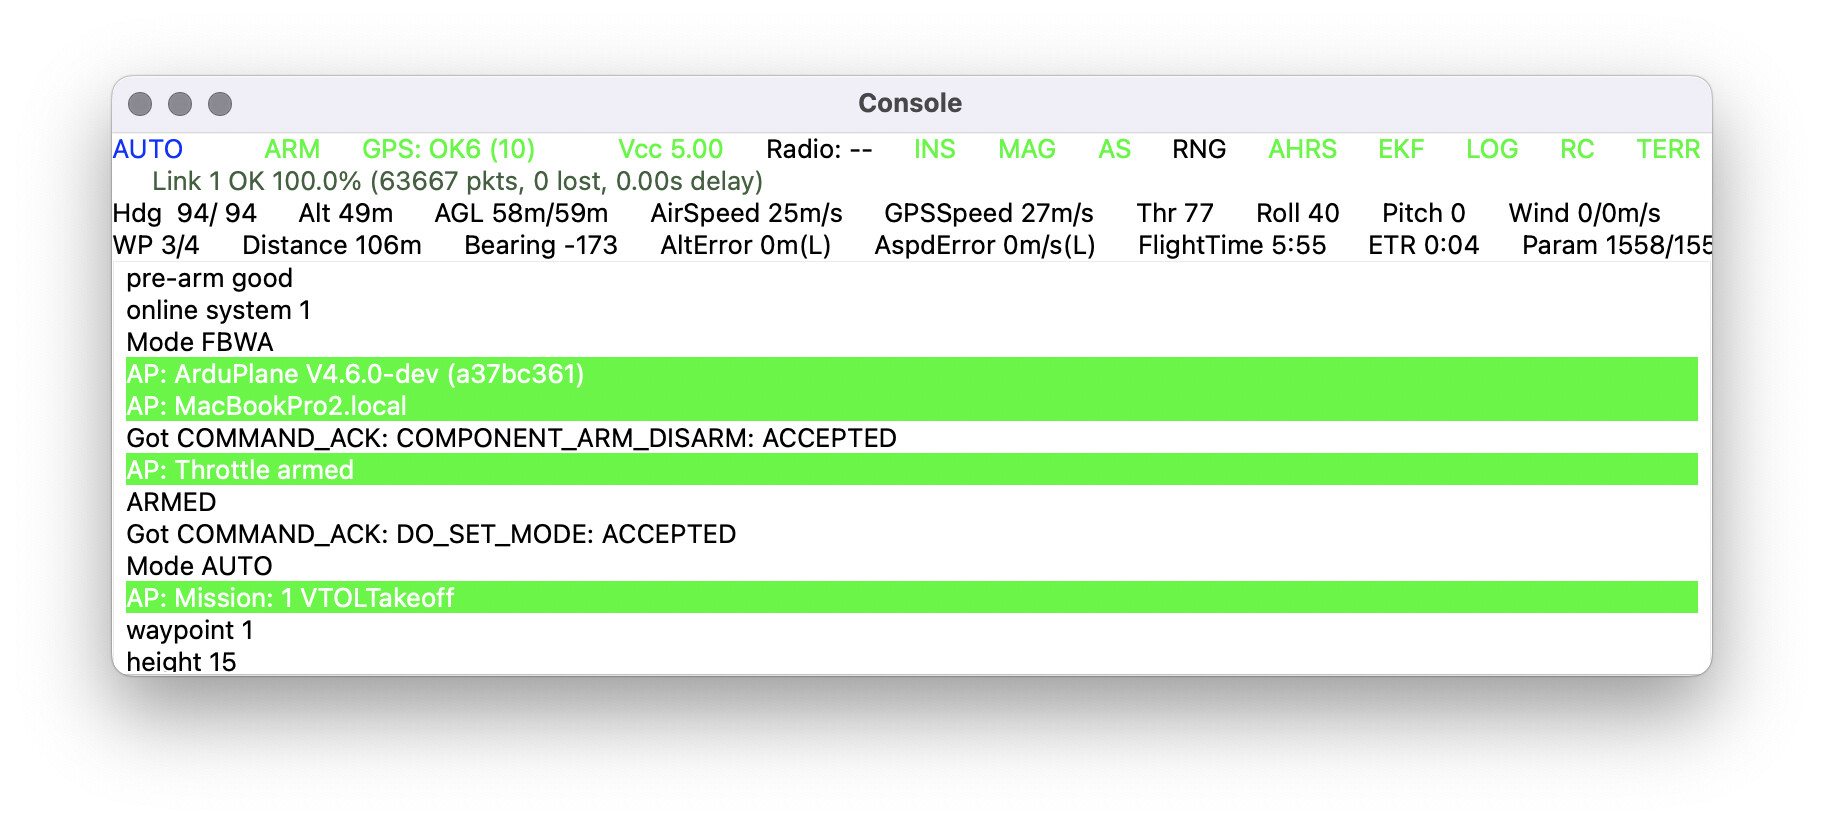
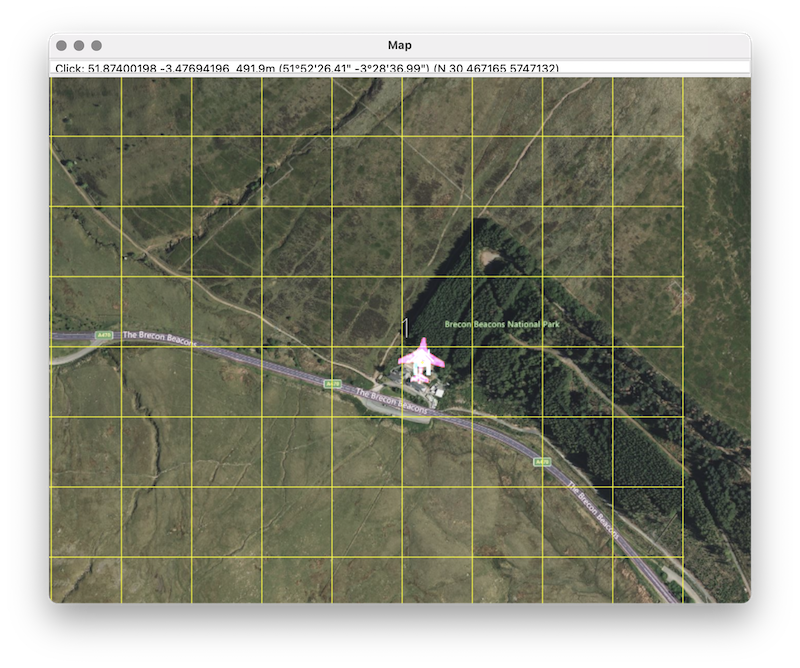
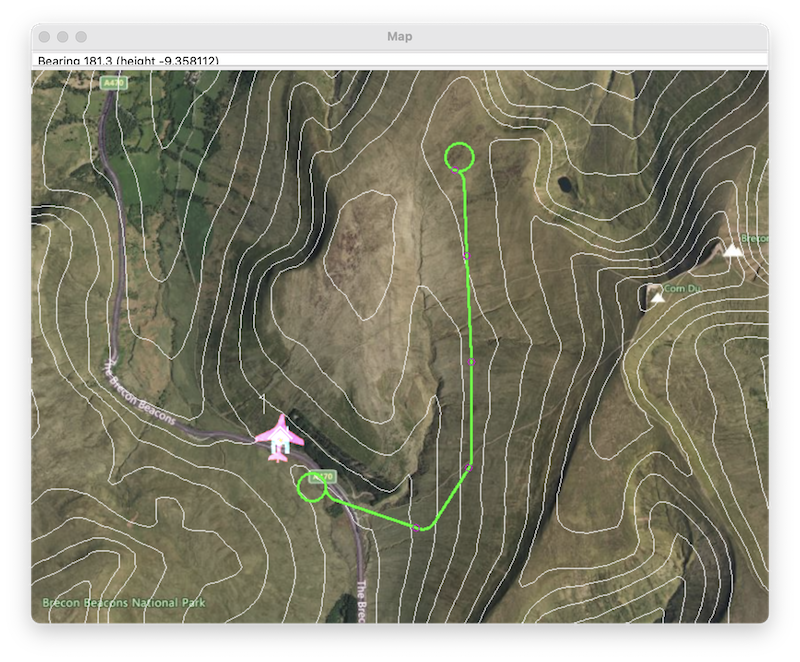
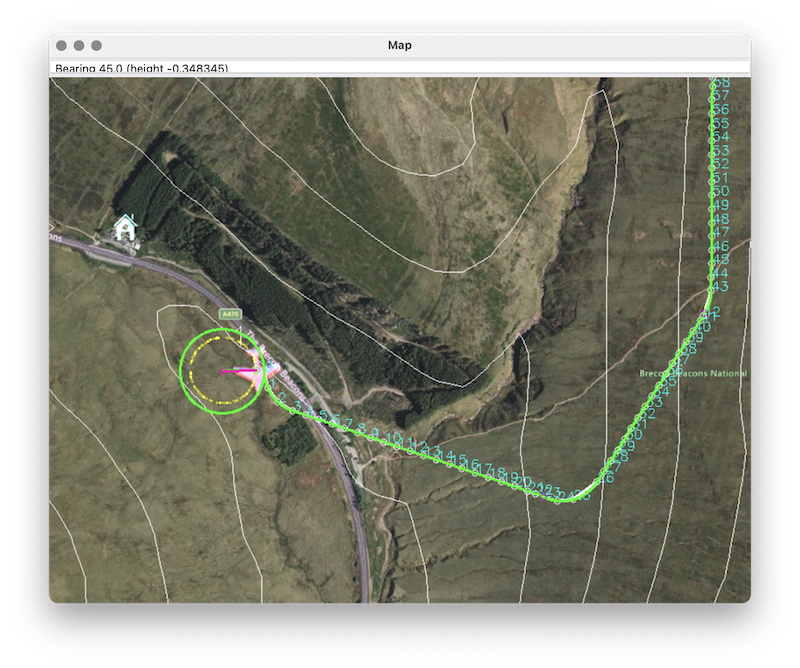
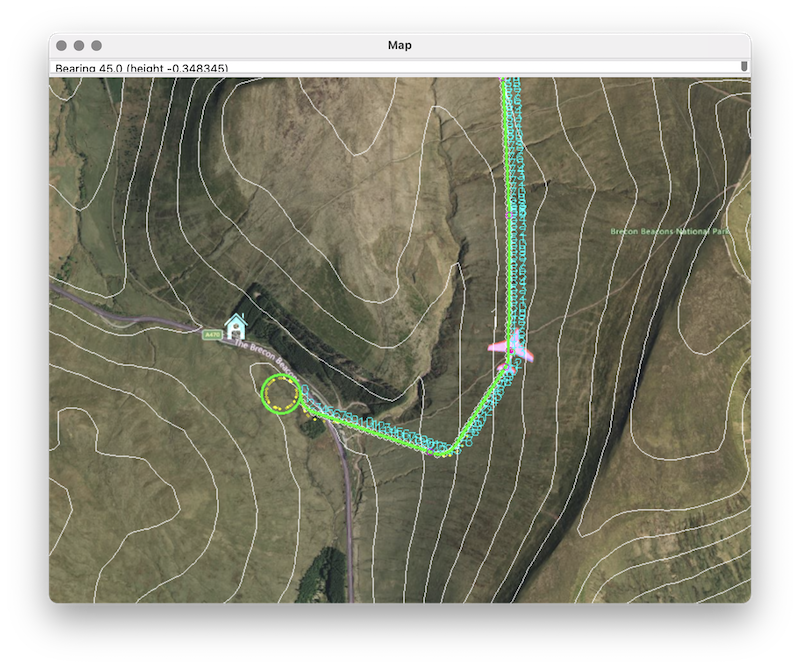
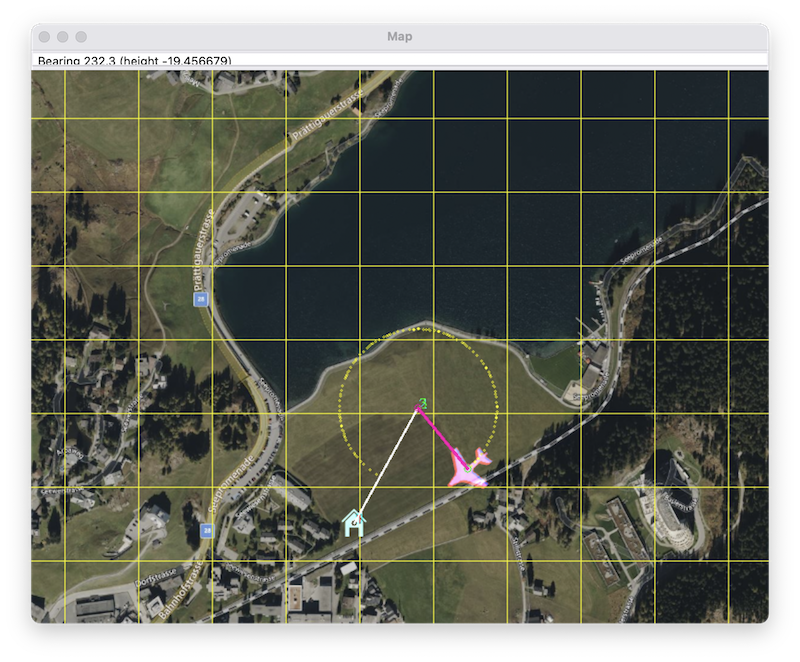
The plane should takeoff and loiter over a park near the lake in Davosdorf.
Run the mavros_dds_bridge node:
python ./src/terrain-navigation/terrain_navigation_ros/scripts/mavros_dds_bridge.py
Launch the terrain planner:
ros2 launch terrain_navigation_ros terrain_planner.launch.py cruise_speed:=25.0 minimum_turn_radius:=80.0 rviz:=false
Launch rviz:
ros2 launch terrain_navigation_ros rviz.launch.py
- Click the
Interactbutton in the top toolbar. - Click
Update Goalto set the target at the markers position.

- Drag the marker to the area near the lake where the plain is loitering.
- Click
Update Startto mark the start of the path.
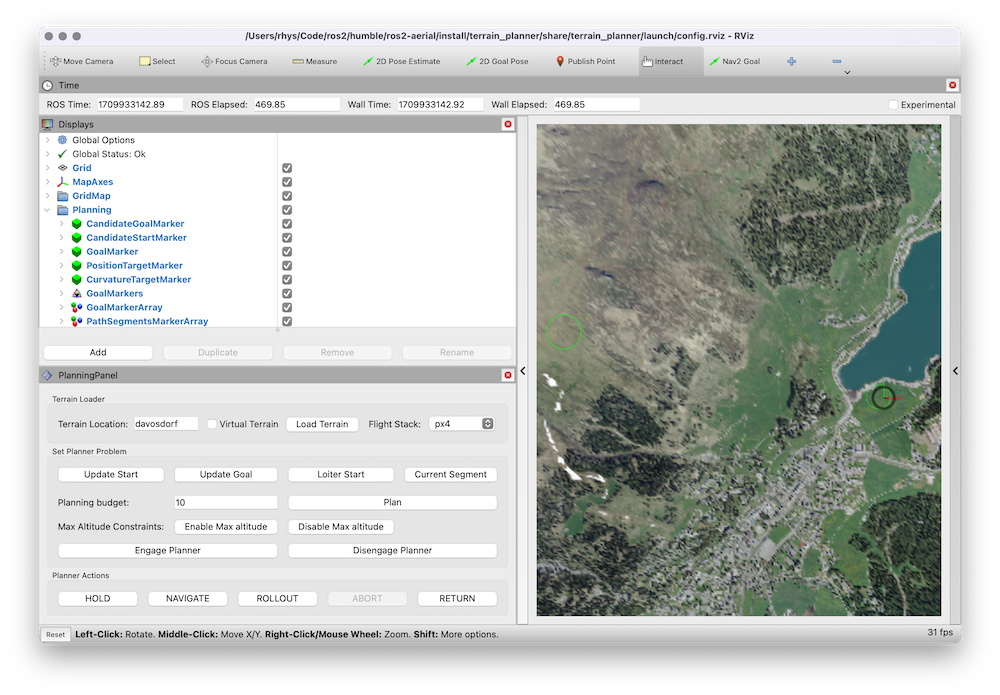
- Select
ardupilotin theFlight Stackdropdown. - Click
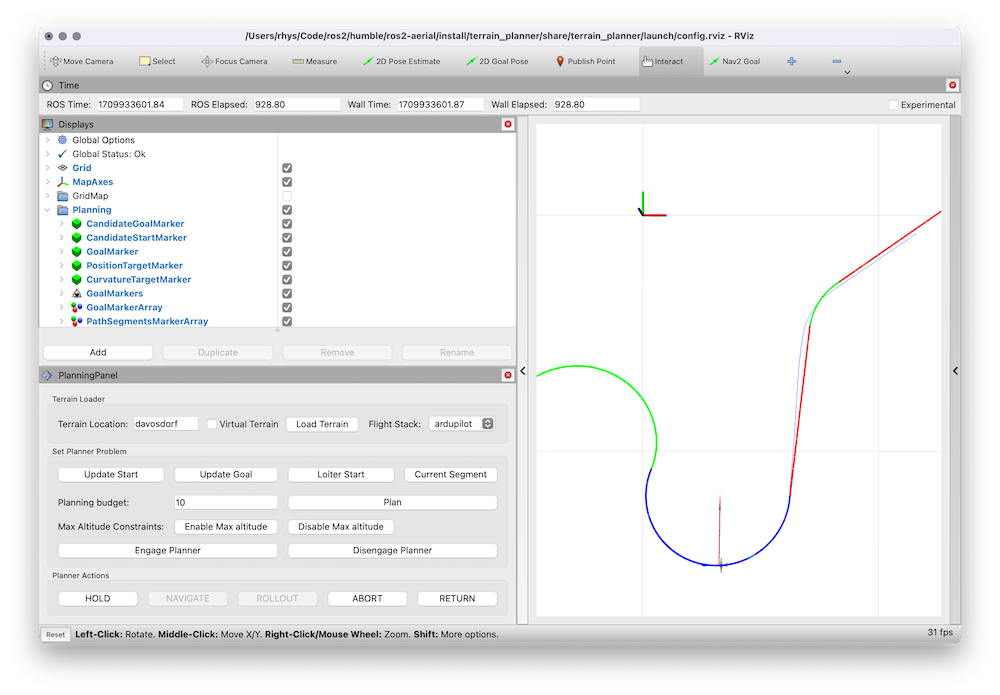
Planto run the planner. - The path is easier to see if the terrain is hidden (uncheck
GridMapin theDisplayspanel).
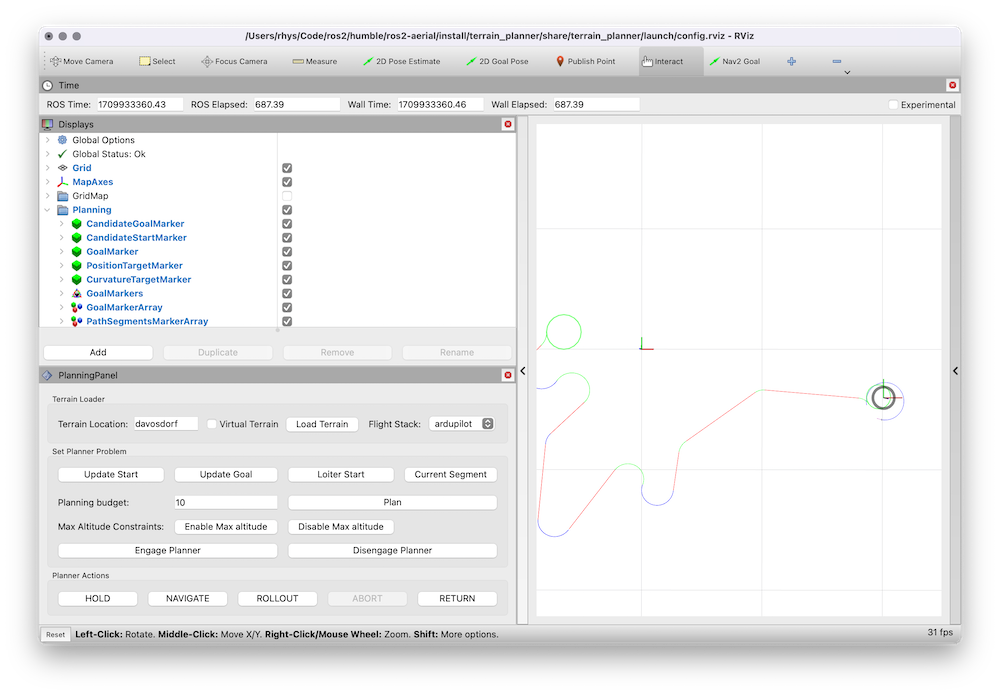
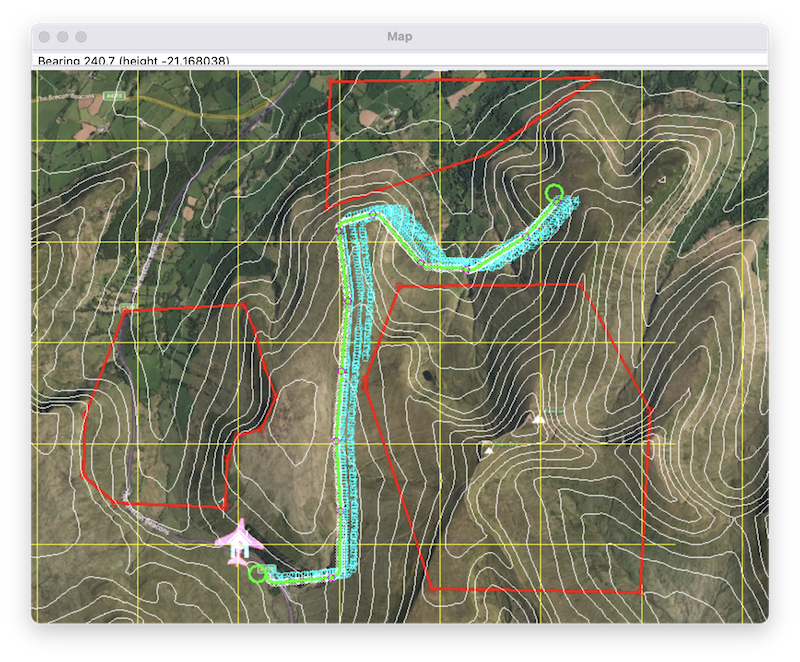
- Click
Engage Plannerand thenNAVIGATE - The plane should exit the loiter and start tracking the path.
Known issues, next steps
Message content
- The altitude of the plane pose and track in rviz are incorrect. This is because the GPS altitude published by AP_DDS references MSL rather than the WGS84 ellipsoid. A temporary fix is applied in the
mavros_dds_bridgewhere the geoid height is added. This adjustment should be moved to the AP_DDS_Client.
Visualisation
- The initial and goal loiter radii shown in rviz are not matching the requested minimum turn radius.
- ideally the planner control would be run from a ground control station rather than rviz. A module for MAVProxy might be a good first step.
Guidance control
- The initial capture of the path from loiter does not always work well. This is most likely related to the loiter information from the AUTO mission not being incorporated into the planners initial state.
- In PX4 the planner uses the Nonliear Path Following Guidance (NPFG) algorithm described in one of the papers referenced in the terrain planner document. There is a draft implementation for ArduPilot here Plane: support off-board terrain navigation #26262 however it is not yet working correctly.
Terrain data
- Tools are required to manage and load the terrain data.