This article will introduce how to transmit pose information to copter through Nokov motion capture system. Contact: https://www.nokov.com/en/
Required hardware
You will need a low-latency network link from your GCS computer to the copter, and from the GCS to your Nokov motion capture system.
Nokov System Setup
-
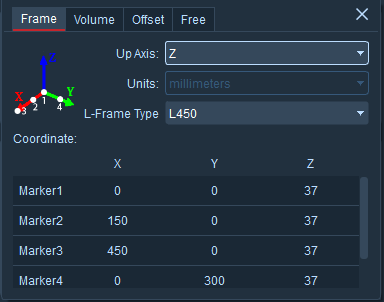
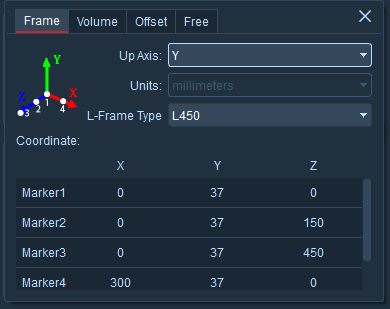
Nokov includes two coordinate calibration systems, namely Z-axis up and Y-axis up.
-
When Z-axis up,the forward direction is aligned with the Y-axis.
-
When Y-axis up,the forward direction is aligned with the X-axis.
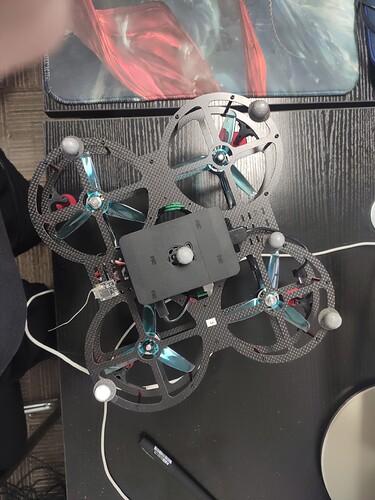
Place markers on the copter
calibration systems of Z-axis up

calibration systems of Y-axis up

Configuration the copter
- AHRS_EKF_TYPE=3
- EK3_ENABLE=1
- EK2_ENABLE=0
- COMPASS_USE=0
- COMPASS_USE2=0
- COMPASS_USE3=0
- VISO_TYPE=1
- EK3_SRC1_POSXY=6
- EK3_SRC1_POSZ=6
- EK3_SRC1_YAW=6
- EK3_SRC1_VELXY=0
- EK3_SRC1_VELZ=0
Starting Nokov module
-
Start connect to copter with MAVProxy. Inside MAVProxy load optitrack module with:
module load nokov
-
Set host to the motion capture system:
nokov set host HOST_IP_ADDRESS
-
Set axis calibration systems(“z"or"y”):
nokov set axis “z”
-
Set tracker_name to track from the motion capture system:
nokov set tracker_name TRACK_NAME
MAVProxy Prepare
From Nokov get the nokvo-sdk and put it in “MAVProxy/modules/mavproxy_nokov”,modify the setup.py file:zip_safe=True.
Test The Flight
Connect the ground station to the copter, then make sure the Nokov SDK is enabled and there is data streaming, set host,axis and tracker_name correctly.Once you’ve done that, you can test flight.
