My new project is to build a Mission Planner GPS-based tracker. With a fully operational set of gear for UAV + FPV , I bought a 6-Ch Maestro servo controller recently and followed the instructions in the arducopter wiki page, but it did not work. Here is my set up :–
Maestro servo controller connected to PC USB port. 5V power is provided to the servo controller and 2 servos connected to Ch 1 & 2. All these are confirmed to work as witnesses in the Maestro Control Center.
3DR radio Ground Module with a directional antenna is connected to another USB port of the PC.
A GPS USB dongle at 4800 baud rate is connected to the third USB port of the PC.
A fully operational Video Rx hooked up to a monitor screen in a tripod.
Note :–
a) I have not yet built the gimbal part of the tracker, so the servos are just lying on the table, loosely connected to the servo controller.
b) The GPS USB dongle has locked over 9 satellites and running as shown on the PC.
c) During testing, I powered up my quadcopter with a 3DR radio Air Module and connected to the Ground Module via the mission planner and there was heartbeat as confirmed in the PC.
d) After powering up everything, I opened up the Antenna Tracker page in Mission Planner, clicked on one of the 2 com ports for the Maestro Servo Controller, then clicked “connect”, the range figures for both pan and tilt all disappeared. By then, I have clicked both the “connect” buttons for the 3Dr radio MAvlink AND the Maestro Servo Controller. Is this correct ?
Now when I moved my quadcopter over the PC, the servos did not move.
Can anybody help ? Does the Video Rx matter, as the signal received by the Video Rx is only for the monitor screen ? Is there a mistake in my basic setup ?
Appreciate any help.
to use the mp version, you don’t actualy need a gps on the laptop. you define the location using the map.
right click in flightplanner and use “set here”
Thanks for reply. Is my connection correct ? Even though I did not connect the GPS USB dongle, it still did not work. Still have following questions :–
Is my connection correct ?
Do I click the connect buttons for both the MAvlink and the Maestro Servo Controller in the MP ?
I think the video Rx does not matter to get tracker working, as it only output the video signal to the monitor. Pls confirm.
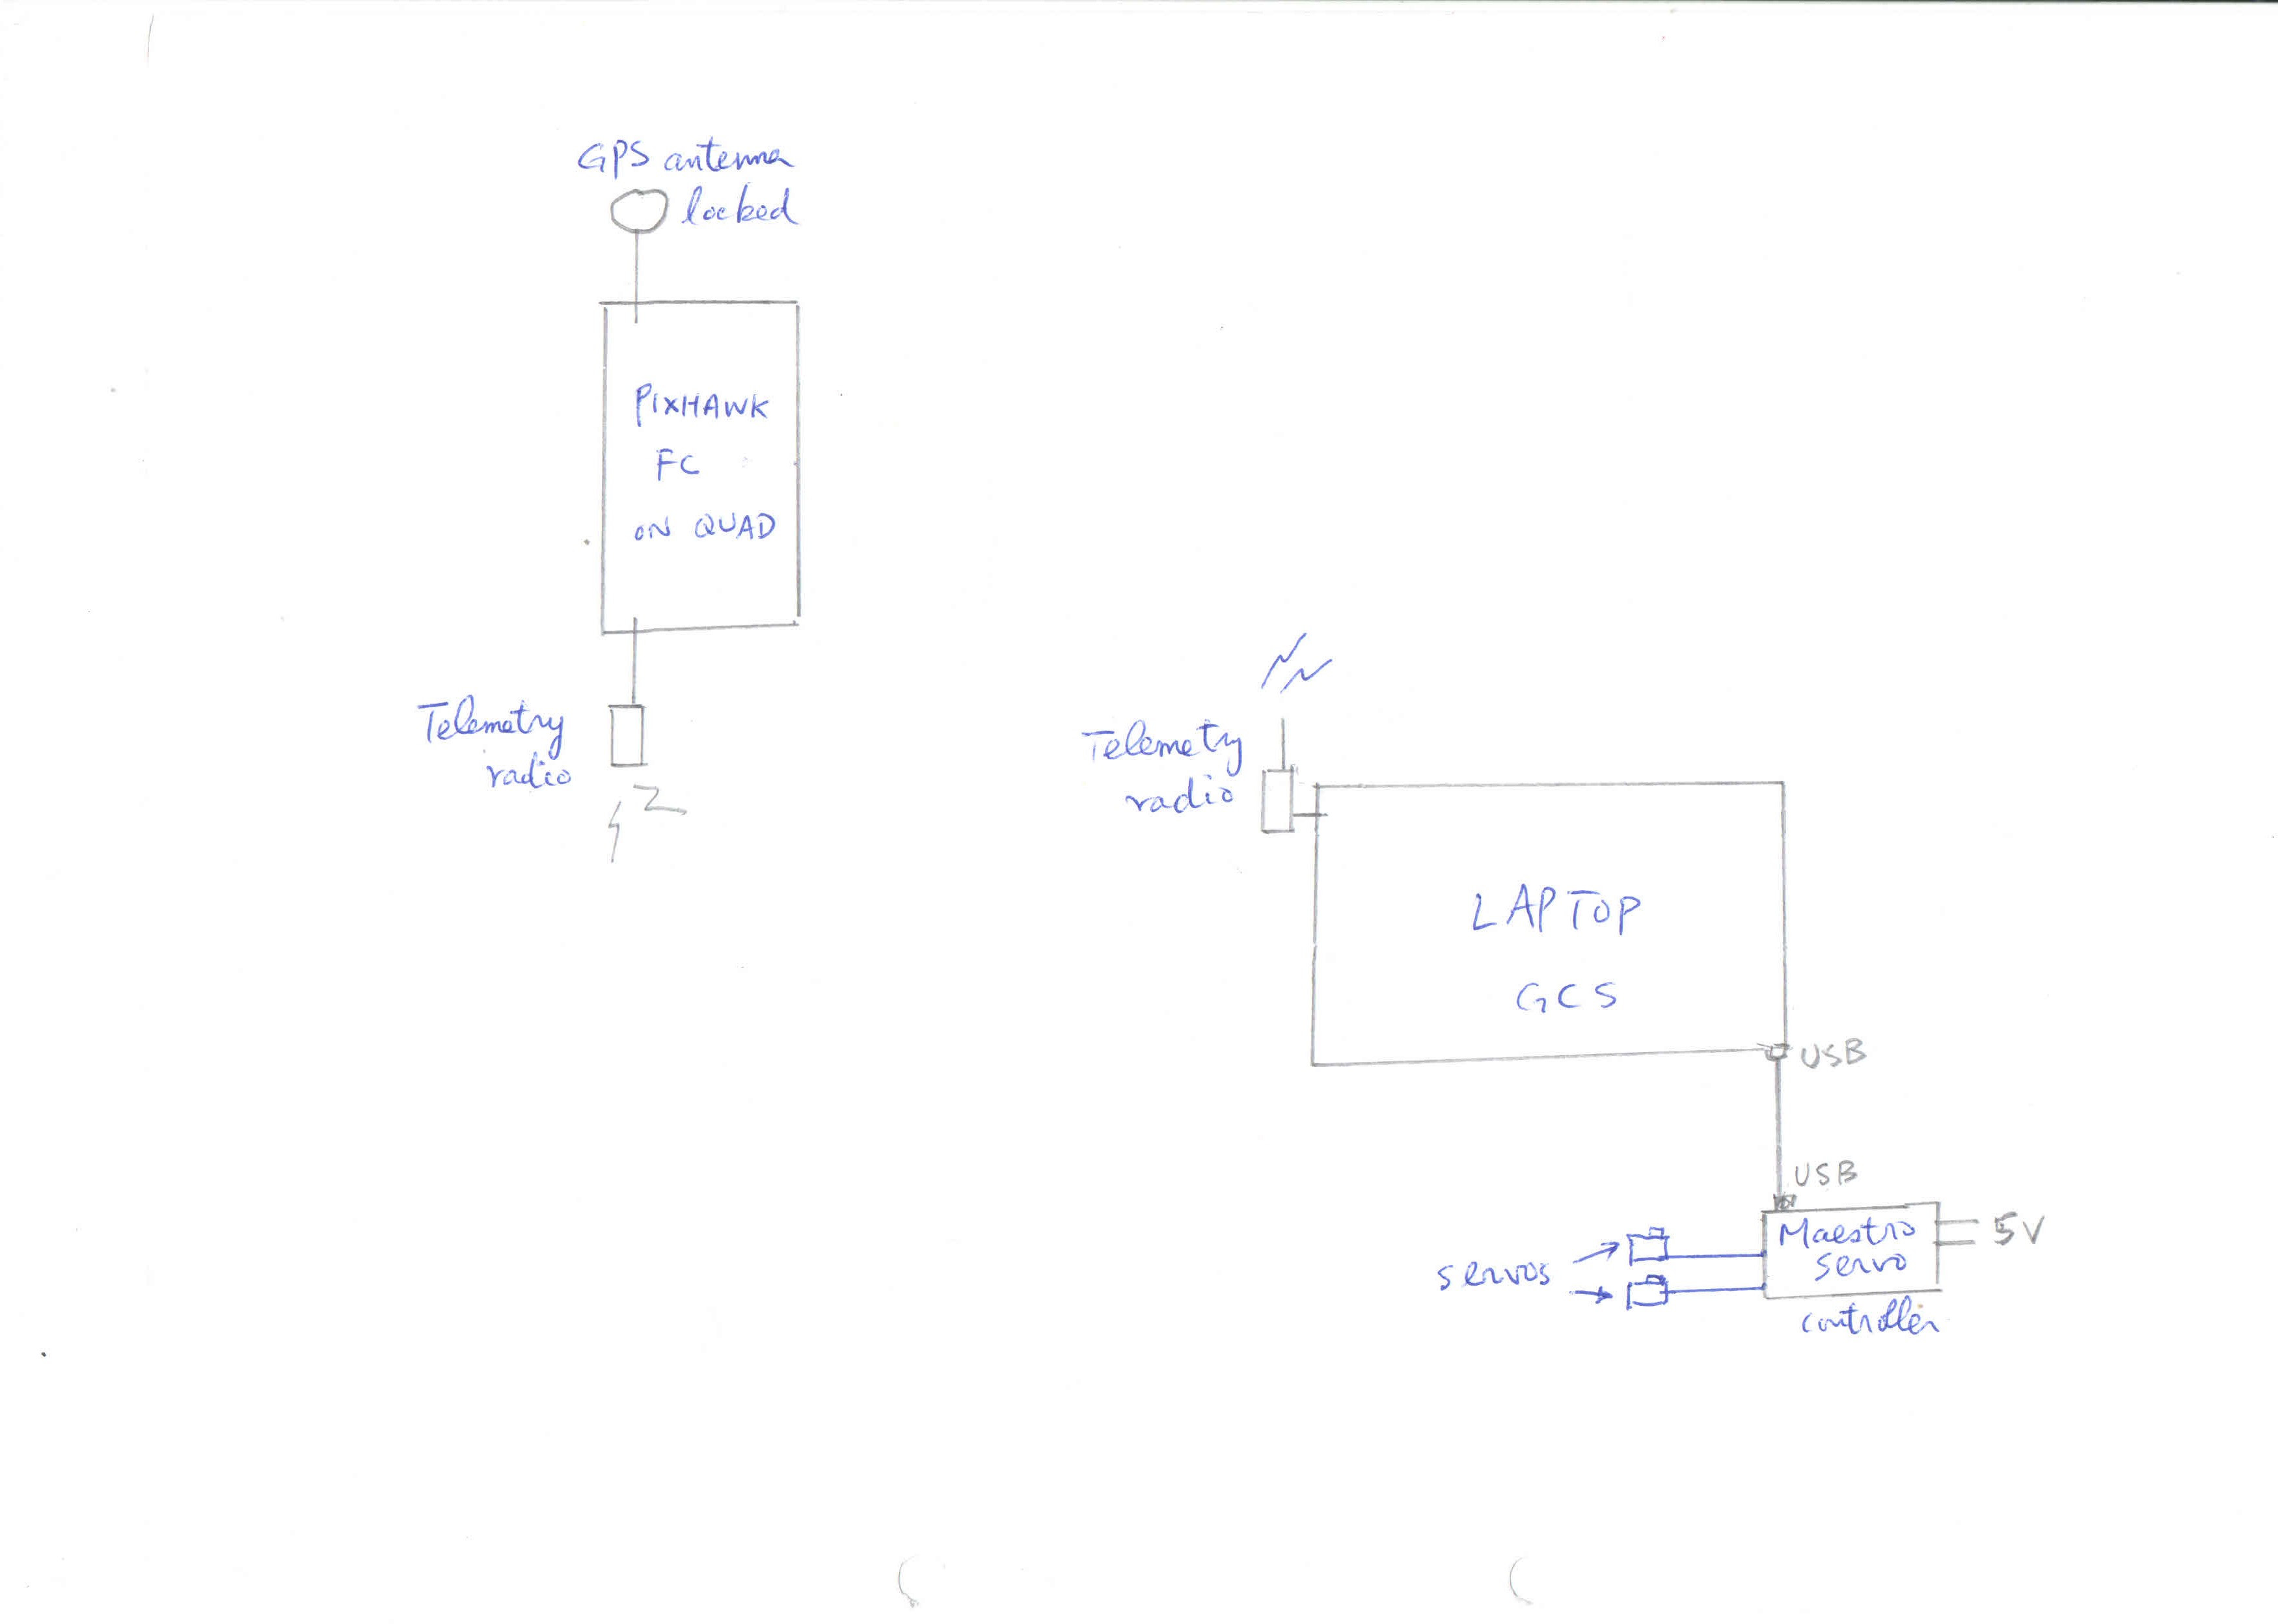
I picked up this project again last week after 1 year. Have done more reading, and tried different things, all do not help. I am still stuck… servos plugged to the Maestro servo controller (powered by 5V) still do not move in response to the moving of the vehicle, see attached diagram.
GPS on Pixhawk FC has 3D fix, locked to over 7 satellites.
Telemetry radio on Pixhawk is has established link with that on the laptop GCS.
Maestro servo controller has 5V for powering the servos.
Maestro servo controller is plugged to the USB of the laptop.
Speed and acceleration have been set to 1000 and 255 respectively in “Channel setting” of Maestro Control Centre.
“USB Dual Port” is checked under “serial Setting” of Maestro Control Centre.
Under Flight Planner window in MP, I set the tracker home by right click and select “Set Here”.
Lastly, after selecting the correct COM port in Antenna Tracker under Optional Hardware in Initial Setup of MP, I click “connect”, but nothing happen except the 2 servos just move a bit in response to the clicking of the CONNECT button, but not moving in response to the moving of the vehicle.
Can anyone point out what has not been done ? Thank you .