- Update Apr 21,2024
Got also the Heli firmware on ESP32 working in principle.
I had to change
- libraries/AP_HAL_ESP32/targets/esp32/esp-idf/CMakeList.txt
added a new target to the 2. if-loop:
ELSEIF(${ARDUPILOT_CMD} STREQUAL “heli”)
message(“Building for heli”)
target_link_libraries(${elf_file} “${ARDUPILOT_BIN}/libarducopter-heli.a”)
target_link_libraries(${elf_file} “${ARDUPILOT_LIB}/libArduCopter_libs.a”)
Update Apr 21,2024
Today I tried to build a Heli firmware for my ESP32 board. But it failed.
Bulding of plane and copter version was prior successfull.
In general building of a Heli firmware worked. this I tested by building a firmware for a matekH743 board. So my general build enviroment and my commands seems to be ok.
But not for the ESP32 board
One difference I saw on the console:
Building the copter version the console shows
– Build files have been written to: /home/juergen/ardupilot/build/esp32famos1/esp-idf_build
ARDUPILOT_CMD=copter
WAF_BUILD_TARGET=
Building for copter[2/3] CMake Build esp-idf showinc
while on building the heli version the console shows:
– Build files have been written to: /home/juergen/ardupilot/build/esp32famos1/esp-idf_build
ARDUPILOT_CMD=heli
WAF_BUILD_TARGET=
CMake Warning:
Manually-specified variables were not used by the project:ARDUPILOT_BIN ARDUPILOT_LIB[2/3] CMake Build esp-idf showinc
hm, at the moment I am little struggling, missing the right idea.
Update Apr 19,2024
As I am not able to reply to my own thread I have now changed the sequence to have always the newest information on top
(PS: I am sorry but I don’t know how to change this behavior, maybe a moderator can look at this)
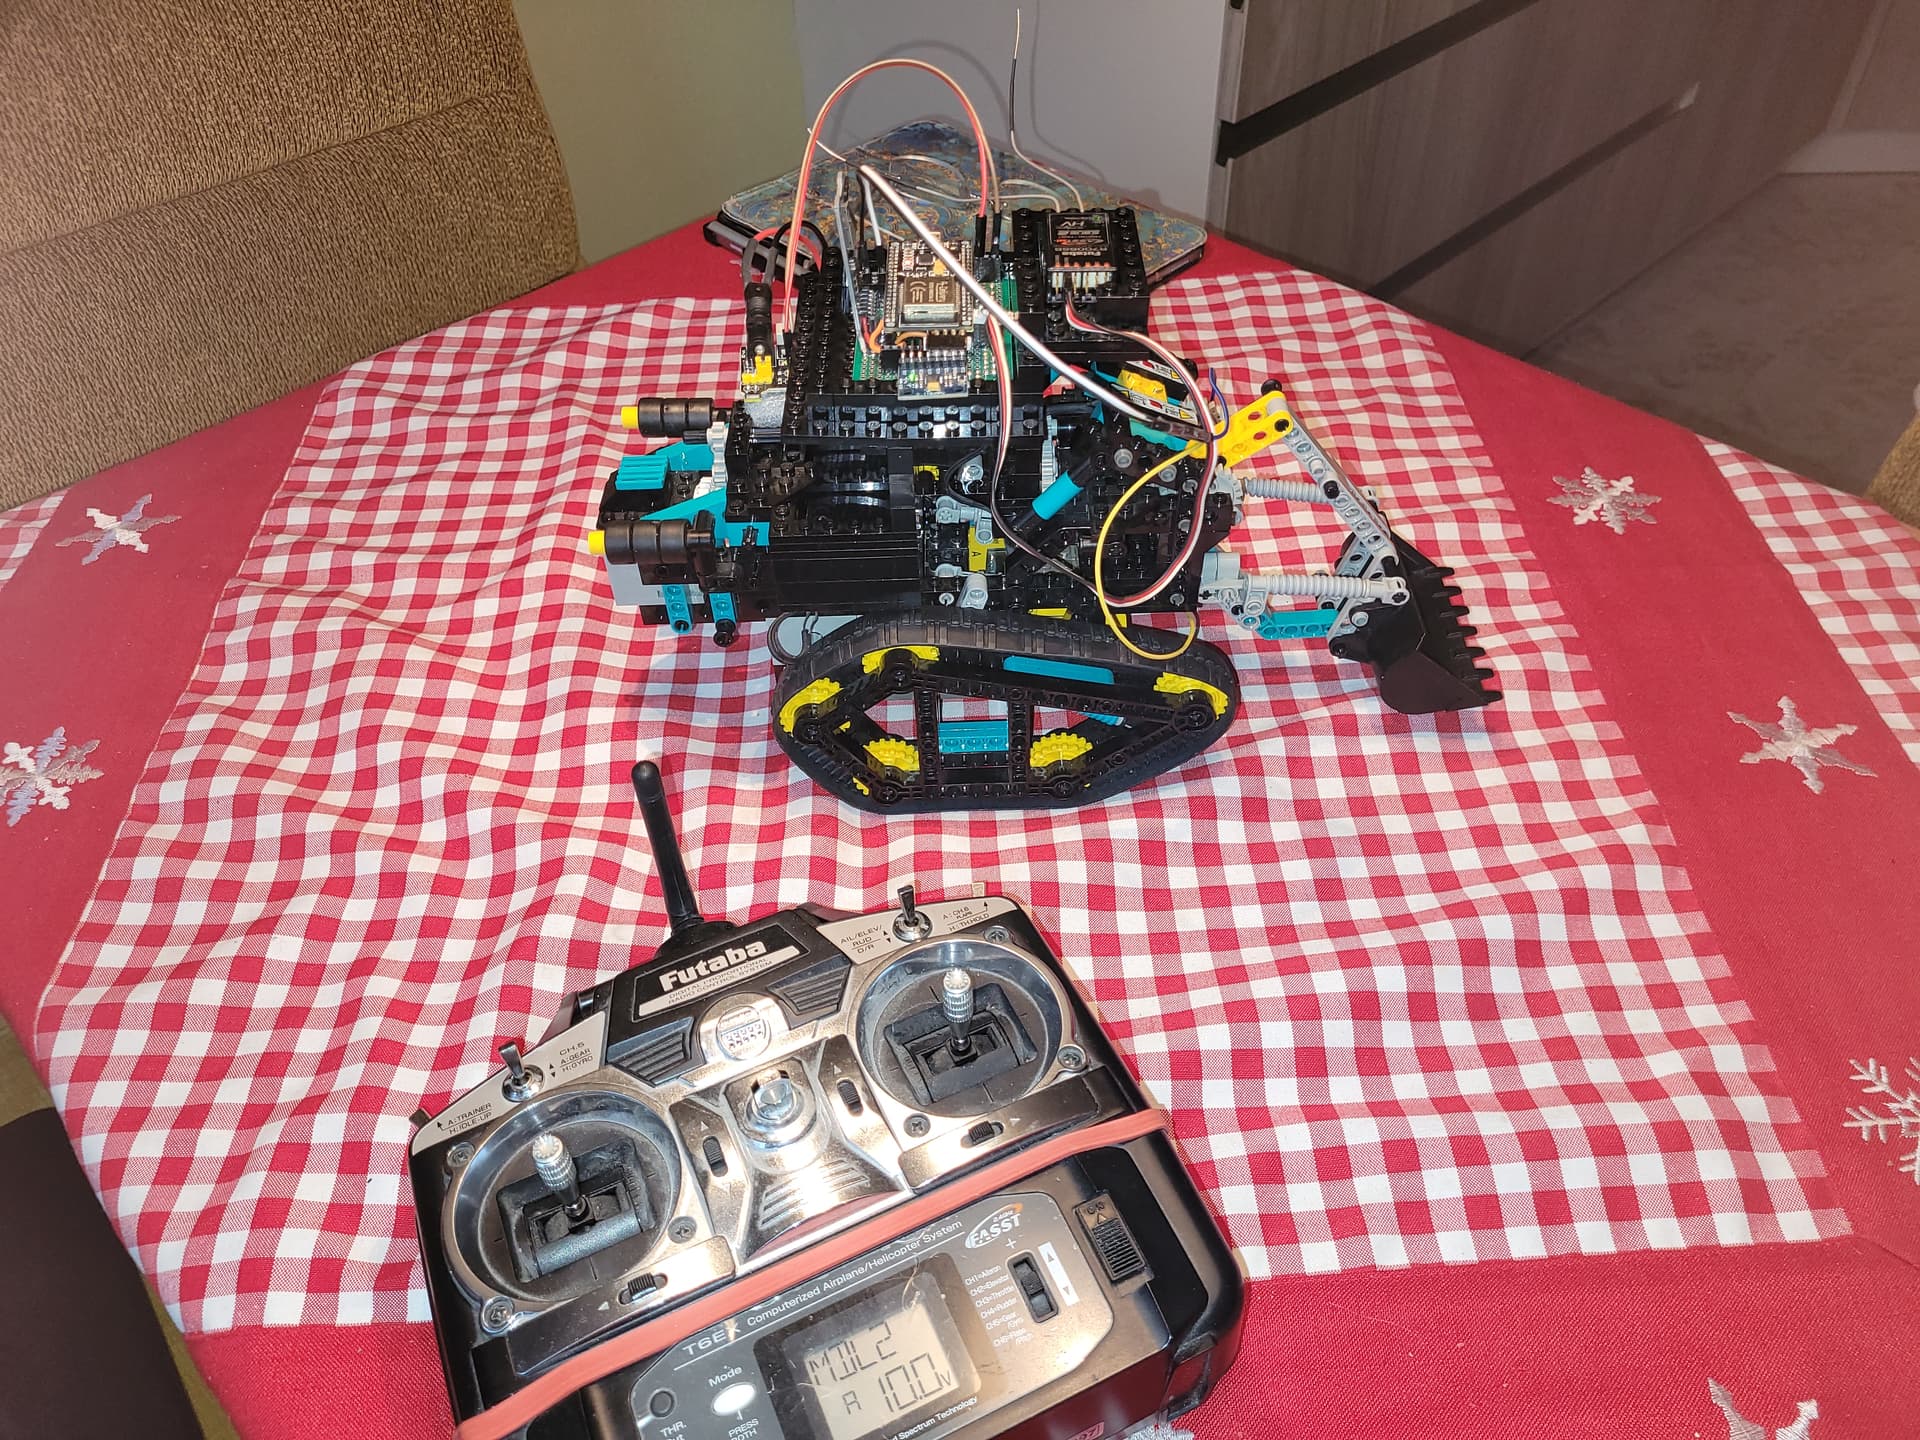
Today I had my first successful arming and basic (cheated) “testflight” with my development board.
Any suggestions or remarks :-))
Update Apr 17, 2024
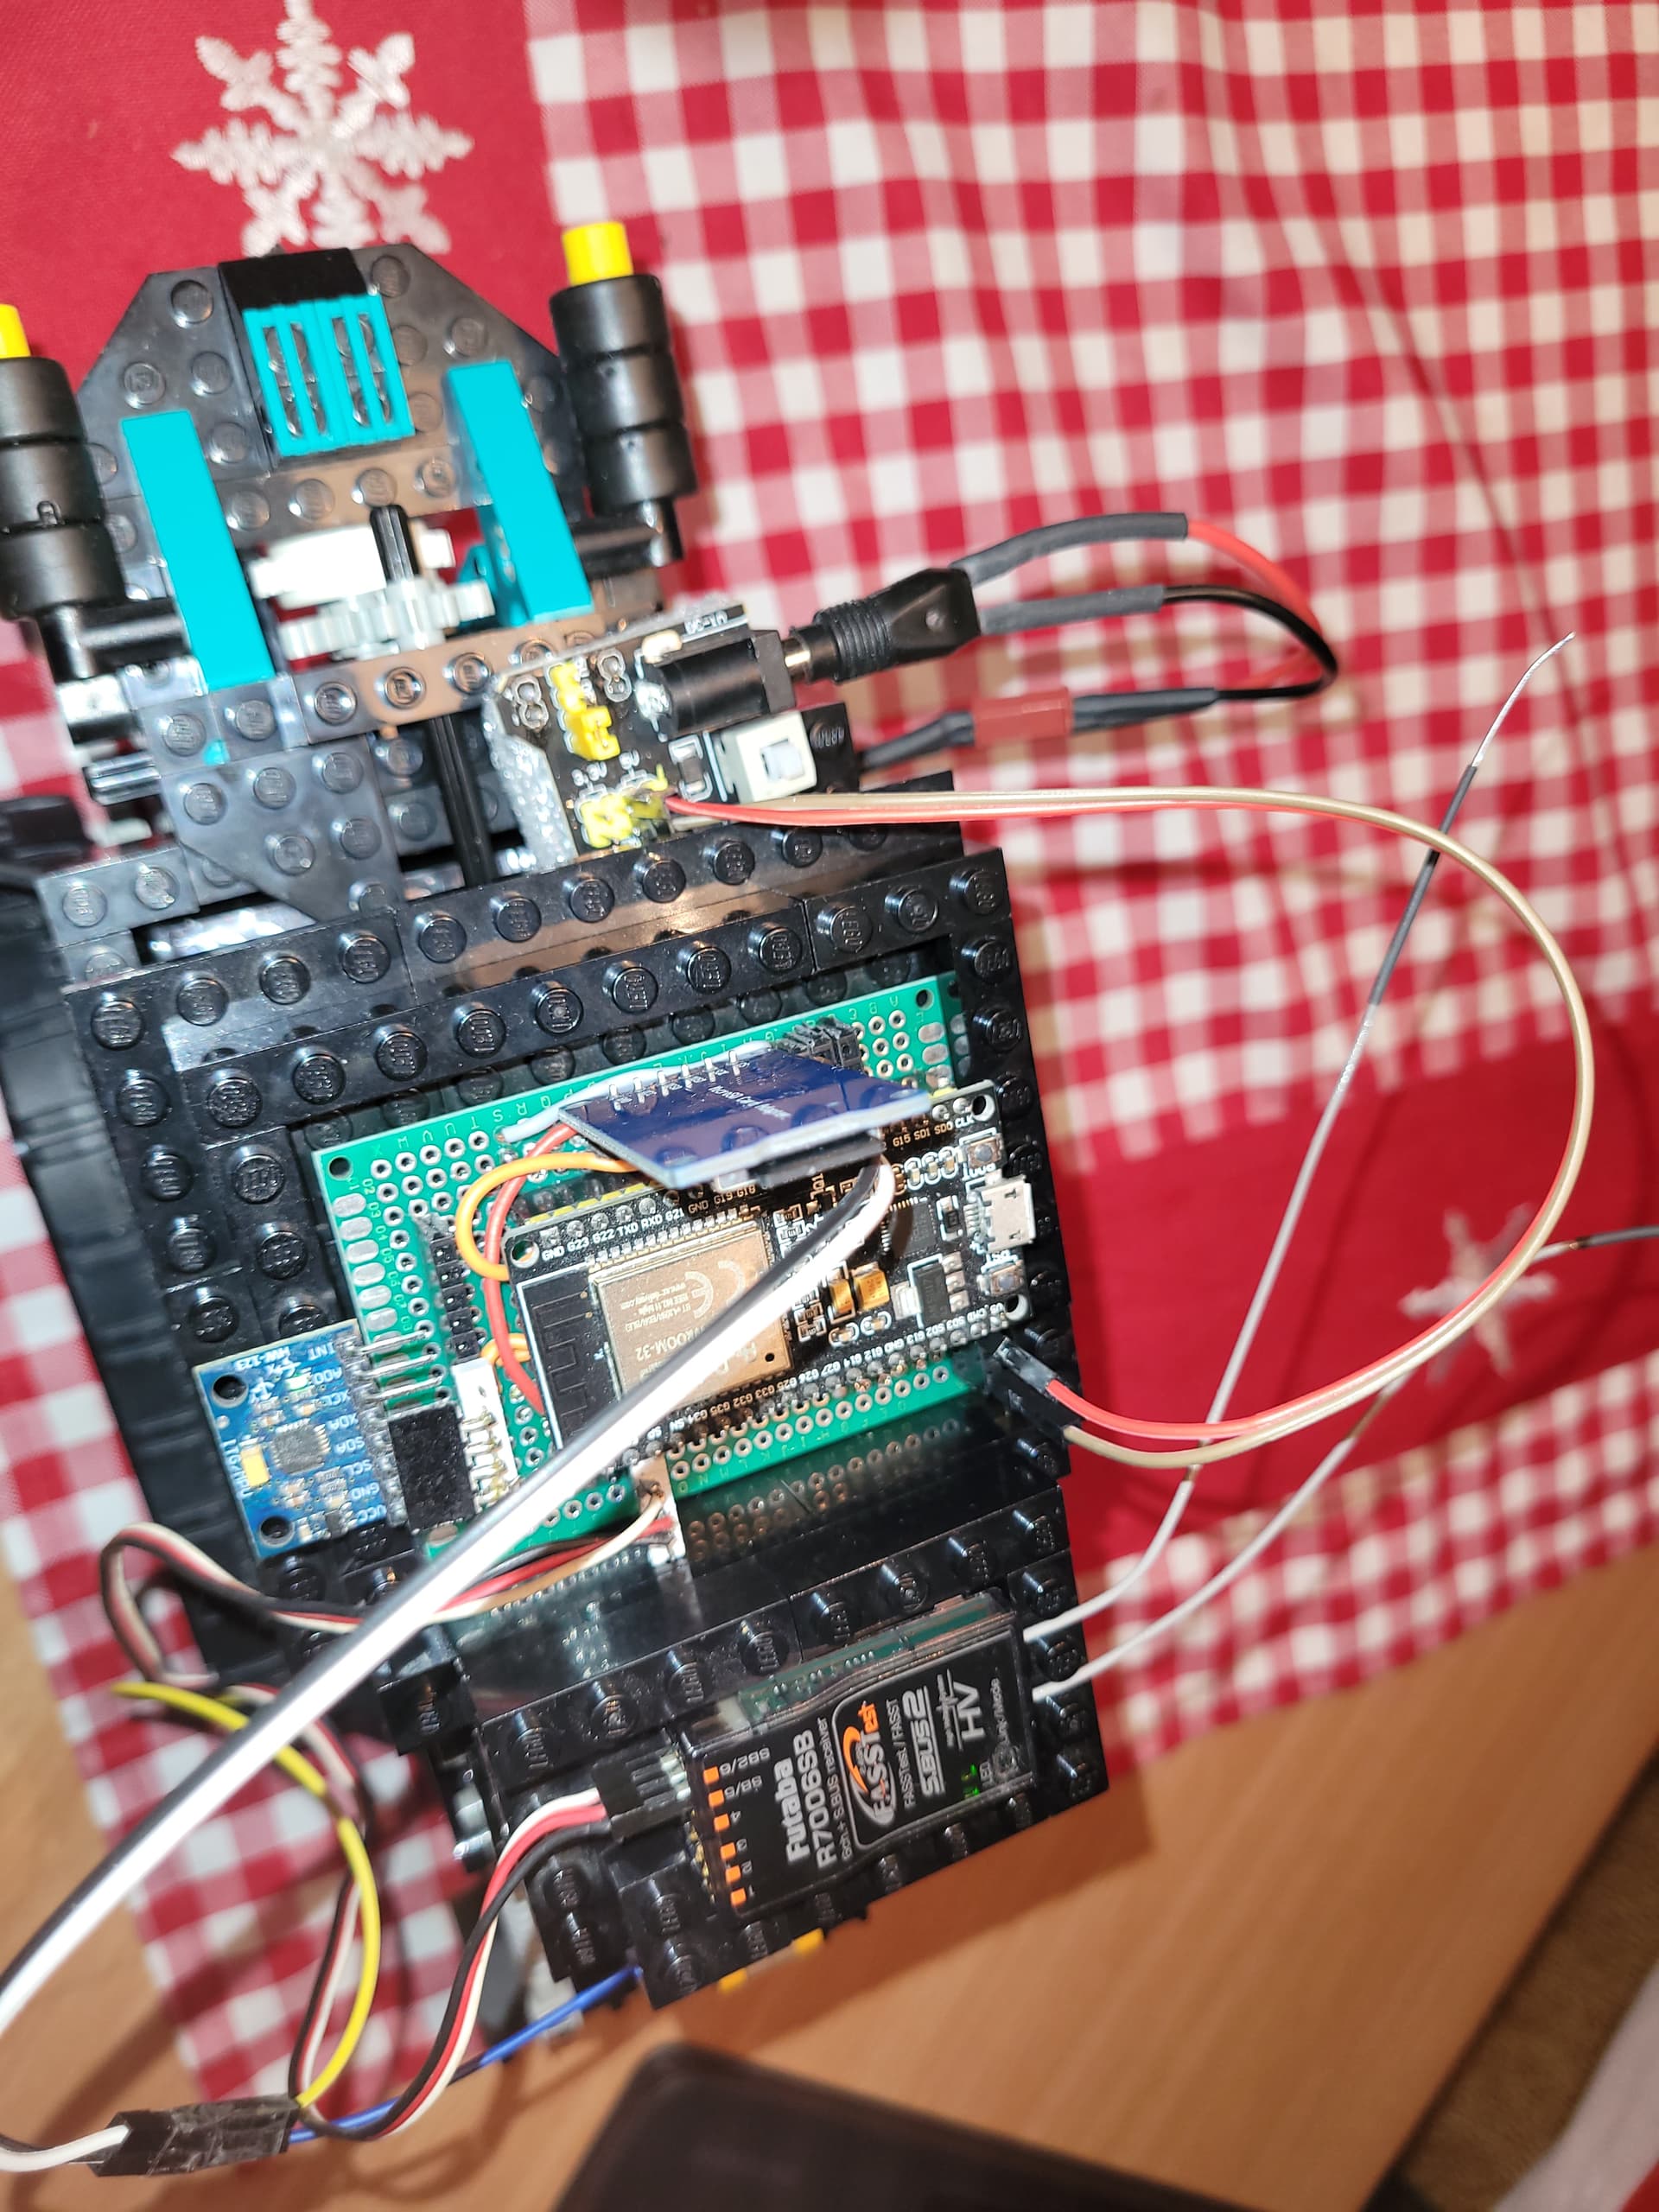
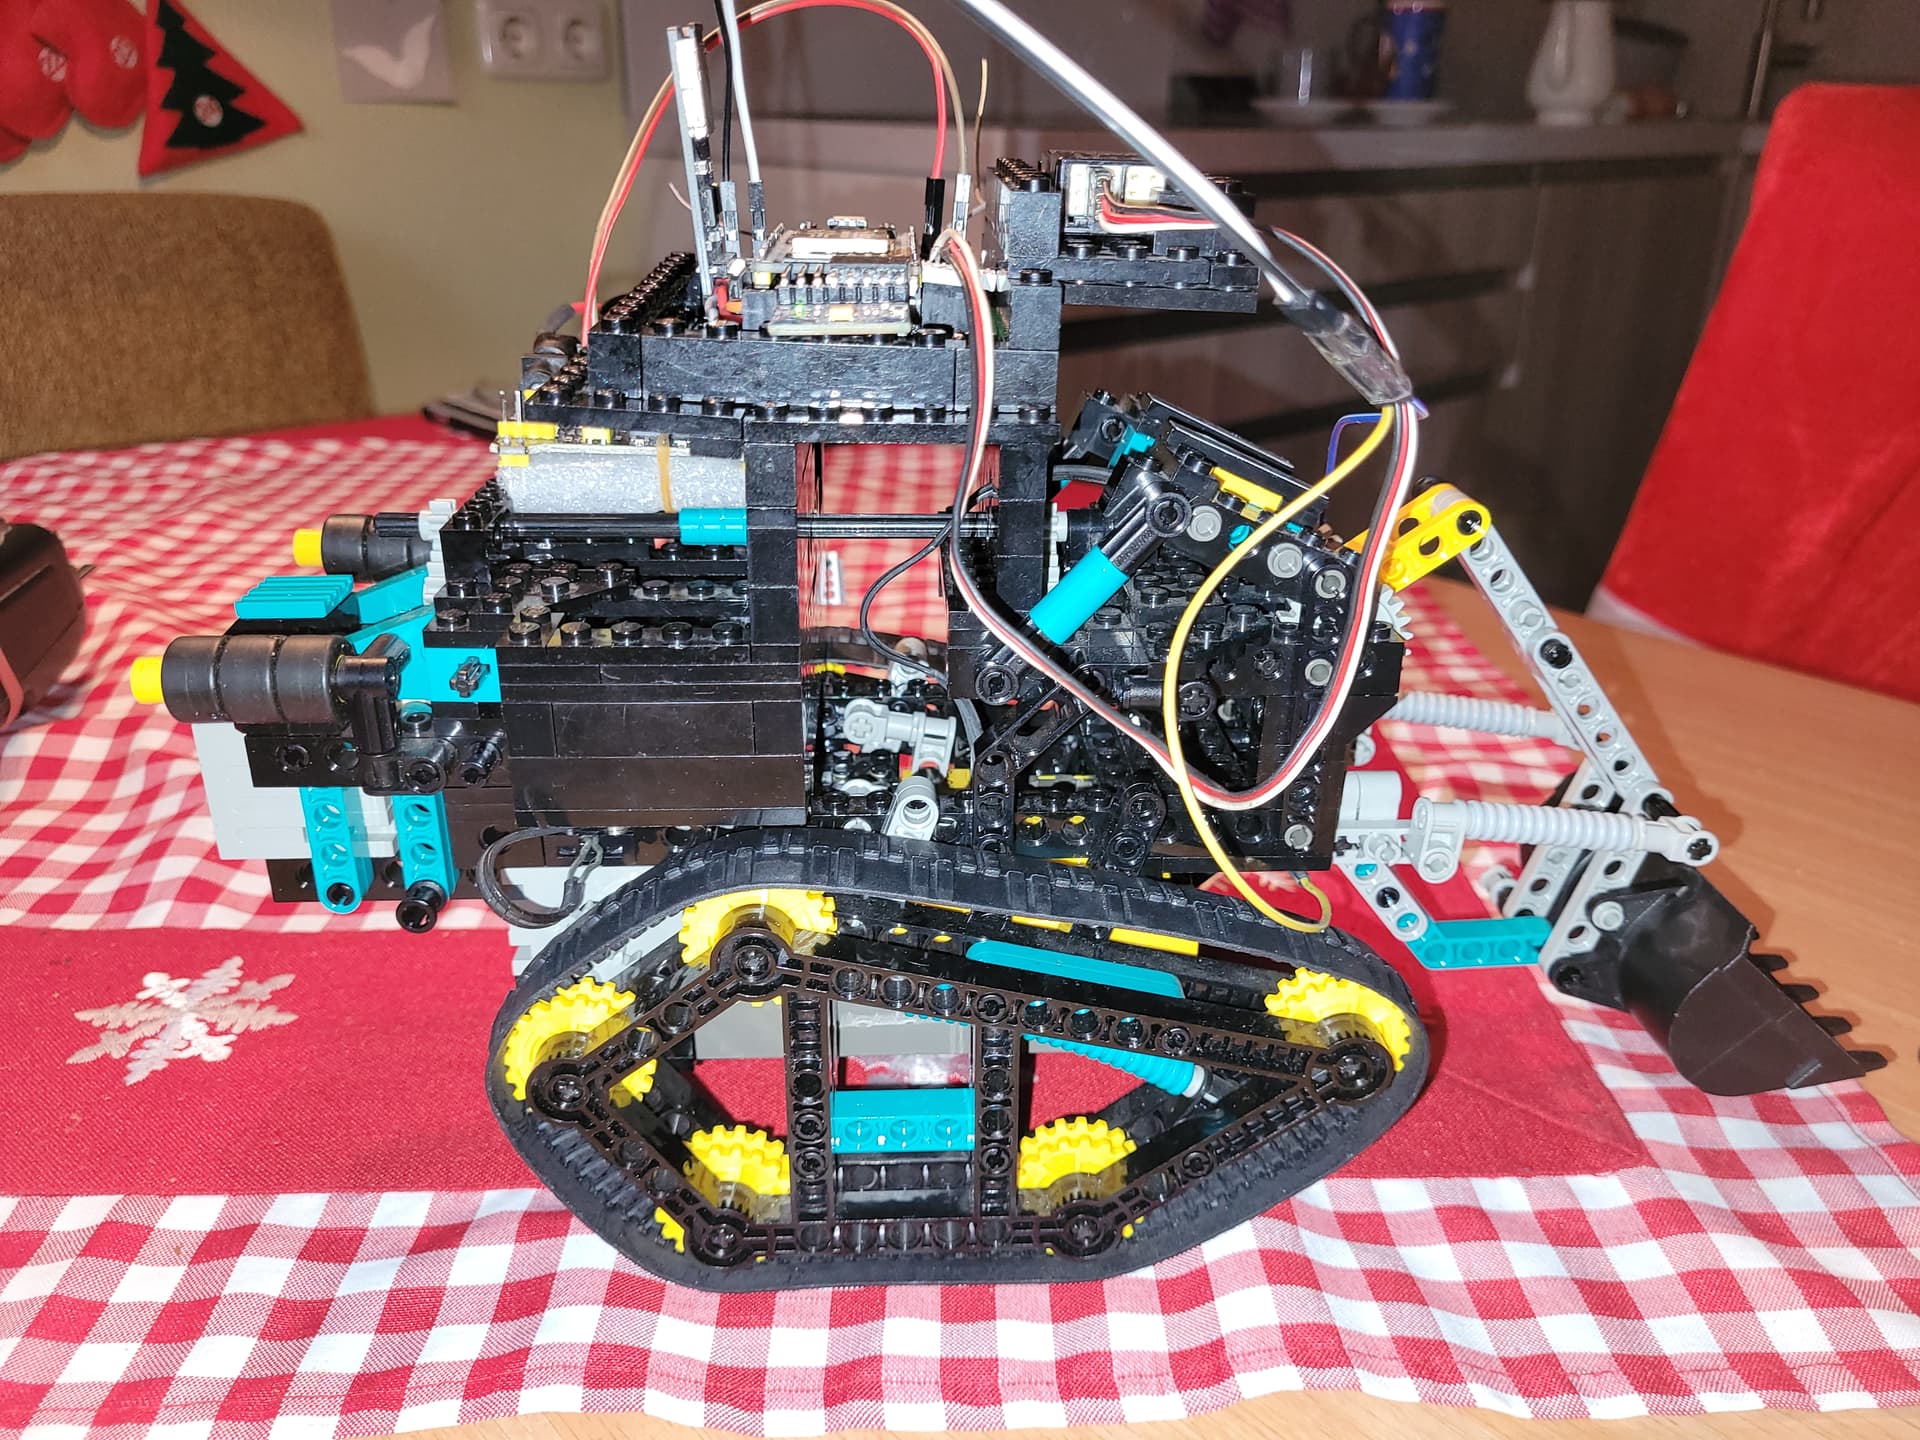
Now the HW - Test platform is completed with SD-Card and IMU MPU6050
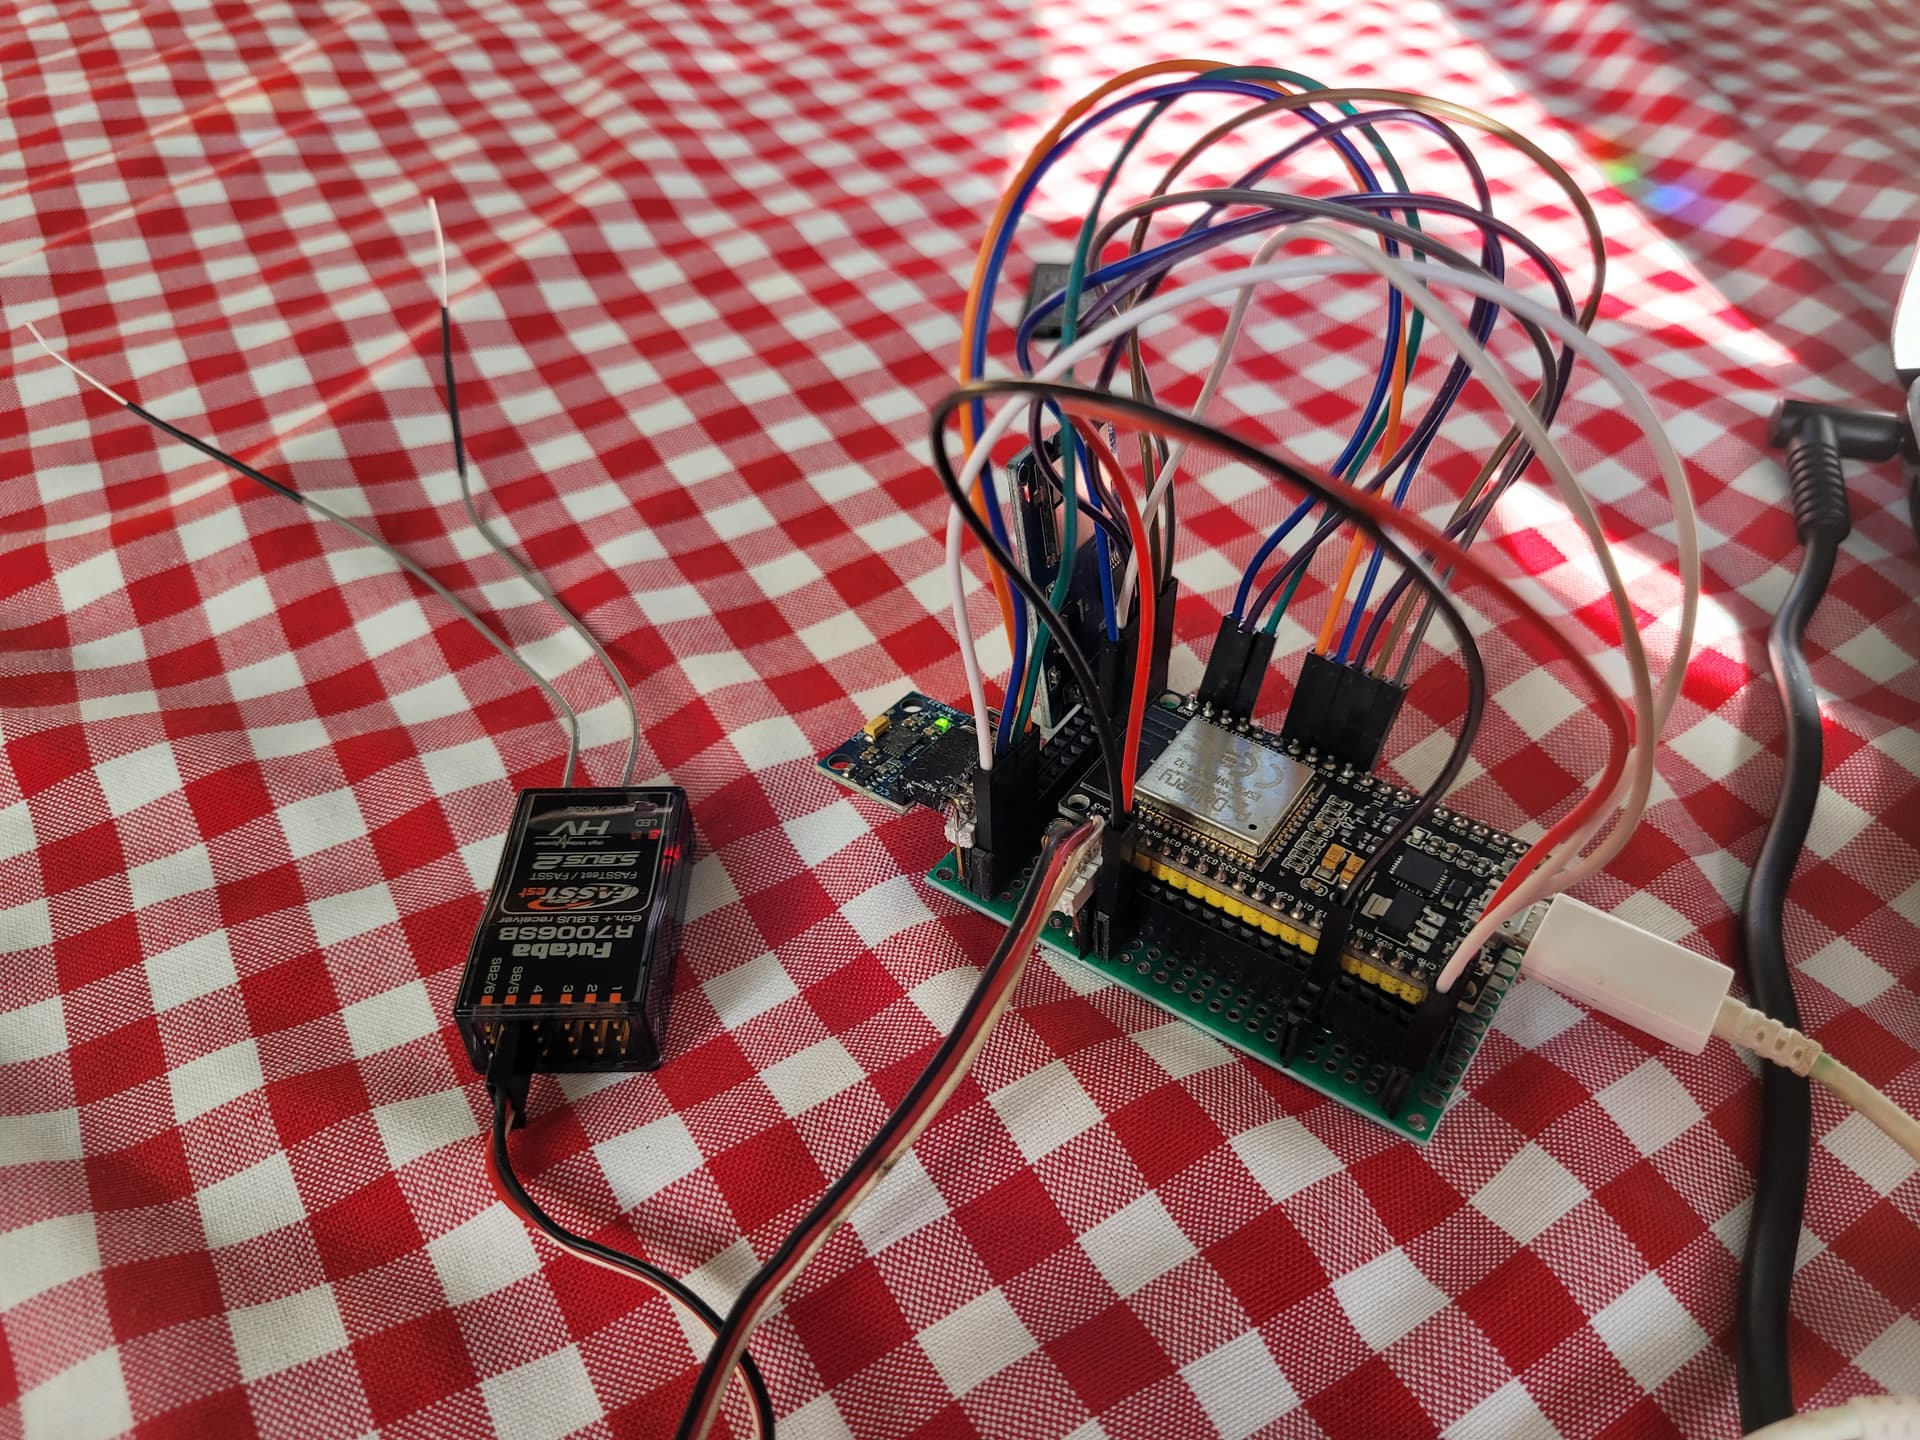
The SD Card is connected to the standard vspi bus on the esp32 board and the IMU is also connected to the standard I2C bus. For this small changes at my new libraries/AP_HAL_ESP32/boards/esp32famos1.h was necessary as the esp32empty.h had some mismatch and doubled used gpio-pins.
(PS: I am sorry to only use update function as I cannot reply to my own thread. Don’t know how to change this, maybe a moderator can look at this)
Update Apr 10,2024
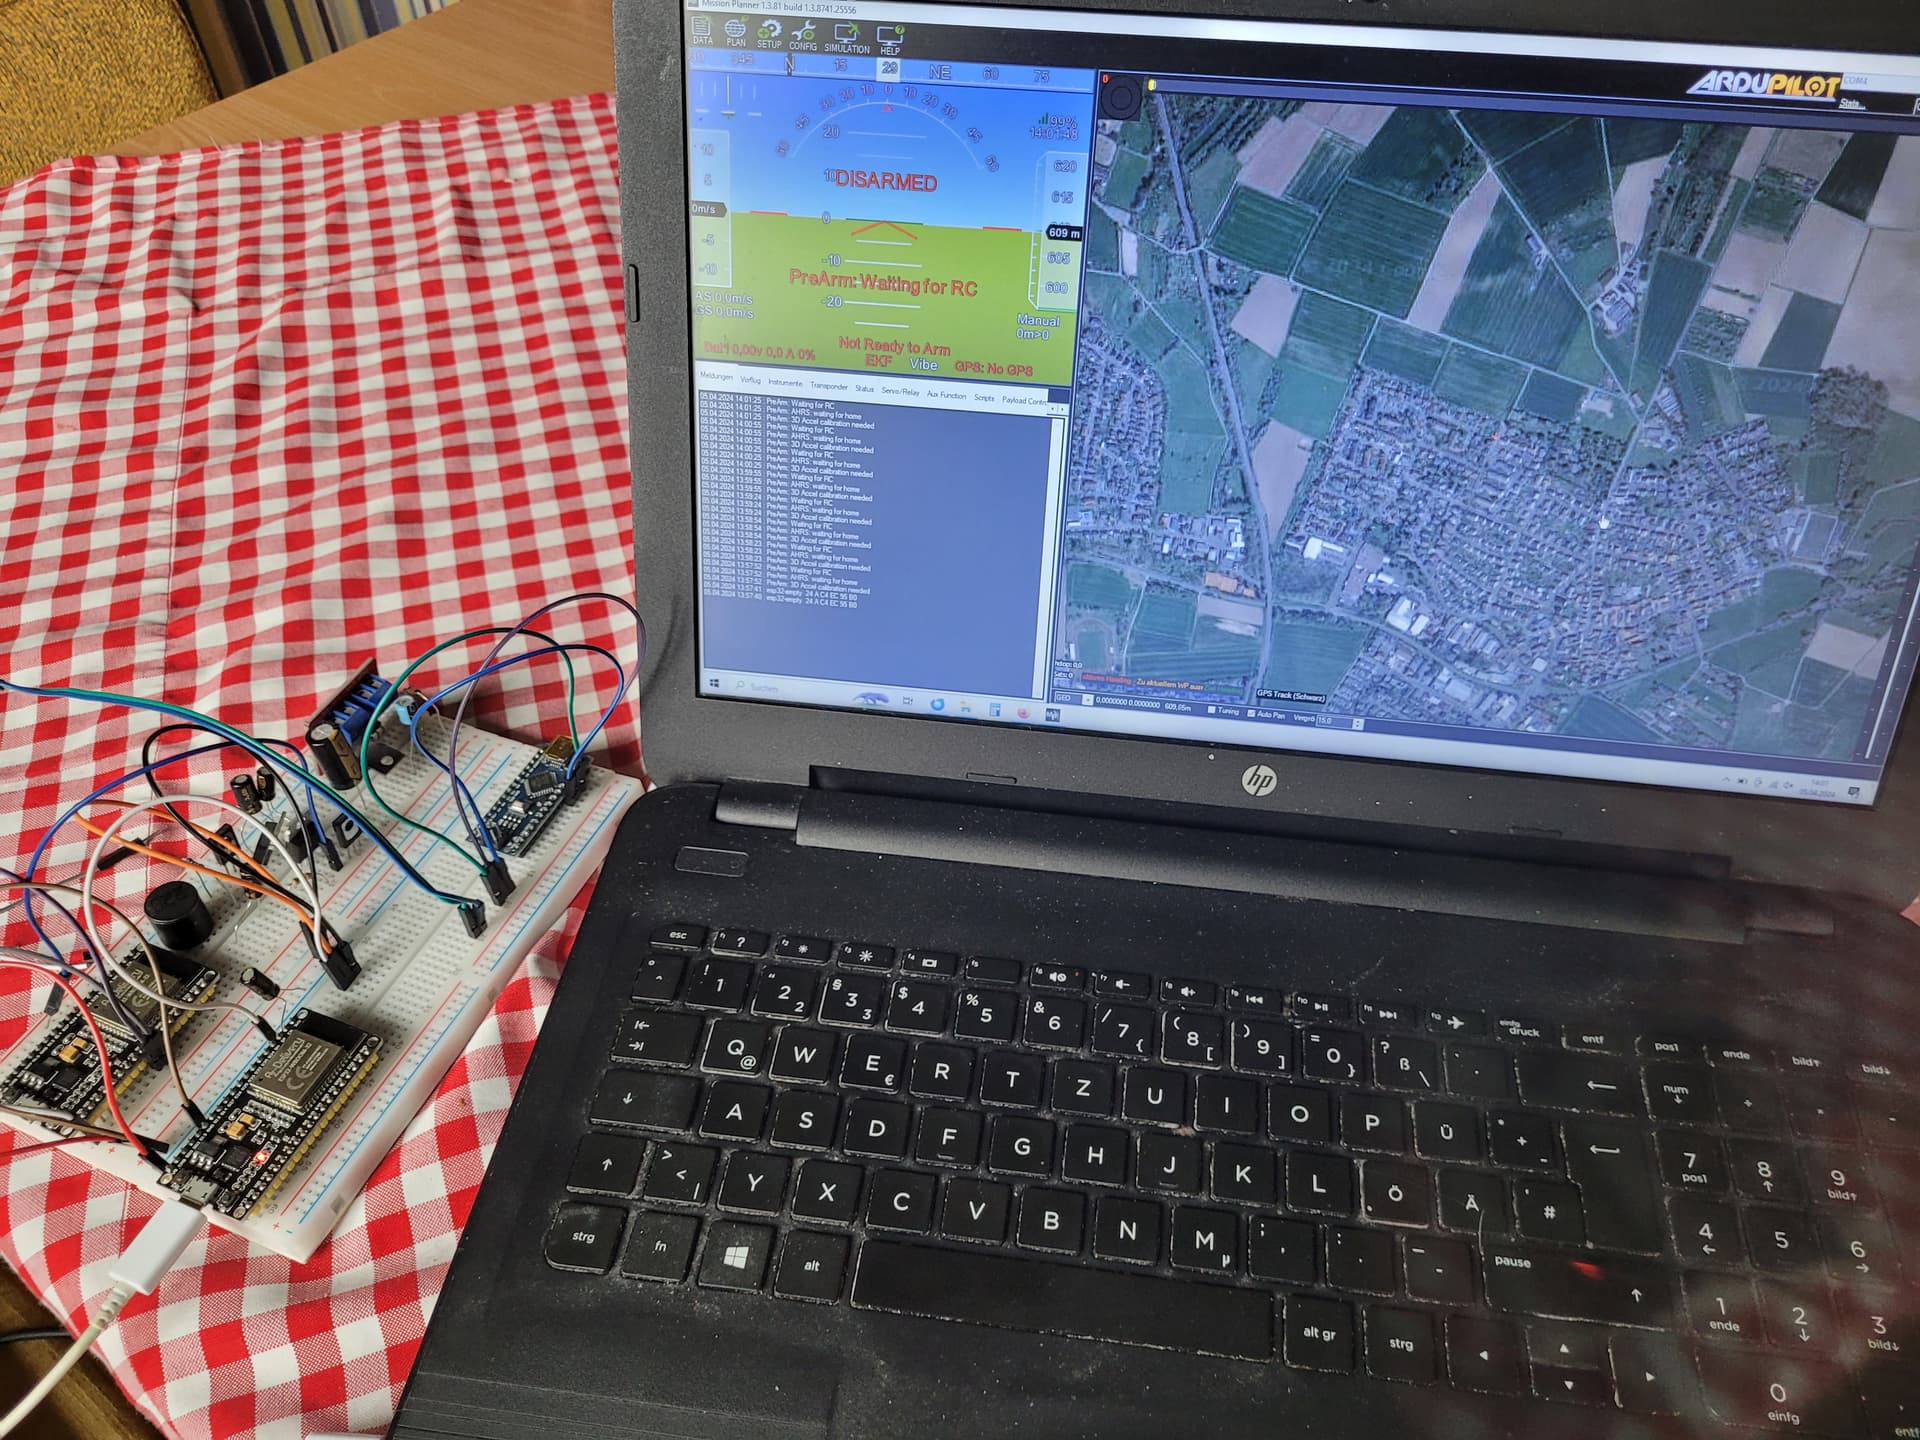
After setting up the development enviroment and programming the first ESP32 with a ardupilot firmware I had the first success as the module shows up on mission planner.
After getting some initial messages during startup in the message window I got some PreArm messages
- 3D Accel calibration needed
- AHRS: waiting for home
- Waiting for RC
The first two messages are clear as my board has no IMU and no GPS connection. It is just the simple ESP32 Dev board.
But the last one is a small disappointment as I had a RC receiver connected to the defined HAL_ESP32_RCIN GPIO_NUM_36.
Also on the setup page I don’t see any reaction on my RC calibration tab.
My radio system is a good old Futaba TX and RX using SBUS on the RX output.
OK, I had to go deaper in the board definition file.
Therefore I decided first to create my own submodule type.
- copied the existing board definition file
libraries/AP_HAL_ESP32/boards/esp32empty.h to esp32famos1.h - copied existing hwdef folder
libraries/AP_HAL_ESP32/hwdef/esp32empty to esp32famos1 - edit libraries/AP_HAL_ESP32/boards/esp32famos1.h
change #define HAL_ESP32_BOARD_NAME to “esp32-famos1”
change #define HAL_ESP32_RMT_RX_PIN__NUMBER to 36
comment out #define AP_RCPROTOCOL_ENABLED 0
After this changes I got two compiler errors and therefore I also had to change
- libraries/AP_HAL/AP_HAL_Boards.h
add #define HAL_BOARD_SUBTYPE_ESP32_FAMOS1 6009 - libraries/AP_HAL/board/esp32.h
add #elif CONFIG_HAL_BOARD_SUBTYPE == HAL_BOARD-SUBTYPE_ESP32_FAMOS1
add #include “esp32famos1.h”
Now compiling runs well and I uploaded the new firmware.
After startup the module shows detection of SBUS receiver correctly and also I was able to check the RC input on the setup tab.
Again good success for today
START April 5, 2024
Hi everybody,
now I did it. The first step in the ardupilot world. With the help of this nice forum.
For a while I am looking for a platform, which I can use as flight controller for a future planned twin rotor helicopter. To built such a basically radio controlled helicopter is dream since decades of years. Now, as pensioner maybe i can realize this youth dream. One part of the way is to built a own flight controller or to adapt existing one.
Therefore I started two approaches.
First approach is a develoment with arduino ide, C-programming based on a Teensy board only for stabilizing functions but not autonomous flight control
Second approach adaption of ardupilot with open end.
To learn more about ardupilot I just started with the next step after only reading the forum and the ardupilot sites.
I installed on a spare Win10 notebook the development enviroment for ardupilot and started today to compile and flash my first ardupilot capable controller board, a bare ESP32 WROOM 32 , as I have some of these boards available.
At the moment the board is not doing much, no sensors, just talking mavlink with mission planer. It is only a very first step.
But as I am not a SW-Developer I must learn all this in small steps.
All information, how to setup the enviroment with the specials for ESP32 I found here and on the ardupilot wikis.
Therefore I say thankyou to you, the developers and this community.
WHAT I DID YESTERDAY Apr.4;2024
Steps I did till yesterday:
Setting up the buid enviroment on WIN 10 Notebook following the
https://ardupilot.org/dev/docs/building-setup-windows10_new.html Steps 1 - 3.
Most problem was enabling the WSL function on the Notebook as
- the support of virtual engine must be enabled in Notebook BIOS
- Antivirus software must be disabled during install
Afterwards I followed the git command line setup
https://ardupilot.org/dev/docs/building-setup-linux.html
and just cloned the ardupilot repository with the command line as described on the above mentioned page to the virtual ubuntu system and executet the shown script for installing the required packages
To check the installation i run a test build like shown here:
https://github.com/ArduPilot/ardupilot/blob/master/BUILD.md
./waf configure board --MatekH743
./waf heli
I selected this test build as for the far futre twin helicopter i think this might be the best board.
This test build run without any problems on the fresh installed virtual ubuntu system and shows that the build enviroment is in principle set up.
As I don’t have such a board available but some ESP32 I decided to start with this an learn further
To use the ESP32 additional tools are necessary. For this I followed
https://github.com/ArduPilot/ardupilot/blob/master/libraries/AP_HAL_ESP32/README.md Step 3
Also this worked fine.
But on Step 4 I got an error during the linking prozess.
The reason was probably that I don’t run ./waf distclean before starting with the new setup.
So the next try
./waf distclean
./waf configure
./waf configure --board esp32empty
./waf plane
runs without errors and generates the correct output files
The next problem shows up with the upload as shown in step 5
ESPBAUD=921600 ./waf plane --upload
The tool could not find my ESP32 board connected to COM4 via USB. But this is a known problem of the ESP32 board. It dosn’t start in bootloader mode. It is necessary to press the boot buttom on the board until the download starts. So on the next try I pressed for a very long time this buttom and than also the upload worked.
Finally I connected the board via USB to mission planer and can see it is communicating with mission planer.