
Introduction
Following part 1 and part 2, we now have a quadcopter capable of precise indoor localization and navigation using position data provided the Intel Realsense T265. In this last part of the ROS-based portion of my ongoing series of labs, we will take a look at how to use Mission Planner or python program to send waypoints to ArduPilot, perform autonomous flights, and verify the tracking performance of the T265 under some challenging scenarios.
This blog is divided into the following sections:
- Prerequisite
- Checking the safety perimeter
- Autonomous flight
a. Mission Planner - Sending waypoints in Guided mode
b. ROS - Sending waypoints in Guided mode - Performance tests
- Conclusions
1. Prerequisite
You need to follow the steps outlined in the previous part 1 and part 2, and have a vehicle that:
- Have a working installation of librealsense and realsense-ros.
- Can hover stably in Loiter mode.
2. Checking the safety perimeter
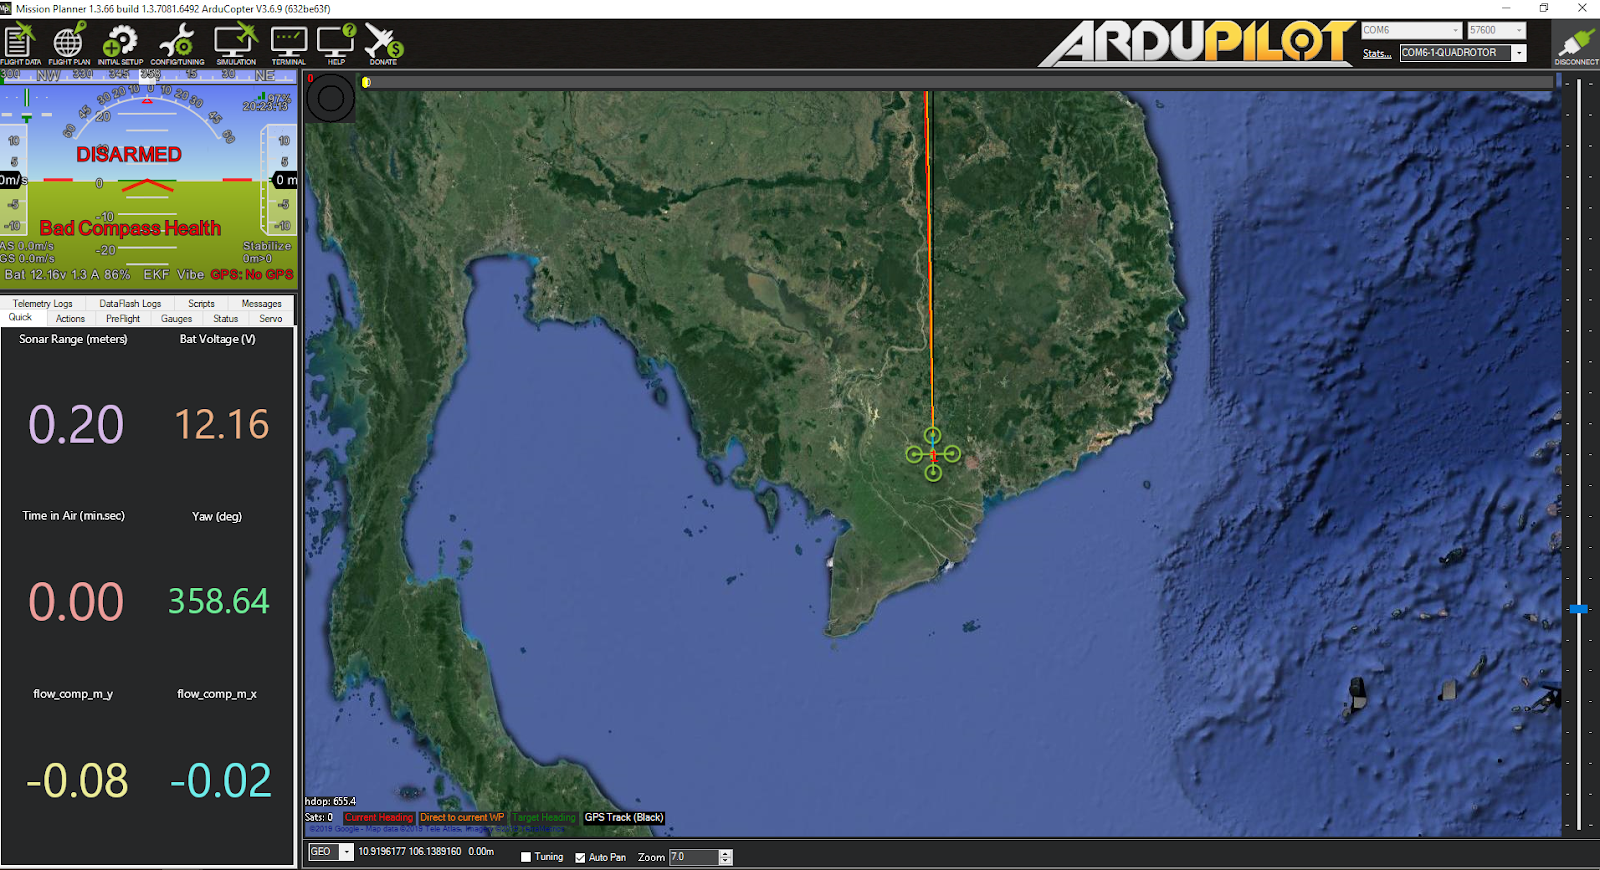
This is an important safety measure for indoor flight tests. What we need to know is the safety area on the map that the vehicle can operate in, so that we don’t accidentally send it to the wall.
-
First, setup everything according to part 2 until you can see the quadcopter icon on the map.
-
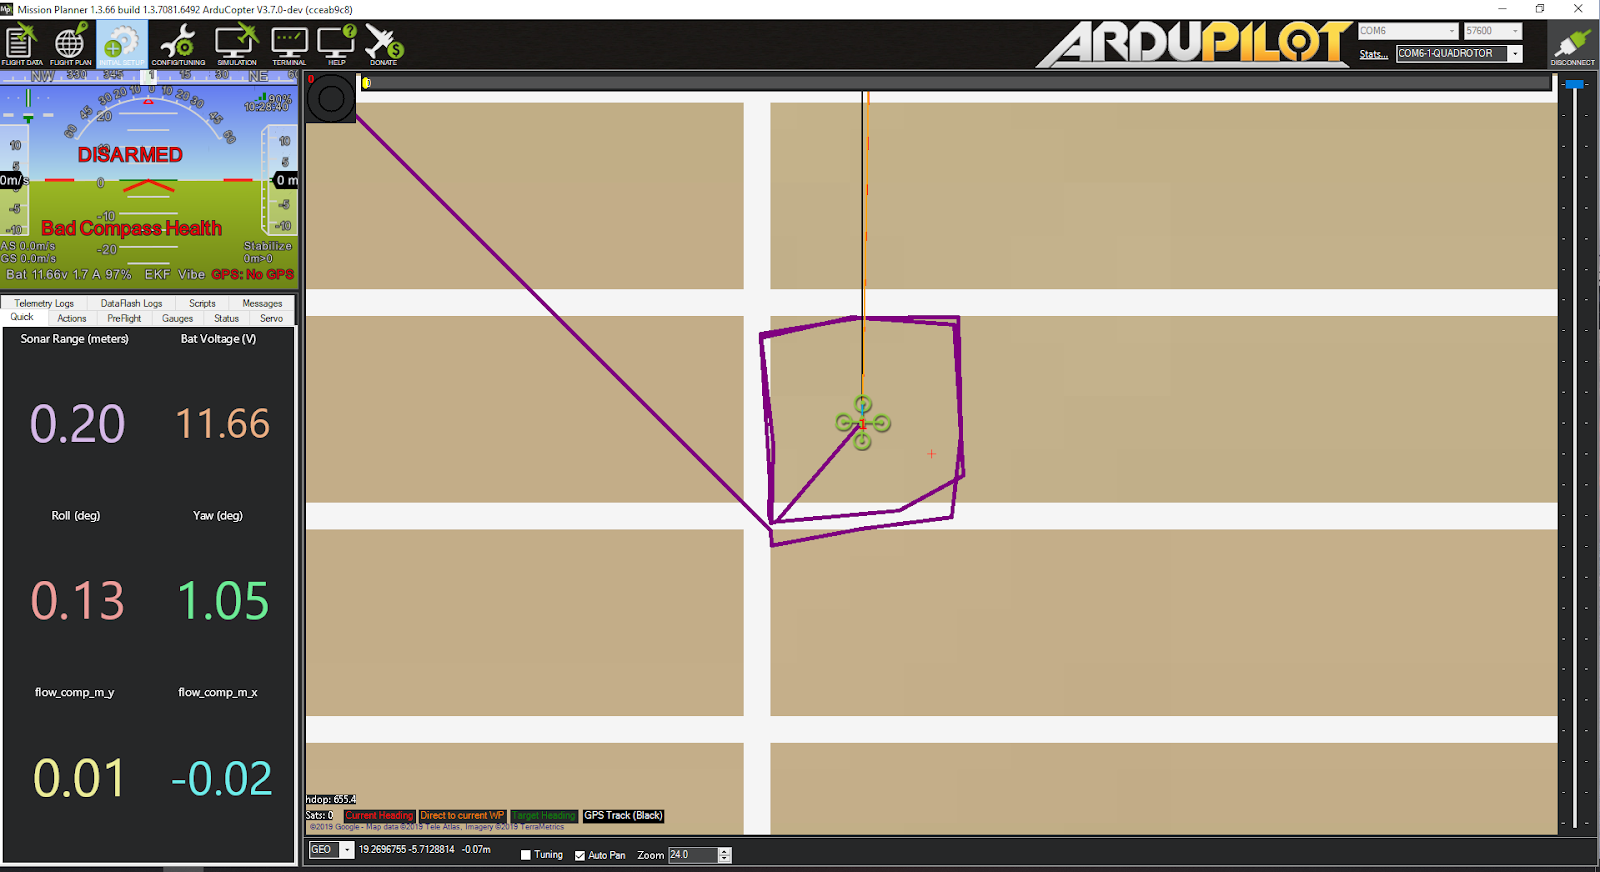
Next, move the vehicle around the safety perimeter of your environment. The trajectory shown on the map of Mission Planner will be the bounding box for the commands that you can issue from Mission Planner.
-
You can also view the trajectory of the vehicle on
rviz(follow the instructions here). If possible, check how accurate the scale of position output is (i.e. move 1m to the front in the real world corresponds to ~1 in y-axis).
3. Autonomous flights
Once a safety working boundary is established, autonomous tests can be carried out. If you are using Mission Planner, you don’t need to set one of the flight modes to “Guided”, but that might not be the case for other GCS.
a) Mission Planner - Sending waypoints in Guided mode
- Make sure position data feedback from T265 is ready, EKF home set, and you have a good sense of the safety boundary.
- Manual flight test: take off in alt-hold or loiter. Make sure that the vehicle can hover stably.
- In the Mission Planner map, right-click on a nearby spot and select “Fly to Here”. Select a safe altitude for guided mode so that you do not hit the ceiling.
- The vehicle should fly to the target location and hover there until further commands or the flight mode changes.
- Next flights, you can try and issue a take off command from Mission Planner directly.
b) ROS - Sending waypoints in Guided mode
We will use the scripts provided by @anbello in the aruco_gridboard repo. If you have cloned my repo vision_to_mavros, two of the examples are located in the scripts folder.
- Make sure position data feedback from T265 is ready, EKF home set, and you have a good sense of the safety boundary.
- Manual flight test: take off in alt-hold or loiter. Make sure that the vehicle can hover stably.
- Before you run the script: if the quadcopter is on the ground, make sure to put it back to the origin, otherwise it will not take off vertically.
- To run the scripts:
# On RPi, run either:

rosrun vision_to_mavros mavros_control1.py

# Or:

rosrun vision_to_mavros mavros_control1.py
- The first script
mavros_control1.pywill ask the quadcopter to take off to 1.2m, maintain that height while moving along a 0.4m square. - The second script
mavros_control2.pywill ask the quadcopter to take off to 1m, move around a circle of 1m radius, while lock the heading to look at the center of the circle.
Now you can explore other options for autonomous flights. Here’s some references to help you get started:
- http://ardupilot.org/copter/docs/ac2_guidedmode.html
- http://ardupilot.org/copter/docs/auto-mode.html
- http://ardupilot.org/planner/docs/common-planning-a-mission-with-waypoints-and-events.html
4. Performance tests
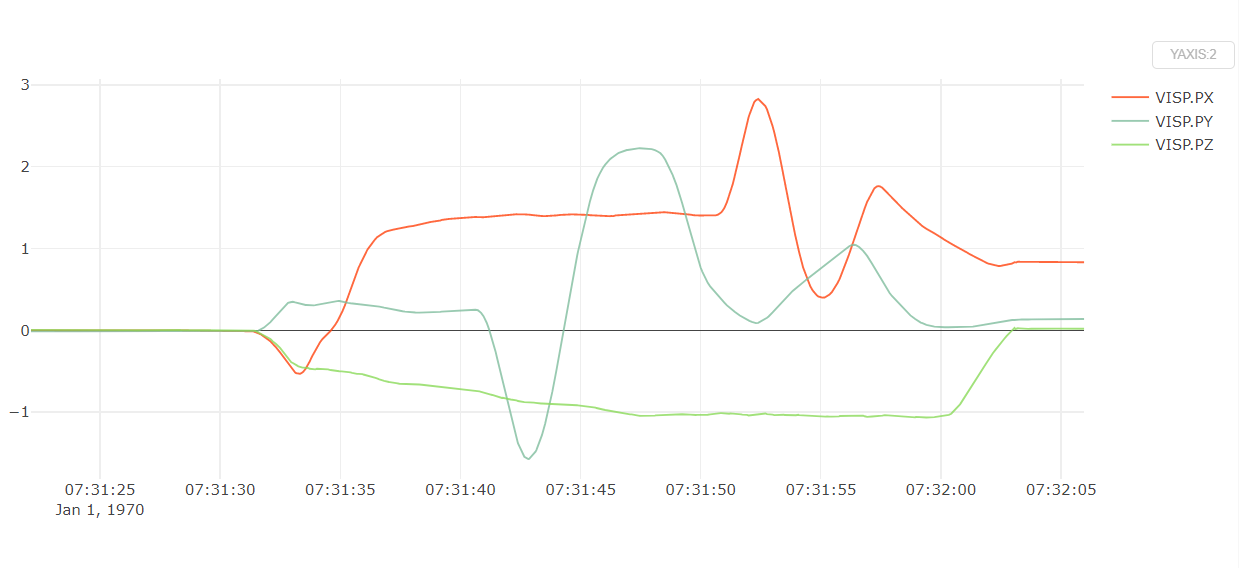
One of the key aspects of my 2019 GSoC project is to analyze the performance of the T265 under various conditions. First, let’s see the results of a good flight:
- Position x, y, z (in NED convention) smoothly follows real trajectory and scale is accurate to cm-level:
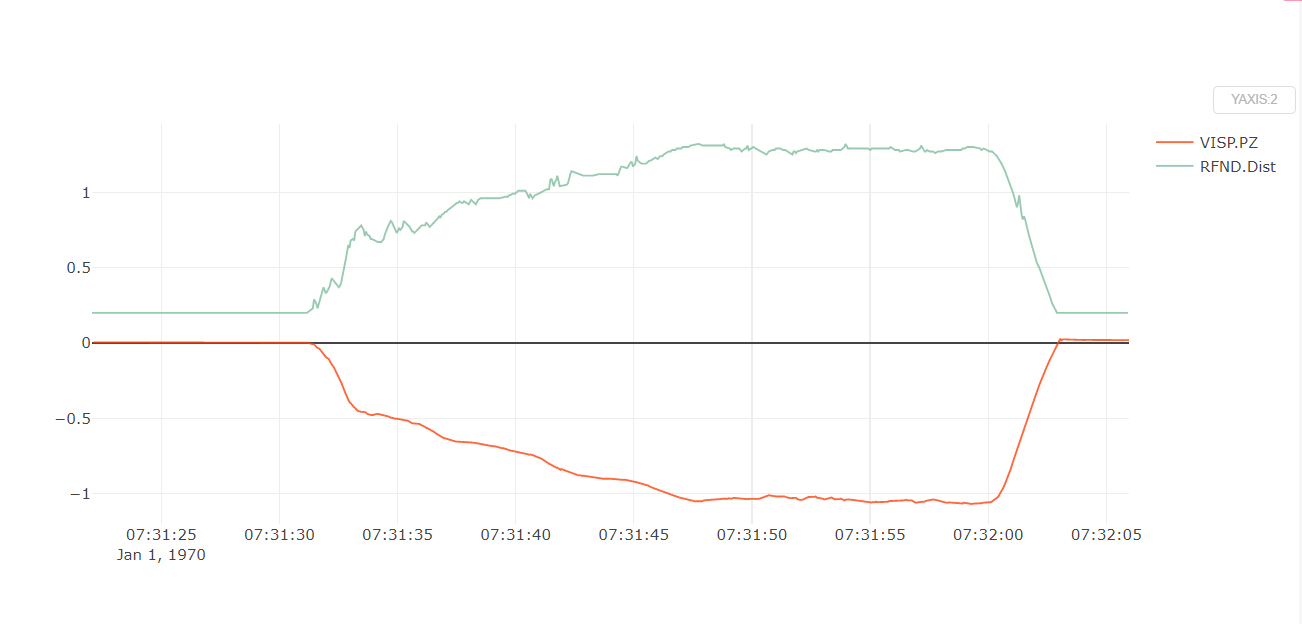
- Attitude tracking compare to range finder’s readings (TeraRanger One in my setup). There is an offset of 20cm for the range finder’s data.
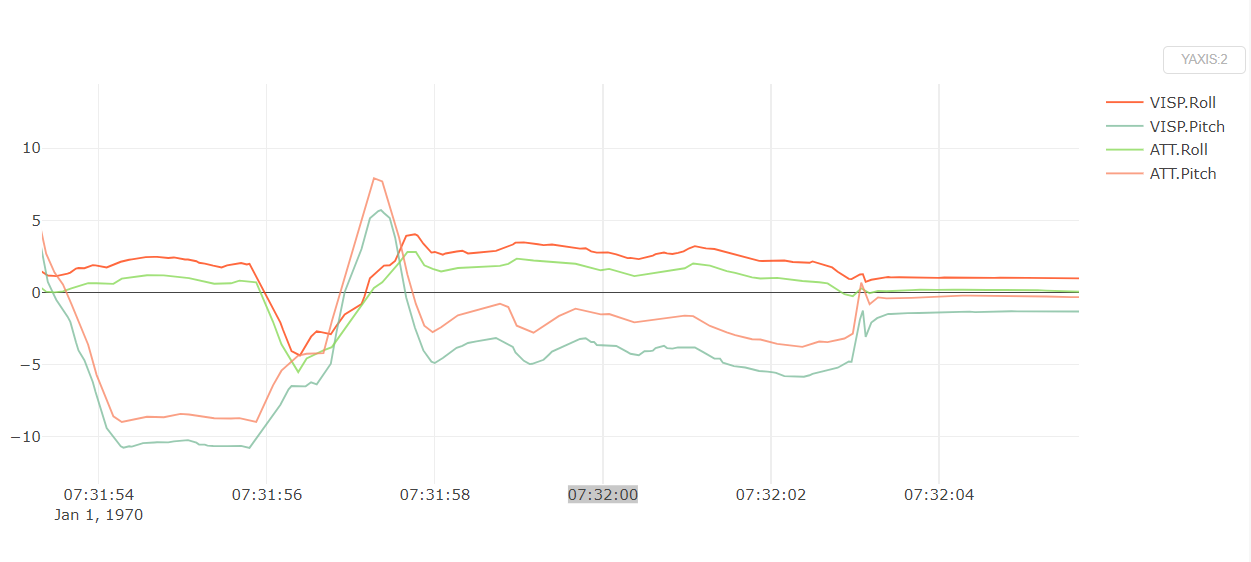
- Here’s a portion of the flight log, showing how well the T265 tracks compared to IMU:
- Any flights that have performance issues, we can go back and compare the logs with good results to figure out what might have gone wrong.
To test the limits of the T265, I have conducted several tests in an indoor environment:
- High dynamic range of luminosity:
In the video, you can see that the tracking “confidence level” of the T265 was “high” for most of the flight and briefly changed to “medium” when the light switched between on/off. The T265 was able to maintain good tracking even when the lights were turned off, or turned of and off repeatedly. Albeit that the room was not completely dark, I believe not many SLAM algorithms would have coped that well with such lighting conditions.
- Frame induced with heavy vibration:
My quadcopter frame did not have much vibration (luckily). To test this, vibration was intentionally added into the system by changing one motor to a different KV than the others, and wrapping duct tapes to the tips of one propeller. Even then, there were no problems with for most of the tests.
However, as can be seen in the video below, position tracking did diverge in some cases, suggesting that with “appropriate” kind of vibrations, problems can occur. The EKF2 was fusing both vision feedback and optical flow. At the end of the video, when position feedback “jumped” back to the right position, the local position did not jump and remained approximately where it was.
- Environment with a lack of distinctive features and repetitive patterns:
To simulate this scenario, the T265 is positioned facing downward. In this case, the scale of the T265 is often not as accurate as facing forward (i.e. 1m lateral movement translates to 1.2 or 0.8 difference in position feedback). Even though optical flow was also fused, local position shown on Mission Planner was similar to that of T265 feedback. Occasionally, the position also drifted after some rounds of movement.
It is safe to say that as of this writing, care should be taken when using the T265 in a downfacing configuration, specifically in terms of scale, initial yaw angle, and drift:


5. Conclusions
With this, we can now close our first section of the lab series, which focuses on the integration of ArduPilot and the Intel RealSense Tracking Camera T265. I hope that these 3 blog posts will be a getting started guide for anyone interested in the use of visual inertial odometry (VIO) technology to make a robot that can navigate in GPS-less environment, using a plug-and-play tracking camera.
Any feedback is welcome and I look forward to hearing from you all.