Yes, that’s correct. The AHRS_ORIENTATION will either be 2 for Yaw90 or 6 for Yaw270. I can’t remember which way the rotation starts. The cool part is that this rotates the IMU and compass readings so there is no need to rediscover your compass orientation from the standard offset.
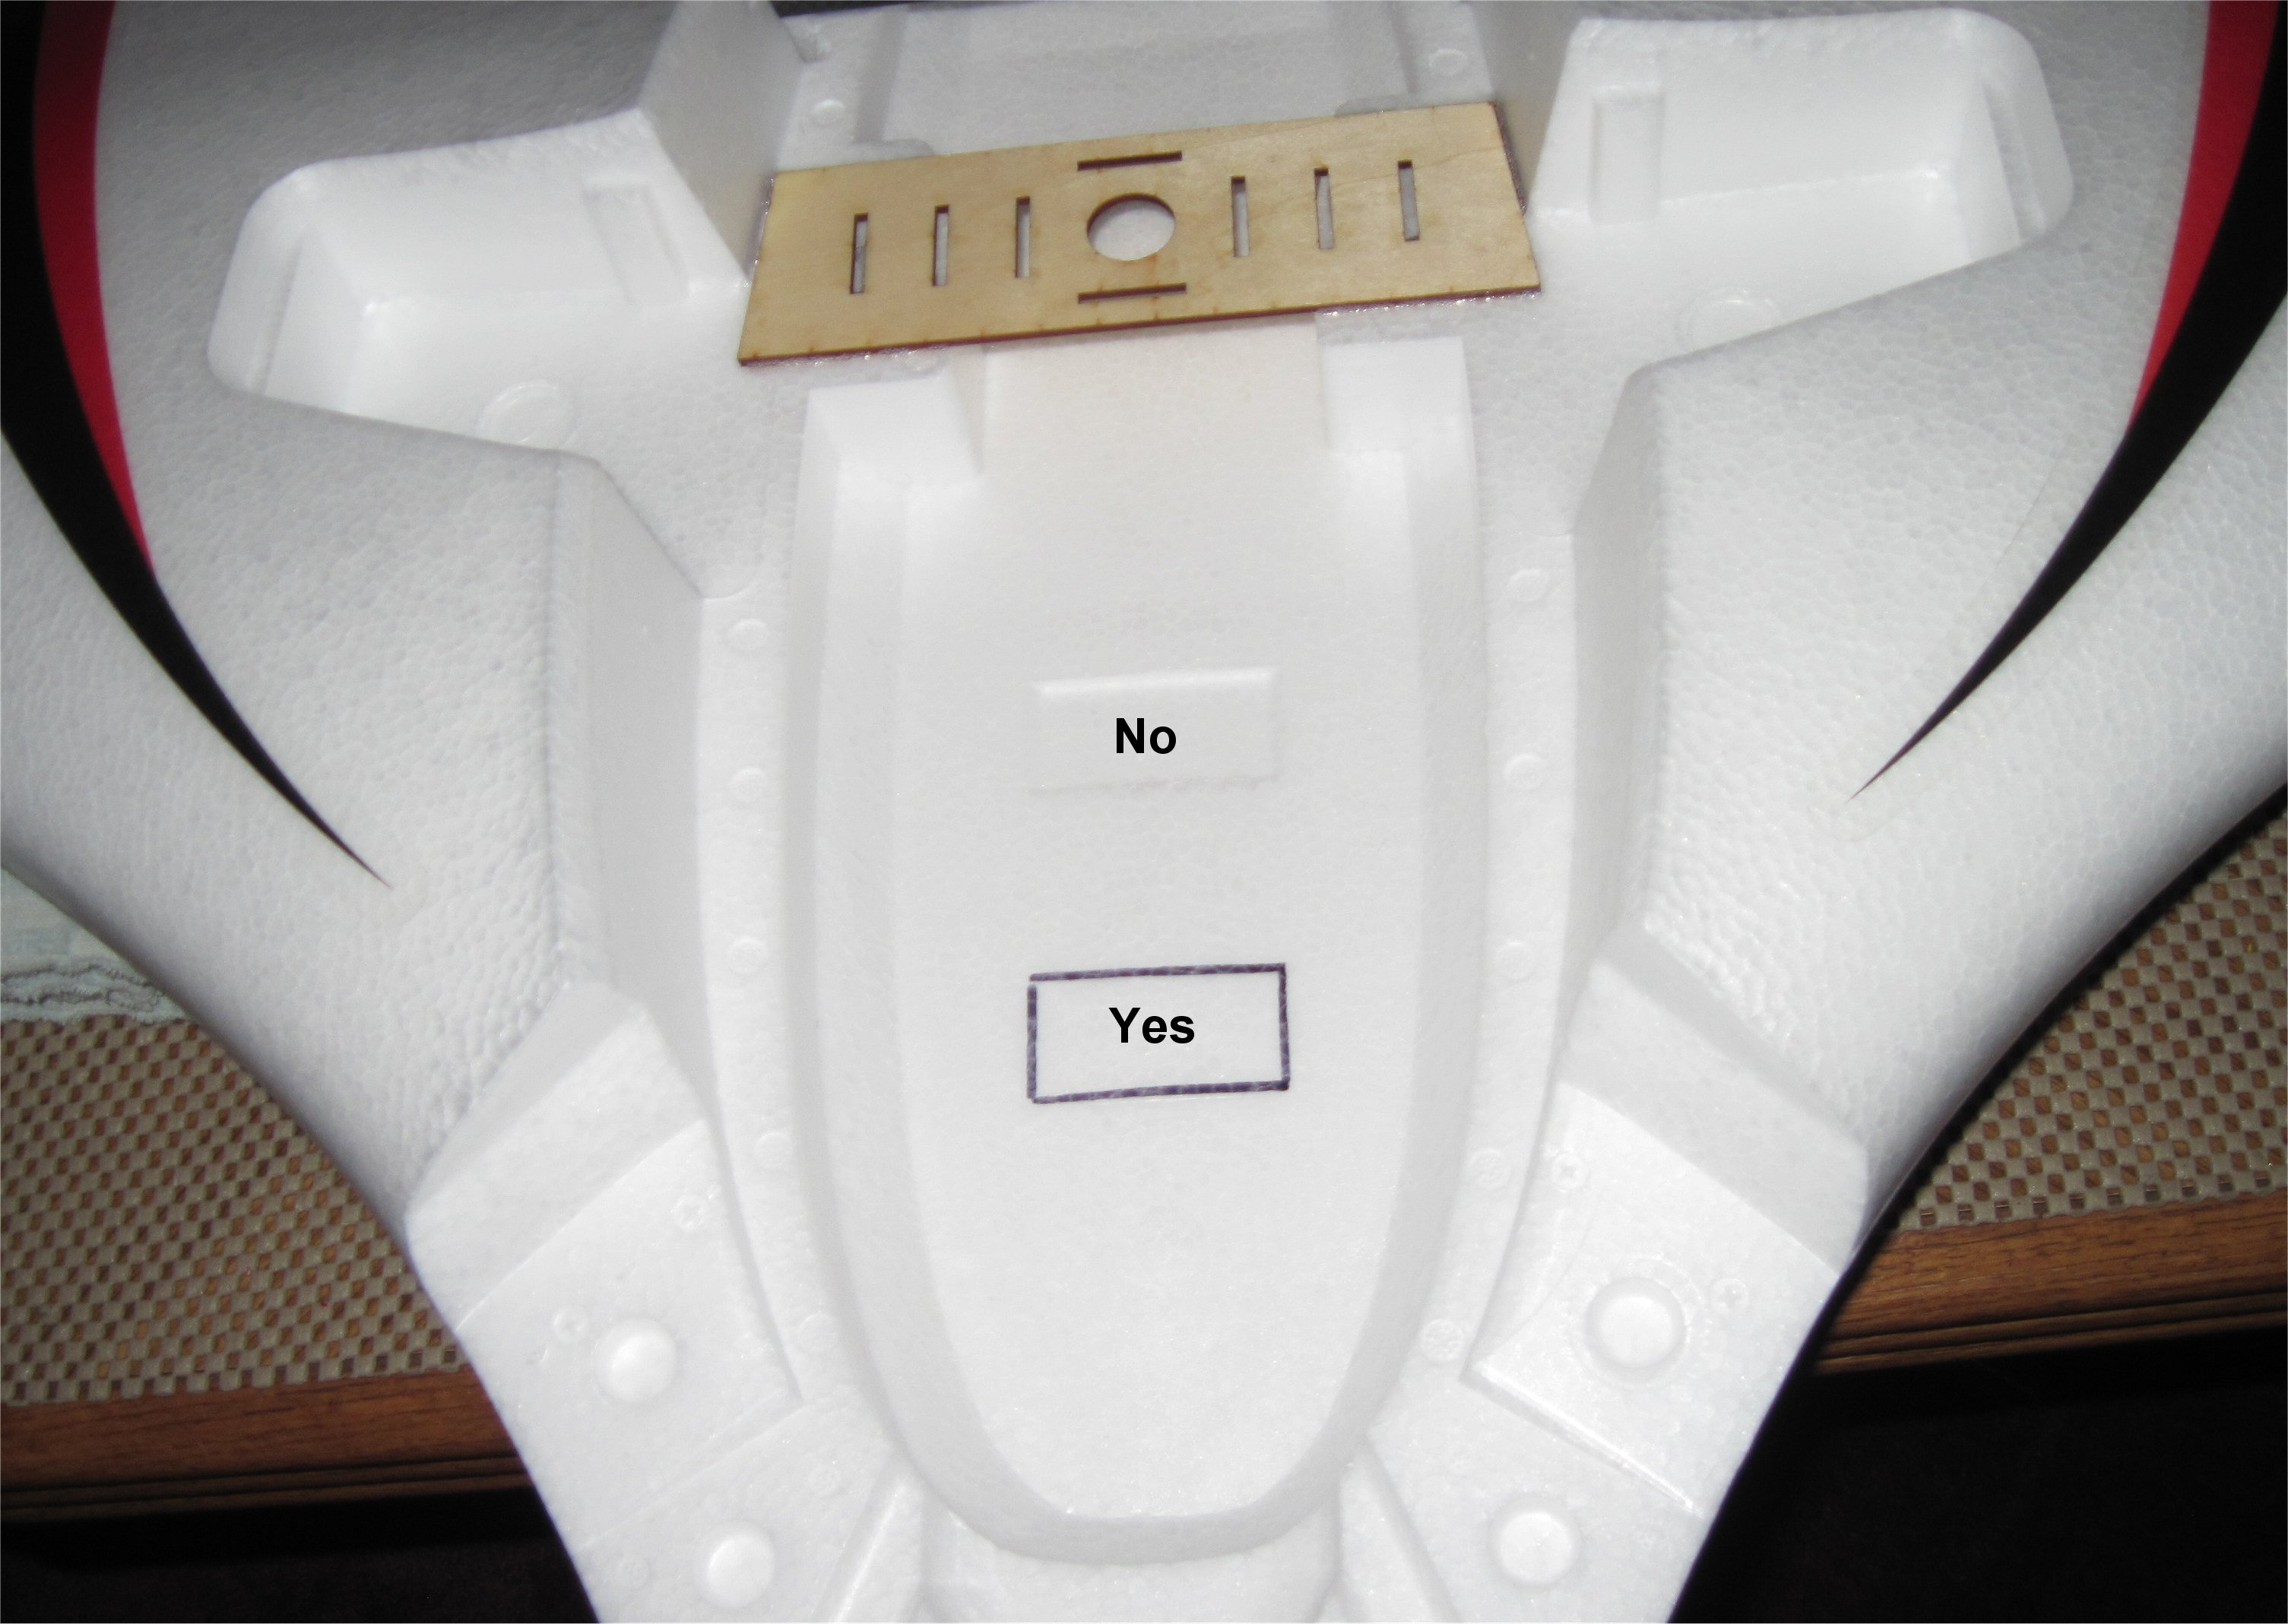
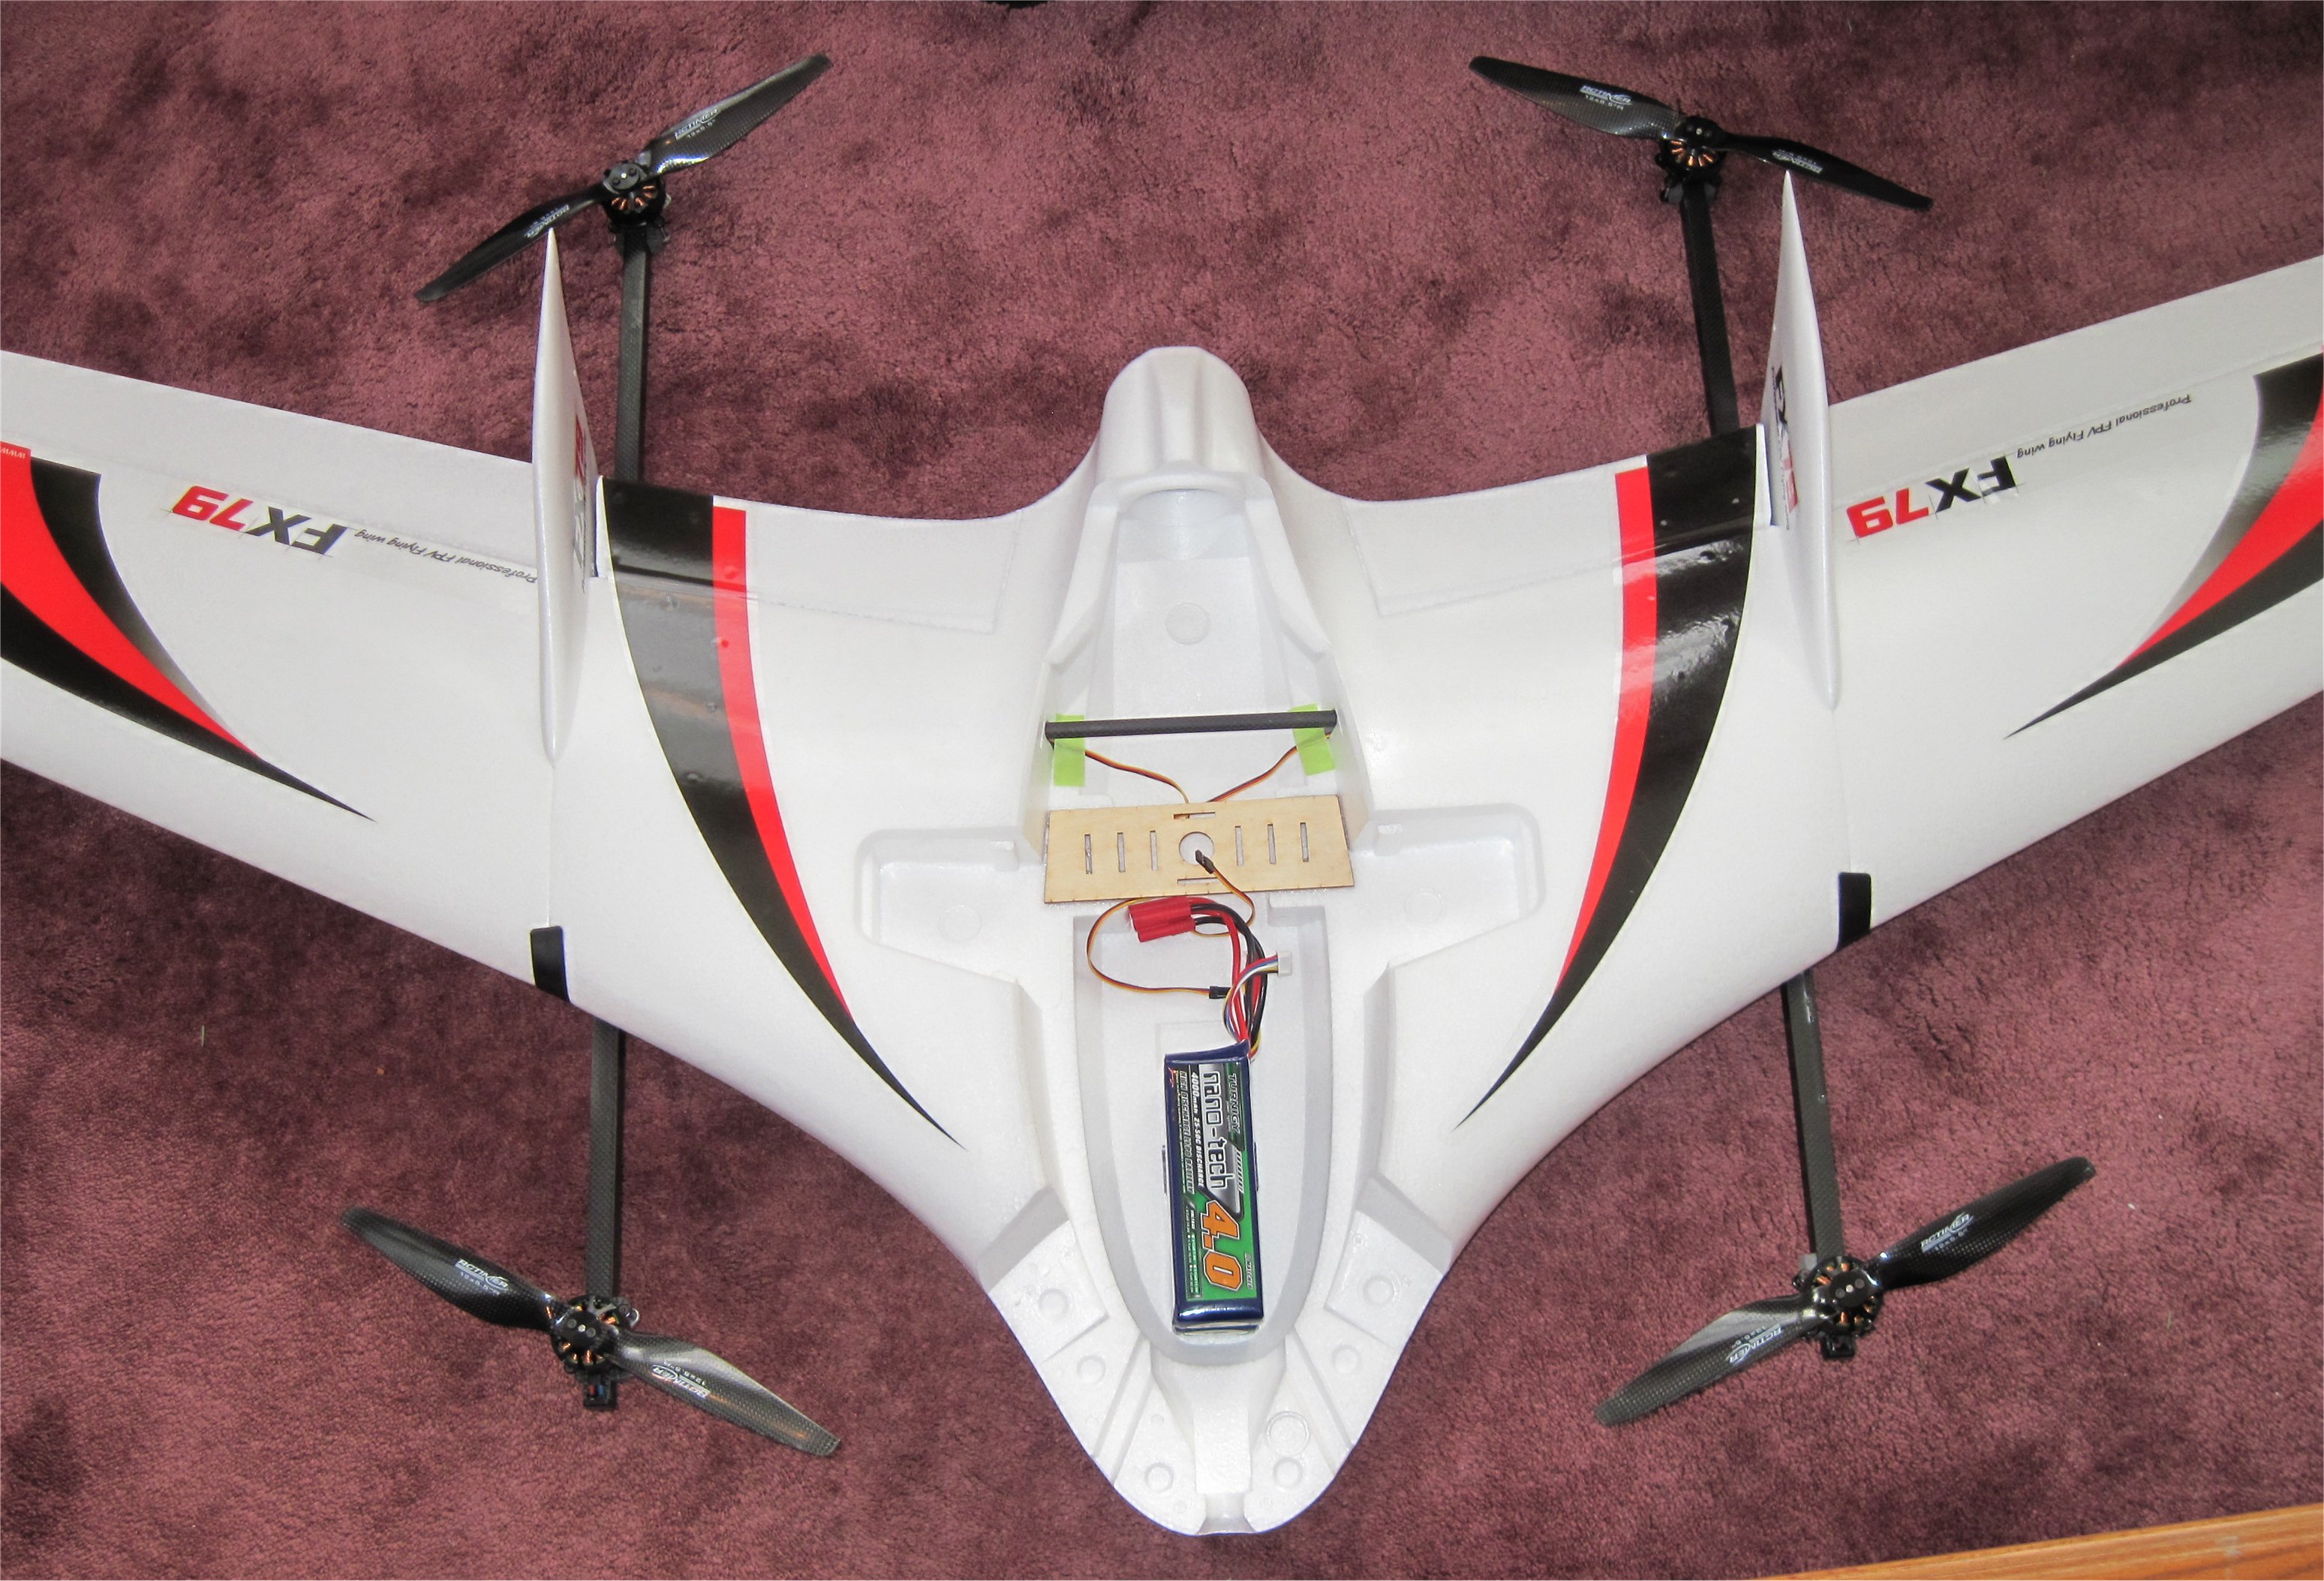
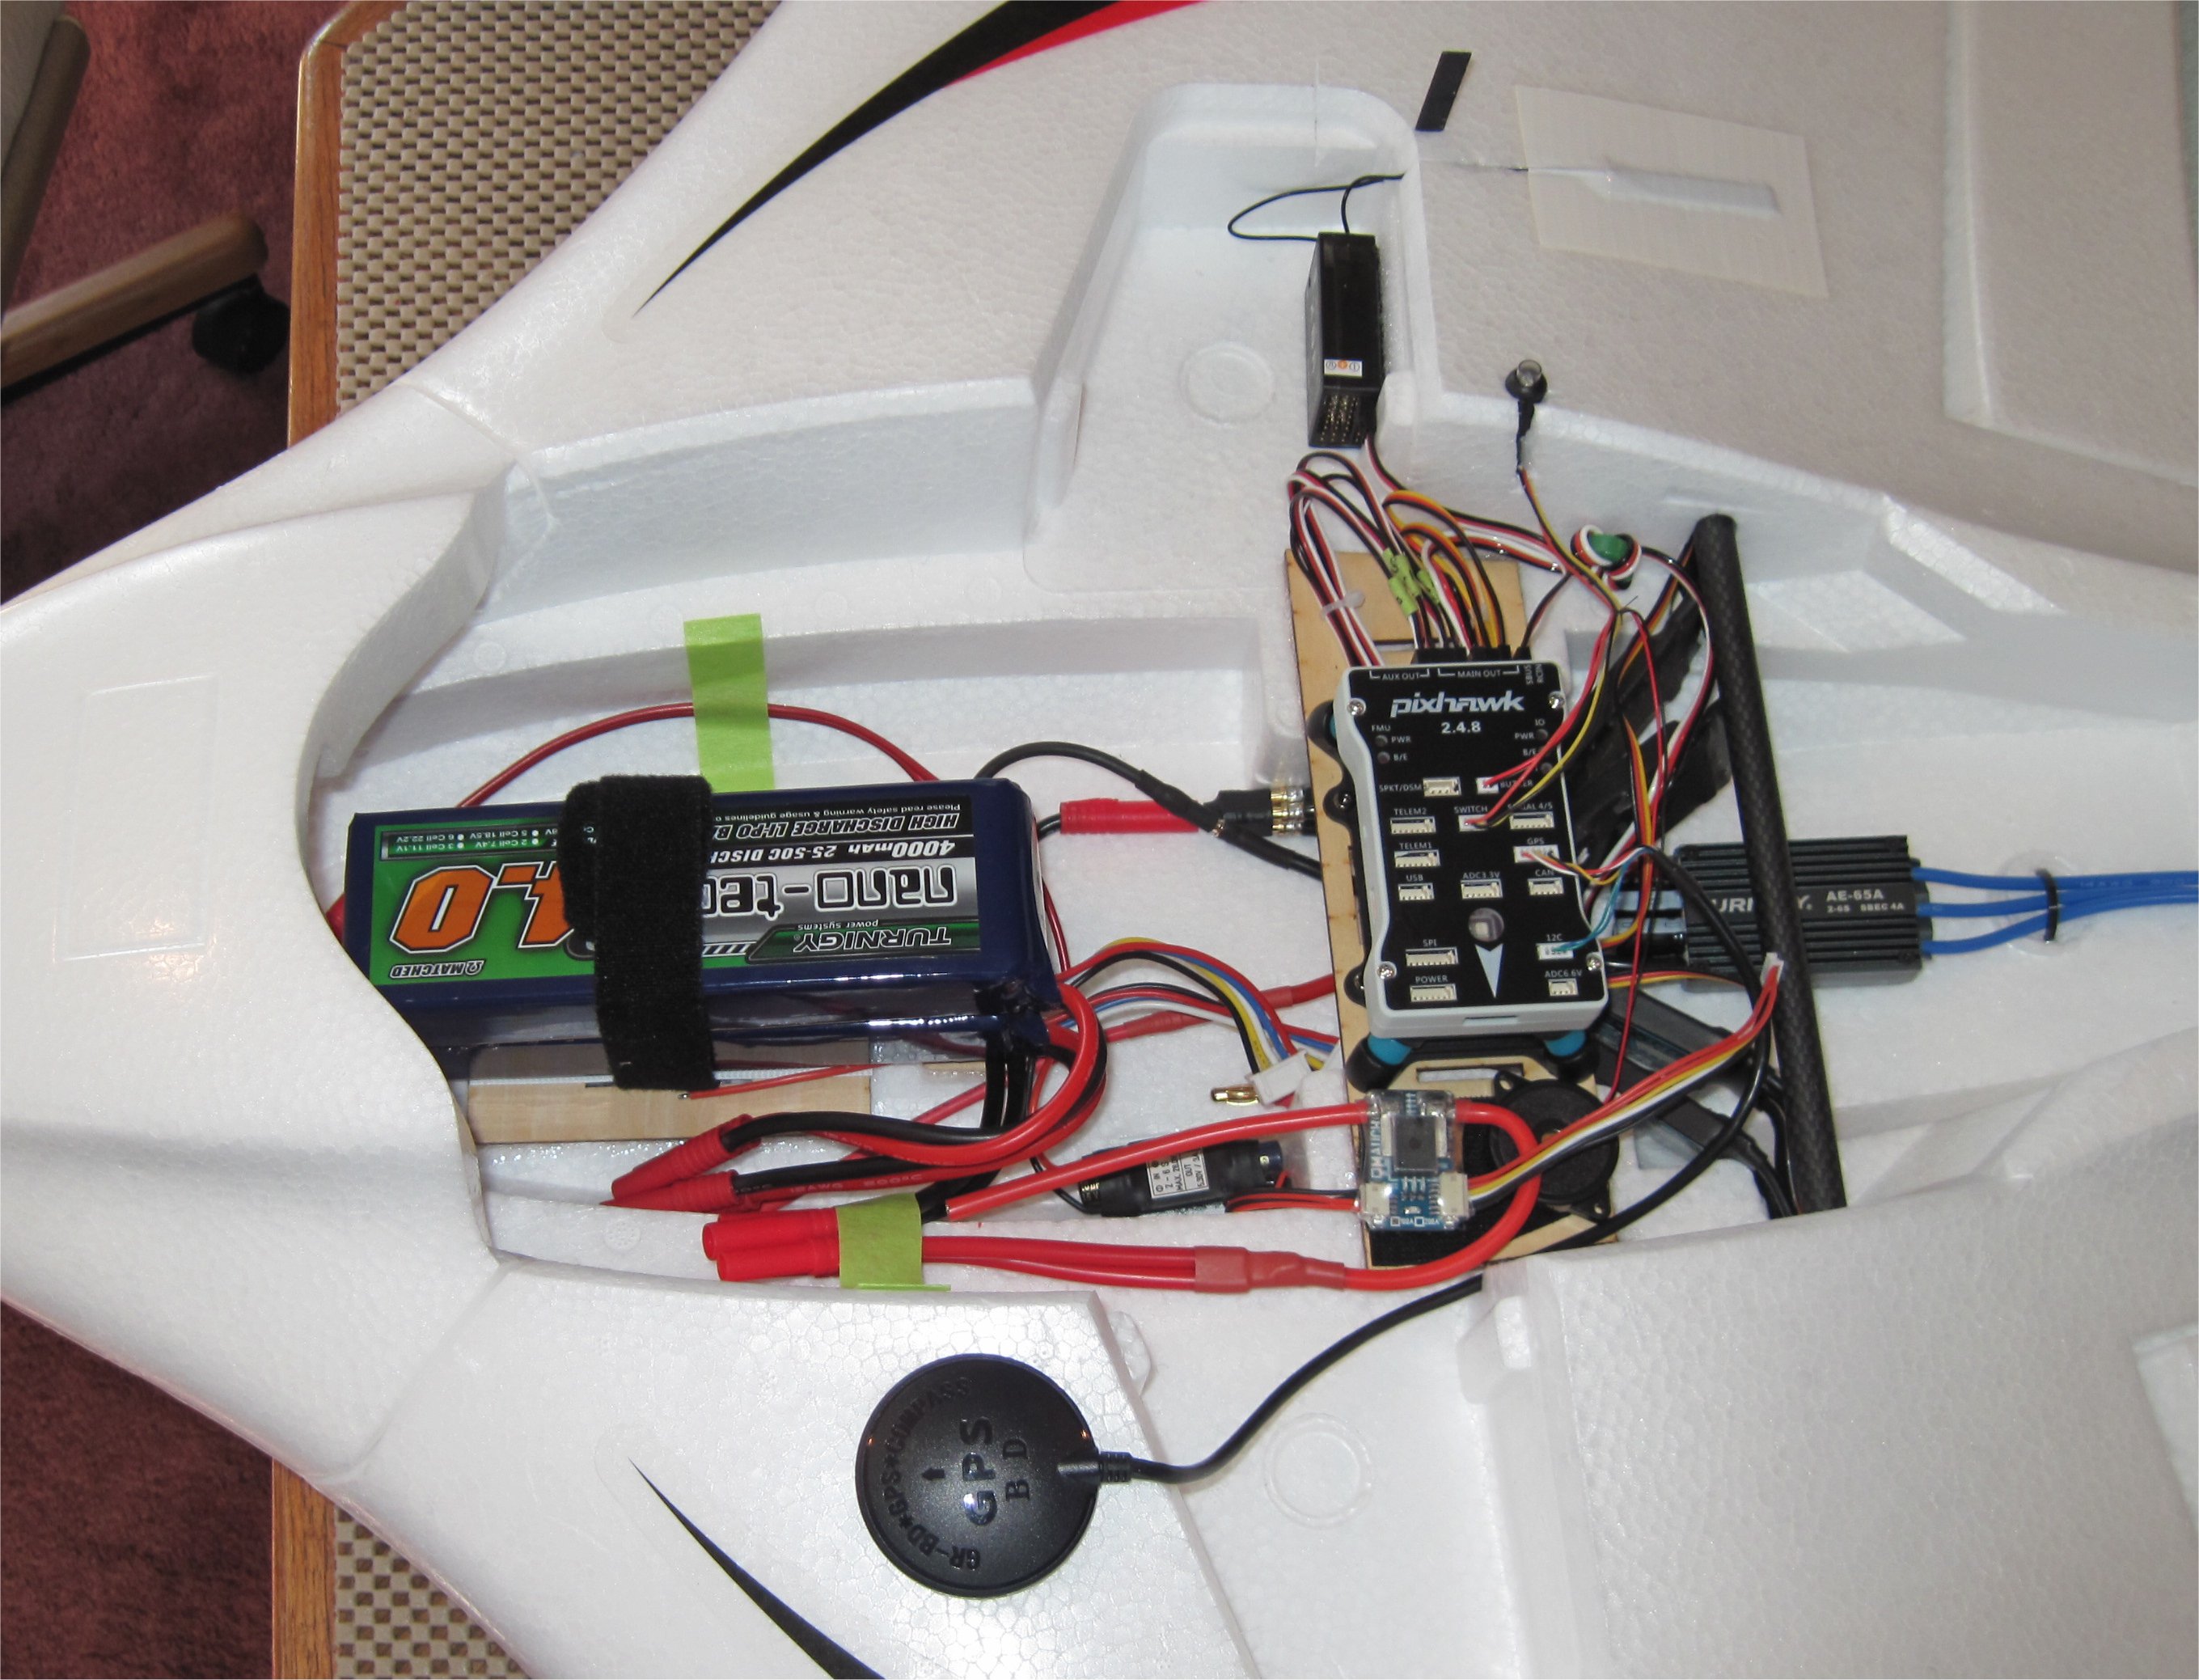
The stock position for the battery strap is typically too far aft so it’s best to move it forward as shown in the Flite Test video here. My plan is to use the same power system I have in my Ranger EX. You can see there is plenty of room for my two 4s 4AH Nano-Tech packs in parallel (8AH 25-50C). The camera and video downlink will be added after the test flights have proven successful.
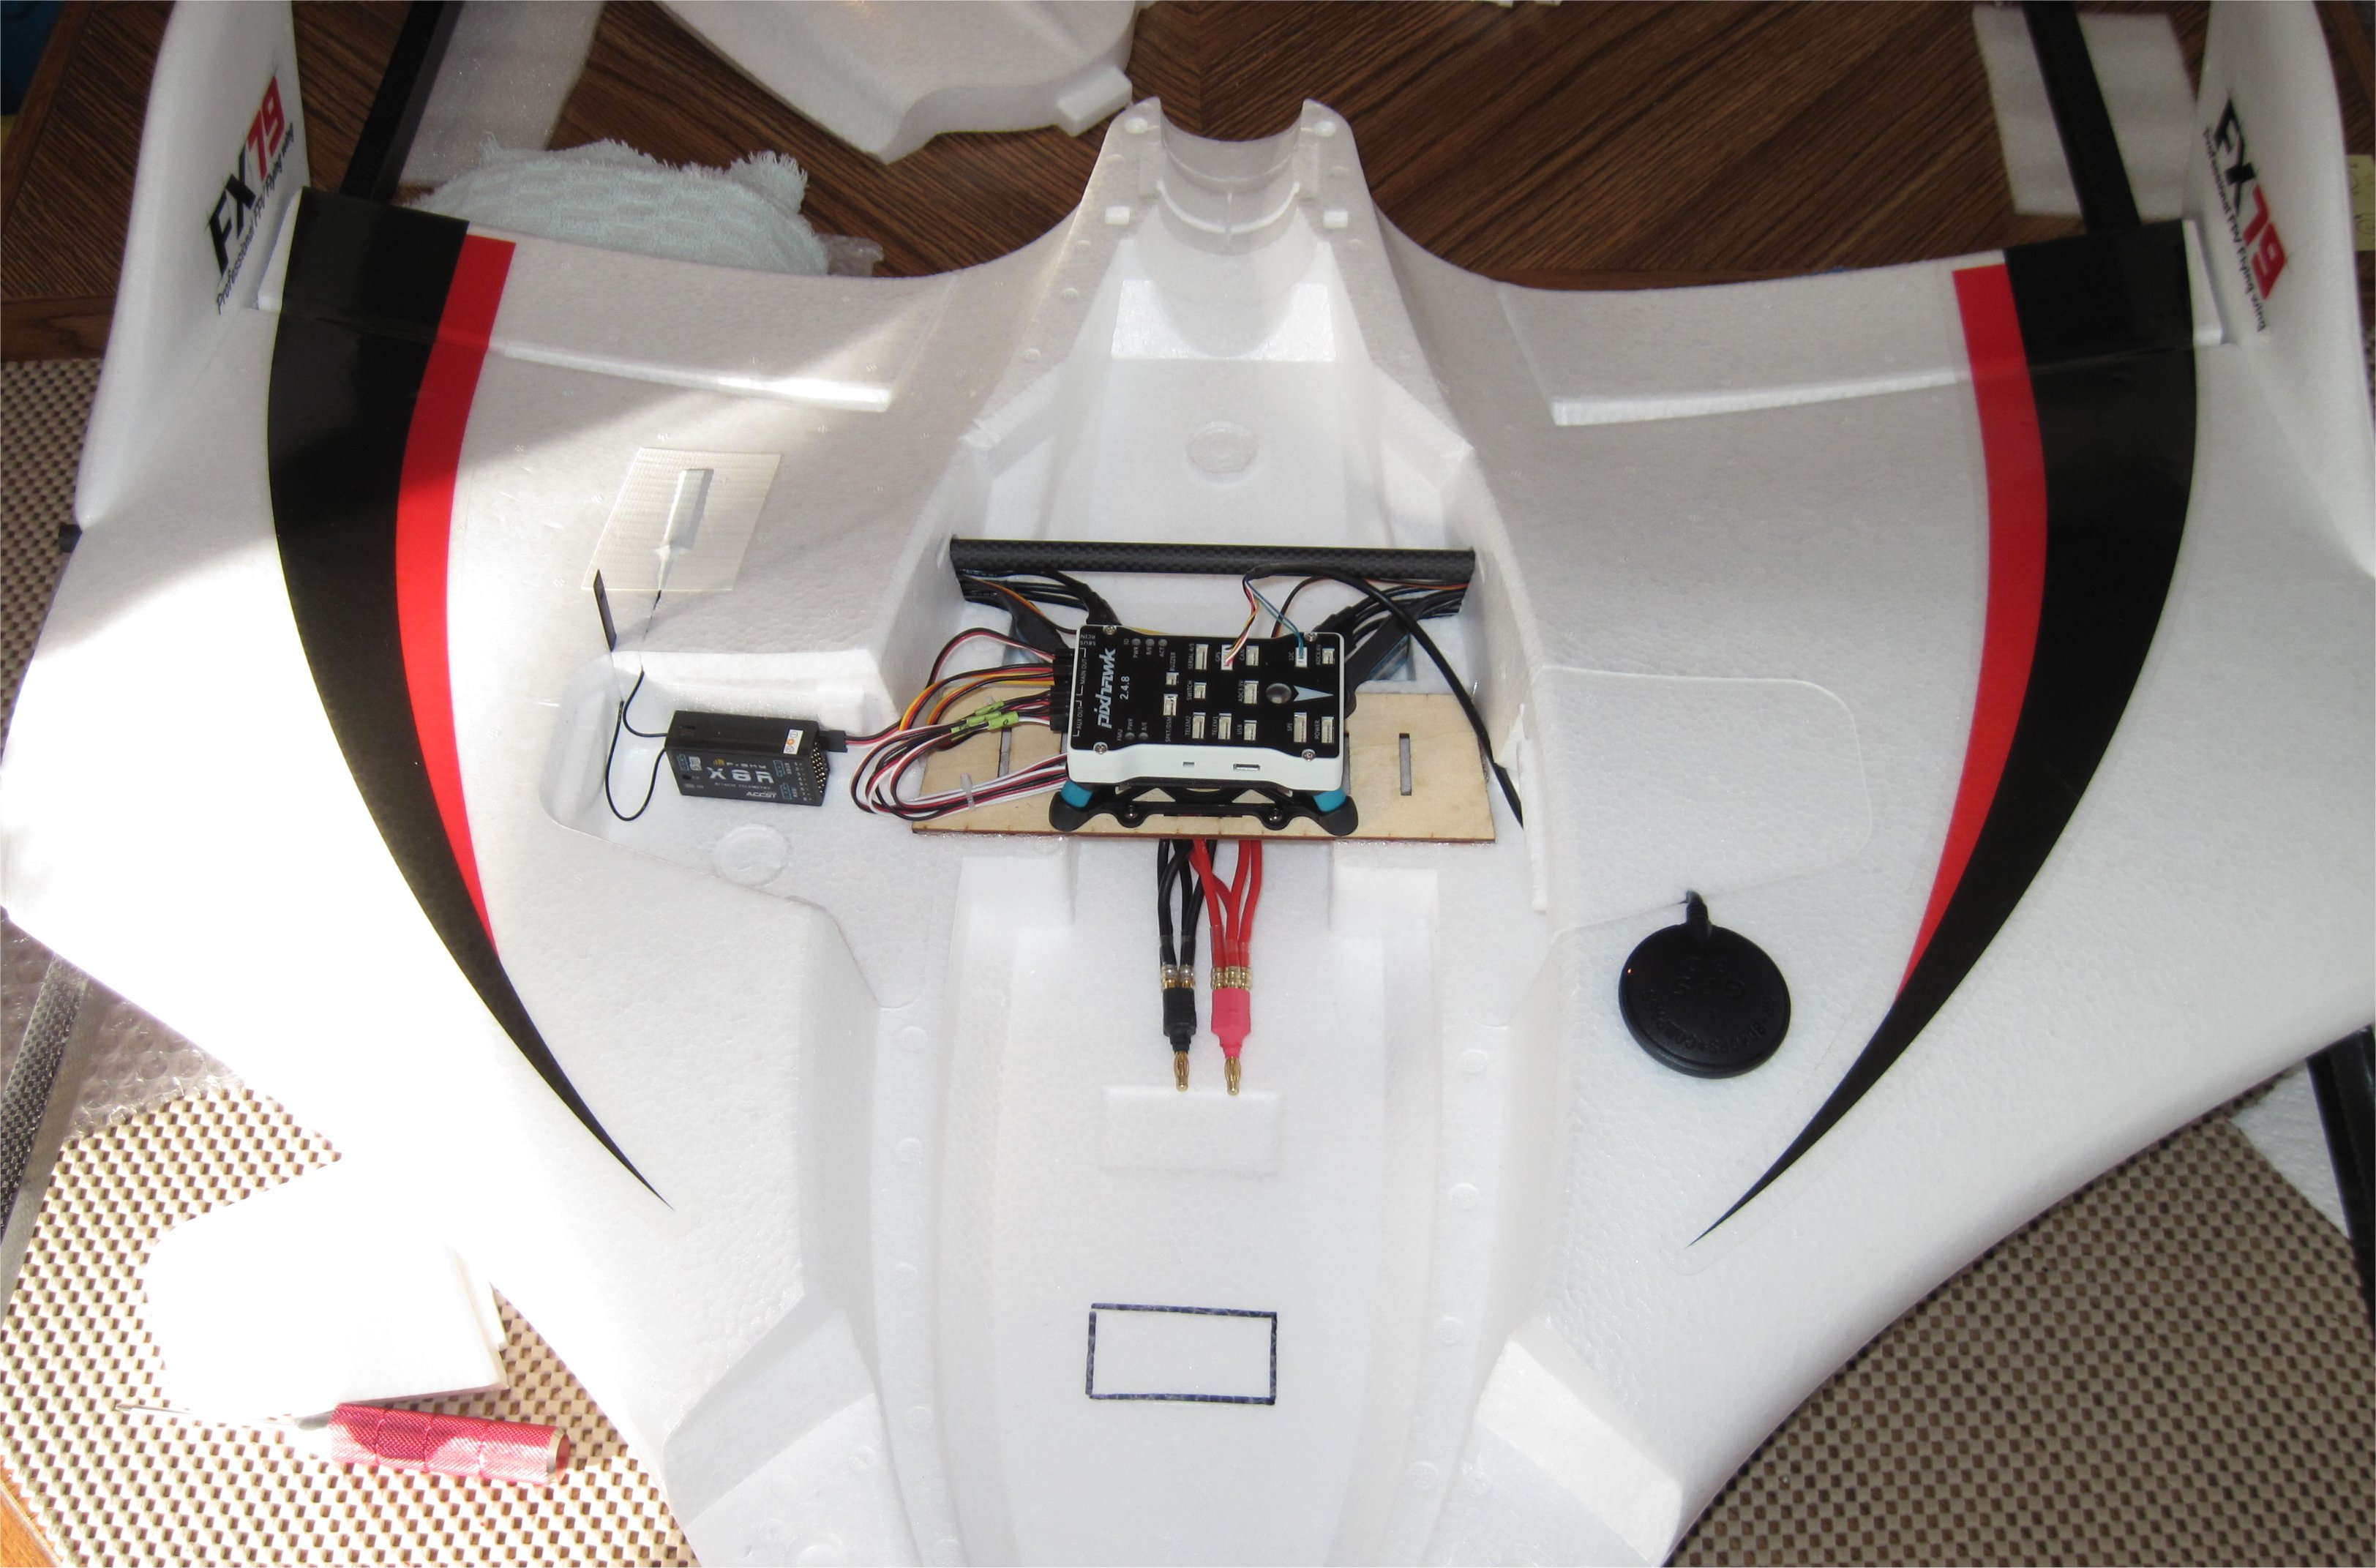
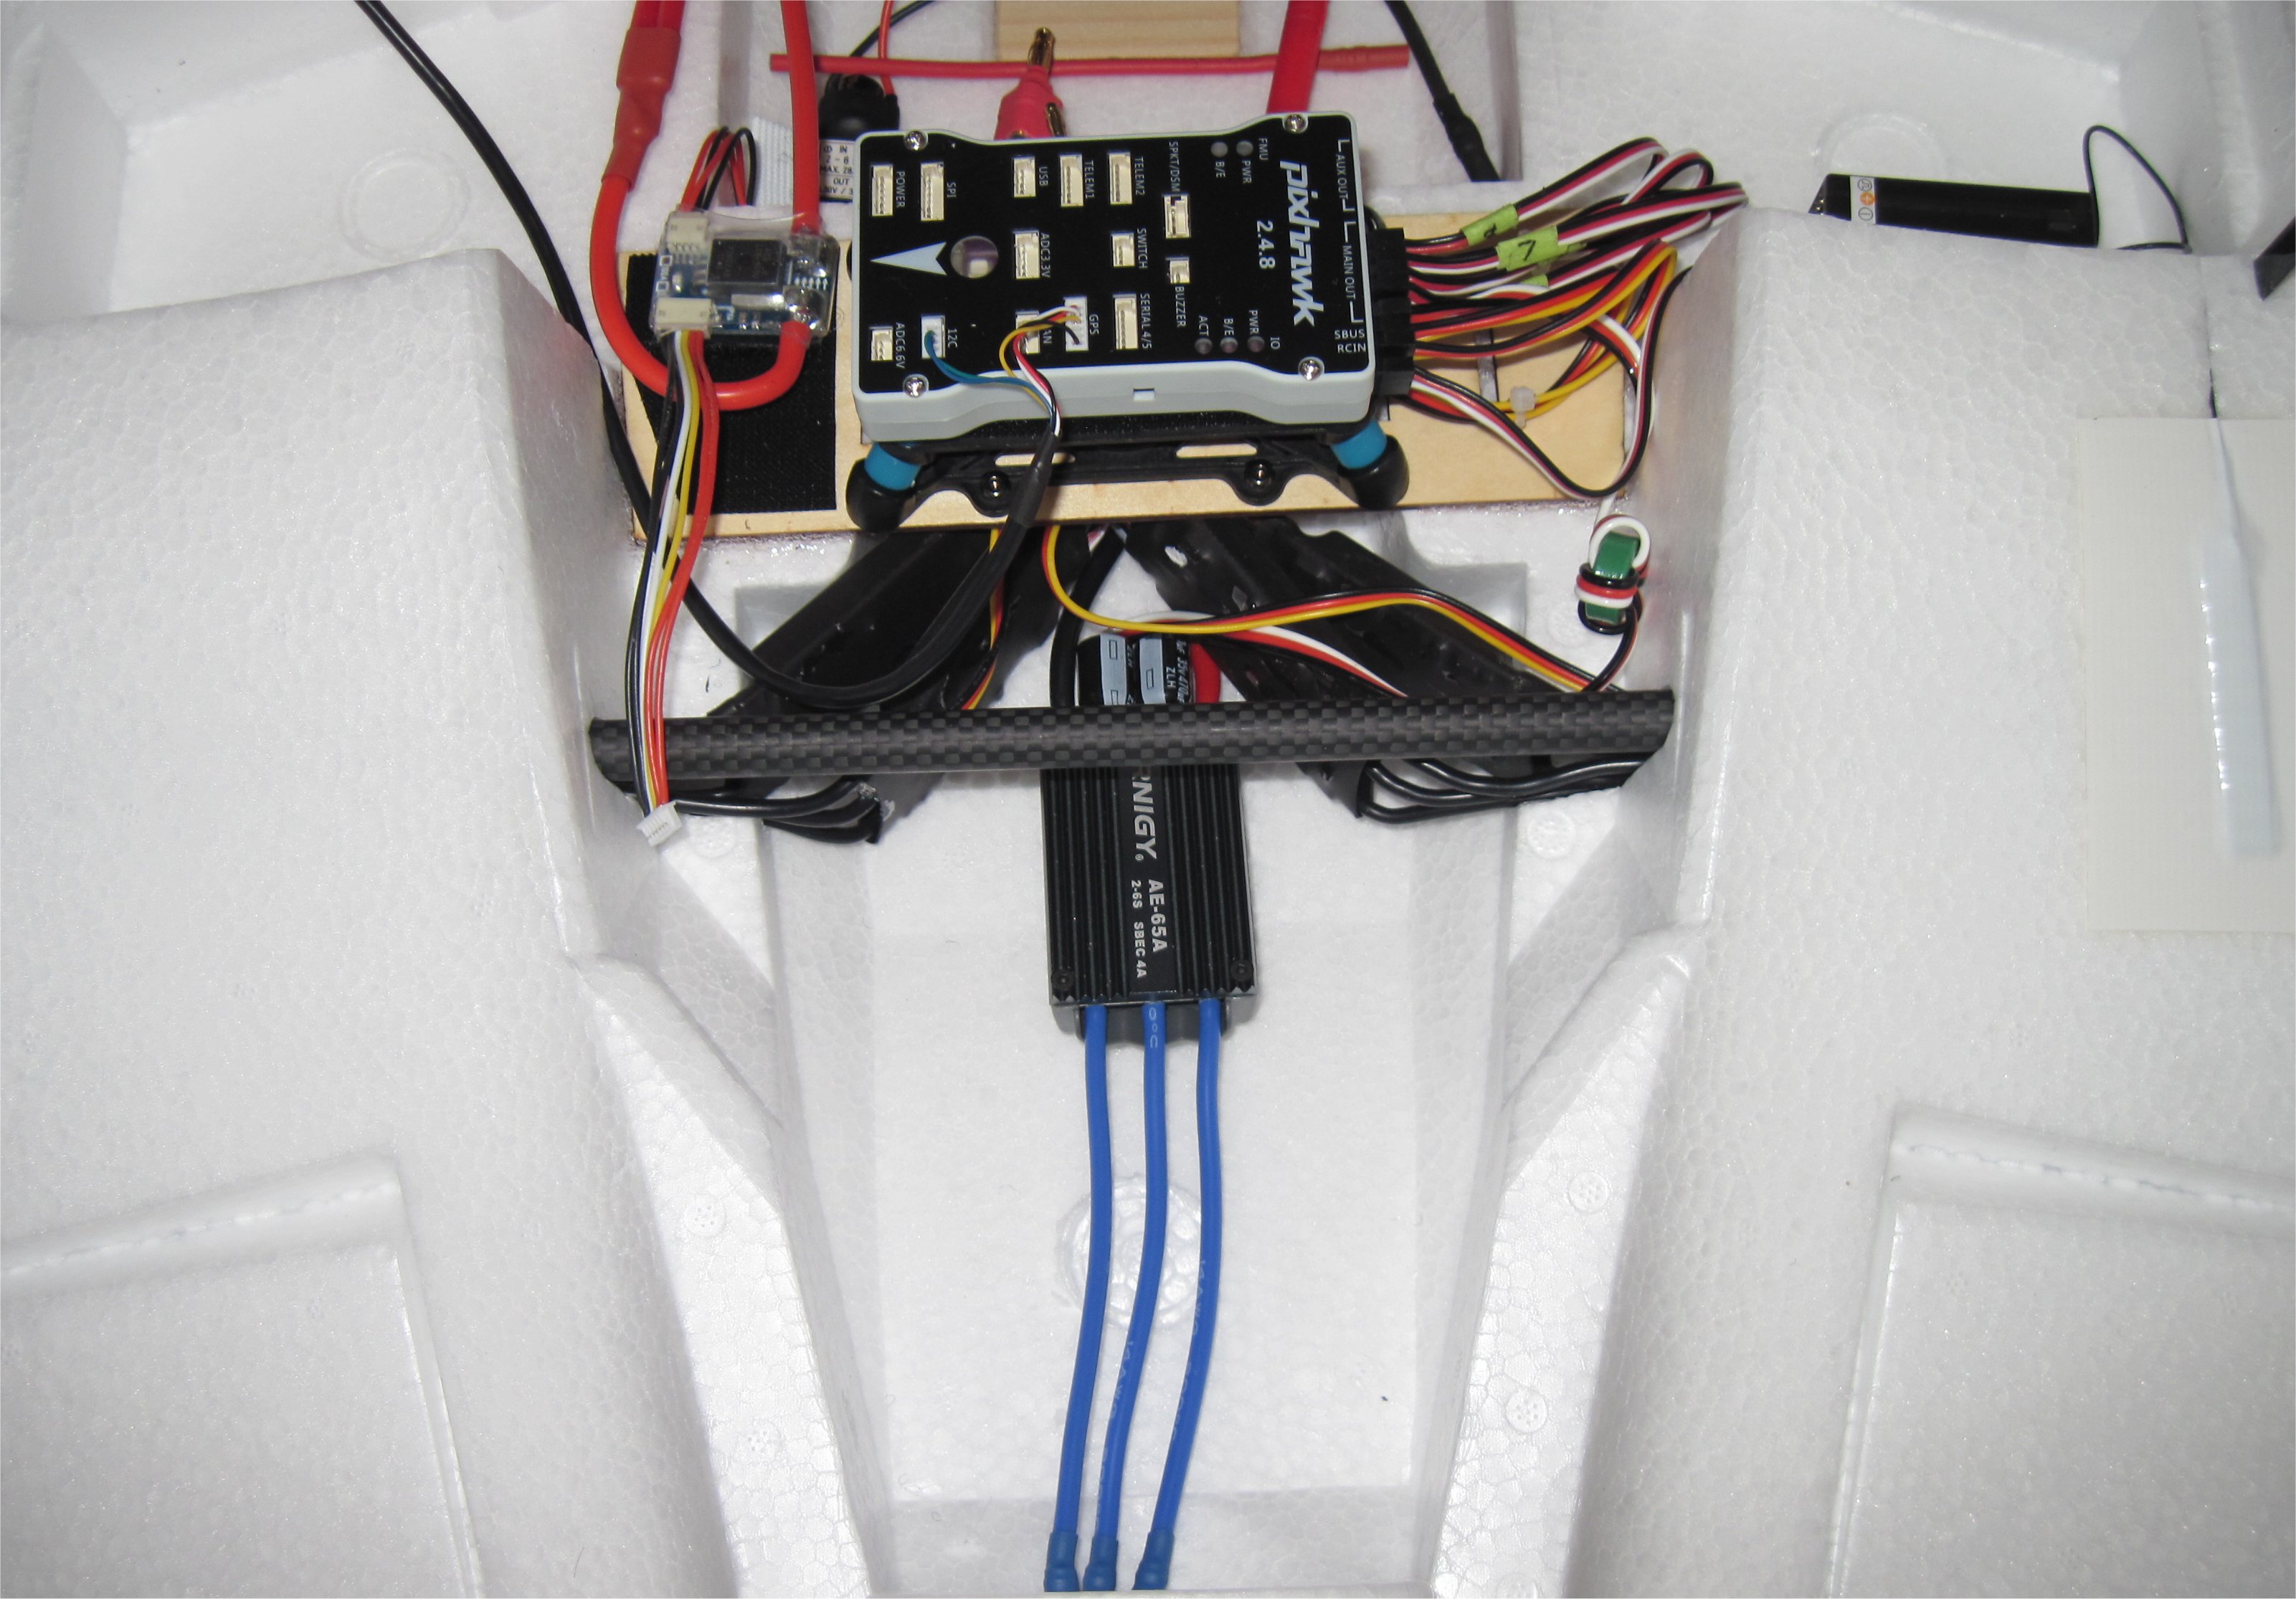
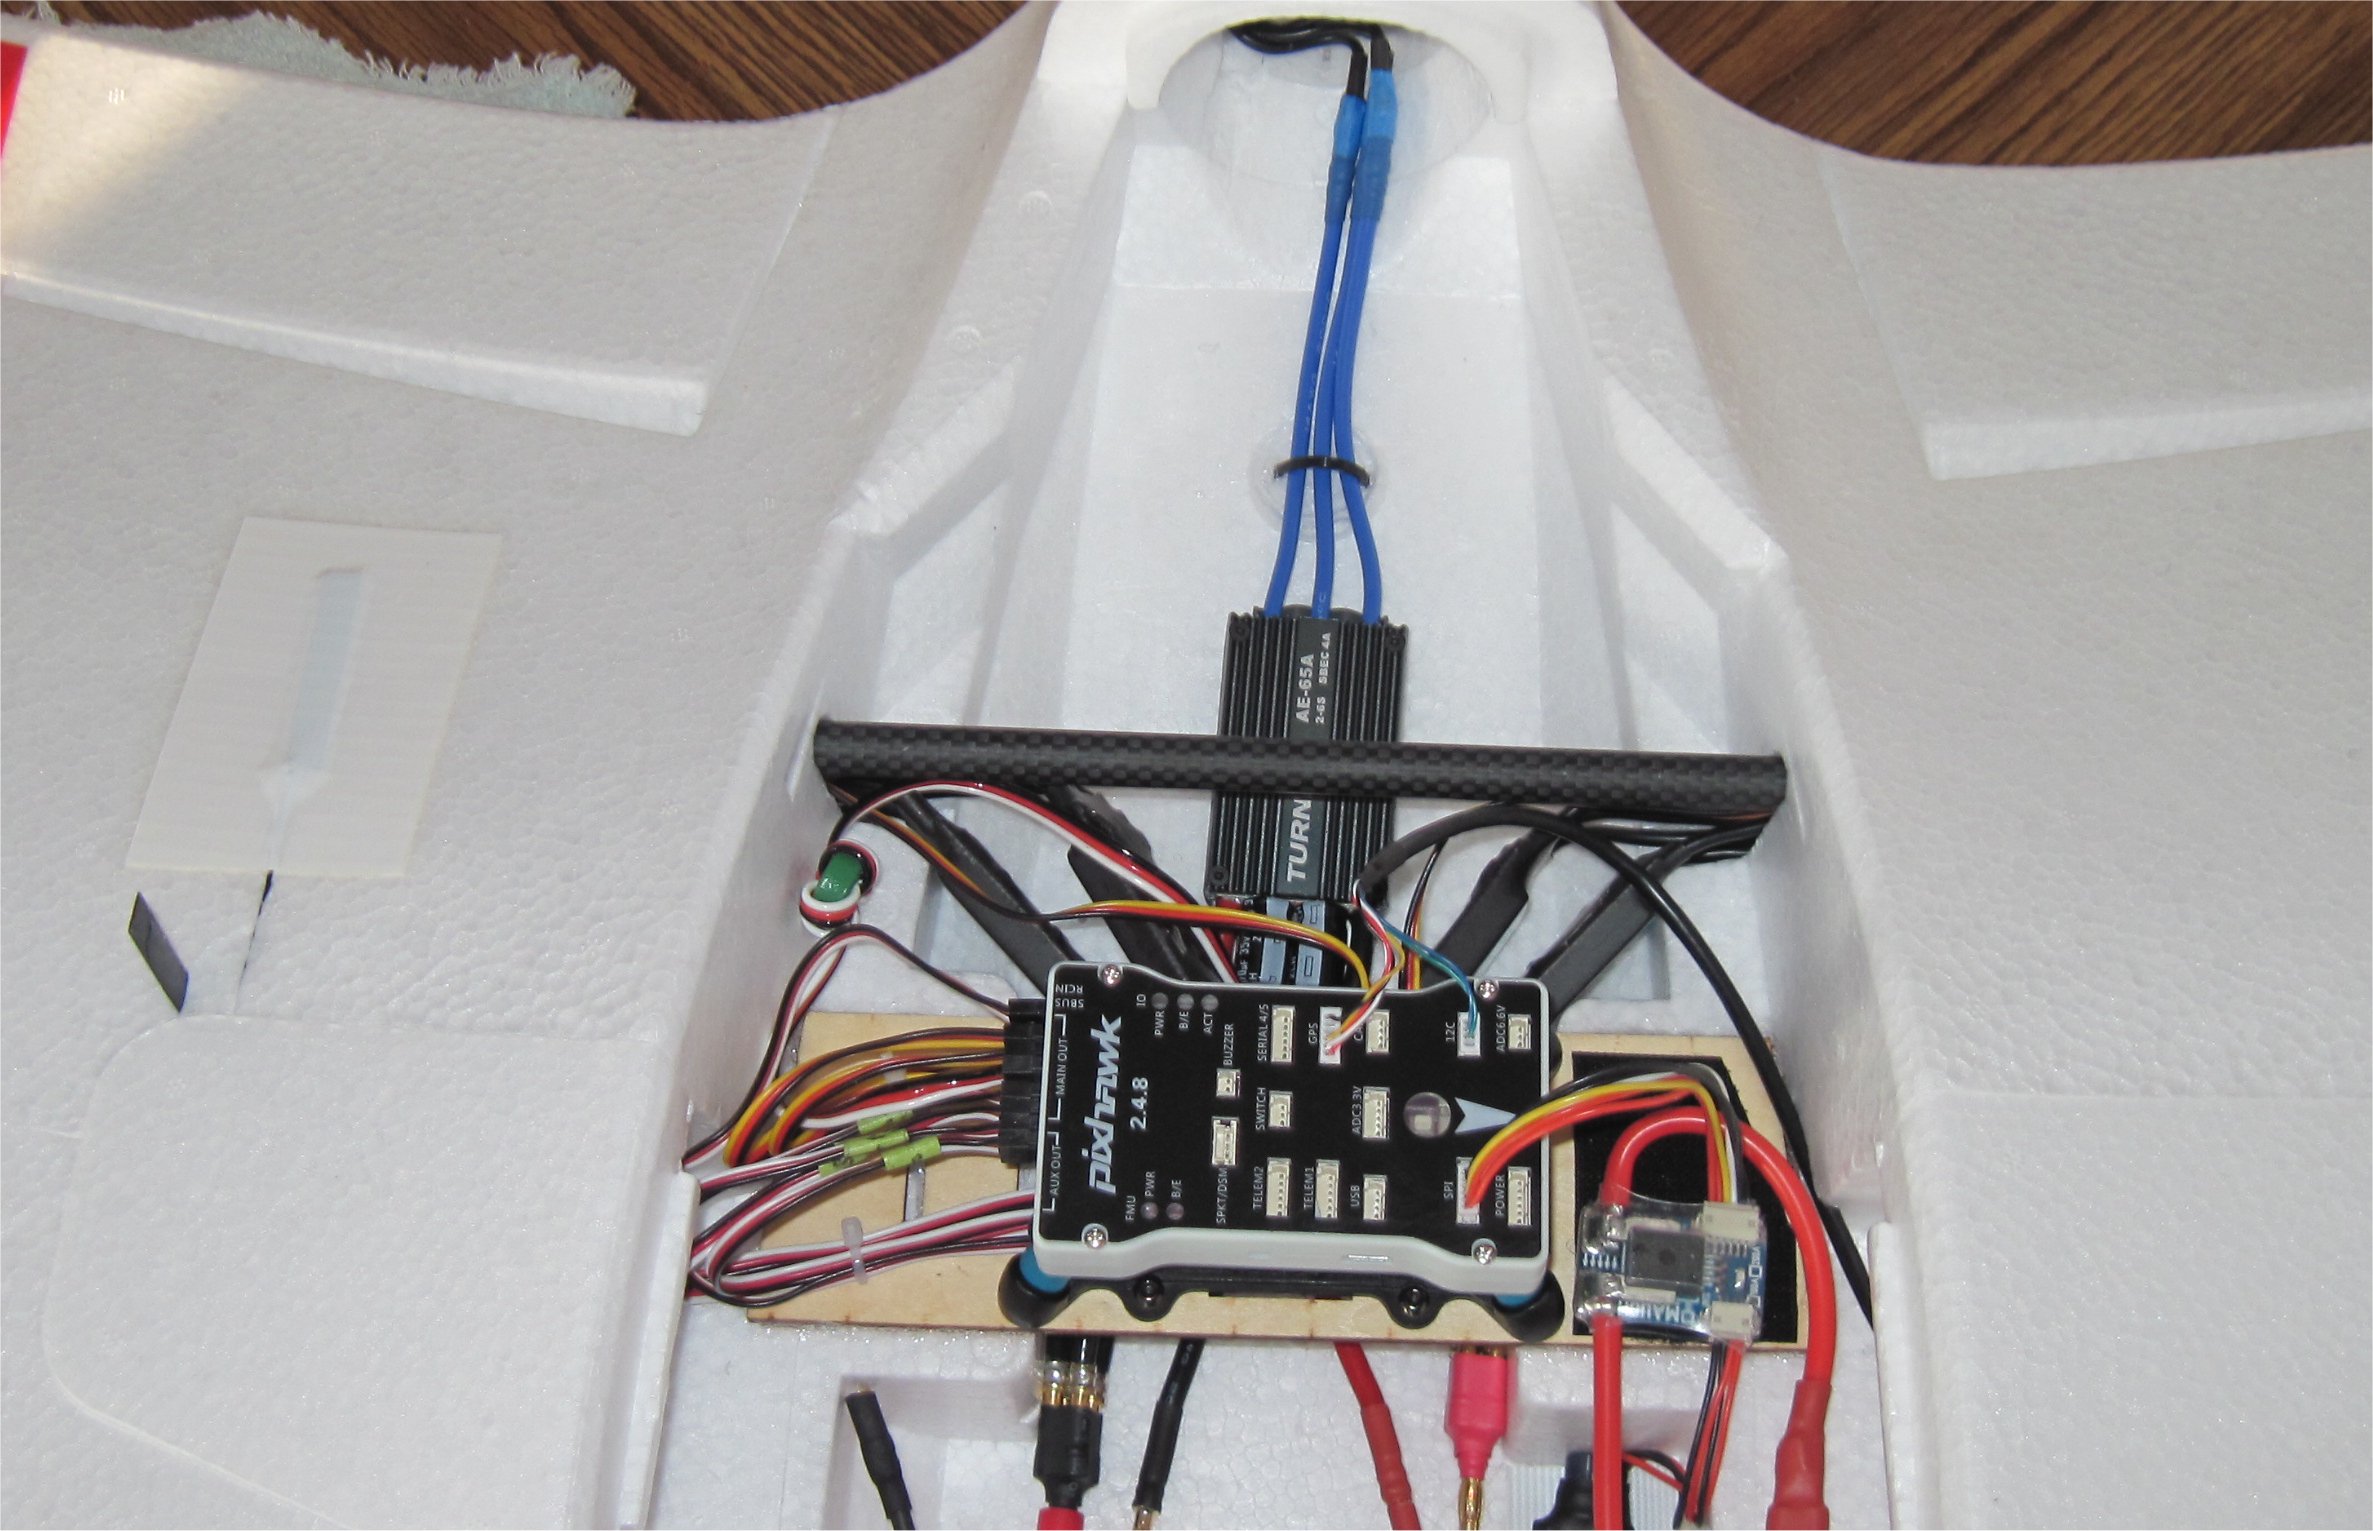
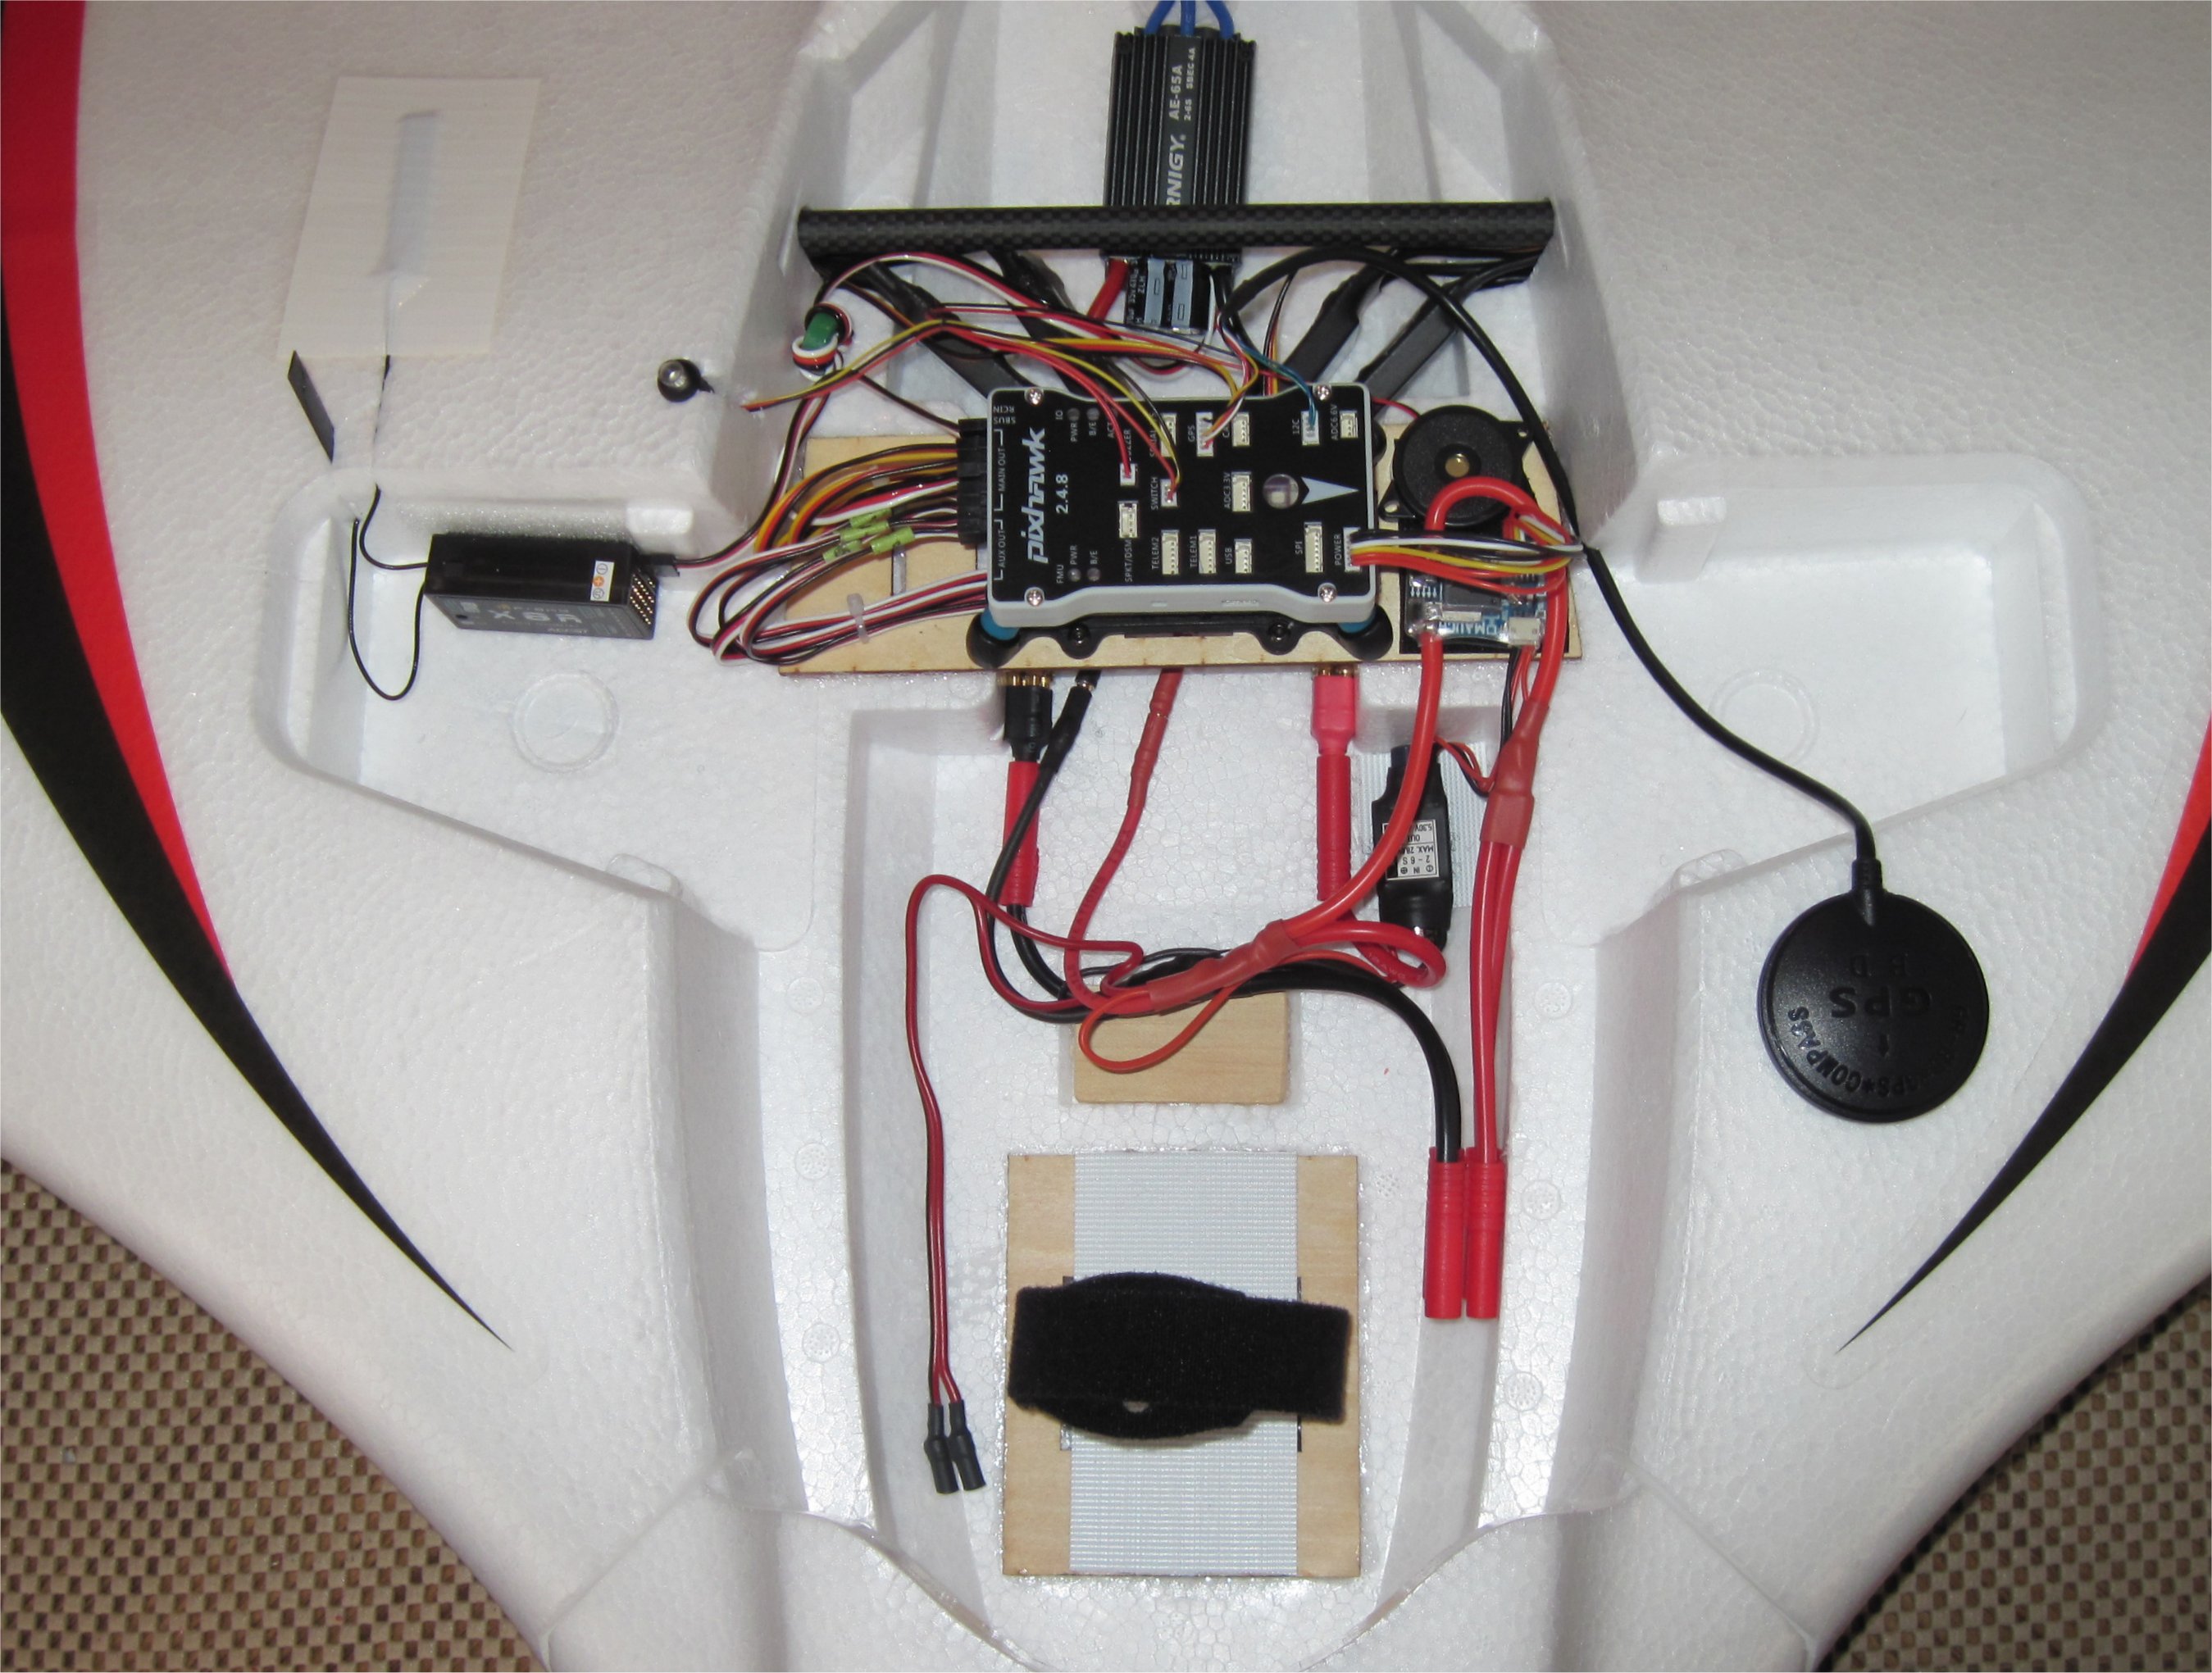
While I wait for more parts to arrive, I mounted the Pixhawk, vibration dampener, GPS puck, and FrSky X8R receiver. All the elevon and quad ESC wires are connected and came out relatively neat. I mounted the GPS puck on the highest point of the fuselage to help eliminate interference.
Note that the USB port facing front provides easy access. The vibration dampener was mounted with the supplied hex head screws and locking nuts.
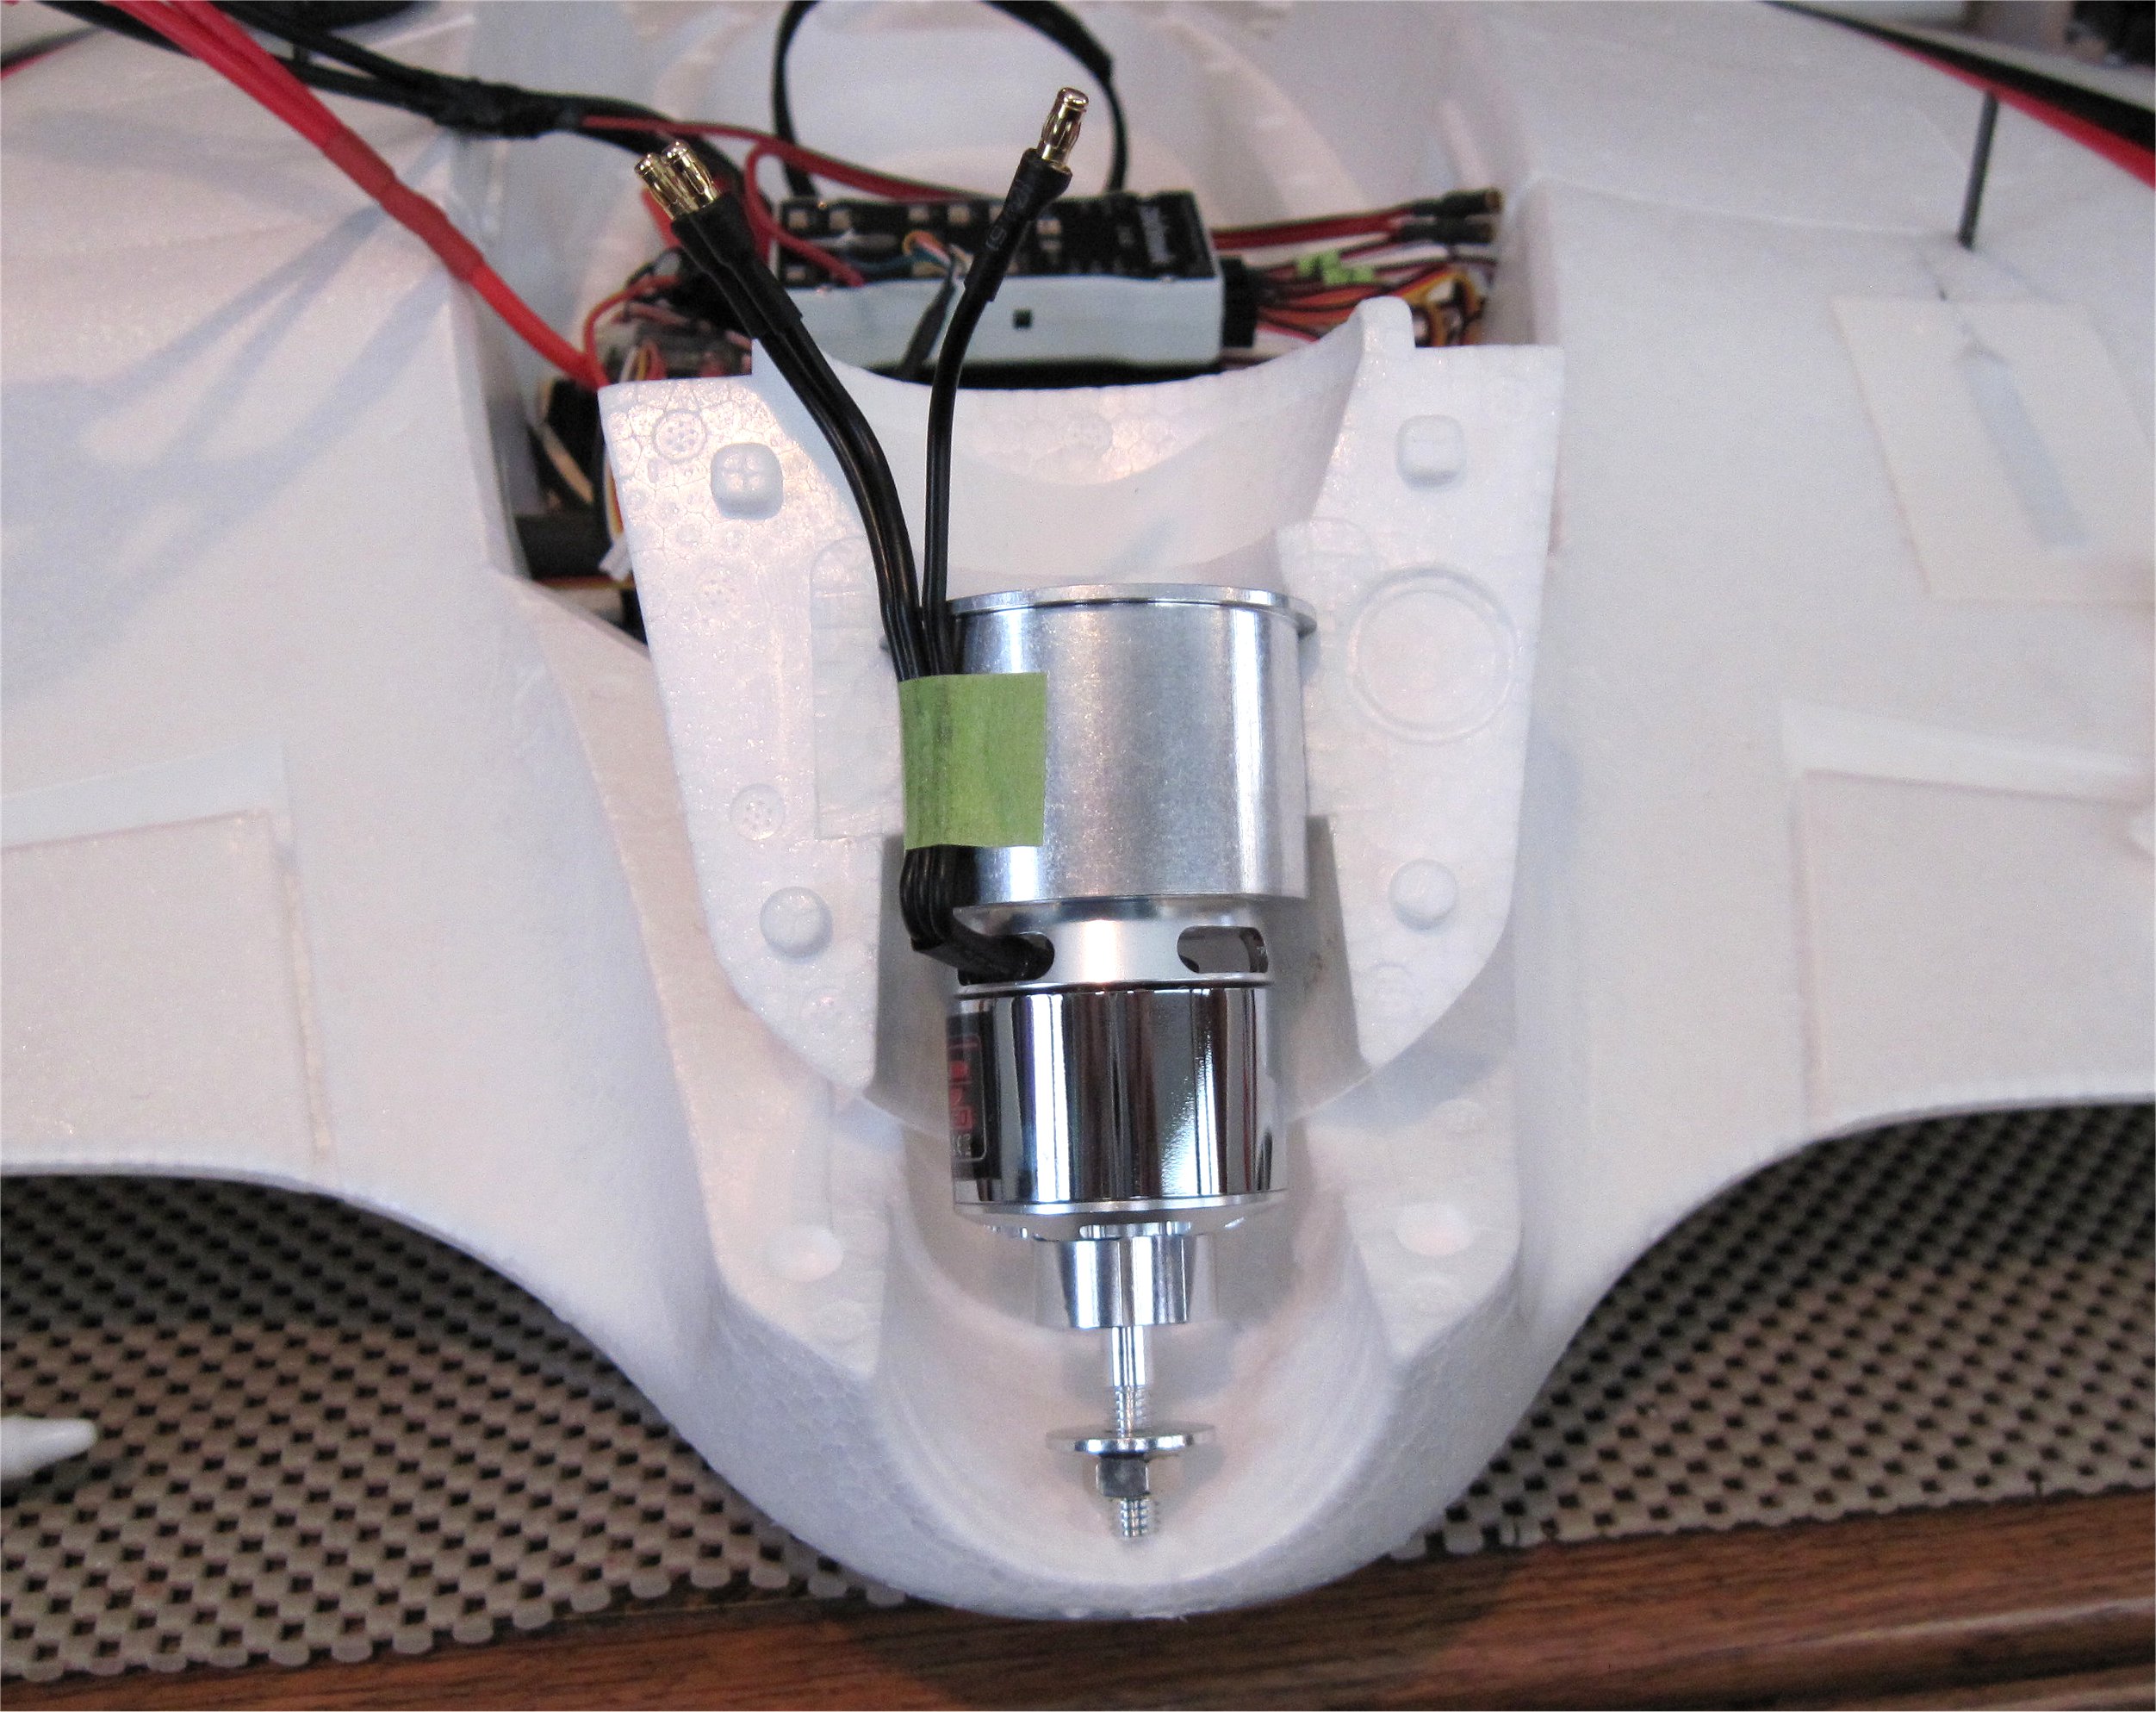
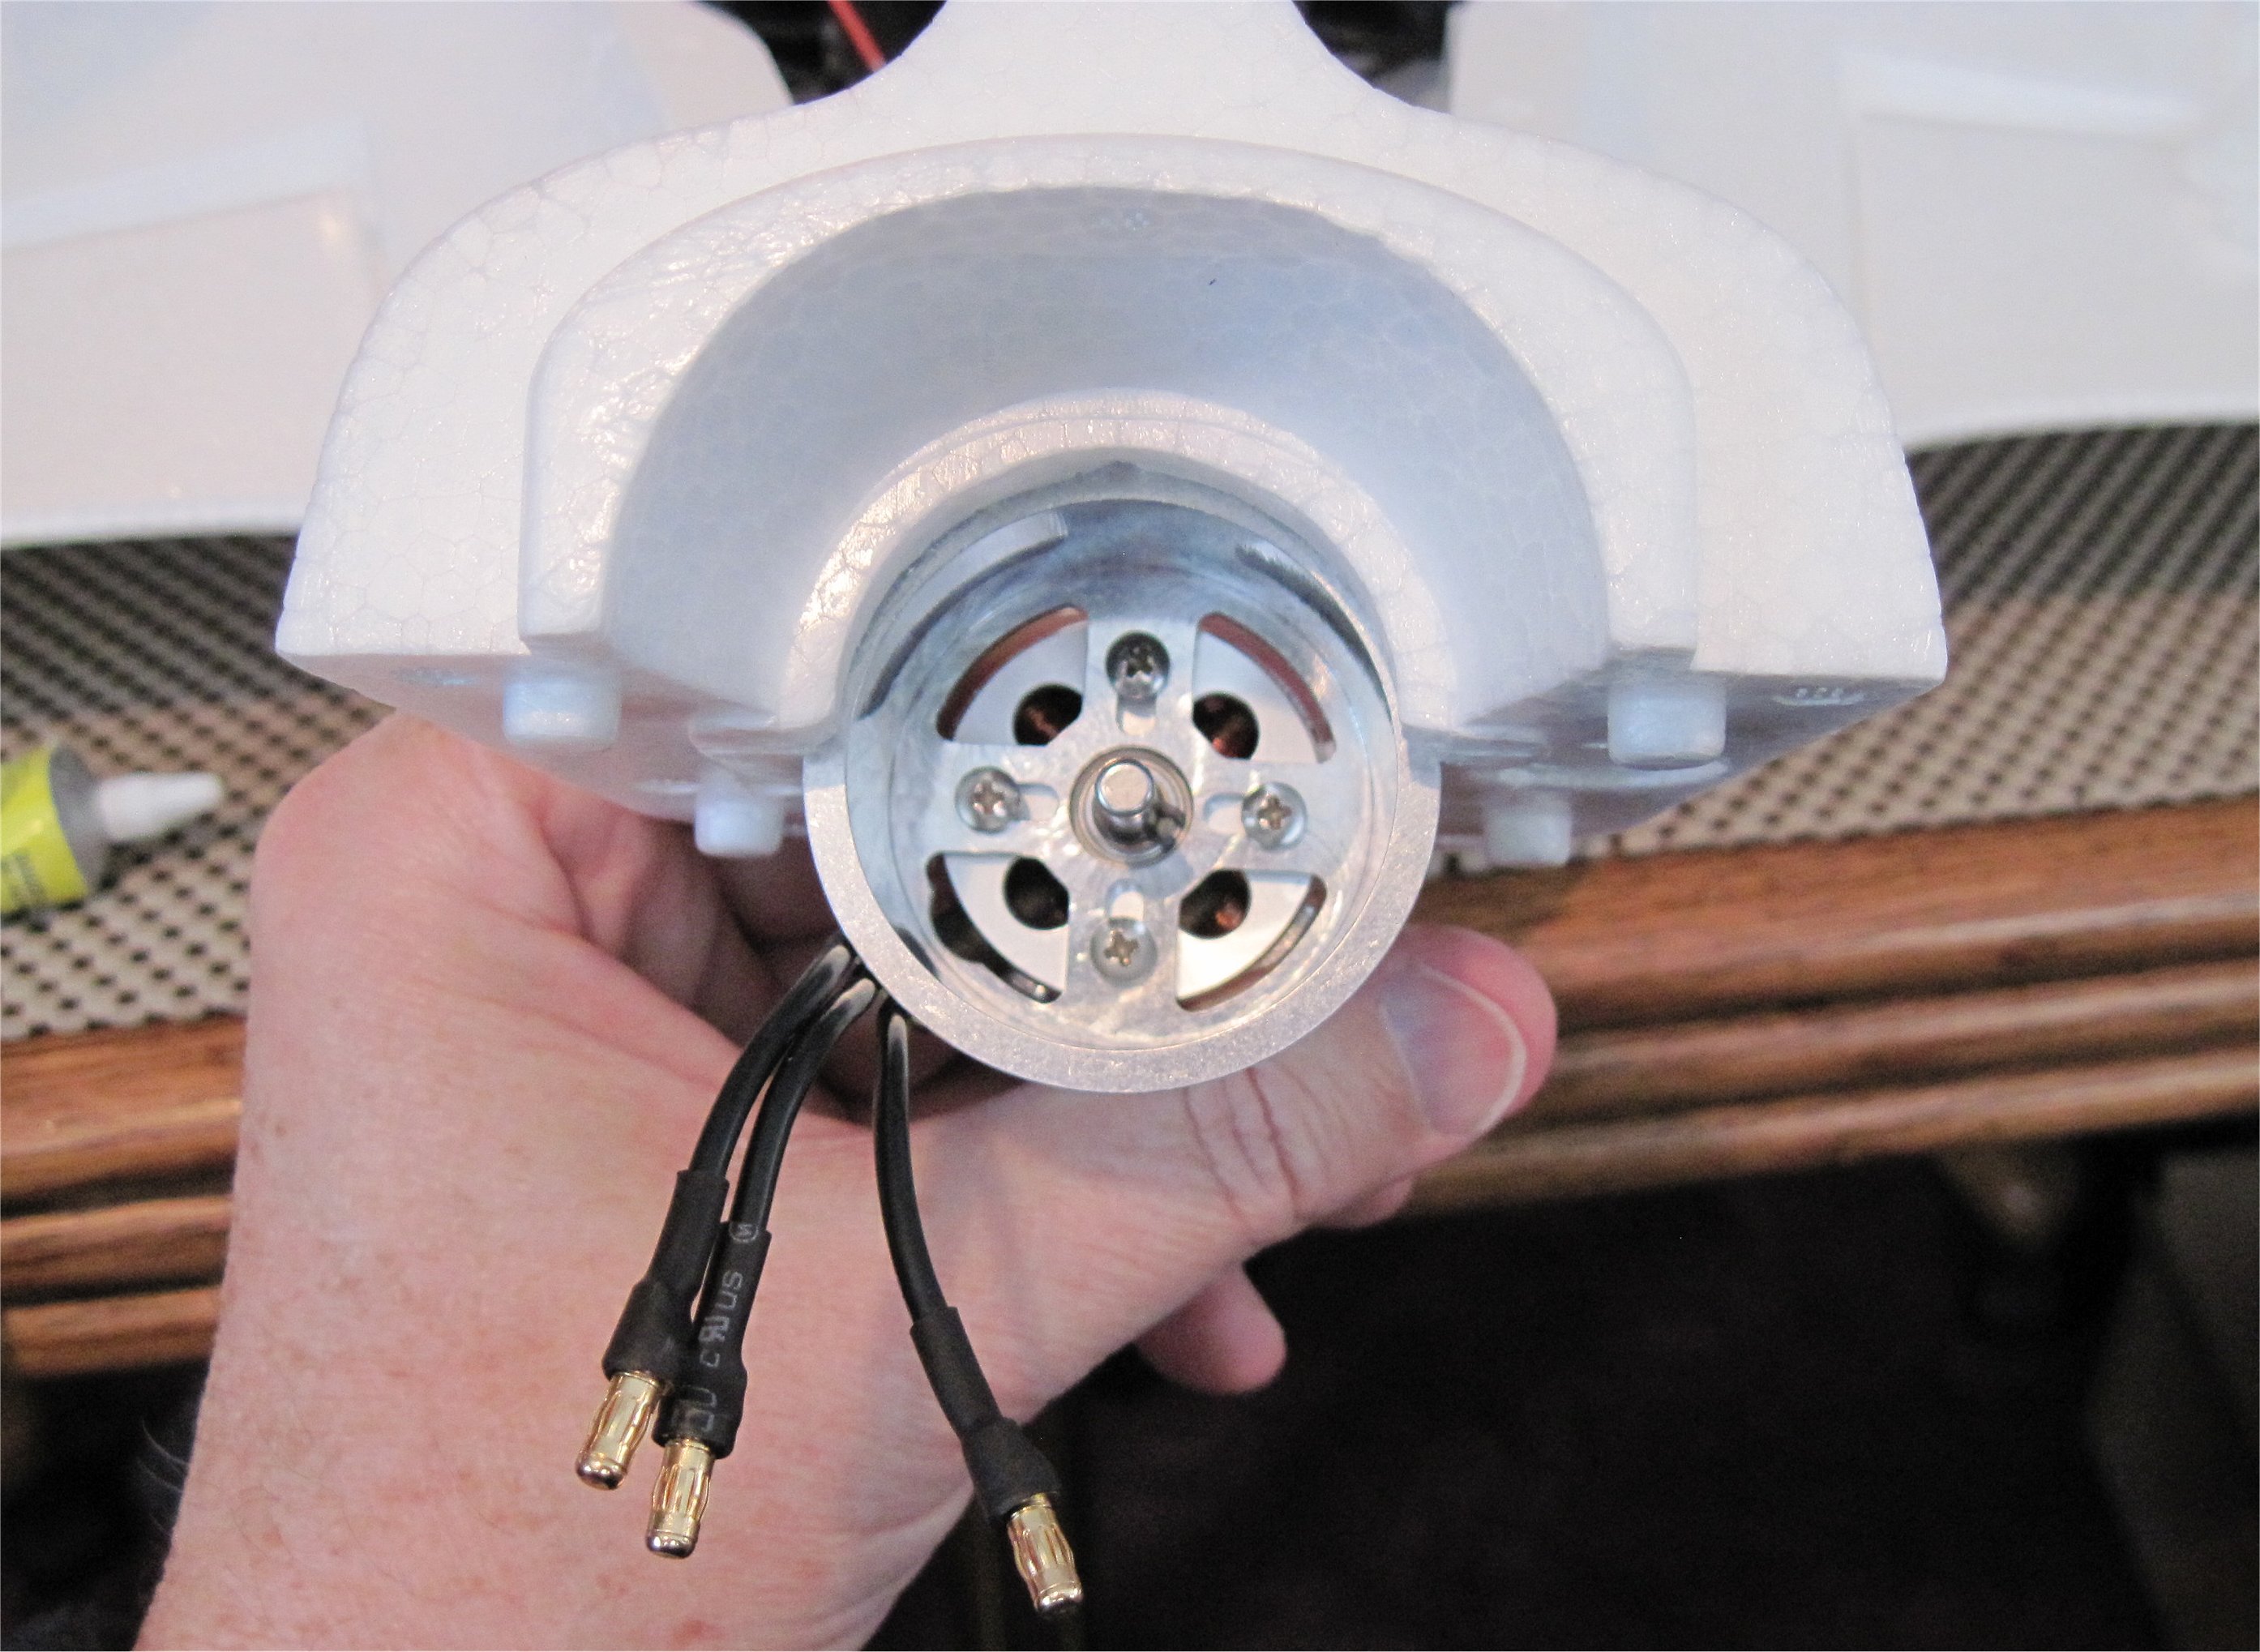
My forward flight power system arrived so I mounted the motor onto the aluminum CNC mount first using the screws that came with the CNC mount. After cutting a channel in the foam for the motor wires, I glued the mount to the main body using Foam Tac.
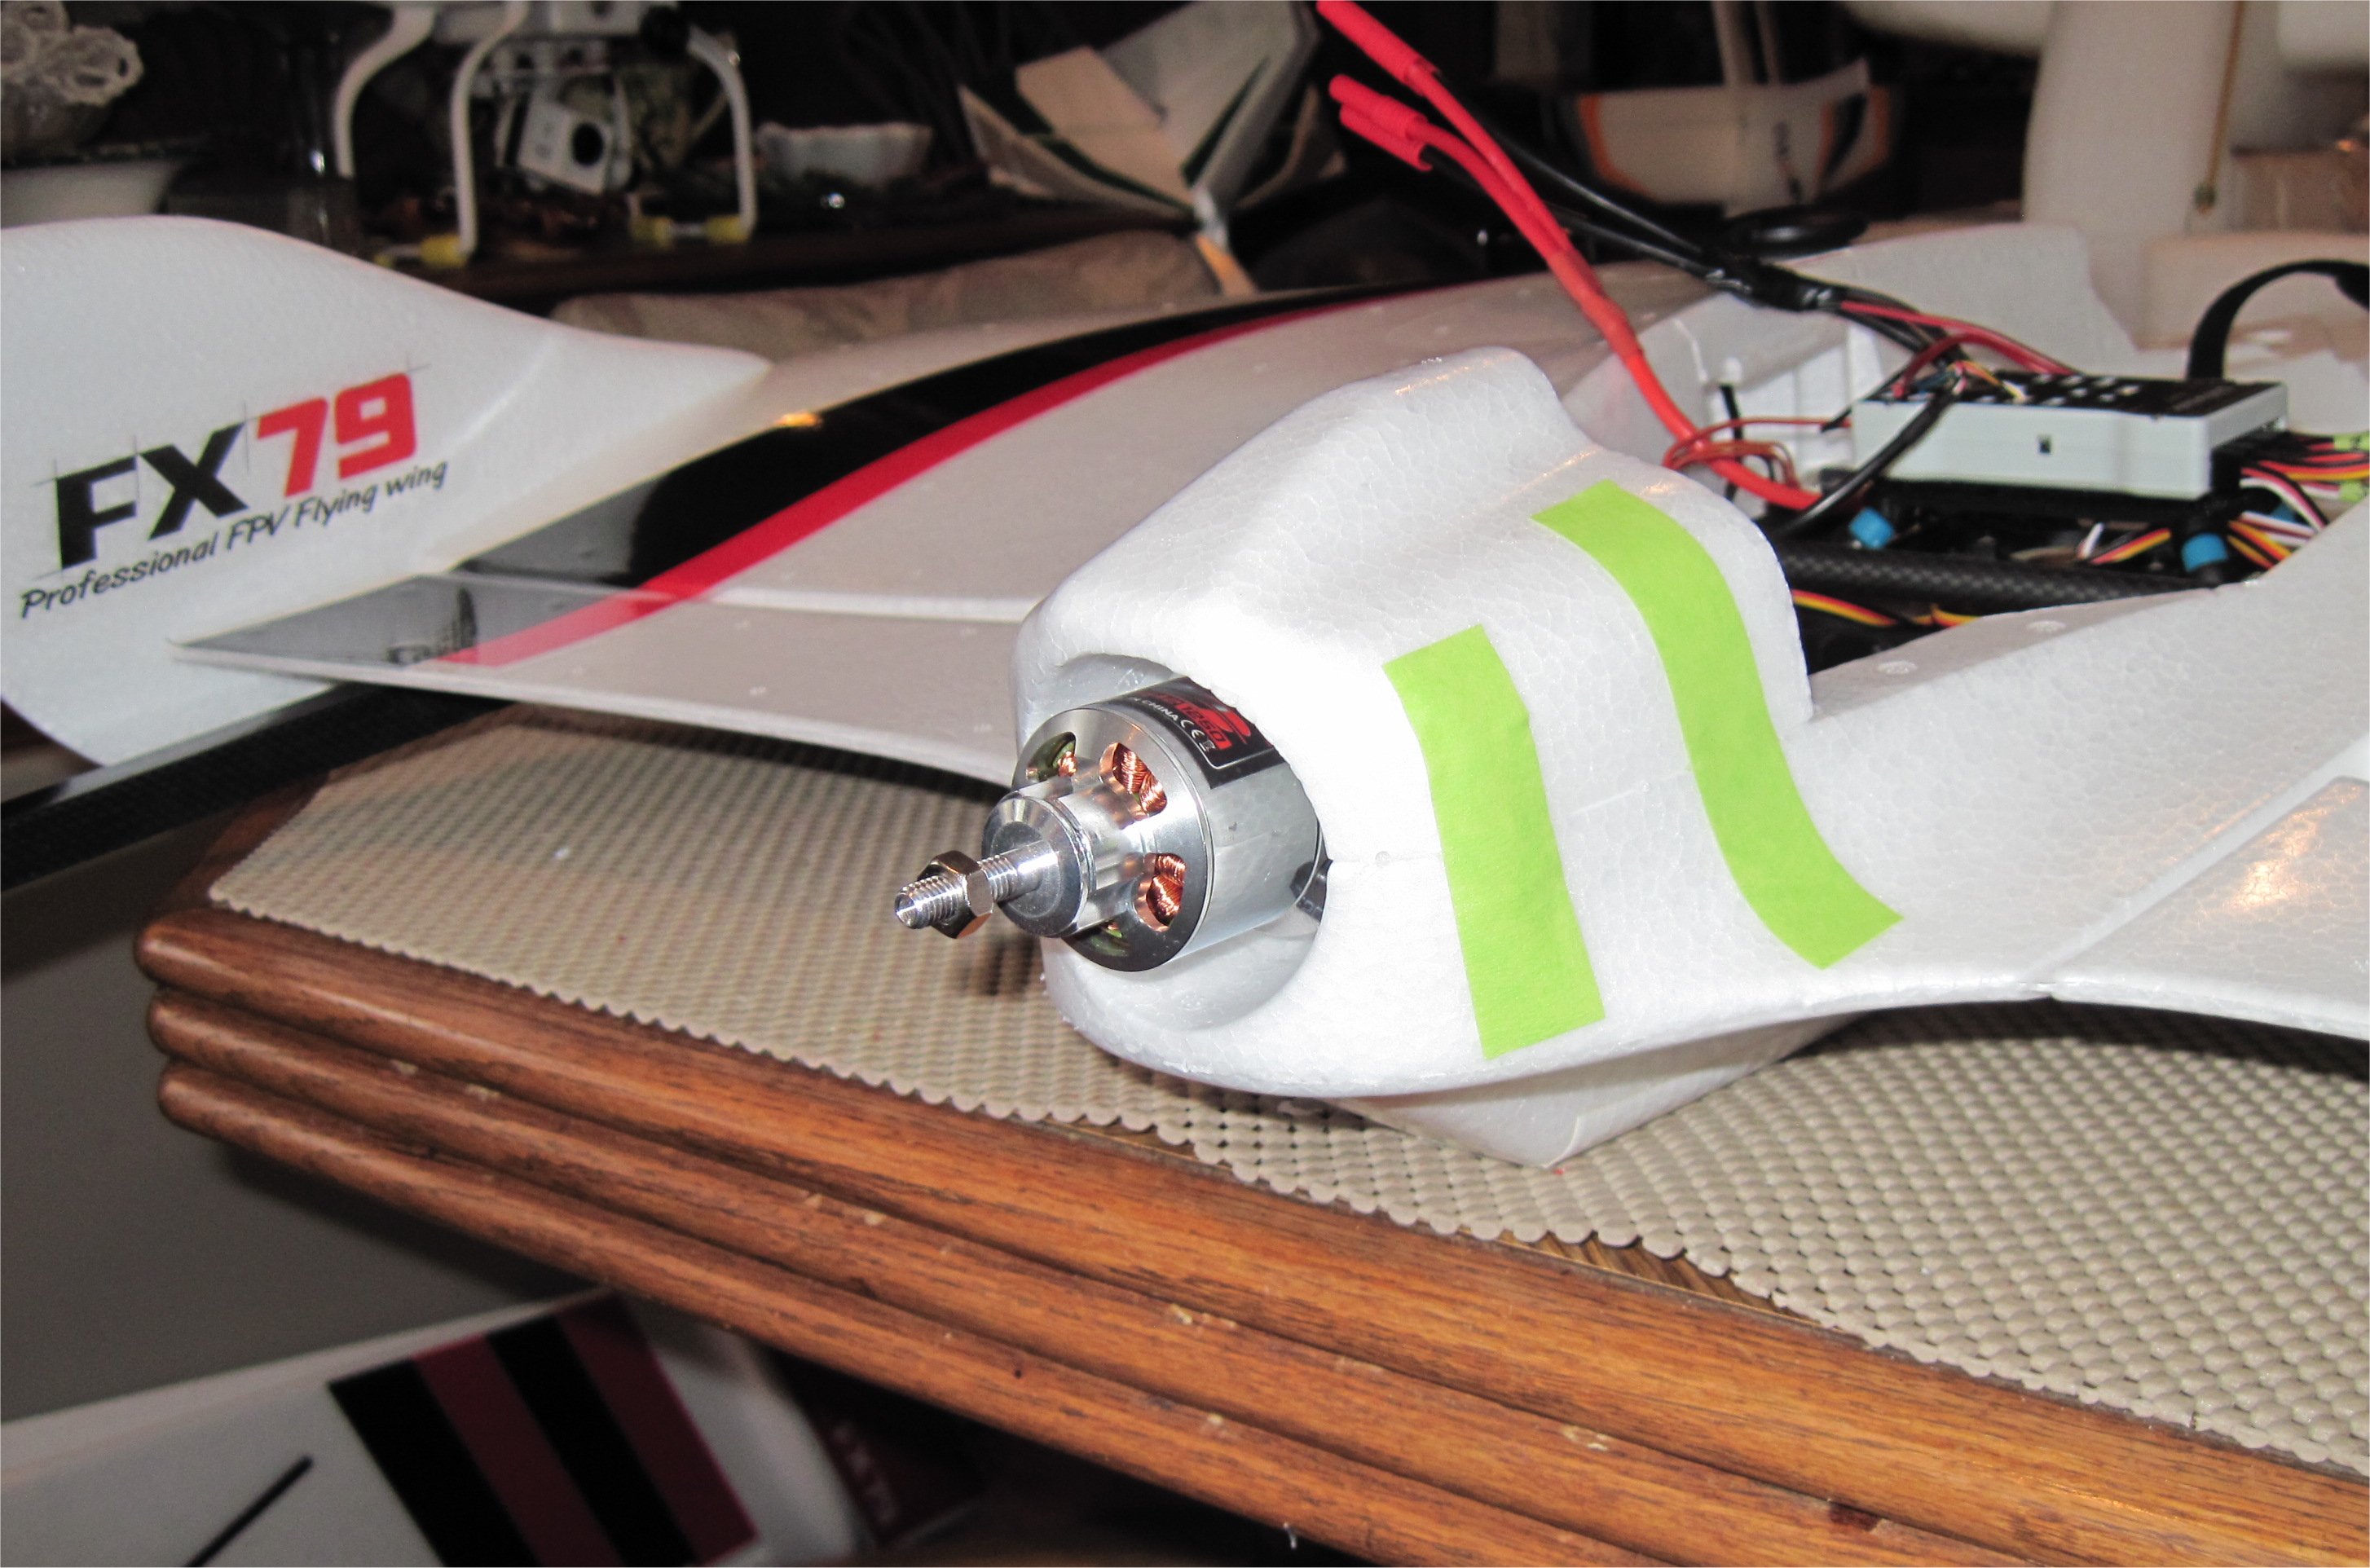
I’m using the Turnigy SK3 3542-1250kv motor with the Turnigy AE-65A Brushless ESC. This combination provides 746 watts at 51 amps using an APC 10x6 e-prop with a 4s Lipo pack. The ESC has a built-in linear 4A @ 5V BEC that is hefty enough to provide power to the servos and ESC control lines.
After soldering 3.5mm bullet connectors on the ESC, I tested the forward flight motor direction for CW rotation and did a trial fit with the APC 10x6 e-prop.
The 65A ESC fit well in the center and has good air flow around it. I glued a cutoff cable tie to hold the wires in place.
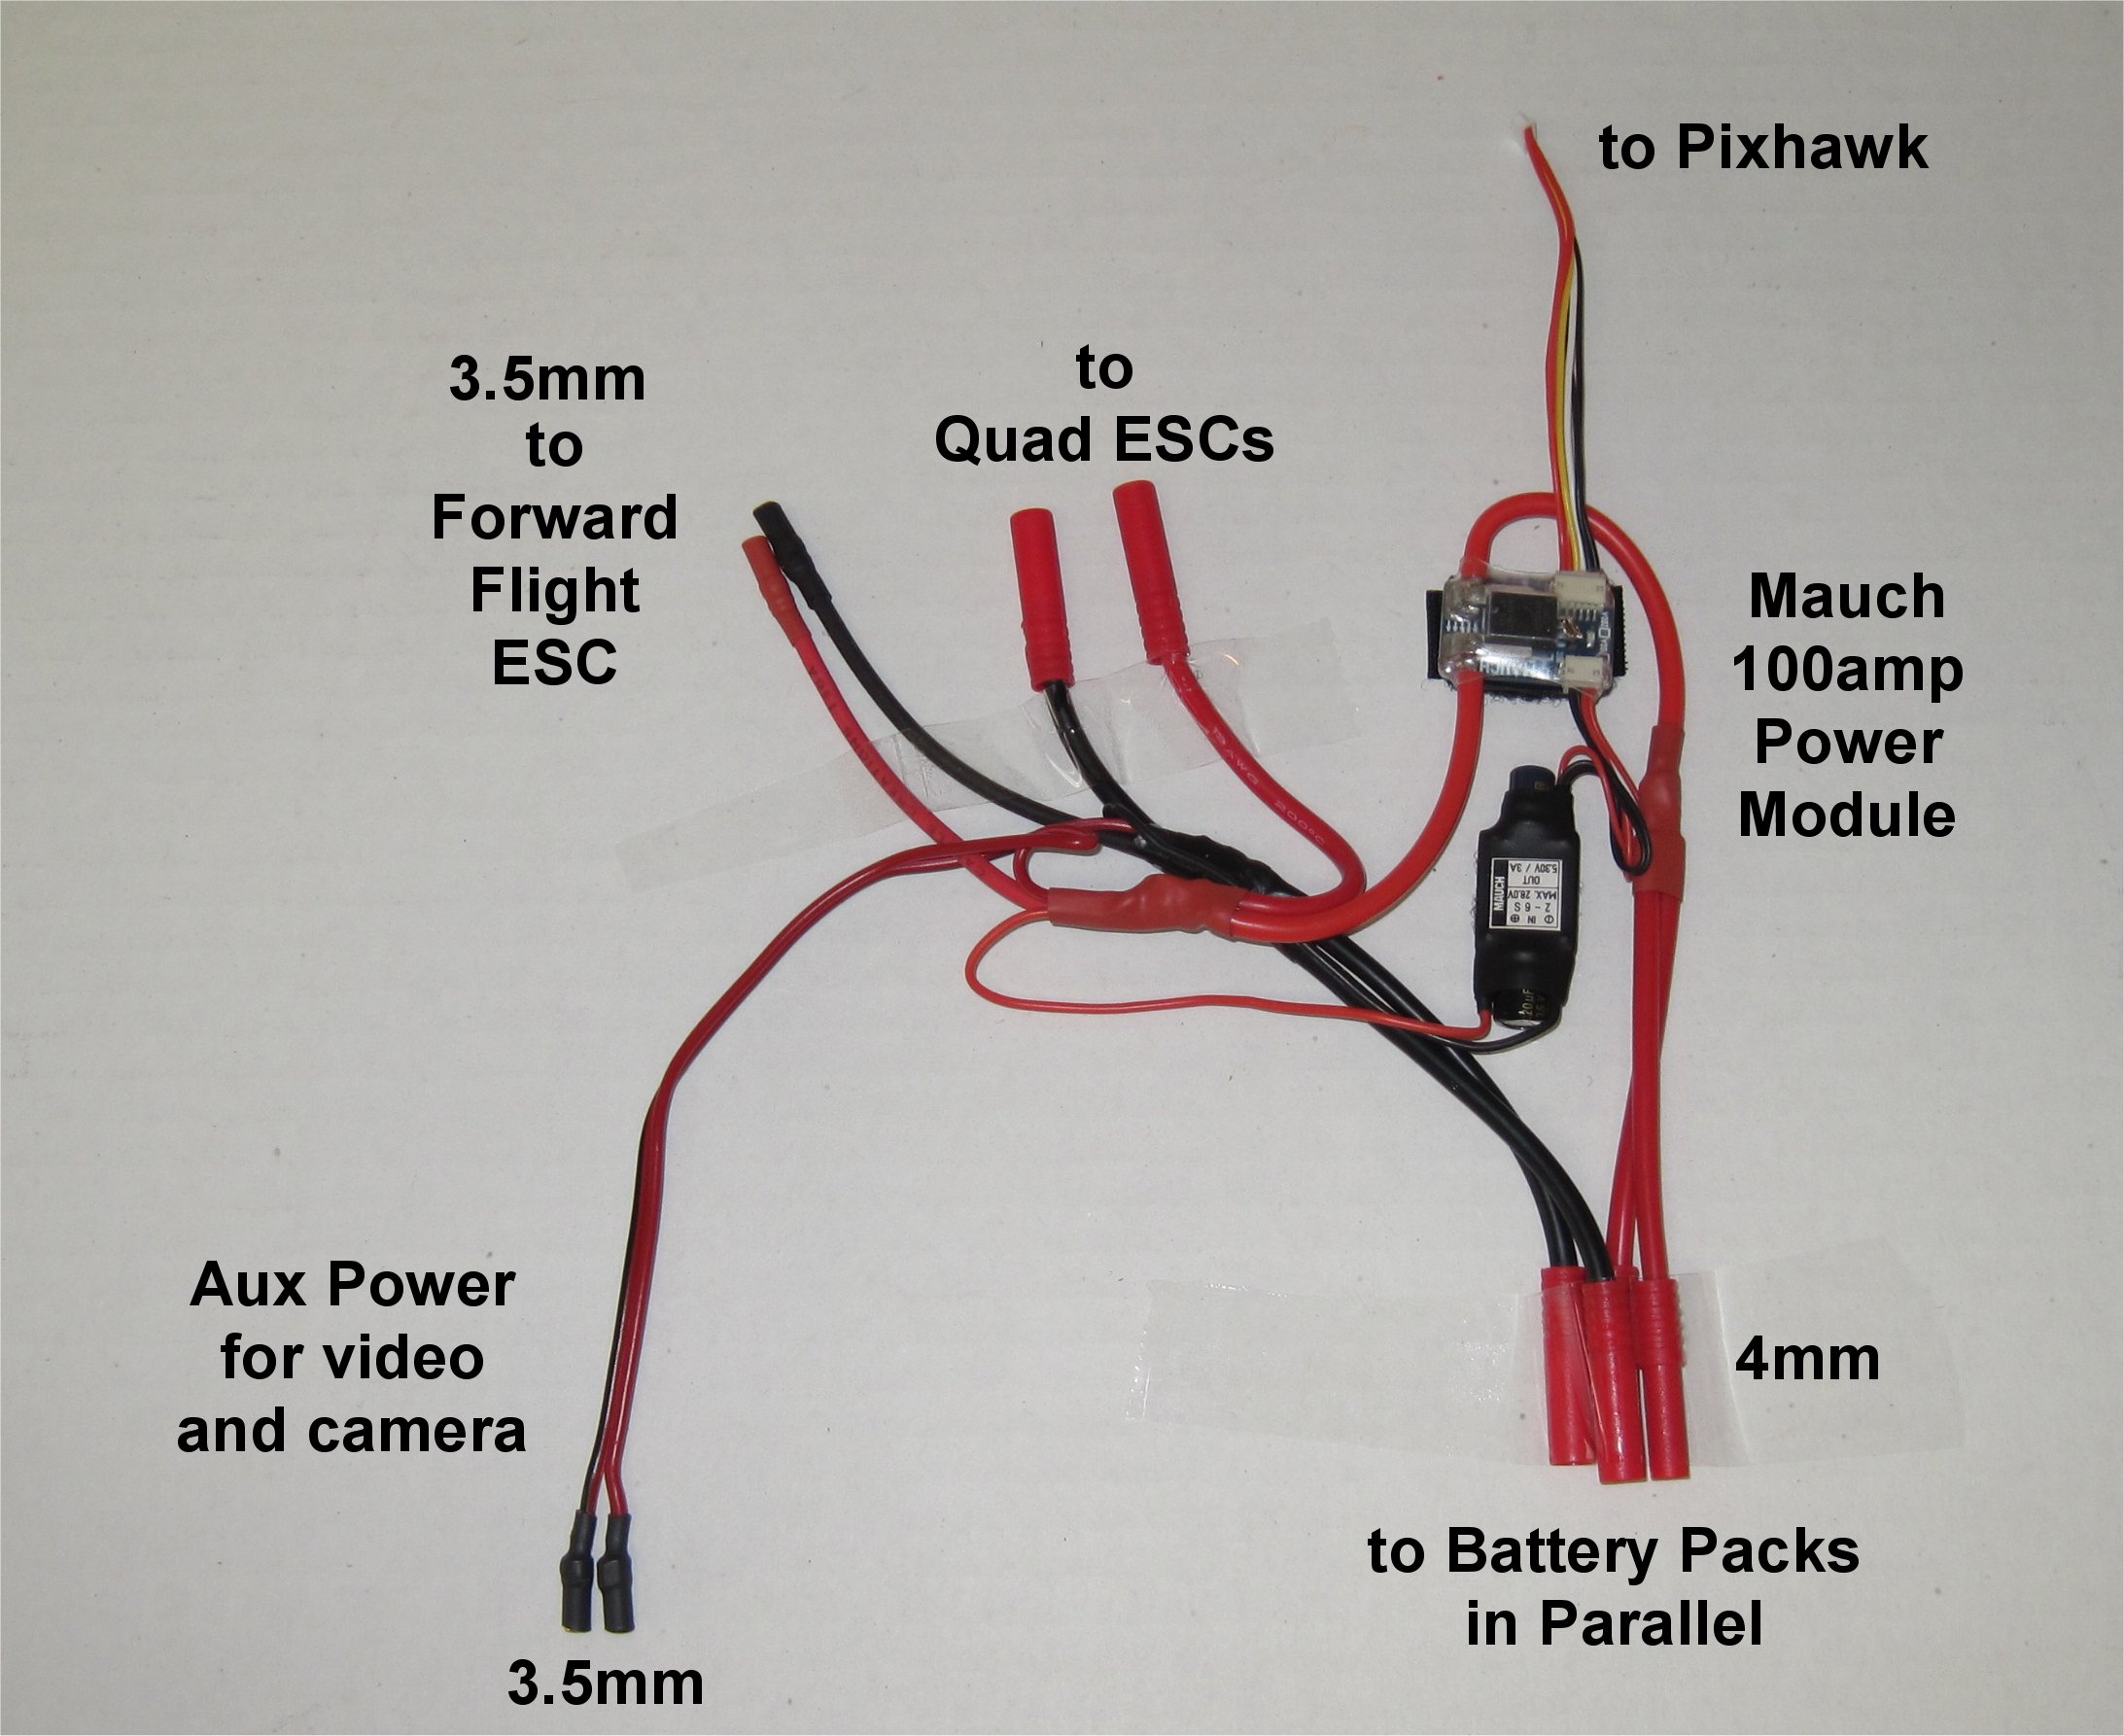
I started working on my main power cable assembly and await some 4mm battery cables from HK.
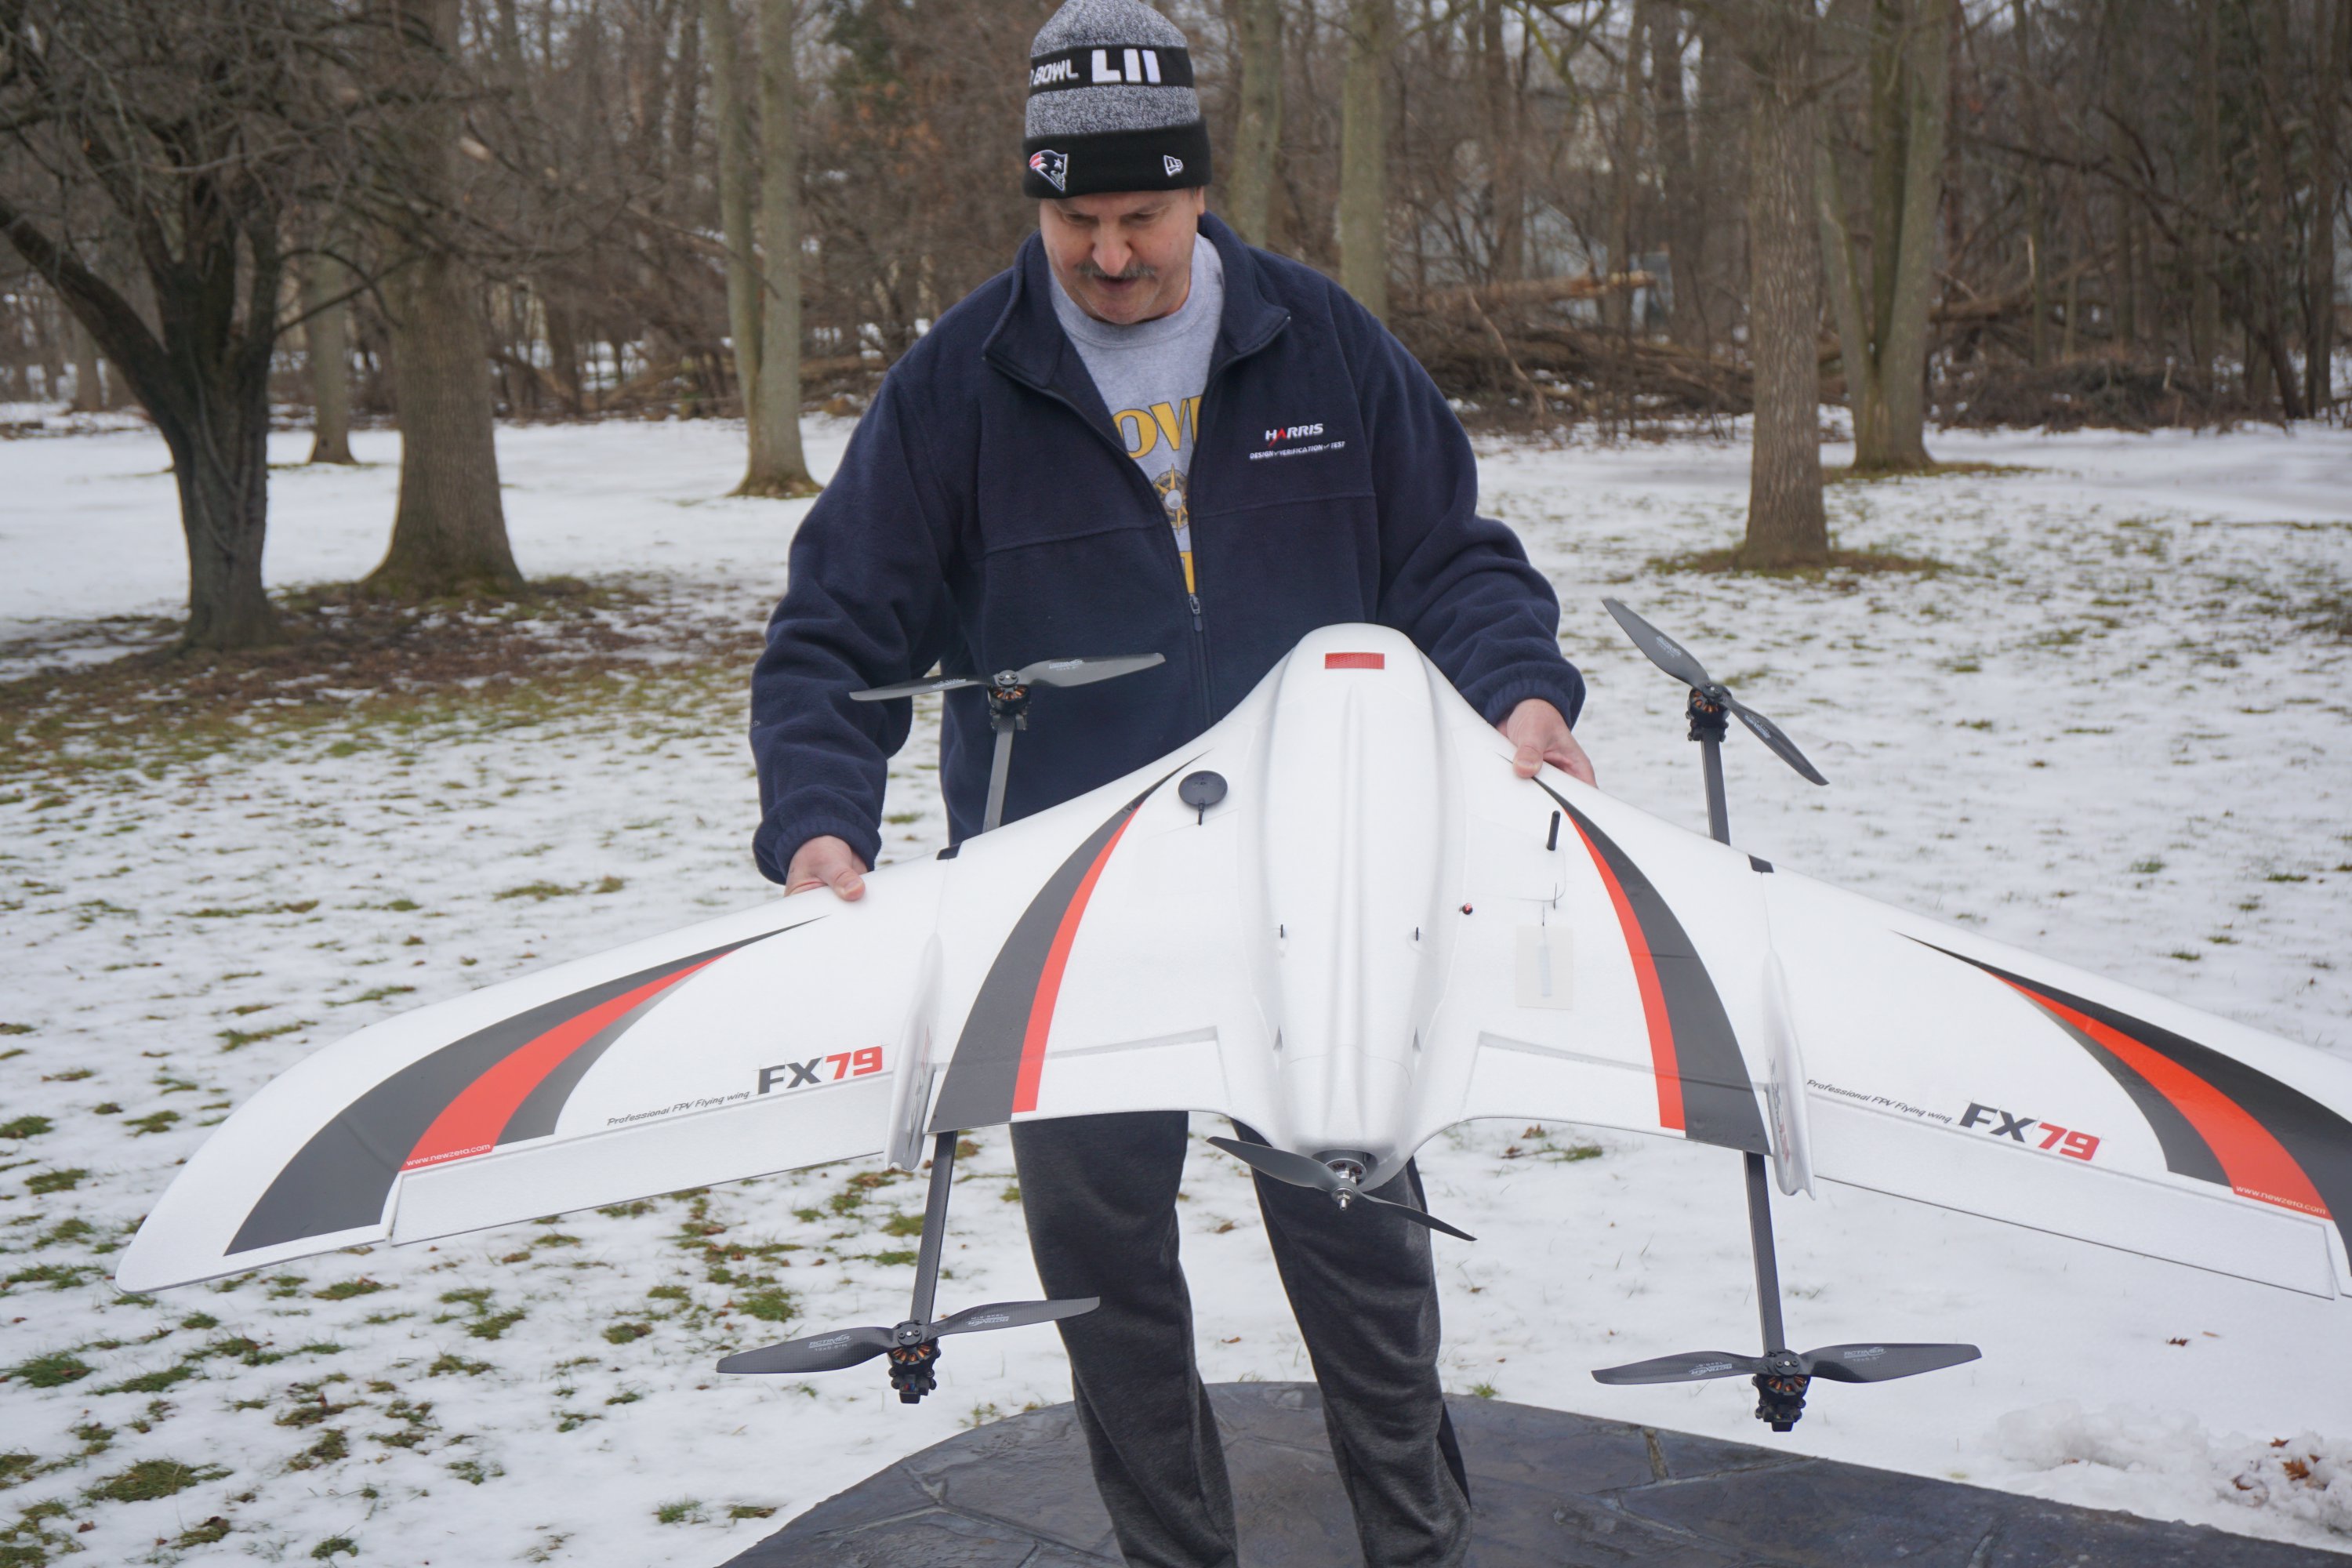
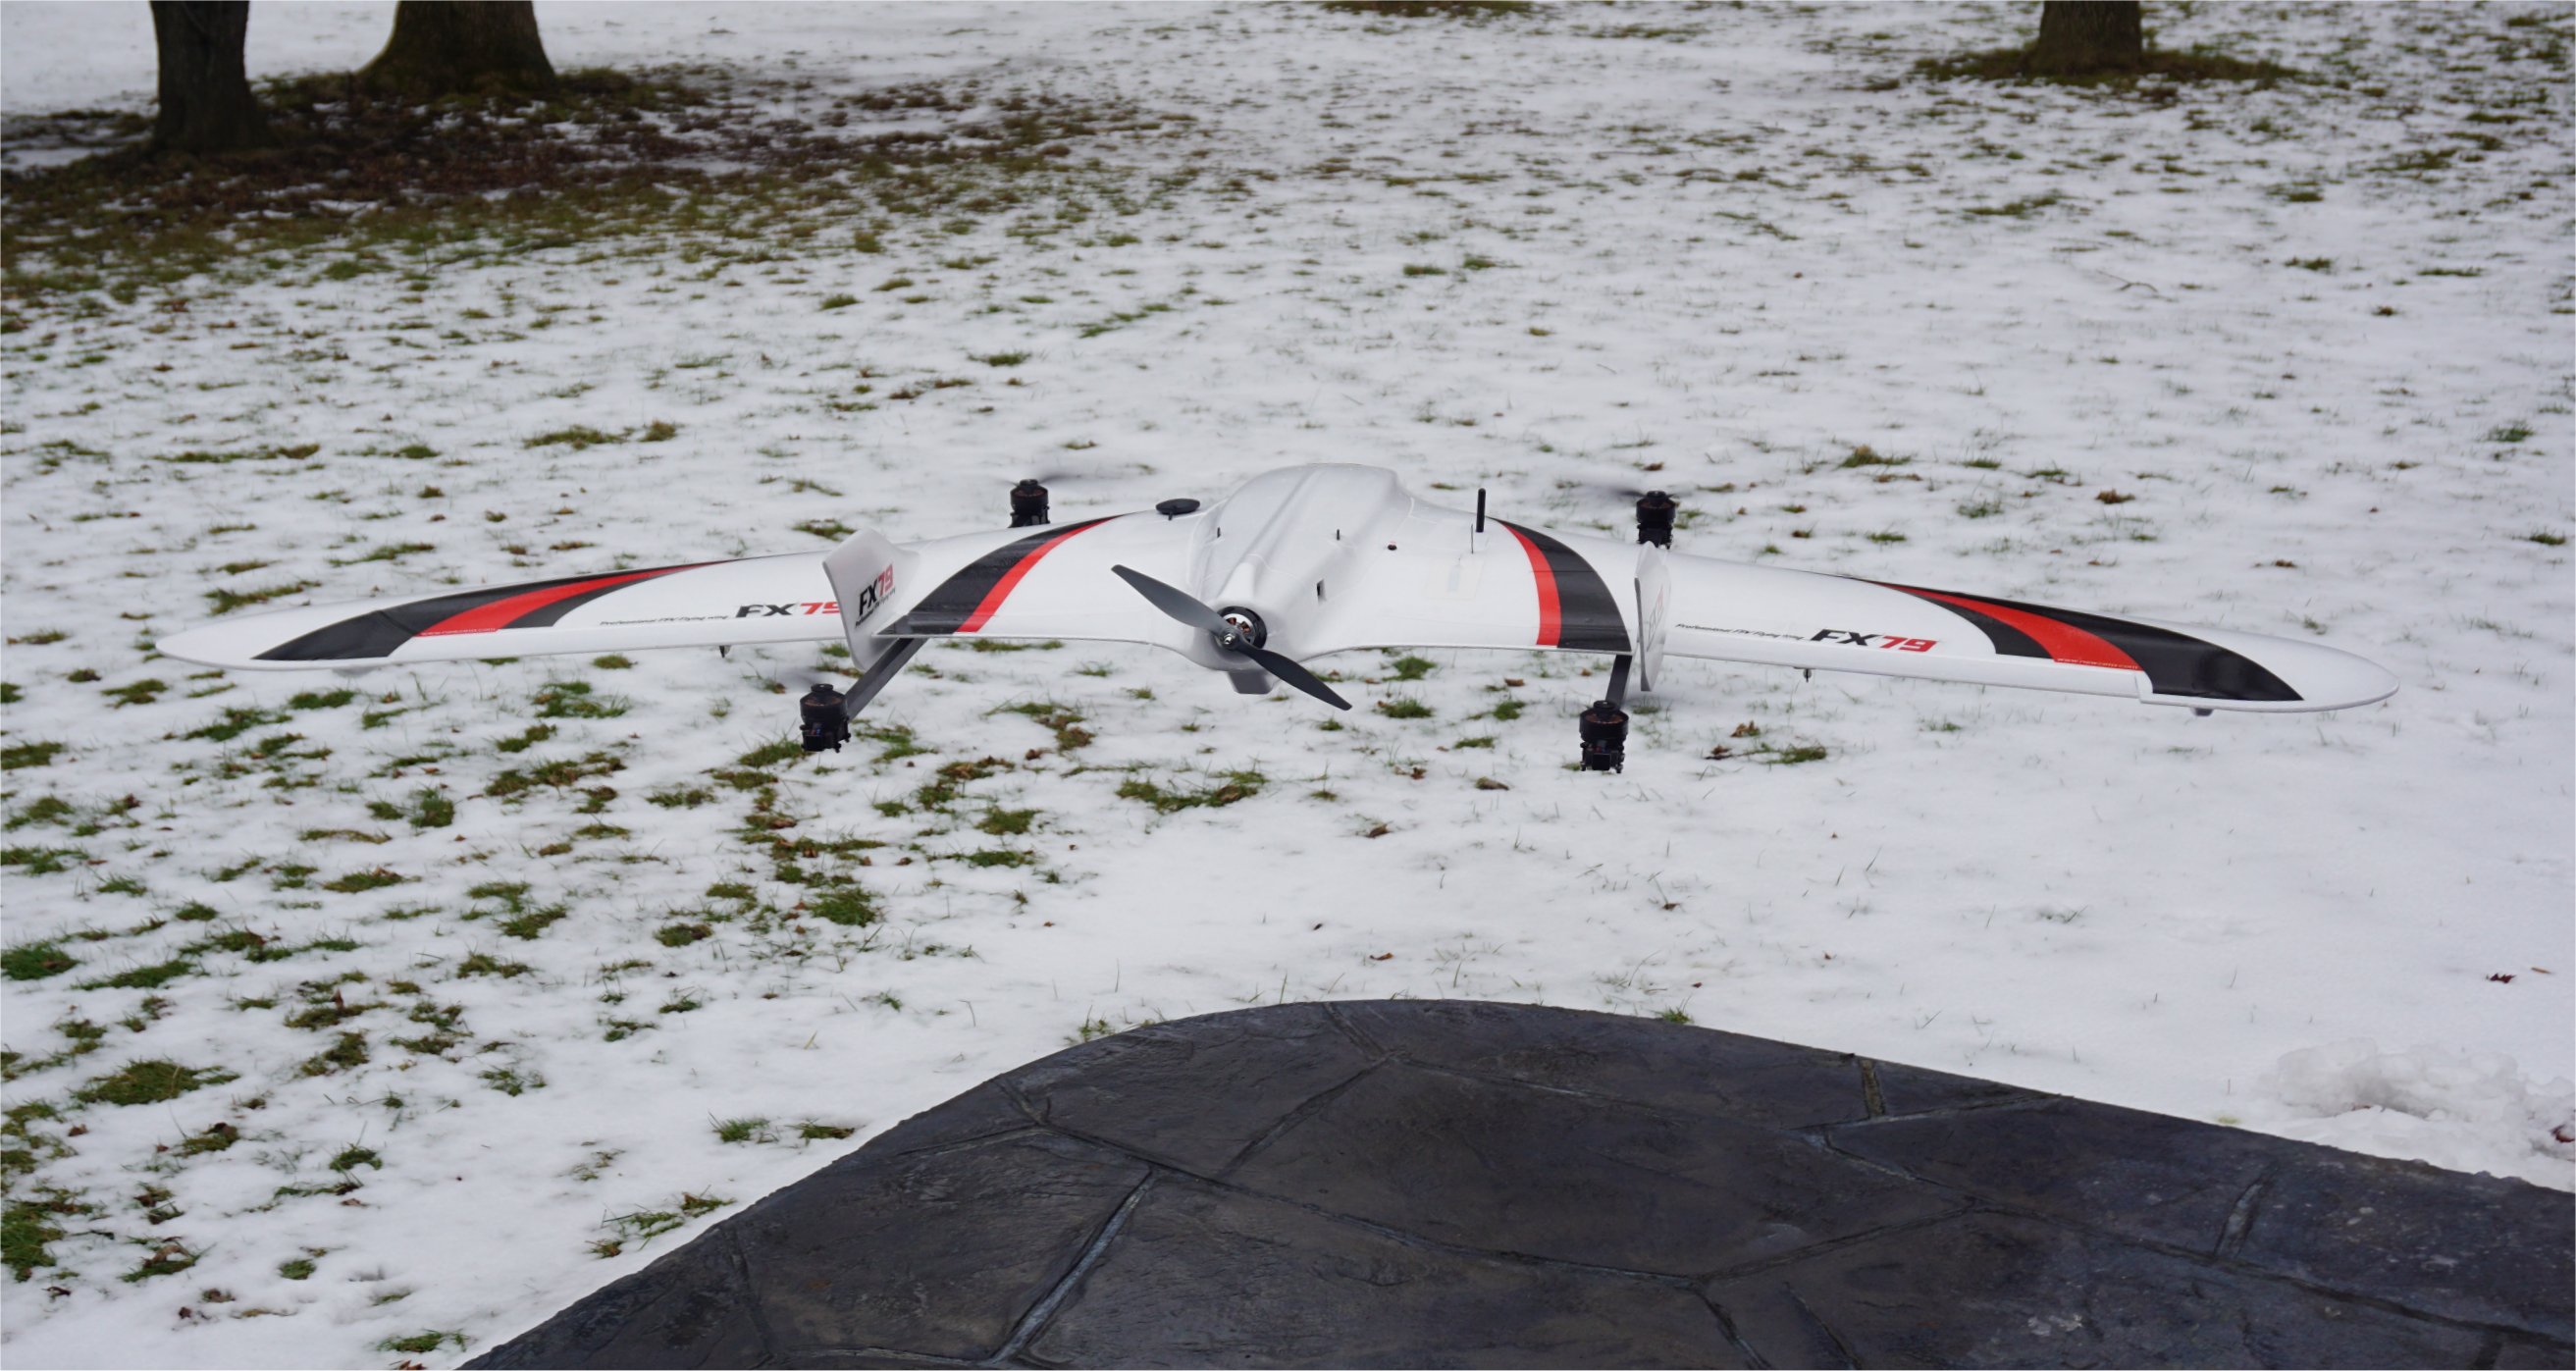
While I wait for my HXT 4mm (Battery Side) and (ESC Side) connectors to arrive, I decided to test my CG balance. I had proper CG with the wings and top cover on using my two 4s 4AH packs positioned as shown. Each pack weighs 15oz (425g). With all 5 props installed I’ll probably need to move the packs a tiny bit forward so I was happy with the result.
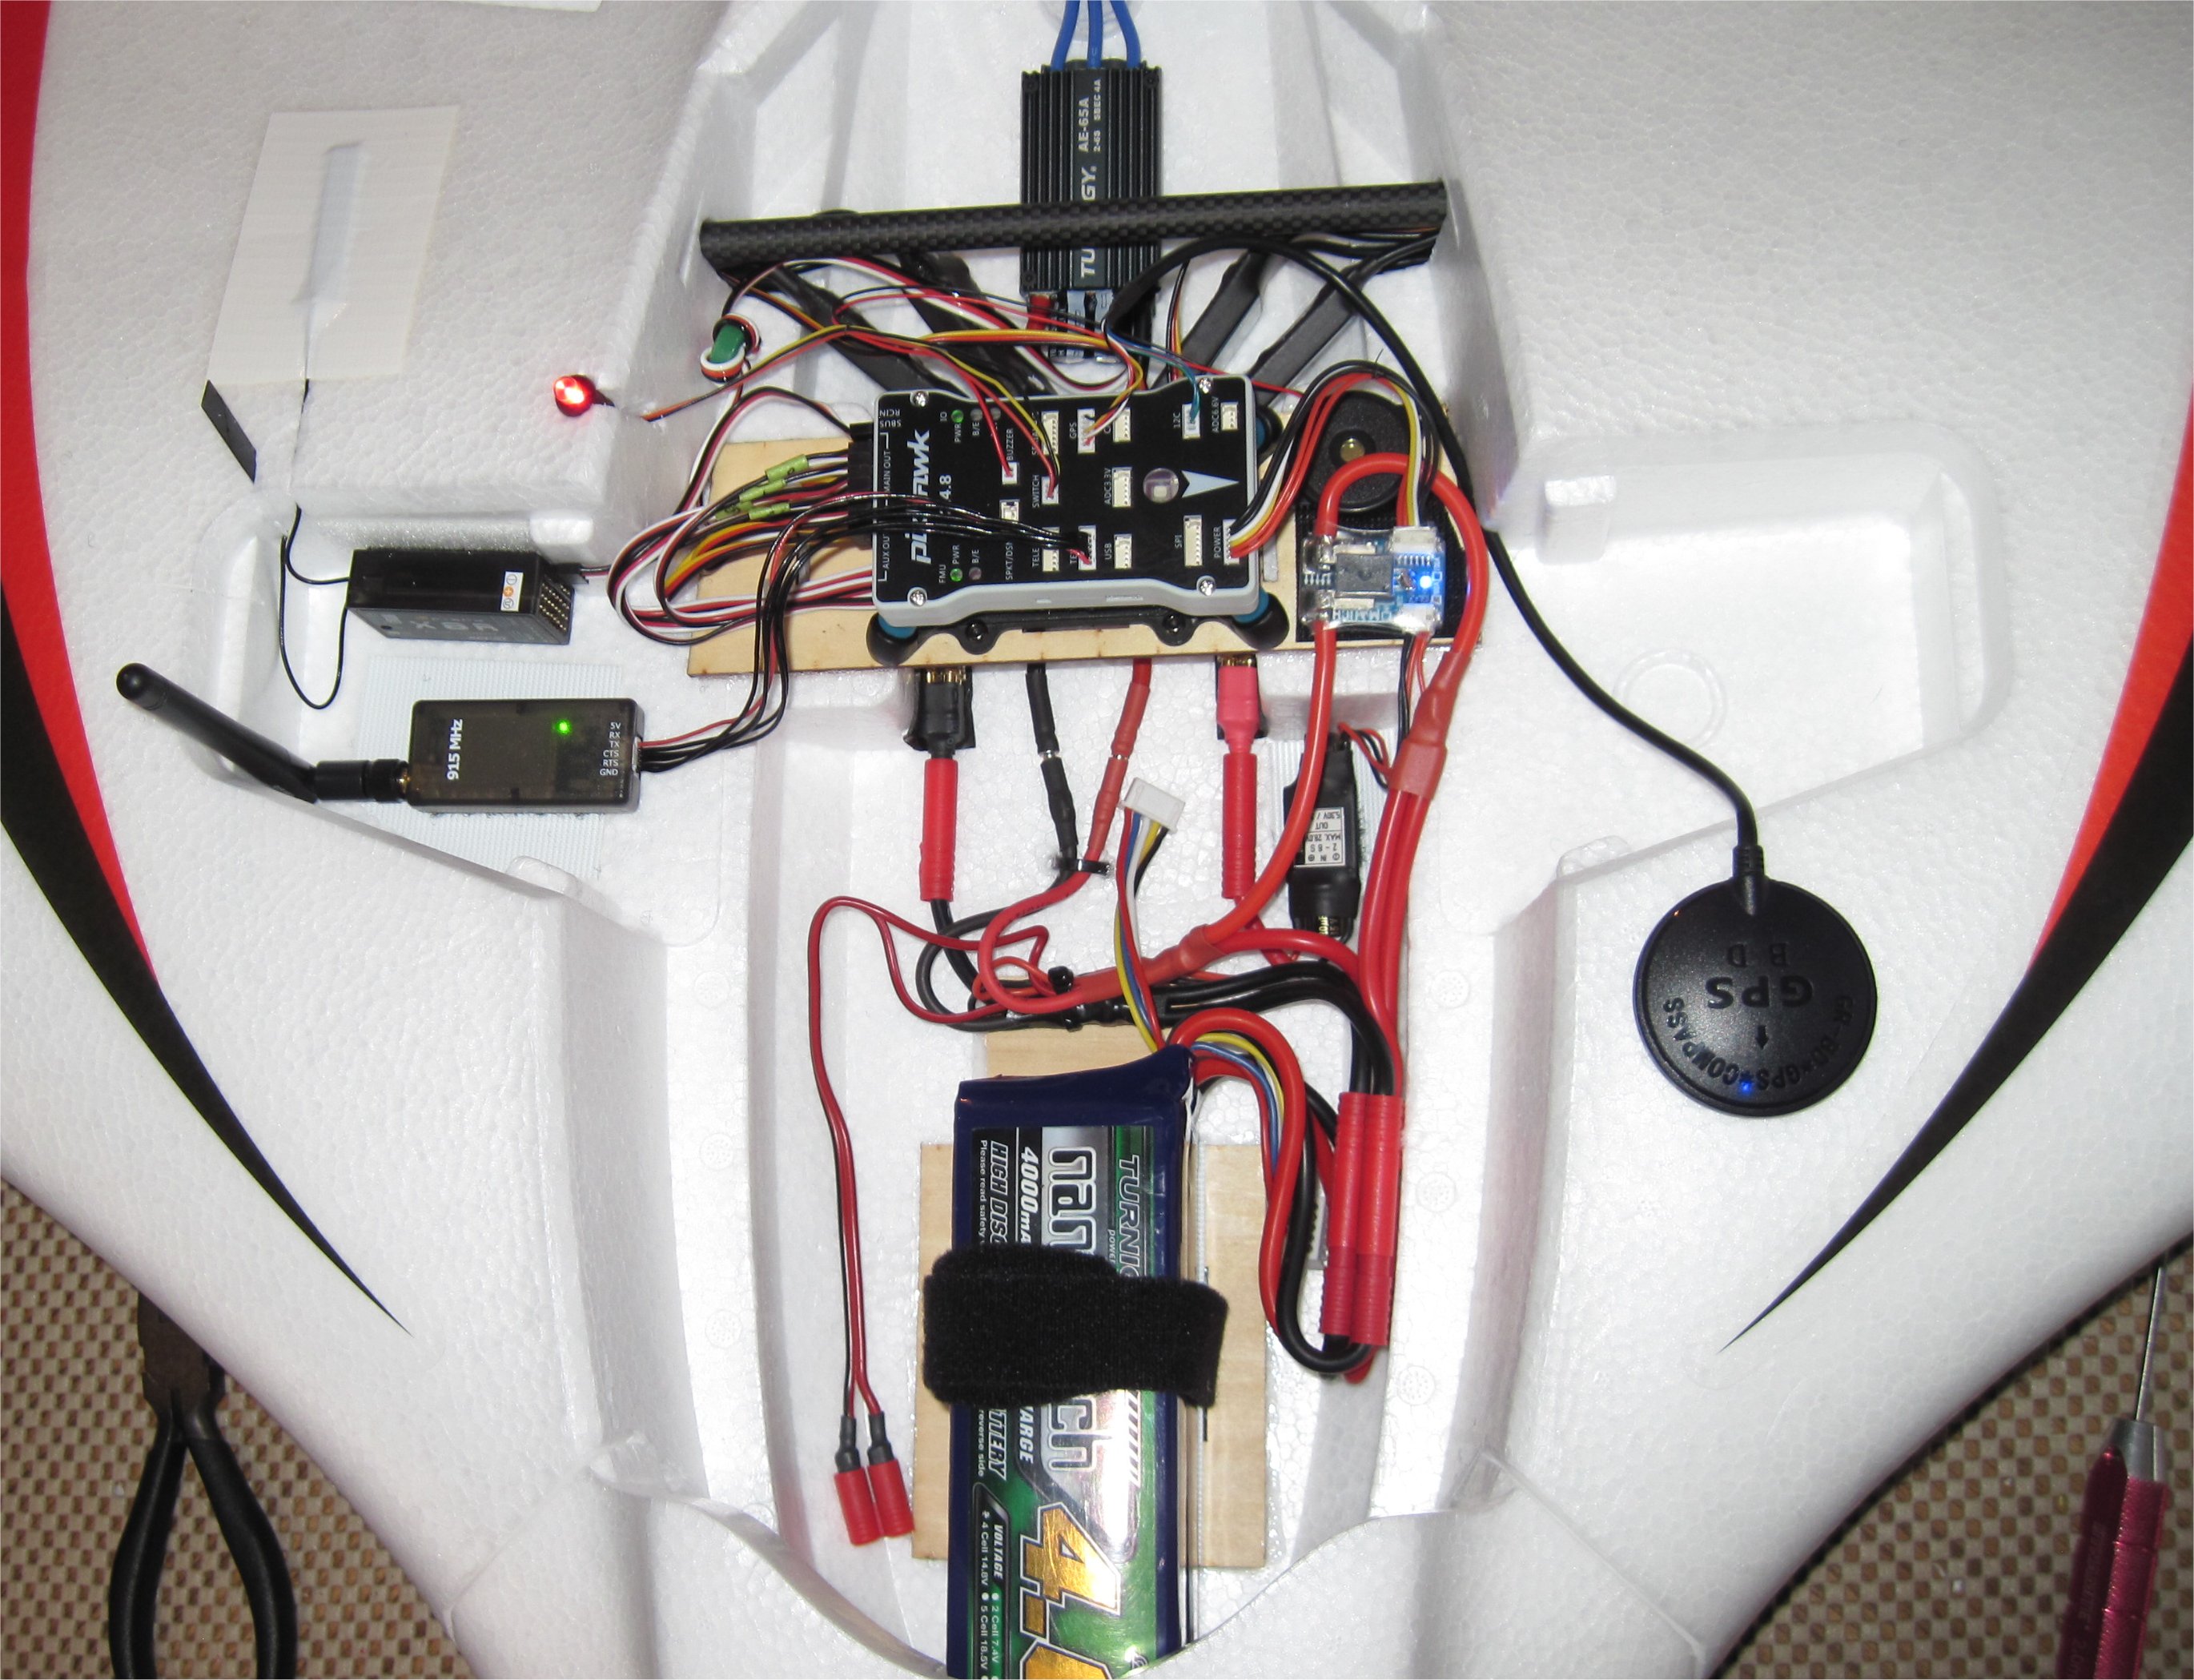
My HXT 4mm connectors arrived so I finished my wire harness. The only component left I am waiting for is my 915MHz telemetry module. Even without it I should be able to start calibrating the Pixhawk and testing the control surfaces. I’ll probably anchor down some of the ESC connectors as well. I added an Aux Power line for camera and video downlink although sometimes I use the Lipo Pack balance connector or even a separate Lipo pack.
There is still plenty of room left over in this big wing for other accessories. The nose area is currently empty so there should be plenty of air flow on my initial testing.
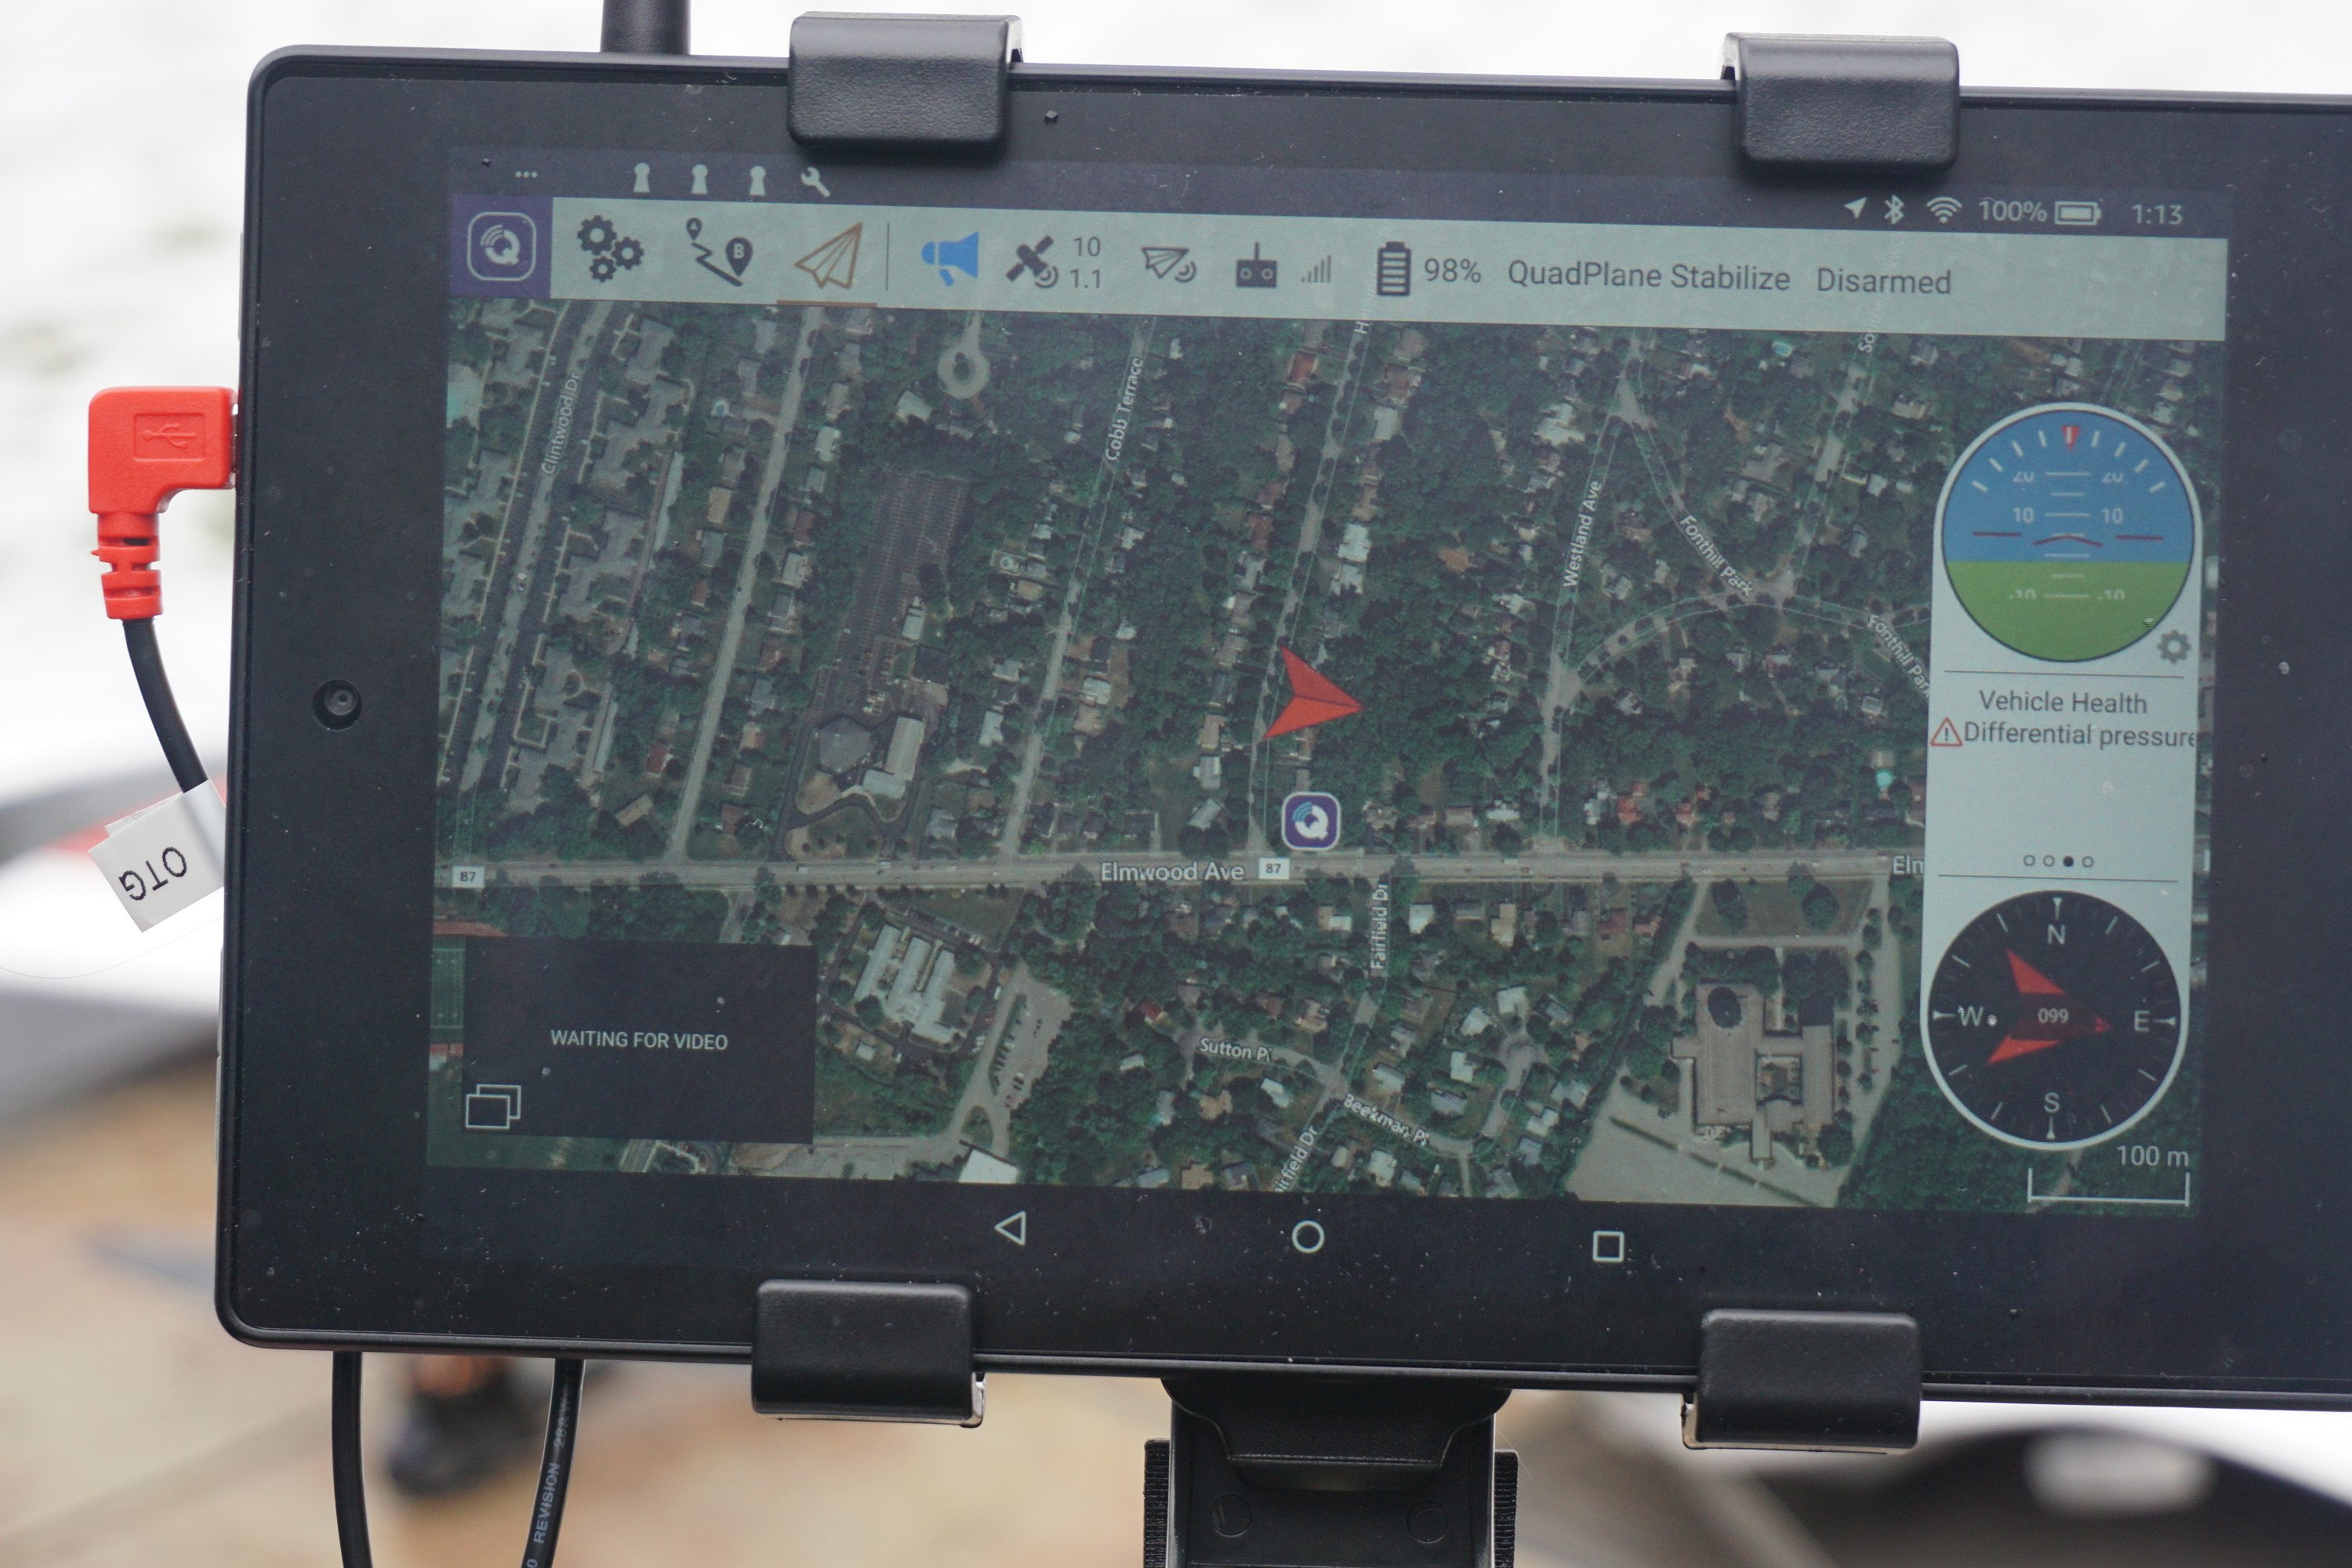
My HK 915MHz. v2 telemetry set arrived today so I was able to power everything up and calibrate the ACC, Radio, Mauch PM in the Battery Monitor, and quad ESCs. Everything seems to be working fine. I haven’t calibrated my compass yet but it seems to be working fine. Usually I get the persistent “Compass Not Calibrated” voice and message in Mission Planner on new Pixhawk startups. I may mount a new analog AS sensor that I have on hand. A fun way to spend a Saturday!
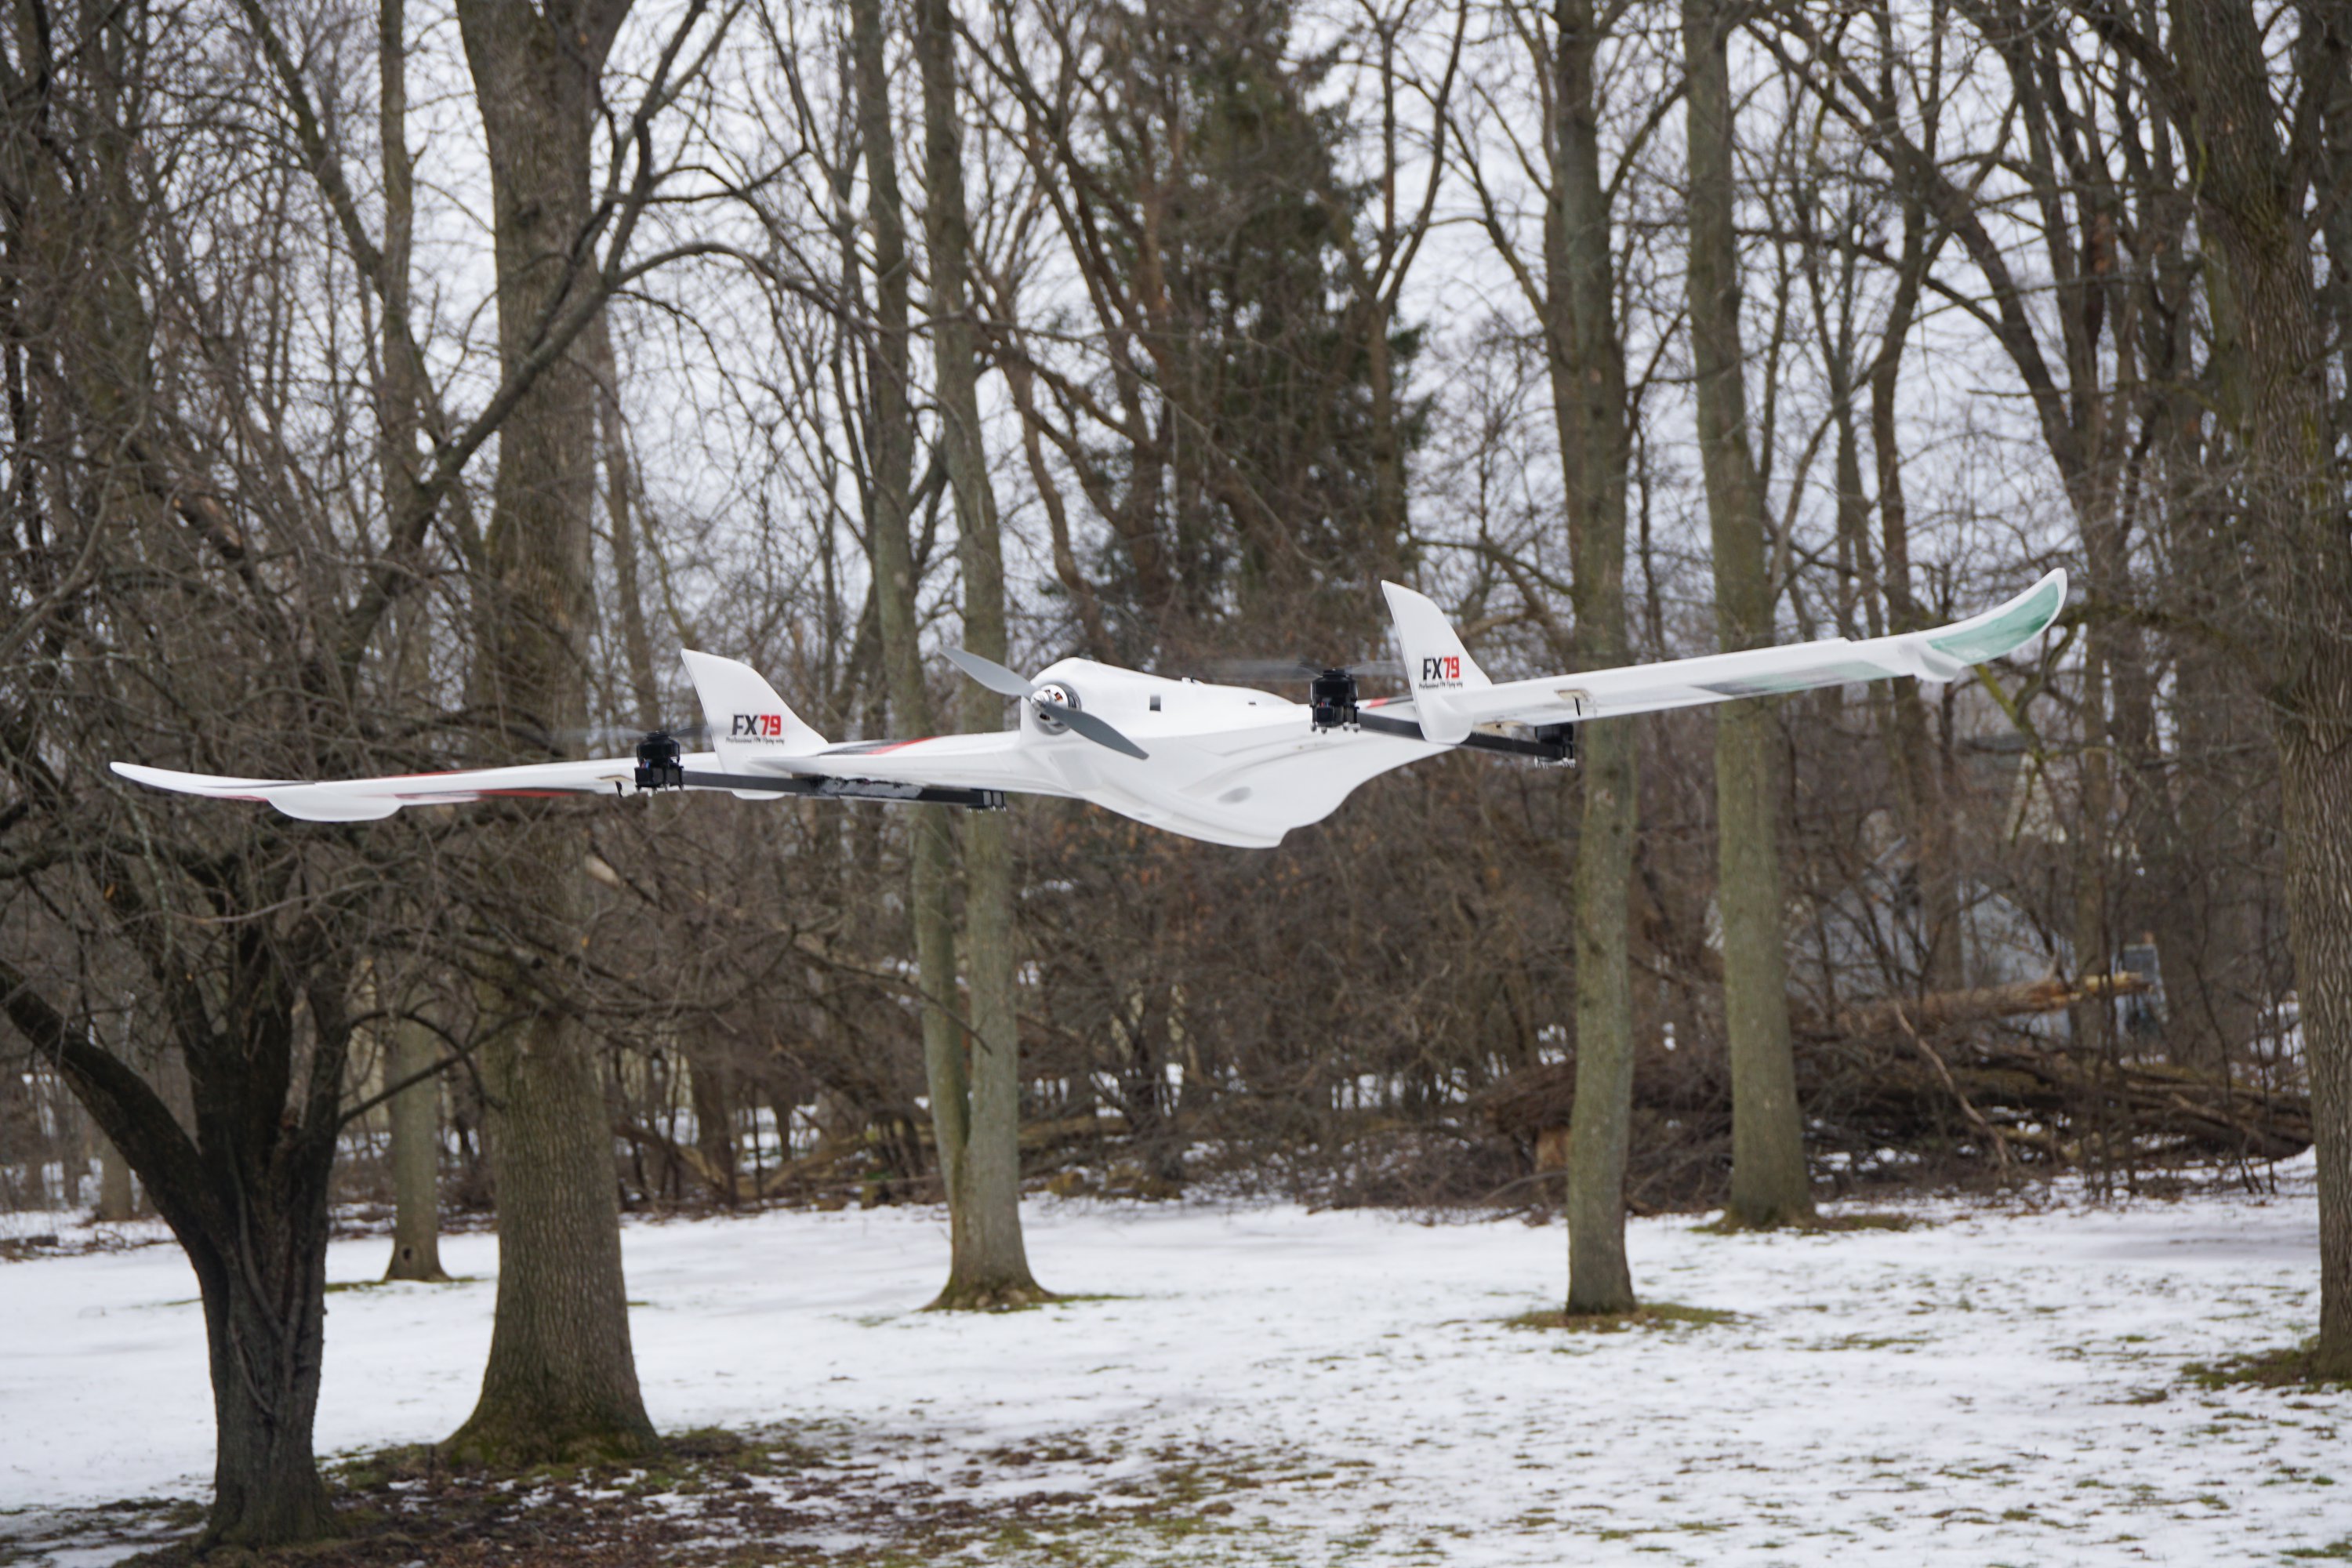
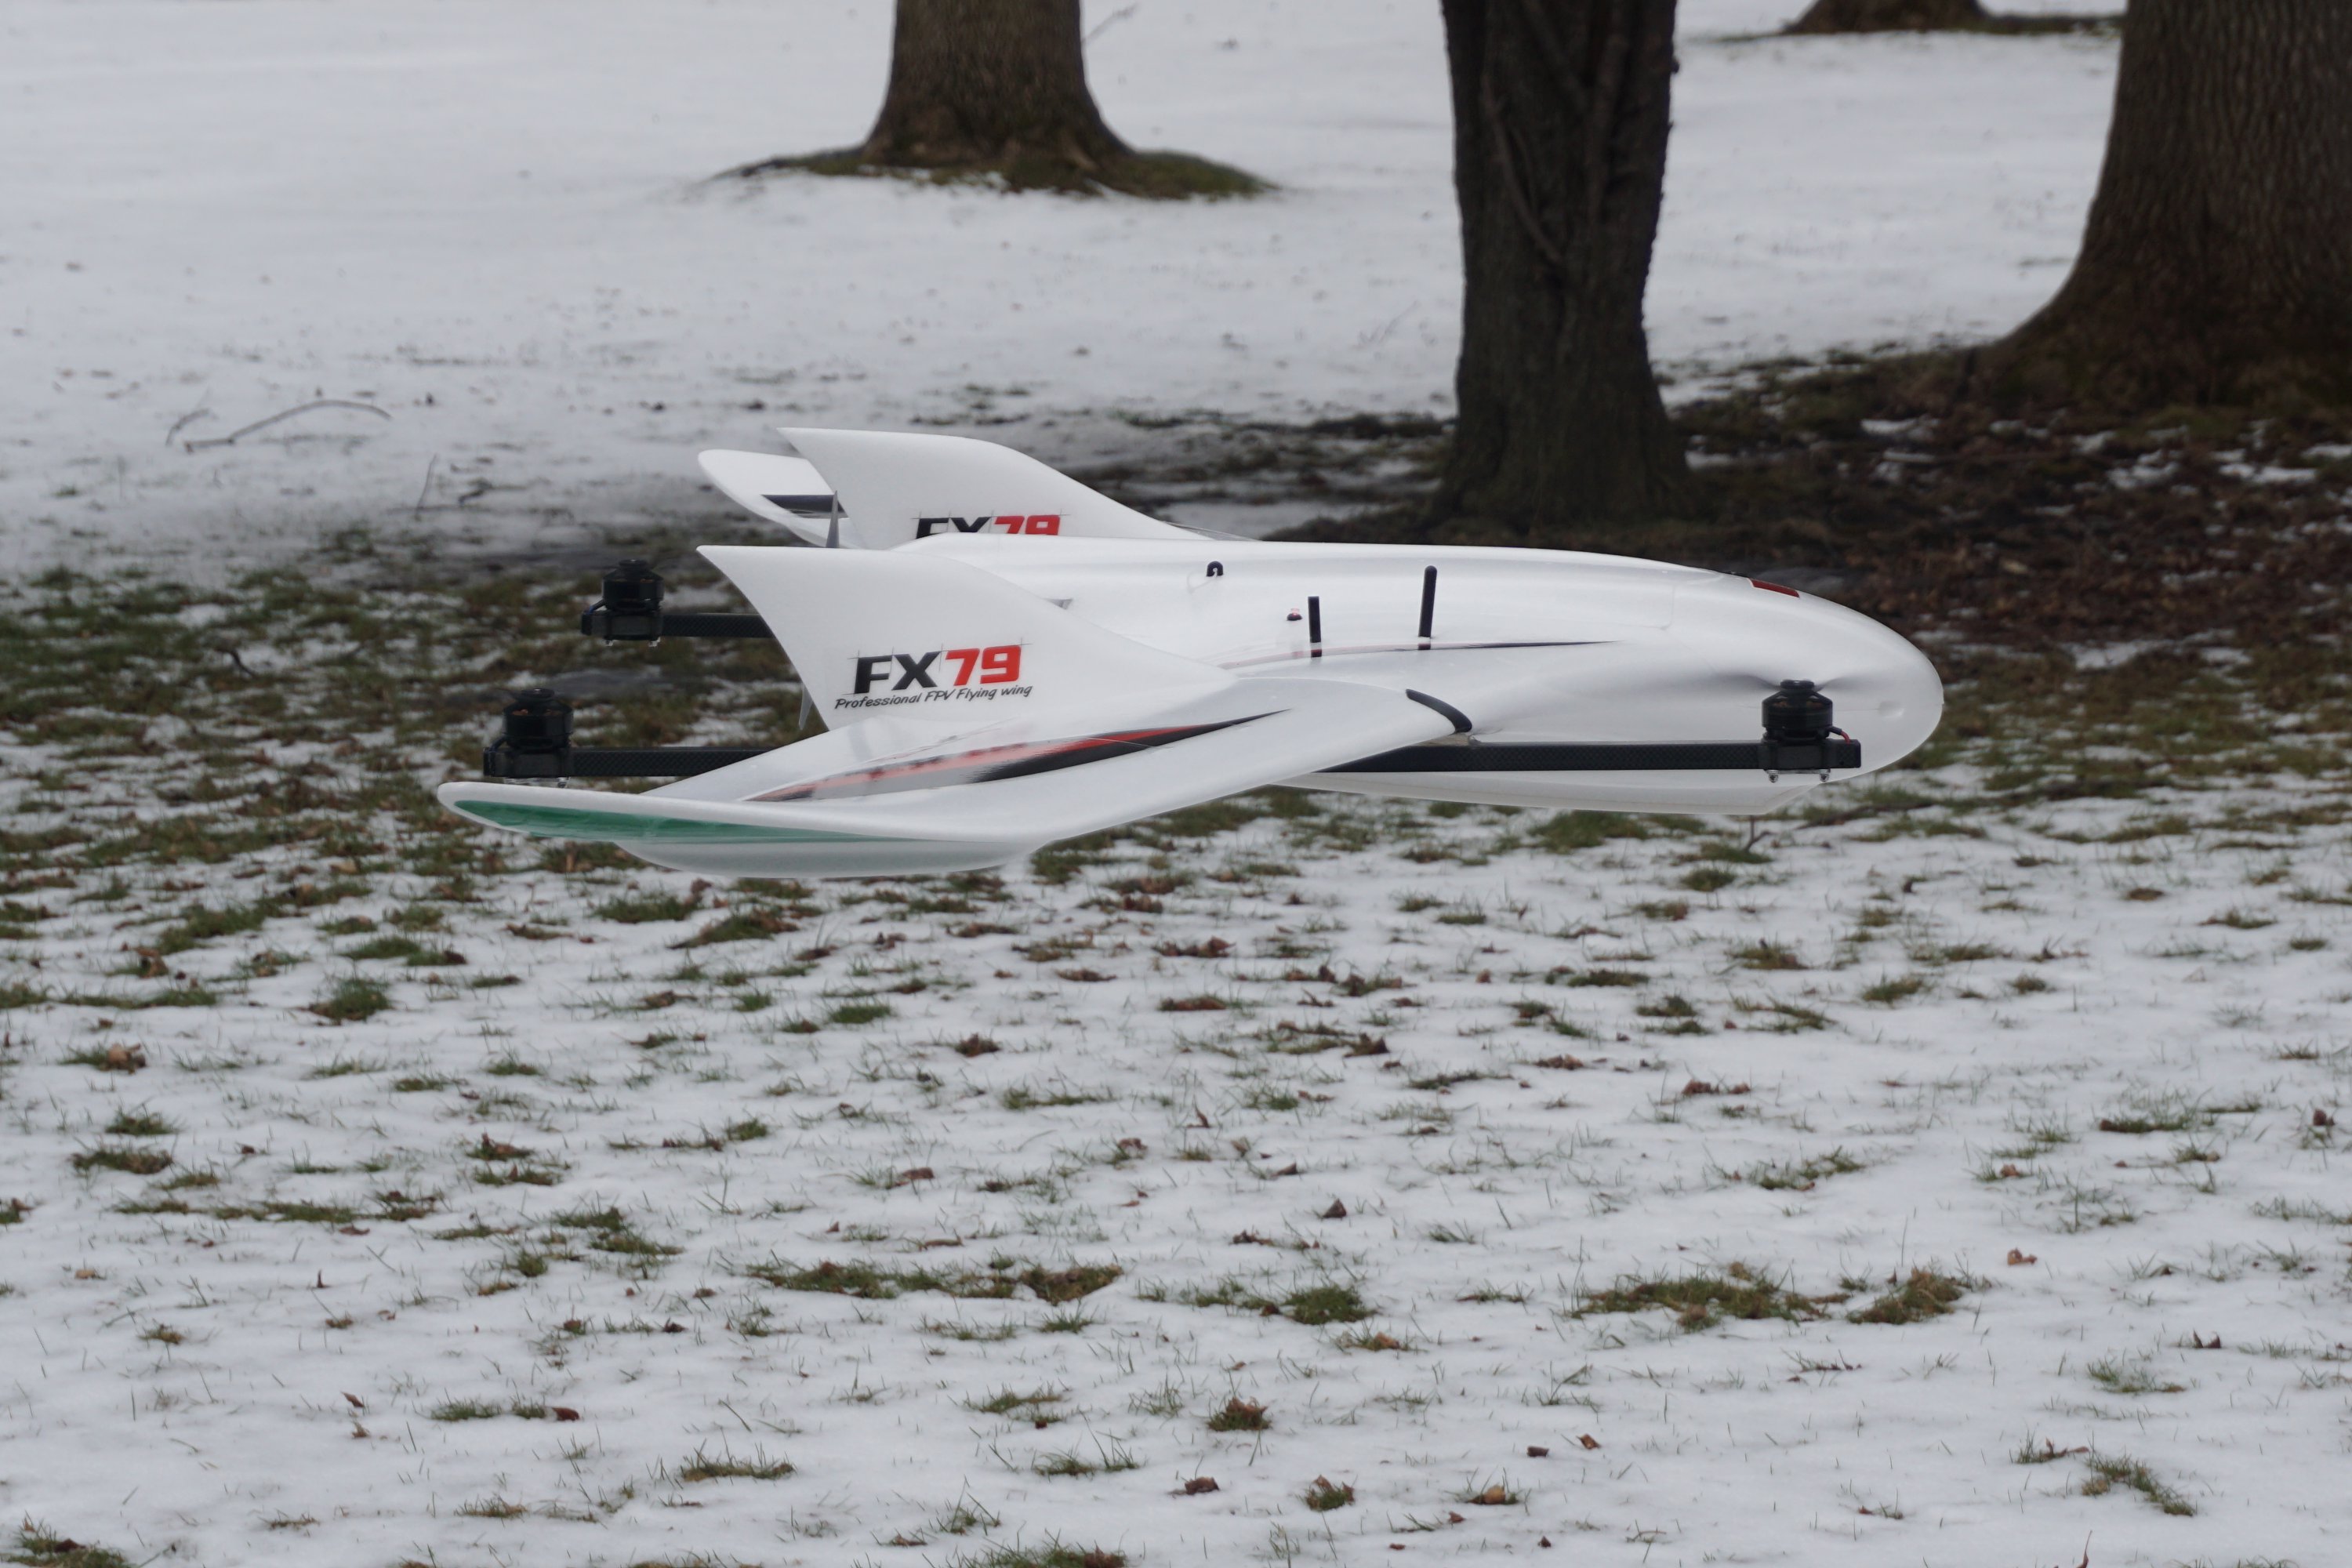
I had several successful hover tests in my backyard today. My buddy took some photos and a video which I’ll post later this week. The FX-79 hovered nicely in a very small area using QSTABILIZE mode. The wind would come blowing through and turn it sometimes. I seemed to have good control so I won’t make any changes until I can test hover it in a larger, safer area. I’m using Plane v3.8.4 with default PIDs.
Looking good Greg. SInce the demise of the FF6, I’ve been working on converting a FX61 to VTOL… Getting close. Might hover test this week. I considered the FX79, but thought it was too big. After looking at your pictures and knowing I had to cut a fare amount of my fuselage away to accomdate a camera, I am beginning to think I choose poorly.
Looks like you have ton of space. What is the largest battery you think you’ll be able to carry? Any flight time estimates?
Since there is plenty of space available up front, I think that you can use the larger Multistar packs from 10AH and above to meet the current demands and increase overall flight time. From my previous testing of the same system on my Ranger EX, I know that there were 80-90amp current peaks when the quad motors were on with the forward flight motor.
I’m initially using my 15oz (425g) 4s 4AH Nano-Tech packs because I have 6 of them from my Tarot copters. Of course, depending upon your application, adding the weight of a camera and possibly a gimbal needs to be considered. I decided not to mount a camera until I test things out more.
The old FX-79 reviews from years ago used a GoPro Hero2 mounted up front. Today, something like a RunCam Split for FPV or HD recording wouldn’t even be noticed. A mapping camera mounted underneath would require the addition of some sort of landing gear.
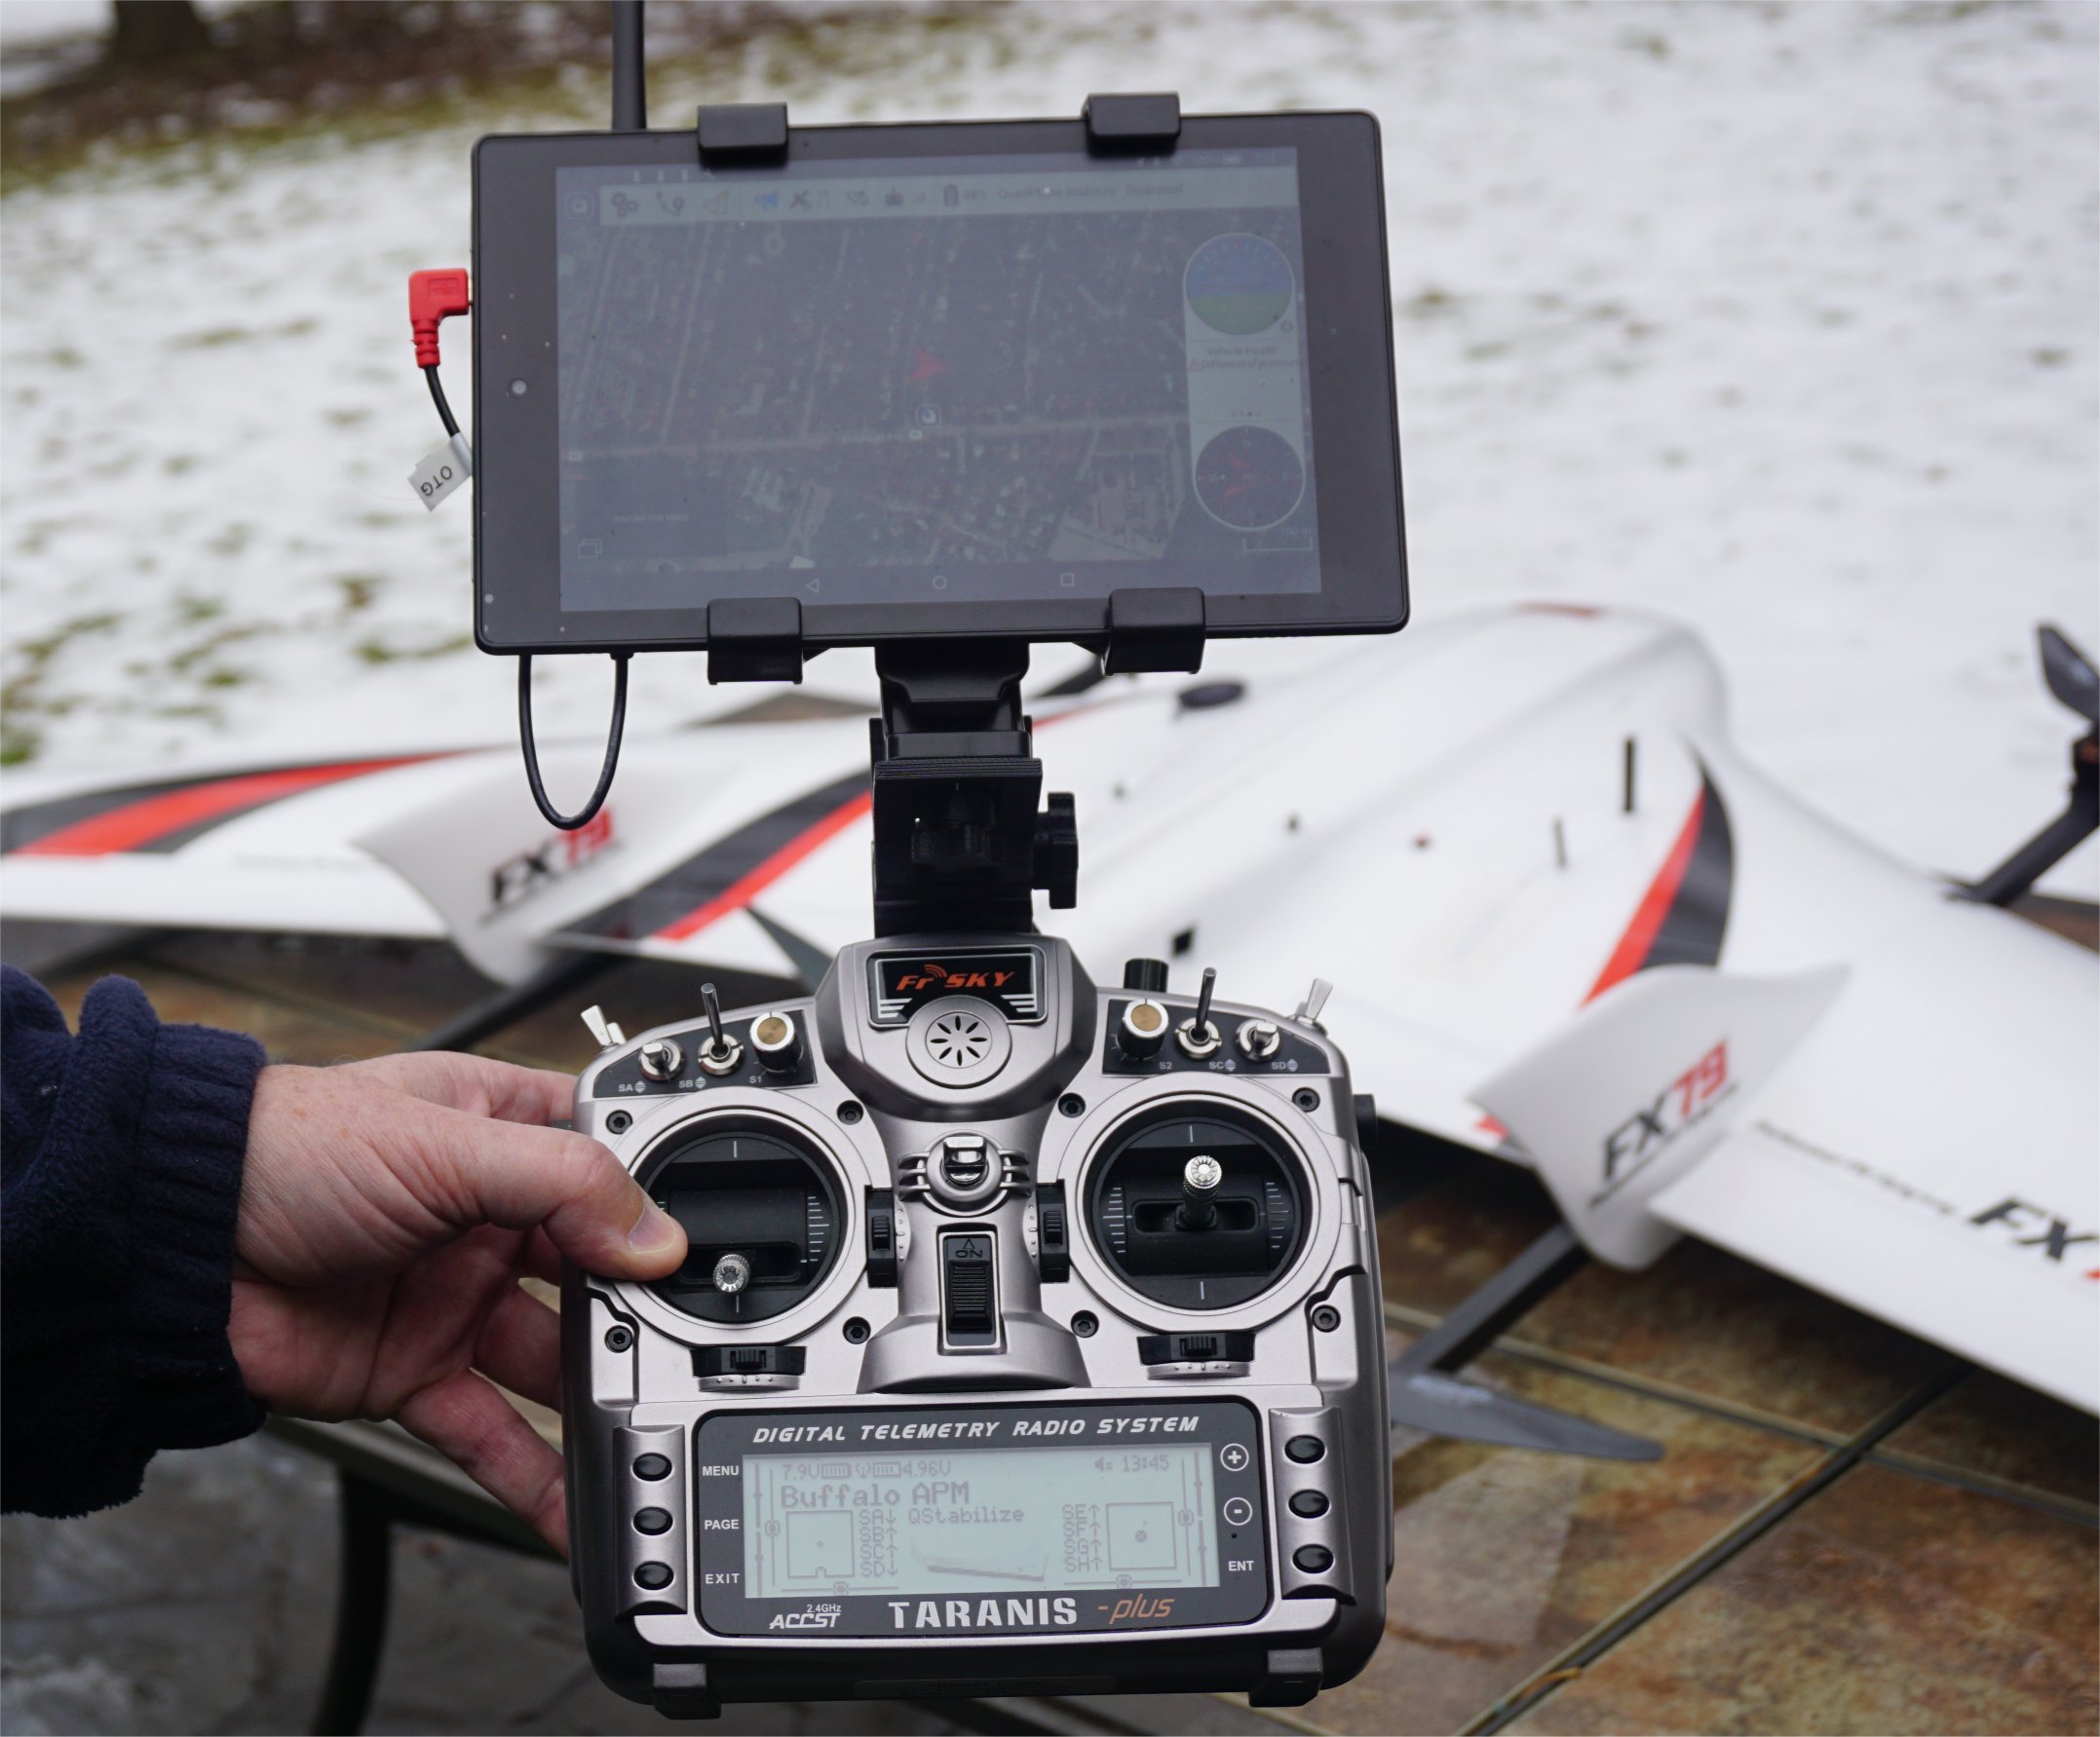
My initial hover test of the FX-79 Buffalo QuadPlane conversion was successful. I tested QSTABILIZE mode in a small space of my backyard as it was rather cold and breezy. I lost my grip on the Taranis as I was not used to the extra weight of the tablet on top. Fortunately, it was only a quick slip and not a drop.
My next test will be in a larger, safer park field where I can better test the stick authority in various hover modes.
I made some progress today. Need to trim the canopy in a few places and do the final CG adjustments. Have to head out of town for a few days tomorrow morning, but hoping to do my first hover test next weekend.
Wondering what you think of the following: I am thinking about doing my intiail quad testing with copter instead of q plane. Thinking I could auto tune the plane with quad autotune to dial in the PIDs. And I understand the landing algorithms are much better in copter than plane. Once I dial in the PIDs, I’ll load plane and set the q Copter PIDS. Good idea? Bad idea? Or waste of time? I don’t have a great understanding of PIDs so I thought this would be a useful exercise.
I’m not sure if it will be a useful exercise or not. I might save it as an alternative if you have QP hover problems. The most critical tuning parameters are Q_A_RAT_RLL_P and Q_A_RAT_PIT_P. Other than that, the yaw authority setting is largely based on personal preference.
In my previous QP autonomous testing with v3.6.0, the Bix3 landed nicely once the final phase transition bug was worked around. On v3.8.0, there should be no issues with autonomous QP landings. I will test this in the summer.
The main thing that you need to take away from your FF6 experience is that a hovering wing is not like a hovering copter. The roll and pitch PIDs may need to differ and the wind is not pushing on a symmetrical airframe. In the video above, when I tried to move from the right back to the left, the wind spun it clockwise and I didn’t fight it until things settled down. I will, however, enable active weathervaning for my next larger field test.
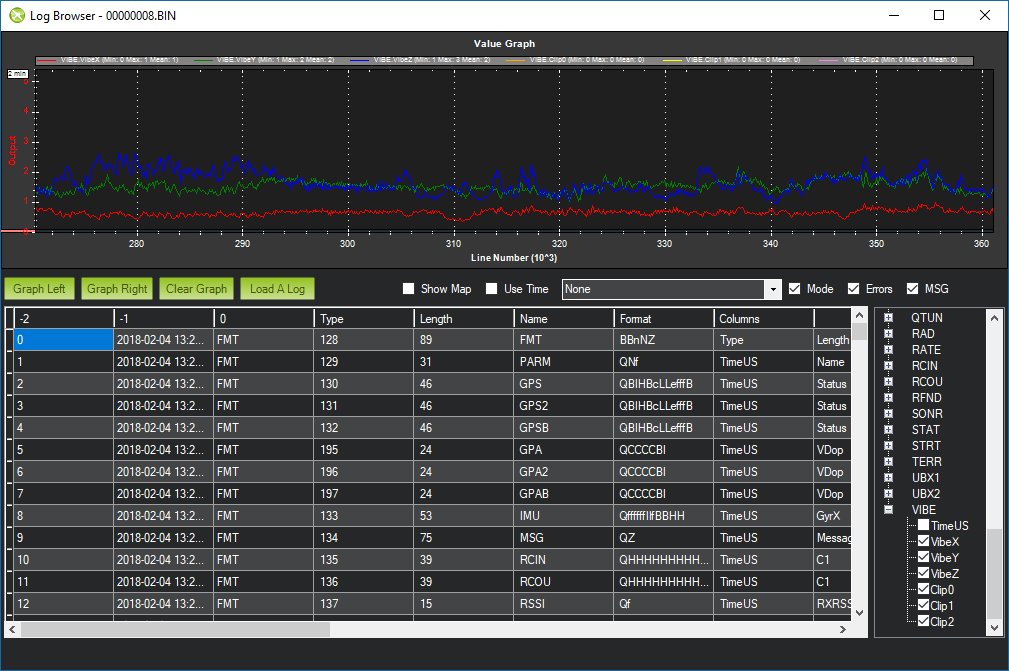
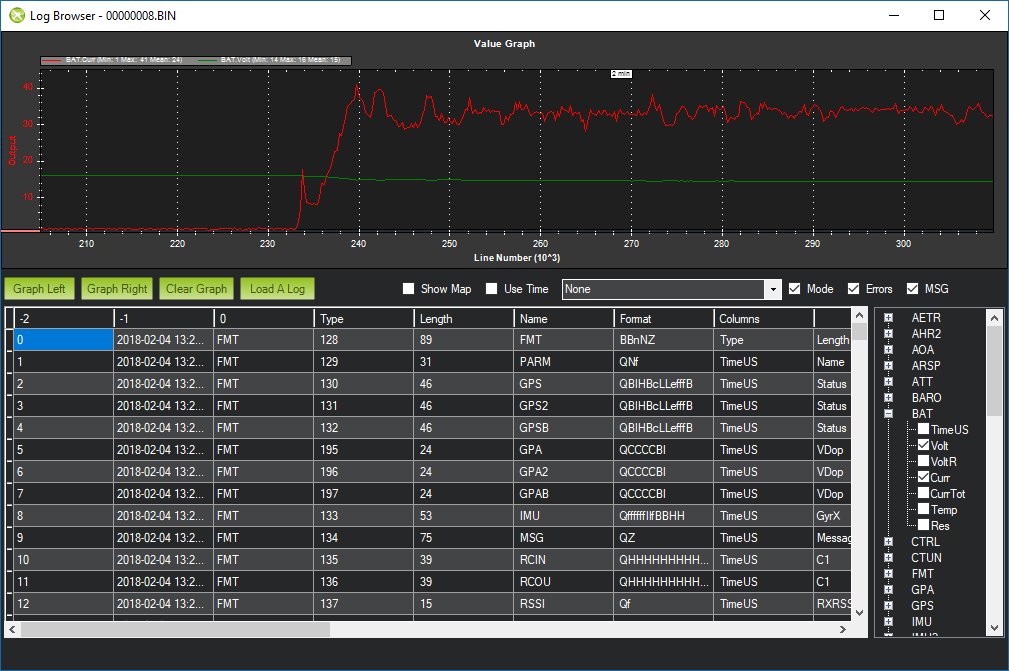
I graphed the vibrations, ThrOut, Voltage and Current from the first hover test. The vibrations were very low due to the mount that the Pixhawk lies on. The ThrOut setting of 42% and 33amp average hover current were much lower than when this power system was on my Ranger EX. I suspect the overall plane weight is less as I am using the same batteries. It looks like I have plenty of room for payload!
Winter persists in Upstate NY (and the rest of New England) in March 2018 so I decided to add the new Open Source Frsky Telemetry Script by Alex Yaapu. The LUA script works for newer versions of APM Copter and Plane.
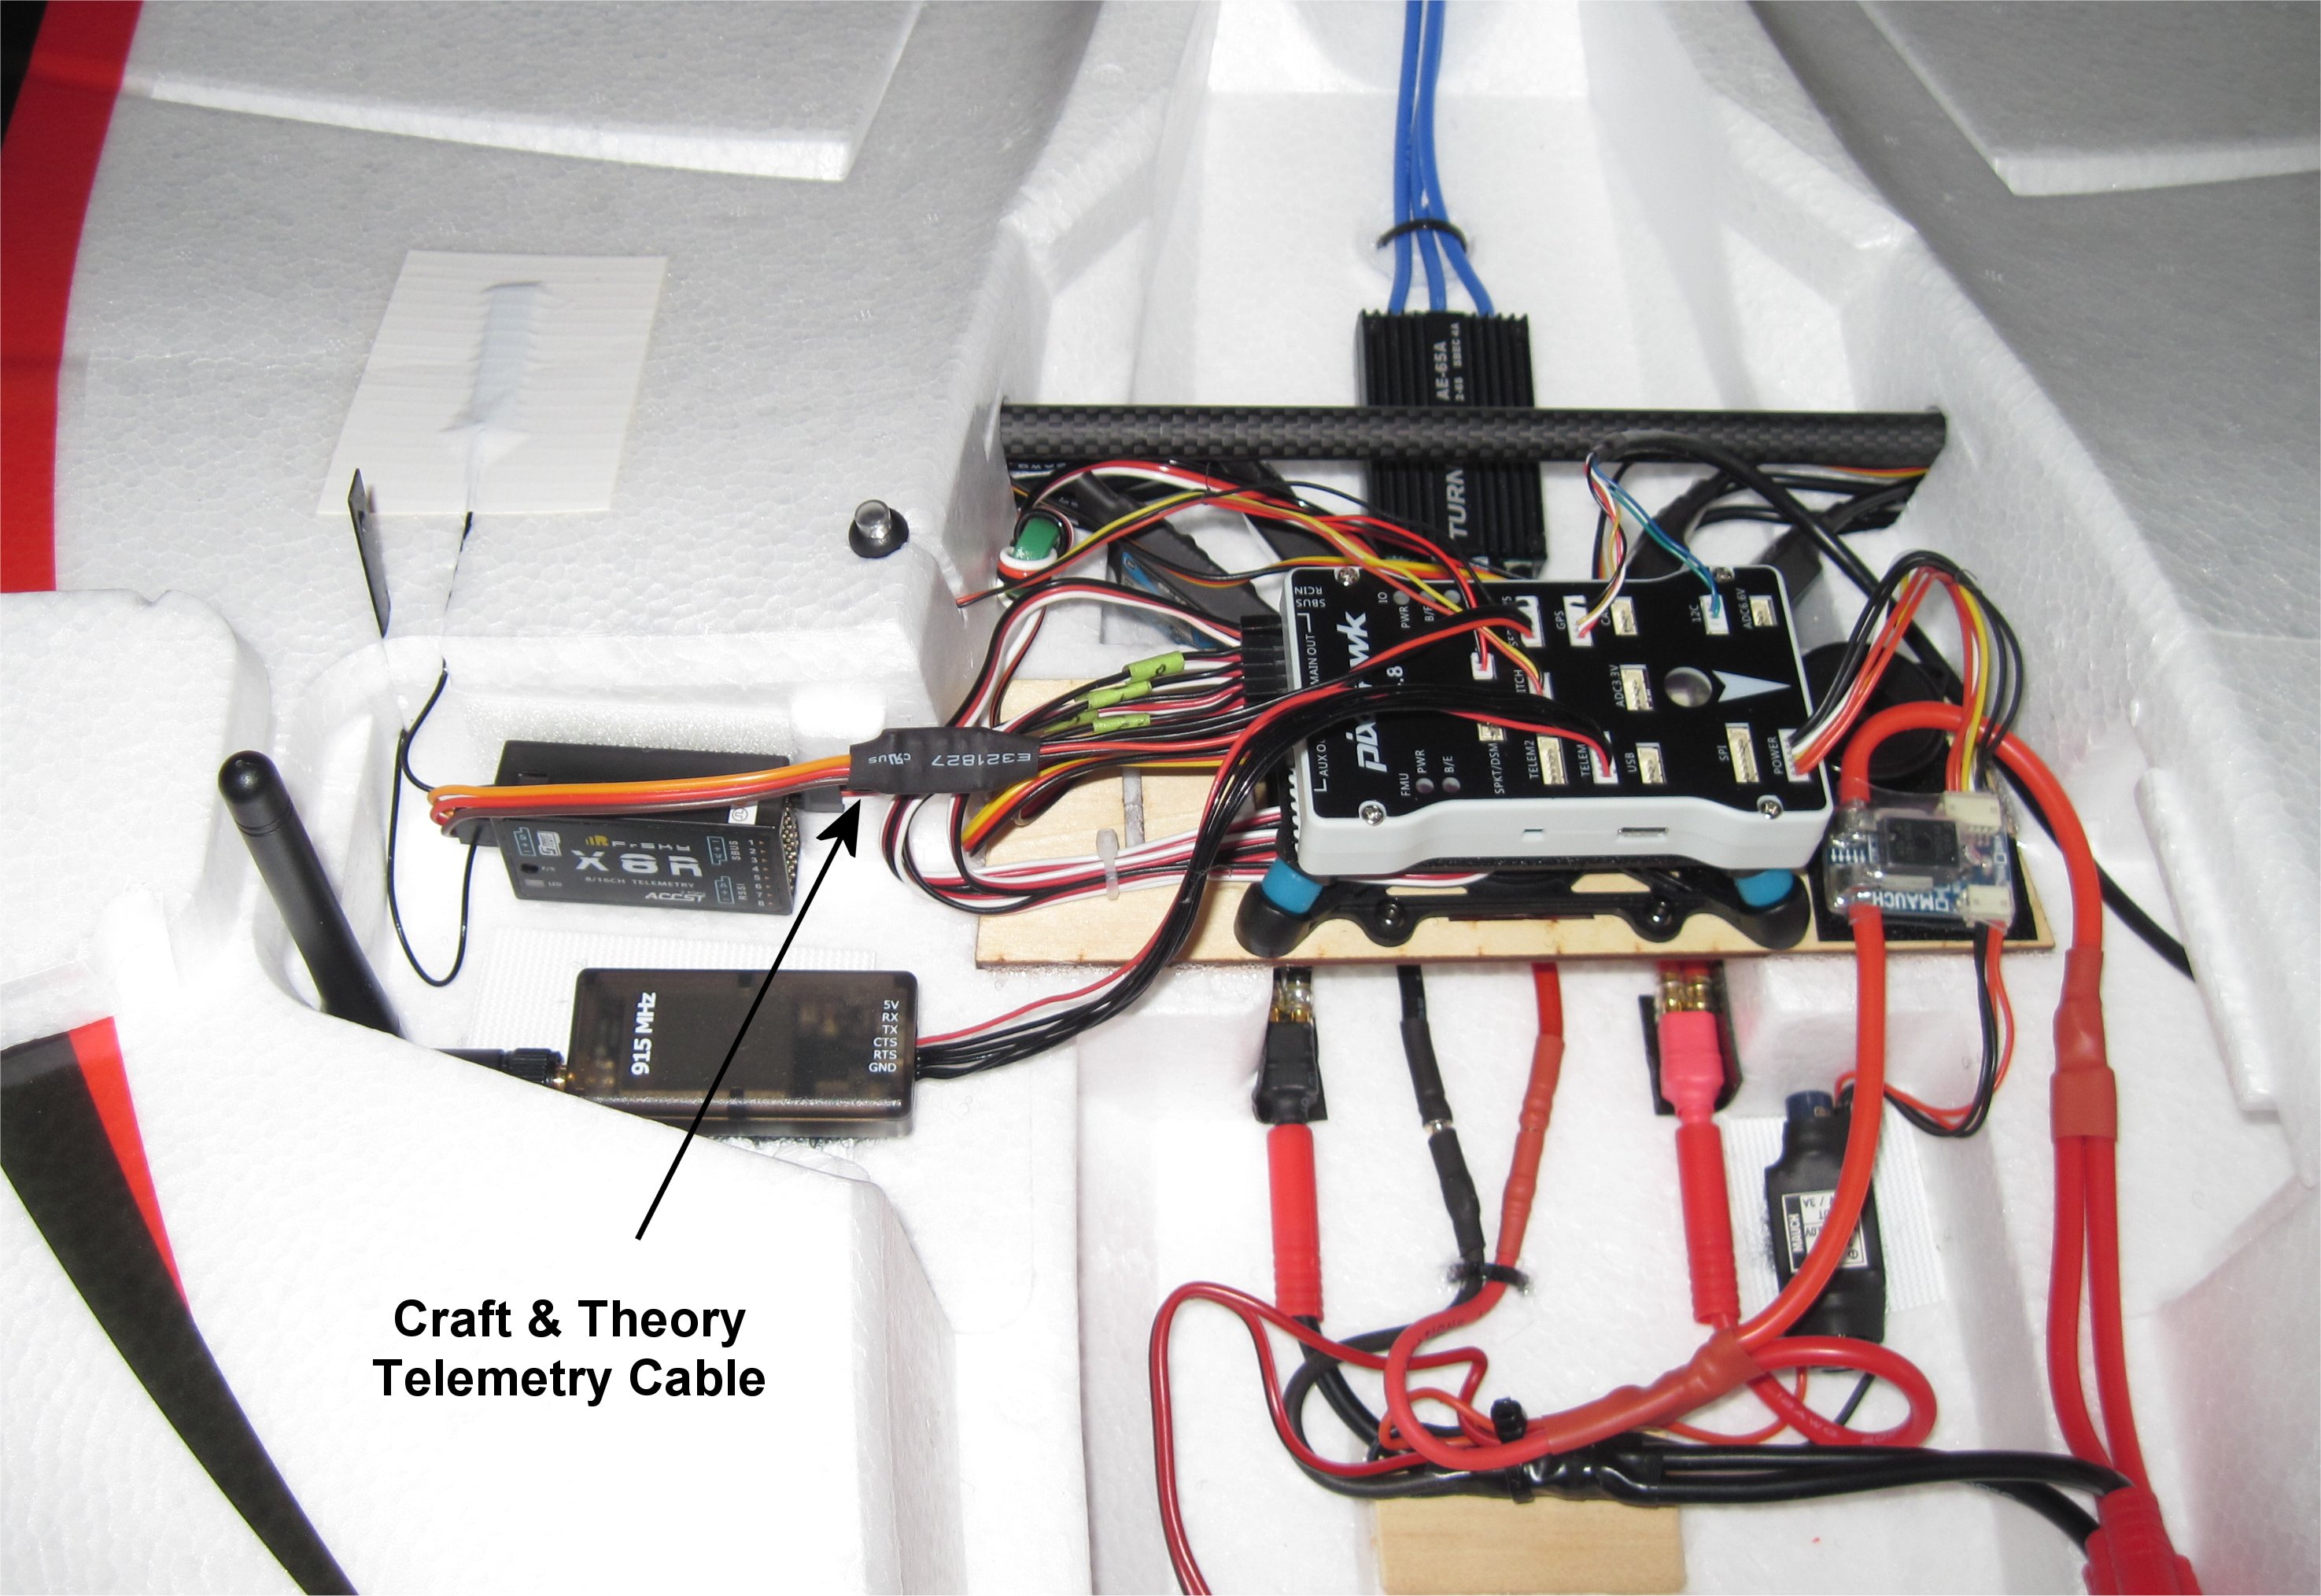
A few prerequisites were needed. Both my Taranis X9D+ radios were upgraded to OpenTX v2.2.1. Using the FrSky Telemetry page in the Wiki, I added the appropriate Craft & Theory cable between the Pixhawk and X8R receiver. Lastly, the Serial 4/5 port needed to be set to protocol 10 for Passthrough.
What a fantastic telemetry script! I can’t wait to try it in flight this summer.
That look´s too cool Greg…BRRRR!!!, If you didn´t your first transition yet, be carefull with your incidence, I had to change in reference the cuad, my first transition fails with the FX64, then it flies.
354/5000
Hello,
I am your advancement with a lot of interests, because it’s been a long time since I hesitated to turn my FX 79 into VTOL.
But my knowledge of arduplane is very limited …
So I confess that I would surely imitate you, if you allow me.
And of course I dare deep within me, hope you share your firmware setting …