CANbus Quadcopter using UC4H : Son of FrankenSolo

When I discovered the 3DR Solo main board as a building block for DIY, because it has a Pixhawk 2 and a companion computer with HD video and telemetry for a very cheap price, I built the FrankenSolo. I used a recycled set of plates from a Daya 680 because it was wide enough for the Solo mainbrd. But it is not necessary to use a Solo mainbrd, all of this could be done with a normal Pixhawk.

https://www.rcgroups.com/forums/show…DS-FrankenSolo

But as with most DIY builds I had to do a lot of bubble gum fitting and compromising to get it all to work. The quad flew better than any of my previous builds and I was sold on the concept. I used OllW’s UC4H components to bring UAVCAN to the build. My reason to use Ollw’s UAVCAN was to have a build with cleaner simpler wiring and real time monitoring.

Since that build OllW has continued to refine and make UC4H an even more compelling platform for DIY builders. The FrankenSolo used 15" props and hovered for nearly 40 minutes which was much longer than the original 3DR Solo. I was tired of builds using pre-made frames that just don’t fit the components we need to use. The hole patterns never seem to be designed for any of the standard sized parts that are available. I also wanted to use 17" props to see if I could extend the flight time. I sketched an extended version of the Daya Mainplate that would support 17" props and have all the proper holes for the components I wanted to use so I would not have to cut and drill to try and get these components to fit.

\ 16x16

I found CNCmadness in Britsh Columbia Canada who advertised in RCGroups to custom make CNC carbon components. Nick at CNCMadness could make the parts I wanted if I could provide him a 2D cad drawing file of my design. I struggled for almost a year just not willing to put the time into learning the 2D cad package when I was only going to use it once. Then I contacted Nick and he said he would take the digitized image of my drawing and convert it to a cad file for a reasonable fee.

In no time Nick sent me the beautiful CNC cut carbon-foam-carbon sandwich plates for my new build.

\ 16x16 This image has been resized. Click this bar to view the full image. The original image is sized 1000x563.

In this build I would use the next generation of OllW’s UAVCAN interface boards including ESC’s, GPS, Serial Tunnel, LEDs and Notifier and the Mavlink Bridge. Now that OllW’s designs are available from JDrones it is easier than ever to use UC4H in a build.

This build I will be using ProfiCnc’s Pixhawk 2.1 Green cube for the Solo with dual heated IMU’s.

Next: assembling the parts for the build

4 Likes

UC4H : Son of FrankenSolo UC4H Powermodule

I received all my UC4H modules from Jani at JDrones and some modules OlliW built for this project, thanks OlliW! I’ll use a UC4H V2 Powerbrick to power the system. The Universal Modules for GPS, Serial Bridge, Mavlink Bridge, LED Notify and Display will finish off the system. I’ll use OlliW’s UC4H Kiss 32A ESC carriers but I could use Universal Modules for the ESC’s also.

I suppose the place to start a new build is the power supply since everything depends on reliable clean power. One of the problem areas and points of confusion in APM/Pixhawk builds over the years has been supplying power. The flight controller is a flying computer with sensors. In order to operate it needs clean reliable power to stay working and to evaluate it’s sensors accurately. So you don’t supply power to your flight controller from a BEC on your ESC. Those voltage converters were made for simple devices on airplanes not the rigorous requirements of a flight controller. Also we can’t power everything in the whole world off our flight controller. So just don’t do it. Use a separate voltage regulator for other devices that need significant power. A flight controller pulls a few hundred mils so don’t think about powering a 1 amp 5v led strip with the flight controller.

The next very important aspect of a flight controller power module is to be able to monitor the power we are using to estimate our available flight time. We would like to know as accurately as possible how much power we have left in the battery, so we don’t unexpectedly run out of battery power and fall from the sky.

The problem with the original 3Dr power module, and it’s subsequent clones, is that the technique for measuring power used is fairly crude. The original design uses a shunt resistor. What this means is that a very small value resistor is put inline with the power flow and the voltage drop across the resistor is related to the power going to the rest of the system. It then sends an analog voltage of 0-3v to the flight controller where it uses an onboard analog-to-digital converter to “read” that voltage and the computer then scales that voltage to the actual voltage and current at the power module.

The problems are that low value resistors in cheap electronics may not be the best quality. If the resistor is not the exact value that the calculations depend on then the readings will not be correct. If the resistor heats up under load then it may not be linear and the readings will not be right. You get the wrong readings and you think you have more battery left than you really do and you fall from the sky. Since the power is actually flowing through the sensing device if anything goes wrong wth it, it can cause your whole power module to fail and you fall from the sky.

So then came along Chris Mauch and he designed a power module that used a Hall effect device. This device acts to sense voltage and current by using a magnetic field that is generated when current is flowing through the power module. The advantage is that the Hall effect device is not directly part of the circuit so if it fails the power does not stop. But you still send the analog voltages representing voltage and current to the flight controller. Chris calibrates each one of his products and you get a chart to help get accurate readings.

OlliW uses a hall device with the UC4H Powerbrick (UAVCAN Power module) but he took one more step since all CANbus devices are “smart” and have a microproccesor onboard he can take the measurements and other information about the power module and send that information in digital form via UAVCAN meassages to anything on the bus that wants the info, including the flight controller. So now the flight controller does not have to change analog voltages to digital and calculate the voltage and current coming from the power module. The UC4H powerbrick does all the heavy lifting for the flight controller.

The UC4H powerbrick supplies clean 5.3v 2.5A power to your flight controller and provides two 5.3v aux output ports for other things that need power.

One thing that needs power is the CANBus itself. Somewhere in the CANbus there needs to be a supplier of power. The flight controller can supply power to the CANbus but like supplying power to power hungry peripherals it is best to be supplied by it’s own source. It is especially a problem because most popular Pixhawk type flight controllers have a current limited 5v supply to the CANbus which triggers at a fairly low .5a to 1 amp. If you hit this trigger, by pulling to much current on the CANbus, your CANbus goes away you end up falling from the sky. Since I plan to have a full set of UC4H CANbus devices I will use one of the aux power outputs to power the CANbus.
Since this project is the Son of FrankenSolo I am once again using a Solo motherboard. Why? Because I get a Pixhawk cube flight controller, an IMX6 co-computer and a HD Video/RC control transmitter all on one board that cost me $50.

But that means I need to supply at least 12v to the Solo mainbrd. I am therefore using a power distribution board that has it’s own 12v power supply to use for the Solo mainbrd. (The IMX6 brd can handle 6s but I am not sure about the transmitter board or the voltage regulator for the Cube)

The battery power comes in to the UC4H Powerbrick where it goes to the 3-in-1 PDB. Power to the CANbus comes from one of the aux 5.3v external power outputs of the Powerbrick. 12v power goes from the PDB to the Solo mainbrd. Battery power is distributed to the ESC’s from the PDB.

First, I do continuity tests to make sure I did not solder anything that should not be soldered together. Then I test the power module with the SLCAN UAVCAN monitor. I make a mini CANbus network with the UC4H Powerbrick and the SLCAN. I plug the SLCAN into my Laptop and connect, which then allows me to monitor messages going across the UAVCAN bus. I power up the UC4H Powerbrick and look for messages from it. I check all the output voltages and if everything looks good next time I connect the Solo mainbrd and see if it boots up.

Please note the soldering on my photos is a good example…of how not to solder. My basement workshop is cold and it is hard to get a good shinny solder joint. At least that is my best excuse I can think of.

Here is the power section of the frame with the UC4H Powerbrick and the 3-in-1 power distribution board.

I’ll be using a Titan 10.5ah 22.2v 6s3p 908gram Lithium Ion power pack.
1048-01_large

4 Likes

UC4H : Son of FrankenSolo Flight Controller

I have checked that the UC4H Powerbrick and the Power Distribution Board are connected correctly and working. The correct 5.3v is powering the CANBus. I am using JST-GH expanders made by MRO which he makes for I2C but work for the CANbus. The CANbus is not designed to be a STAR topology but a daisy chain. But given the short distances involved on the quad it just does not affect anything negatively and it is so much easier to use the expanders.

I now have stable power for the flight controller and CANbus and have a way to distribute the power. Now to choose the flight controller. There are many options in the Ardupilot world but the key here to check is that not all Pixhawk variations include the CANbus connector. The full sized Pixhawk 1 and Pixhawk Cubes have the CANbus connector but many of the mini-Pixhawk boards eliminated the CANbus connector to save space.

This project was designed to use the Solo motherboard because it essentially is a carrier for the Pixhawk Cube and also has the IMX6 companion computer and the built in HD Video/RC Control transmitter board. In addition I have tested a Pixhawk 2.1 Cube with a separate carrier for the IMx6 and that works fine as well.

So you have many options when building a UC4H UAVCAN multirotor.

I chose the Solo motherbrd because they can be purchased for under $100. You get a Pixhawk Cube and HD Video and RC control. With the addition of a Solo Controller for another $35 and your smartphone you have a full HD video ground station.

UC4H: General Purpose Node

Ok, I got the basic platform up and running. The UC4H Power module is powering the Pixhawk 2.1 Cube and the CANbus. I can connect to the Cube with Mission Planner and I have installed Betacopter 3.6.6 from OlliW Github respository. OlliW has provided pre-compiled versions for three standard flight controller FMUs. Use ArduCopter-v2.px4 for standard Pixhawk 1s and Cubes. Use ArduCopter-v3.px4 for Solo boards and ArduCopter-v4.px4 for newer boards like the Pixracer. You do this by going to the install firmware tab in Mission Planner and Load custom firmware. Loads just like any normal pre-compiled version of Arducopter.

Now we can have some fun. The SLCAN device is a basic tool for monitoring the CANbus. If you are a network type it is like an ethernet network sniffer. Think Wireshark or Bloodhound. It listens in on the bus and can capture the messages going by. You can make one or buy one from Jdrones or Zubax. The UAVCAN GUI tool gets this info and displays it for you. So get UAVCAN GUI from the UAVCAN.org site and install it.

SLCAN

Plug your SLCAN adapter into your computer via USB and a CANbus cable is plugged into one of the two CANbus ports and then to your CANBus. In the following picture you can see my SLCAN plugged into my computer and then to my CANbus expander.

On the CAN Interface Configuration screen choose the usb port your SLCAN is connected to. (You can unplug the SLCAN and run the UAVCAN GUI again and see what port disappears if you are unsure.) The baudrate should be 1000000 not the common 115K.

Hit OK, then it starts up.

First, click on the check mark to confirm that your SLCAN is on 127.

Now we will see the nodes that the SLCAN is hearing on the bus.

Each node on a CANbus must have a unique node ID (NID). It is similar to an IP address on your computer for the internet or the street address for your house. In the display see that the Pixhawk Cube has a node ID of 10 and the Powerbrick has a node ID of 46. Any node that does not have a node ID will not show up.

In fact, I have a general-purpose node connected but it is not listed yet. We can set a static node ID like the Cube and the Powerbrick or we can use the automatic node ID allocation server in the UAVCAN GUI to provide an ID. Click on the little rocketship icon (under the Dynamic node ID allocation server).

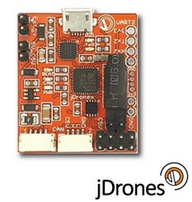
Now we can see my general purpose node (NID 125). It does not have specific firmware right now because we can use it for many different jobs. Once again Jani at Jdrones has built some nodes for us and sells them at a very reasonable cost to support UC4H. He also donates a portion of each sale to Ardupilot. In fact, you can get a complete starter kit from Jdrones. It is a WIN-WIN for me.

So now the UAVCAN GUI knows I have an “empty” general-purpose node online. It is really simple to now click on the node and decide what firmware I would like to load onto the node. The firmware for all the various things you can make the general node into are located, once again, on OlliW’s github repository. (GITHUB is really weird. You cannot simply right click on the file name and “save link as” like you normally would. You must click on the filename and use their “download” button next to “history.”)

You can see the general-purpose node is really universal. You can make it a GPS node, an ESC node, a Serial bridge node, a Notifier display node, an LED controller node and on and on.

I am going to make this node a Notifier node. So I simply click on “Update Firmware” and choose the uc4h-notify-v010-4bl.bin I downloaded from OlliW’s Github repository.

UAVCAN GUI tells me I am doing a “software update.” When it is done the main window will change and identify it as a “notify” node.

I will do the same process four times, with four more general-purpose nodes for my ESC nodes, and once for my GPS node with another general-purpose node etc.

You should have “node” it would be this easy!

2 Likes

excellent job :call_me_hand:

question: how did you connect to the CAN bus on the Solo main board? I can’t see solderings on this 23-pin header in your 2nd picture. I seem to fail to see the best option for doing this.

https://dev.3dr.com/hardware-accessorybay.html

There are two CANbus on the Solo, even tho I don’t think 3DR ever used either. One is available on the accessory port connector, which is the one I used. In comes with a ribbon cable and the accessory port connector and this cable will easily break-off the Solo mainboard when handling it outside of the Solo body. When it does break off it leaves many strands of wire in the mainboard that are hard to get out cleanly. So I just pre-emtively remove it before it breaks off. I hot-glue the wires onto the connector after soldering to prevent my CABbus connection from breaking.

On the Solo schematics the second CANbus is available at the ESC connectors but I have never gotten it to work on any of mine.

ah, you’re using that 23-pin header, but from the bottom
thx for clarifying

UC4H: Son of FrankenSolo gets ESCs!

I hate doing ESCs. Because of my unexceptional soldering skills, I tend to melt them into a pile of slag. I’m going to try real hard not to do that today. I could use the general-purpose node and program it for ESC. It would have the advantage of being able to use one general-purpose node for all four of my ESCs. The ESC firmware supports up to 6 PWM or 4 Dshot outputs. Just a reminder that you can make all these UC4H devices with simple “Blue pill” STM boards that are really cheap. They may not be as neat and clean but it makes UC4H super accessible.

But I want to use the OlliW super-special Kiss ESC carriers. Super cool!

The general-purpose nodes can work with just about any ESC but the Kiss ESC carrier boards are designed specifically for the Kiss32 and Kiss24 ESCs. One of the reasons OlliW chose the Kiss 32 is that it supports telemetry. This allowed him to capture real-time information about the ESC status and create CANbus messages to put that data on the bus, yielding real-time data on temperature, voltage, current, and rpm for each motor. Furthermore, the telemetry data is used to feed a battery monitor, which provides additional data for checking the status of the power train. This allows you to get some of the functionality of the Powerbrick. Now you can know if the temp on your ESC is rising too fast. At what RPM are you hovering? How much current are you puling with the Tarot props vs the T-Motor props? Which is more efficient? You can get this same functionality using the general-purpose node and the right ESC but with the Kiss32 ESC carrier you get a clean CANbus ESC in a single package.

“The ESC firmware also allows adding a LED strip for each motor yielding a lightning system for the copter”

Now it’s time to test the ESCs one by one to see if I destroyed anything :eek:.

UC4H: Configuring the ESC’s

Amazing! I did not melt my ESCs into slag and they all work. Yippie!

One of the nice things about a UAVCAN ESC is it doesn’t need to be calibrated like a standard PWM ESC. But you do need to configure the ESCs, each with a unique node ID, and set them up so they are in the right position on your frame.

To set the node ID we go into the UAVCAN GUI, click on the automatic Node ID server, and let it assign a random ID so we can see the node. Then we simply open each ESC node, click on “fetch all,” and then change the node ID to whatever we want. Each node can have any ID up to 126. I am setting mine so they are 60, 61, 62, and 63 but it could be 34, 68, 92 and 101. You can choose any ID as long as each node has a unique number and it is not greater than 126. Be sure to click “save all” afterward to change the ID for each ESC.

There is an index to identify the ESCs. I have four ESCs so the count starts at 0 then 1, 2, 3, unlike the Ardupilot count that starts at 1. Each ESC needs to be associated with it’s Arducopter arm/motor number. Don’t be confused with Arducopters motor test which starts at the upper right and goes one motor at a time clockwise labelling each motor in turn A, B,C and D.


For Arducopter, my X frame (picture on the right), motor order is upper-right motor 1 then, going clockwise around the quad, lower-right is motor 4, lower-left motor is 2, and upper-left motor is 3.

We need to associate each ESC, where we have placed it on the quad with the correct ESC Index number for that arm/motor number. But when they first start up the ESC index could point to any arm. It is the digital equivalent of plugging your PWM ESC into the motor outputs on Pixhawk matching the Ardupilot diagram for your frame.


So first you need to attach a motor (without props, right?) to test each ESC separately.


Now we open up the UAVCAN GUI and click on Panels, in the upper menu, then “ESC Panel.”


The ESC panel shows four sliders, the left-most one associated with index 0, the next one to the right index 1, then index 2, and finally index 3. Move the sliders slowly up then back to zero one at a time. One of the sliders will start the motor you have attached running. Note which slider starts the motor running and note the arm you have it on at the moment. Say you have your test motor on arm 4, the lower right. But when you push the sliders up one at a time the motor starts running when you slide up the first slider which is ESC index 0. So you now know that the motor on arm 4 is actually set for ESC Index 0 now and we need to change it to ESC_Index 3, since the ESC index starts at 0. So ESC_index 3 is the lower right motor.


So open up the nodes for each ESC, one at a time, and click on “fetch all” and look at the parameter OUTA1 Index and find the ESC which has OUTA1 Index set to integer 0 and change it to 3 and click “save all.” Let’s say it was the ESC node ID=63. Verify that now when you move slider 3, the right-most slider, the motor starts running.
Note that down on a piece of paper that arm 4, ESC node ID 63 is ESC_index 3.

Now move the motor to another arm and do the same thing until you set the ESC_Indexes so the motor on arm 1 is ESC Index 0, motor on arm 4 is ESC Index 3, the motor on arm 2 is ESC Index 1 and lastly the motor on arm 3 is ESC Index 2. WOW that is confusing. I really don’t understand any logical reason the arm/motors were numbered that way but they are so… It will all be different if you have a hex or an octo. Just follow the Ardupilot diagram for your frame and remember the ESC index will be one less that the Ardupilot arm number in each case.

Note: If you jump ahead and try doing an Ardupilot motor test it will not work. Next we have to “turn on” the UAVCAN ESC’s in Mission Planner.

Or you can do this all automagically by running a slick script OlliW wrote in Python to do all this for you.

https://www.youtube.com/watch?v=Dauo8hX4teE

1 Like

great write up, thx :slight_smile:

all this numbering, lettering, indexing is admittedly a bit confusing. I do this as follows:

the motor with ArduPilot number 1 must have ESC index 0, and I like to give it Node ID 60
the motor with ArduPilot number 2 must have ESC index 1, and I like to give it Node ID 61
the motor with ArduPilot number 3 must have ESC index 2, and I like to give it Node ID 62
the motor with ArduPilot number 4 must have ESC index 3, and I like to give it Node ID 63

This is simple enough for me to memorize, and helps me to not get confused.

You might be saying the same, but I then did not get it :smiley: .

As you emphasized, one also can use the Python script, which does it all with only little user interaction, including getting the motor spin directions correct

It is confusing. I think it is probably best to setup the ESC’s outside the frame, assign the node ID’s and then mark each ESC with the node ID. IF you use node ID’s with 0,1,2,3 like 50,51,52,53 you can make the numbers match the ESC index. So node ID 50 would go on arm 1 and have ESC index 0. Node ID 51 would go on arm 2 and have the ESC index value of 1 etc. Then you don’t have to figure that out, after you mount them, by moving the sliders around to find the esc with the right esc index.

that’s exactly how I’m doing it (when I’m doing it manually)(you note this little stickers ?):

:smiley:

UC4H: Finishing the notify Display

I used the UC4H Notify display as an example of flashing the firmware to a General node now I’ll just finished up that project. The UC4H is similar to the Ardupliot status display. It is really useful to get some important information before you fly without having to haul around a ground station. It is particularly important to have a good GPS lock before you fly with Ardupliot and a simple LED on your GPS indicating a 3D Lock is not adequate. The Notify display gives you the number of satellites you are using and the quality of the signal. It also has a ticker tape line that gives you the messages that you would normally have to get from the message tab in Mission Planner. It will tell you what your battery voltage is and all in plain text rather than having to decipher sequences of blinking lights or musical tones.

The notify display using a cheap and commonly available SSD1306 .96" OLED I2C module. Becareful to note that these modules can look identical from various vendors but instead, stupidly, have the power and ground pins reversed from manufacturer to manufacturer.

There are case designs in thingiverse.com for the SSD1306 you print or get printed to finish up your display.

There is a bigger 1.3" display that OlliW does now support. In the UAVCAN parameters for the Display Node set Display Type =0 for 1306 based or =1 for SH 1106 based displays.

In addition the UC4H Notify Display node offers a indicator LED option extending the built-in Pixhawk indicator led to the location of your choice. I put my indicator LEDs inside my HERE converted GPS with my UC4H GPS node. The display node supports standard RGB WS2812 LED strips, cut down.

The UC4H Notify display does not require any changes in Arducopter parameters, it just works! But the Indicator LED option on the UC4H Notify display requires a parameter setting.
In Mission Planner to activate the Indicator LED, set the NTF_LED_TYPES=33 for The UC4H the internal led and the UAVCAN UC4H Indicator.

1 Like

UC4H: adding dual GPS

Adupilot is heavily dependent on GPS for accurate position information. It uses position information for all the various modes that set it apart from other flight controllers. Auto missions, loiter, position hold, follow me etc etc all require a great GPS lock to function. Ardupilot has made great strides in recent years by implementing dual GPS capability and allowing the evaluation of the GPS signal quality and switching to the best GPS or blending the data from the two GPS. It brings greater reliability to Ardupilot.

In my first FrankenSolo I used a UC4H GPS node to convert a Here GPS to UAVCAN. This conversion caused the Here GPS to send out UAVCAN messages with GPS information to the CANbus. In the second generation UC4H OlliW has implemented a new message type that is a tunnel to send serial data to the Pixhawk. The new message has raw serial data as a payload and allows any serial device to create a tunnel to deliver that data to the Pixhawk without creating special UAVCAN messages for every serial device. So I am replacing my old UAVCAN node with a new general purpose node with the GPS/MAG/Baro firmware. The GPS data uses a serial_TUNL to get its data to the Pixhawk and the compass and or barometer send their data through normal UAVCAN messages.

There is also a general purpose node firmware to provide nothing but serial tunnels. The firmware is called the UART Bridge is used to provide extra serial ports to the Pixhawk from about any serial device.

I then took apart my Here GPS and replaced the original node with a new UC4H GPSMagBaro node.

One extra feature is that the node can support an indicator LED using the RGB strip leds. I chose two and put them in the Here GPS replacing the ones that the HERE normally supplies.

The general procedure is to get your general purpose node and download the UC4H firmware from OlliW github repository . Using your SLCAN connect to the Node and your USB connection to your computer. Use UAVCAN GUI tool to update the firmware on the bare node. When it finished the node name will change from “bootloader” to GPSMAGBaro. Now you can choose which combination of GPS/MAG or Baro you want. OPen the node in UAVCAN GUI and fetch the parameters. At the bottom of the list is the node configuration parameter which is a bitmap. GPS is a 1, MAG is a 2, and Baro is a 4. If you leave it at the default= 0 all the GPS/MAG and Baro are active. IF you set it to 1 it is GPS alone and if you set it to 4 it is Barometer alone. A 3 would configure it for GPS and MAG etc. Then save the setting and reboot.
Next open the node again and assign it a unique node ID and set the Channel_ID to match the node ID.
Now connect your standard M8N GPS using the connection chart.

Next there are a few parameters in Betacopter to set.

In the full parameter list in Mission Planner, right after the normal serial devices, you will find serial_TUNL0, Serial_TUNL1, and Serial_TUNL2.

Here you tell Mission Planner what node ID is “connected” to this tunnel and what the baudrate is needed and finally what the serial tunnel is used with. For a GPS the node type is 5 for instance. For my GPS I have node_ID’s 50 and 51 at 115 baud and type 5 each node using serial_TUNL0 and serial_TUNL1.

Set the GPS_Type to 1 for auto or in my case 2 because I know my GPS use the ublox chipset.

Done. Dual GPS via UC4H UAVCAN!

For more detailed information about using UART tunnels to add serial ports to Pixhawk see ppoirier excellent article:

1 Like

The continued epsiodes of the Son of FrankenSolo build. Using Olliw’s UC4H and a 3DR Solo surplus motherboard to create and advanced DIY quad.

I have gotten the UC4H powerbrick, UC4H ESC’s, UC4H Display Notifier and UC4H GPS/MAG/Baro installed. Kinda the required basics to get flying.

Now for some frosting on the cake. I have wanted to experiment with a downward facing sonar since the APM days but the sensors available have always been marginal or quite expensive. The old HC-SR04 did not do much. The Maxbotix had noise isssues to deal with and the true LIDARS were in the hundreds of dollars.

For low altitude measurements Pixhawk depends on it’s barometer. But the Barometer senses air pressure and that changes with the weather. So adding a better sensor for low altitude height measurements could improve landing and AltHold flight mode.

The new kid on the low altitude sensor block is the Benewake TFTmini LIDAR. It is not a true LIDAR (Light Detection and Ranging) because it does not use a laser. It instead uses a less costly LED light. But it seems to work well and is moderately priced at around $50.

OlliW took advantage of this new sensor and added it to UC4H. The UC4H Rangefinder. It could use the UART Tunnel technology but it is easy to setup and use as a UAVCAN device or the generic mode.

First install the UC4H Rangerfinder firmware on your General Purpose node.[/SIZE] using the UAVCAN GUI tool. Choose a unique node ID and leave the Channel ID=-1, to use the UAVCAN mode for the node. RangeRate> 0 sets the node in the generic mode.

Mount the TFTmini so it has a clear view of the ground.

In Mission Planner goto the advanced Parameter list and the category RNDFND.

RNGFND1_TYPE=83 sets the rangefinder to UAVCAN/UC4H

You must set the RNGFND1_MAX_CM= to a reasonable and low height so that the limit of the Rangefinders accuracy is not exceeded, like 700cm which is about 20ft. Above that the Pixhawk will switch back over to using the barometer.

You can check to see if your Rangefinder is working by taking a look at the status tab (under the HUD in Mission Planner) the parameter Sonarrange will change as you move the quad up and down.

Now time for a nice soft landing!

2 Likes

fantastic!
as I might have written somewhere else, the moment I did install the TFMini UC4H Rangefinder I was in “love” with it. IMHO a must-have addition.
great that you’ve added it and that it was easy to get it running

UC4H: Mavlink Bridge, bringing UC4H to Mission Planner

Like most things CANbus Ardupilot is a little behind the game. We have come a long way on this project from setting up power, installing the ESC’s, adding GPS and Mag, getting information from the Notify display and adding the rangefinder for more accurate altitude measurements. The SLCAN tool and the UAVCAN GUI software has given us a great way to monitor data on the CANbus and configure our can devices and troubleshoot. It still allows us to troubleshoot those devices even buttoned up inside the multirotor. We get an unprecedented view of what is going on inside the quad in real time instead of waiting until the flight is over to review the logs. With UC4H we know what the rpm of the motors are and what the temperature of the ESC’s is at. We know how many satellites we have locked and that the EKF2 as initialized as examples.

But some of use grew up using Mission Planner and with all the benefits of UAVCAN GUI it would be nice to integrate Mission Planner and UAVCAN. So OlliW developed a way of linking Mission Planner to the CANBus and allow us to connect with CAN devices on our multirotor just like connecting to the flight controller and downloading the parameters. With the UC4H Mavlink Bridge we can get our CANbus information right in the Parameters with all the other aspects of the flight controller we configure.

http://www.olliw.eu/uploads/uc4h-mav…mp-gui-v01.jpg

The UC4H Mavlink Bridge sits on the CANbus and connects to the Pixhawk via a serial connection. It is created using our multipurpose General Node. So simple and so powerful.

All good things come to and end and so it is with the Son of FrankenSolo. What a fun project.

I built a gimbal for this project using OlliW’s STorM32NT gimbal controller. OlliW has provided excellent compatibility with Ardupilot and your choice of connection methods. You can use PWM, Sbus, Spektrum or serial connections between the flight controller and the gimbal. You can use Mavlink or OlliW’s own STorM32 mode serial. Lastly you can use native mode STorM32 as I did which is a serial connection and the Betacopter branch of Ardupilot which includes OlliW’s improvements for his gimbal. Native mode has the richest set of features.

I was unhappy with all the Nex sized gimbal frame kits I bought. Some the adjustments on the axis were not long enough to properly balance the camera. If you can’t balance the gimbal it is game over no reason to continue. Some I did not like the way the anti-vibration plate worked. In my opinion the rubber anti-vibration balls must be in compression. This means the yaw motor must attach to the top plate of the anti-vibration platform and not the bottom. It is critical to stop vibrations from the multirotor affecting the video. Next I want the cables to be dressed neatly and not floppy around in big loops. This means using hollow shaft motors and running your cables through the center of your motors. You can’t have gimbal balance if your cables change position as the gimbal moves around. As OlliW pointed out to me you can’t have the cables going through the motor jam up and cause the motor not to rotate freely, however. It seems appropriate for the Son of FrankenSolo project that I build a FrankenGimbal from all my gimbal kits acquired over the years. I was able to cherry pick the parts that worked for me and finally build a gimbal I was happy with.

So one of the most difficult aspects of building a gimbal is the management of cables. That is one advantage of OlliW’s NT gimbal system because in the distributed motor module version, which I did not use, the only wires going to each motor are the NT bus which is tx, rx power and ground with power to the motors for 5 wires.

The most difficult of the whole project is getting control of your camera. You need to get video from the camera up to transmit to the ground and you need whatever control you want to trigger or zoom etc your camera. This is a good reason to consider these factors before you decide on a camera.

The camera and gimbal is a major payload for the multirotor and never forget that every gram counts. A heavy gimbal and camera can instantly weight down your multirotor such that you end up with 5 minute flight time. Don’t forget that adding battery power to get more time is a lost cause. You end up adding battery just to lift the new battery you added with no change in your flight time.

It is a complete system and when you design a multirotor you need to consider the payload right from the start.

I am using a Ricoh GR because it produces high quality images and it is lighter than most camera in this size class at 245grams. The gimbal wound up weighing 505grams. The AUW weight is 4000grams with the 10500mah TItan LI-ION battery.

I love using the Solo motherboard for DIY projects. I have the Solo Controller running Solex on my Tablet with video from the Son of FrankenSolo displayed on the tablet. But for actual flight I will use my goggles. I just can’t see the tablet display in sunlight. Solex has voice commands which is nice. The only thing better would be OlliW’s new Pixhawk cube carrier board with the Sololink IMX6 board piggy back.

I like the lights on the quad. WIth OlliW oreo lights the status of the quad can be easily seen and my Flytron Neo light strips are a lifesaver for me. I have a real hard time determining direction of the aircraft in the air and the neo lights have a running white light that moves toward the front of the aircraft, pointing me to the forward direction, red lights on the right and green lights on the left rear of the aircraft help determine orientation.


Using OlliW’s UC4H via UAVCAN has been easy to build and easy to troubleshoot. It is a complete system now with a general purpose CANbus node, available off the shelf from JDrones, that can connect all your existing peripherals to your multirotor on a robust common bus.

Now the final step to see how it flies and determine the flight time.

2 Likes

Great project, thank you for sharing!

I would like to use a Ricoh GR for my next copter too and I wonder how you trigger it. Would you share any information about that?

My attitude is that with the size of SD cards these days why would I bother triggering it? The Ricoh Gr has an intervalometer function built-in. SO I can set it to take a shot every 1 sec and just pause over a subject for 1 sec. For video just start it when you take off.

Now if for some reason you don’t like that answer you can use a Gentles trigger cable #122 (https://www.gentles.ltd.uk/gentwire/videousb.htm) to control shutter and video out.

That is what makes the Ricoh GR a good aerial camera.

1 Like