Since I got one request for this and created instructions, I though I would share with all.
Foamboard “Box Kite” Copter Tailsitter build guide
utlra cheap, very relaxing “wright flyer” style copter tailsitter

Parts List:
3- 20inch x 30inch Foamboard sheets
4- 1804 2300-2500kv motors and 8- 2mmx6mm bolts for mounting
4- 4x4.5x3 props or 5x4.5x2
1- 4 in 1 20A ESC
1- 3s, 1000-1300mah battery
2- 9g servos, preferably metal gear train
1- OmnibusF4Pro autopilot running ArduPlane firmware
1- BN880 GPS/compass (I used a BN220 + discrete compass)
1- RC receiver of your choice, with single wire protocol output (SBUS,CPPM)
{I used FrSky r-xsr with Fport to get telemetry back to TX}
8- bamboo cooking skewers for elevon push rods and cross bracing
6- Dubro 1/4A control horns
6- Dubro micro EZ connectors
- .042 wire for pushrods and elevon link rod ends
- fiber re-enforced UV resistant packing tape (for hinges)
- Hot Glue and spray contact cement
4- motor mounts, either 3D printed or likewise fabricated from lite plywood (STL
files attached) - optional, 3mm corex used for center panel


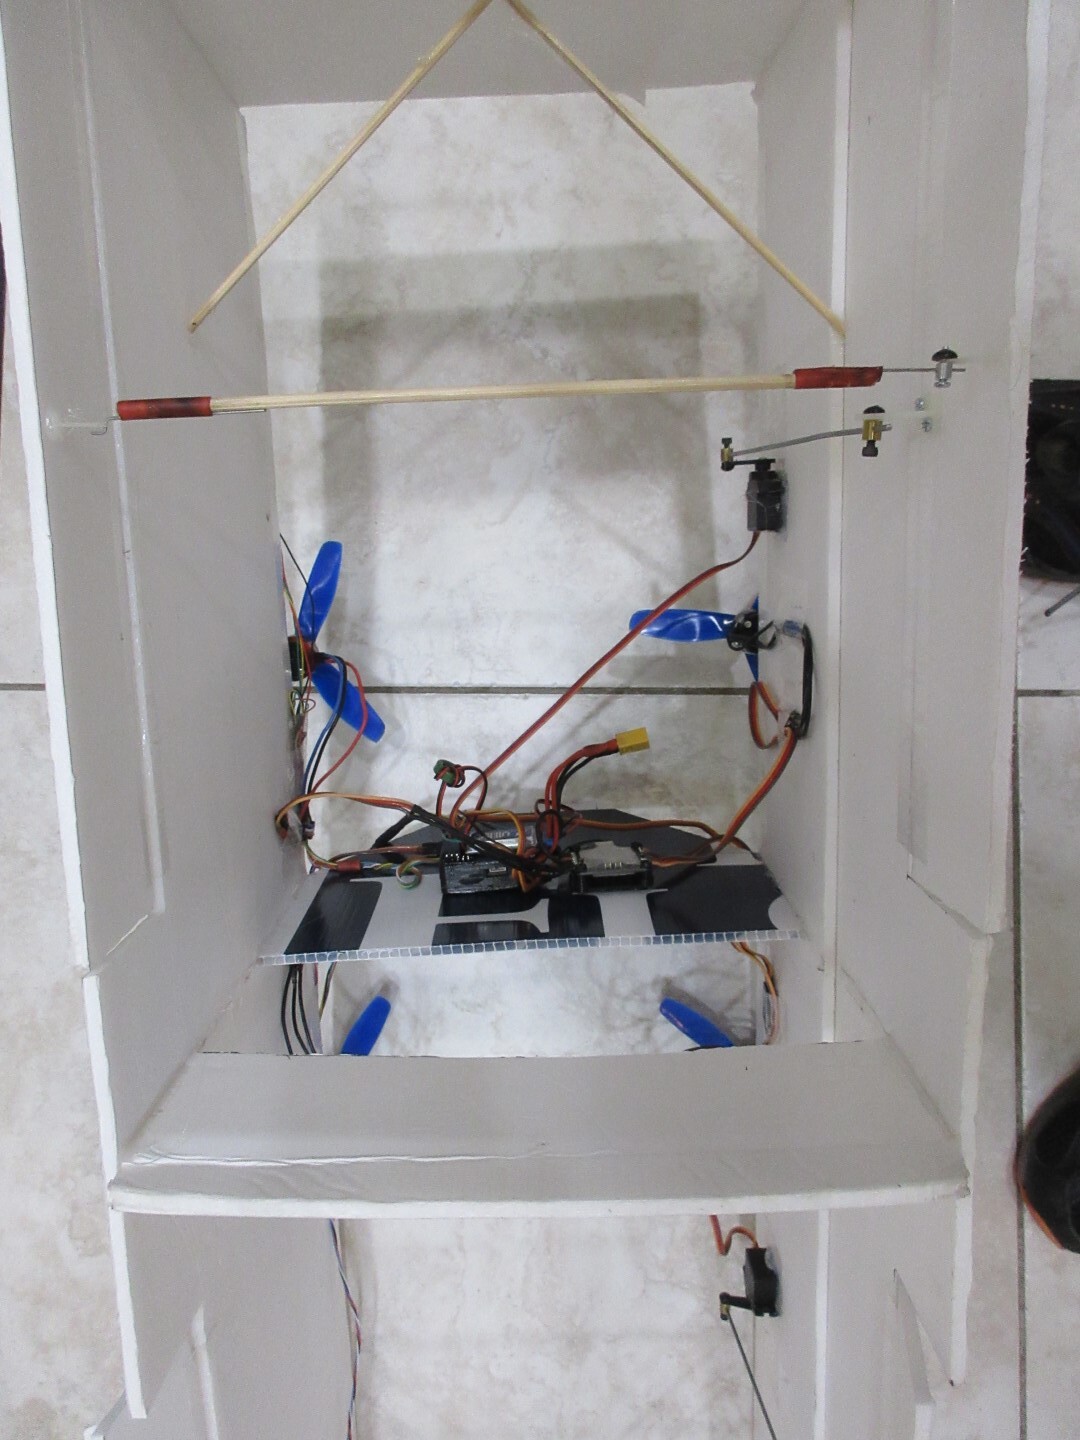
Construction should be obvious from photos:
1.cut two sheets in half in the 20 inch dimension…you now have 4 10inch x
30inch panels… now cut one of the 10" wide sheets in half and trim 3mm off each
end of the 5inch KMF2 doublers you just cut for the side pieces to fit…these are
the top airfoil sheets (KMF2) and strength doublers
2.glue the shorter sheets to the longer sheets, leading edges flush, these are the
wings…cut out 1.5 inch elevons, 45 degree angle, flip over elevons and trim to fit
flush again,add tape hinges in normal foamy plane style
3.from the other 10" sheet, cut three 10 x10 inch vertical members for ends and
center and cut remaining full sheet for an extended center section 10 inch tall and
13 long with tapered nose(3" nose for extending battery location)…and use
remaining to double the nose portion…laminate the center sections together…cut
recess to fit KMF2 top airfoil 5inch sections…alternatively, you can cut a single
3mm corex panel for the center section (shown in photos)…its more durable and easier to attach
velcro and autpilot,etc with double sided foam mounting tape…
4.Glue all the vertical sections together, add bamboo cross braces, tape leading
edge and ground contact points (not elevons they should be trimmed a little to
avoid contact) with tape for durability
5.Make pushrods for top to bottom elevons
6.Add equipment and setup ArduPilot, be sure to check motor orders and
rotations, just like a copter…my param file is attached
7.go fly! pick a zero wind day…you can also gently hover in your garage,if
careful…definitely in your yard if you have a 10mx10m space…
note, you may have to lay it horizontal for 20 seconds if you get “DCM pitch/roll
inconsistent” prearm failures, then back vertical and it should arm now.
Notes:
-elevons upper and lower are linked with bamboo link rods…music wire CA glued
to ends after wrapping with thread or heat shrink…an old foamy plane method of making light
strong pushrods
-try to mount everything as far forward as possible as shown in the photos. If you
do, then the battery will only have to be a little beyond the leading edge to
balance.
-joints are butt hot-glued but KMF2 doubler is shortened on each side to allow end
joints to be fitted, as is center section fitted to KMF2 step for flush joint it entire
length
-kmf2 doubler attached with contact cement
-CG is at ~15% of chord, I printed a cg hanger to help determine that…finger tips
under top wings works also
.
STL Files:
Motor Mount 3D design dragonfly mount | Tinkercad
Parm diff from default Plane:
(you may want to setup OSD to your liking if you FPV this…but choose light camera and vtx)
ARSPD_FBW_MAX,16
ARSPD_FBW_MIN,6
BATT_AMP_OFFSET,0
BATT_AMP_PERVLT,30.5
BATT_CAPACITY,1300
BATT_CURR_PIN,11
BATT_MONITOR,4
BATT_VOLT_MULT,11
BATT_VOLT_PIN,12
COMPASS_EXTERNAL,1
EK3_CHECK_SCALE,100
LIM_ROLL_CD,6000
Q_ENABLE,1
Q_A_RAT_YAW_P,2.3156
Q_A_RAT_YAW_I,0.014
Q_FRAME_CLASS,1
Q_FRAME_TYPE,1
Q_TAILSIT_MOTMX,15
Q_TRIM_PITCH,-2
SERVO_AUTO_TRIM,1
TRIM_THROTTLE,30
TRIM_ARSPD_CM,700

