I have never seen a HydroGear transaxle from that angle. Does the control side look like the one on my mower?
1 Like
The parts breakdowns make them look nearly identical to mine (and yours, Steve).
Hydro Gear PG-1JQQ-DY1X-XXXX Parts Diagrams (jackssmallengines.com)
So, yes (as has been suggested at least 3 times), the D845WP servos should work.
1 Like
I have also been waiting to post this picture that I took while at MowStock2023 of the box @Swebre built to contain his electronics. I got his permission and now I can show you this picture. Where and how to mount the electronics is always an issue and he makes it look so clean and easy. I’ll leave it for him to describe.
2 Likes
@ktrussell @Swebre @Bdflies @SJohnson @Christopher_Milner
I have added a Mower sub-category to my fork of the ArduPilot Wiki under the branch, “rover-mower.” As you’ll see, it’s very much a work in progress with only a few basic suggestions for further sub-topics.
At the following link, look for files prefixed, mower-:
ardupilot_wiki/rover/source/docs at rover-mower · yuri-rage/ardupilot_wiki · GitHub
Refer to the Wiki Editing Guide for making contributions. It’s reasonably straightforward to make a quick edit completely within the web browser - you just need a GitHub account.
I will manage contributions (as my time permits) for a while until we feel it’s ready for prime time, and then I will handle making a PR to the official wiki.
4 Likes
@Swebre did a heck of a job with his electronics. It would have been nice to have made it to MowStock2023. If there is another event on the East coast I will do everything in my power to make it.
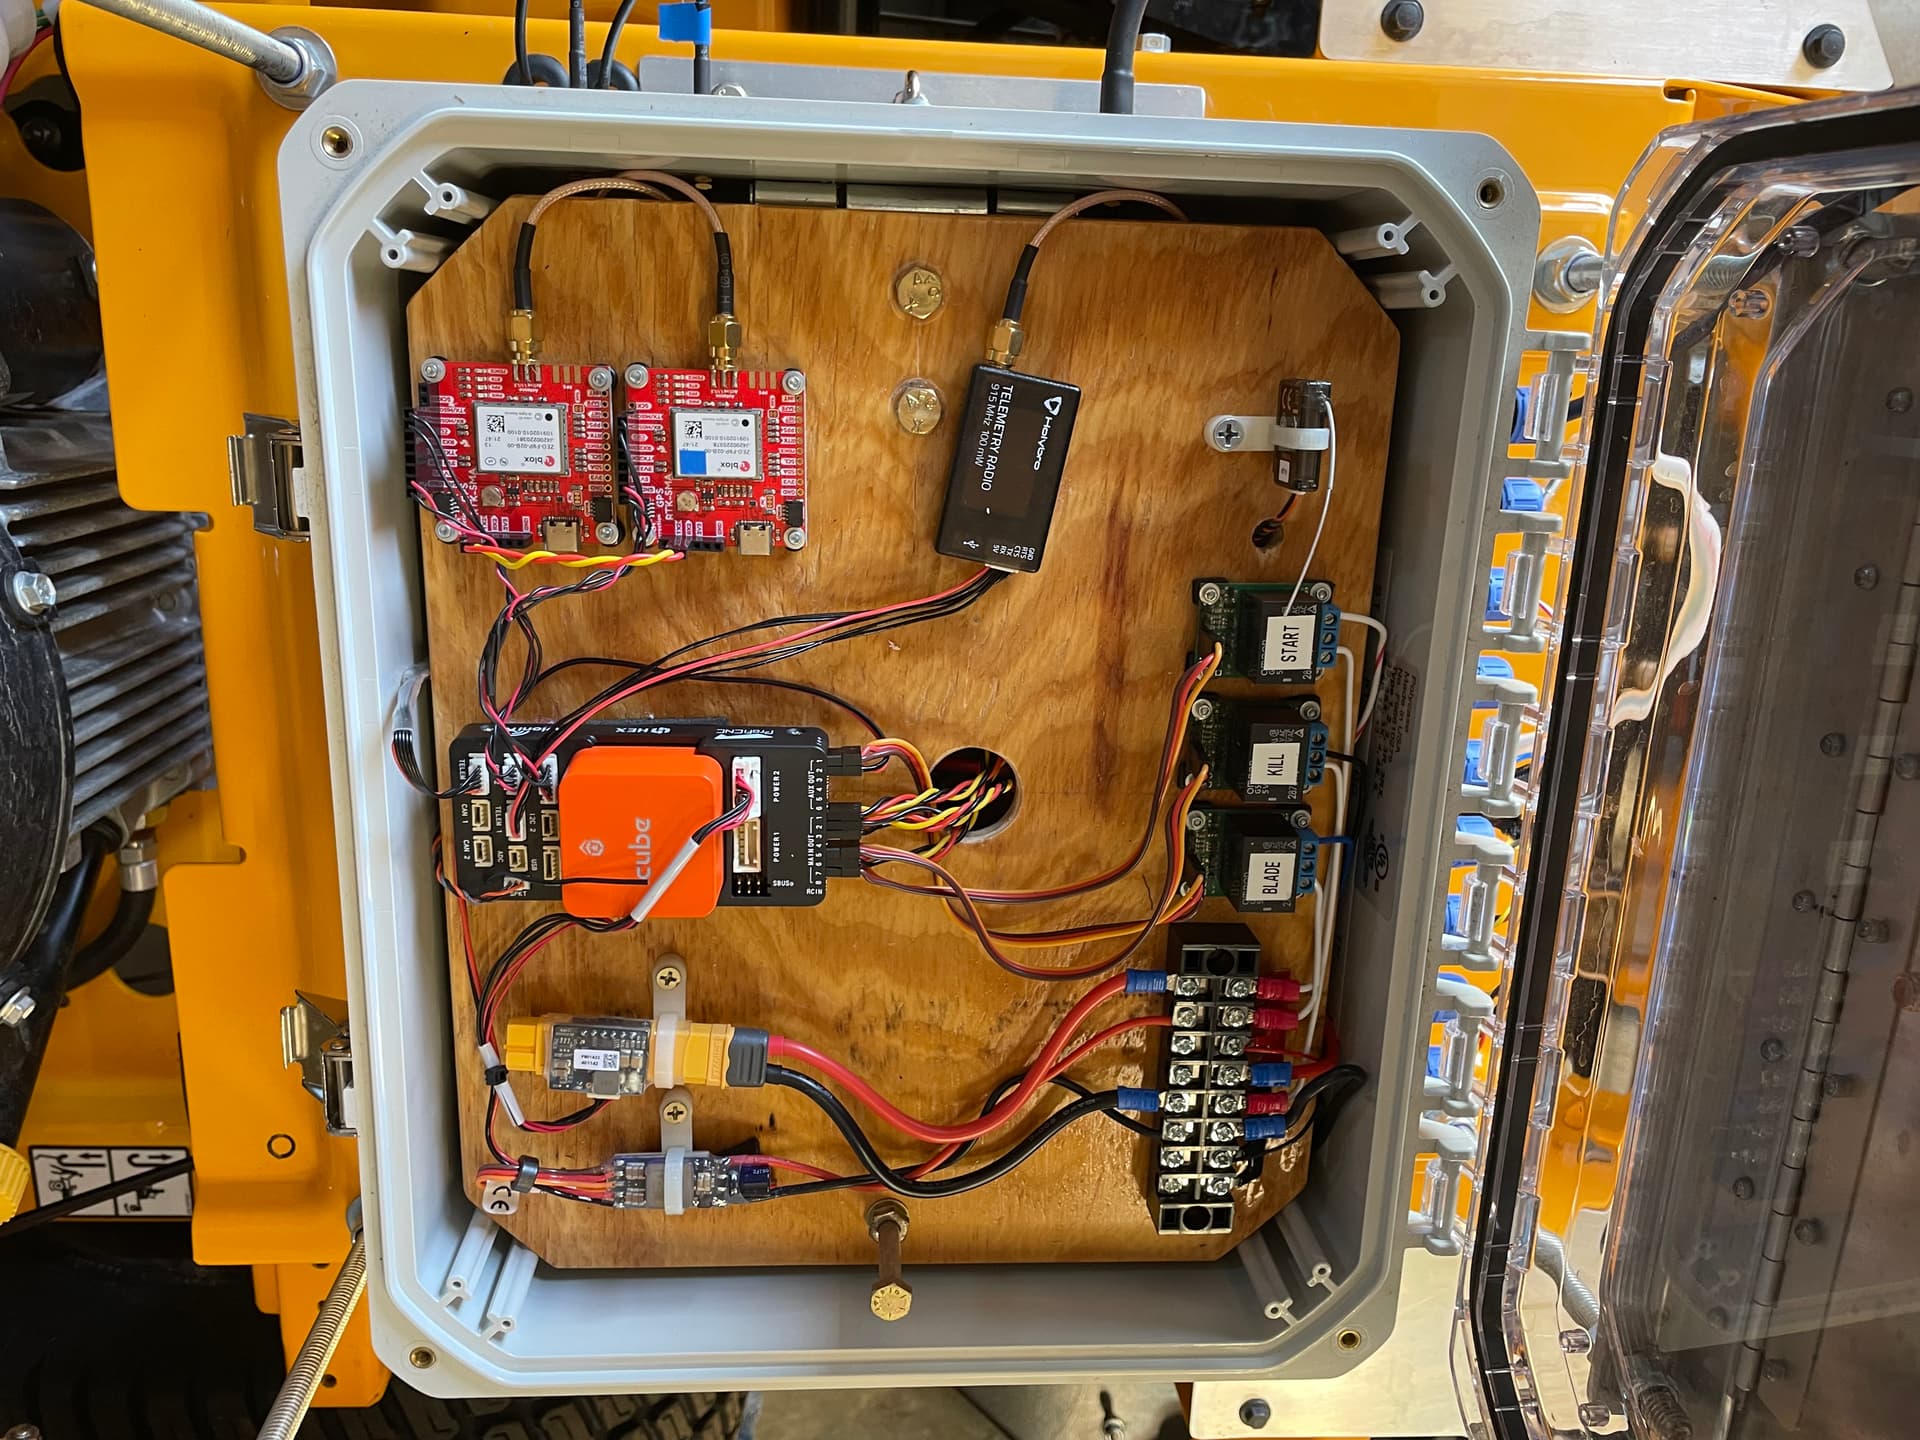
I plan to make a few upgrades to my electronics package over the next year but in the meantime here is my setup with the cover off of the enclosure housing; the 2 SimpleRTK2B modules, the Matek H743-wing, and a DIY Relay board to control various things like the seat switch, the fuel shutoff solenoid, and switch the servos between the flight controller and the RC receiver.
The servos, while not cheap, are from RobotZone and were a great suggestion from @Swebre as the space constraints, throw distance of the levers, and the torque required to move the levers under load was more than any other servo I could find.
The GPS antennas are mounted front and rear of the mower.
The accuracy of the setup is so precise I get within string trimmer distance, 6 inches, of my fences, structures, and even a pond.
The next projects are 6 hp autonomous track slope mower.
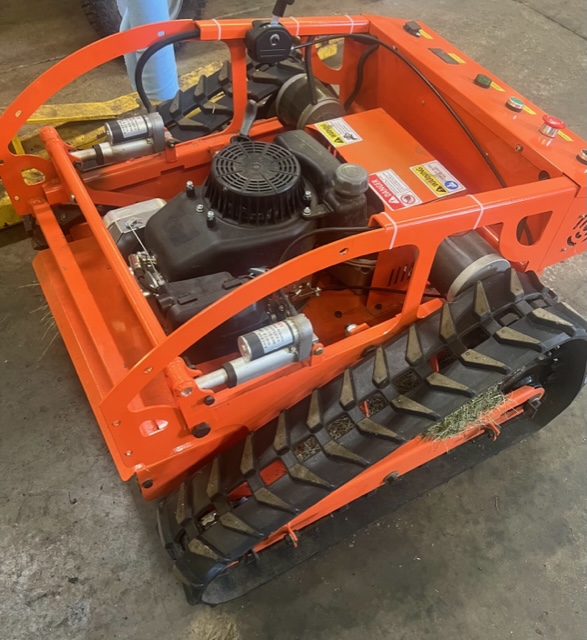
Then a 20 hp track machine to pull a modified DR tow behind string trimmer.
I hope to bring these to MowStock2024!
2 Likes
Great work Jason! Your big Kubota mower looks like a machine that can do a lot of work. It would be interesting to know how you have it configured for manual operation with the switchable RC receiver. Do you have a transmitter setup with a proportional response curve to give you a a finer control for manually mowing around obstacles? I tried that once while going through the flight controller and got things really messed up.
Thank you Steve.
I currently do not use a curve although that would be smart. I have been using the linear option so far. I will be looking into the other curves now that you bring it up!
I added the ability to switch the servos from the flight controller to the RC receiver originally due to the need to mow the grass manually as I was adding components and configuring the flight controller.
I decided to leave this feature in the event the flight controller experiences a failure.
It also allows me to move the mower even if the flight controller is not ready to arm or will not arm.
The RC left stick forward and back, channel 3, controls the left servo while the RC right stick forward and back, channel 2, controls the right servo.
The mower operates much as it would if you were driving it with the factory control levers only without the feedback or resistance of the transaxle. Now how to get the factory control lever position to tell the RC transmitter or the flight controller where to position the servos?
1 Like
Looking good Jason!!! Really glad you got things worked out. Also looking forward to seeing your tracked mowers. I have one also that is begging to be modifyied… Onward!
For Reference: (Pic posted by Steve JHohnson)
Top Left - Two Sparkfun SMA- F9Ps. Have purchased 6 to date. Great GPSs.
Top Center - Holybro Sik telemetry radio - Only 100 mW but get 2800’+ range with good antennas.
Top Right - Spectrum Remote RC Receiver
Mid Center - Cube Orange.
Mid Right - PWM relays marked Start, Kill and Blade
Bottom Left- Top BEC feeds Cube 5.2V. Bottom BEC feeds 8.2V to servo rail
Not shown- Main Power switch and Fuse. @Bdflies had a better idea and used a switchable breaker. Next time…
2 Likes
Hey Max_G!
I also started with a Cub Cadet Ultima ZT2 for weight and engineering reason. It has worked out well.
The servos you picked will easily work your mower. Once you remove the centering spring from the HydroGear 3100-3400 series drives, the control lever moves easily even under load (No need for that spring if the drives are connected directly to servos). Have never measured forces but have ~300 hrs on our first mower (now our Tug) with HydroGear 3200s using 25 kg “DSSERVO” ($25 US) servos without issue. Just lucky? Perhaps. This was a “proof of concept” effort that works well but I have gone to bigger servos for my other builds. These are still “hobby” grade servos so bigger/stronger SHOULD ultimately give us better service life. Time will tell.
Couple of other thoughts:
I use cheap Amazon “45 kg” servos for the throttle (governor control) and choke as they get very little use during a mission. I also arranged the servo linkage so they both go “over-center”, which seriously reduces the load on the servos. Mine are both fighting strong original spring/linkages on the Kawasaki 24HP engines. On both the mower and tug all servos are barely above ambient temp after 3-7 hr missions.
You mentioned automatically changing engine speed (throttle) during the mission depending on grass thickness, etc. Great idea. Just be aware the changing the engine speed slightly changes the HydroGear drives response to control inputs. For small changes in engine speed, I see very little changes in mower tracking, turning, etc. However, when I kill the blade and drop my engine speed to ~1/4 after the last waypoint to start cooling down as it trundles home, I do see a difference in tracking. Since I’m not cutting then, it’s not an issue. Just something to consider.
Along those same lines, if you tune your mower in January, expect to be making very minor tweaks in August. Nothing major, but the drive system responses will change slightly with temperature. Ditto for wear.
Good luck!
3 Likes
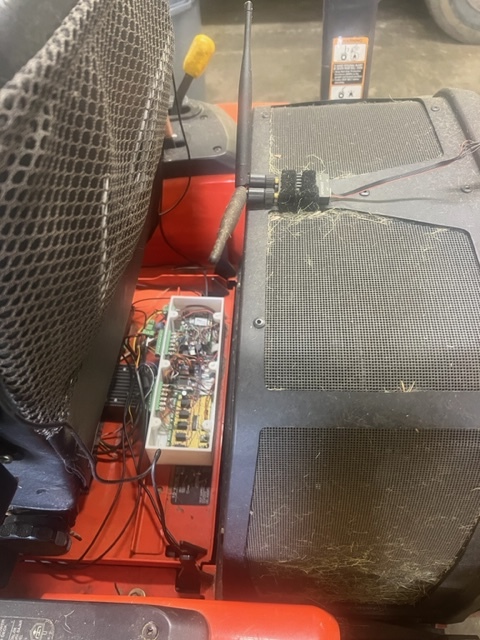
Not sure if this is of value to you… I am at present in the middle of a FreeCAD design to take the damper position from the control arm via a linear motion sensor which turns this is into an angular output (via an AS5600) value can be raw (0-4095 as well).
Here the work in progress…
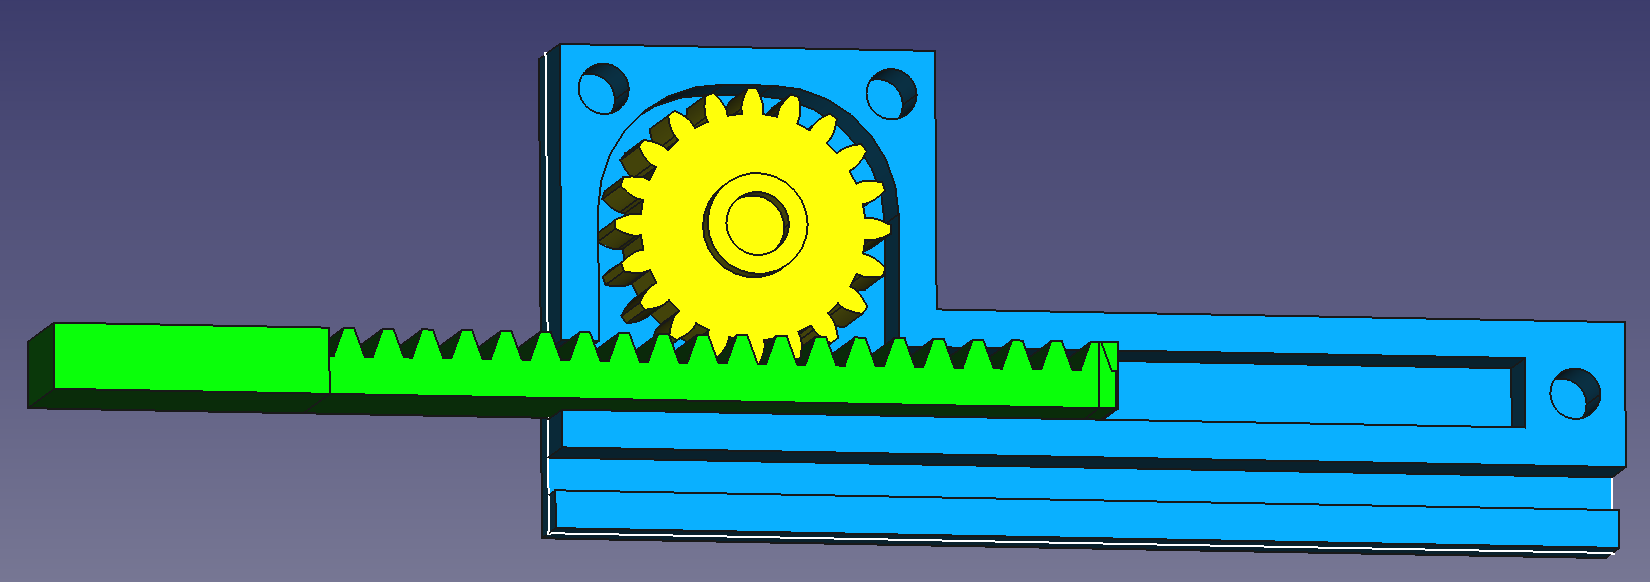
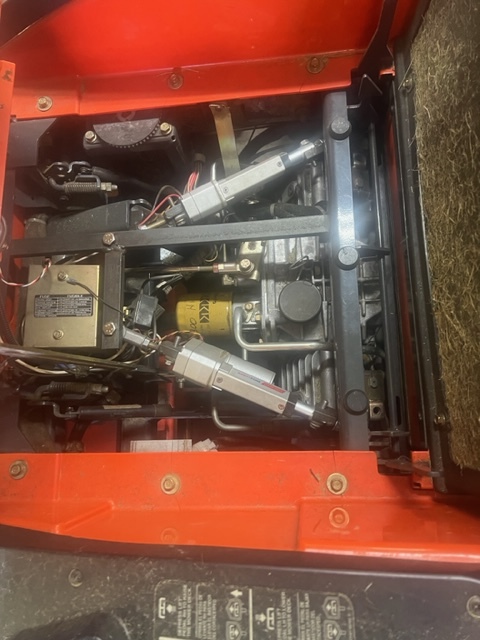
Here the damper where the sensor will piggyback onto it. (The left one in this ‘box’.)
Happy to share files if of interest and once completed, and proven it works.
Thanks for this great feedback…
… do I have to prepare for some temperature compensation? ![]()
(Which could be easily incorporated, once a performance curve has been established.)
I am pretty sure I bought the swivel ball end linkage connector at McMaster Carr. I can look up the part number tomorrow if you like.
1 Like
Would be nice; I see the ball joints but not the horn (arm).
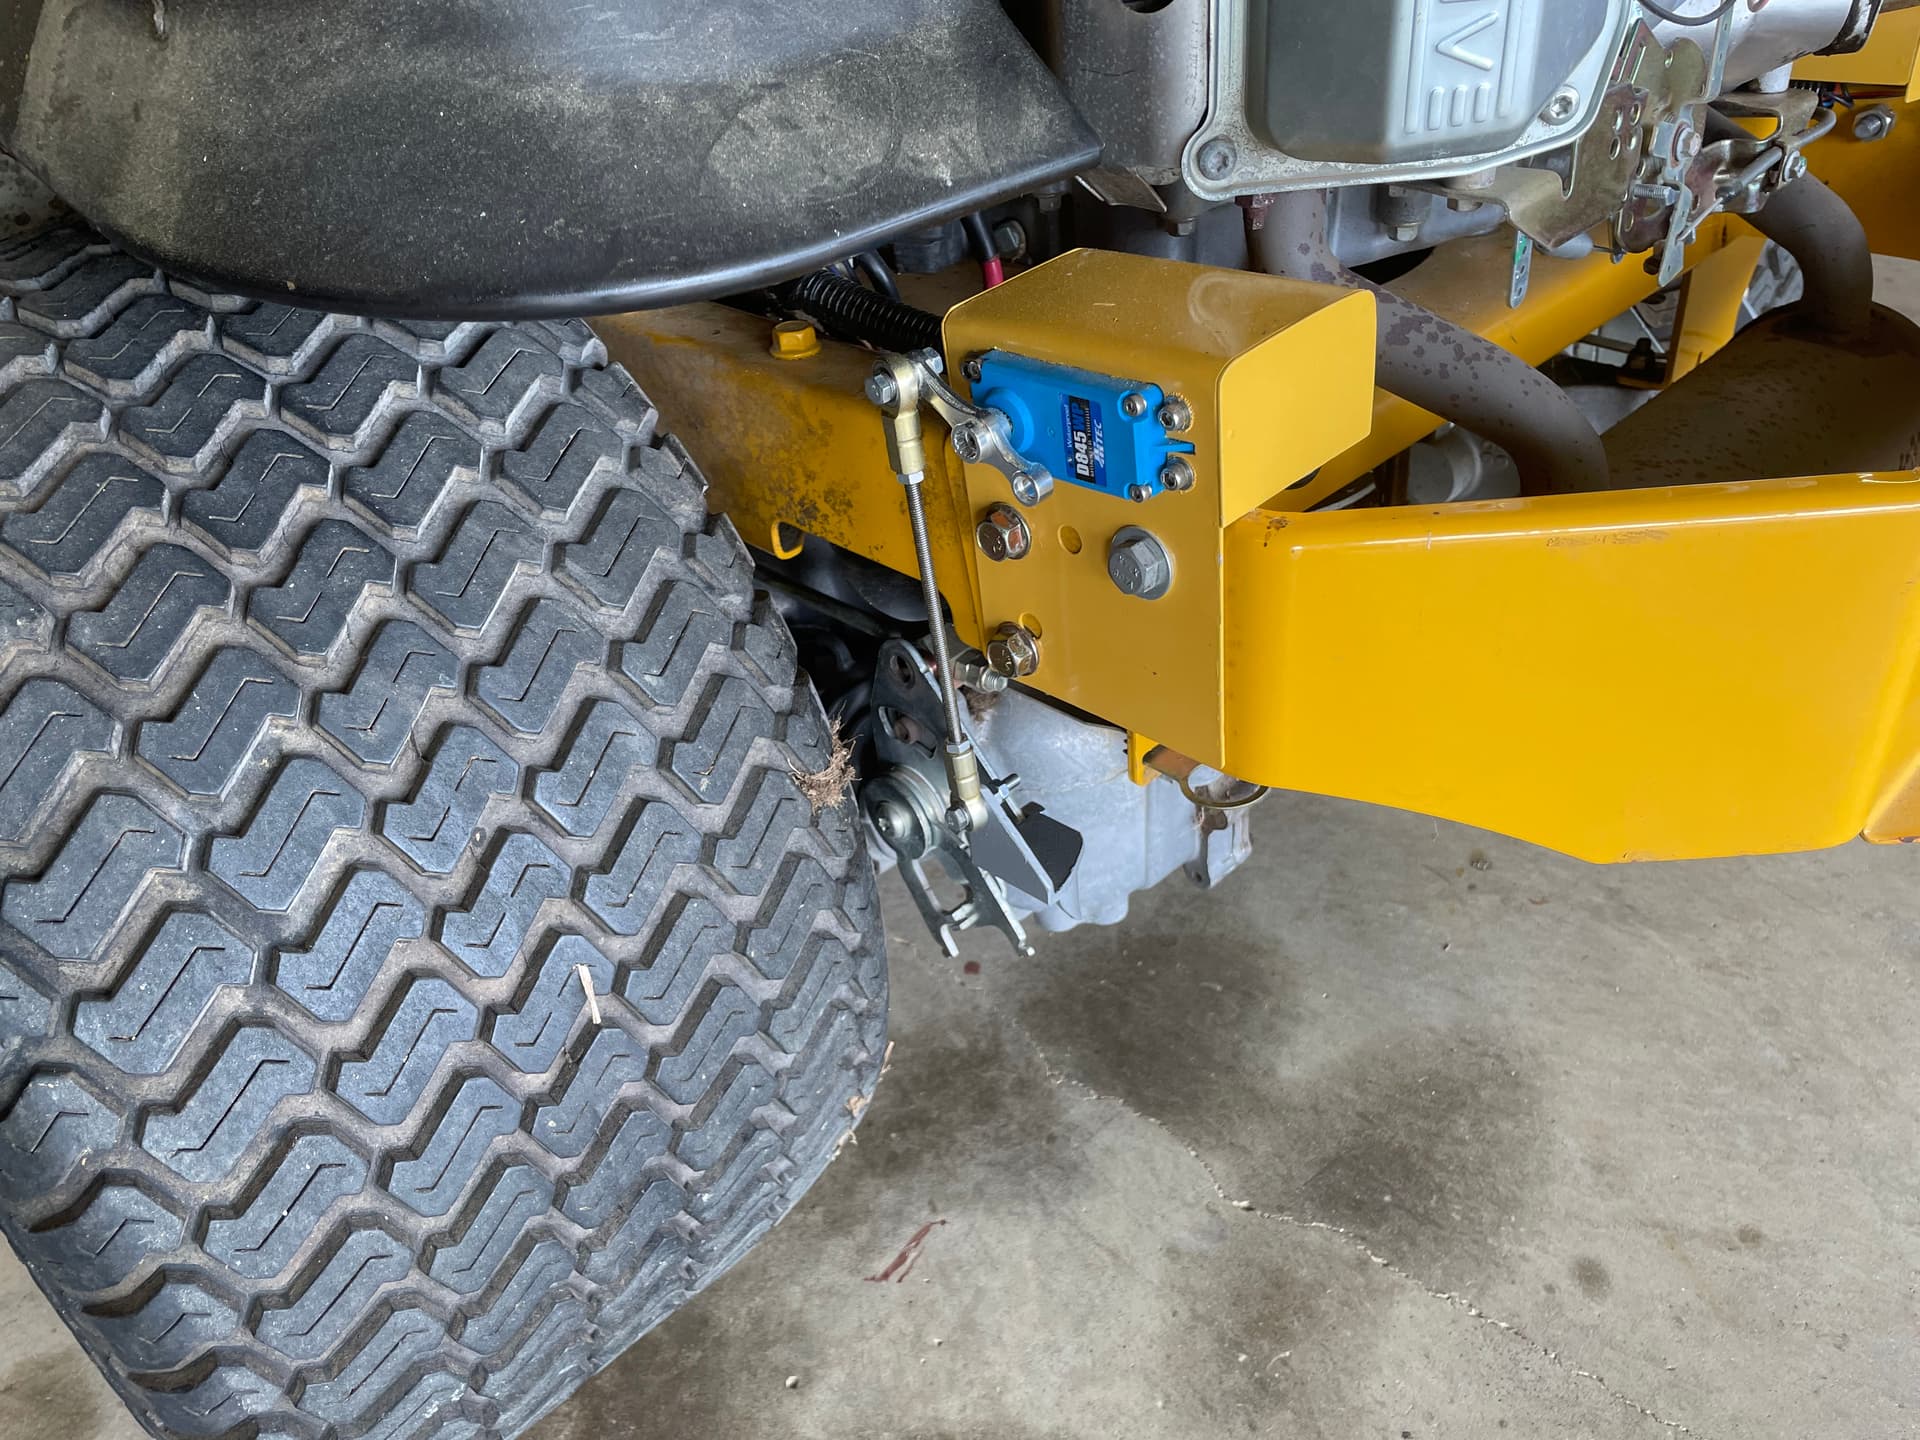
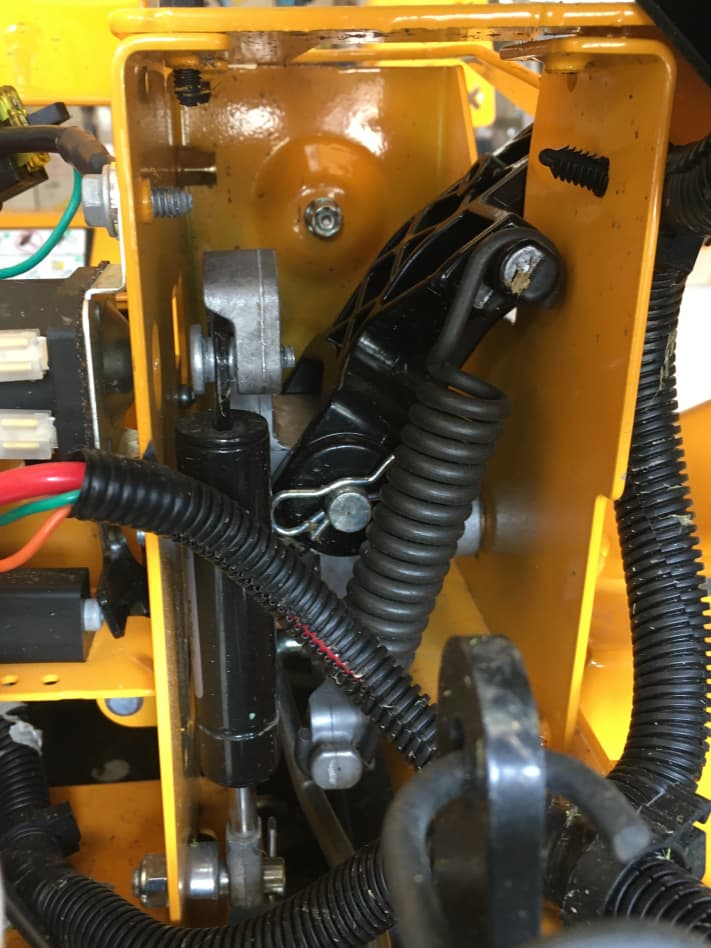
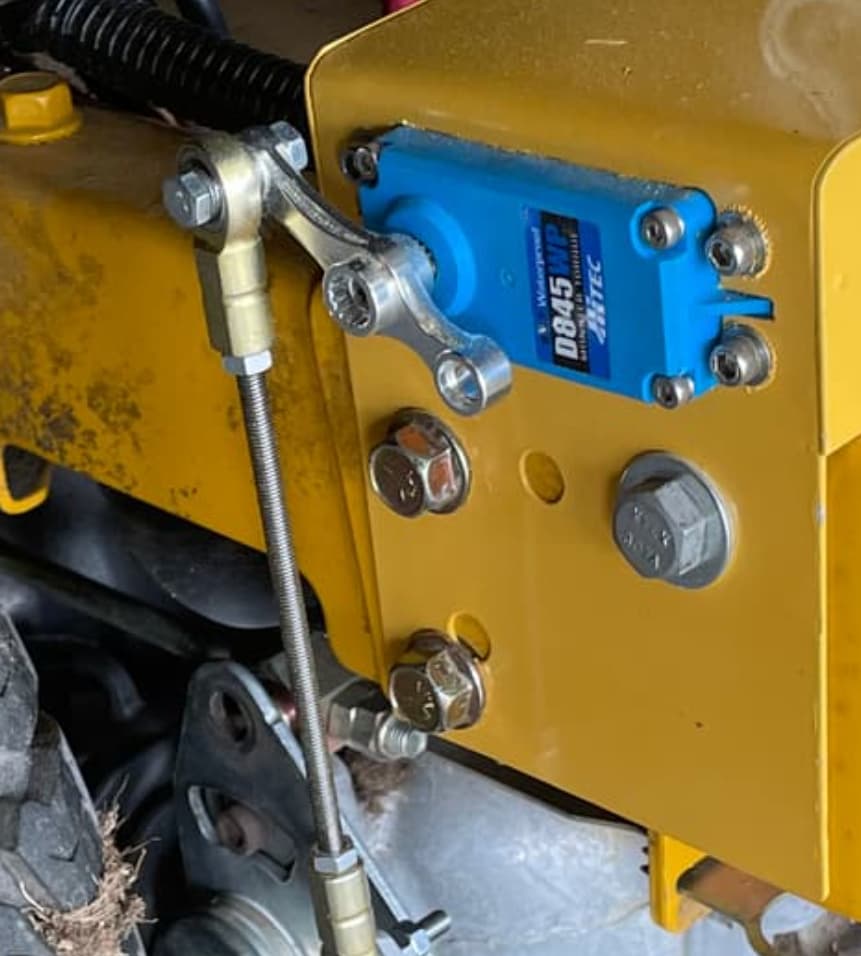
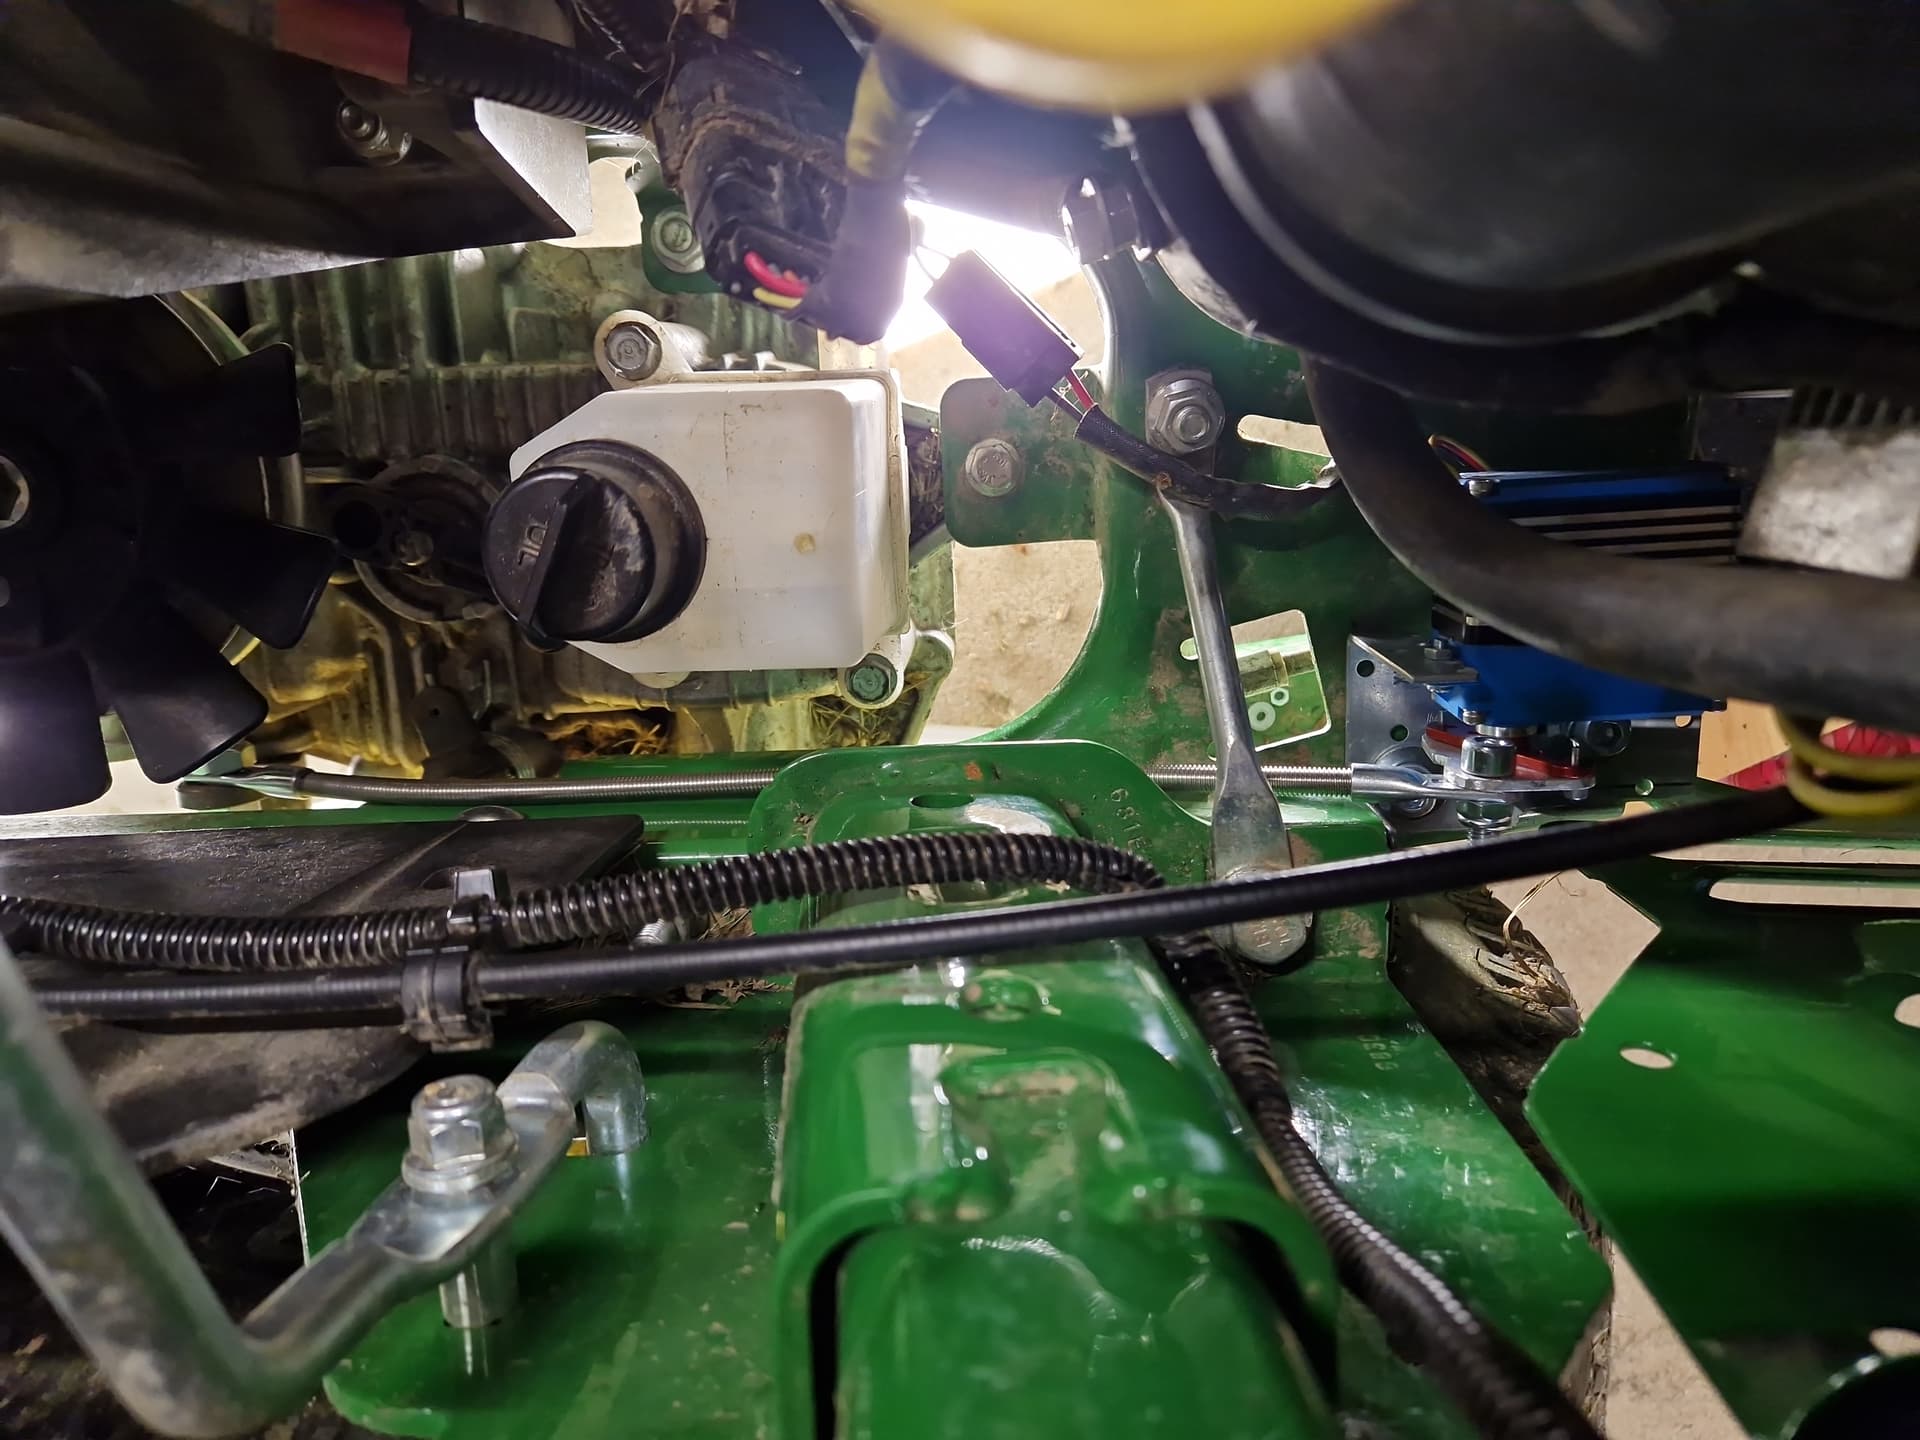
Oh I wish there was that much room for a servo in my case! Finding the spot was a bigger challenge than I anticipated initially, then came bending the connecting rod around the obstacles… It works now, but I am still thinking on redoing it. With the current servo setup, wheels need to be removed in order to access the rod ends. Here is the top down look:
I believe the connecting rod is a piece of stainless steel all-thread.
Okay, I got it figured out. I am not an RC guy so I didn’t know what a “horn” was. I got that cheap little servo arm off of ebay and I have sense gotten rid of it. It seemed to come loose on the servo with the constant movement. (Sorry for the old picture). I went to another arm that was the same length and it attached better with a clamping arrangement and a screw in the center of the shaft. I had seen other builders using it.
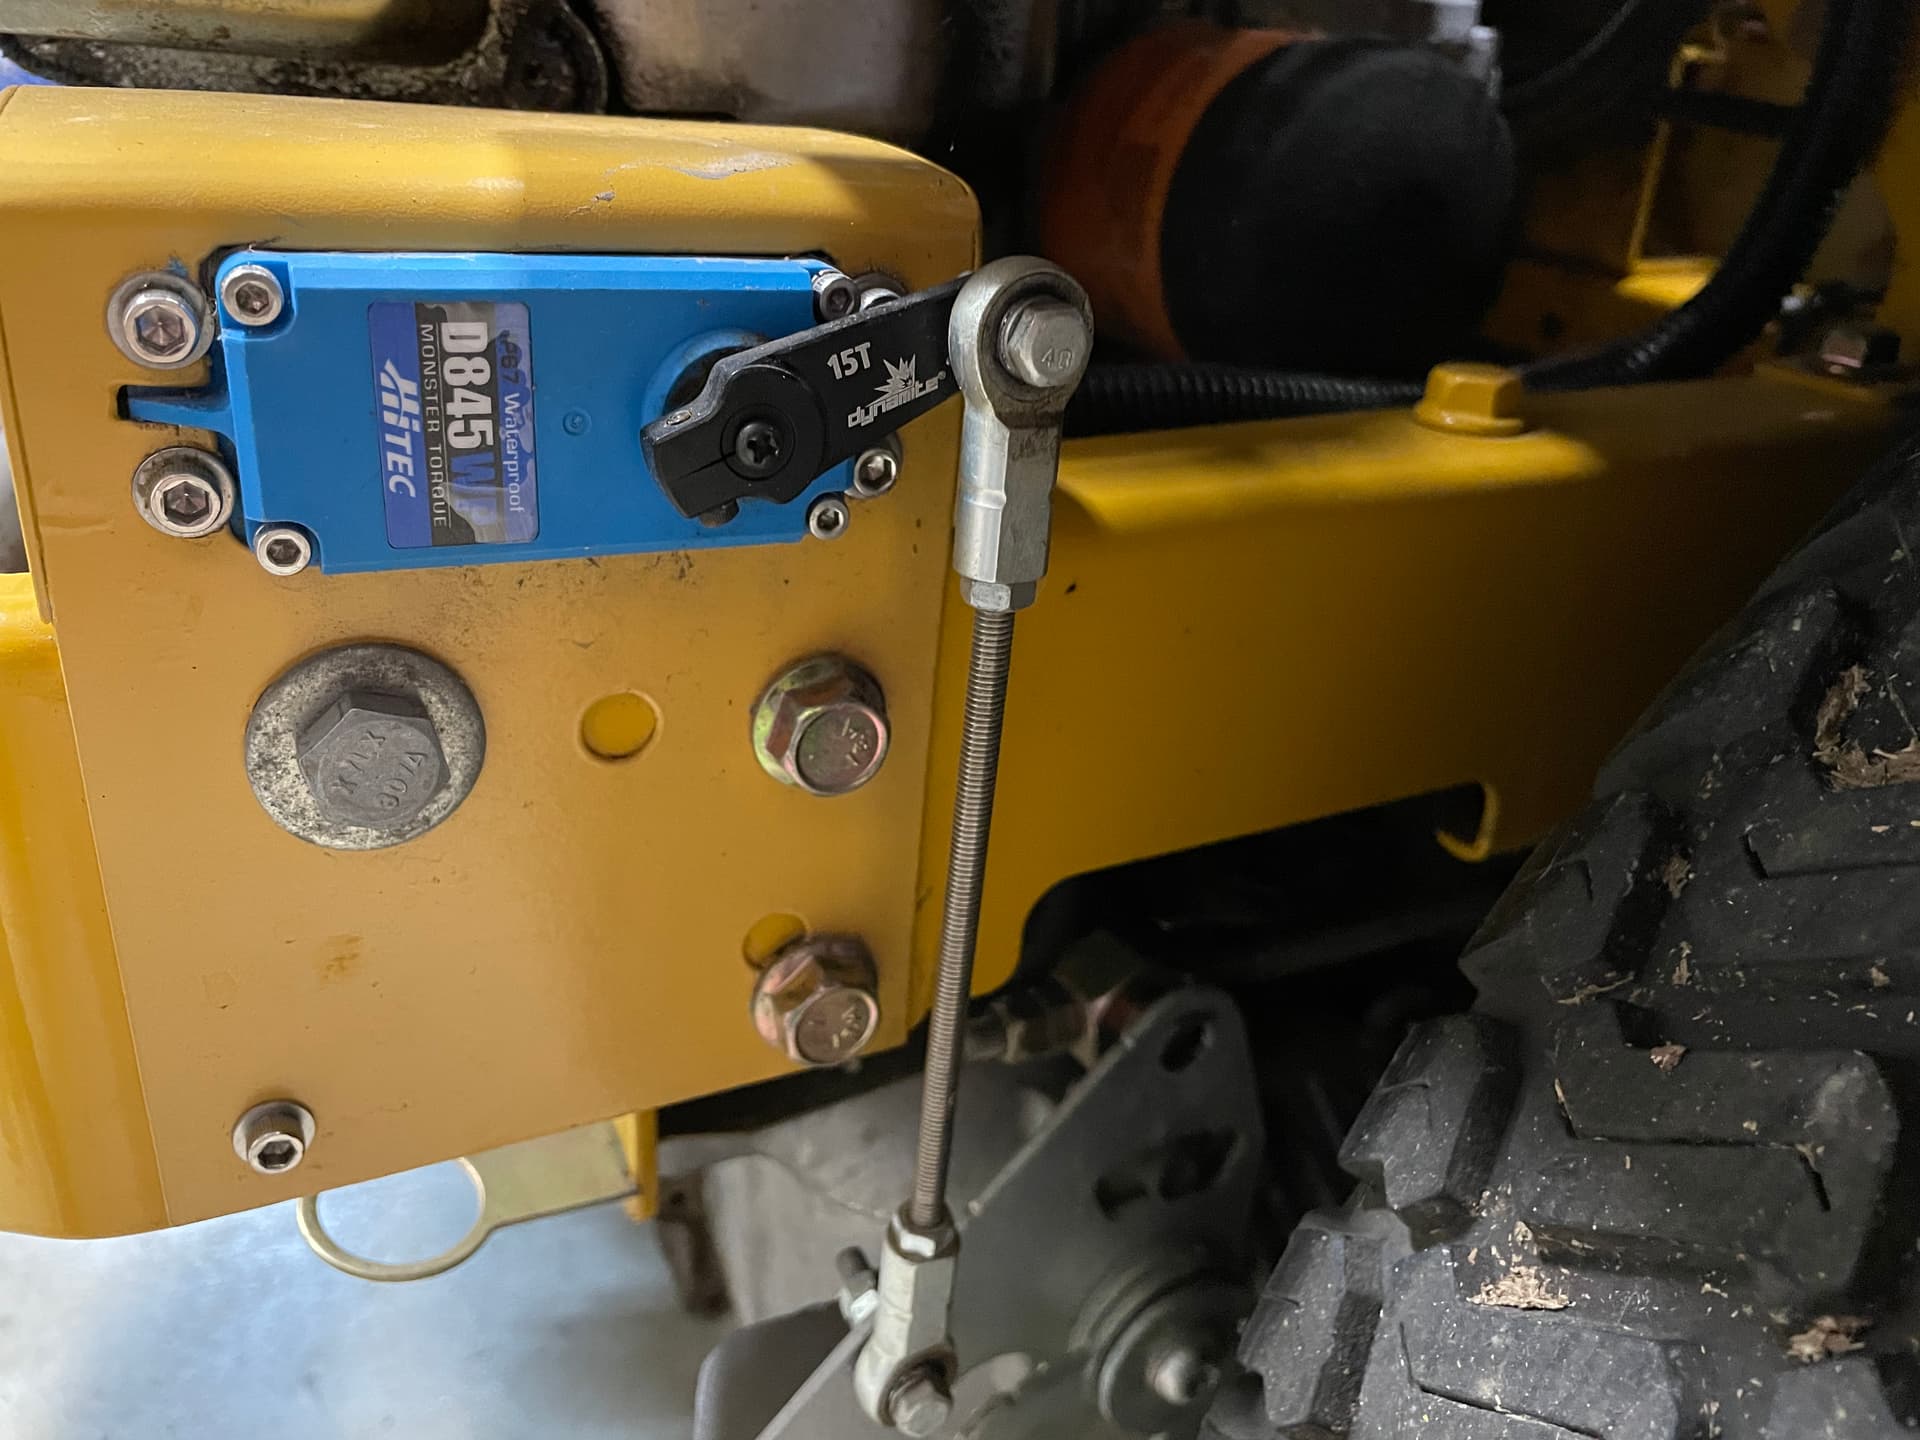
I believe I had to drill out the 3 mm hole on the linkage connecting end and tap it for 5mm thread. I bolted the connecting linkage to it with a 5 mm bolt with Loctite and added double nuts jammed together.
1 Like
@Max_G, Glad to see I am not the only one that would like to maintain the ability to control the mower using the factory control levers without having to mechanically remove the servos.
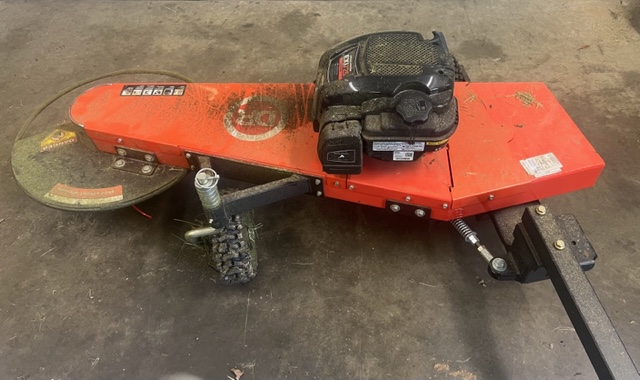
My use case is when I am TDY and the wife or kids need to mow. As things are they hop on the old John Deere 345. As many times as I have showed them how to use the Kubota, my son even helped with automating it, they avoid using it which is ok with me.
If they could jump on the mower and plug in the control lever position sensors to the remote and use the mower like they were used to that would be good.
Better would be if the control lever position sensors were hard wired to the flight controller so they could be switched on or off as an input.
I am interested in the files and BOM you come up with. I would like to see if I can incorporate them into my mower.
1 Like
That is tough arrangement! It seems like the only improvement would be to find a better spot for the servo or a different linkage arrangement. People don’t realize how hard it is to install servos on a piece of machinery that was never intended to have them. I studied my mower for several days before I decided to build a spot for them near the hydraulic valve assembly in the back. It is a multi-dimensional puzzle. Then I built several linkages and tried them before I got what I needed. Maybe what you have is the best you can do. As long as you can make sure you get the travel you need each direction from the servo center position. If the overall travel is there you can move the arm on the shaft to get the servo centered up.
Hi - im about to pull the trigger on RTK for our mower project - looking at the SIMPLERTK3B + Heading - your warning against the SimpleRTK2B + Heading… being hard to configure … is that true also for the 3B Heading kit eg Septentrio mosaic-H also ?? Ease of install/effort is key for us, so if non “+ heading” is the way to go ??
There is a nearby NTRIP server available to us,
Thanks, Paul