Hello everyone.
I am starting to integrate the pixhawk ( probably v2.1) to sab goblin 570.
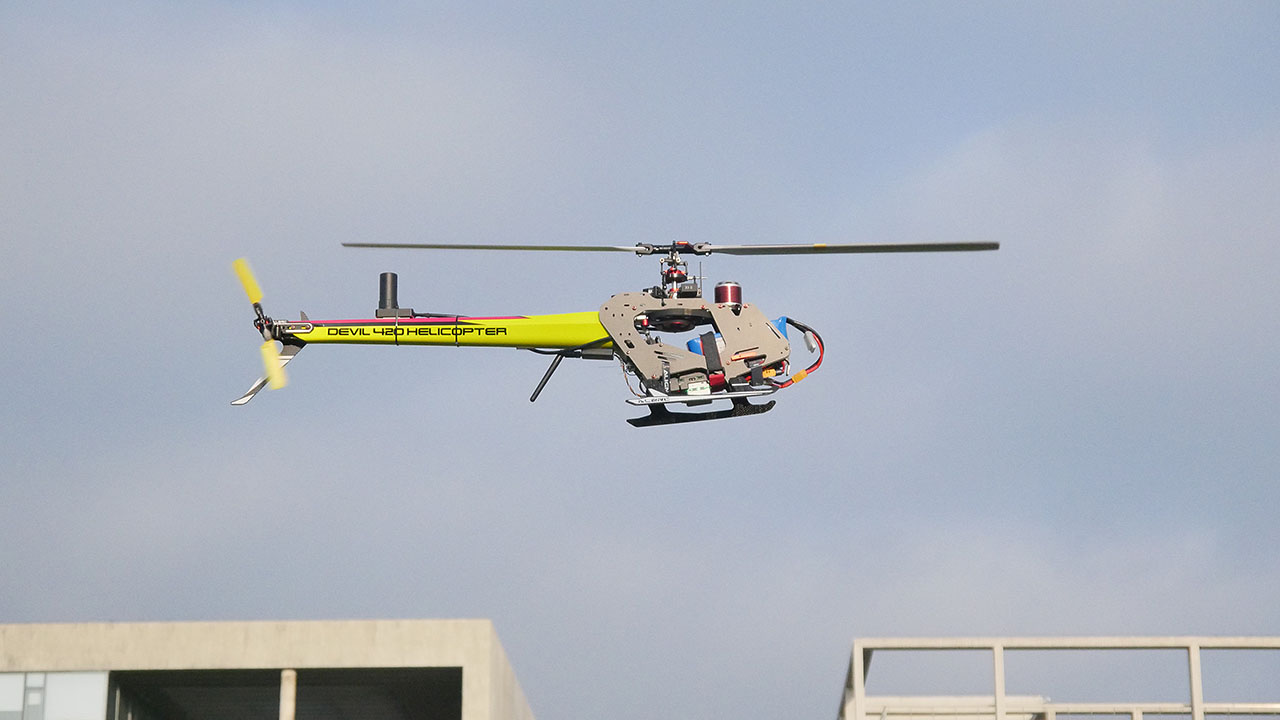
It is currently flying with fbl system axon from bavarian demon.
I wonder if I should stick to it and use pixhawk plus fbl system.
Any suggestions?
I read that this is feadible…
Second: any installation recommendations? There is not so much space…
Attached to the main chassis behind battery will end up in a 10 degree negative pitch orientation…
Building a new landong gear might be difficult though…
The best location would be where usually the FBL goes, but I guess the 2.1 might be too big to fit.
On a E700 the 2.1 wouldn’t fit anywhere reasonable without changes to the frame, so I ended up using a smaller PixRacer sized controller or a MindPx v2 which also has a damped IMU. Some have used the PixHack v3 successfully but it’s something that you’ll have to determine the position giving the size of the controller with some spare space for cabling.
Yes you can have a FBL downstream from the PixHawk/PixRacer
the fbl spot is just a tiny 5x5cm spot…
I want to try out the autopilot with this 500 setup.
goal is a much bigger heli with longer endurance in the end.
So I want to stick to one autopilot hardware.
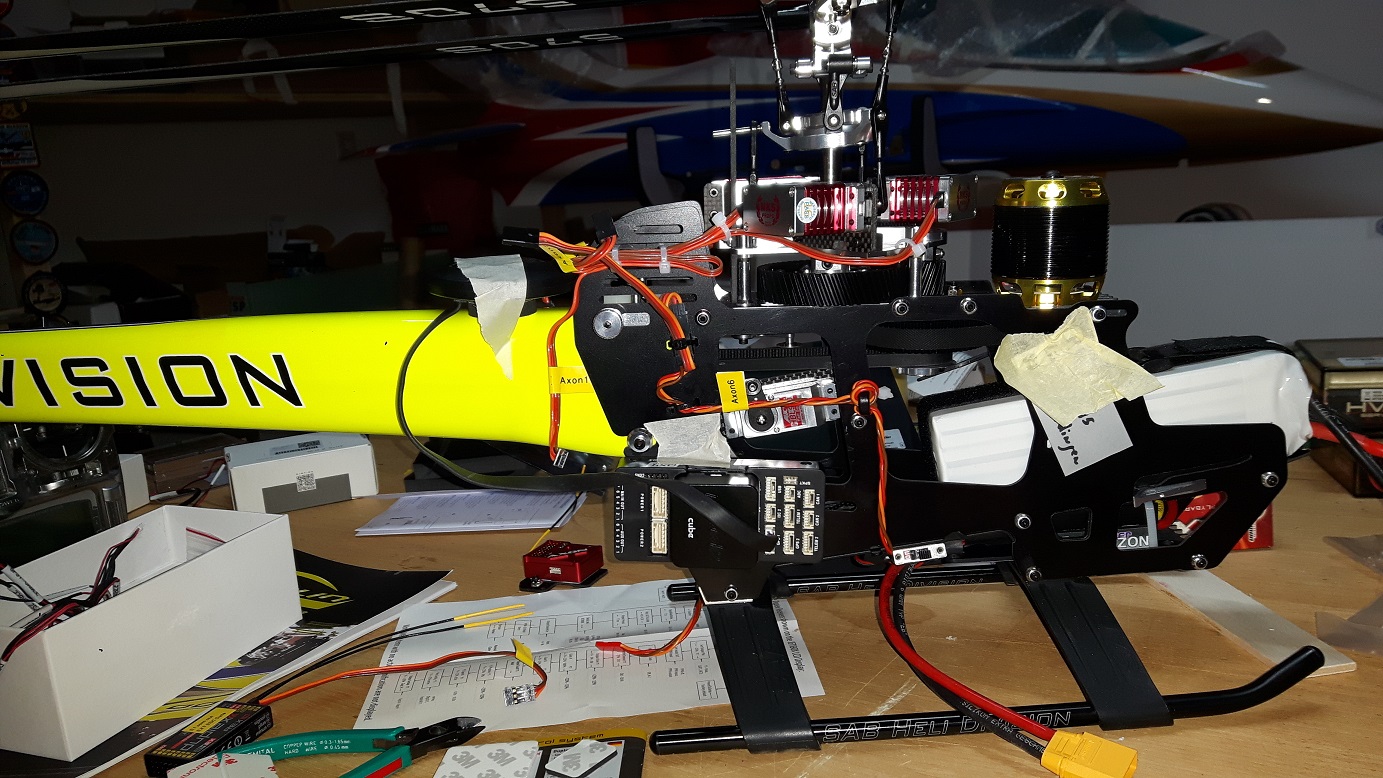
This is a CUAV V5 mounted on the Alzrc 420 backplane. It also has a certain angle of inclination, but does not affect any flight, only the proper accelerometer calibration is required.
the first pixhawk I could get was the proficnc 2.1.
it is big…
I wonder If I can install it on the side. The GPS cable is quite short.
the accelerometers were calibrated outside in it’s original orientation.
the sensor rotation was set afterwards.
I would align the case to the rotor axis.
this helicopter model has a certain negative pitch on its landing gear.
I followed the instructions of "Traditional Helicopter – ArduPilot Helicopter Ground School "
the videos from chris.
from my understanding, I am almost ready for first flight with stabilize mode as soon as I get the equipment attached and magnetometer calibration is done and I put in the tuning paraneters according to “Initial Setup of Pitch and Roll Tuning Parameters” http://ardupilot.org/copter/docs/traditional-helicopter-tuning.html
It is also recommended to install the Pixhawk 2.1 FC to the mounting position of the SAB 570 gyroscope, using an external compass to avoid interference from the elevator to the FC built-in compass. If you install the side, you are worried that the counterweight and direction of the built-in shock absorber are not suitable for handling the vibration generated by the body.
Hi luis. Ok Installation is done.
But the accelerometer calibration is quite complicated due to the helicopter shape.
I thought that it should be as accurate as possible (not more than 1 degree offset, or so)
But turning around the helicopter will definitely end up in something like 5 degree offsets (put it on the nose, put it on back…)
If you use the pix+FBL method, you can ensure the feel of the manually flying FBL unit in Arco mode. This kind of feel is that pix can’t be in any mode and under any parameters.