25 years learning to fly. (Everything comes to those that wait) Ardupilot, Sailboat, Gazebo

Kwiki at Whitefriars

Back in the 1990’s, I got involved with racing model catamarans. The models were 1.2 metres long and built to a rule called the 1.2m rule. The rule was pretty simple. Maximum length and width of 1.2m and that was it. ( Nowadays the rule has evolved into the Mini40 rule, but that is another story).

I built 2 Models, The first was called White Light and was constructed from a foam sandwich of 3mm divinycell foam under glass cloth. The second was called Kwiki and this time I went low tech and constructed the boat from strip planked balsa.

There is some detailed info about Kwiki here.

The attraction of this type of model for me was to be blasting along with the windward hull out of the water (“flying a hull”). With my original boat “White Light” I could keep it flying a hull in the right conditions, since it had a central fin, which would come out of the water as the boat heeled so increasing side slip. With Kwiki however, I decided to use a fin in each hull and it was much harder to keep the boat flying a hull. Another problem with these boats generally is that you are some distance away and it is very difficult to react to gusts. Back in those days, you could get single axis accelerometers in a through hole IC , and I thought to put one in each hull,but anyway over time I put the boat in the attic and moved on to other things.

Recently however I got access to a lovely model yachting lake and I also realised that the electronics problems had been solved! All I needed was to put a flight controller in the boat, so after more than 25 years, I got the old boat out of the attic and assembled it to see if I could get the old boat working.

Here is a video of the old boat in action. No flight controller on board as yet. Anyway you may be able to see the issues with keeping it flying a hull.
In order to get things working the best option is usually to start with a simulator. The next issue was that the Sailboat simulator I knew about in ArduPilot was quite basic. I initially attempted to modify it as shown here to try to model heel of a boat.
Modifying The ardupilot Sitl Sailboat sim to add heel

Anyway it turns out that there is an infinitely better Ardupilot sailboat simulator using Gazebo that had been built by Rhys Mainwaring, so I decided to try it out. The simulator is quite sophisticated, with realistic modelling of the physics of buoyancy and sail hull and keel forces. The downside is that there is quite a big learning curve to installing and running it, but I hope to write down my experiences with it here. After quite a little tinkering I have got the sim to simulate what I want e.g Flying a hull, as shown in the video here. With this sim working I am finally feeling ready to get the real flight controller installed in the real catamaran.

Flying a hull in Ardupilot Gazebo

8 Likes

Excellent ! I am looking forward seeing the boat fly !

I add some screenshots for a bit of illustration

3 Likes

Setting up Ardupilot-Gazebo SITL Catamaran.

The instructions here describe how I set up the Ardupilot Gazebo Catamaran Sim on Ubuntu.
The process is somewhat involved. Building the various libraries may take a couple of hours, so be patient. I opted to put everything including ardupilot under one directory. YMMV.

Prerequisites

First Install colcon, which is required later to build asv_sim and asv_wave-sim. Other prerequisites will be installed as needed.

Create a working directory for the project

Next, create a directory called ApGzCatSim. This is the root directory. Everything we need goes in here.
NOTE: Call the directory what you wish but it is unwise to rename the directory after starting the build process, since some build artefacts of asv_wave_sim ans asv_sim hard wire the build directory.

Create a script to invoke Ardupilot SITL

Create a bash script called ap_cat.sh. This will ultimately be used to invoke Ardupilot SITL. For now just make a skeleton:

ap_cat.sh -------------------------------------------------------------------------

#!/usr/bin/env bash
echo "Starting SITL for Ardupilot Gazebo Catamaran simulation..."

----------------------------------------------------------------------------------------

Save ap-cat.sh in the ApGzCatSim directory, make it executable and invoke it to test it works:

>$ cd ApGzCatSim
>$ ./ap-cat.sh

Install ArduPilot

Next Install Ardupilot.

Add lines to ap-cat.sh to invoke the basic ArduPilot SITL simulator:

ap-cat.sh-------------------------------------------------------

#...
cd ./ardupilot/Rover
python3 ../Tools/autotest/sim_vehicle.py -D -v Rover --console --map
#...

---------------------------------------------------------------------

Invoke the modified ap-cat.sh script again. NOTE: It may take some time (1/2 hour on my slow system) to build the SITL version of ardupilot first time, but then it should invoke the SITL sim. You should see the console and a map with an airfield. Once built once, it should work more quickly.

Press CTRL-C in the terminal you invoked ap-cat.sh in to kill the SITL sim.

Install Gazebo

Next Install Gazebo.
NOTE: You need Gazebo Garden or Gazebo Harmonic, rather than legacy gazebo.

Create a bash script called gz-cat.sh. For now we just make a simple test that gazebo is basically working:

gz-cat.sh-------------------------------------------------------

#!/usr/bin/env bash
echo "Starting Gazebo for Ardupilot Gazebo Catamaran simulation..."
gz sim -v4 -r shapes.sdf

----------------------------------------------------------------------

Save gz-cat.sh in ApGzCatSim directory, make executable, test it works.
NOTE: First time gazebo may take a while to start while it downloads resources.
Close Gazebo-sim using the buttons in the gui (It is best not to kill it direct in the terminal)

Install ardupilo-gazebo

Next, Install the ardupilot-gazebo plugin.

Again I would recommend cloning the ardupilot-gazebo repo direct into the ApGzCatSim directory.

Build ardupilot-gazebo as described in the link above.

Create a bash script called cat-sim-env.sh which will be used to set up the environment variables to run the sim. Add the environment variables described in this link to cat-sim-env.sh, but modified for our setup:

cat-sim-env.sh-------------------------------------------------------------------

#!/usr/bin/env bash
export GZ_SIM_SYSTEM_PLUGIN_PATH=$HOME/ApGzCatSim/ardupilot_gazebo/build\
:$GZ_SIM_SYSTEM_PLUGIN_PATH
export GZ_SIM_RESOURCE_PATH=$HOME/ApGzCatSim/ardupilot_gazebo/models\
:$HOME/ApGzCatSim/ardupilot_gazebo/worlds:$GZ_SIM_RESOURCE_PATH

--------------------------------------------------------------------

Save cat-sim-env.sh in ApGzCatSim dir and make it executable.

Modify ./gz-cat.sh by to invoke cat-sim-env.sh to setup the environment and change the gz invocation file to start iris_runway sim:

gz-cat.sh----------------------------------------------------------------------

#...
source ./cat-sim-env.sh
gz sim -v4 -r iris_runway.sdf
#...

---------------------------------------------------------------------------------
Invoke gz_cat.sh to test the new setup. You should now see the runway with the quadcopter in the gazebo gui.
If so, you have the basics of ardupilot-gazebo working.

Close gazebo-sim using the buttons in the gui.

Download and build associated libraries

For the catamaran simulation you need to download three more repositories: Again I find it tidier to place them direct in ApGzCatSim. YMMV.
Note that these first 2 libraries will take a while to build. (30 mins for asv_wave_sim, 5 mins for asv_sim)

>$ cd ApGzCatSim
>$ git clone https://github.com/srmainwaring/asv_sim.git
>$ cd asv_sim
>$ colcon build --symlink-install --merge-install --cmake-args \
-DCMAKE_BUILD_TYPE=RelWithDebInfo \
-DBUILD_TESTING=ON \
-DCMAKE_CXX_STANDARD=17
>$ source ./install/setup.bash

-----

>$ cd ApGzCatSim
>$ git clone https://github.com/srmainwaring/asv_wave_sim.git
>$ cd asv_wave_sim
>$ colcon build --symlink-install --merge-install --cmake-args \
-DCMAKE_BUILD_TYPE=RelWithDebInfo \
-DBUILD_TESTING=ON \
-DCMAKE_CXX_STANDARD=17
>$ source ./install/setup.bash

------

(Optional) build optional asv_wave control gui:

>$ cd ApGzCatSim/asv_wave_sim
>$ cd gz-waves/src/gui/plugins/waves_control 
>$ mkdir build && cd build
>$ cmake .. && make

Download the SITL_Models library which includes the catamaran:

>$ cd ApGzCatSim
>$ git clone https://github.com/ArduPilot/SITL_Models.git

No building required for that last one, but next we need to rewrite cat_sim_env.sh again for gazebo to find the various models, worlds and plugins.
NOTE: There is currently a bug in asv_sim and asv_wave-sim of the libs so the versions of the plugins in the install directory aren’t found, but the mods below worked for me.

cat-sim-env.sh------------------------------------------------------

#!/usr/bin/env bash
echo "Setting up Environment Gazebo for Ardupilot Gazebo Catamaran simulation"

export GZ_VERSION=garden

# not usually required as should default to localhost address
export GZ_IP=127.0.0.1

# ensure the model and world files are found
export GZ_SIM_RESOURCE_PATH=$GZ_SIM_RESOURCE_PATH\
:$HOME/ApGzCatSim/asv_wave_sim/gz-waves-models/models\
:$HOME/ApGzCatSim/asv_wave_sim/gz-waves-models/world_models\
:$HOME/ApGzCatSim/asv_wave_sim/gz-waves-models/worlds\
:$HOME/ApGzCatSim/ardupilot_gazebo/models\
:$HOME/ApGzCatSim/ardupilot_gazebo/worlds\
:$HOME/ApGzCatSim/SITL_Models/Gazebo/models\
:$HOME/ApGzCatSim/SITL_Models/Gazebo/worlds\
:$HOME/ApGzCatSim/asv_sim/asv_sim_gazebo/worlds

# plugins
export GZ_SIM_SYSTEM_PLUGIN_PATH=\
$GZ_SIM_SYSTEM_PLUGIN_PATH\
:$HOME/ApGzCatSim/ardupilot_gazebo/build\
:$HOME/ApGzCatSim/asv_wave_sim/build/gz-waves1/lib\
:$HOME/ApGzCatSim/asv_sim/build/asv_sim2/lib

# ensure the gui plugin is found
export GZ_GUI_PLUGIN_PATH=$GZ_GUI_PLUGIN_PATH\
:$HOME/ApGzCatSim/asv_wave_sim/gz-waves/src/gui/plugins/waves_control/build

-------------------------------------------------------------------------

Next in gz_cat.sh script, change the gz invocation to test that the gazebo part of catamaran sim is working:

gz-cat.sh---------------------------------------------------------

#...
gz sim -v4 -r catamaran_waves.sdf
#...

-------------------------------------------------------------------

Test things are working by invoking gz-cat.sh script. You should now have a model catamaran floating around on some realistic looking waves, as shown below.
APGZSim_cat_in_waves

If you have a slow system like mine, you may find the update rate slow. Don’t worry. We can improve this, but that must wait till next time, when we can hook up the gazebo model to Ardupilot SITL

2 Likes

Optimising the sim for a low end system

I mentioned that my system is slow and the first modification I needed to make was to tame the bits that use a lot of processing power.

NOTE1:When running the gazebo gui, the “realtimeness” of the running simulation is shown as a percentage in the lower right corner of the sim display. Ideally this should be 100% but with default settings on my system it is around 15%, which is unworkable.

NOTE2: Even if you have a fast system, I would recommend applying the following modifications, at least to make a calm sea. The waves make a lovely sim, but we need simplicity to start with!

NOTE3: If you have a fast system , you may not need to do this, but I have a hunch that some settings such as PID constants may be heavily dependant on the physics update rate, so it would probably be worth making these mods to start with to follow this tutorial.

Customising the sim

To make changes to most anything in Gazebo involves modifying xml files. To know more about the format see http://sdformat.org/.

First a quick look at the real file structure which is hidden somewhat by the environment variables and gazebo search algorithm.
The 3 important files are as follows:
The catamaran_waves gazebo sim is in ~/ApGzCatSim/SITL_Models/Gazebo/worlds/catamaran_waves.sdf
The catamaran model definition for the catamaran_waves sim is in ~/ApGzCatSim/SITL_Models/Gazebo/models/catamaran/model.sdf
The waves model definition for the sim is in ~/ApGzCatSim/asv_wave_sim/gz-waves-models/world_models/waves/model.sdf

Calming the sea

To calm the sea, the recommendation from Rhys, the asv_wave_sim author, was to modify the waves/model.sdf file. Generally modifying source files willy-nilly is not recommended, however here we don’t really have a choice. So to change the sea conditions to flat water, we will need to make use of git to checkout a new asv_wave_sim branch for the modified versions.

Prior to creating the new branch, we need to check the status of the repo, to see the effects of the library build:

$< cd ~/ApGzCatSim/asv_wave_sim
$< git status

It should throw up some artefacts of the asv_wave_sim build namely the build, install and log directories, which we want git to ignore.

Open the ~/ApGzCatSim/asv_wave_sim/.git/info/exclude file in an editor ( or do it from the command line if you are a whizz kid!)

and add the various build dirs to the exclude file:

~/ApGzCatSim/asv_wave_sim/.git/info/exclude-------------------

#...
build/
install/
log/
#...

-------------------------------------------------

Save and close the file and redo the status check. Git should now indicate the branch is clean, so let us create and checkout the new branch.

$< cd ~/ApGzCatSim/asv_wave_sim
$< git checkout -b flat-water

Now modify the waves/model.sdf file with the new settings:

The required mods are in the “gz::sim::systems::WavesModel” plugin definition.
Change the cell_count value to 4 and the wind_speed value to 0.

NOTE: There are 2 places in the waves/model.sdf file where these values have to be changed, else the mods won’t work!

~/ApGzCatSim/asv_wave_sim/gz-waves-models/world_models/waves/model.sdf---------------

\...
  <model name="waves">
   \...
    <plugin
        filename="gz-waves1-waves-model-system"
        name="gz::sim::systems::WavesModel">
    \...
     <wave>
      \...
     <cell_count>4</cell_count>
     <wind_speed>0.0</wind_speed>
    \...
    </wave>
    </plugin>
    \...
    <link name="base_link">
      <visual name="visual">
      \...
       <plugin
        filename="gz-waves1-waves-model-system"
        name="gz::sim::systems::WavesModel">
        \...
        <wave>
           \...
            <cell_count>4</cell_count>
            <wind_speed>0.0</wind_speed>
         \...
        </wave>
    </plugin>
      
      </visual>
    </link>
    
   </model> 
\...

------------------------------------------------------------------------------

Slowing the Physics update rate

The other modification I needed to make to get acceptable performance on my system was to lower the simulation update rate.

This time the relevant file is in SITL_Models in catamaran_waves.sdf
Again prior to modifying the update rate we should create a new branch.

$< cd ~/ApGzCatSim/SITL_Models
$< git status

The repo should be in a clean state so we can go ahead and create and checkout a new branch

$< git checkout -b physics_update_200Hz

Now find the physics definition in catamaran_waves.sdf and change the physics name to “5ms” and the max_step_size to 0.005, which will change the update rate from 1kHz to 200Hz.

~/ApGzCatSim/SITL_Models/Gazebo/worlds/catamaran_waves.sdf ------------

<sdf version="1.7">
  <world name="waves">
    <physics name="5ms" type="ignored">
      <max_step_size>0.005</max_step_size>
      <real_time_factor>1</real_time_factor>
    </physics>
\...

---------------------

Save and close catamaran_waves.sdf and run the gazebo sim again. With the above modifications my system gave a realtimeness percentage of 90%, so, much better and workable.

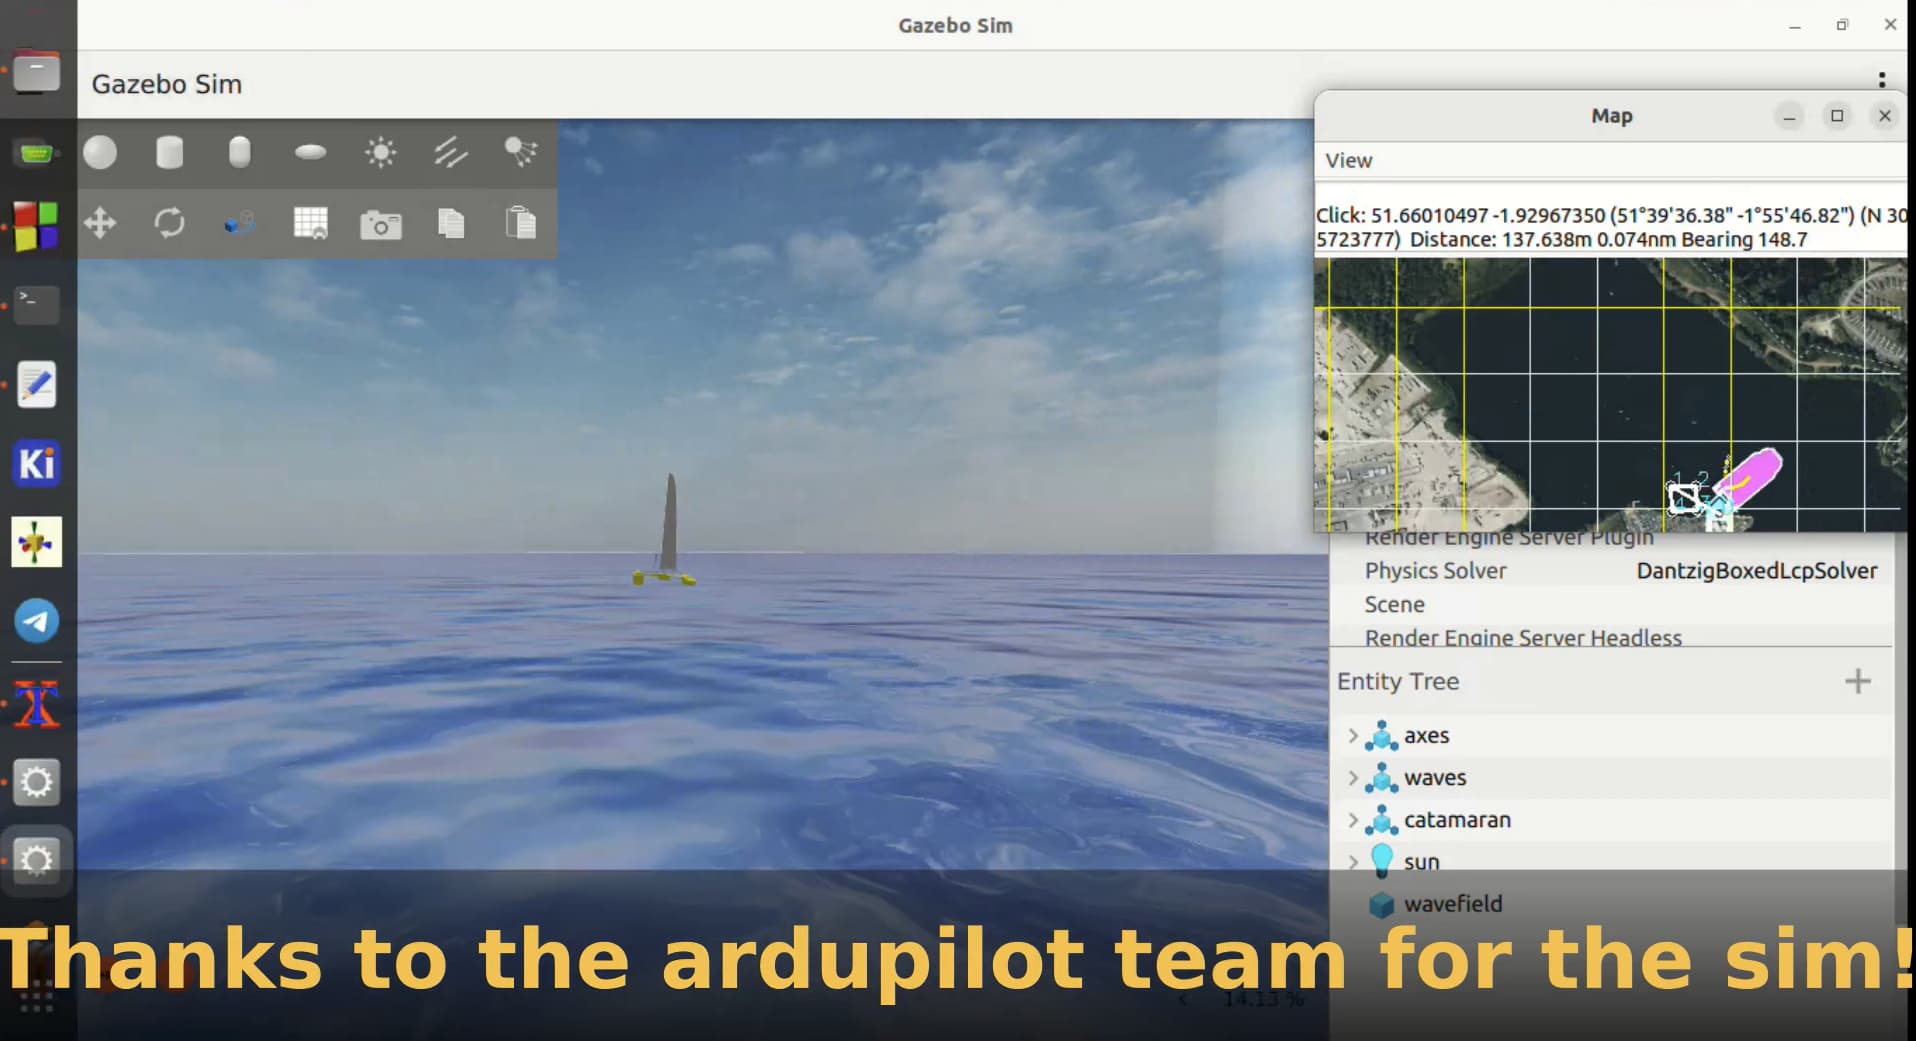
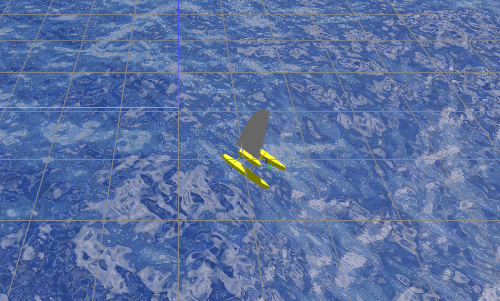
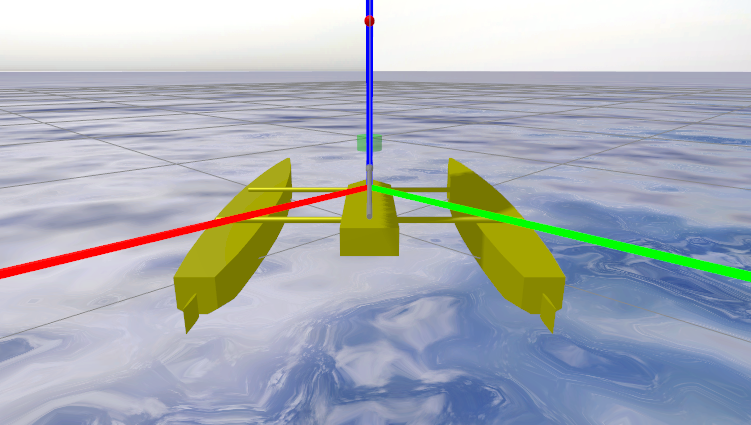
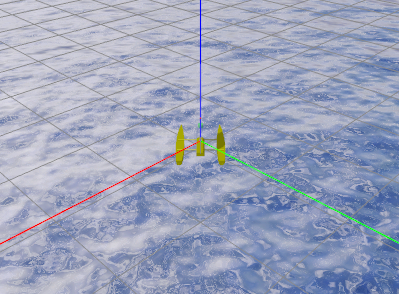
OK so, running the sim we have a catamaran sitting on a now calm sea, with no wind, as shown below:
APGZSim_cat_calm_sea

To add some wind we can use Gazebo’s distributed messaging system.

Write another bash script called 4wind.sh:

\4wind.sh--------------------

#!/usr/bin/env bash
gz topic -t /wind -m  gz.msgs.Vector3d -p "x:0, y:-4, z:0"

-------------------------------------

Save it in ApGzCatSim and make it executable.

In order to run wind in the sim, Open a fresh terminal, cd to ApGzCatSim, then tab open another terminal from the menu bar, which should now start in ApGzCatsim directory.
TIP: I find it best to put terminal down in the bottom right corner of the display and size it quite small and select “always on top” mode to keep it visible while gazebo is running.

Run ./gz_cat.sh in one terminal, and once the sim is running, switch to the other terminal and run ./4wind.sh.

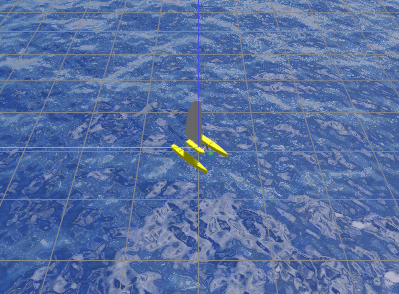
You should now see the cat being blown by the wind, though it will probably end up going backwards, sideways, anyway but forwards.

TIP: You can run the sim in Follow mode. When the sim starts, right click on the catamaran and select follow.

APGZSim_cat_default_follow_mode

NOTE: There is presumably a way to start in follow mode, but I didn’t find what it is. Unfortunately you have to start the sim, set up follow mode, only then can you adjust it.

I prefer to follow close behind the catamaran. Write another bash script called follow.sh

follow.sh--------------------------------

#!/usr/bin/env bash

gz service -s /gui/follow/offset --reqtype gz.msgs.Vector3d\
 --reptype gz.msgs.Boolean --timeout 2000 --req "x: -1, y: 0, z:0.3"

-------------------------------------------------------------

Run follow.sh once you have set up following the cat in the sim.

Hooking up Ardupilot SITL

Modify the ardupilot sitl invocation ap-cat.sh to use the json SITL model, and to set a suitable watery location. The one here is just off the Mumbles in Wales, UK.

~/ApGzCatSim/ap_cat.sh------------------------------------------

#...
python3 ../Tools/autotest/sim_vehicle.py -D -v Rover\
  --console --map rover --model JSON\
  --custom-location='51.566151,-4.034345,10.0,-135'
#...

-------------------------------------------------

To invoke the setup, start a fresh terminal, cd to ApGzCatSim and open 3 terminals (You can usually tab these off a terminal menu bar to keep them tidy)

In first terminal run Gazebo:

$< ./gz-cat.sh

Once the sim is running , follow previous notes to select follow and run follow.sh in 3rd terminal.

In the second terminal run Ardupilot SITL with MavProxy:

$< ./ap-cat.sh

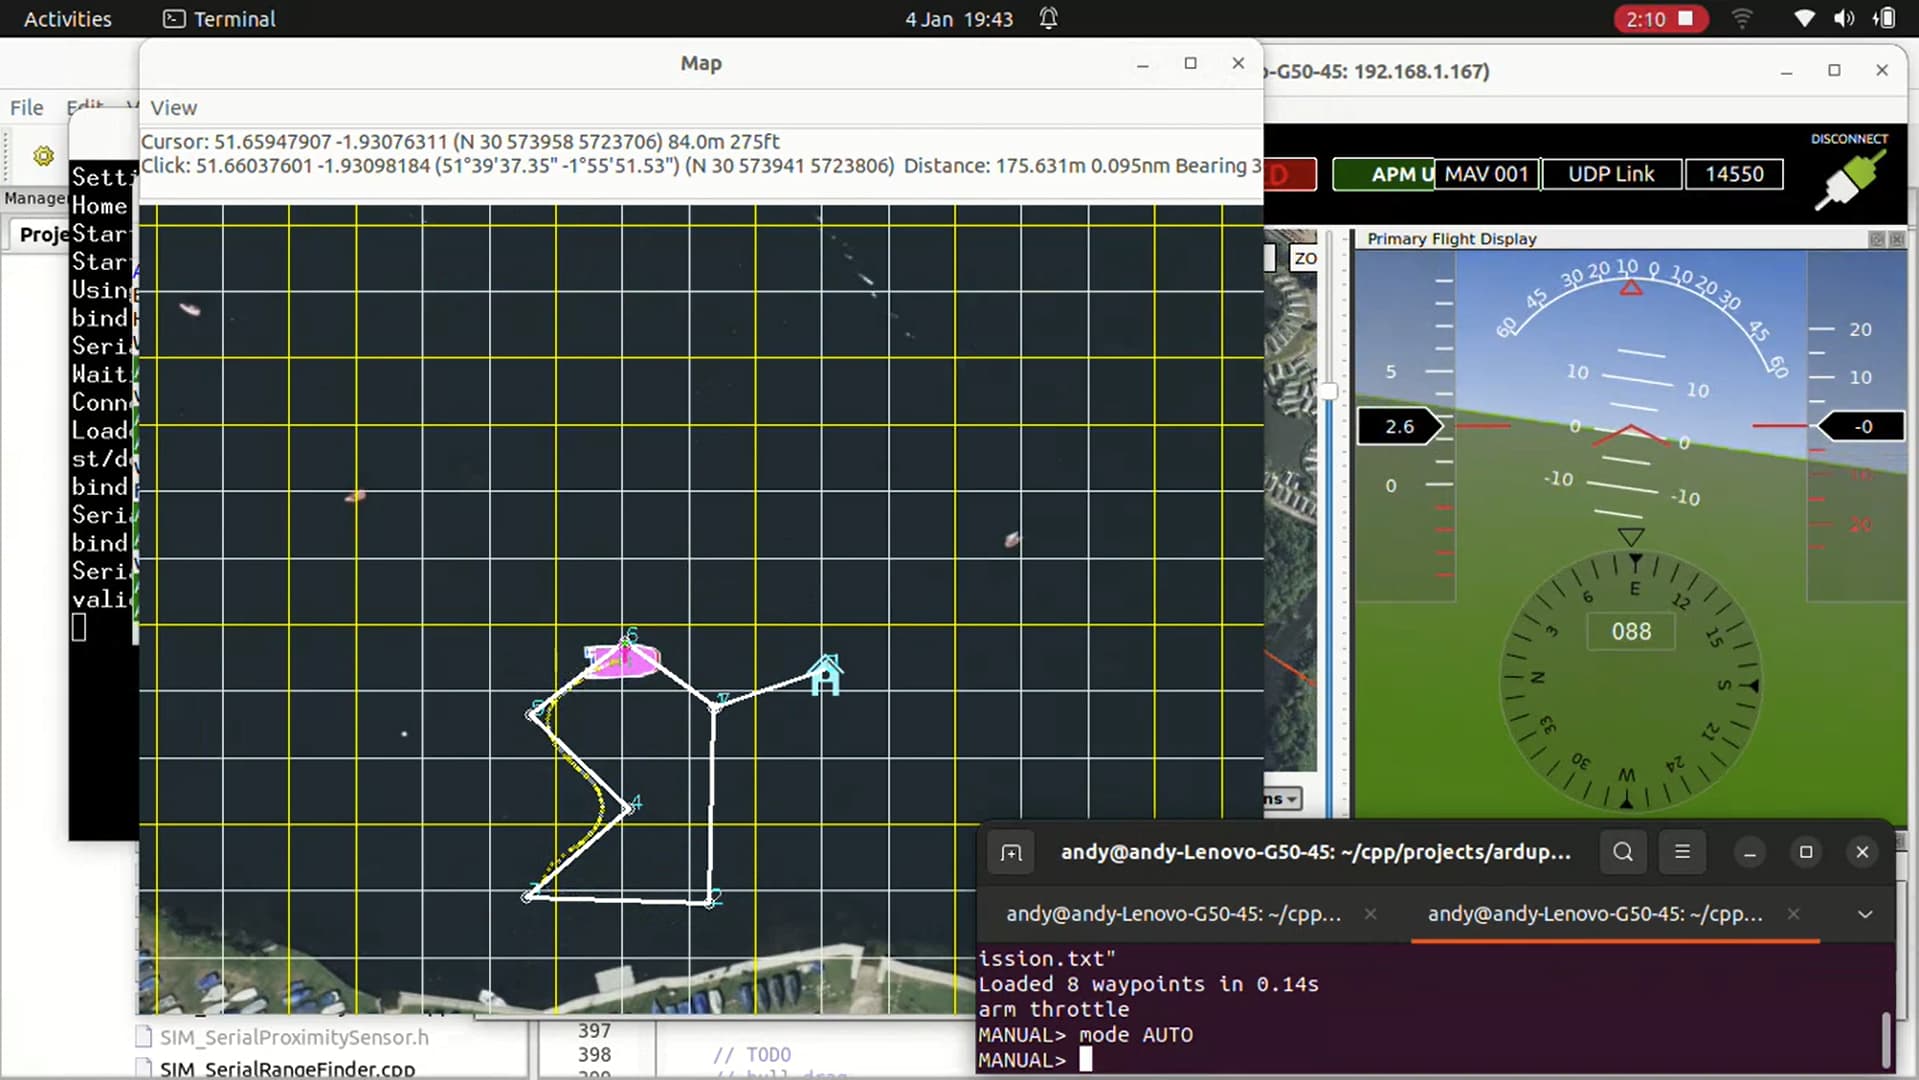
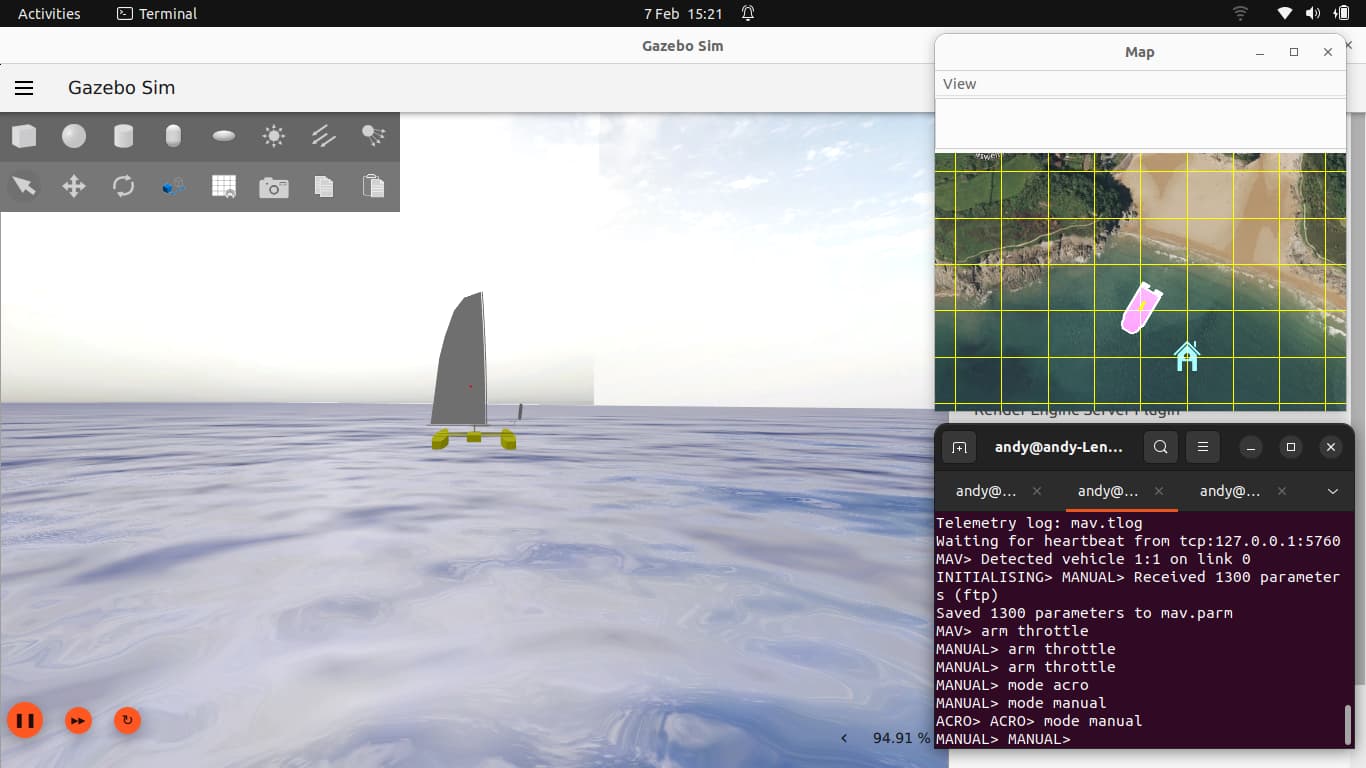
(The ardupilot sitl may rebuild the software if it thinks it is stale). Anyway ultimately you should end up with the ardupilot mavproxy console and the map.

NOTE1: The 3rd terminal is used to send Gazebo messages, such as the follow and wind messages in the scripts we wrote previously.
NOTE2: All these windows can be unwieldy. I tend to move the map up to top right of the display and select “always on top in the menu bar”, similar for the triple terminal in bottom right.

Wait for the MavProxy console to show that the AHRS is stable, signified by the green AHRS text, and then invoke ‘arm throttle’. Once armed, minimise the console. The main display should then be clear to observe the sim.

In the Ardupilot SITL terminal try moving the rudders. rc 1 1000 is full left, rc 1 2000 is full right. You should see the rudders moving in the sim.

You could try adding some wind too. ./4wind.sh You can also try moving the mainsheet, using rc 3 . Unfortunately you will probably find that the boat is very hard to get working. It weather cocks into wind and then stops. You can get it moving a little by wiggling the rudders, but it is very hard to get out of irons. You can also try changing the wind direction, which may help you. Anyway it is very hard to sail by the keyboard, so we need to make some serious modifications, but that will have to wait until next time!

1 Like

Adding a joystick

Before proceeding, I would seriously recommend you add a joystick to the sim, because controlling the sim with the keyboard is not really a practical option. See here for instructions on adding a joystick. There are a variety of input devices that will work, from game consoles to rc transmitters. It may take some time to setup, but will be worth it.

You need to setup the rudder channel as channel 1 and the mainsail channel as channel 3.
The exact values depend on the joystick.
For the rudder channel full left is negative, full right is positive of 0.
For the mainsheet channel full towards you is negative, full away positive.

Setting custom SITL params

I forgot to add in the last blog post, that the gazebo sim isn’t quite like the simpler SITL sailboat, where you just need to add a command line --sailboat switch. We need to run Ardupilot SITL with custom parameters, to switch on sailboat functionality, so let us do that now.

Modify the ap-cat.sh sim_vehicle.py invocation as follows to add the switches for the custom parameters file and the joystick.

./ApGzSim/ap-cat.sh---------------------------------

#!/usr/bin/env bash

echo "Starting Ardupilot Gazebo Catamaran simulation"

cd ./ardupilot/Rover

python3 ../Tools/autotest/sim_vehicle.py -D -v Rover\
  --console --map rover --model JSON\
  --custom-location='51.566151,-4.034345,10.0,-135'\
  --add-param-file=$HOME/ApGzCatSim/SITL_Models/Gazebo/config/catamaran.param\
  -C --load-module=joystick

----------------------------------------------

Modifying the Sitl update rate

We also need to modify the param file we added above. The SCHED_LOOP_RATE parameter controls the SITL update rate, and it is set to 400 in the file (for 400Hz). We slowed down the gazebo sim rate to 200 Hz and the SITL rate needs to be less or equal. I opted to set it to 50 Hz, to reduce additional work for the system. Since we are running Rover on a sailboat without a motor, this should be adequate and we shouldn’t miss many packets that way.

cd to ApCatSim/Sitl_Models and check you are on the physics_update_200Hz branch.
In $HOME/ApGzCatSim/SITL_Models/Gazebo/config/catamaran.param, find the SCHED_LOOP_RATE parameter and change it to 50.

Run the sim again (gz-cat.sh , ap-cat.sh, follow.sh etc) with your joystick plugged in. Check mavproxy terminal output for errors re the joystick. If all Ok, before starting the wind, you can check to see your rudders and mainsheet are working with the joystick.

For the main sheet, try toggling it full up and down and check the sail jerks in response. The default setup isn’t ideal for my preference. something else to be modified. To arm the throttle set mainsheet to min and type arm throttle in the mavproxy terminal. If successful, you should see ARM gone green in the console.

Start Sailing…

In the 3rd console start the wind ( NOTE: if nothing happens, try invoking the command again. Sometimes packets get lost) The boat should react and you should now be sailing in manual mode.

Finally sailing!

OK, I hope you are now finally sailing manually in the sim. The boat is fun to sail this way and sails very realistically. It helps to have the Mavproxy map to give a birds eye view. I set up the display as in the picture. The wind in 4wind.sh is from the North.

Feel free to use Mavproxy to explore setting acro and auto, adding different wind, running missions etc. You should probably RTM for more info about how the sailboat works in various modes

Next steps

I found there are still things I want to change with the setup.

  • You don’t want to get into irons, since the boat will eventually stop, and you won’t have a lot of control ( The easy way out is to change the wind direction). This isn’t quite like a real boat, which would be blown backwards.
  • I find the way the mainsail reacts to the joystick unsatisfactory in manual mode.
  • I also found the boat too fast and slippery to be realistic. It is fun to sail at high speed, but ultimately we want to simulate reality.

At this point you should commit the changes on the various custom branches of the various repos, with suitable messages.

I will discuss how I opted to customise things further next time.

2 Likes