In my quest for the best elevation data to use for terrain following I came across this site and with the help of a coworker figured out how to get this added into mission planner. Here are the steps to take to get it, you may even be able to find 1/9 arc second data for certain areas, I do believe the whole state of Alaska has 1/9 arc second data available.
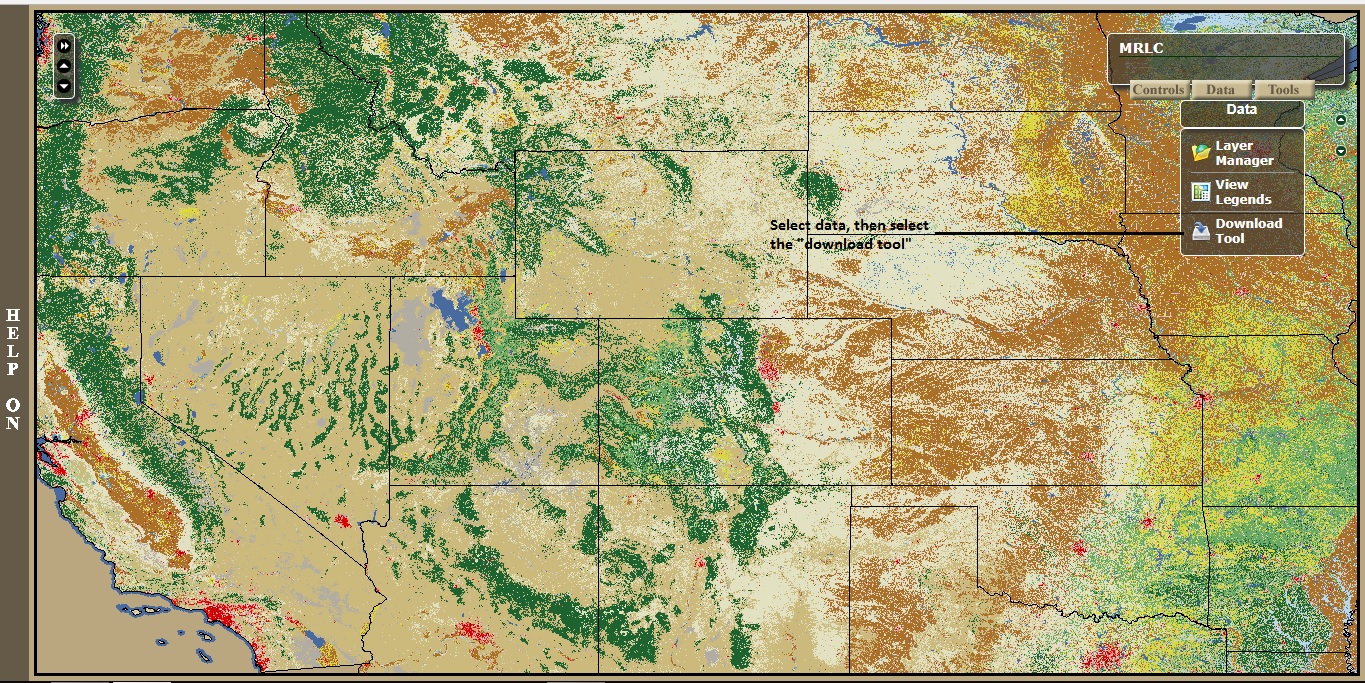
This is the link to the site to get the USGS data from https://www.mrlc.gov/viewerjs/.
It is pretty self explanatory, but there are a few hints to make sure you get geotiff instead of arcgrid. on the very left side of the map there is a help button it explains it very well how to use the viewer. Within the viewer you want to hover your mouse over the data tab, then select the “download too” see picture below for steps.
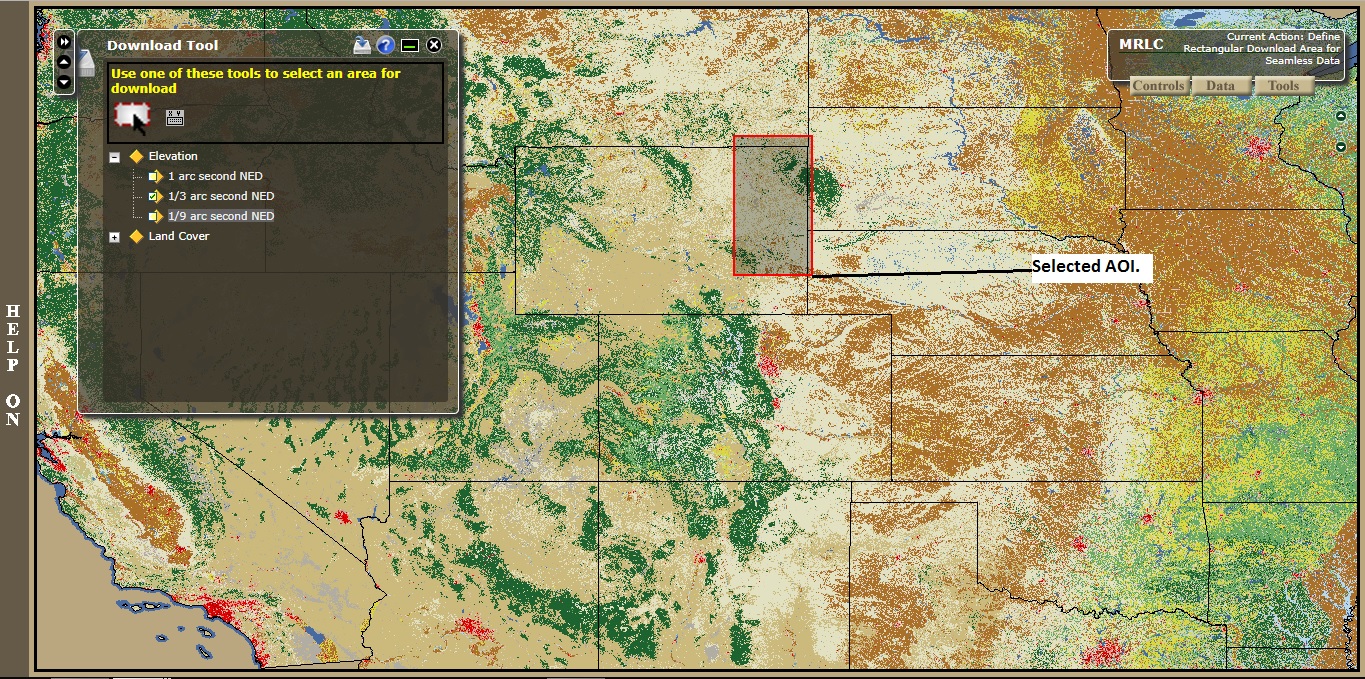
Next you can select you area of interest (AOI) by either using the red dashed box or the gray box with xy you can select you AOI, keep in mind that you can only select up to 3,000MB for your AOI. See picture below for steps.
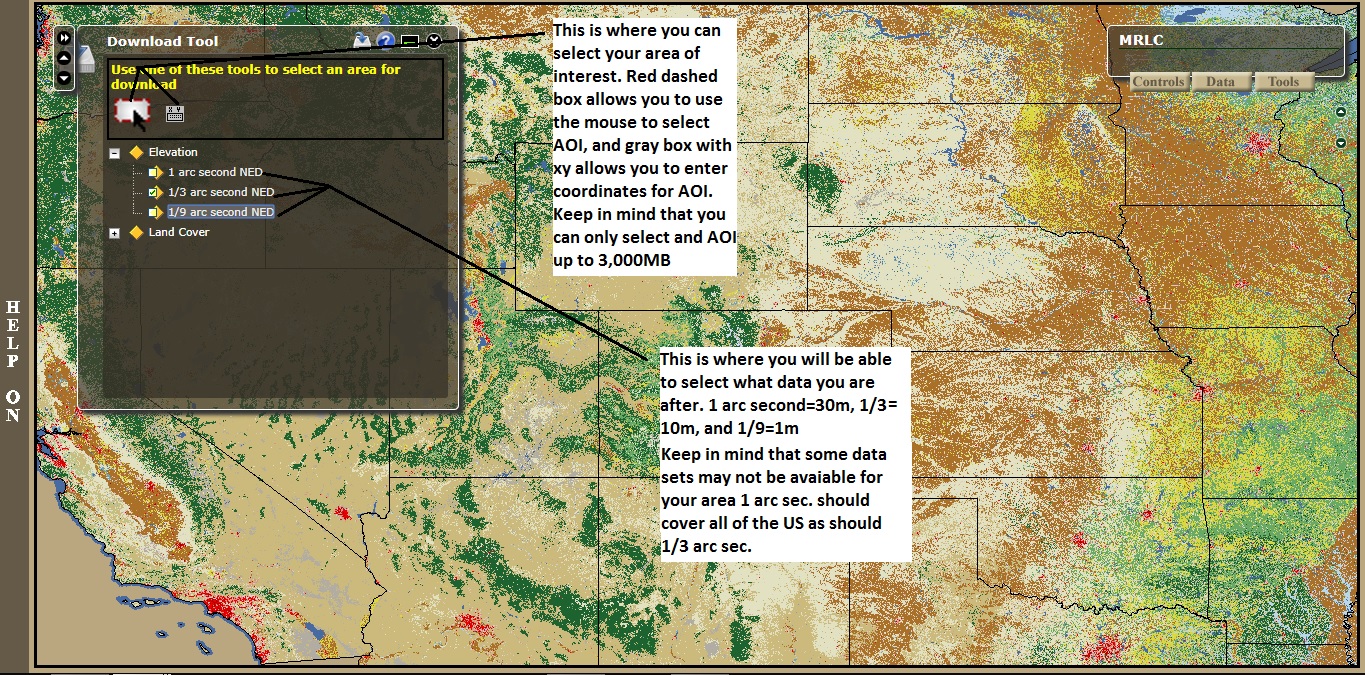
Next you can select your AOI I find it easier to use the mouse to select your AOI.
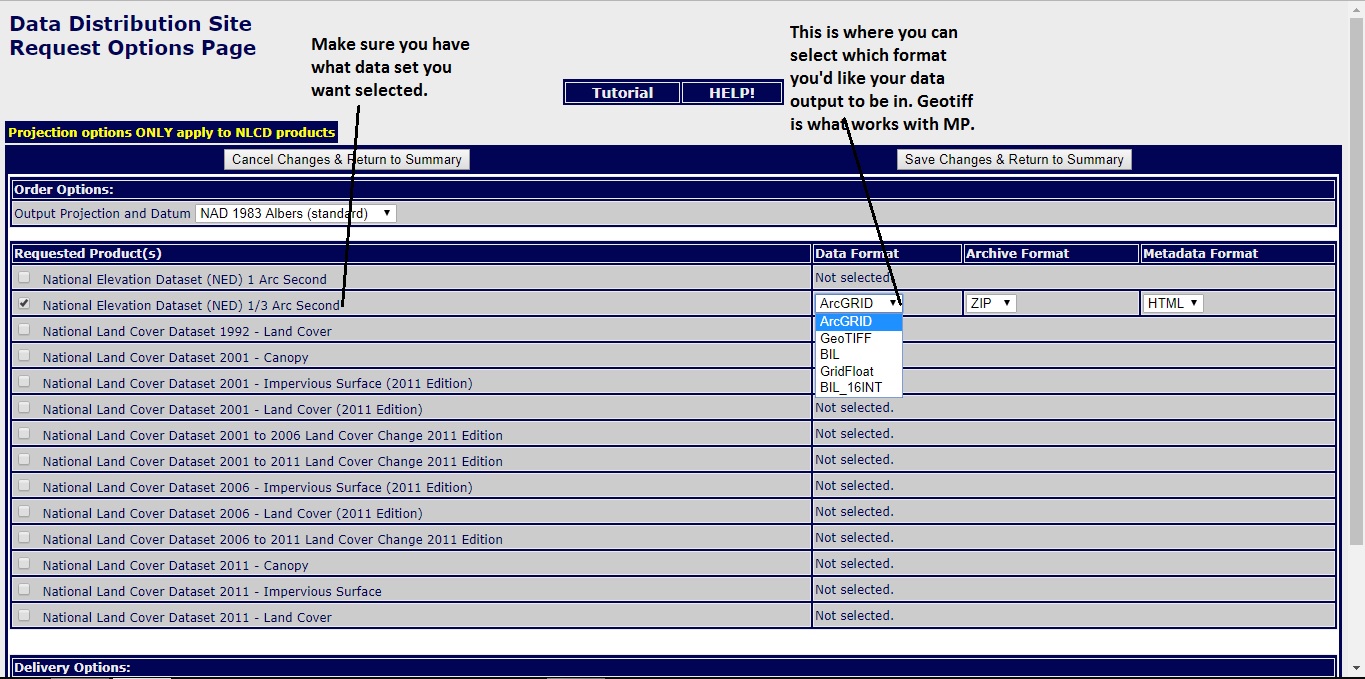
Once you have your AOI, it will pop up a data selection tool, but it will be in arcgrid format and it needs to be in geotiff format. At the top of the page you will see modify data request button, this is where you will be able to select geotiff format for the output. See picture below for steps.
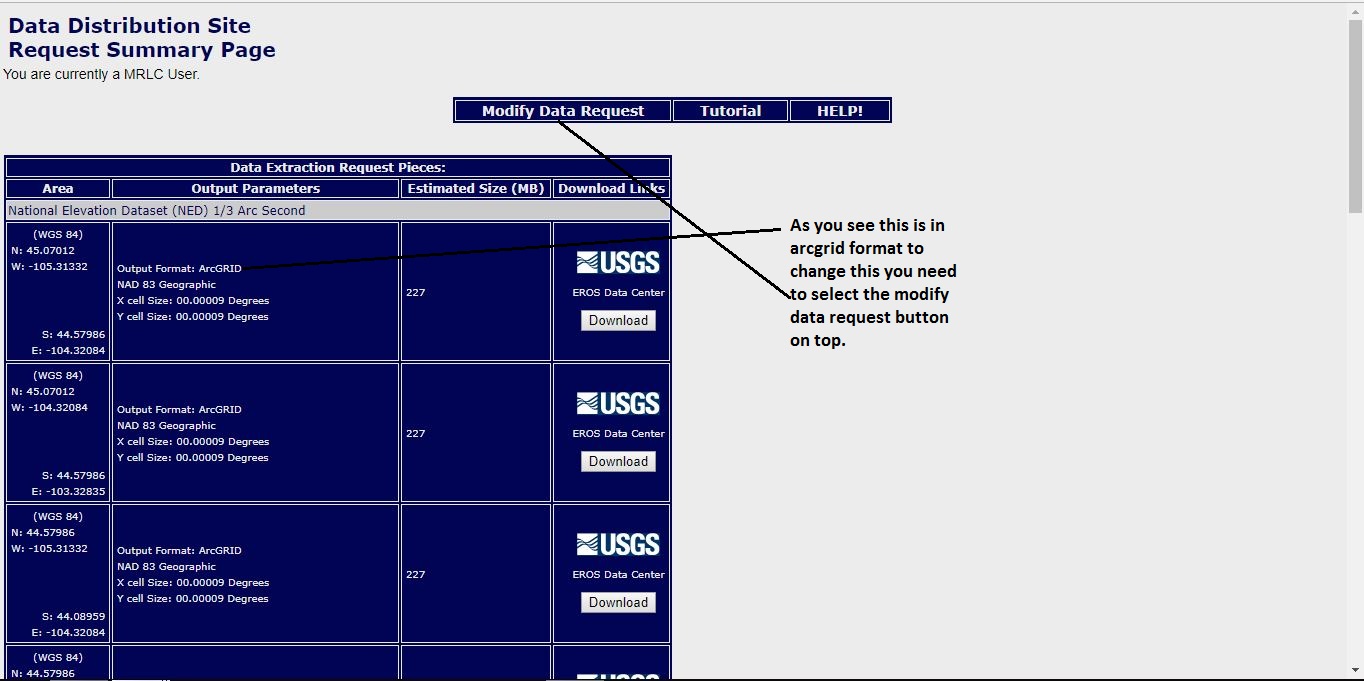
Next you want to make sure you change the format of the output and make sure you have the correct data selected that you’d like to download. once you change the data format make sure and press save changes and return to summary. See picture below for steps.
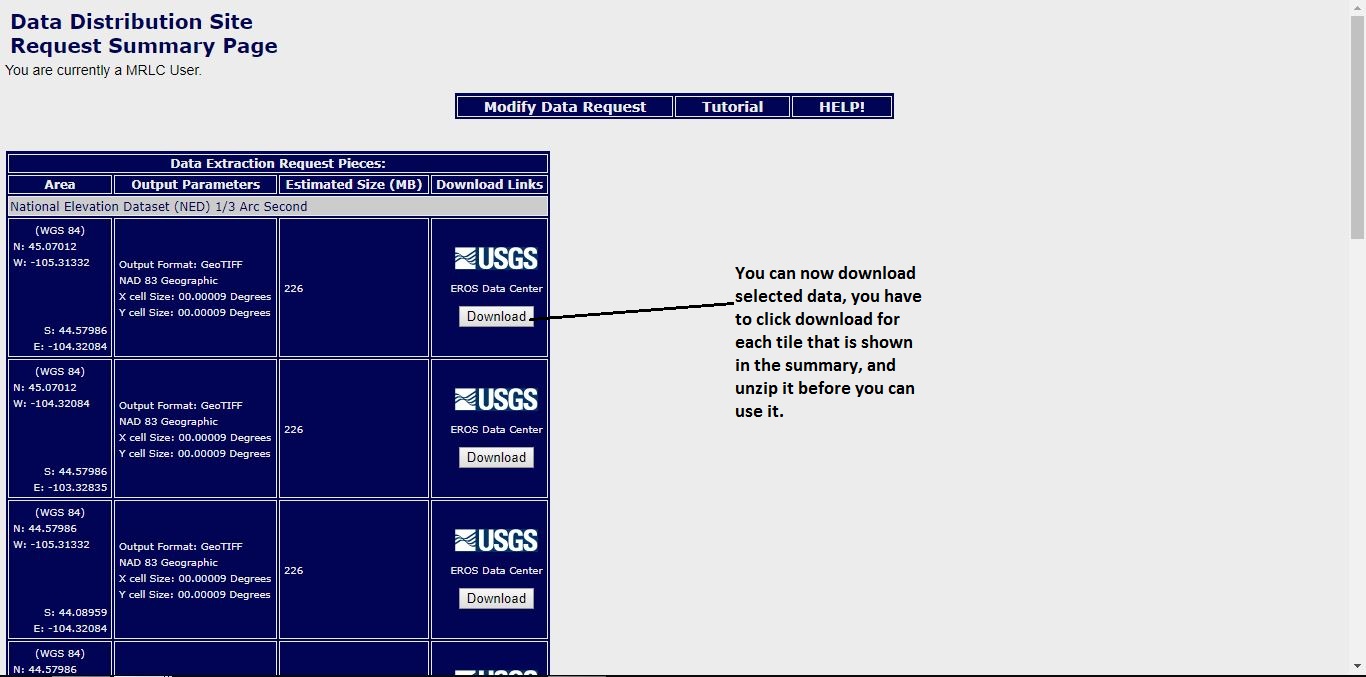
Once you are in the correct output format you can now download the data, it will be in a zip file so will have to be unzipped before you can use it. see picture below for step.
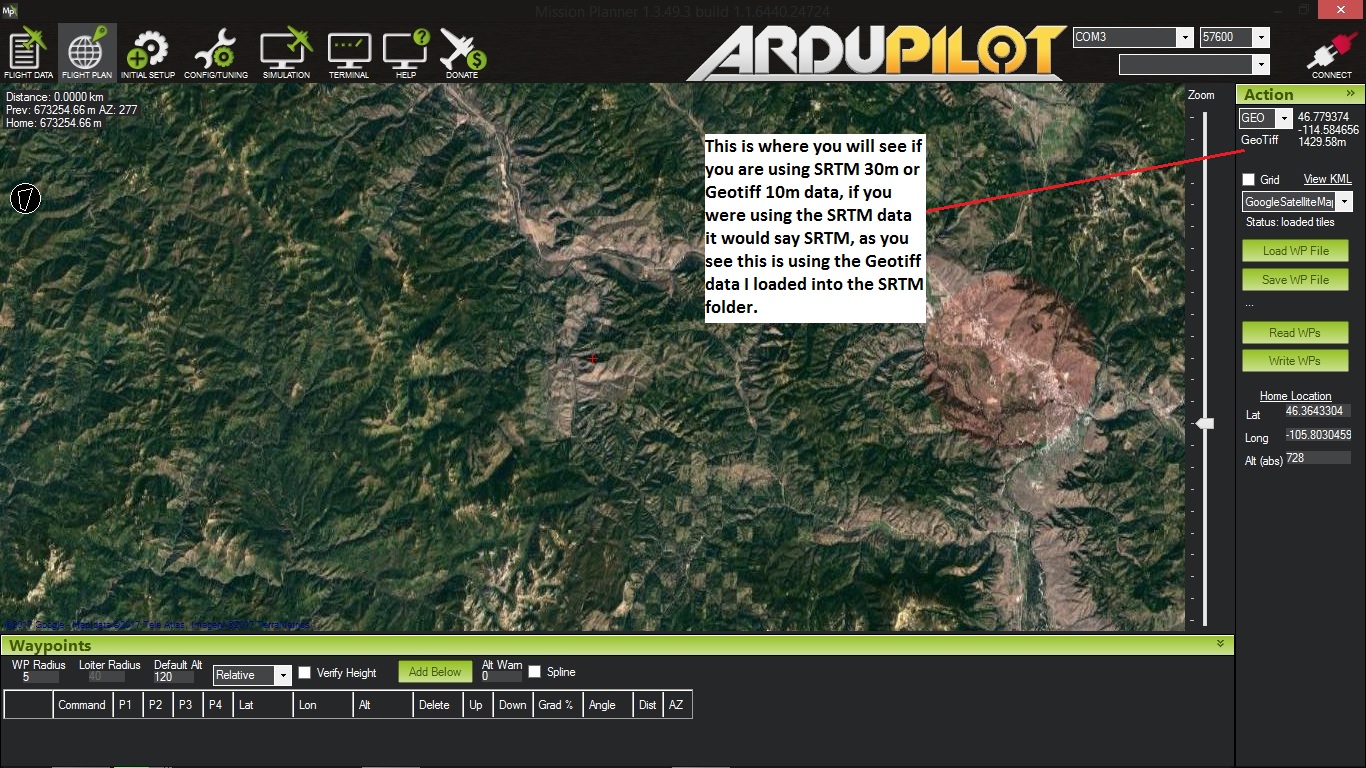
Once you have all the files unzipped you can locate this folder C:\ProgramData\Mission Planner, you will have to type that into a file exploer window to find it. Once you have that folder located find the folder labeled SRTM and open it, put all geotiff files into the SRTM folder, they will now be able to be used for terrain following and offline use. The SRTM data that mission planner uses is 30m, but if you follow these steps you will be able to use 10m terrain data. The best way to validate that you are using the 10m data is to zoom into the area where you have gotten the 1/3 arc second data for and open mission planner and go to flight plan and zoom into the area in the top right corner of the screen it will show either SRTM or Geotiff. See picture below for validation of data.
Hope this helps!
Matt