I am no expert on TF Mini’s but I did write up some directions to get it to work if this helps.
So here is how to get the TF Mini Plus working on Pixhawk I2C.
Connect your TF Mini via the supplied cables to a TTL to USB adapter.
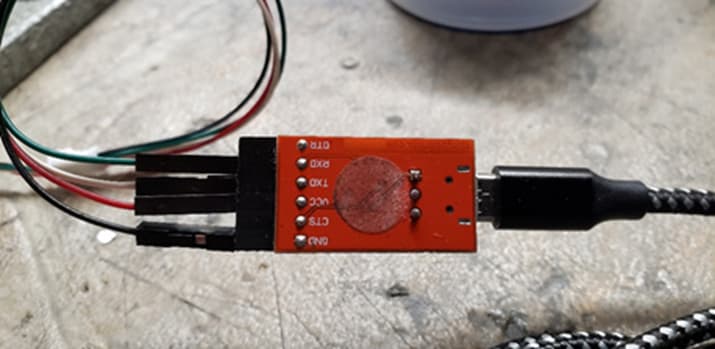
Connect via the USB cable to your PC.
If you have not already downloaded the TFMini Gui…do so from 北醒
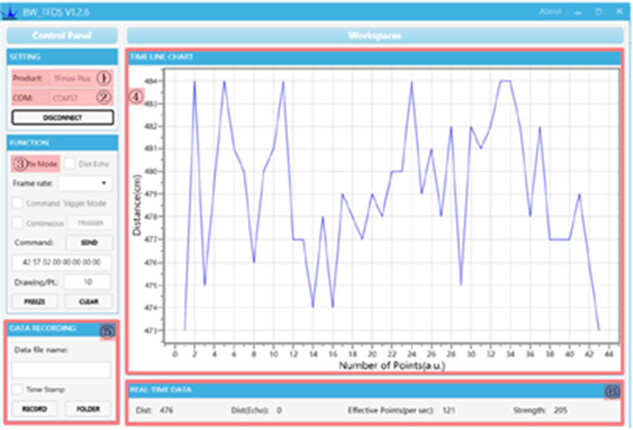
Open the Gui
Set the product type to TFMini Plus
Select the correct Com Port
Click connect.
You should start seeing distance information on the graph in the gui.
Using the command line function issue the following two commands by pasting each in the command line and pressing send

5A 05 0A 01 6A
5A 04 11 6F
The first sets the device to I2C and the second forces a save.
Nothing should appear on the graph from this point on.
Next you need to connect it to your Pixhawk or I2C hub.
Please note that the pinout on the supplied connector has the SCL and SDA reversed. You need to pull out the pins and swap them.
Please note the SCL and SDA are reversed.

You need to configure a few settings in Arducopter.
RNGFND1_ADDR,16 This is the I2C address for the Lidar
RNGFND1_GNDCLEAR,34 This the distance from the Lidar to the ground…easiest way to set it is to have the drone report the distance to the ground when sitting on your workbench and then enter that distance.
RNGFND1_MAX_CM,600 Set this as the max distance the device will be used.
RNGFND1_MIN_CM,30 This is the minimum distance for the lidar.
RNGFND1_ORIENT,25 This is telling Arducopter that the lidar is pointing down
RNGFND1_TYPE,25 This sets the lidar type to TFMini I2C
It should be working now.
Good luck