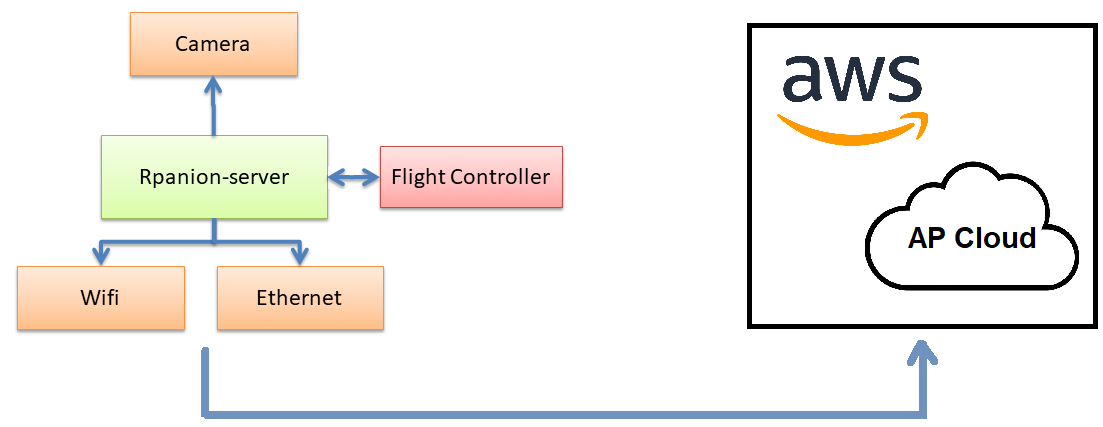
This short tutorial shows how RPanion, Amazon Web Services and AP_Cloud can be used to upload onboard log files (aka “dataflash logs”) from an ArduPilot flight controller to an AWS server and then process them using AP_Cloud.
For this test I used the following hardware
- CubeOrange flight controller running ArduPilot Rover-4.2 (but any ArduPilot compatible autopilot running any recent version of AP should work)
- RPI4 (but should also work with Raspberry Pi 2, 3, 4, Zero2 and Jetson)
- Pi-Connect Lite to make connecting the RPI to the autopilot easy
ArduPilot configuration
The ArduPilot changes enable sending the onboard logs (aka dataflash logs) to the companion computer in real-time (via MAVLink).
- set SERIALx_BAUD = 921 (or even 1500) to enable highspeed mavlink communication with the companion computer (“x” is the telemetry port number connected to the RPanion)
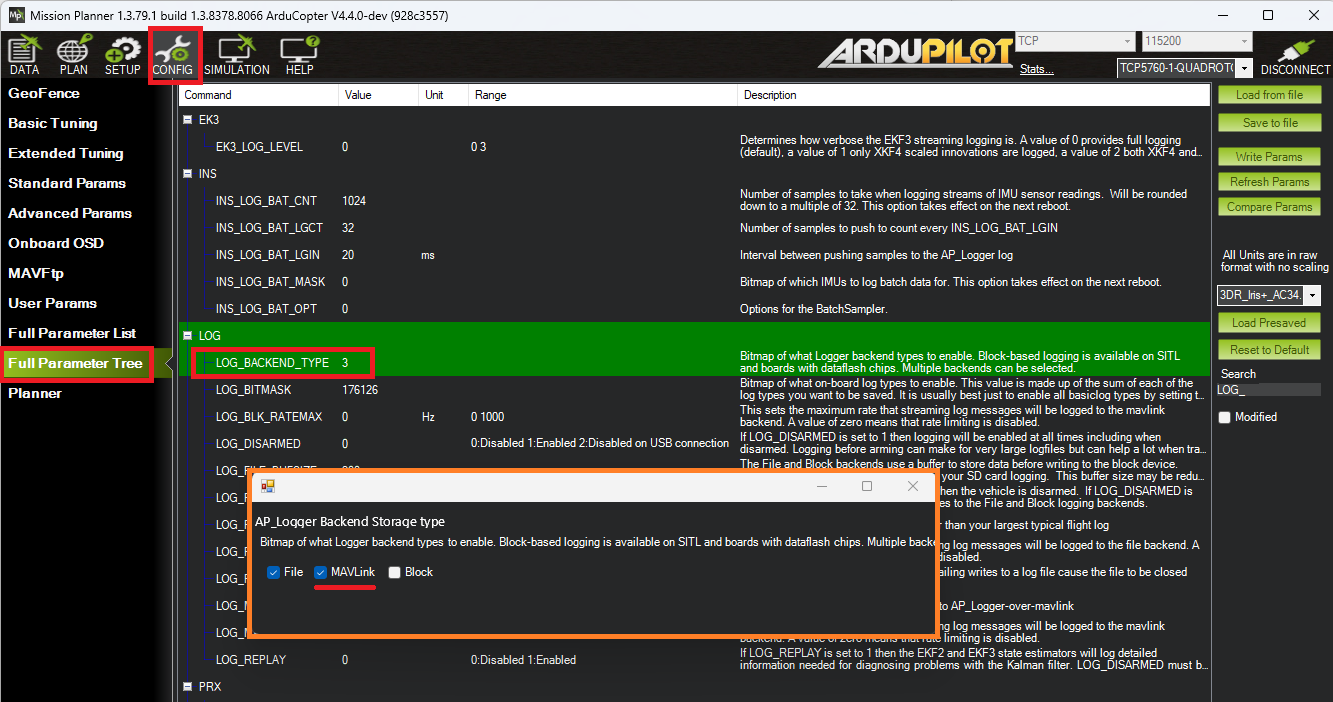
- set LOG_BACKEND_TYPE = 3 (File+Mavlink) to enable sending the onboard log file to the companion computer in real time via MAVLink
RPanion setup
In this step we install RPanion on the RPI4, configure the connection to the autopilot and confirm the autopilot->RPI4 log transfer is working.
- Install RPanion ver 0.9 (or higher) using the instructions here
- Power-up the autopilot and RPanion and connect to the RPanion web server
- the easiest way is to connect to the “rpanion” wifi access point and then open http://10.0.2.100:3000/
- another alternative is to plug in an ethernet cable and use your local network router’s interface to determine the RPI’s IP address and then use a modified version of the address linked directly above.
- On the FlightController page’s Serial Input section set the Baud field to 921600 (or 1500000) to match the autopilot and MAVLink version to 2.0
- Reboot the autopilot and RPanion and then confirm the logs are uploading correctly and arming and then disarming the vehicle (or set LOG_DISARMED = 1, wait a few seconds and then reset to 0) and then check a new log appears on the RPanion’s FlightLogs screen’s Bin Logs section.
Next we use Putty or another SSH client to generate a keypair which is used later to allow the RPanion to upload to the AWS server
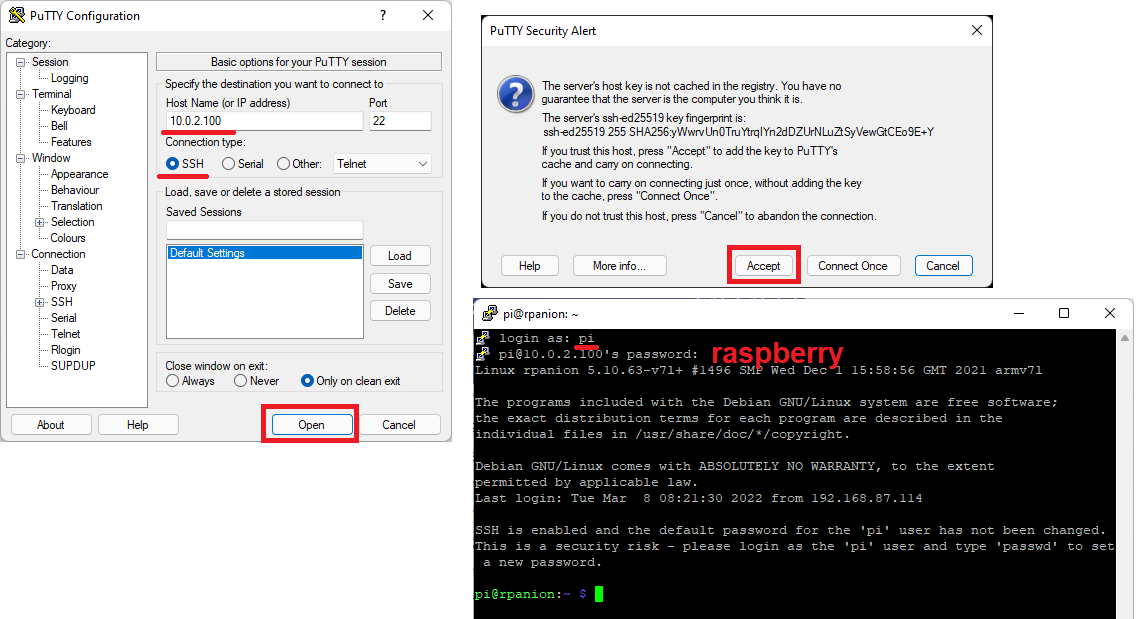
- Open Putty and connect to 10.0.2.100 using SSH
- When the login appears, provide username/pwd pi/raspberry
- cd .ssh
- cat id_rsa.pub and copy and paste the contents to a text file on your local PC (this will be used later to allow the RPanion to SSH to the AWS server)
AWS setup
In this step we configure an AWS server to receive the log files from RPanion
- Create a AWS account by pushing on the Create a Free Account button here. Select the “Root User” option
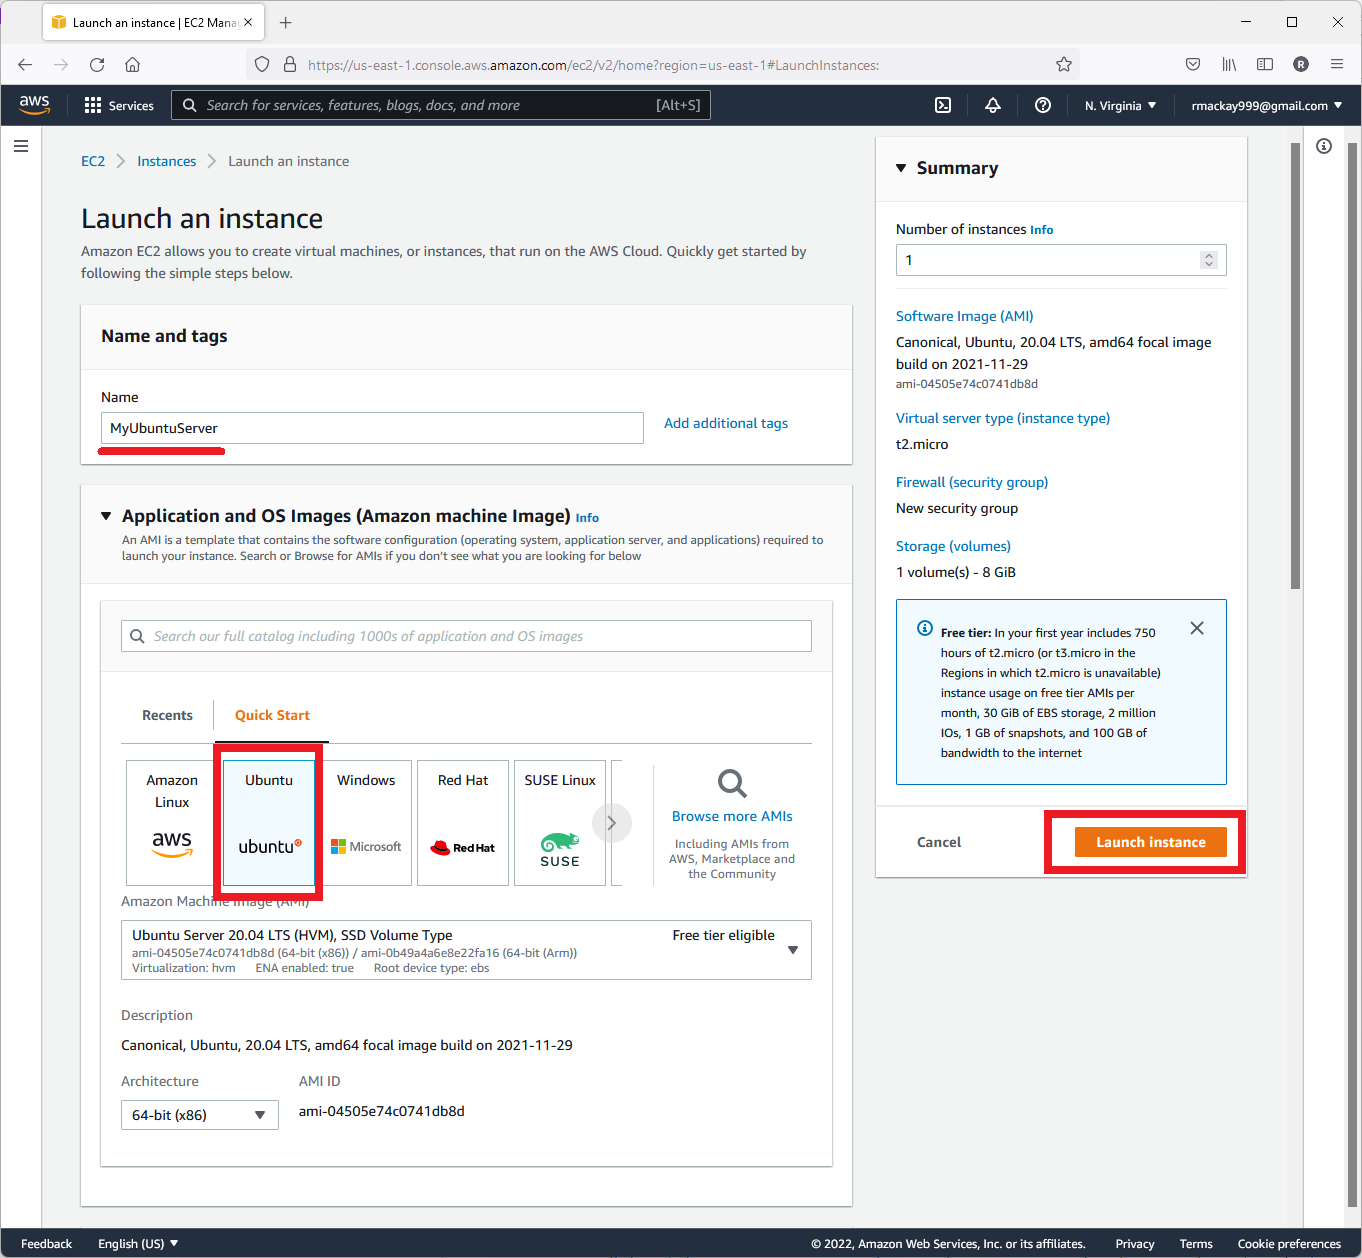
- Open the AWS Console Home, select “Launch a virtual machine With EC2 (2 mins)”
- select “Ubuntu Server 20.04 LTS”
- push “Create new key pair” and save the .ppk or .pem file to your local PC in case you later which to connect to the server from Putty or similar terminal application (these instructions do not require this key)
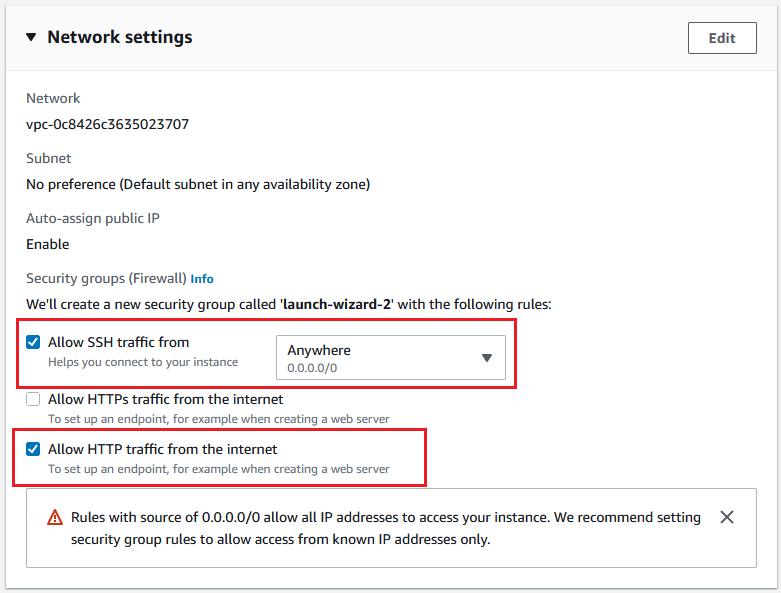
- In Network settings, enable SSH (to allow RPanion to upload logs) and HTTP traffic (used later by AP_Cloud’s web server)
- push the “Launch Instance” button
- select “Ubuntu Server 20.04 LTS”
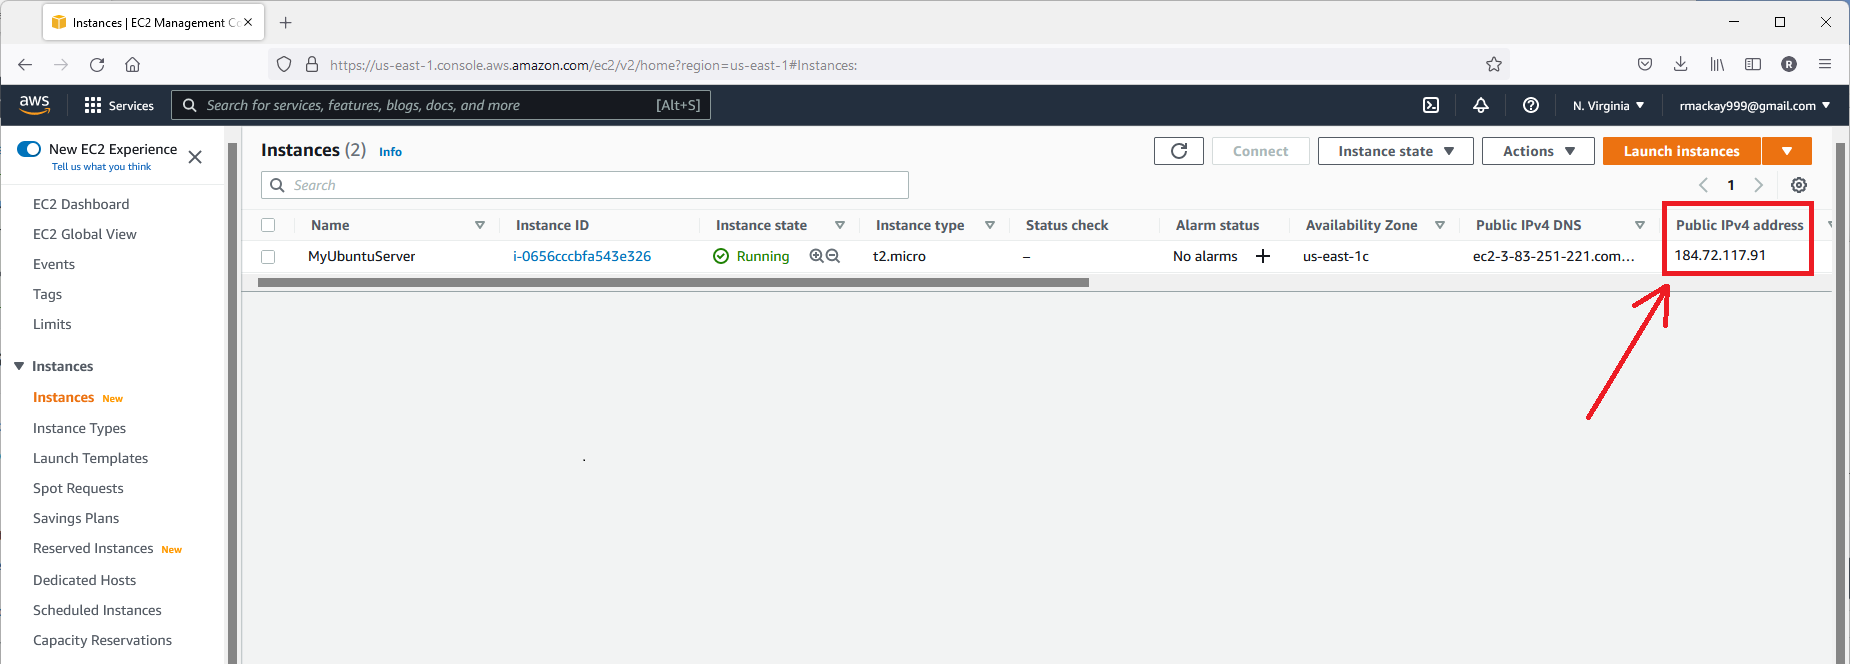
- From the AWS Console, select Instances, look for the “Public IPv4 address” column which holds the server’s IP address
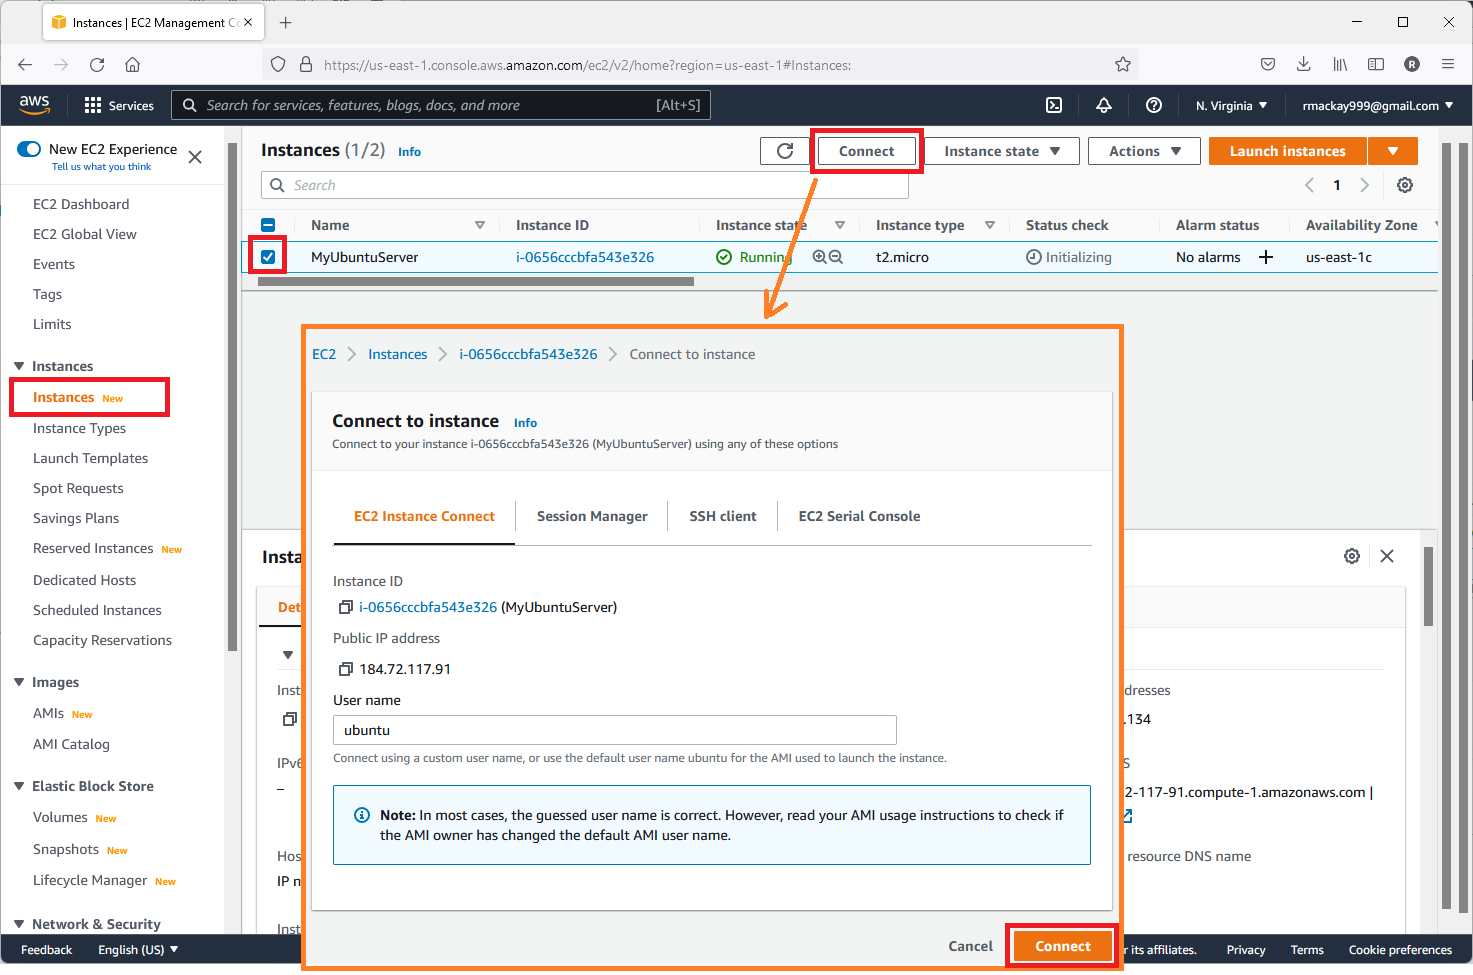
- From the same screen, start EC2 Connect by checking the checkbox for the server and press Connect and Connect again.
- type “mkdir logs” to create a directory where the logs will be stored
- type “cd .ssh”
- “vi authorized_keys” and then “i” and Ctrl-v to paste in the rpanion’s public key captured in the “RPanion setup” stage. press “wq” to exit vi and then close the window. This allows the RPanion to connect to the AWS server
Enable RPanion’s Cloud Upload
First we manually check that SSH to the AWS server works
- On your local PC, open Putty (or similar) and connect to the Rpanion (e.g. 10.0.2.100 using SSH)
- When the login appears, provide username/pwd pi/raspberry
- In the console type “ssh ubuntu@xx.xx.xx.xx” where the Xs are replaced with the AWS server’s IP address
- Reply “yes” is asked about “The authenticity of host can’t be established”
- If it successfully connects this confirms the RPanion can connect so type “exit” (or just close the window)
Configure “Cloud Upload”
- Open RPanion’s web interface (http://10.0.2.100:3000/)
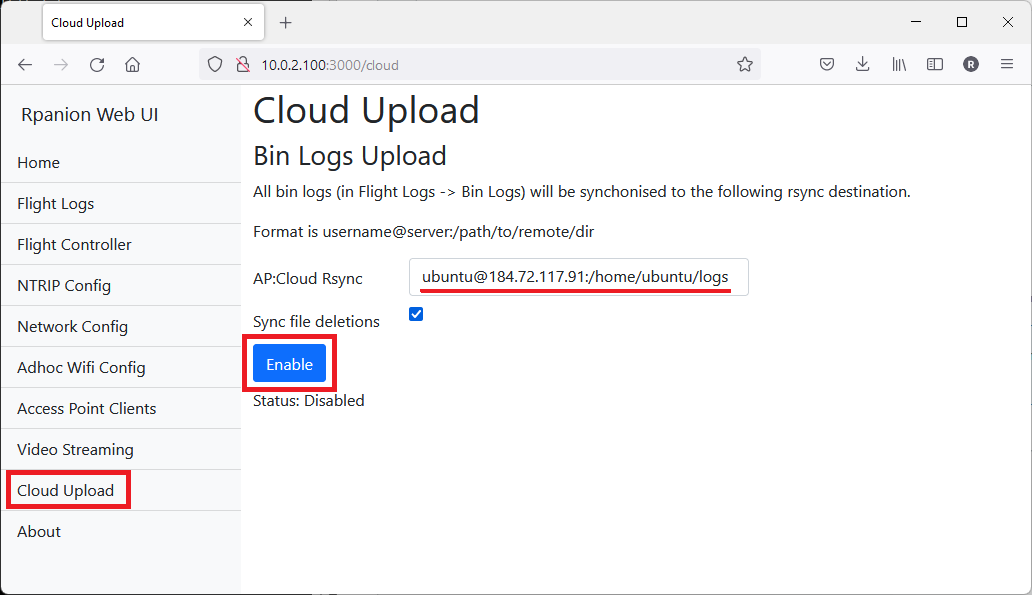
- On the Cloud Upload screen, in the “AP:Cloud Rsync” field enter ubuntu@x.x.x.x:/home/ubuntu (where “x.x.x.x” is the AWS server’s IP address and press “Enable”. After a few minutes “Success” should be displayed
- If after a few minutes “Status: Success” is displayed then you can be confident that the upload has worked but if you wish you may double check using the AWS’s EC2 Connect feature and type “ls logs” and confirm the files are there.
Install AP Cloud on AWS server
AP Cloud installation instructions can be found here but more specific and verified instructions are as follows
- Connect using EC2 Connect by going to the AWS Console, select Instances, check the checkbox for the server, press Connect and Connect again
- Install MAVProxy (see instructions here)
sudo apt-get updatesudo apt-get install python3-dev python3-opencv python3-wxgtk4.0 python3-pip python3-matplotlib python3-lxml python3-pygamepip3 install PyYAML mavproxy --userecho "export PATH=$PATH:$HOME/.local/bin" >> ~/.bashrcsource ~/.bashrc
- Install nvm (see instructions here)
curl -o- https://raw.githubusercontent.com/nvm-sh/nvm/v0.39.1/install.sh | bashsource ~/.bashrc"nvm install 12nvm use 12-
node -v(should return v12.22.10 or higher) npm install
- Allow Node.js webserver on port 80 without running as root (see here)
whereis node-
sudo setcap 'cap_net_bind_service=+ep' /usr/local/bin/node(Note: change final path with output from “whereis node” line above)
- Install and run AP_Cloud
cd ~git clone https://github.com/ArduPilot/AP_Cloud.gitcd AP_Cloud- with your favourite editor modify AP_Cloud/config/default.json and change “port” to 80 (was 8123)
source ~/.bashrc"node index.js
Change RPanion’s Cloud upload location
- Open RPanion’s web interface (http://10.0.2.100:3000/)
- On the Cloud Upload screen, in the “AP:Cloud Rsync” field enter ubuntu@x.x.x.x:/home/ubuntu/AP_Cloud/logs/drone1 (where “x.x.x.x” is the AWS server’s IP address
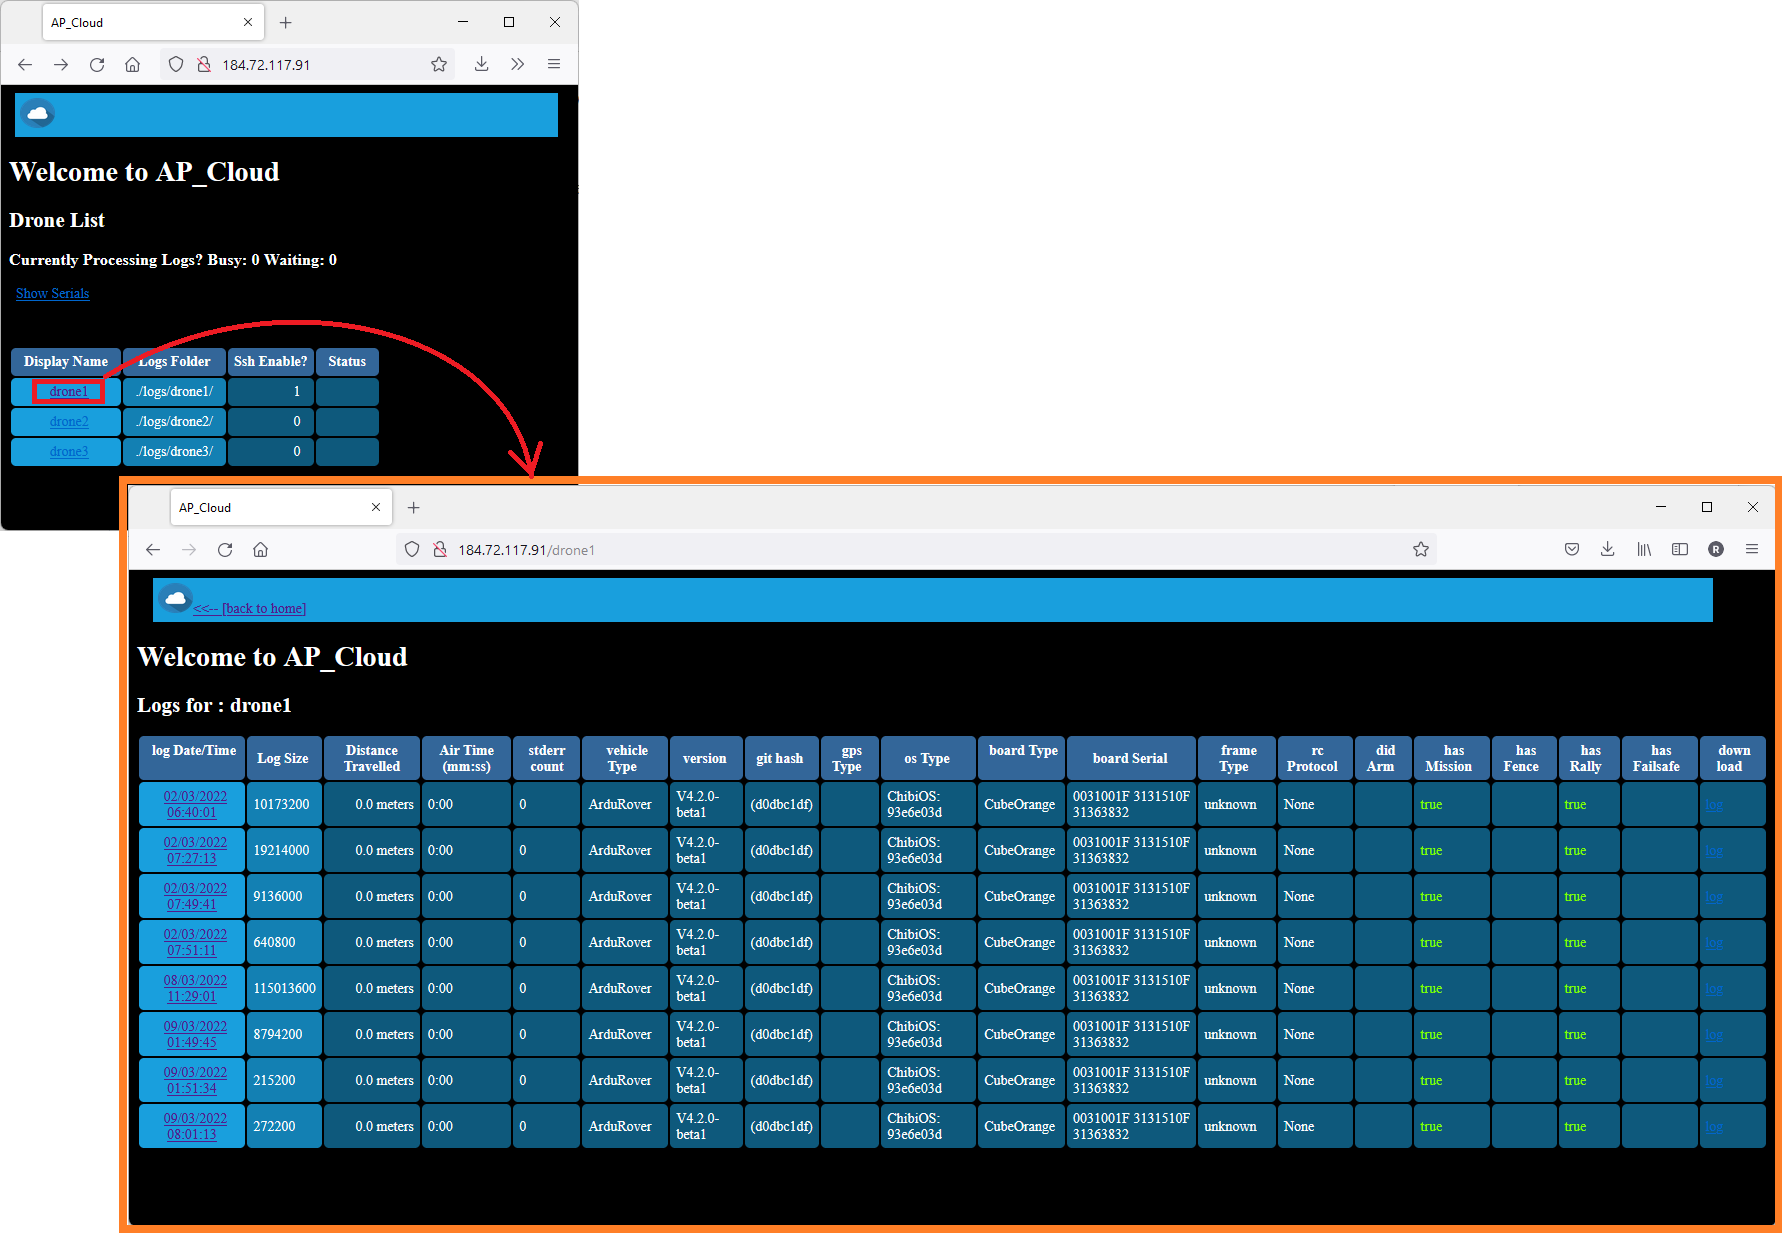
Open AP_Cloud by opening a browser on your local PC and type the AWS server’s IP address into the address bar. Click on “drone1” to see meta data extracted from the logs and a link (on the far right) to download each log.
Thanks very much to @DavidBuzz and @stephendade for their work on AP Cloud and RPanion respectively!