OK… I am looking for options for a short range telemetry solution. I have a small foam plane (Nano Goblin) that I am running a Matek405-CTR in. I woulds like to be able to use some sort of wireless telemetry solution for short range, really just need for adjusting settings and pre-flight setup/checks. I would normally use a small 900MHz telemetry radio, but the Nano Goblin is small, and I am using FrSky R9MM for the RC receiver, a 900 MHz system. Any suggestions?
Well, if standard SiK radios are too big, you have a couple options.
in theory, yaapu script can setup to be able to change parameters, but that is not finished or stable yet. But it is perfect for checking status and get feedback during flight.
If you use 2.4 rx, you can stick to the 900Mhz SiK radios, they are based on HM-TRP modules, with a 3.3V regulator and a HM-TRP module you can have a 900Mhz radio (Antenna can be a piece of 1/2 Lambda wire) The catch is that you need a ST-Link programmer to upload Radio firmware for the HM-TRP module. https://www.aliexpress.com/item/32284559867.html
If you need only check and adjust parameters on the ground, you can use a simple serial-bluetooth module, it can provide connectivity for 5meters range.
If you move away from 2.4G radio, then an ESP based Wifi module (for example a CUAV PW-Link) also a good option, it provides around 20-50meter connection…
Sik Radios are basically a HOPE RF HM-TRP module but with a different firmware. Since original HM-TRP modules does not have the right bootloader, you need a ST-Link programmer to upload the bootloader and firmware for first time.
Changing parameters would not happen much after initial tuning, likely. So a majority of time it will be downstream telemetry.
I have a ST-link programmer from one of the Dev boards I got for a ST microcontroller, so I should be able to program that if necessary, but would need to go to 433MHz, which is not a problem.
I use ESP8266 WiFi radios on many of my models for setup, configuration and short (very) range telemetry. It’s minuscule in size and weight and is ~$5. Logs can be downloaded but it’s slow. These are easily flashed with an FTDI adapter, after that it can be done OTA. I use the ESP-01 boards but there is more info here: https://ardupilot.org/copter/docs/common-esp8266-telemetry.html
Hi @Eosbandi,
please could you point in the right direction how to write a bootloader on a HM-TRP using a ST-Link?
As far as I know I would need a “Silabs C2” programmer to do this.
I have a few bricked ones (without bootloader) which I would like to revive.
They seem to be made from “unobtainium” today.
I don’t find the pinout, but you can figure out the gnd/+3v3 and the data clock is 50% chance to get right at first (you have to use 3v3 to power the module). The programmer connections are the four holes on the panel beside the processor
The wiring diagram can be found in the source code:
/// @page hm_trp_programming Programming the HM-TRP Board
///
/// The HopeRF HM-TRP board conveniently provides pads for programming
/// the Si1000.  These are the four 2mm-spaced holes next to the LEDs,
/// near the edge of the board ('o' in this picture).
///
/// +-----------~~
/// | O #:#:
/// | O = +------+
/// | O = |      |
/// | O   |      |
/// | O o +------+  <- C2CK
/// | O o     +-+   <- C2D
/// | O o # # | |   <- VDD_MCU
/// | O o     +-+   <- GND
/// +---^-------~~
///     |
///  This row of 4 holes.
///
/// The SiLabs programmer has a 10-pin ribbon cable, for which you will
/// need to make an adapter.  The User Guide, linked from the page here:
///
///  http://www.silabs.com/products/mcu/Pages/USBDebug.aspx
///
/// describes the pinout of the cable.
///
/// WARNING: The SiLabs adapter provides 5V on the USB Power pin.  DO NOT
/// connect this directly to the VDD_MCU pin on the HM-TRP module, or you
/// will (probably) destroy the chip.  If your HM-TRP board is mounted on
/// a breakout module that supports 5V input, you can connect USB Power
/// there.  If not, you must arrange for your own power supply, either by
/// adding a regulator to your cable or by using some other power source.
///
/// Connect the SiLabs debug adapter to the HM-TRP as follows:
///
/// Debug Adapter Pin:                 HM-TRP pin
///
///        2 <--------------------------> GND
///        4 <--------------------------> C2D
///        7 <--------------------------> C2CK
///       10 <-> 5V to 3.3V converter <-> VDD_MCU
///
///
/// @page hm_trp_hookup Connecting the HM-TRP Board
///
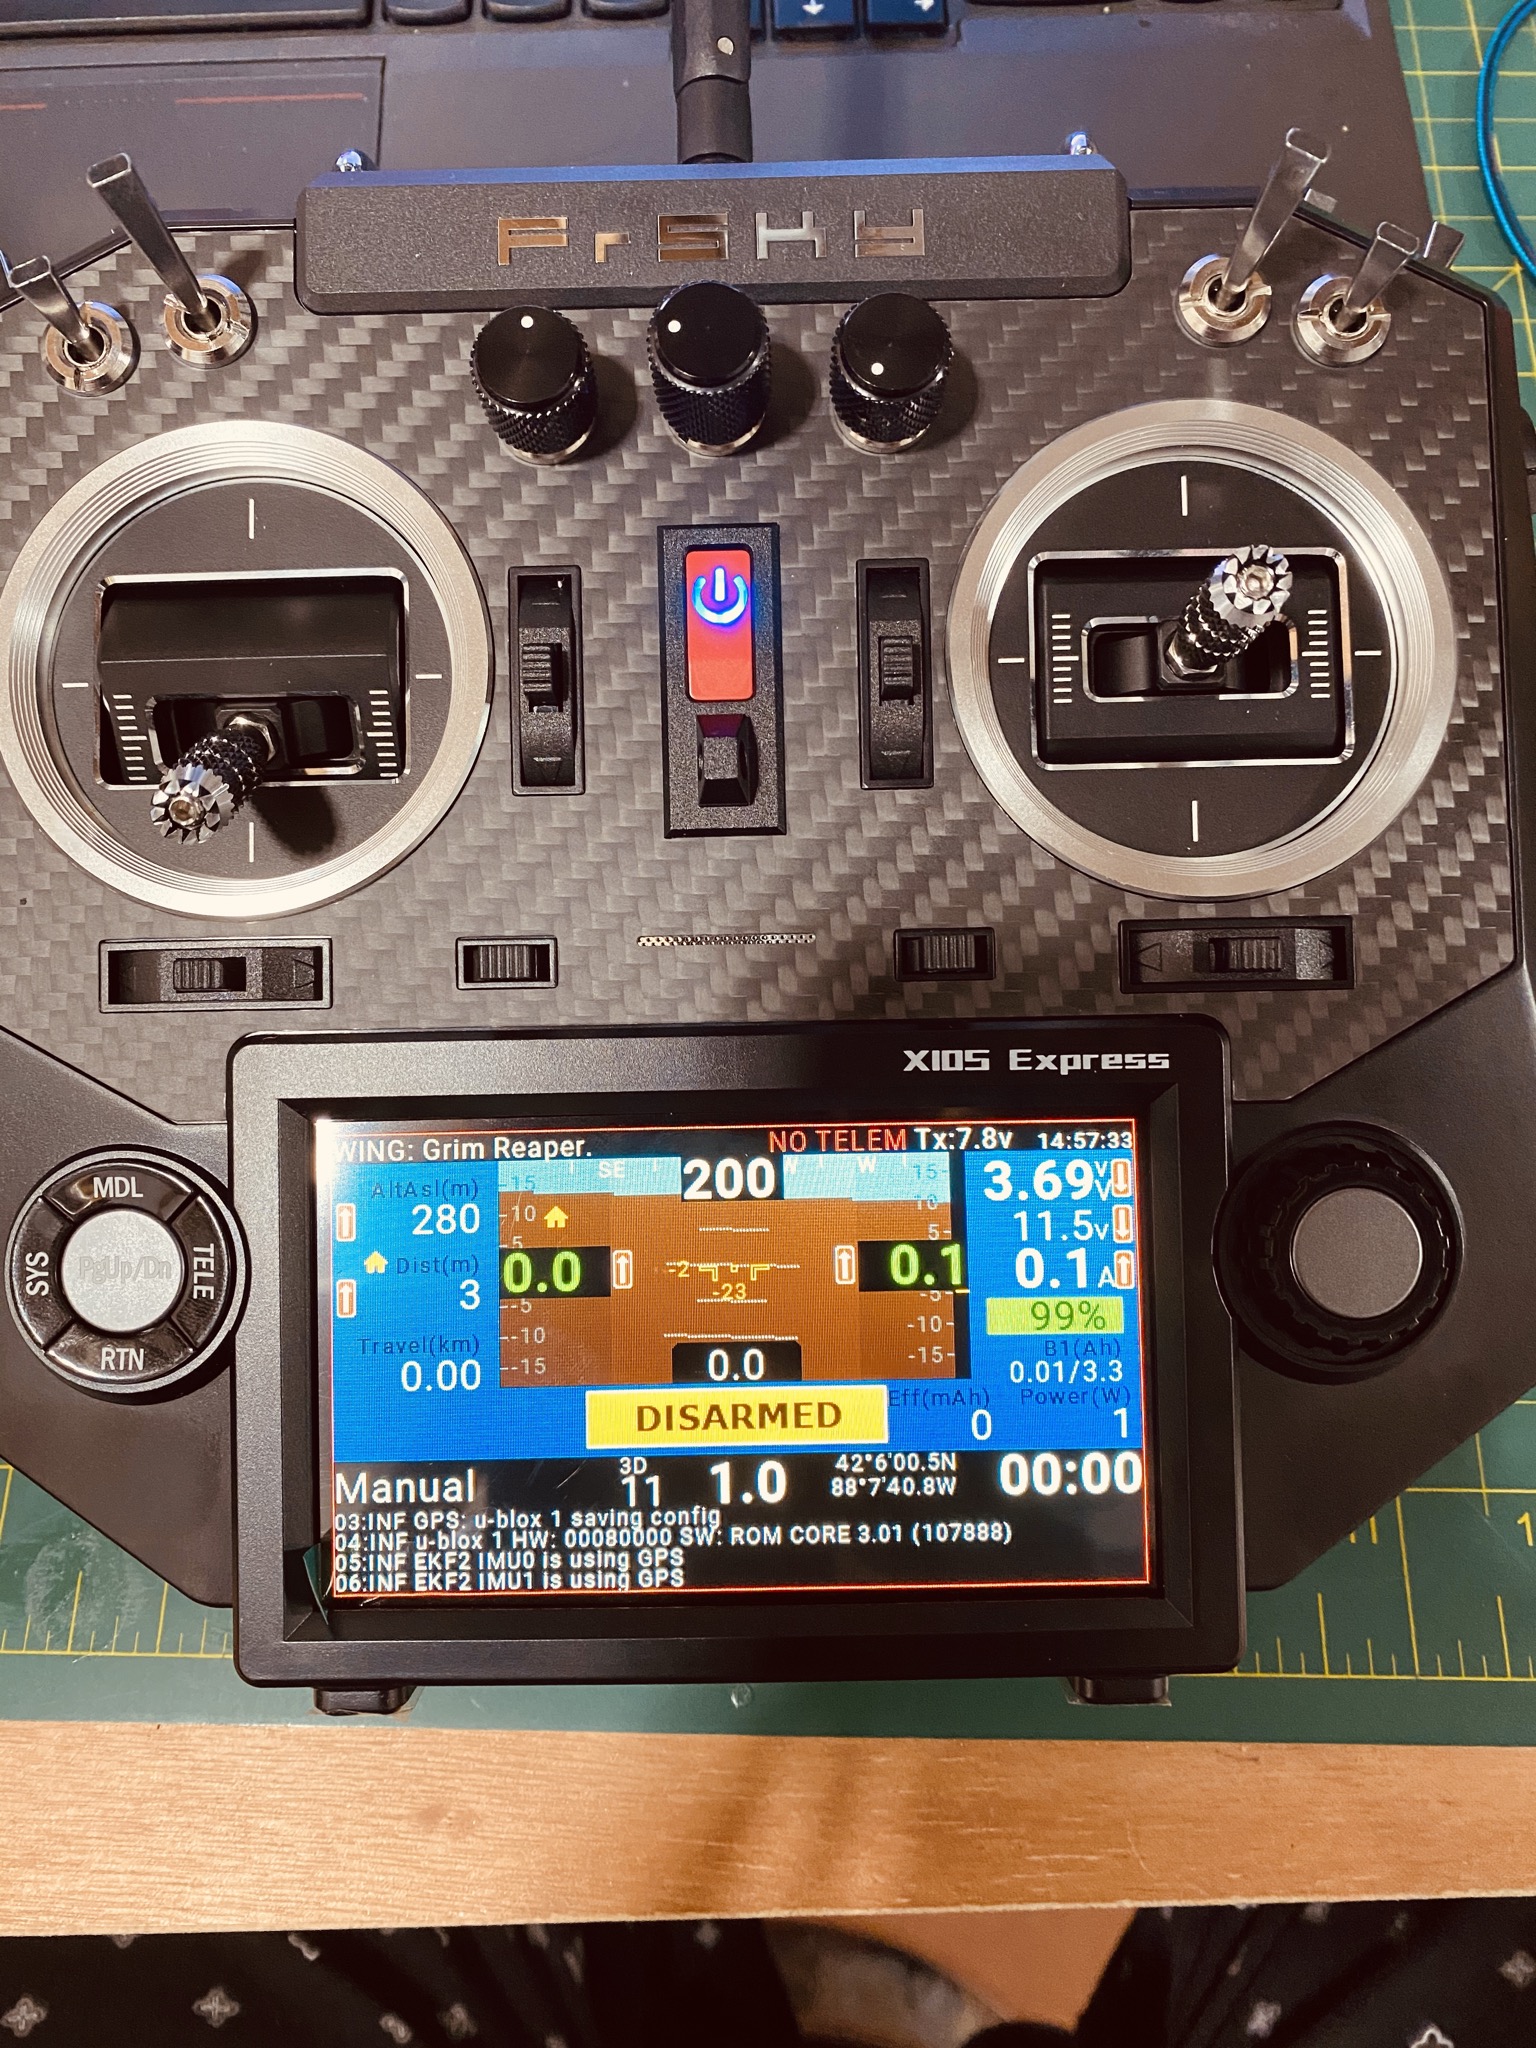
 Mission planner HUD inside my radio. Just awesome…