Now that it is flying, I think it’s time to let you know what was my Project, just in case I could help someone who could have a similar target.
HEXACOPTER
Pixhawk 2.1
T-Motors 2814-Kv710
ESC Opto 40 A
13x4.4 CF Propellers
Battery 4s. 8000 mAh
Retractable landing gear
2x TF Mini
Gimbal with Hero4 camera.
750 mm. 3D printed frame.
Weight: 3.5 Kg with everything on it.
I think it will be a long post as far as I would like to introduce you in the design process, so, if you are interested, thank you for reading till the end. Of course, any suggestion will be appreciated. Sorry for my English, but I will try to do my best.
The initial goal was to design an UAV with a 3D printer. I know, nothing new, but I started on my own, with a white sheet of paper. I also didn’t choose a powertrain kit. At that moment, I even didn’t know about ardupilot, and never flown a drone, so everything was really from zero. That was more or less one year ago…
First step: Choosing a frame. I thought about making an hex. An hexacopter looks like more “pro” UAV, and also more capable just in case I would need a bigger battery or I would like to carry a photogrammetry camera. An hexa can work better than a quad for the design of frame was thinking about. It is important to consider that you would need 6 motors, 6 ESC, 6 arms… so an hexacopter easily multiplies the budget of a quad by 1.3.
Second step: Powertrain calculation. Again I started from a white sheet of paper. Now that it is finished I think that miraculously it works. I should have looked more for other similar UAVs, but I started brave. First I had to estimate the weight of a drone that didn’t exist. Then every composition I checked in eCalc had some warnings. I was quite lost. There were many parameters and nothing really designed. I just knew I wanted a navigation UAV. I mean, not a racing one, not a heavy lifter, just something that could move a camera in a stable way for around 20 min. Then, playing a lot with eCalc I found three different combinations that could fit. With this information I composed an excel sheet with the weight of every component. At that time, I had an estimated weight of 3.2 Kg.
In this way, I miss an introduction category in ardupilot forum in which we could introduce our UAV with its main specifications. It could help as a primarily design point for many users.
Third step: Selecting the motors and recalculate. With eCalc data I went to ebay and I found a good offer for a pack of T-motors 2814 with 40A Opto ESC. ESCs were too big, but motors were great for the price, so I didn’t miss the offer. Then, with the motor specifications sheet I decided the size of the propellers, the battery and everything became ready for the frame design.
Fourth step: Choosing a controller. I was thinking about pixhawk 2.1 and naza v2. Now I am really happy with the pixhawk 2.1. Arducopter works very nicely and it also opened the door to this community in which I have really learnt a lot.
Fifth: Drone design. With Freecad I started the desing of the UAV parts. Based on the cars self-supporting bodies, I designed a dodecagon frame in three layers. Middle layer would contain the Power distribution board, the arms, the landing gear and the Pixhawk. The upper decker would contain the GPS and would give rigidity of the body and the lower layer would contain the camera and the battery. The three parts were to be joined with bolts. In this way, I can redesign one part keeping the other two.
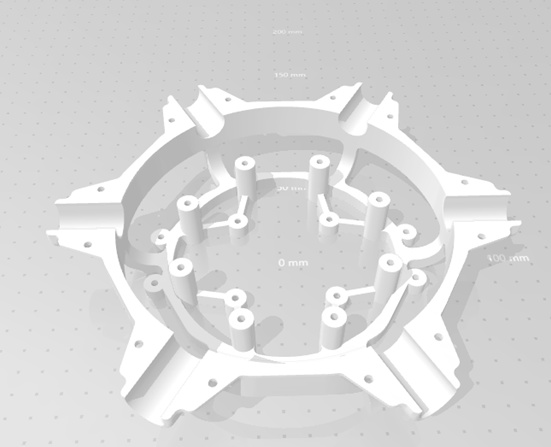
3D design of the middle part of the frame.
To me, that was the main part of the project, and I dedicated a long time to it. Some parts were calculated with FEM to make a strong and light design. In the first version of my drone, the wings were also printed in my Box UP 3d Printer. I will go back to this point at the end.
First prototype. Arms made with ABS. The top part became too heavy and quite flexible. That first design was not well optimized.
Sixth: Assembling everything together. That was enjoying. One full day welding, screwing…
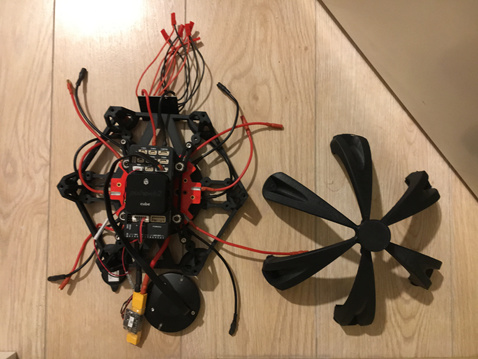
Picture taken during the assembly process of the first prototype.
Seventh: Wiring. I had read about placing the ESC far from the IMUs to avoid interference. That is right, but I couldn’t imagine how many wires and volt levels there are in a simple UAV. 5 V: TF minis and ESCs. 12 V. Leds, Landing gear and gimbal, and finally 4s (14,8 V.) motors. Imagine all the wiring for these things and then the telemetry, the receiver, the GPS and so on. I didn’t think that much about this point and it is something I will have to improve for future designs. As a tip, use a good and big power distribution board, and two BECs (One for 5 V. and another one for 12 V.) and then redistribute the wiring properly around the frame.
Eighth: Configuring MP and the radio. There is a lot of information on these points in youtube. Just watching and copying.
Nineth: Ground testing. Well, many things were tested as I was assembling them. I remember when I connected the telemetry radio to the MP. It was like WOW, a kind of magic. Turning on/off the leds from the transmitter or deploying the landing gear with one stick, really keeps you motivated.
Finally: Flying and crashing the hexacopter. It just took off and flipped around. Come on, what would you expect! It was a newly first design. There were many things that could give problems. Maybe a motor spinning to the other way, maybe ESC not calibrated…
So Redesign and courage to try again. At this time of the project, some amount of stubborn is welcome.
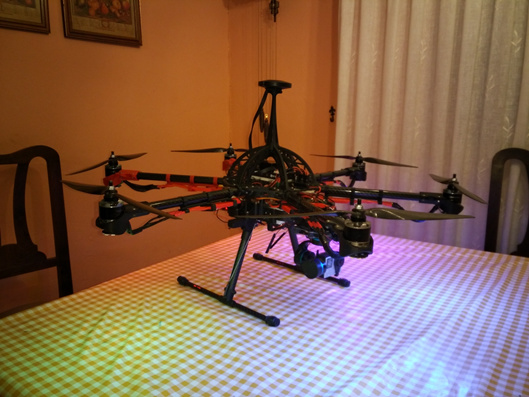
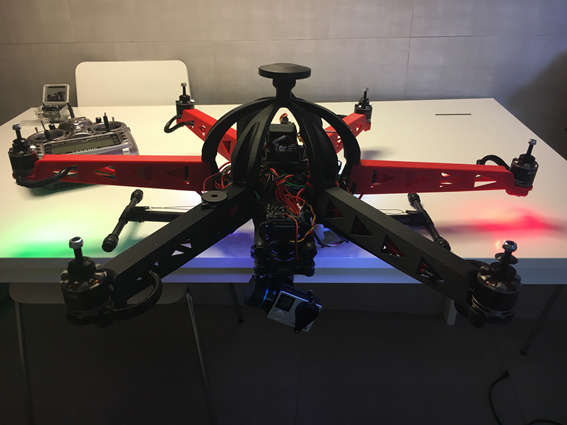
Evolution of the HEXA project, with CF arms and a truss top part frame.
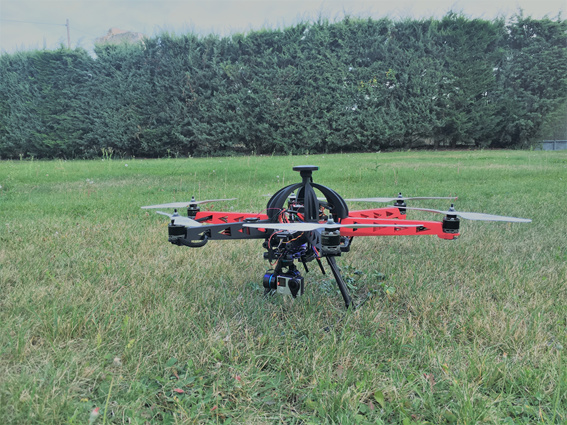
And Last: Maiden flight.
When you have designed up to the last part of the drone, you have done all the calculations, the wiring and finally you see it climbing itself to the sky… this feeling is sublime and unbeatable. Well, I have dedicated that many hours to this project that I feel a bit scared when flying, but as far as I don’t crash it, I am gaining confidence.
Some design improvements during the project.
Rectangular carbon fibre arms are the best solution for medium to big size UAVs. I couldn’t find rectangular ones so I bought circular tubes, but now I have a small problem to orient the propellers exactly upwards. Rectangular ones are stiffer and easier to integrate in a 3d printed frame. For the next design, they will be foldable. A rigid medium size UAV is very uncomfortable to handle.
Motor Supports. I have seen motors attached directly with bolts to the arms. Of course, this is a very light solution, but I made a 3d printed connector. It allows to attach the motor at the end of the tube. It is nice and helps a lot to reduce the motor and propeller vibrations. Also, in case of accident, this part would protect the motor and it is easy to reprint.
The frame itself. In my case, the drone has a total weight of 3.5 Kg. In the initial design, 250 g. were for the center frame (the lower, the middle and the upper layer of the center frame). During the second design was 210 g (but a bit too weak). In the last design, it came up to 263 g. Now the frame is much more rigid and much more resistant to hard landings. 50 g. is not a lot in comparison with the 3.5 Kg. of the UAV, but robustness and stiffness have improved a lot, which are important for a stable flight.
Accessories: I am a technology enthusiast. So I wanted my drone with many, many things. Retractable landing gear, rc switched leds, gimball, lidar for collision avoidance… Now I am happy with those things working, but I also enjoy flying in stabilize mode, and that many controls make me nervous. I think I use all the switches of the transmitter and many times I can’t remember what every switch does. In this way, sometimes less is more. Remember: More weight, less flying time.
Pros and Cons of a 3d printed medium size frame.
Pros:
The first one is a personal motivation. As I have a 3d printer, and I enjoy designing things, I wanted to make this project in this way. I know it is not an objective, but a powerful reason.
Customized design. It is possible to design each part of the copter to contain as many components as you want. One place for the gimbal, one for the leds, one for the receiver, and so on. In this way you can have a tidy design. I should have worked a little more with the wiring, but anyway, it has an impressive DIY design that I like.
Vibration dampening. I think that 3d printed parts are good vibrations from the motors and propellers. Special care must be taken to ensure enough stiffness while keeping weight low. A flexible design would be a cause of instability.
Accessories accessibility: As there is a place for each accessory, I can easily remove, and connect any of them.
It can keep improving. Some parts have five or six versions. I can easily improve the design of one part, in order to reduce weight or to increase strength.
In case of a crash, it should be easy to reprint one part. Also 3d printed parts should break before and therefore protect other expensive components as the gimbal or other sensors.
Cons:
It is heavier than a UAV with the same stiffness and the same strength done with carbon fibre plates (if both are designed properly).
You need a detailed design for 3d printed parts. That means that you will need much more time and some drawing skills. In addition, some parts need more than 20 h. to be printed.
The joining of the frame and the arms was difficult. I solved it with bolts, but there were so many that I decided to use titanium bolts and nuts to keep the weight.
Summing up, 3D printed frame is a good possibility, as far as it is possible to make parts strong enough with a limited weight. To achieve this, a special care in the design must be taken.
As always, a very good frame design could be made with 3d printed parts and CF mixed properly.
For a small quad, a 3D printed shell could be a very good/strong/light/customized solution, but my next project will probably be an X-Octa.
Regards.