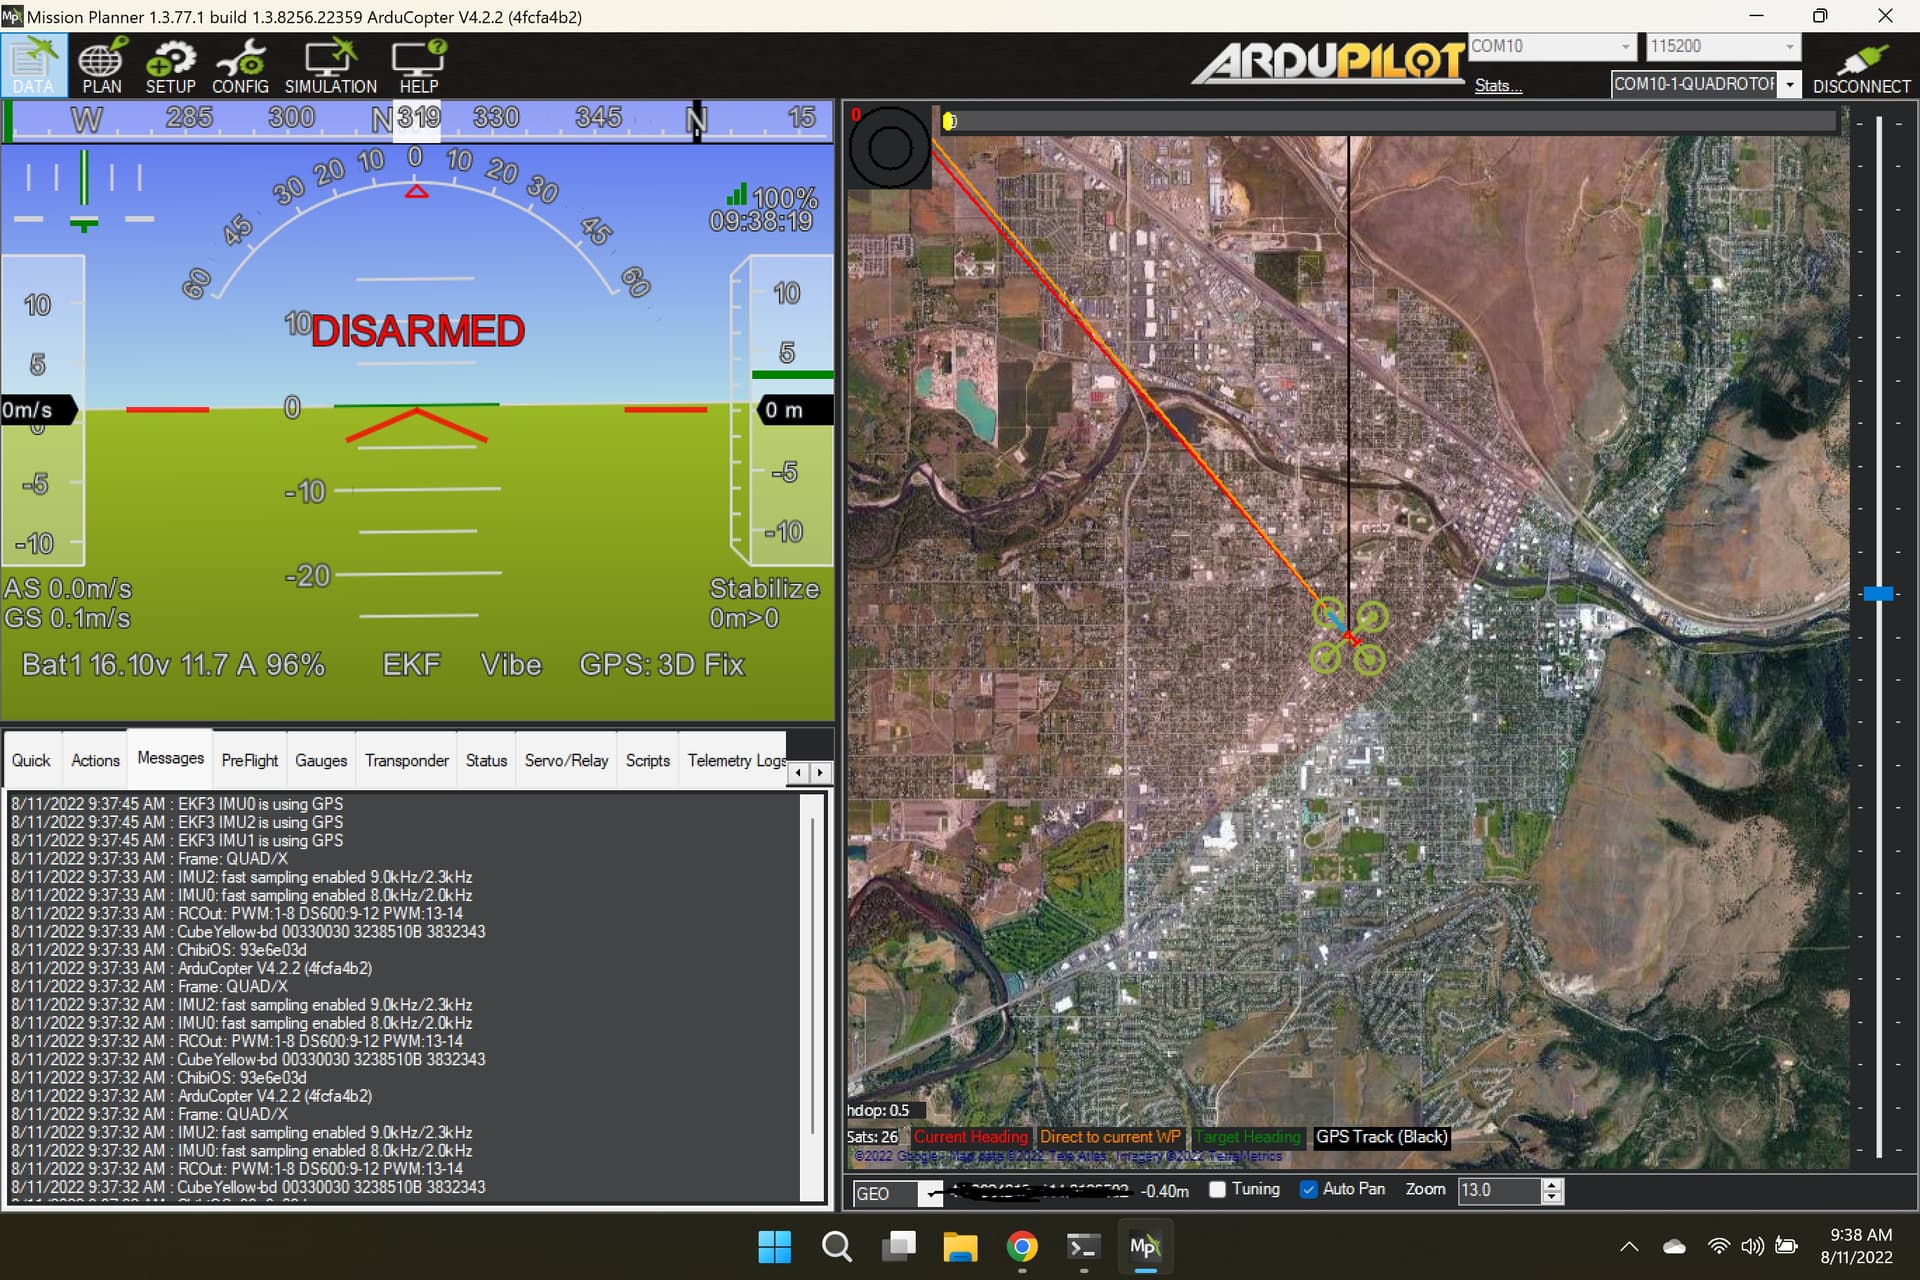
I have had this sitting for awhile and finally am getting around to flying it or at least trying to hahaha. I initially didn’t realize that there was a stable version of cube yellow bdshot so I went with dev, I also had all disarming check shutoff (shame on me I know). I ran through the initial setup for a 9 in prop on a 4s battery and have been using this as a starting point on all my builds to get ready for tuning. This initial flight was to get a hover in so I could setup the notch filter so FFT was enabled and then use autotune. Upon take off in STAB it would be ok for the first second then begin to oscillate so I set do and halved all the parameters from the above pre-tuning guide
( 1. ATC_RAT_PIT_P
2. ATC_RAT_PIT_I
3. ATC_RAT_PIT_D
4. ATC_RAT_RLL_P
5. ATC_RAT_RLL_I
6. ATC_RAT_RLL_D)
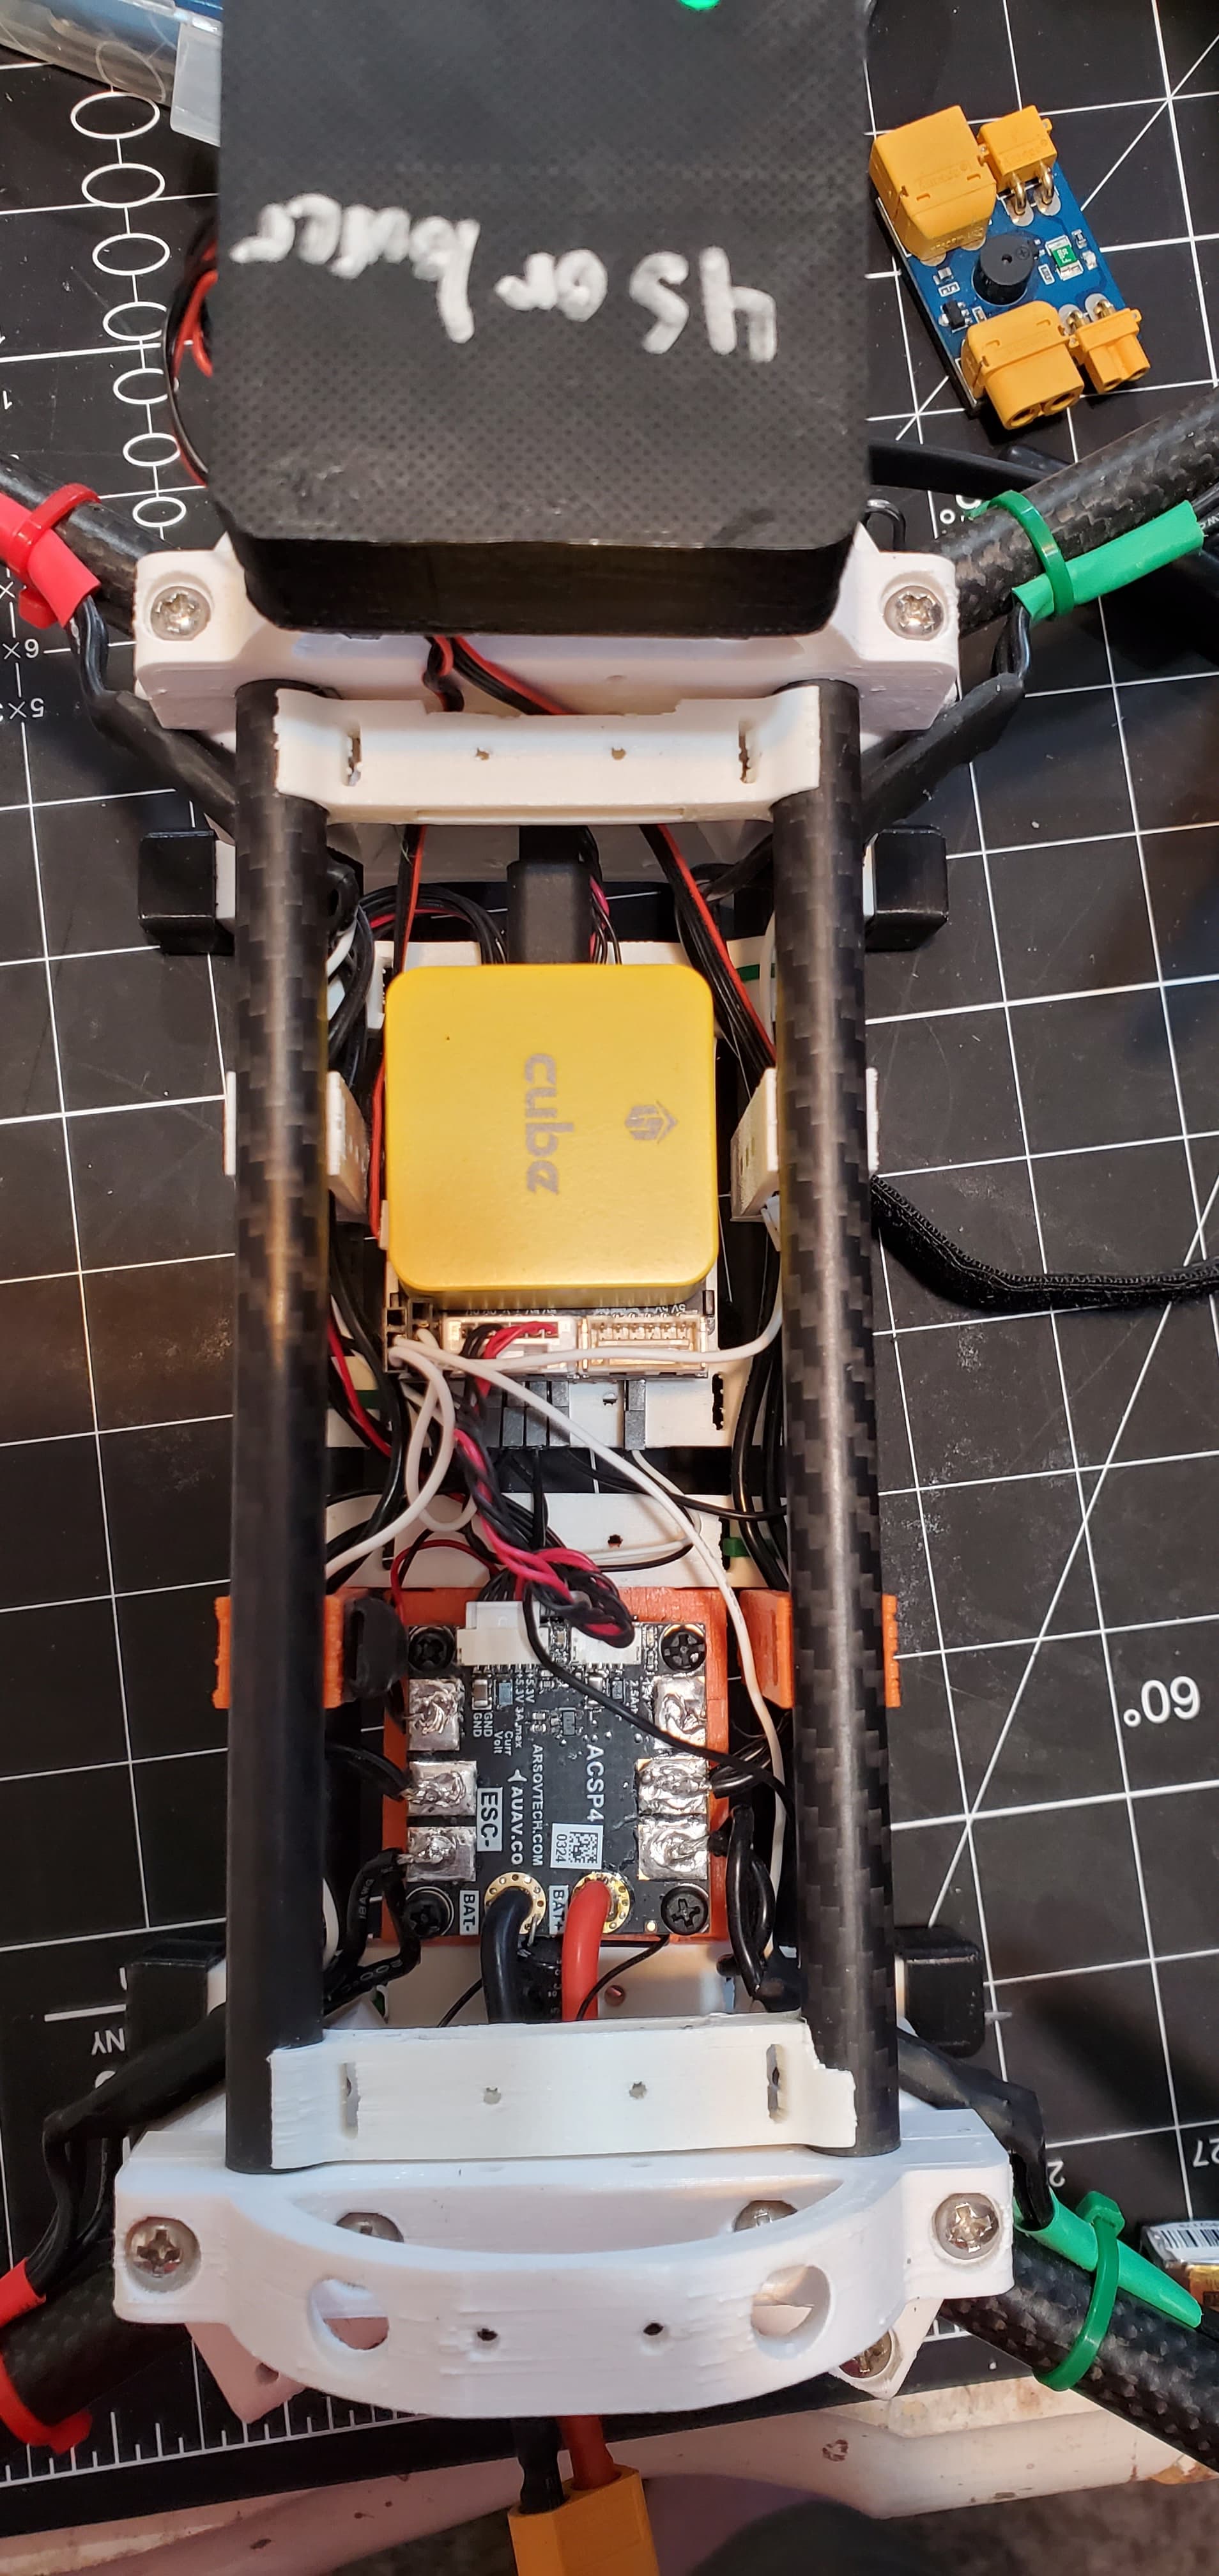
The second flight didn’t seem to be much better after doing so and I am worried that my motors my be a bit off (they have to be a bit off with how hard it hit the first time) they at least looked good to the naked eye and this handy little motor level I printed, what are the parameters in the bin file that can help look at motor skewness and is a positive value more forward and negative value more back? As I only had one battery, I only did two short flight. I have looked at the desired vs achieved on the PIDs and they are not bad at all actually. I will also mention that when power up this cube yellow it take a bit longer than all the rest of my cubes (yellow, black, orange, blue) to power up and if I try and plug the USB in with the buzzer given in the kit the USB will not power just sits there and gives a faint clicking noise so I have to remove the buzzer connection to get it to power via a USB without the battery plugged in. which seems fairly odd as though there is a short somewhere. I also noticed that when I fire up the cube and read the messages in MP when initializing that it never state BDshot on even though I have MOT_PWM_TYPE set to 5 and SERVO_BLH_OTYPE set to 5 which per my reading is both dshot300 yet it never says this on startup like all other quads that have it set. I also may have something set wrong for the BLH setting such as the bitmask as I get confused between all the different flight controllers and the mcu/iomcu stuff. I will also admit there were some hard landings so there will be some spikes in vibes and more than likely some clipping from those hard landings. dev-frame.param (17.2 KB)
Above is the param file and it will show 4.2.2 but that was because I just uploaded it when I realized there was a stable version but I changed nothing from when 4.3.0 dev was on it when I flew.
That’s because you have the Bdshot mask at 0 (SERVO_BLH_BDMASK,0)
Set this back to default (0) you don’t need it.
Dshot600 is generally more stable.
Not sure what you are doing with the motor output assignments. AFAIK The Cube Yellow has an IO co-processor so you need to use the Aux outs for Dshot. Looks like you have 2 configured…
@dkemxr
Is there any issues with SERVO_BLH_OTYPE and MOT_PWM_TYPE set to 5 (6 in this case for dshot600) would that cause something wrong as I have that set on all my other 2 pixracer 6" frames, just didn’t know one was not needed? Since this is an F7 I will set it to Dshot600. See this is where I get confused about which inputs to use.
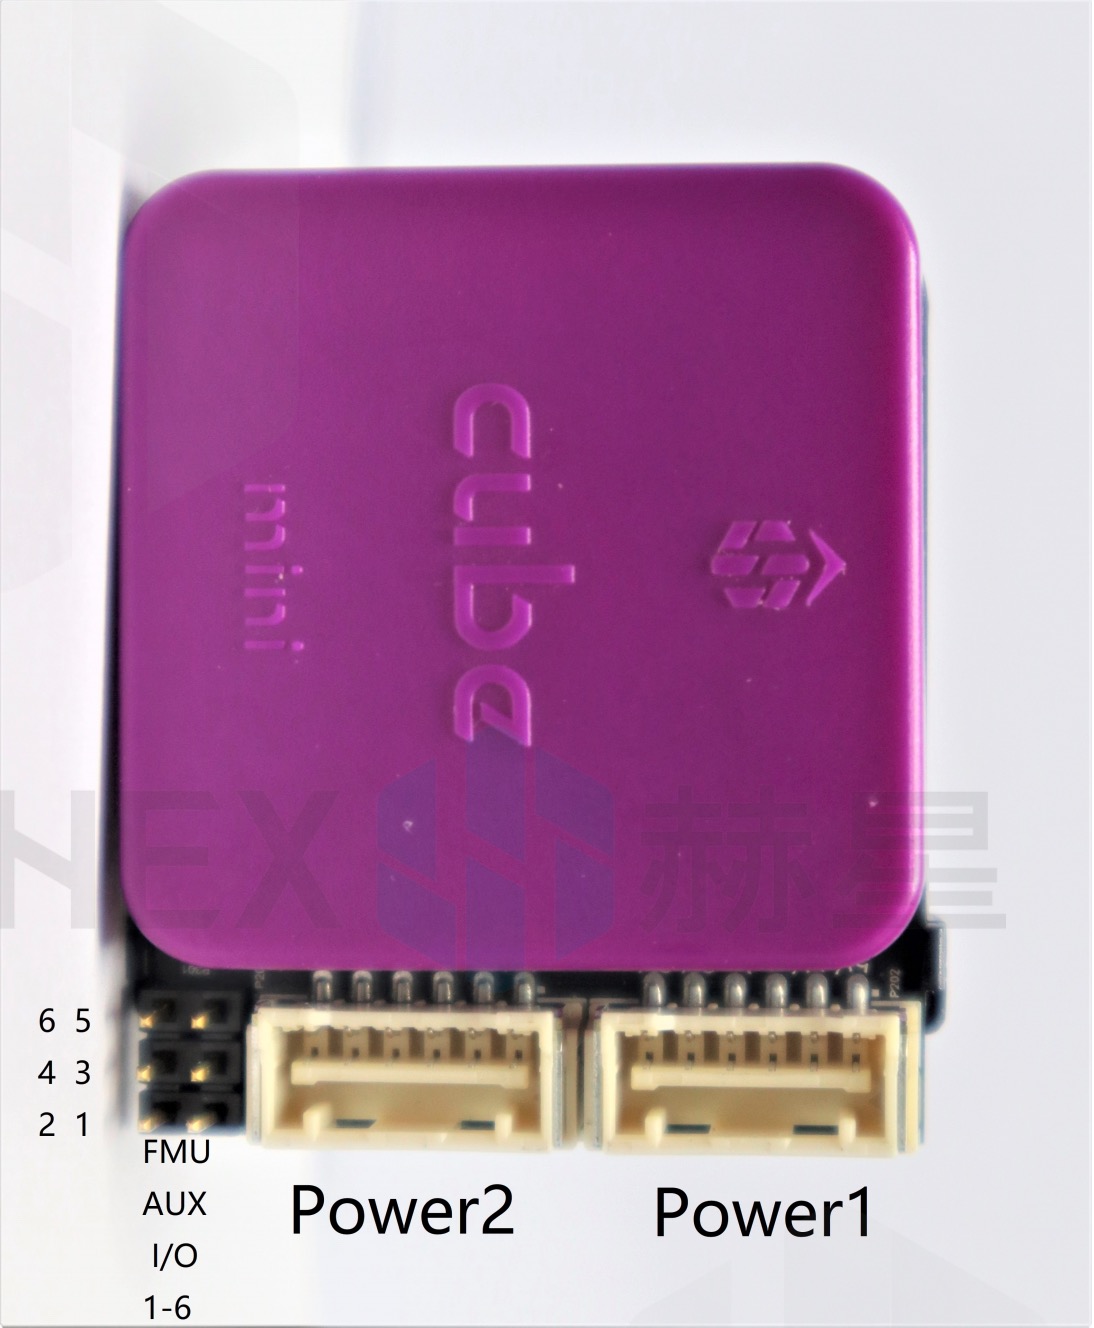
Because this is a mini carrier board that must not include the original 8 outputs on the back and instead is these in the picture below (ignore the purple cube just looking at the pins on the board) can I still use the ground pin on the others to keep a common ground?
@xfacta I am using this power module and I have followed @rmackay9 instructions on this page to calibrate my sensor even using the same Turnigy power analyzer, my current never really stayed at a constant range on that module and jumped up and down when using it, not sure why voltage is off as I set it in the field with that same module and checked with a little pocket one before flight. I have found power modules to be a bit tough to nail down at least the older ones, if that module didn’t come with a nice pdb and what not I would use the the mro power zero as it seems to be fairly accurate.
This is used if you have different types of outputs between groups of chanells. Like on a Plane where you have motors and servo’s. It’s not doing anything for you here.
You need to use the FMU AUX I/O pins for Dshot. Yes, the grounds are all common.
Ok I got everything all wired up properly now with the motors on aux 1-4 (9-12) and have set my bdshot_mask to reflect 9-12 and set it for dshot600. I am remeasuring the motor distance and making sure all the props are level again. Have recalibrated all the sensors again after putting 4.2.2 on it and will attempt another test flight. I am also going to try an recalibrate the current and voltage sensor.
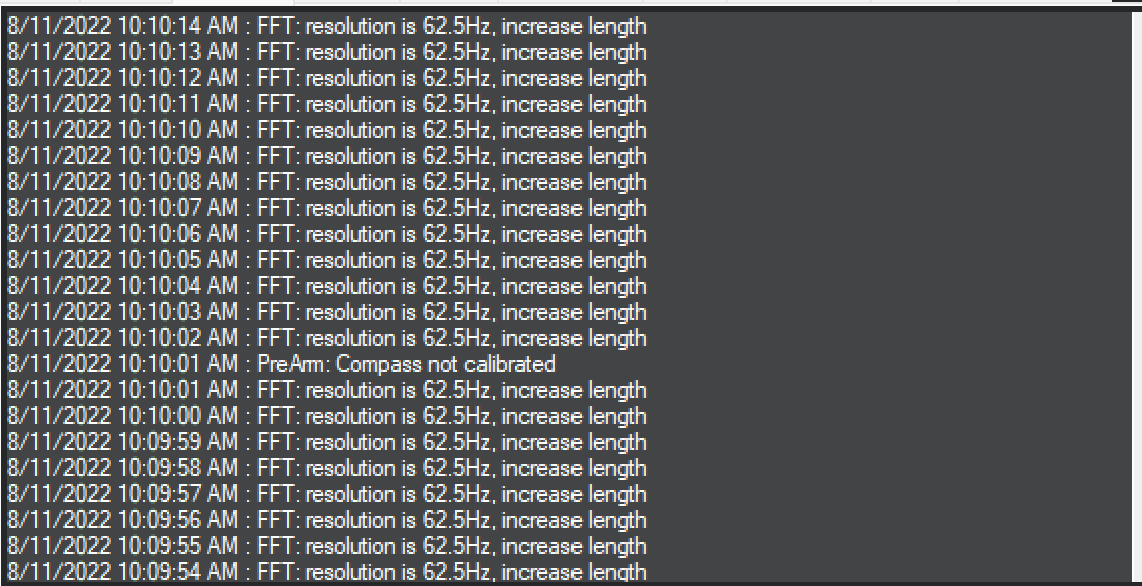
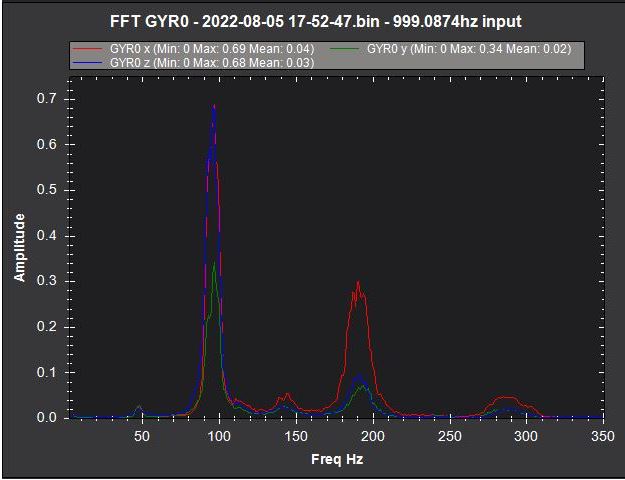
I have also re-enabled arming checked and noticed this message appear: FFT: resolution is 62.5Hz, increase length where is that parameter and please help me understand what it means?
How will I know what to set the INS_HNTCH_FREQ and _BW to if FFT is not enabled to log specific things? Boy I must be reading things completely wrong on the wiki.
the only place that it tells you to do that is on the throttle based notch filter and it does point to post flight analysis on esc telem page that is to me slightly confusing and why not have complete end to end instructions on esc telem page instead of click here for this, it is just not intuitive. I understand the need for efficiency in the wiki (someone said 9000+ pages) but to me some of the instructions are confusing. I have brought up plenty of places and github request about the wiki only to be told that its to much effort to make complete instructions on each of the the notch filter pages and there is a hierarchical structure which doesn’t seem very intuitive or hierarchical. I have read and read those notch filter pages multiple times and missed completely this INS_LOG_BAT_MASK because I am not setting up throttle based I am using esc telem so why not complete the entire setup for each one end to end on each page it would read much cleaner and more intuitive instead of having to click back and forth between two completely different setups. I do not currently have the knowledge to add to the wikki, for making this more of a easy step by step as I do not understand each of the setups (Throttle, RPM, ESC, FFT) yet but once I do I will gladly help but until then. @dkemxr I greatly appreciate you walking me through these steps. I had to take a hiatus from this stuff to finish a masters degree and the year away has made me have to relearn a lot again, plus all the new amazing features! I have been 100% doing this esc based notch filter completely wrong by using FFT enabled so thank you this may make things look similar to what I have read in the forums and seen pictures of
This has actually been acknowledged by at least one developer (~3wks ago on Discord) in regards to the order that the Wiki docs are in as you make your way thru the instructions for configuration of the Notch Filter. Those of us who were following the initial work done to add these features before there was any instructional Wiki entries probably don’t appreciate how confusing it can be.