@TCIII Thanks a lot:grinning:
Hi TCIII,
This really is an amazing project. As a hydrographic surveyor working in the industry seeing the costs of the commercial equivalent and their many zero’s on the price tag these kind of projects really are a breath of fresh air.
The depth and attitude hold work incredibly well.
Are there any plans to add the functionality of following lines in Mission Planner using a GPS position if at the surface or a USBL position underwater?
I’m looking at building a semi-sub DP platform and would like it to hold station as well as follow a line, stop and then rotate.
All the best with the project. Keep up the amazing work guys.
@knuckles55,
Check the ArduSub Gitter for using GPS. Unfortunately there is no search function and the discussion was conducted last week. Maybe you can ask for an update?
@knuckles55,
Because the ArduSub firmware has been in a constant state of change and it is a PITA to pull the BBBMINI navigation controller out of it WTC, I have been working on a three thruster ROV configuration that combines a BR BlueROV1 chassis (no thrusters or WTC) and three T100 Thrusters with an OpenROV 2.8 Developer’s Controller Kit, [WTC] (http://store.openrov.com/collections/2-8-replacement-parts/products/3-16-replacement-cast-acrylic-main-tube), End Caps and IMU/Compass/Depth Module.
The only limitation of this hybrid ROV is the fact that the OpenROV Controller is not designed to handle the maximum current required by the BR T100 Thrusters. Therefore the ROV cannot be run at its full thrust, but close to it fortunately.
Regards,
TCIII AVD
Hi All,
Recently I have decided to replace my home brew HDPE chassis with a BlueROV2 chassis due to the excessive weight of the HDPE chassis. Since both of the ROV chassis support a vectored six thruster configuration replacing the HDPE chassis with the BlueROV2 chassis should be fairly straightforward. Though I will have to pot the Battery Power Distribution Board, which is presently located in the 4 in diameter Battery WTC, because there will be no room for it in the BR 3 in diameter Battery WTC. Actually BR had originally intended for both the Battery Power Distribution Board and the Signal Distribution Board to be potted (encapsulated) and be mounted externally to the Battery and Navigation Controller WTCs.
I plan to switch from the BBBMINI Navigation Controller and move to the RPi3/Pixhawk Navigation Controller combination along with the Fathom-X interface. The BlueESC Signal Distribution Board will take the place of the ESCs used on the BlueROV2 Electronics Tray.
The BlueROV2 chassis should be here around early December which is just about when I will finish up my BR/OROV Hybrid Three Thruster ROV.
More to come.
Regards,
TCIII AVD
any images available?
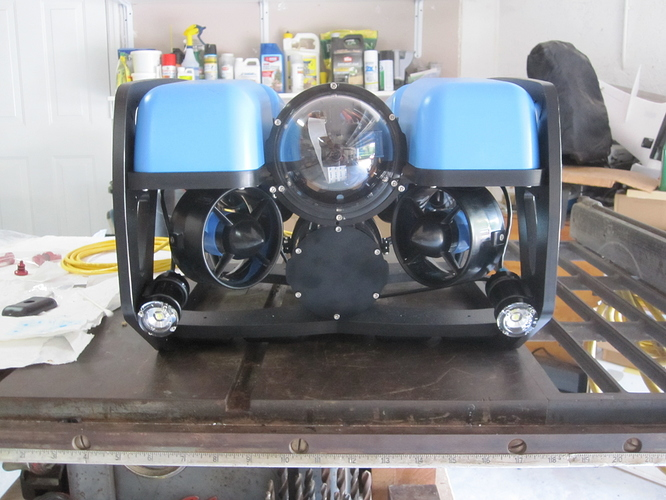
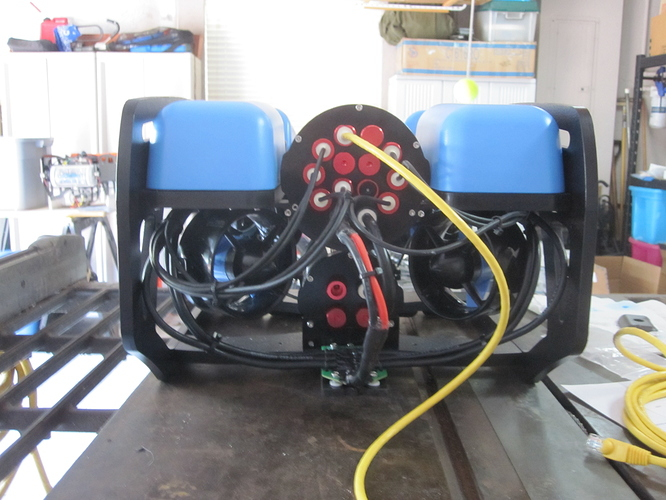
A while back I tried uploading images of my present vectored 6 thruster homebrew ROV, but with no success.
I will try again.

Top View with Forward to the Left
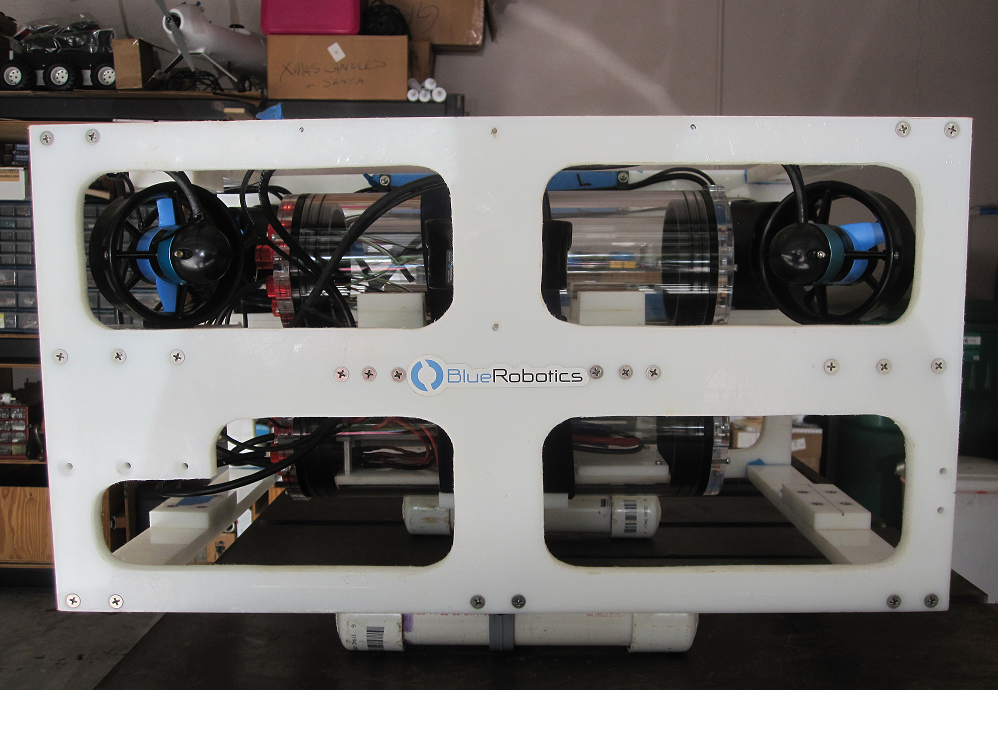
Side View
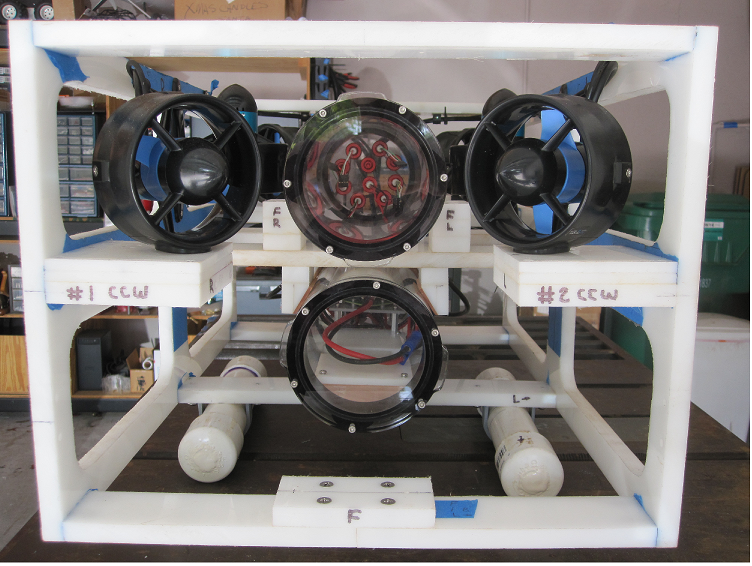
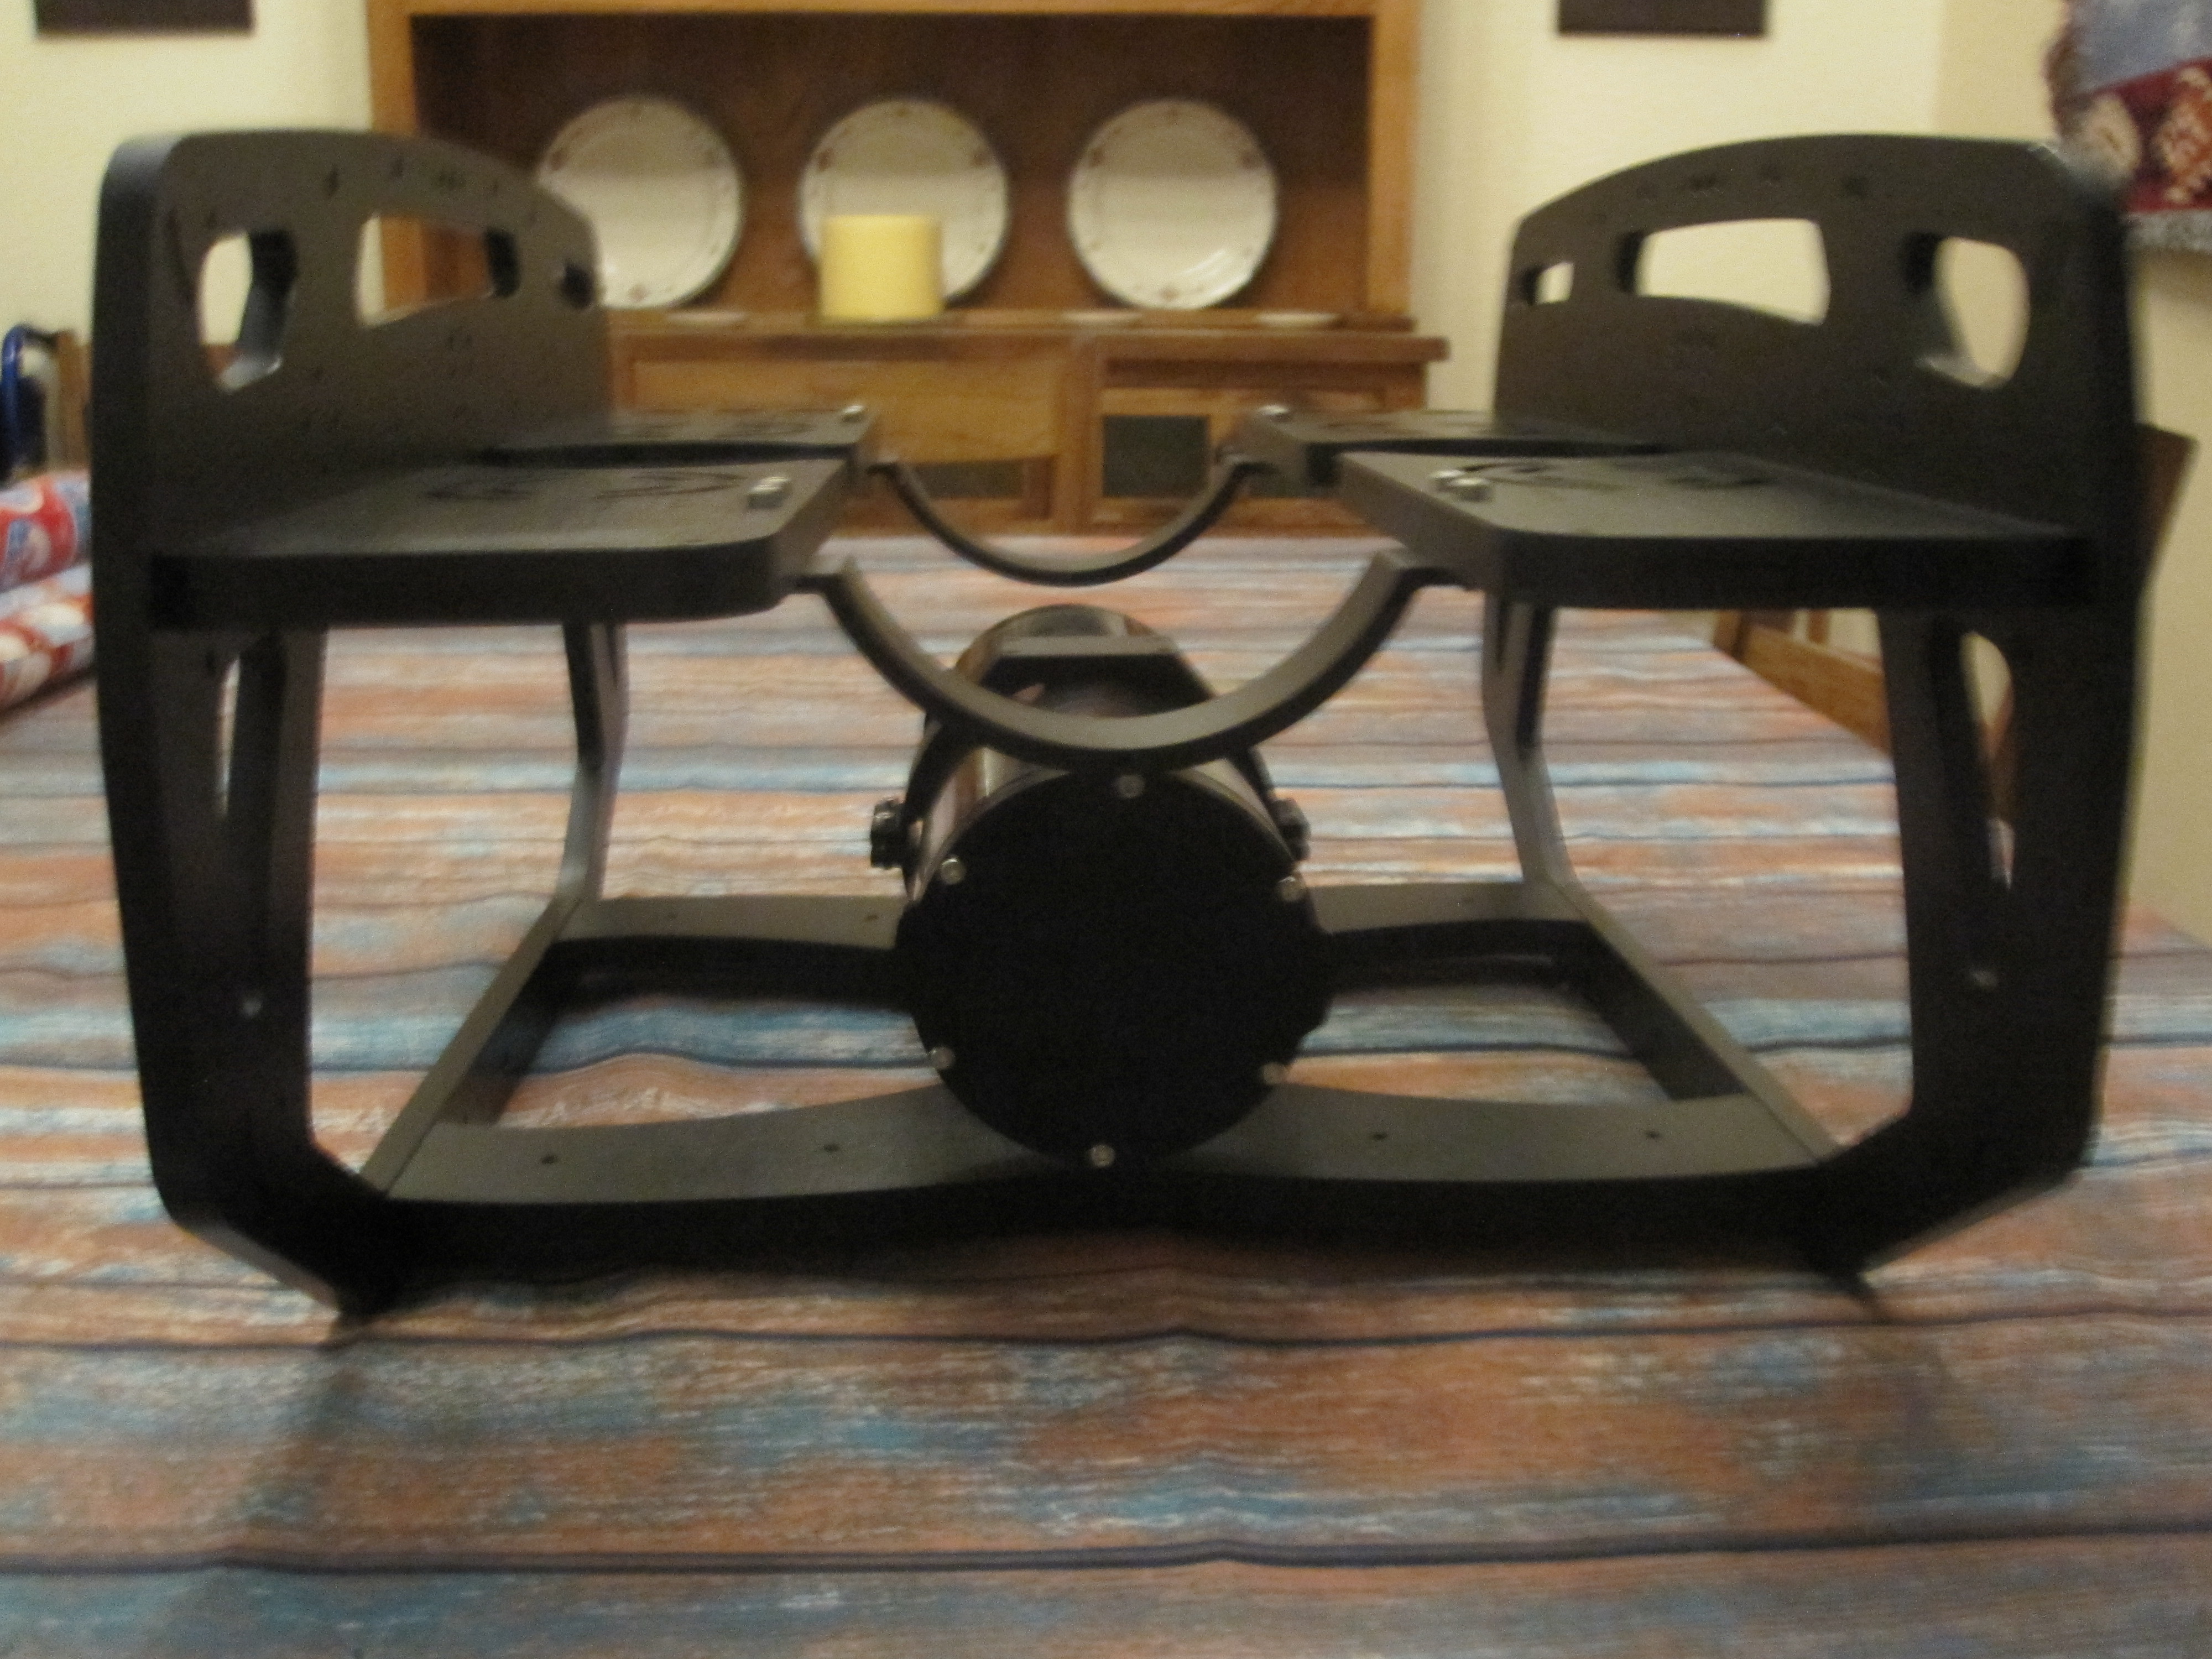
Front View
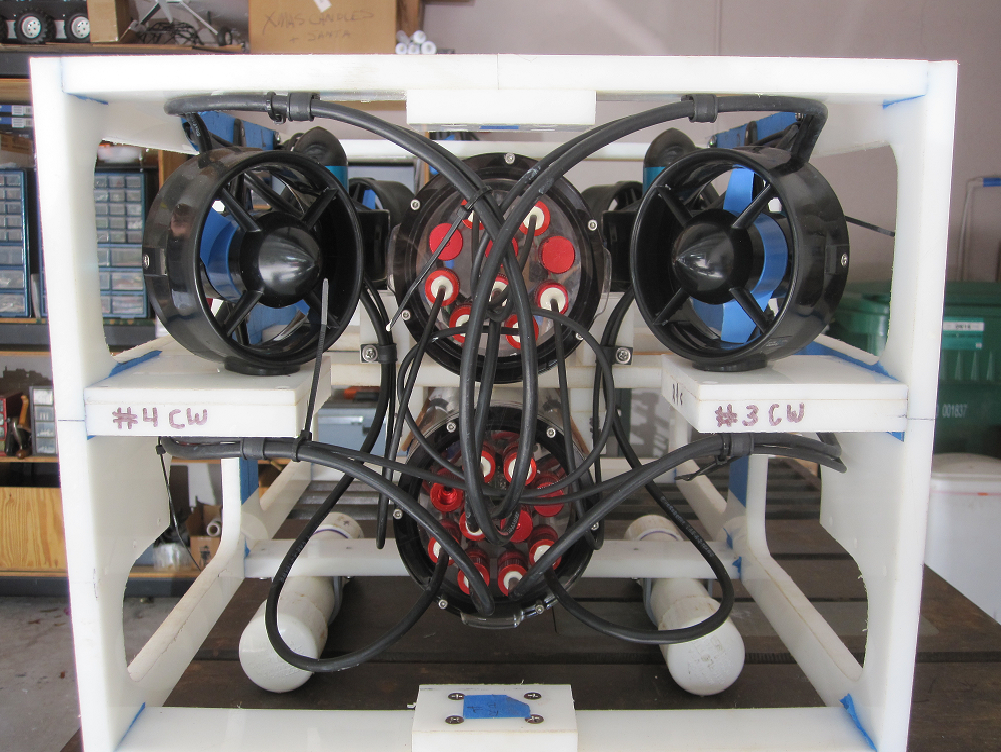
Rear View
I will convert my homebrew chassis to a BlueROV2 chassis and reduce the weight of the ROV by about 15 - 20 pounds. I am just purchasing the chassis components as I already have the T100 Thrusters and the WTCs.
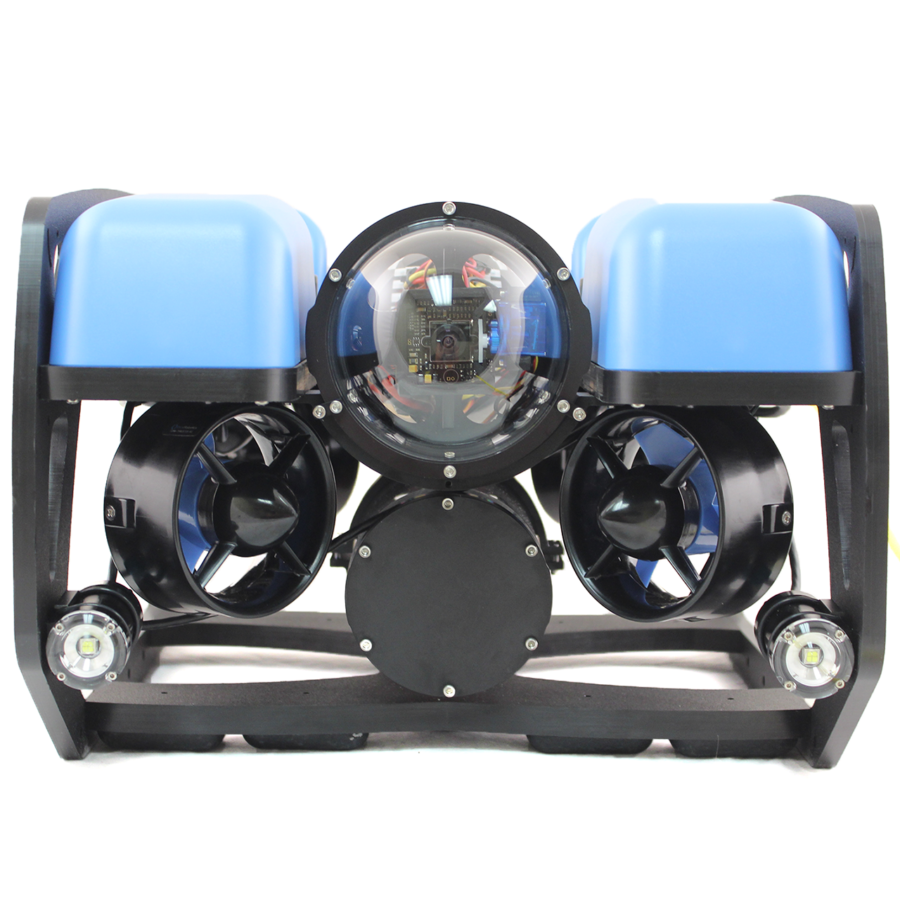
BlueROV2
Regards,
TCIII AVD
@TCIII very impressive. I notice you didn’t use and buoyancy foam in you version? Was there a motive behind that?
Cheers,
RS
@Lat_Long,
Thanks for the kudos, much appreciated.
The HDPE used in the chassis is near neutral buoyancy and I wound up having to add 5 pounds of BBs to get the chassis to sink just to the point that it is slightly awash on the surface.
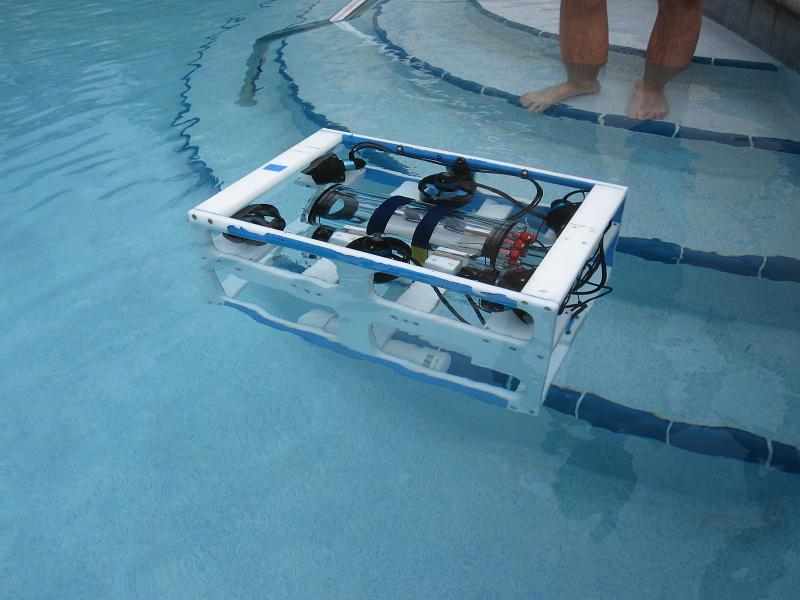
Homebrew Chassis just slightly awash and Trimmed Fore and Aft
Regards,
TCIII AVD
@Lat_Long,
Will do.
The BlueROV2 chassis components just shipped from BR today so I should have them by a week from today which should be Dec 8th.
Regards,
TCIII AVD
Hi All,
This has been a busy week for me since my BlueROV2 chassis components arrived on Dec 7th.
Upon receipt of the chassis components I proceeded to assemble the basic frame which also included the installation of the Battery WTC by following these instructions.

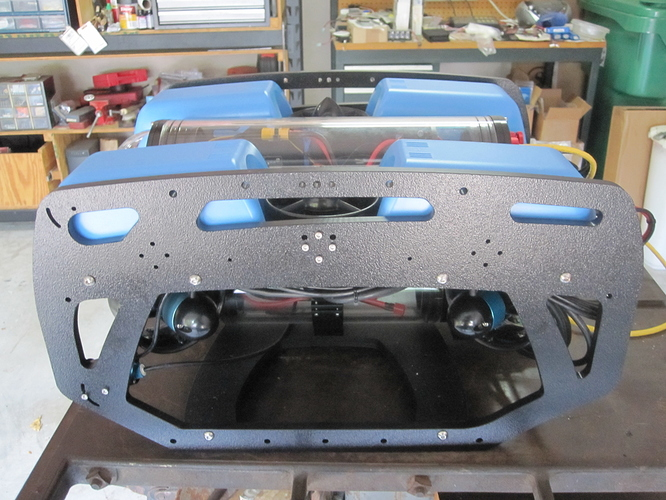
BlueROV2 Frame Front View
BlueROV2 Frame Head On
I then tackled the assembly of the Electronics Tray using the same instructions as above, but not before I had actually assembled the Electronics Tray Frame using these instructions.
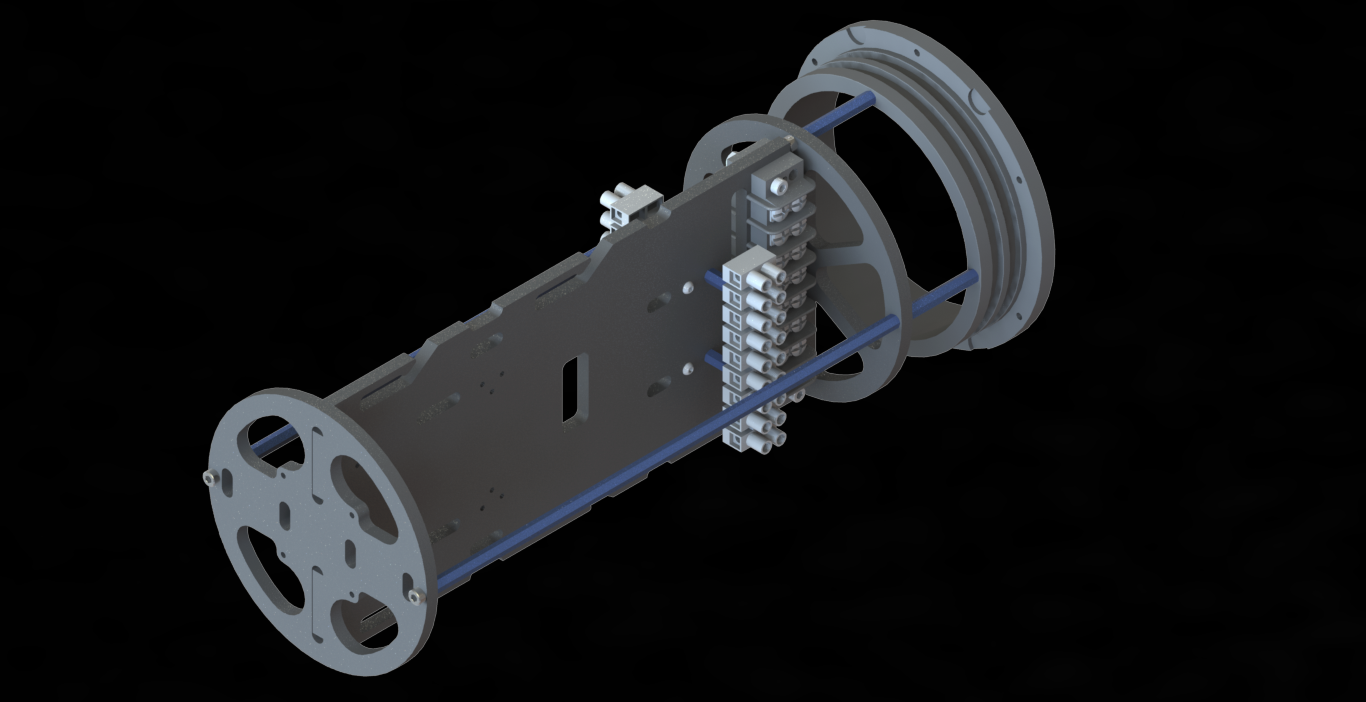
Electronics Tray Frame
The assembly of the Electronics Tray consists of attaching the RPi, the Pixhawk, the 3DR Power Module, and the Fathom-X Interface to the Electronics Tray Frame and then adding interconnecting cables and BECs.
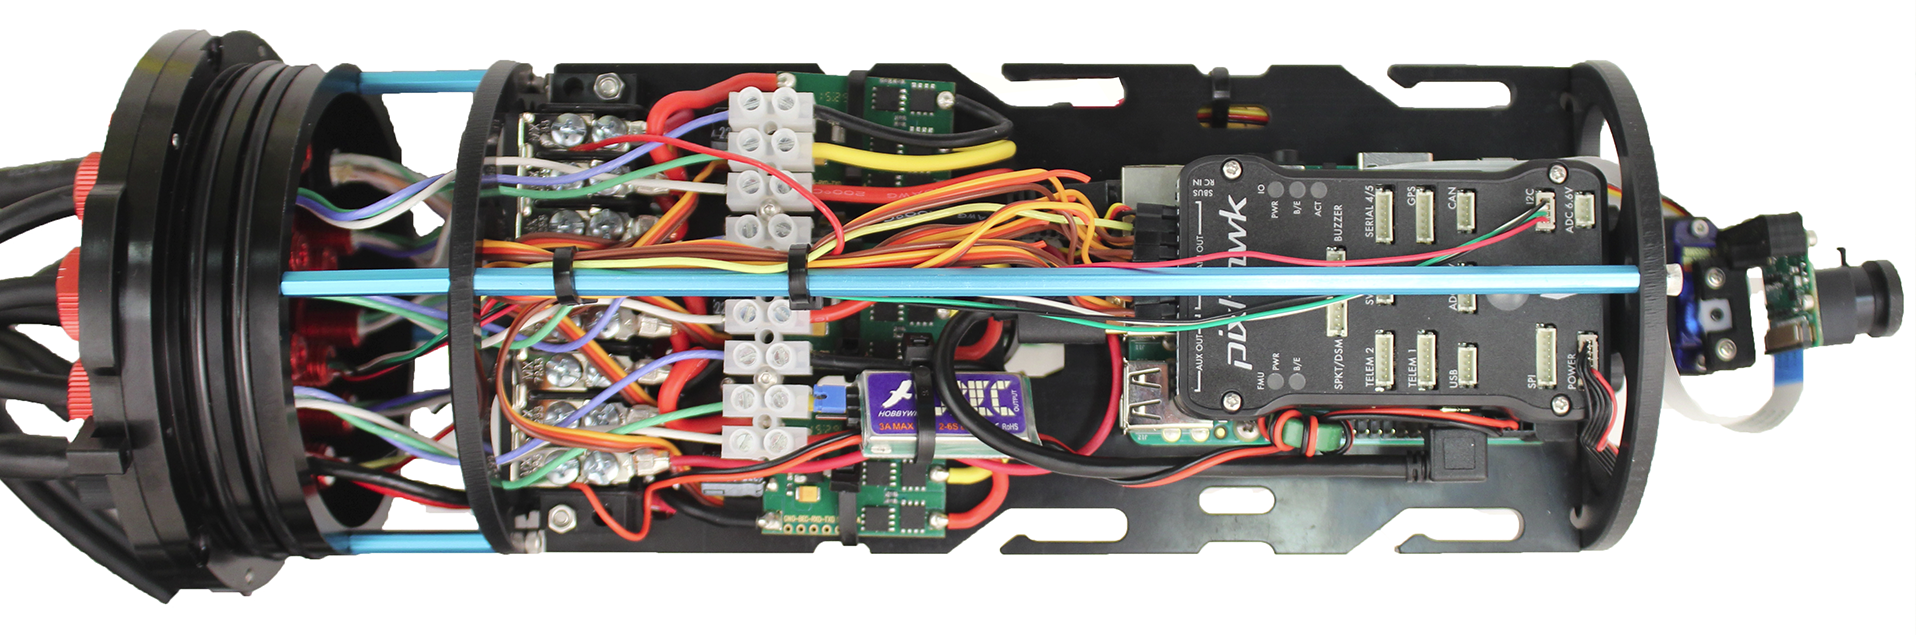
Electronics Tray Starboard Side
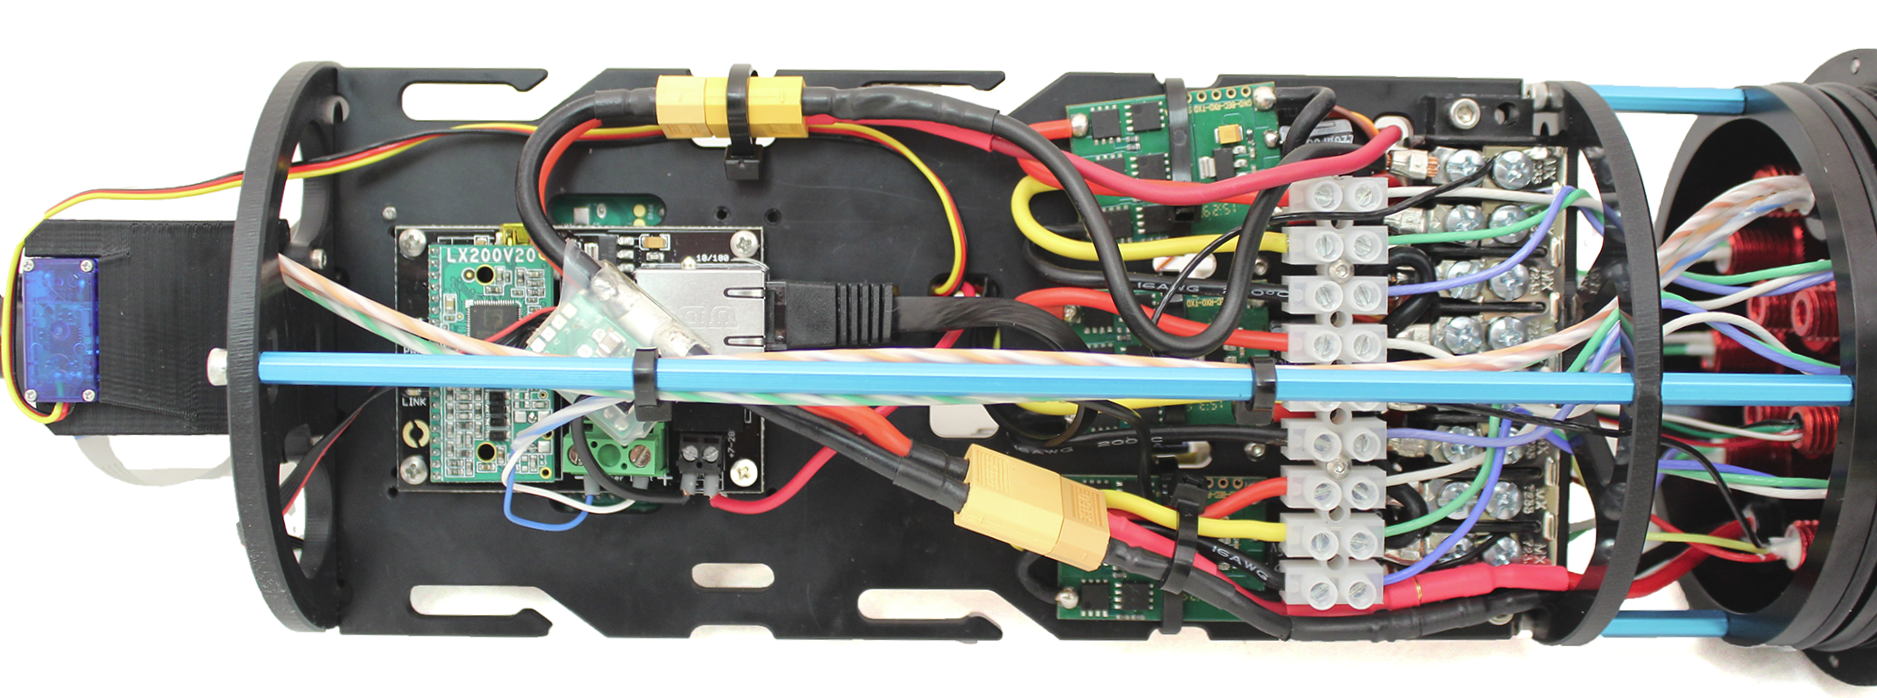
Electronics Tray Port Side
Because I am using the BlueESC thrusters, my Electronics Tray does not include the six thruster ESCs seen in the Port and Starboard Side pictures above.
Tomorrow I plan to move all six BlueESC thrusters from the home brew chassis to the BlueROV2 Frame to see how much excess cable I have to deal with and how the two cables from each thruster will be routed. I have already modified the BlueESC thruster control cables to mate with the Pixhawk Servo Output Bus connectors so my main efforts will be directed towards setting up the BlueESC thruster power cables in order to attach them to the external Power Distribution Board.
More to come.
Regards,
TCIII AVD
Hi All,
On this last Sunday I spent the day moving the six BlueESC Thrusters from the homebrew chassis to the BlueROV2 chassis. It took most of the day as I had to turn each Thruster’s ESC/motor Housing180 degrees in its accompanying Nozzle so that the Control/Power Cables pointed towards the bottom of the Frame Thruster/Faring Plates. Then I proceeded to route the Control/Power Cables to the back of the ROV chassis. The Control Cables appear to be long enough to reach the Electronics Tray WTC and have a sufficient amount of slack. The Power Cables appear to be too long and will have to be trimmed back to be able to connect to the outboard Power Distribution Board. Here is a typical Thruster installation on the Frame Thruster/Faring Plates (Note: the ROV chassis is upside down in this picture):

Typical Thruster Installation on a BlueROV2 Chassis
This morning I began the process of deciding where to mount the outboard Power Distribution Board. I finally ended up deciding to mount the Board on an aluminum/ABS plastic fixture that attaches to the back of the Battery WTC End Cap. The fixture uses three of the lower screws that hold the End Cap plate to the End Cap. I plan to degrease the aluminum part of the fixture and paint it with a good grade of marine epoxy paint to help reduce corrosion. Once the power cables are soldered to the Power Distribution Board pads I will coat the exposed solder joints with a sealing resin. A picture of the Power Distribution Board fixture is below:
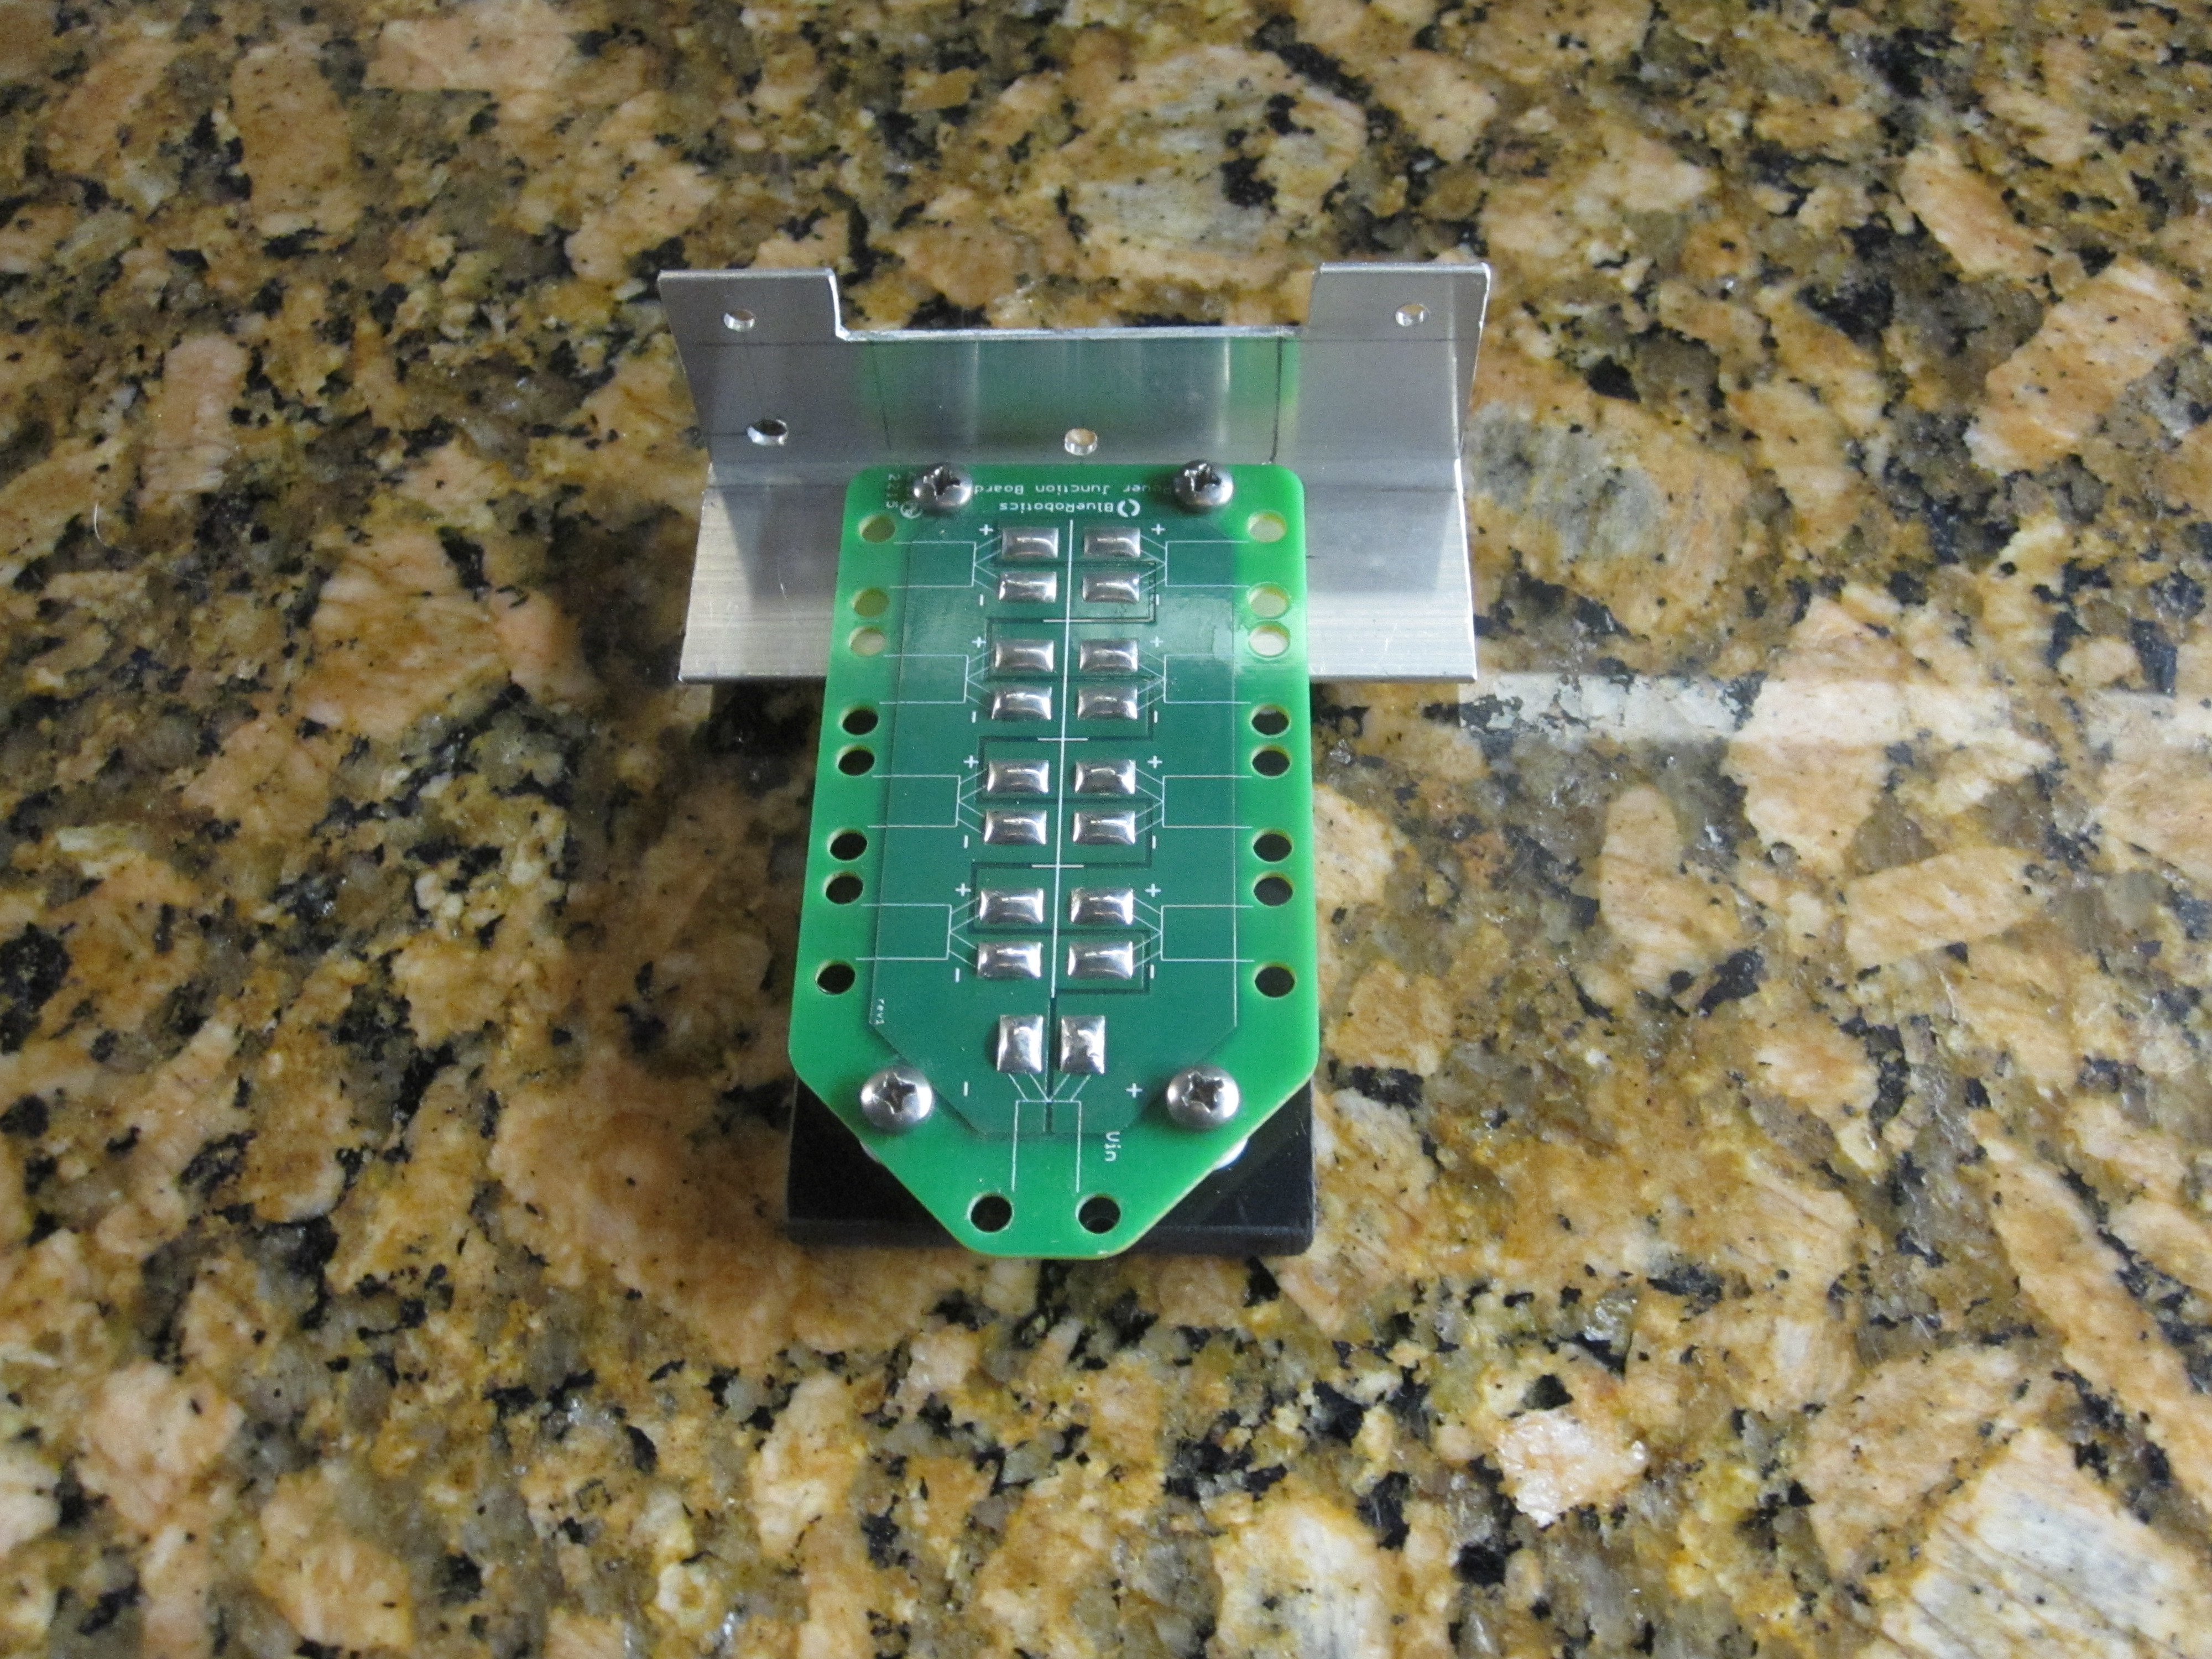
Power Distribution Board mounted on Aluminum/ABS Plastic Fixture
More to come.
Regards,
TCIII AVD
Hi All,
I have now soldered the BlueESC power cables to the Power Distribution Board and have also soldered the Power Cable from the Electronics Tray WTC to the Power Distribution Board. Pictures are below:

Power Distribution Board with BlueESC Power Cables Attached
Power Distribution Board with Power Cable Attached
My biggest concern now is sealing the solder joints and cable jacket entry points on the Power Distribution Board. Several Liquid Tape users have had success using it as a form of “conformal” coat. They said to apply thin layers of the Liquid Tape letting it dry thoroughly in between coats. The other approach to sealing would be to make a small dam around the Board and coat it with a layer of epoxy resin.
Comments on how to proceed are welcome.
Regards,
TCIII AVD
Hi All,
Due to the holidays, progress has been somewhat spotty, but I have made some progress nonetheless.
I have coated the Power Distribution Board with eight coats of MG Chemicals 4229 Connector Coating allowing at least four hours of curing time between coats. The connector coating was recommended by Rusty at BR and went on quite easily and has formed a firm rubbery finish on the exposed areas of the board.

Coated Power Distribution Board
In between waiting for the coatings to cure I proceeded to being to attach the BlueESC Control Cables, the Battery Cable, and the Lumen Power Cable to the Electronics Tray End Cap. I will still need to attach the Tether Cable, Power Distribution Board Power Cable, and the Pressure Sensor.
Electronics Tray End Cap Cable Routing
I have also had a chance to communicate with the Electronics Tray over the Fathom-X ROV Side/Topside Interfaces. Using the latest Daily Build of QGC I was able to view the RPi HD Camera and view the ArduSub parameters. I also took the time to update the Pixhawk ArduSub firmware to rc3 which corrected the Pressure Sensor issue where the Pressure Sensor was set to the Firstbaro and not the Secondbaro all of the time. This week I plan to configure the Pixhawk various operating parameters and sensors and prepare for the ROV’s first dive in my 38 gallon test tank.
More to come.
Regards,
TCIII AVD
Hi All,
I have completed the calibration of the Electronics Tray which included the accelerometers, compass, and battery monitor. I also verified the functionality of the baro 30 external pressure sensor, added the SOS Leak Sensor board and mounted the four Leak Sensor probes on the Tray. Now I am ready to attach the Electronics Tray to the End Cap, but not before testing the integrity of the Cable Tray and Battery WTC cable penetrators and End Cap O ring seals.
To test the WTC cable penetrators and End Cap O ring seals I followed the instructions in the BR BlueROV2 Assembly instructions except that I used a motor driven diaphragm vacuum pump and did not have the Electronics Tray in the main WTC during the vacuum testing. BR recommends pumping both WTCs down to 10 inches of vacuum, wait 15 minutes, and then verify that the vacuum has dropped no more than 1 inch and is 9 inches or greater. I took the vacuum to 22.25 inches and after 15 minutes, I had lost only 0.5 inches of vacuum which I consider to be acceptable given the vacuum test setup.
Now, I will attach the Electronics Tray to the its respective End Cap, make all necessary cable connections to their respective connections in the Tray, and then proceed to tidy up the external wiring, add the Fairings/Buoyancy, and the Ballast, and then prepare for the first dive in my 38 gallon test tank.
More to come.
Regards,
TCIII AVD
1 Like
Hi All,
Finally got the Electronics Tray all cabled up, the buoyancy fairings, and the ballast weights installed on the Frame and a vacuum test of the two WTCs.So I was ready to put the ROV in my 38 gallon test tank. The biggest problem I had prior to being ready to test was getting the Power Cable from the Electronics Tray WTC to the Thruster Power Distribution Board to be watertight. It took about two weeks of experimenting and testing to achieve a waterproof seal.
I charged up the two 3S 5000 mah LiPos that I am running in parallel and stuffed them into the Battery WTC and let the ROV run for a while to heat up the air in the Electronics Tray WTC prior to sealing the vent plug. I then put the ROV into the test tank and added water. When the test tank was 2/3 full the ROV began to float and according to the QGC HUD, the Frame is stable in both pitch and roll.
I then tested the functionality of the Thrusters, Camera Servo, and the Lumen Lights. All of the components worked as expected. It is kind of wild to watch the ROV Frame move sideways (strafing) as I have only been used to three thruster ROV Frames. Even with only the BlueESC T100 Thrusters at 50% drive, the ROV seems pretty powerful.
Pictures below show the finished ROV Frame:
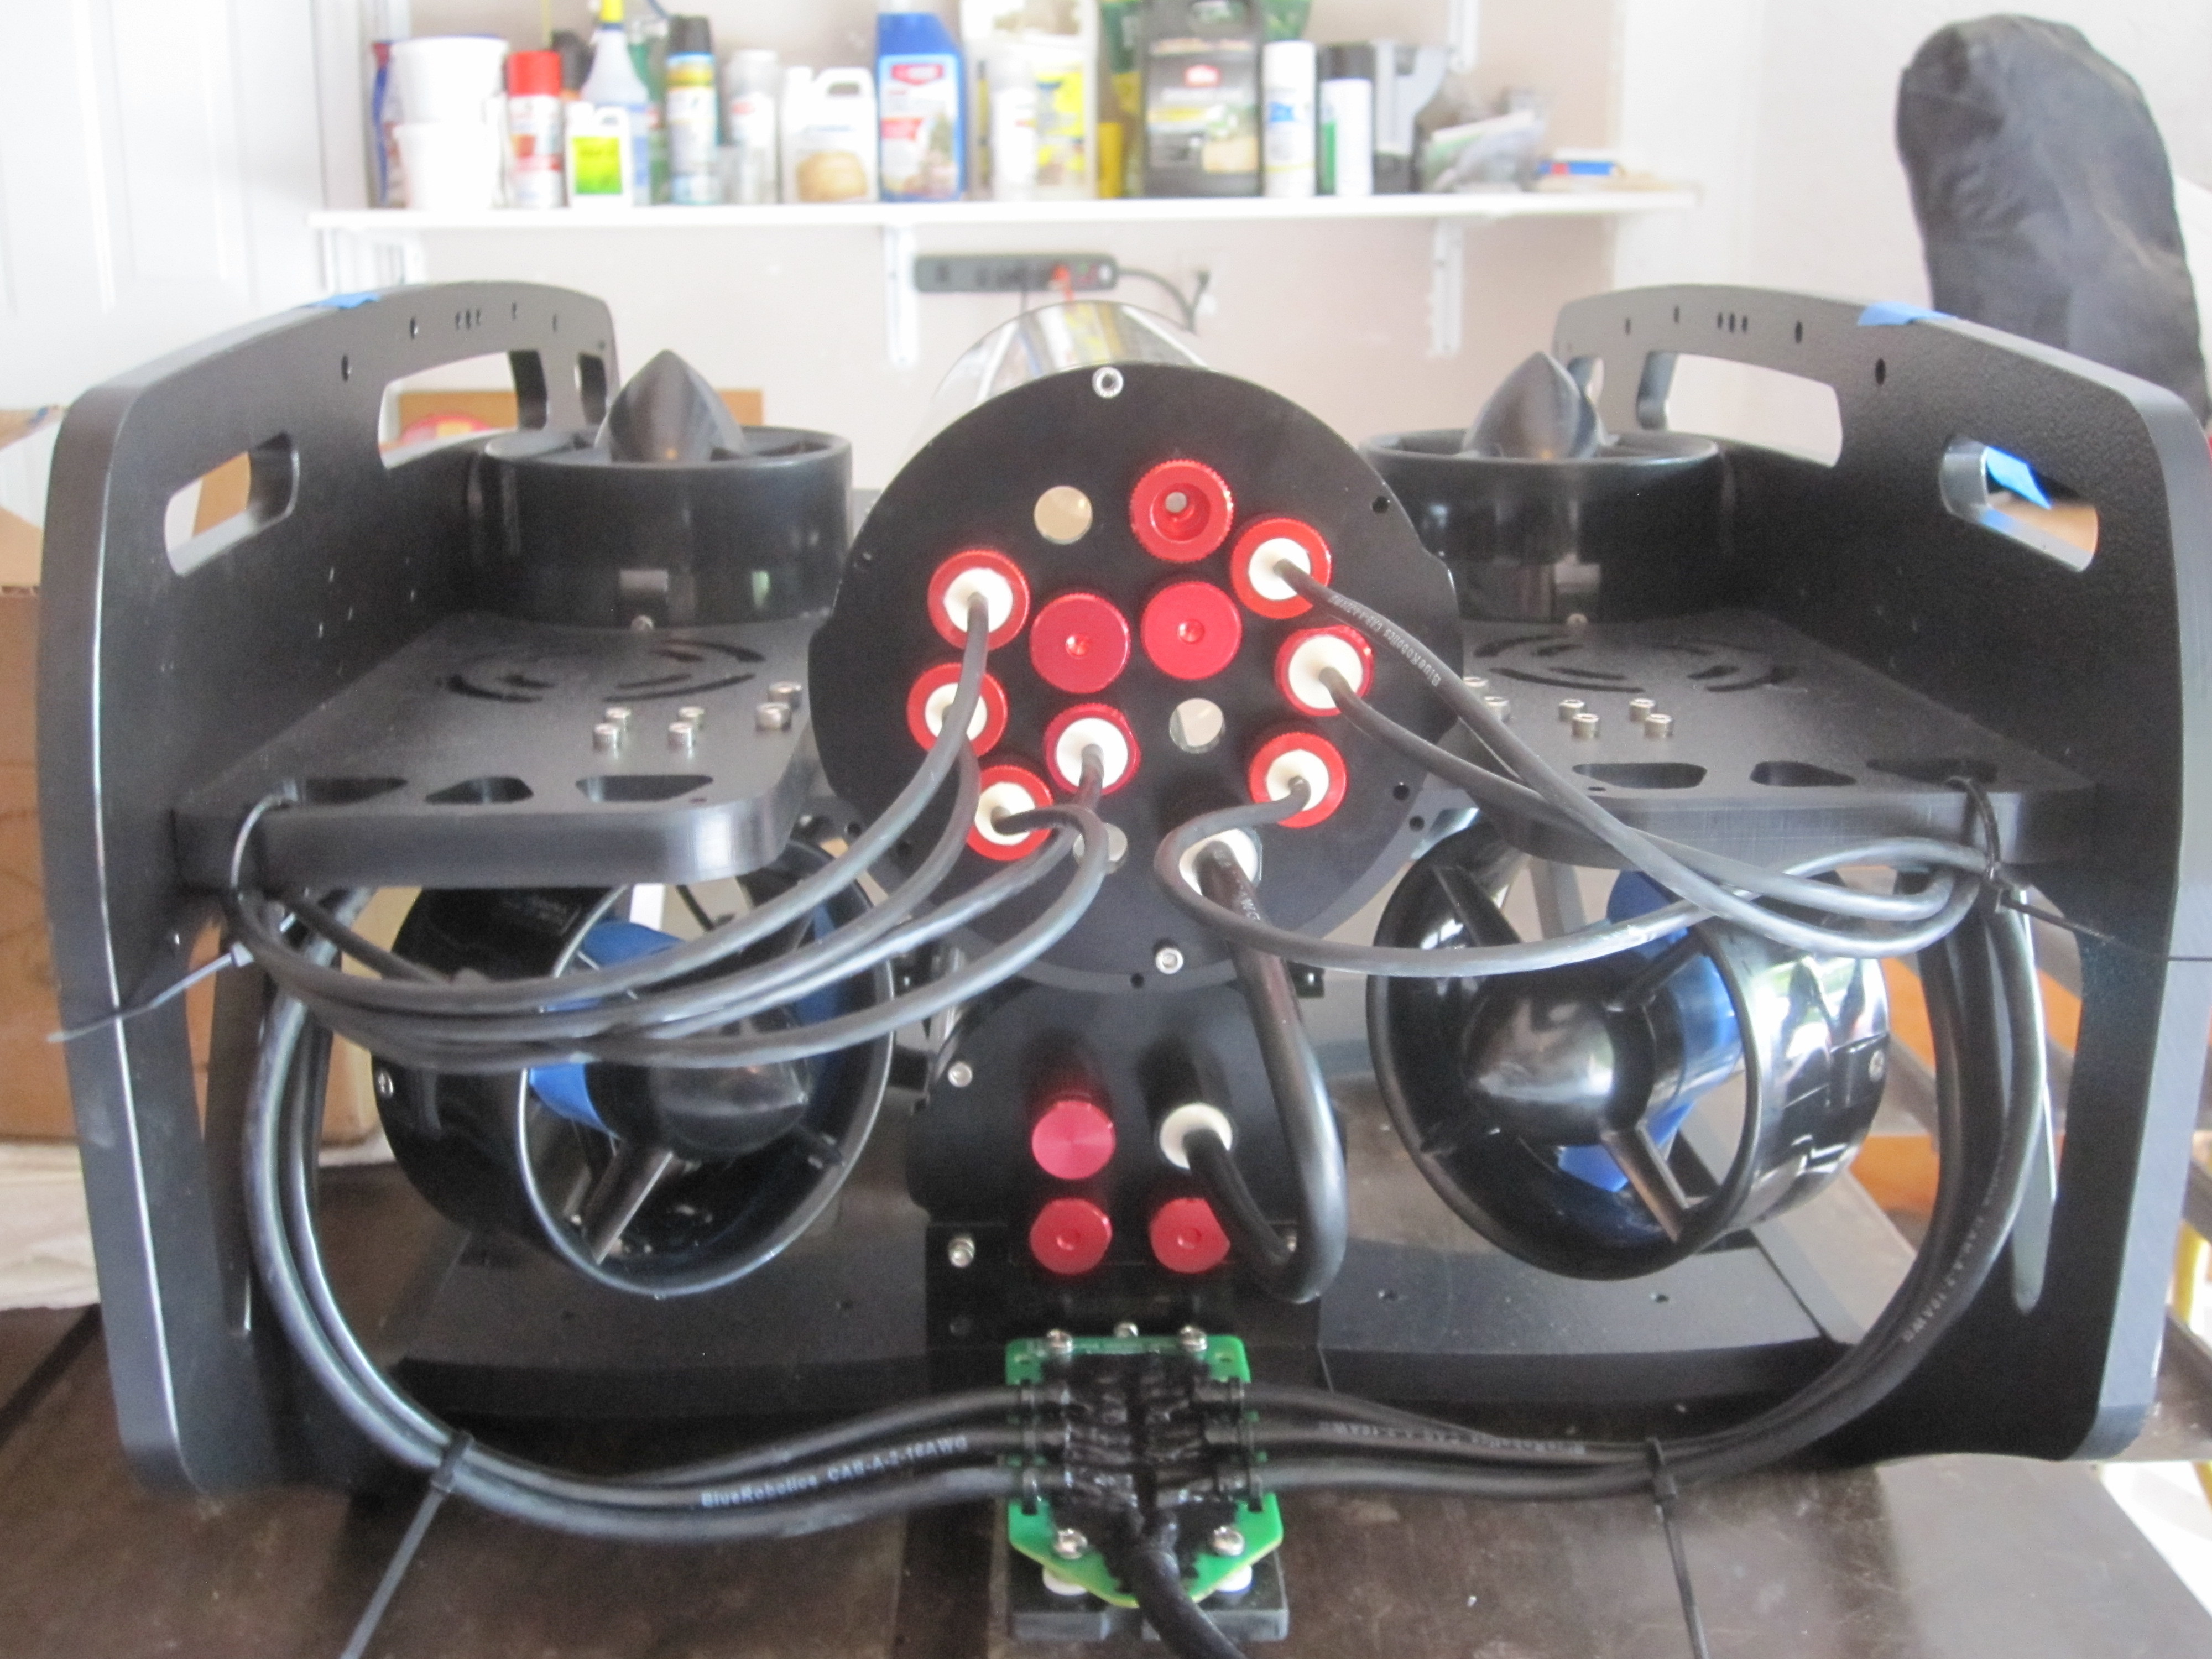
Front View showing RPi Camera and Lumens
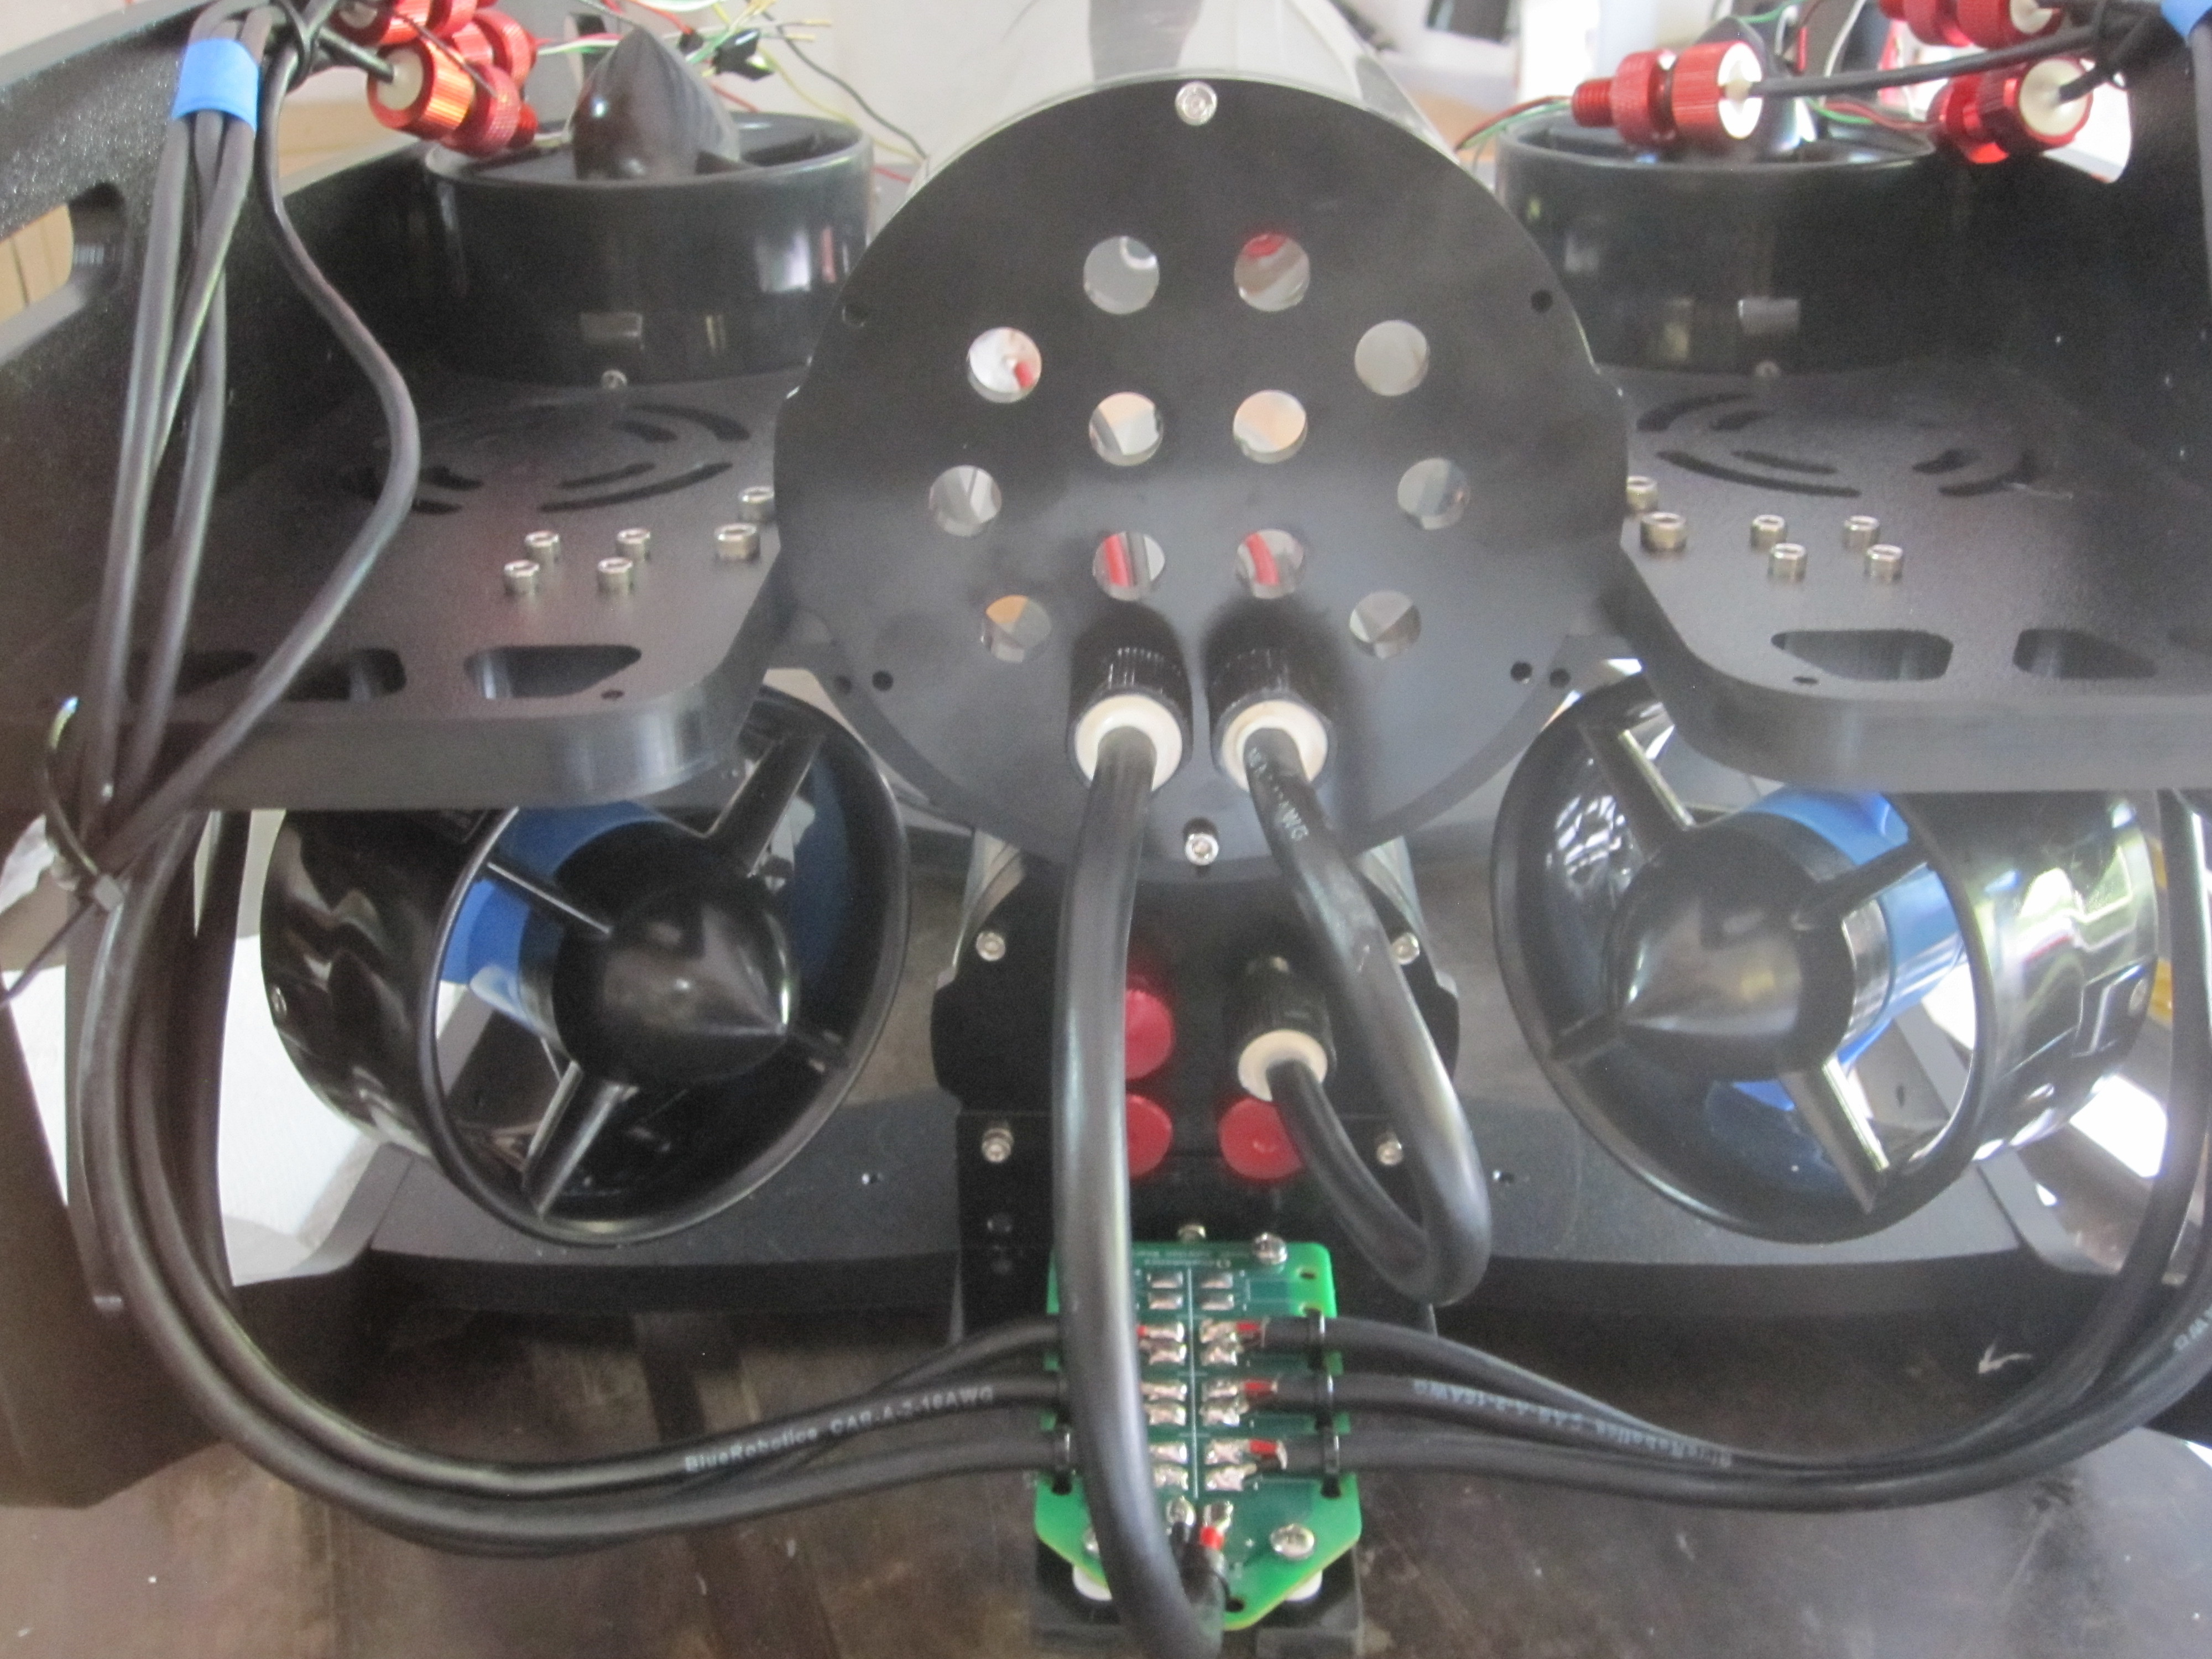
Rear View showing BlueESC Thruster Power Distribution Board and temporary Tether
Side View
I believe that this project proves that the BlueESC Thrusters can be used in a BlueROV2 Frame, but it is not the easiest project I have tackled especially getting the Power Distribution Board Power Cable watertight.
I will grab a shot of the ROV in the test tank to show how well balanced the Frame is due to Rusty’s (BR) ballasting scheme.
More to come
Regards,
TCIII AVD
1 Like
Hi All,
Here are a couple of shots of the Conversion BlueROV2 in my 38 gallon test tank:
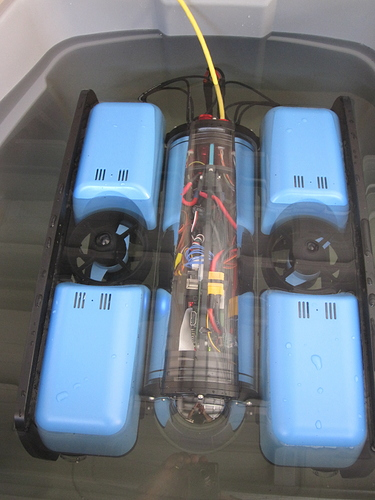
BlueROV2 Front View
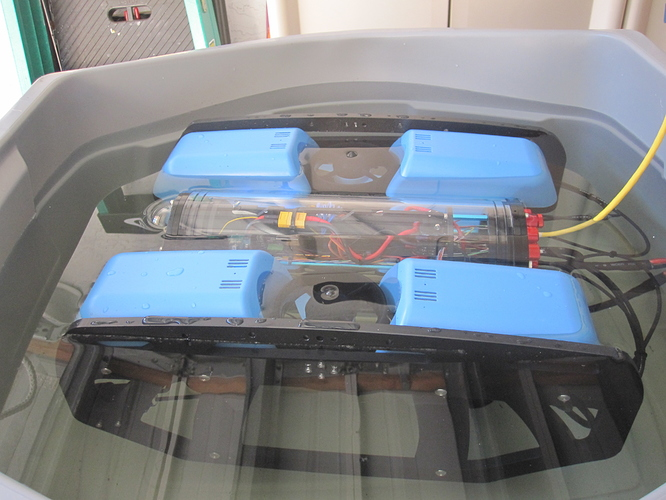
BlueROV2 Side View
Regards,
TCIII AVD
1 Like
Beautyfull vehicle! Nice to see it in the water
Hi Linus,
Thanks for the kudos, much appreciated.
I am presently waiting for a HeadPlay HD FPV Headset before I put the BlueROV2 in the Association swimming pool where there is more room to rove around. The Headset has a nice FOV and is easier to view than my laptop.
Regards,
TCIII AVD