Tom, Can’t you find a gator infested canal somewhere to test. I finally got logged in over here. Good job as always.
Regards,
David R. Boulanger
Tom, Can’t you find a gator infested canal somewhere to test. I finally got logged in over here. Good job as always.
Regards,
David R. Boulanger
Hi David,
You would not believe how polluted the lateral canals here are that come off the West Fork of the New River not to mention our Association mini-lake. The amount of trash and floating debris is appalling unfortunately. However I have not seen any wayward alligators recently 
I think that I will stick to the Association swimming pool for my test dives.
Regards,
Tom C AVD
Hi Tom. Any updates? I’d be interested if you could even fill a bath tub and put the ROV in it and see how it goes.
Thanks, Grant.
Hi All,
It has taken about a month to get the baseline ArduSub software working with the BBBMINI. Much of the time was spent debugging the various updates to the software and coping with several changes to the ROV Thruster configuration layout.
Since this ROV is a six Thruster Vectored configuration, Horizontal Thruster #1 is located in the front right corner of the chassis, Horizontal Thruster #2 is located in the front left corner of the chassis, Horizontal Thruster #3 is located in the rear right corner of the chassis, Horizontal Thruster #4 is located in the rear left corner of the chassis, Vertical Thruster #5 is located in the middle of the right chassis side, and Vertical Thruster #6 is located in the middle of the left chassis side. All the Thruster locations are viewed from the top of the ROV chassis.
I am attaching a Thruster layout diagram below:
ROV Thruster Layout_20160416.pdf (186.4 KB)
If you decide to duplicate my BR T100 BlueESC Thruster layout, please note the orientation of the Thrusters in relation to the centerline of the chassis. The “U” shaped protrusion with the two small holes in the top is the front of the Thruster.
Once the Thrusters were mounted in the chassis I used a servo tester to determine the PWM input to the Thrusters that would provide forward thrust and noted it on the Thruster ROV Chassis layout diagram. This came in handy when verifying the servo output PWM values of the BBBMINI for forward/reverse, yaw right/left, and strafe right/left joystick inputs from the Xbox 360 joysticks.
Rusty at BR has provided these instructions to get the software up and running on your ROV and to use QGC to communicate with your favorite Navigation Controller which in my case is the BBBMINI. I am presently using UDP over my LAN to allow QGC to communicate with the BBBMINI for bench testing purposes. However I have communicated with the BBBMINI using BR’s Topside USB Interface to ROV-side serial Interface using BR’s Tether.
There are several ROV control functions that should be assigned to the various buttons on the gamepad. I assigned the Arm function to the Start button, the Disarm function to the Back button, the Stable Flight Mode to the B button, the Altitude Hold Flight Mode to the Y button, the Input Gain Increase to the A button, the Input Gain Decrease to the X button, the Trim Roll Right to the right Bump button and the Trim Roll Left to the left Bump button.
The Input Gain buttons can be used to raise or lower the servo output PWM range of each Thruster in 25% increments. I found that I had to increase the Input Gain to 100% to get QGC to be able to calibrate the R/C Radio Channels.
The Trim Roll Right/Left buttons can be used to raise or lower the Trim PWM input to the two Vertical Thrusters when there is no input from the Y axis of the right joystick on gamepad. I found that the input to the two Vertical Thrusters would drift down to ~1300us from a neutral of ~1500us with no input from the Y axis of the right joystick of the gamepad which is used for vertical ascend/descend control. Using the Trim Roll Right/Left buttons I was able to trim the PWM input to the Vertical Thrusters to around ~1500us with no input from the Y axis of the right joystick of the gamepad.
Once the BBBMINI sensors, the gamepad joysticks and the R/C Radio Channels were calibrated per the BR instructions, I verified, using the QGC MavLink Inspector and the Info Viewer, that the BBBMINI PWM servo outputs to each Thruster were correct for forward/reverse, yaw right/left, and strafe right/left joystick inputs from the Xbox 360 joysticks and that the Input Gain, Trim Roll Right/Left, and Flight Mode buttons performed as expected.
The next step will be to test the ROV in my Association’s swimming pool using a short Tether.
More to come.
Regards,
Tom C AVD
Hi Grant,
Unfortunately my ROV is too tall for a standard bath tub to be able to float it in a full tub.
That is why I will use my Association’s swimming pool which is only five feet deep at its deepest.
Regards,
Tom C AVD
@ppoirier,
The magnetic compass should work well underwater since the BBBMINI is in a nonmetallic WTC.
My real concern is the fact that the BBBMINI is surrounded by six brushless motors which could cause some interference during operation.
However Rusty, at BR, has indicated that this will not be an issue based on, I assume, his experience with his BlueROV which uses a Pixhawk/APM2.x to provide IMU and compass sensors as well as drive the Thruster brushless motors.
Regards,
Tom C AVD
Cool, I might add scuba diving on my next trip in Sunny Florida 
@ppoirier,
In my way of thinking the hobby ROV is a kind of proxy scuba for those of us who cannot scuba dive, but would like to explore the depths between the surface and 100 feet.
Regards,
Tom C AVD
Hry Thomas. . I’ve been kicking around the idea of a arduino under water ROV for years and we spoke about it in the past.
I’ve been doing some 3d printing and now.have the capability to look at.this project again.
I’m looking to perhaps use some brushless motors or other diy thruster setups… any ideas on that specifically? Any ideas on the cheapest controller board to use? Will a apm 2560 still do the job?
If you like to do your own programming, then an Arduino 2560 will work, but there are other better navigation controller solutions out there like the Pixhawk 1 and 2 and the control firmware, ArduSub, has already been developed and is maturing.
You can also get an OpenROV 2.8 Developer’s Controller Kit which uses a BBB and an Arduino 2560 for the navigation controller and even includes the tether. It is not cheap, but gets the job done and includes robust open source firmware.
You can use brushless motors from HK like OpenROV has done, but they take a lot of preparation initially and a lot of maintenance after each dive.
The way I look at it, you get what you pay for in the way of ROV hardware. Since I am a Systems Integrator, I prefer Blue Robotics hardware as it has been performance and depth tested, but is by no means inexpensive.
If you plan to operate down to 100 meters, I would not cheap out in relation to the WTCs or the navigation control systems if you want the hardware to survive.
Regards,
Tom C AVD
Hi All,
The reason that I have not moved the ROV Project forward as of late is the fact that it is 92 degrees F by 9 am in the morning here and sometimes reaches as high as 98 degrees F by 2 pm.
Also, there is a problem with the BBBMINI recognizing and communicating with the BR MS5837 pressure sensor on the external BBB I2C bus which Mirko is presently investigating.
Once Mirko has updated the BBBMINI firmware to work with the pressure sensor and we get an occasional break from the hot weather, I will begin testing in my Association’s swimming pool.
Regards,
TCIII AVD
Hi All,
Mirko’s latest BBBMINI baro build, https://github.com/bluerobotics/ardusub/tree/pr/bbbminibar30, has gotten the MS5837 pressure sensor working correctly with the BBBMINI.
See ArduSub Gitter for additional information.
Regards,
TCIII AVD
So I have decided to stick with freshwater for my first ROV. I figured what I learned from this I can apply to a saltwater setup.
The one thing that I’m wondering about is a dry compartment for the electronics. I know that there are commercially available solutions like that used in the openROV but I’m wondering if there’s a DIY solution? I am only interested in going down to the depth of a GoPro dive case. Maximum 120 to 150 feet. If it is limited further by a diy seal… I am ok with that for now. If I could do 30ft I would be happy just to start in the water.
Also curious about the absolute cheapest spot for a pixhawk or clone to run ardusub?
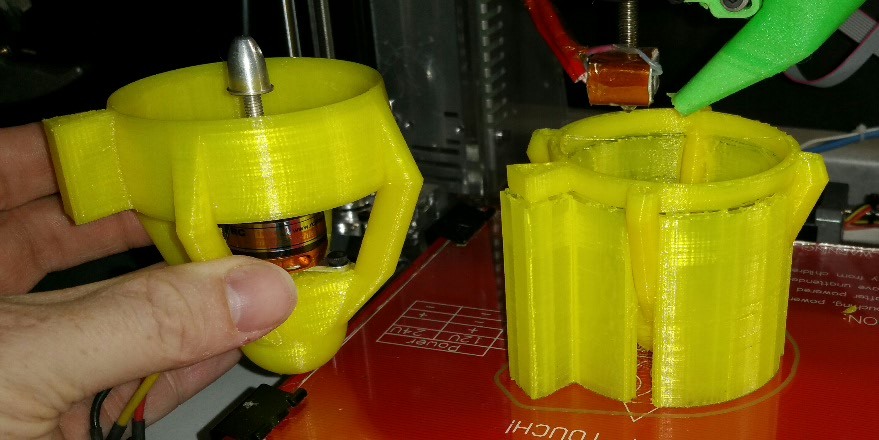
I have some photos of my brushless thrusters starting to be assembled… it’s a start!
Great job!
Could you tell me what the board is up your BBBMINI.it seems different with the OpenROV Controller and the OpenROV Cape Rev i have seem on the OpenROV.com
@Mark,
The BBBMINI information can be found here
I am also working with an OpenROV 2.8 Developer’s Controller Kit to be used on a smaller three thruster ROV.
Regards,
TCIII AVD
Hi TCIII,
This really is an amazing project. As a hydrographic surveyor working in the industry seeing the costs of the commercial equivalent and their many zero’s on the price tag these kind of projects really are a breath of fresh air.
The depth and attitude hold work incredibly well.
Are there any plans to add the functionality of following lines in Mission Planner using a GPS position if at the surface or a USBL position underwater?
I’m looking at building a semi-sub DP platform and would like it to hold station as well as follow a line, stop and then rotate.
All the best with the project. Keep up the amazing work guys.
@knuckles55,
Check the ArduSub Gitter for using GPS. Unfortunately there is no search function and the discussion was conducted last week. Maybe you can ask for an update?
@knuckles55,
Because the ArduSub firmware has been in a constant state of change and it is a PITA to pull the BBBMINI navigation controller out of it WTC, I have been working on a three thruster ROV configuration that combines a BR BlueROV1 chassis (no thrusters or WTC) and three T100 Thrusters with an OpenROV 2.8 Developer’s Controller Kit, [WTC] (http://store.openrov.com/collections/2-8-replacement-parts/products/3-16-replacement-cast-acrylic-main-tube), End Caps and IMU/Compass/Depth Module.
The only limitation of this hybrid ROV is the fact that the OpenROV Controller is not designed to handle the maximum current required by the BR T100 Thrusters. Therefore the ROV cannot be run at its full thrust, but close to it fortunately.
Regards,
TCIII AVD
Hi All,
Recently I have decided to replace my home brew HDPE chassis with a BlueROV2 chassis due to the excessive weight of the HDPE chassis. Since both of the ROV chassis support a vectored six thruster configuration replacing the HDPE chassis with the BlueROV2 chassis should be fairly straightforward. Though I will have to pot the Battery Power Distribution Board, which is presently located in the 4 in diameter Battery WTC, because there will be no room for it in the BR 3 in diameter Battery WTC. Actually BR had originally intended for both the Battery Power Distribution Board and the Signal Distribution Board to be potted (encapsulated) and be mounted externally to the Battery and Navigation Controller WTCs.
I plan to switch from the BBBMINI Navigation Controller and move to the RPi3/Pixhawk Navigation Controller combination along with the Fathom-X interface. The BlueESC Signal Distribution Board will take the place of the ESCs used on the BlueROV2 Electronics Tray.
The BlueROV2 chassis should be here around early December which is just about when I will finish up my BR/OROV Hybrid Three Thruster ROV.
More to come.
Regards,
TCIII AVD