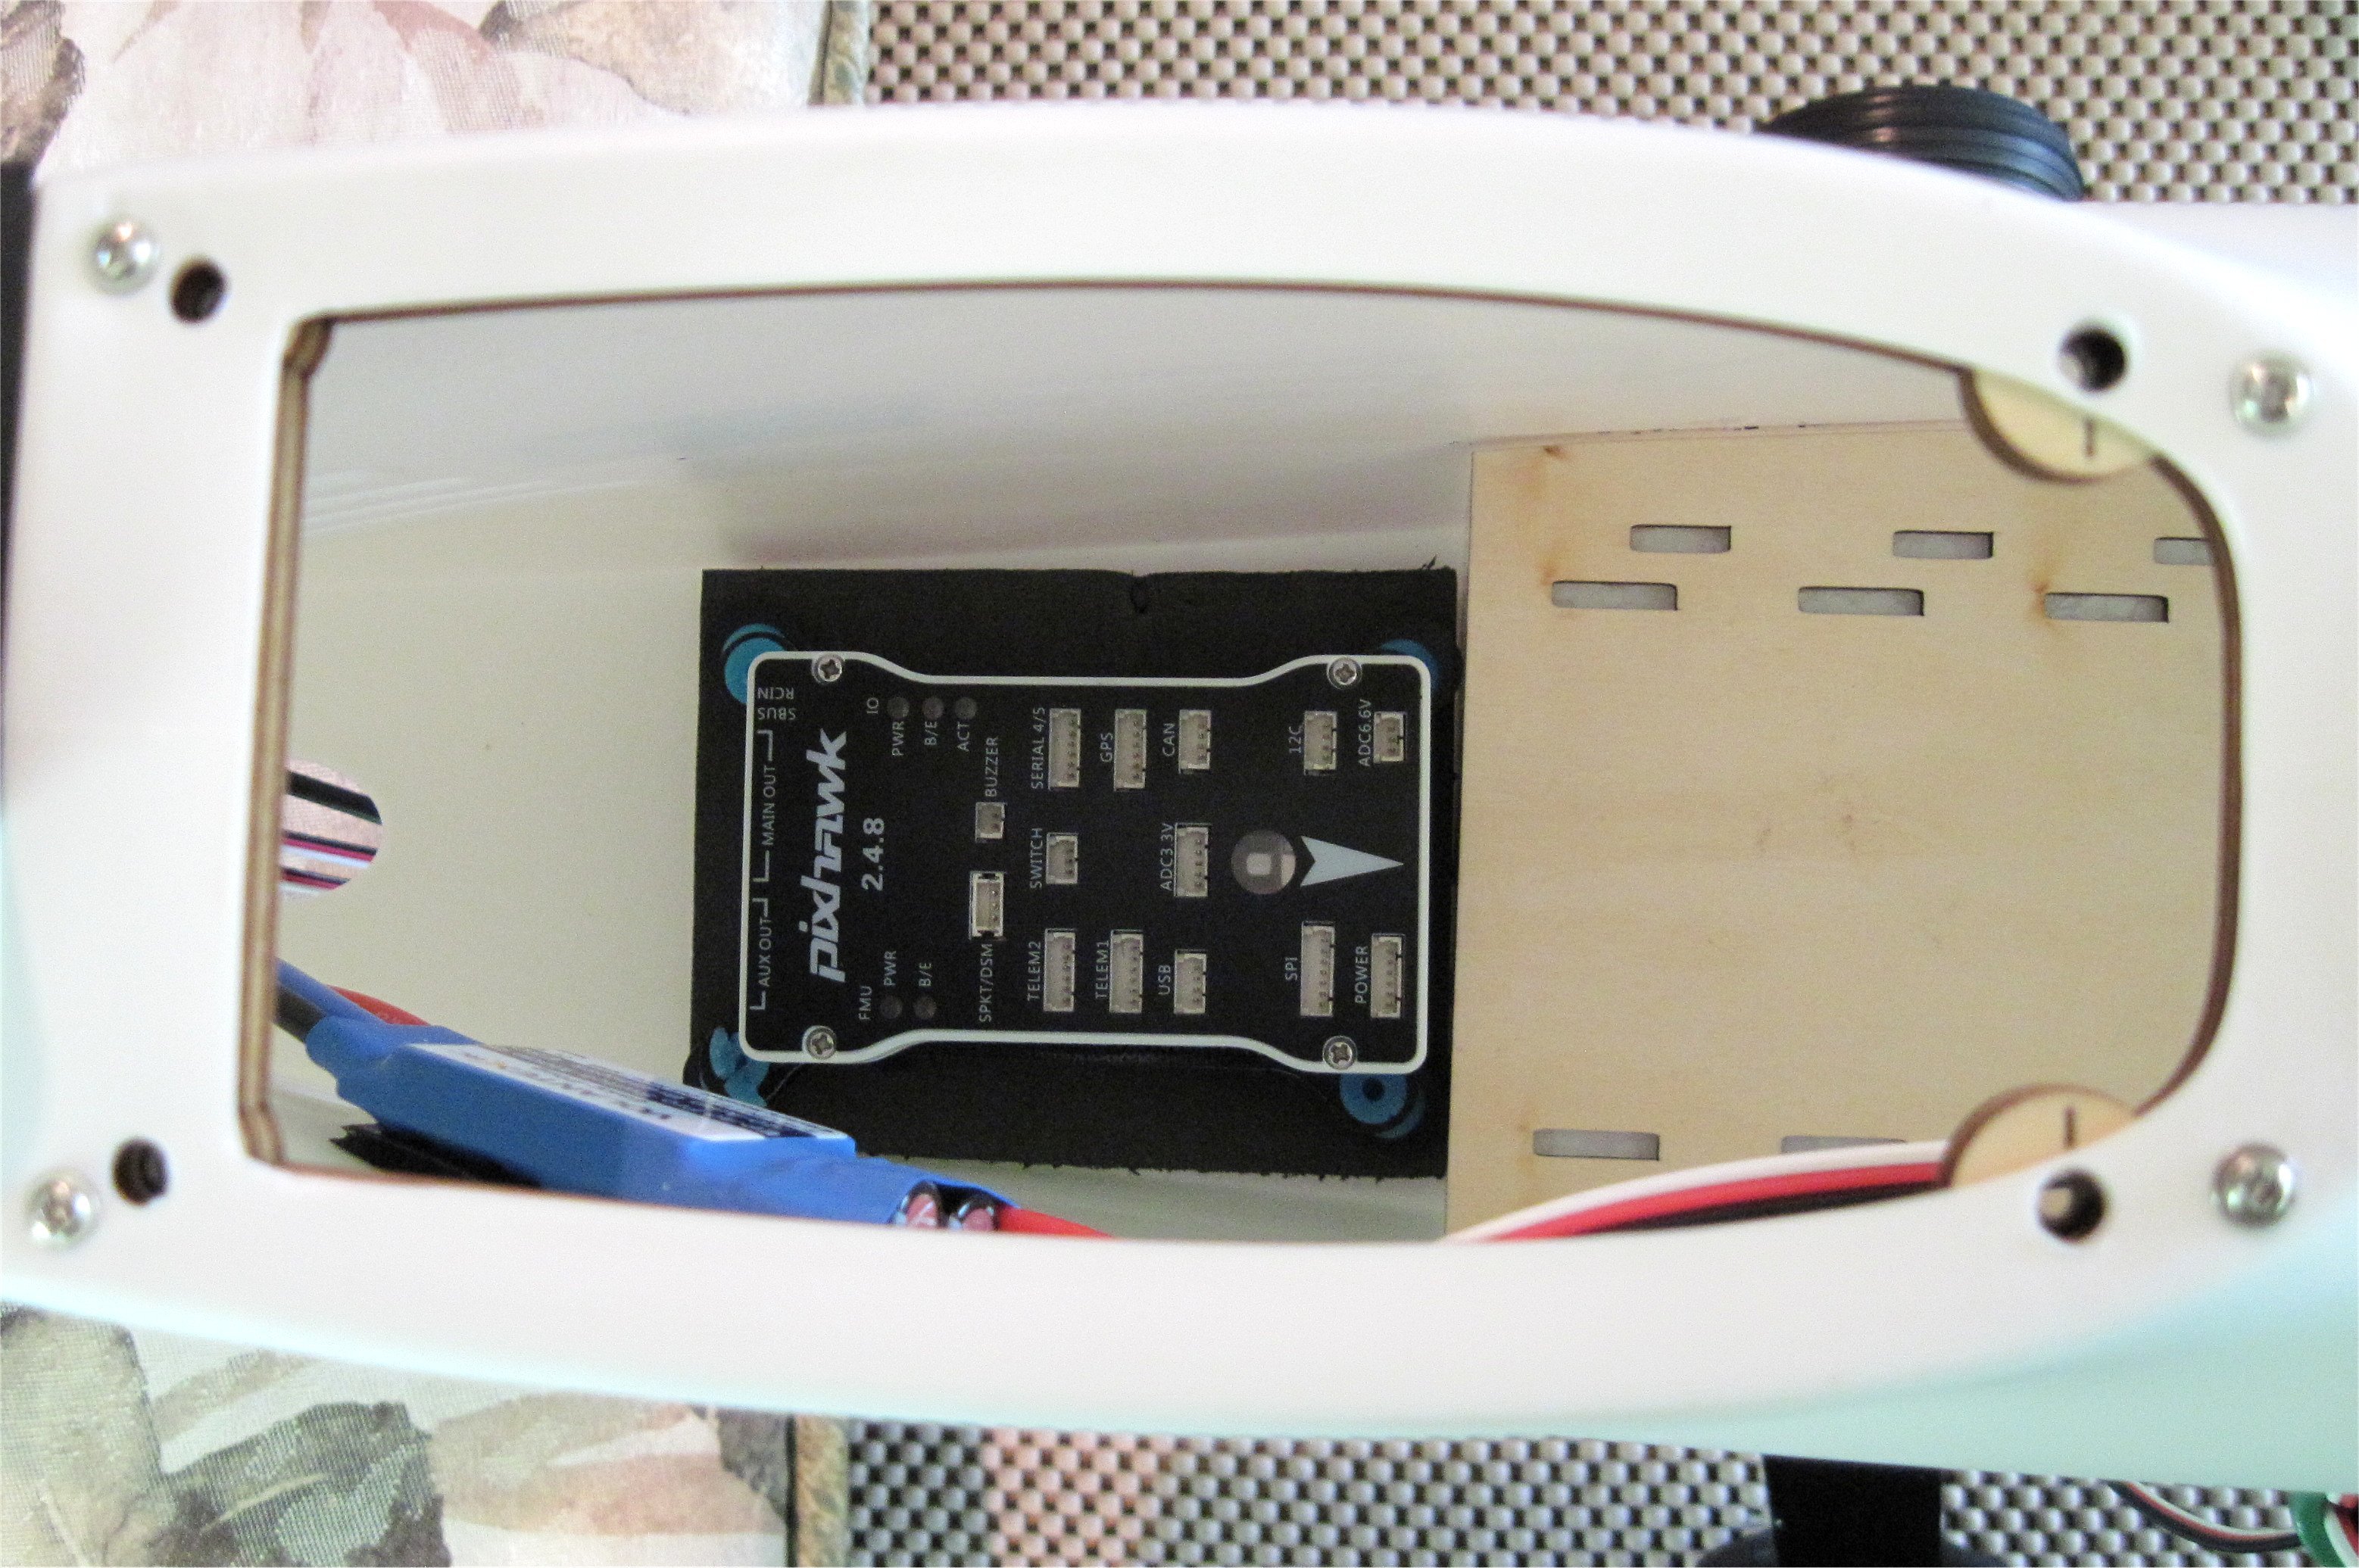
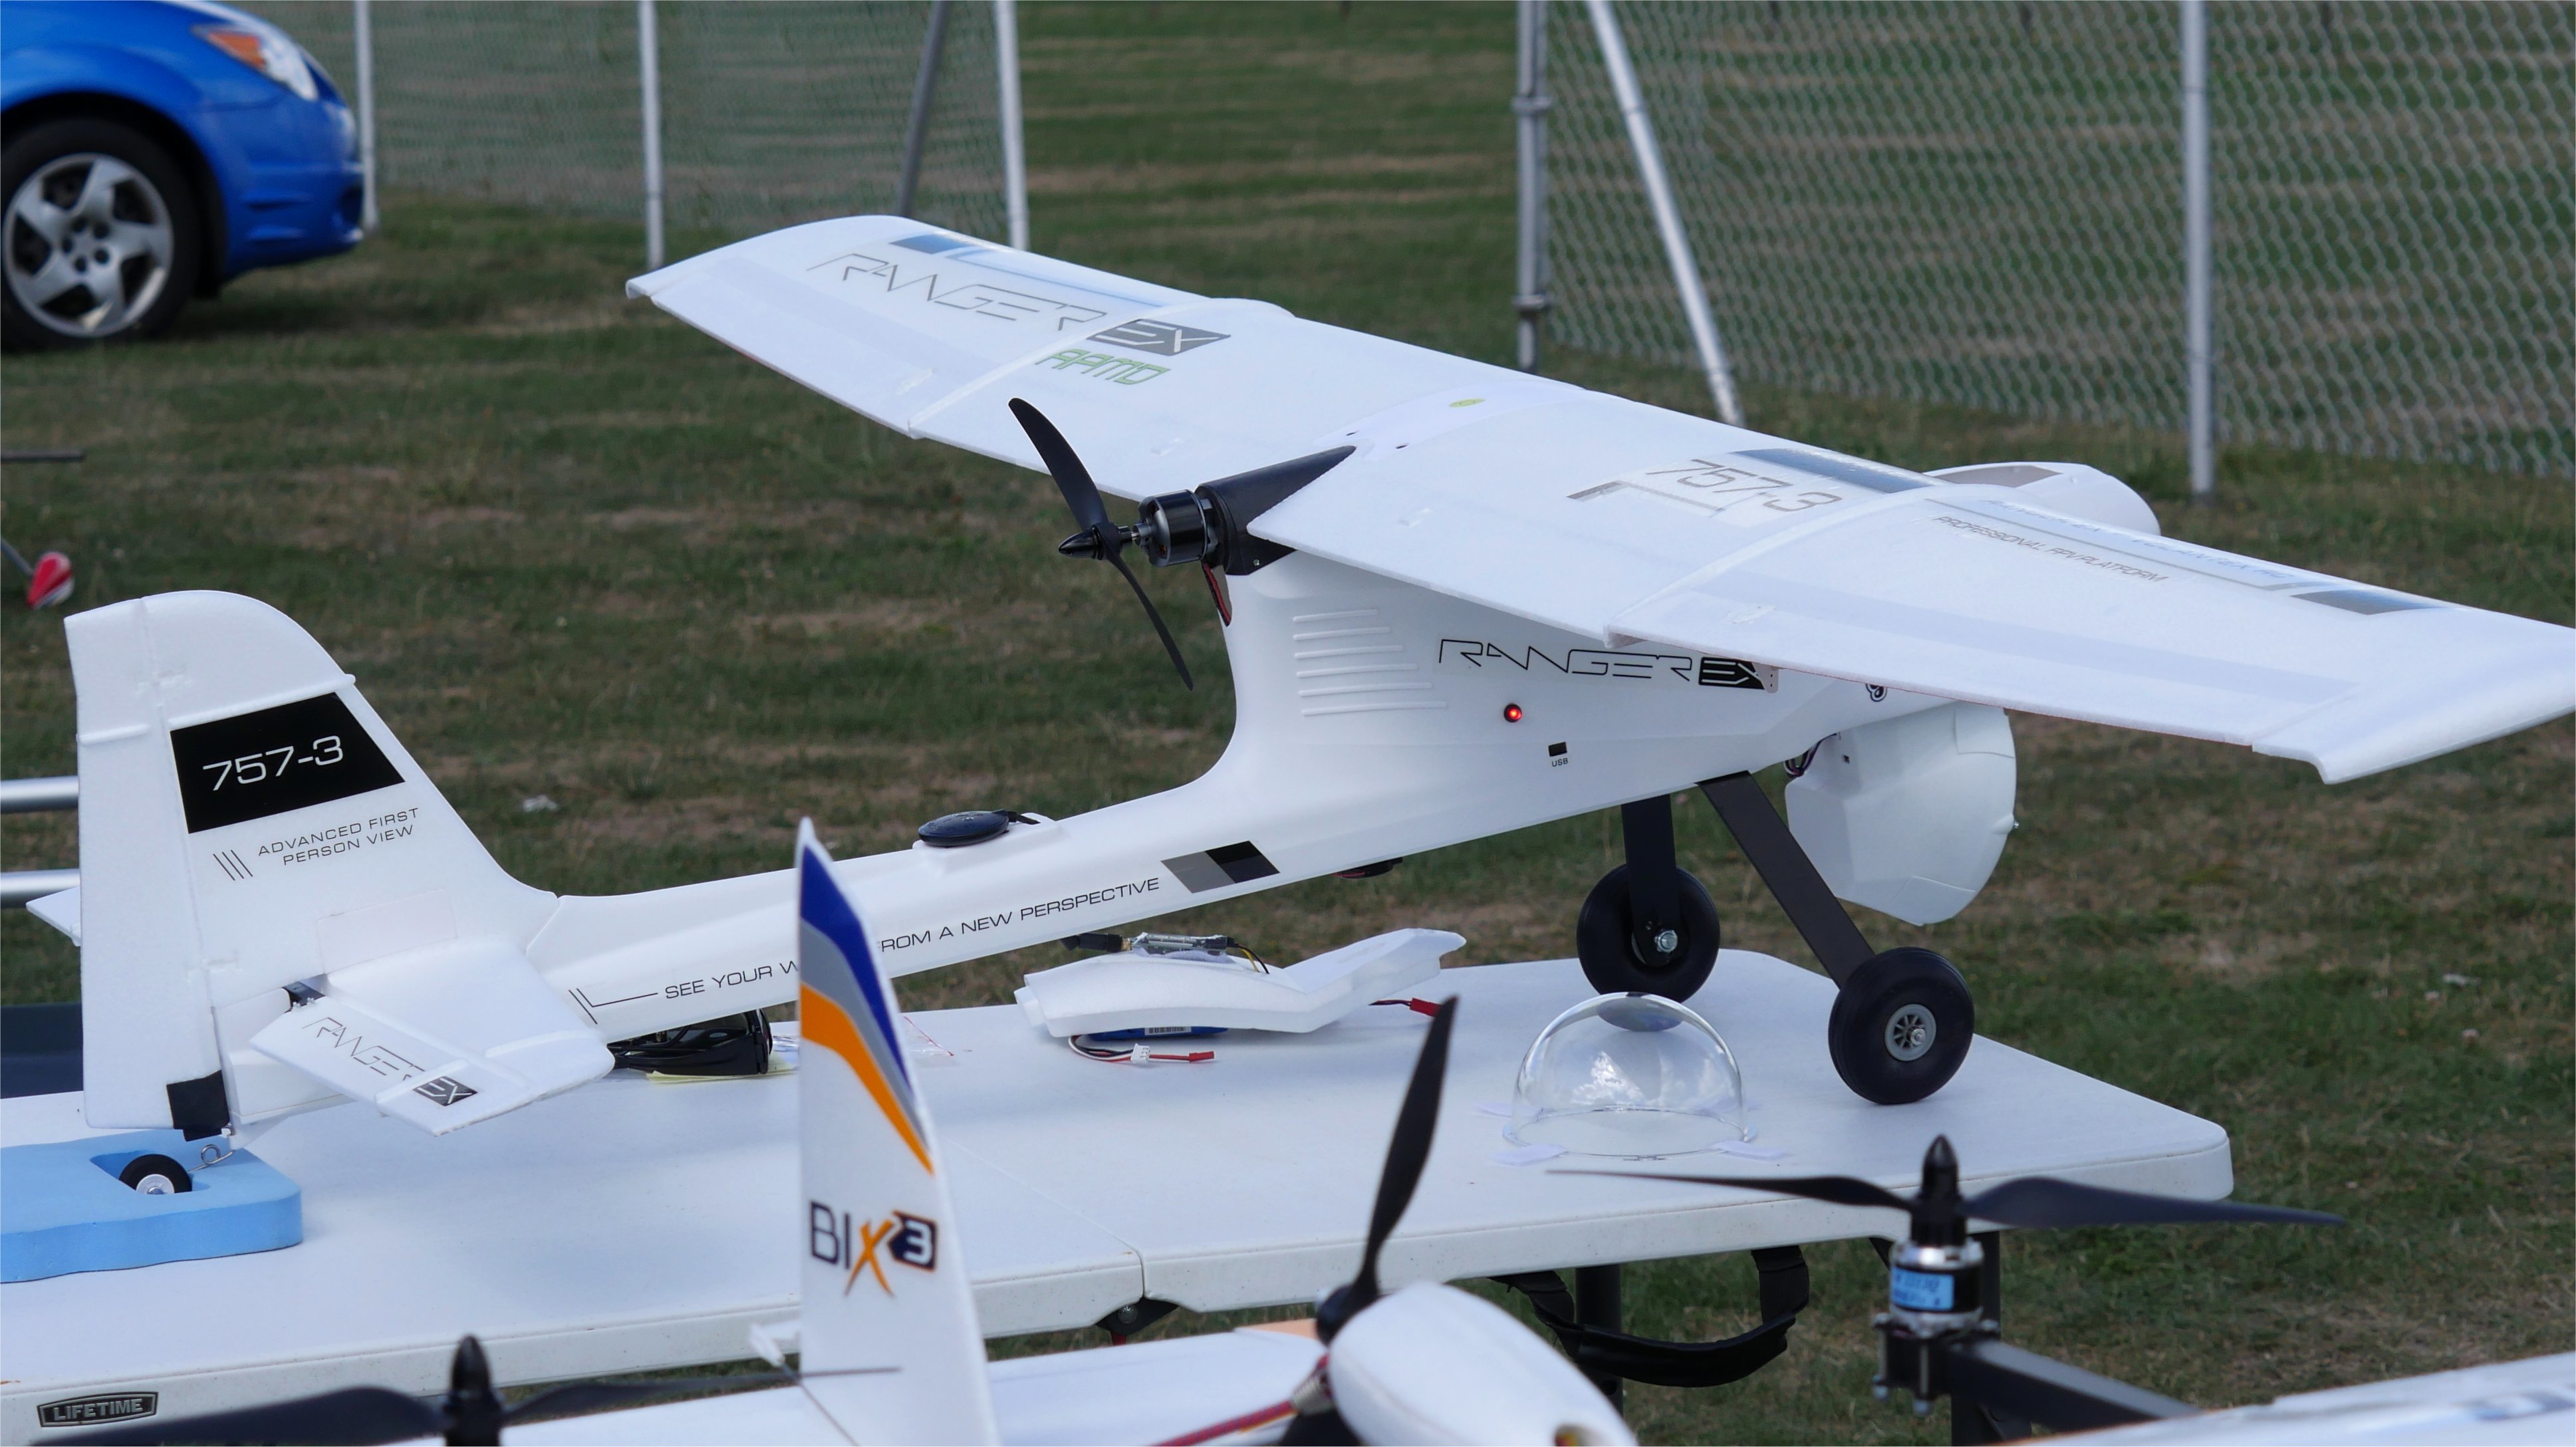
Now that I have had several good flights on my Volantex Ranger EX and have successfully trimmed it out and flown it using APM Plane v3.6.0 with a Pixhawk, I am ready for my QuadPlane conversion. By first flying the plane manually, and then with APM Plane, it eliminates much of the initial complexity of converting it to a QuadPlane. Further, when I assembled the Ranger EX for APM, I made the wiring “QuadPlane ready”.
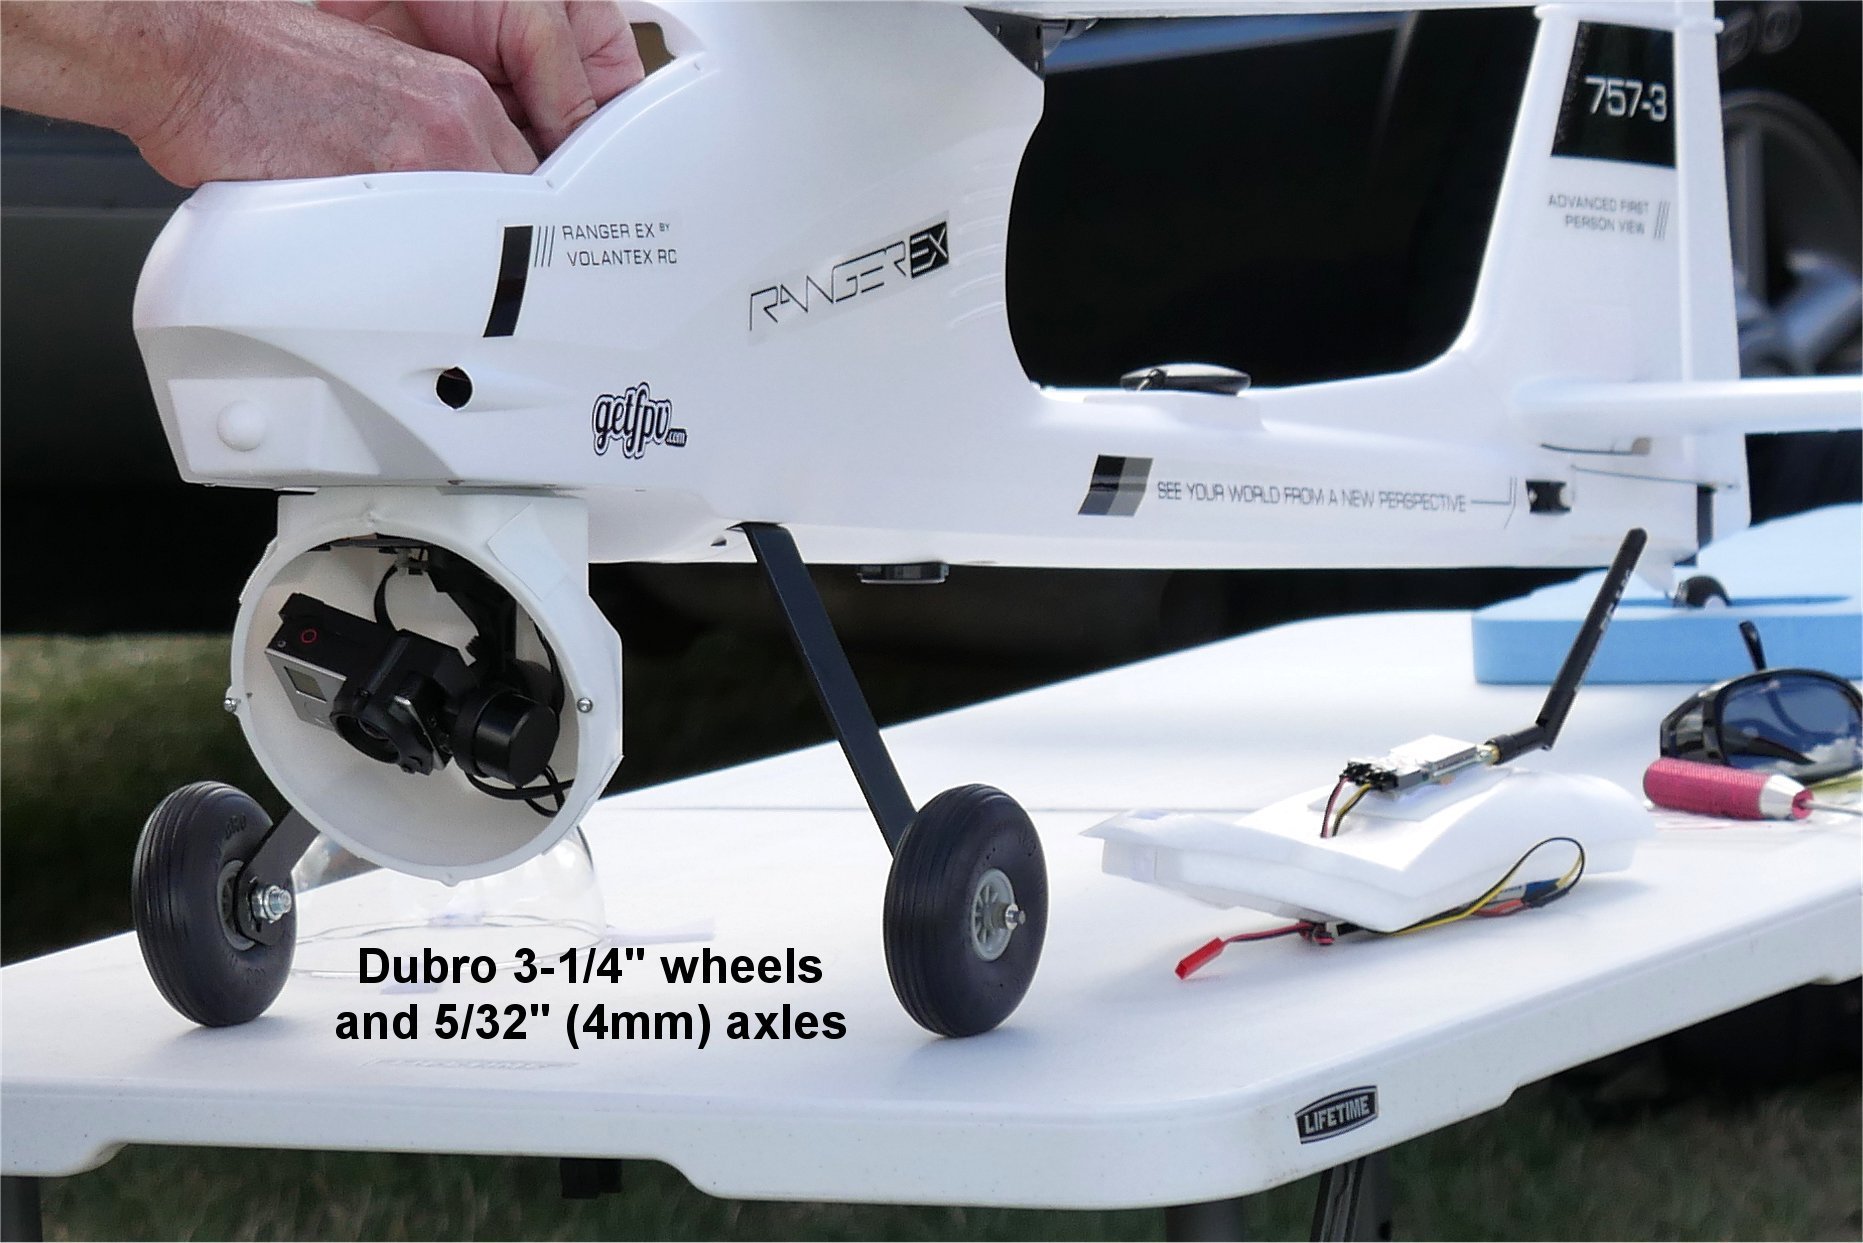
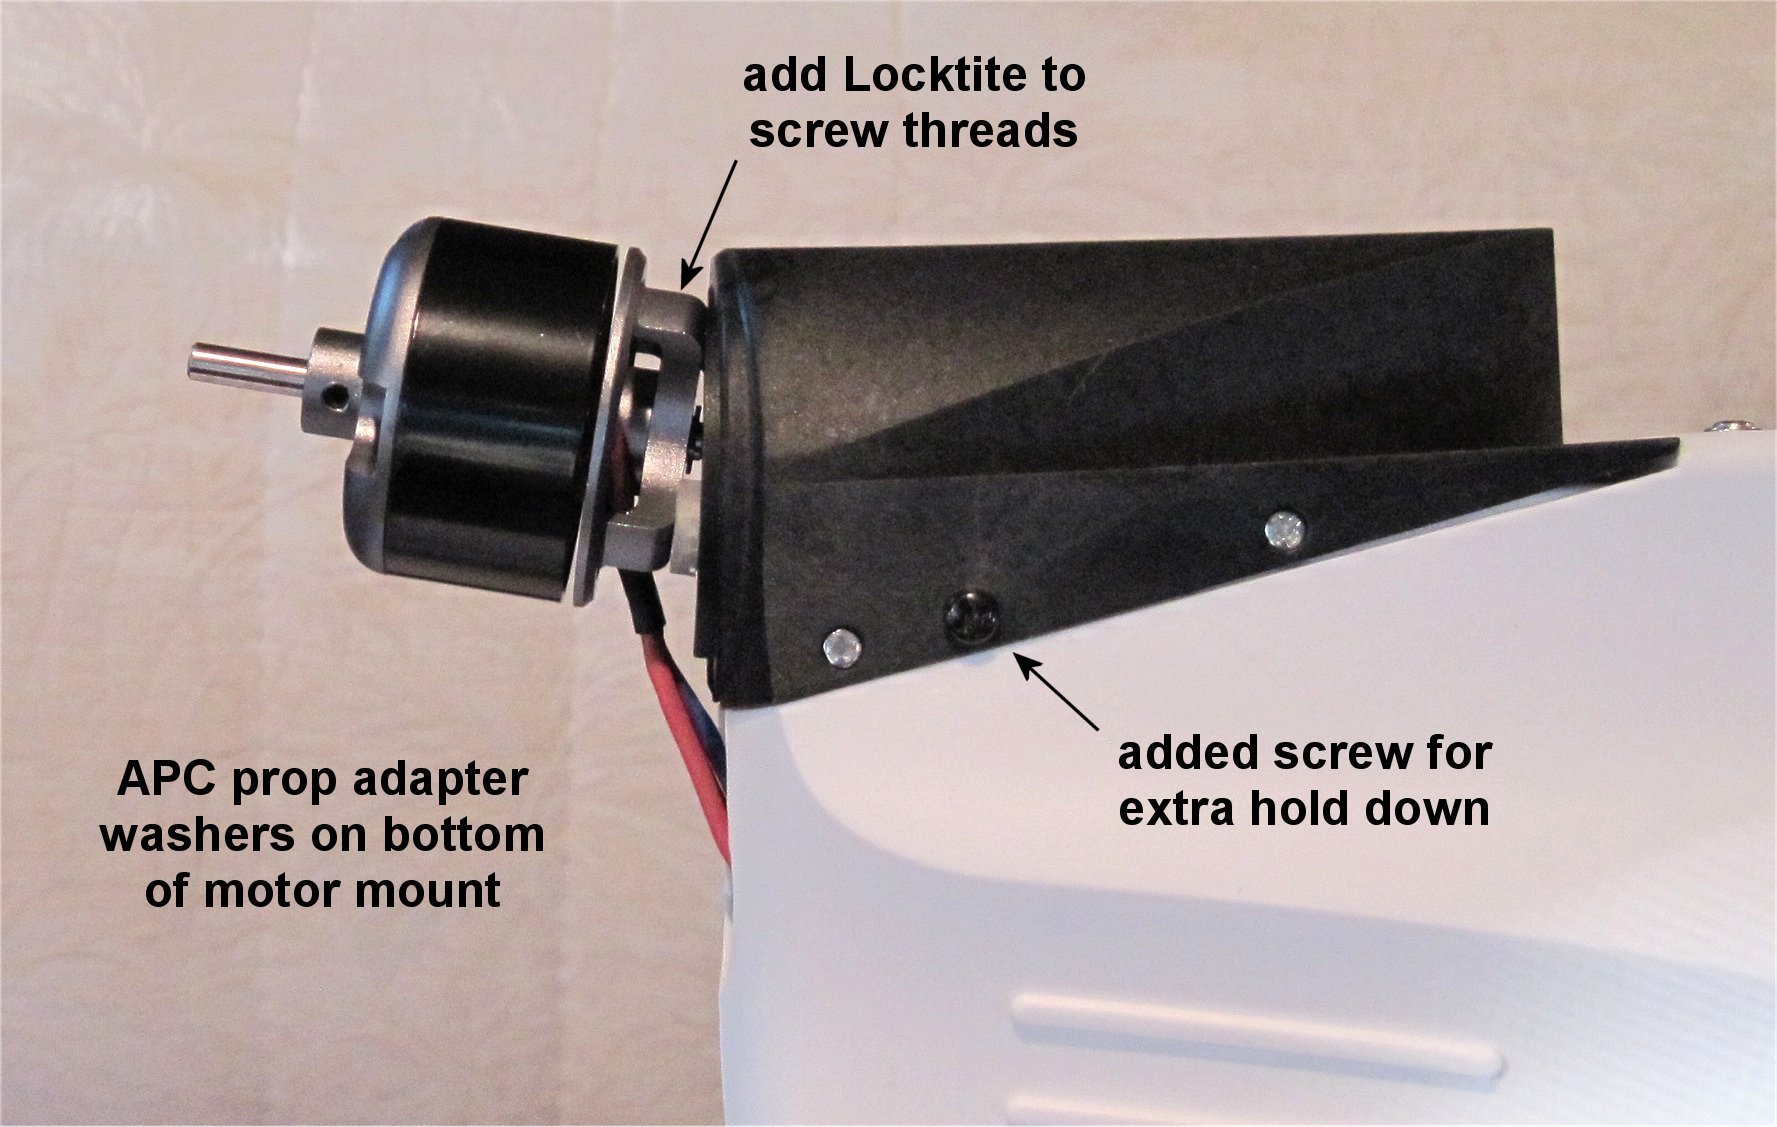
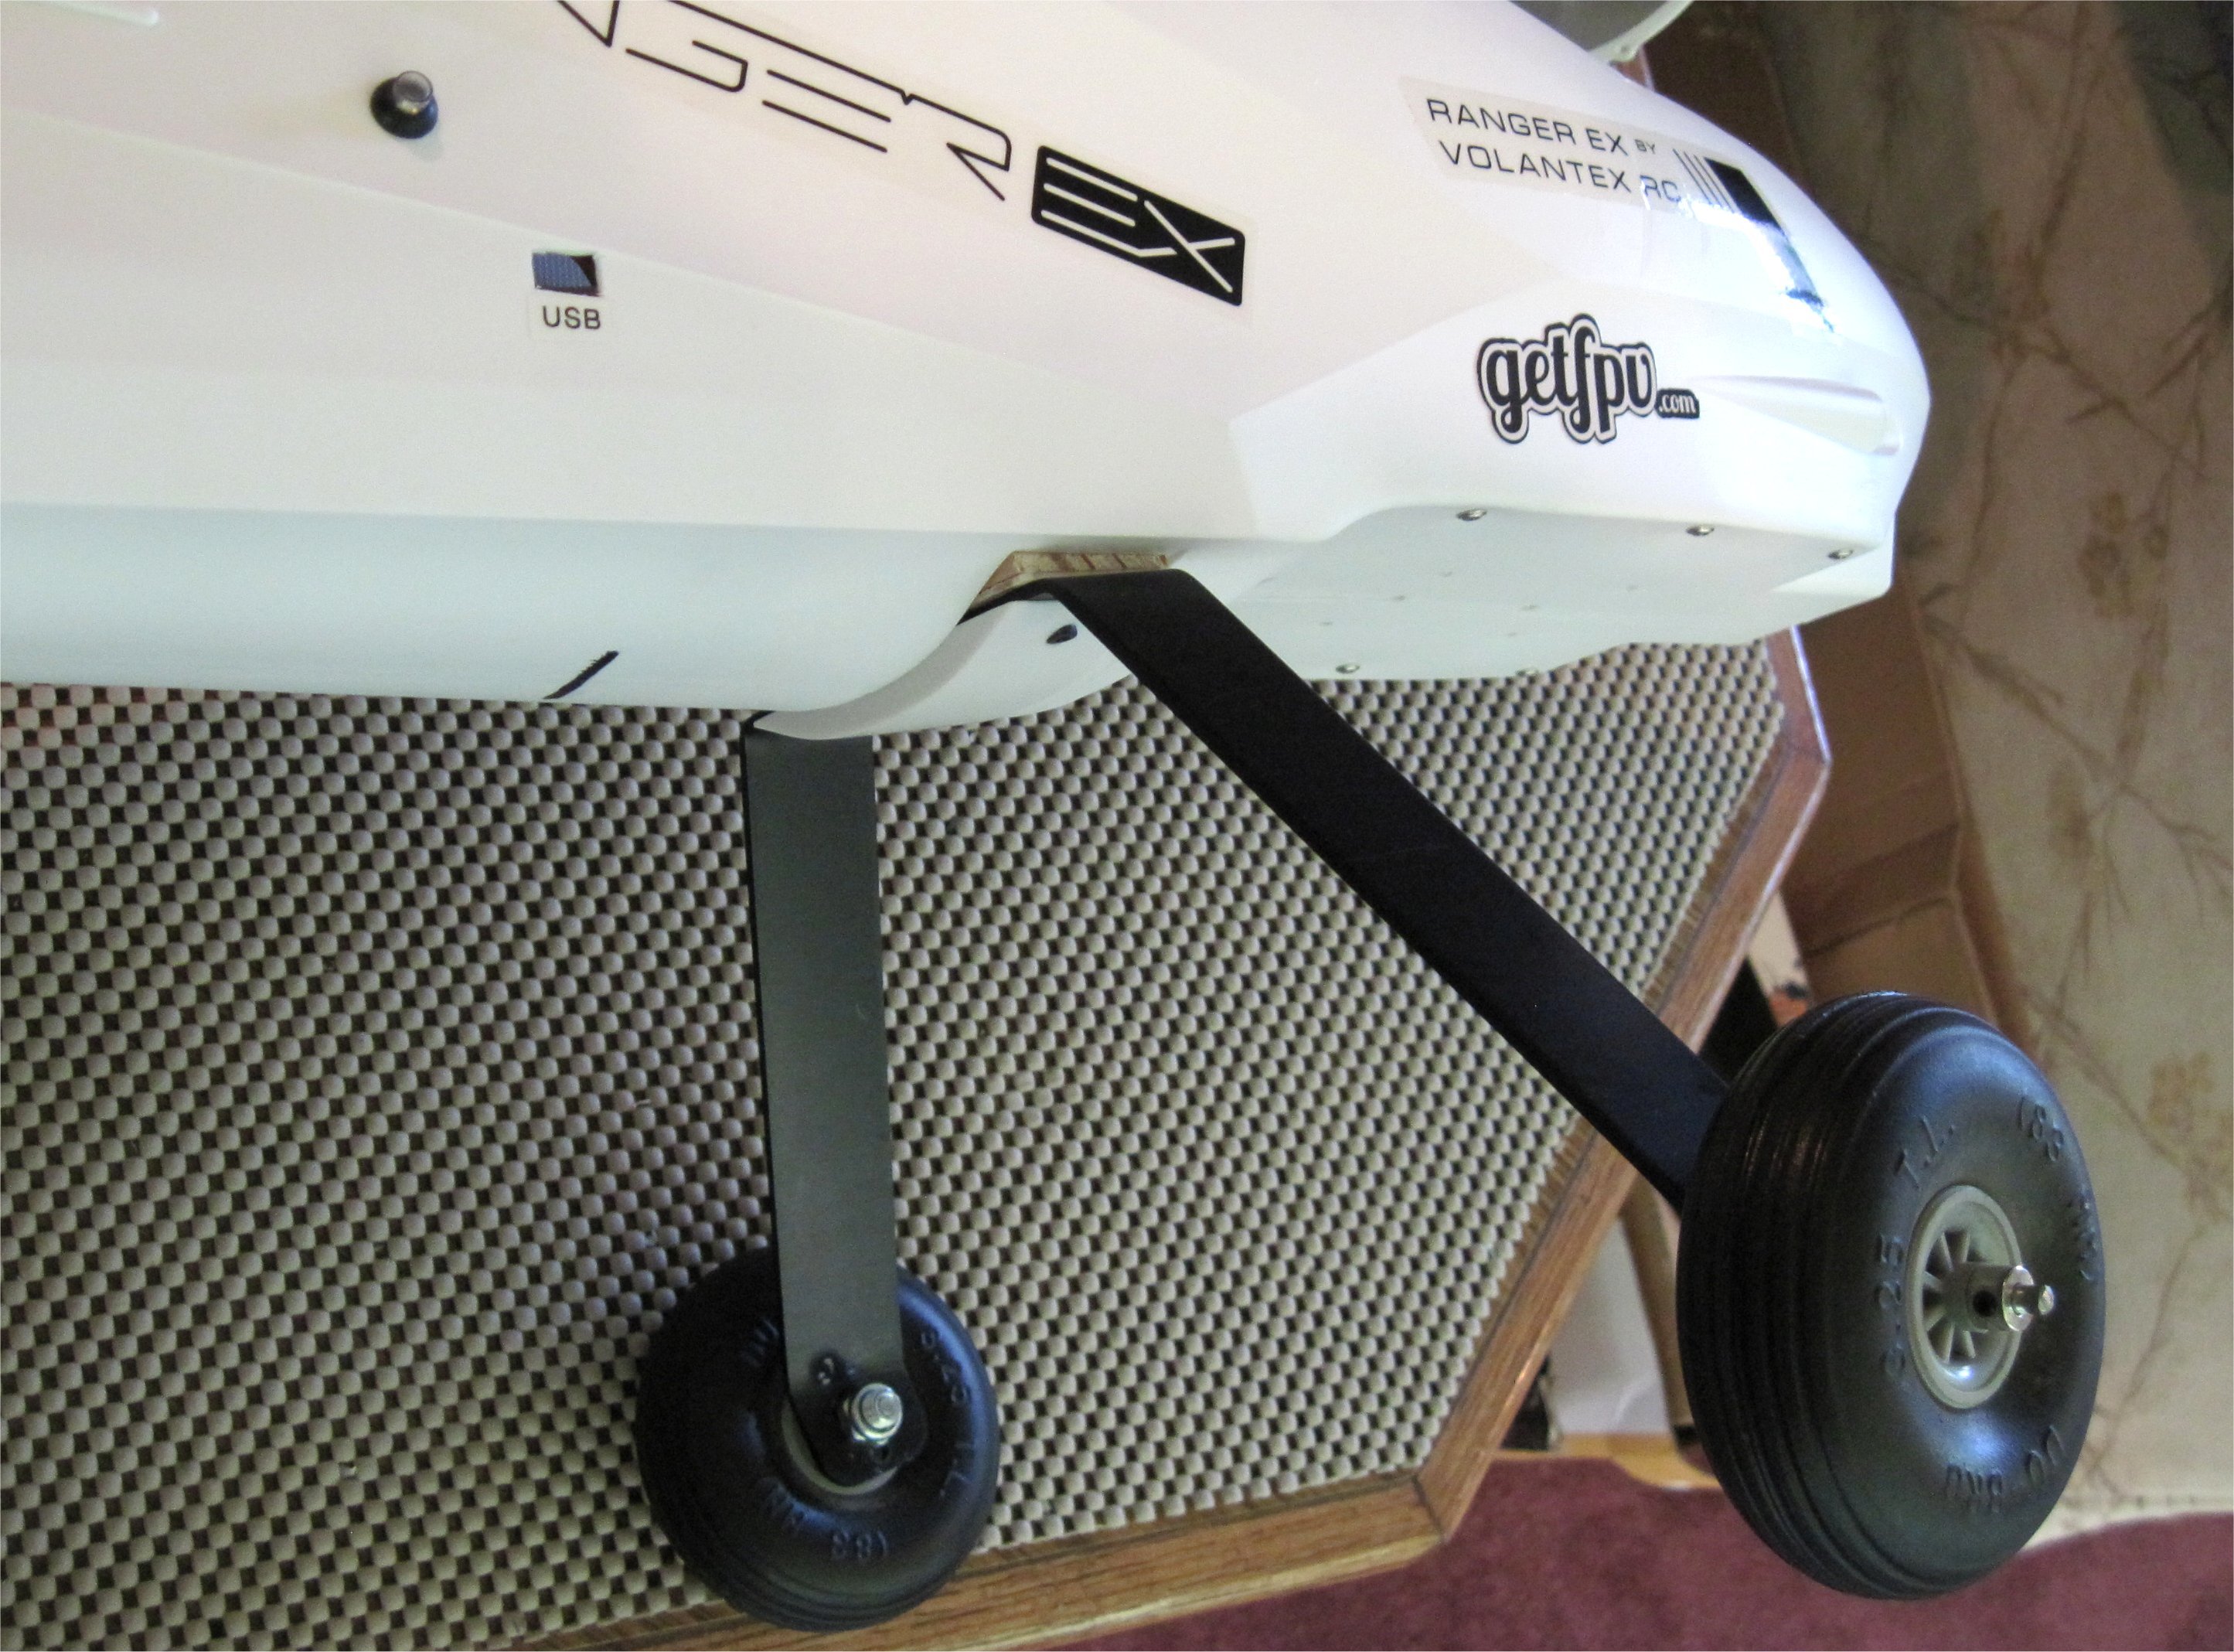
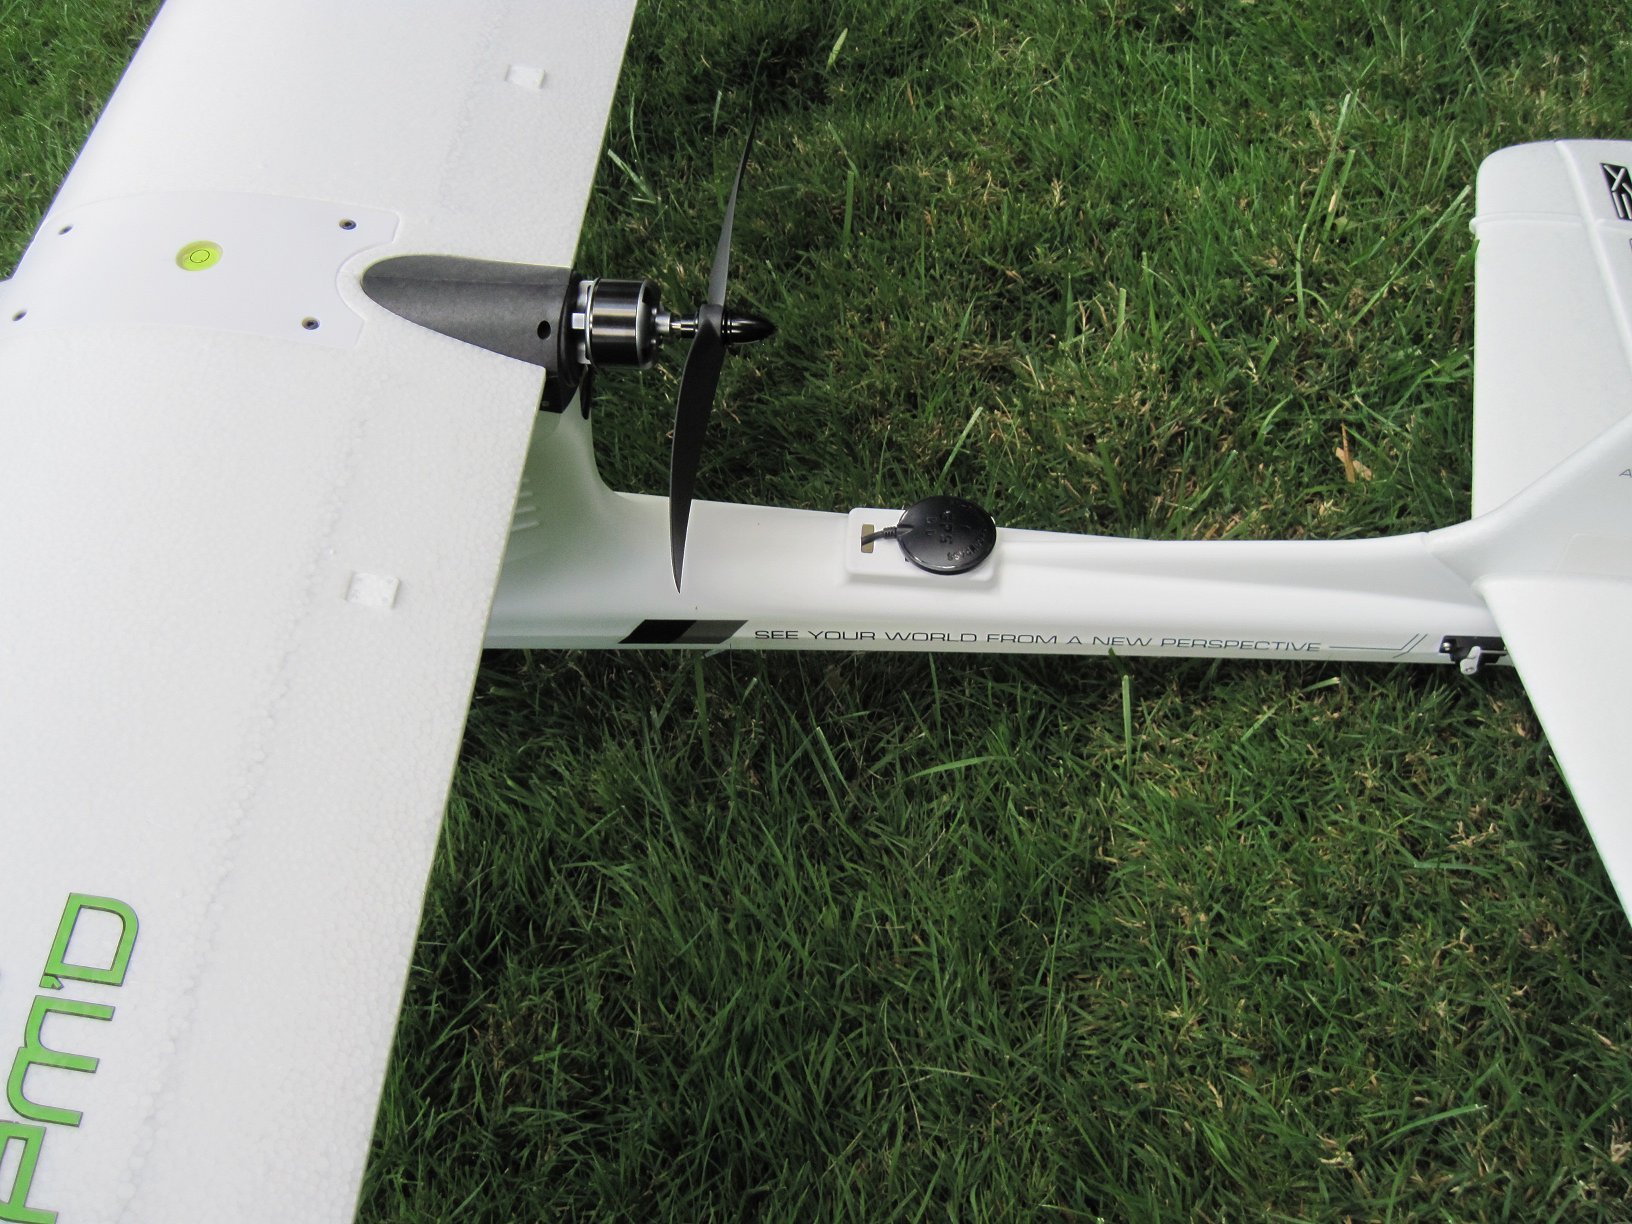
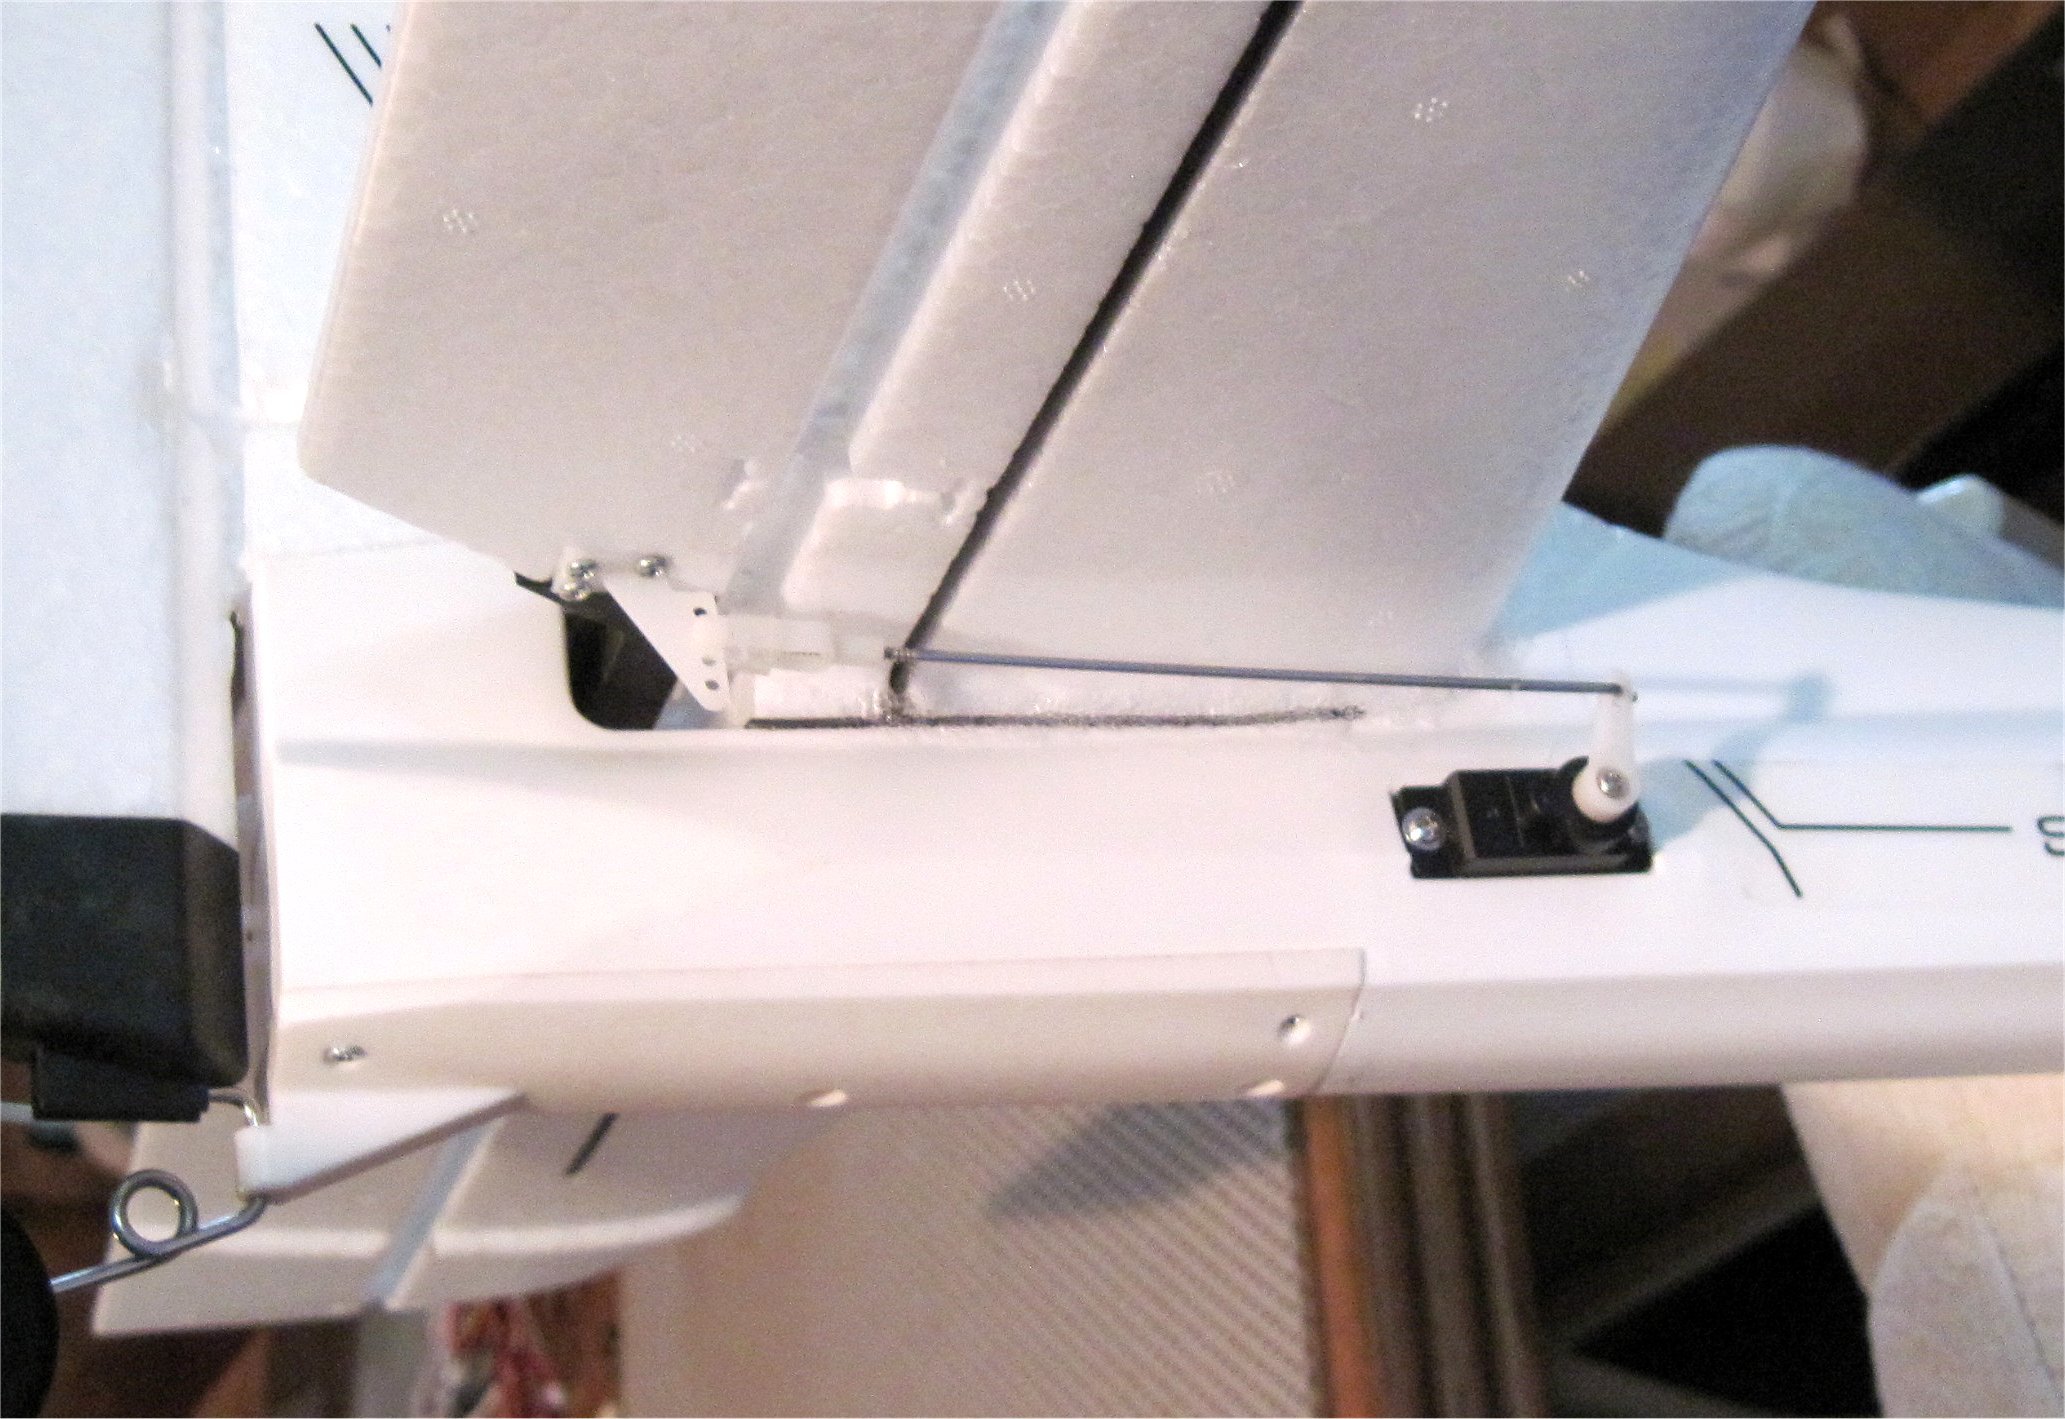
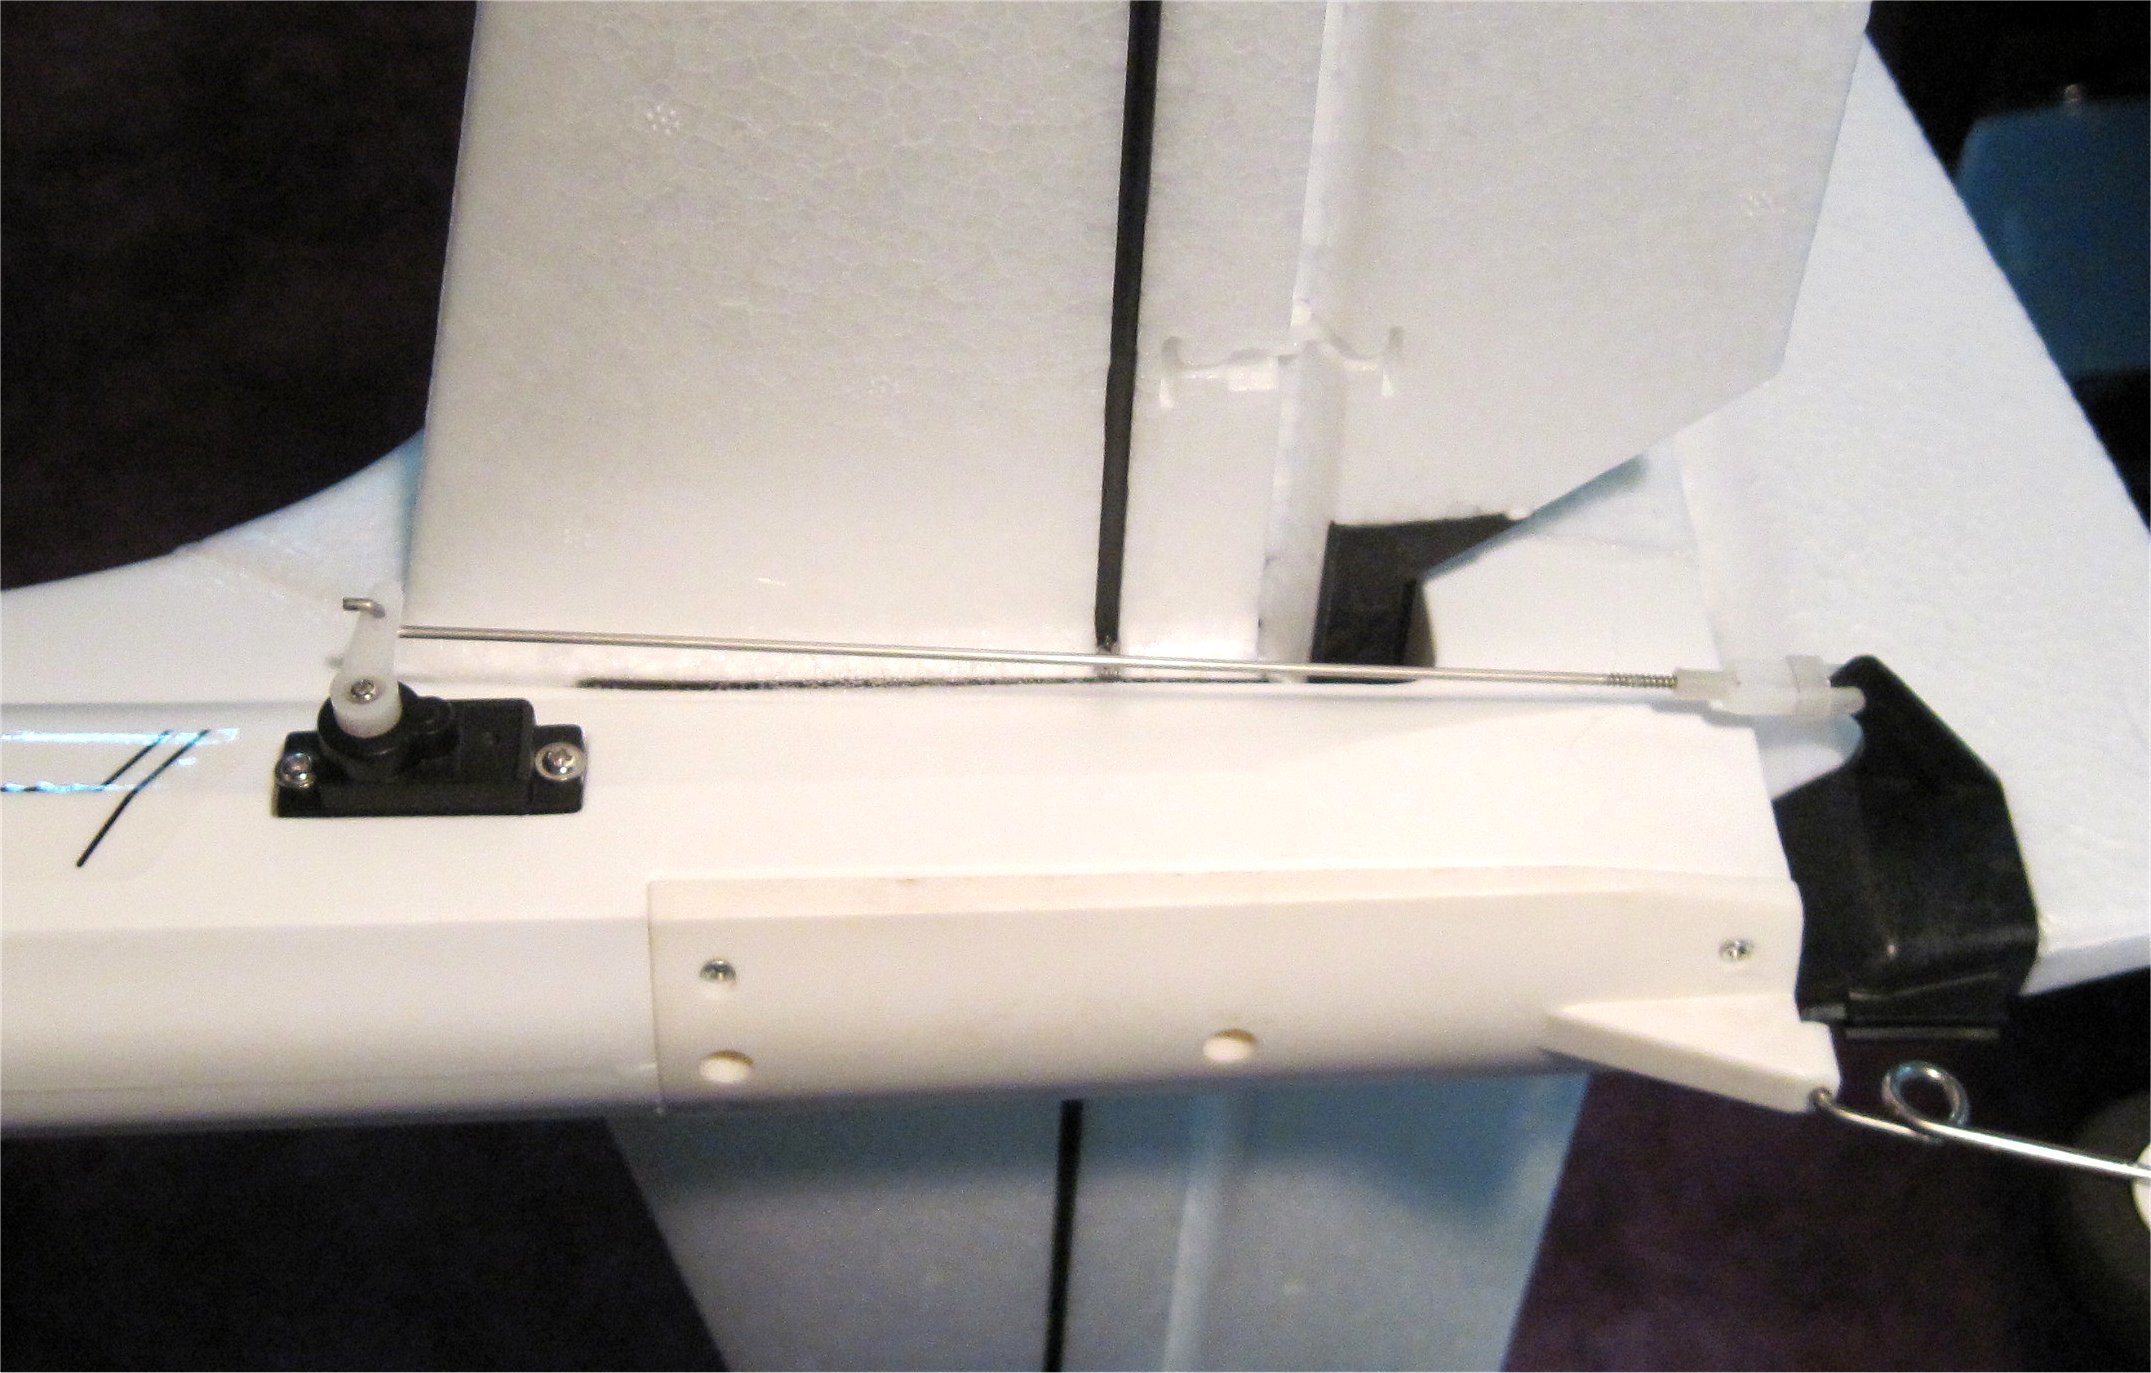
Here are my initial build images and findings from the Ranger EX thread on RCG. The plane needed some larger wheels and the gear mains swept forward a bit to prevent tip overs on ROG take-offs. The thrust angle was incorrect and the supplied tractor prop wrong for the built-in thrust offset of the stock motor mount. Once corrected, the Ranger EX flies like a dream!
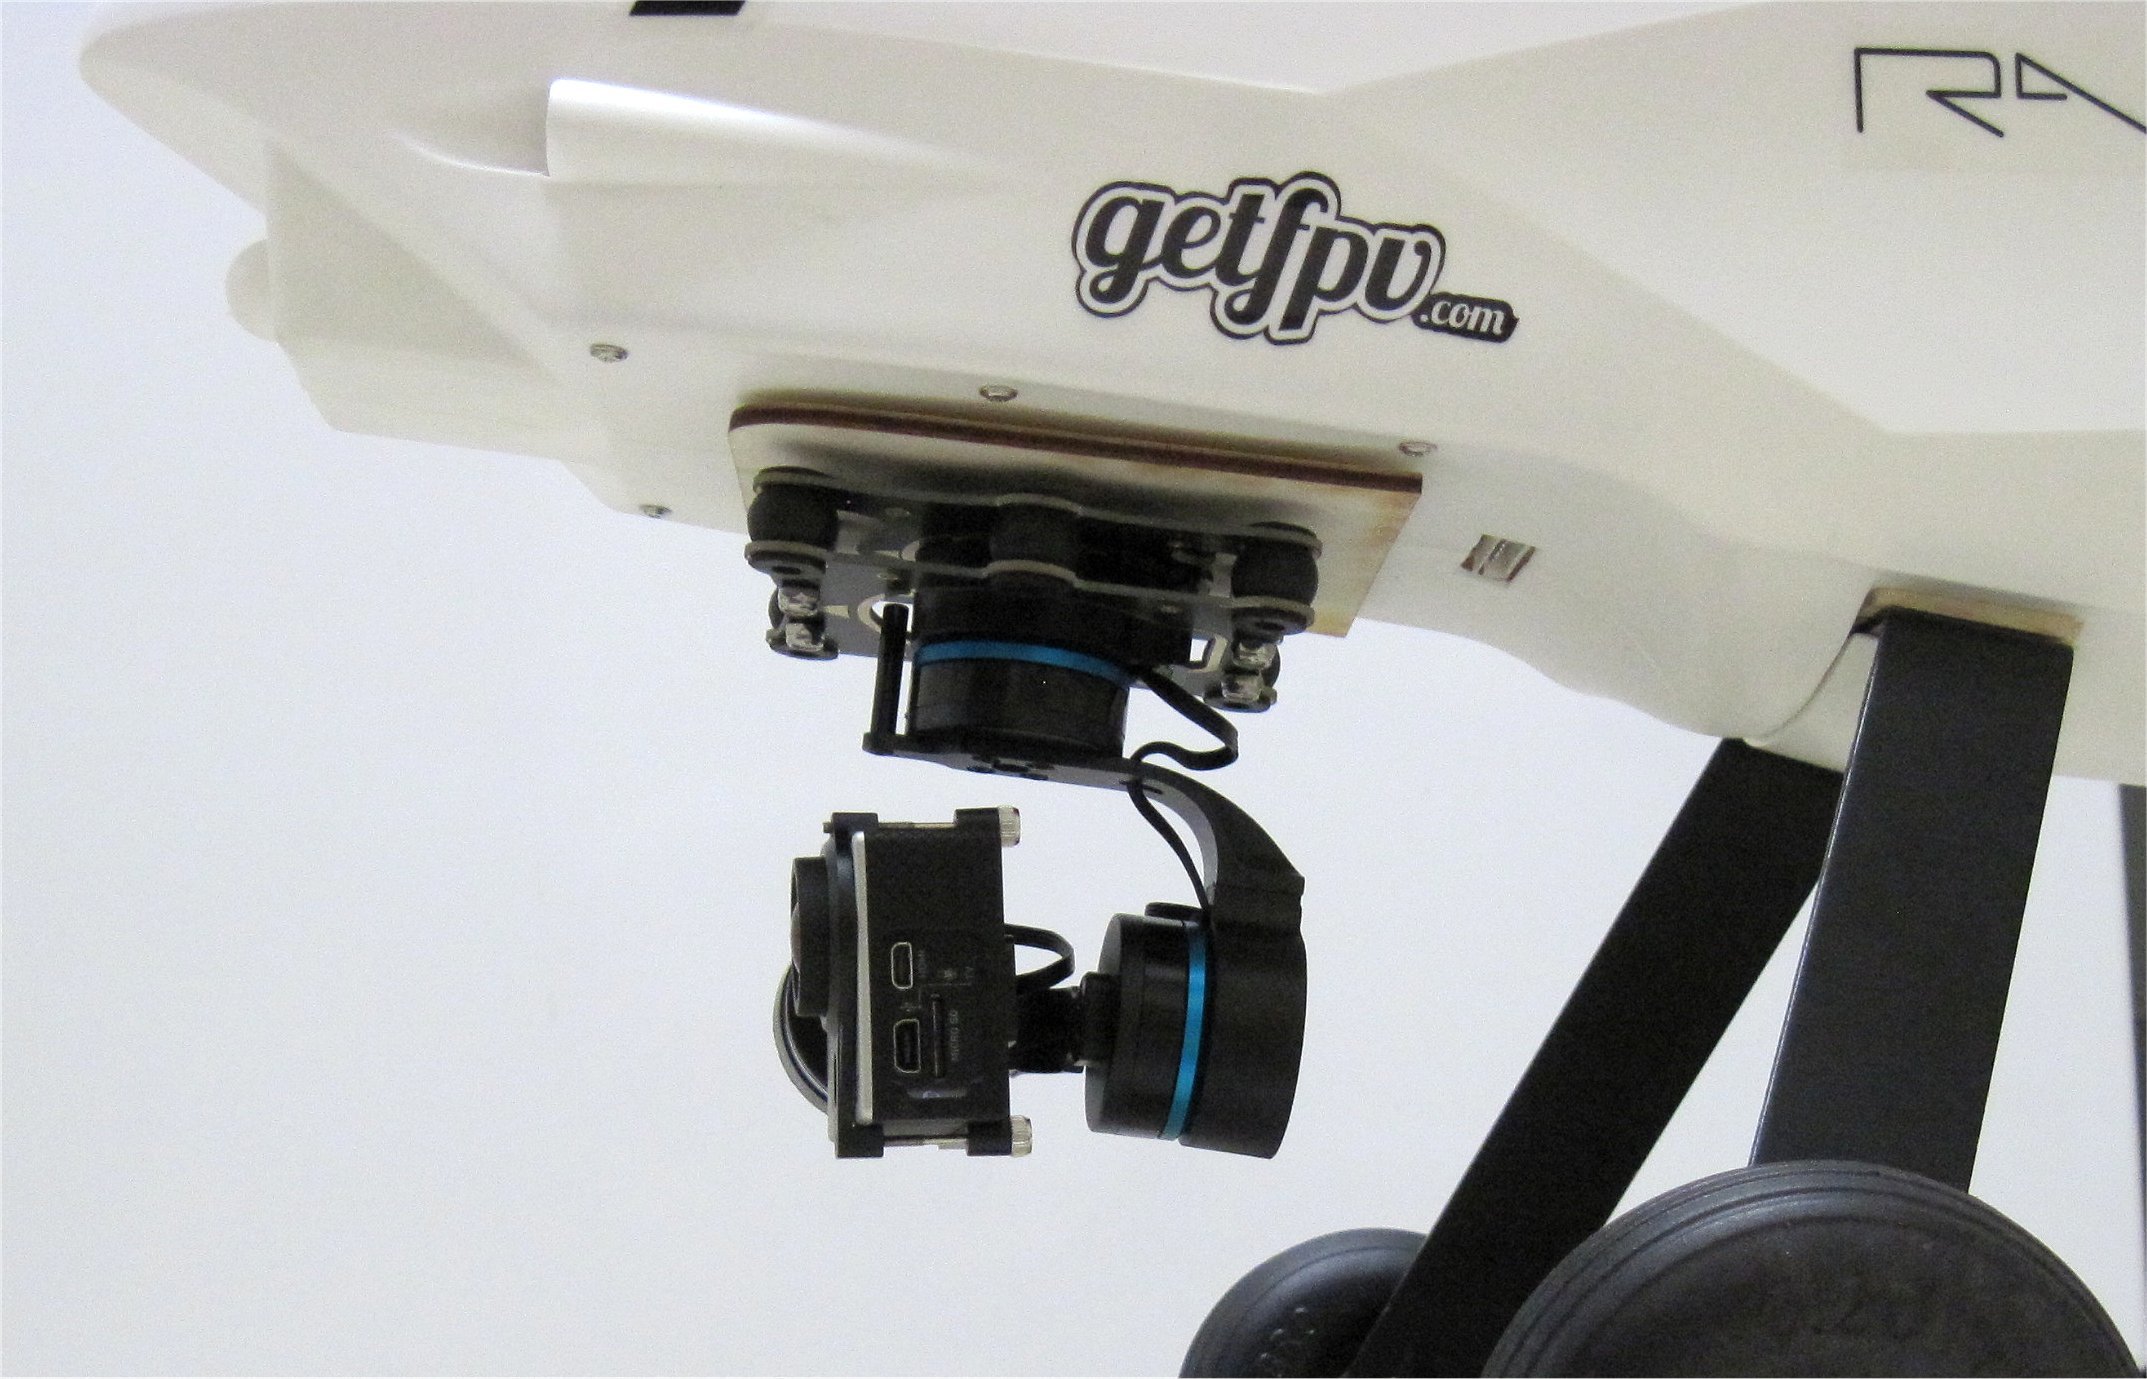
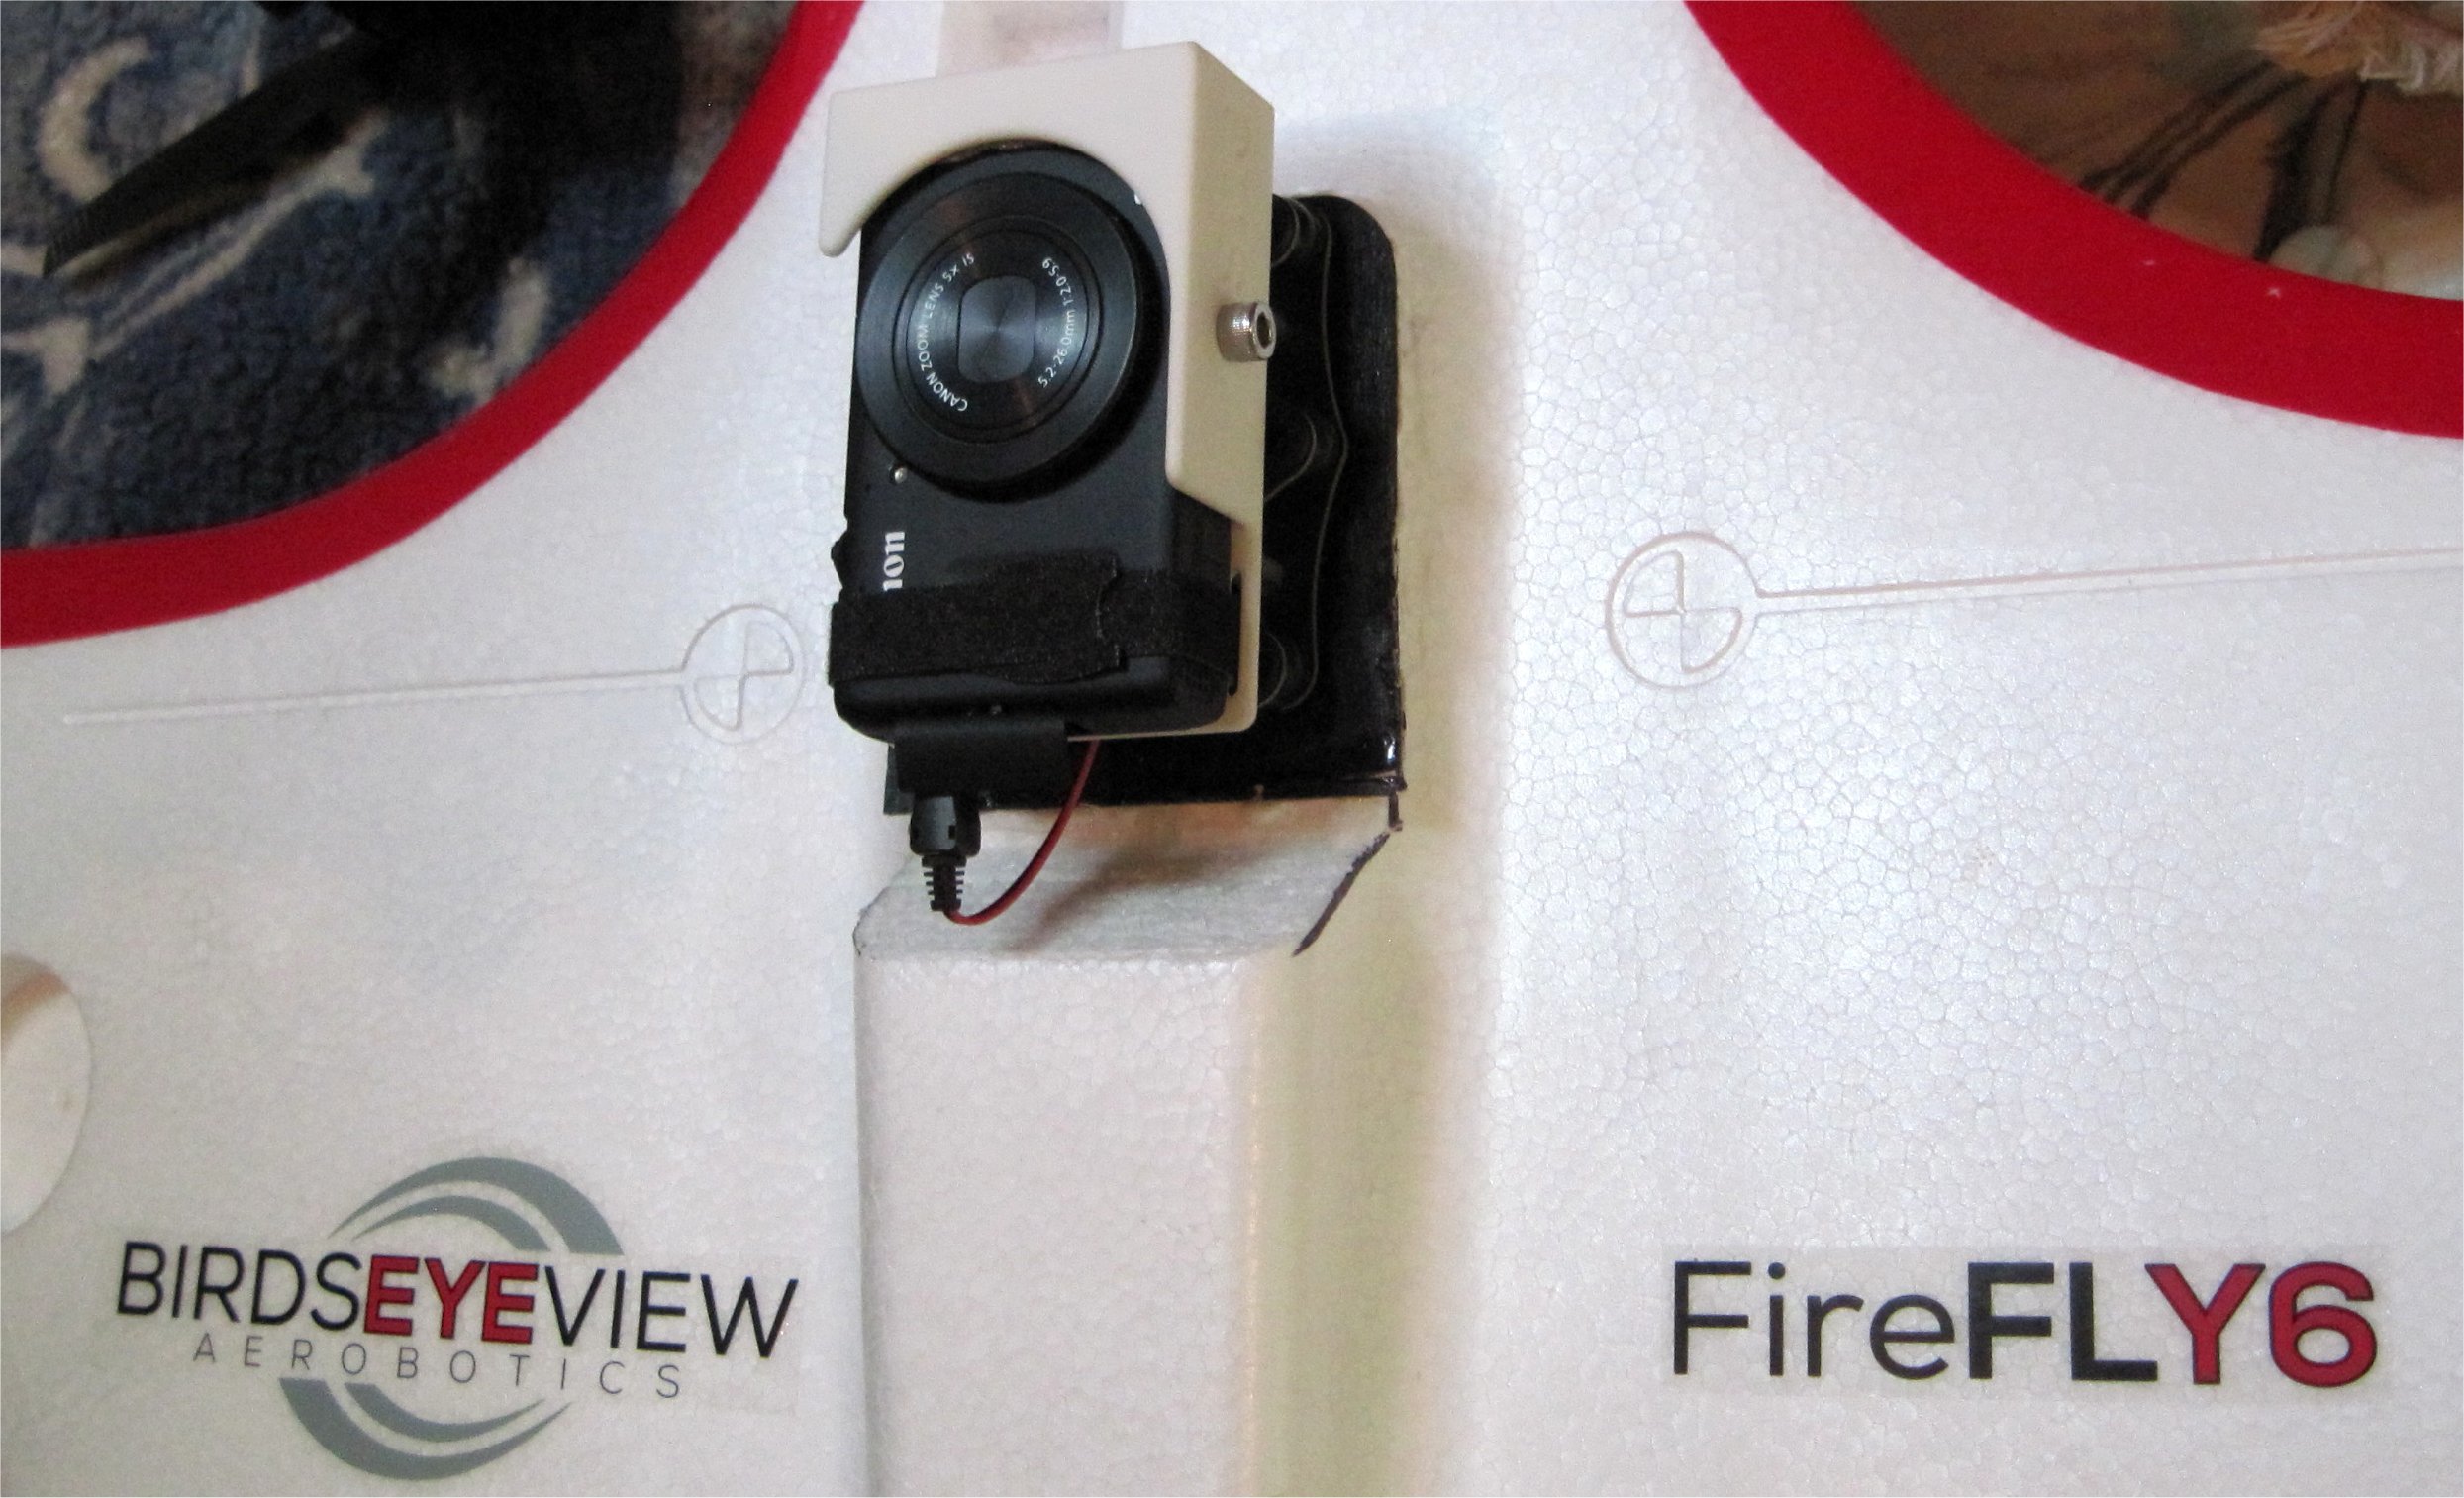
My new camera mount scheme uses the FireFLY6 Payload Mount Kit from BirdsEyeView Aerobotics. This allows me to swap video and mapping payloads between my Ranger EX, FireFLY6, and Tarot 680 Pro hexacopter.
The video gimbal is a Feiyu Tech FY-G3 for GoPro and my mapping camera is a Canon S100. I’m also working on an inexpensive FLIR camera.
The Ranger EX has enough space under the fuselage and carrying capacity that I may use a second payload mount for multiple cameras together.
My 5th flight of the Volantex Ranger EX was just like flights 2-4. After fixing the issues from flight 1, the plane continues to fly great! My Pixhawk flight controller was running APM Plane v3.6.0 in preparation for my conversion to a QuadPlane for VTOLs. This will allow me to take off and land in nasty farm fields or partially wooded areas for agricultural mapping.
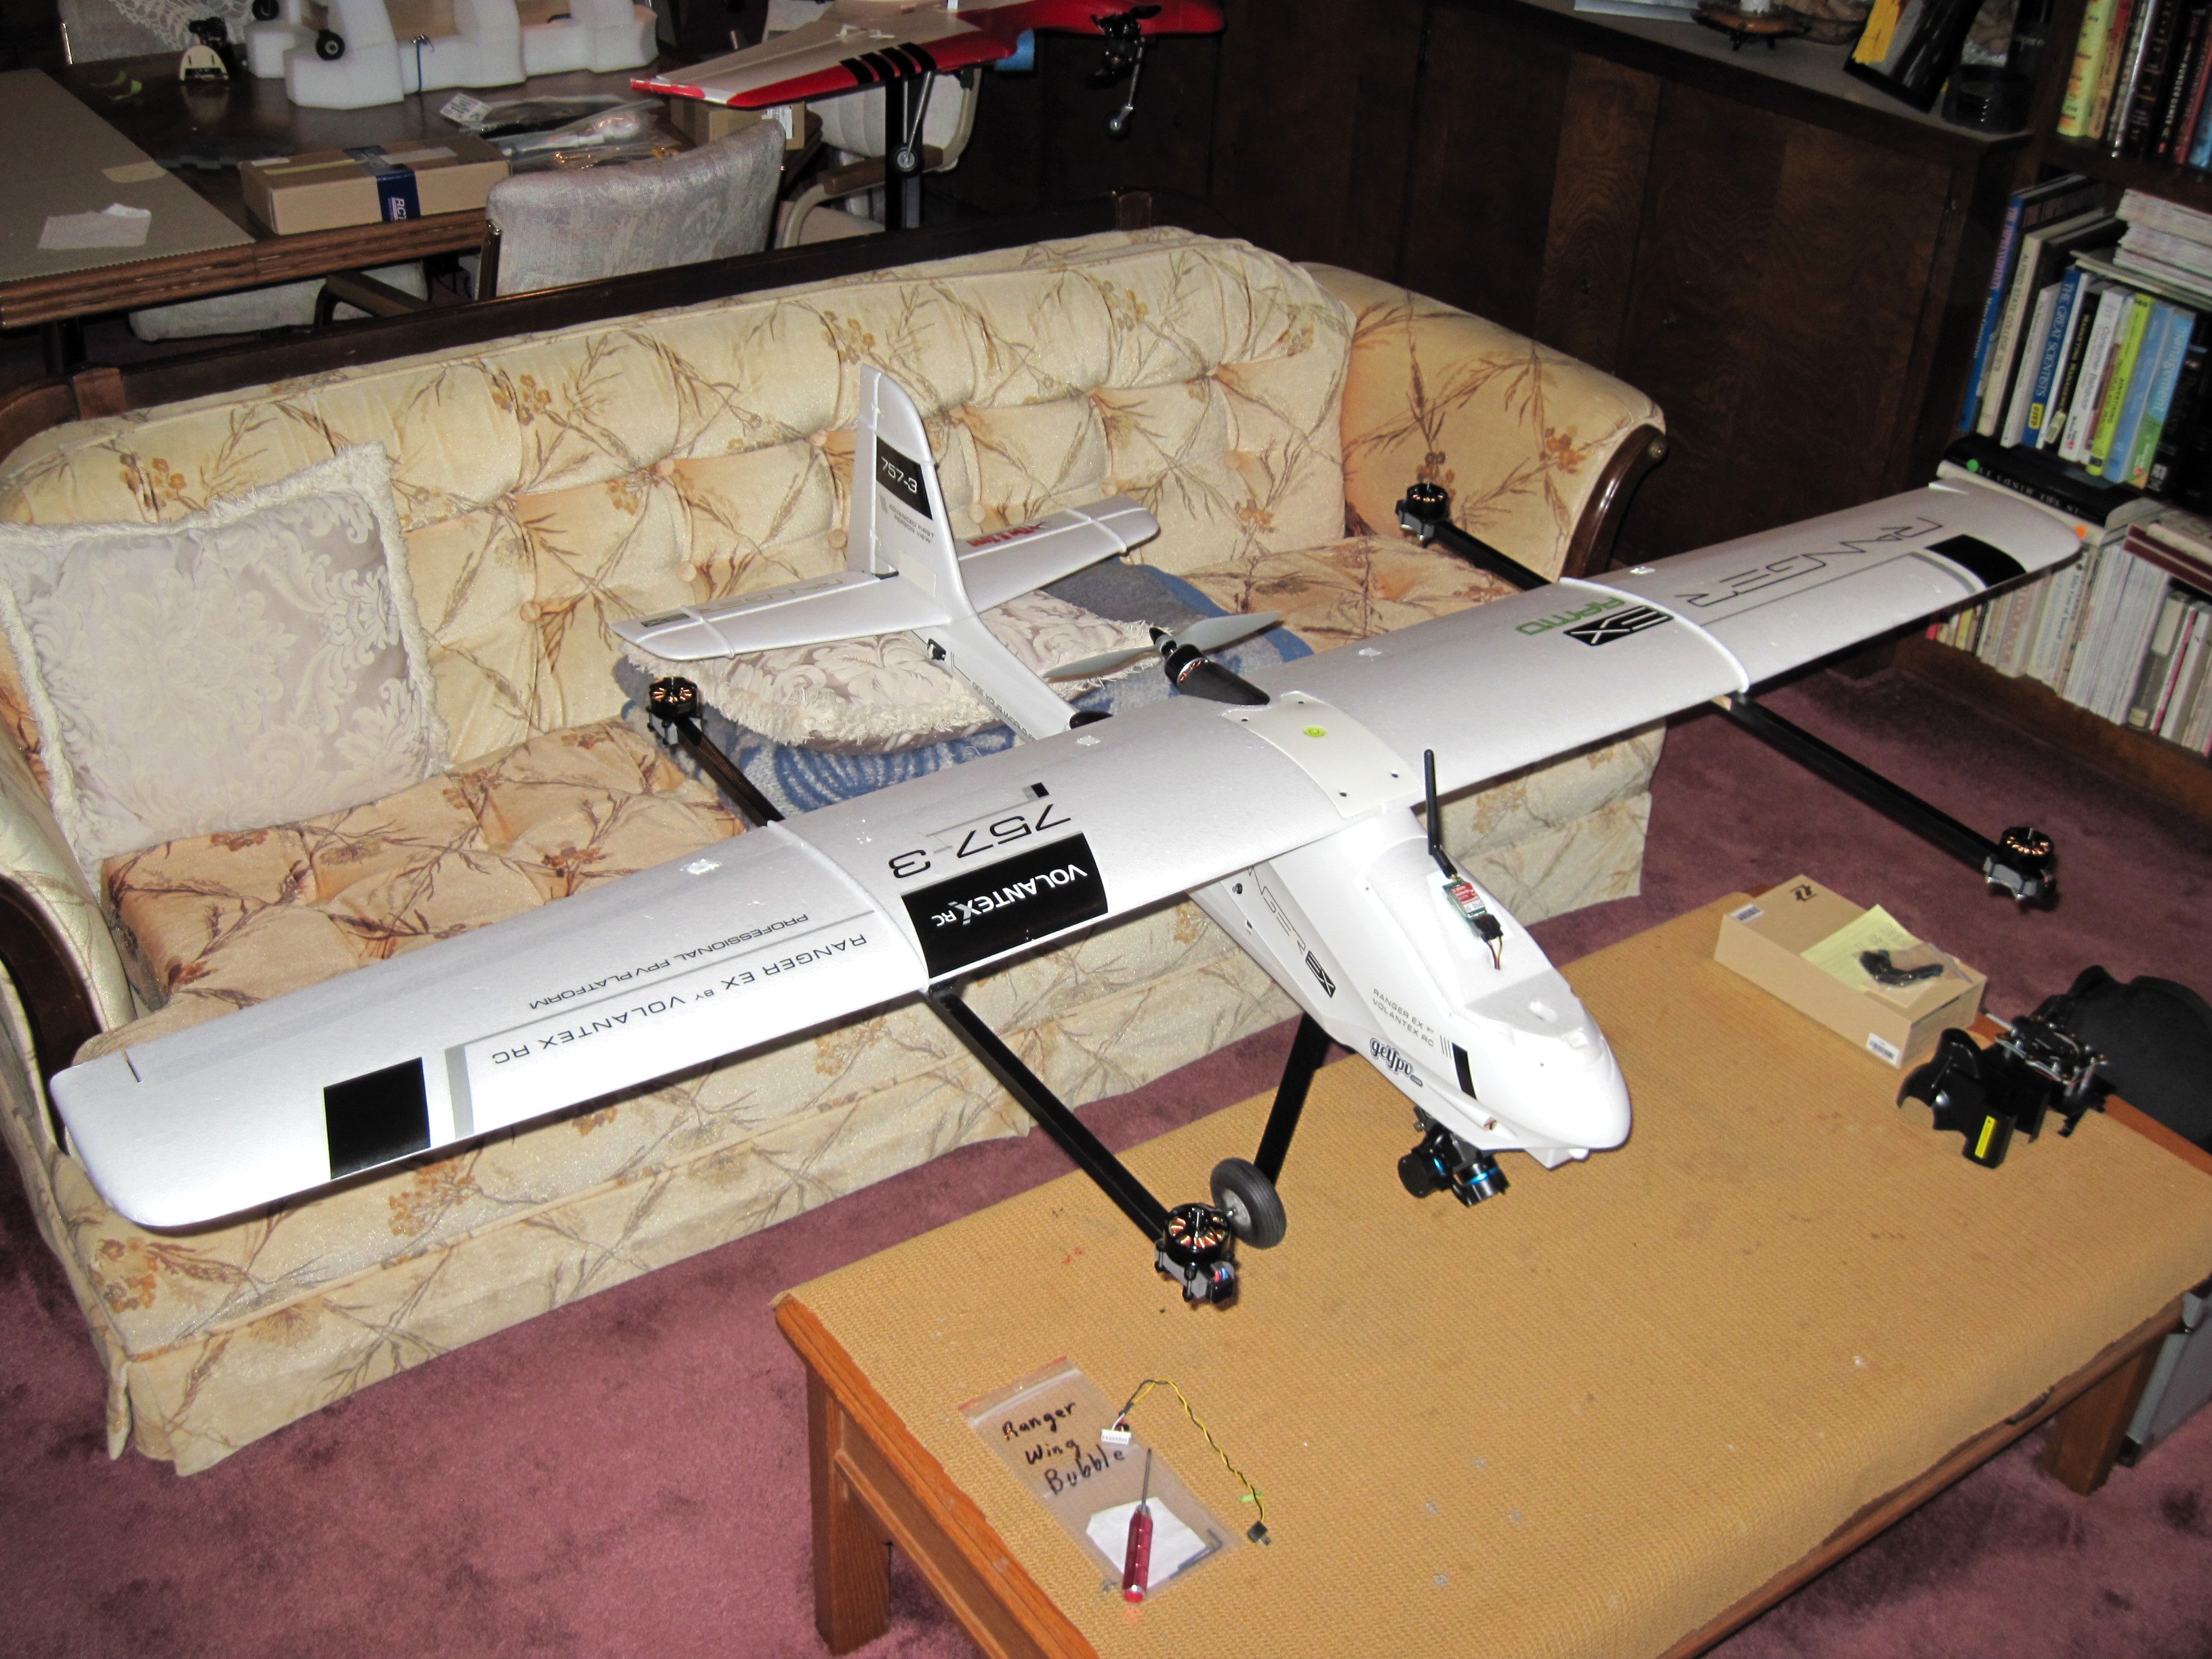
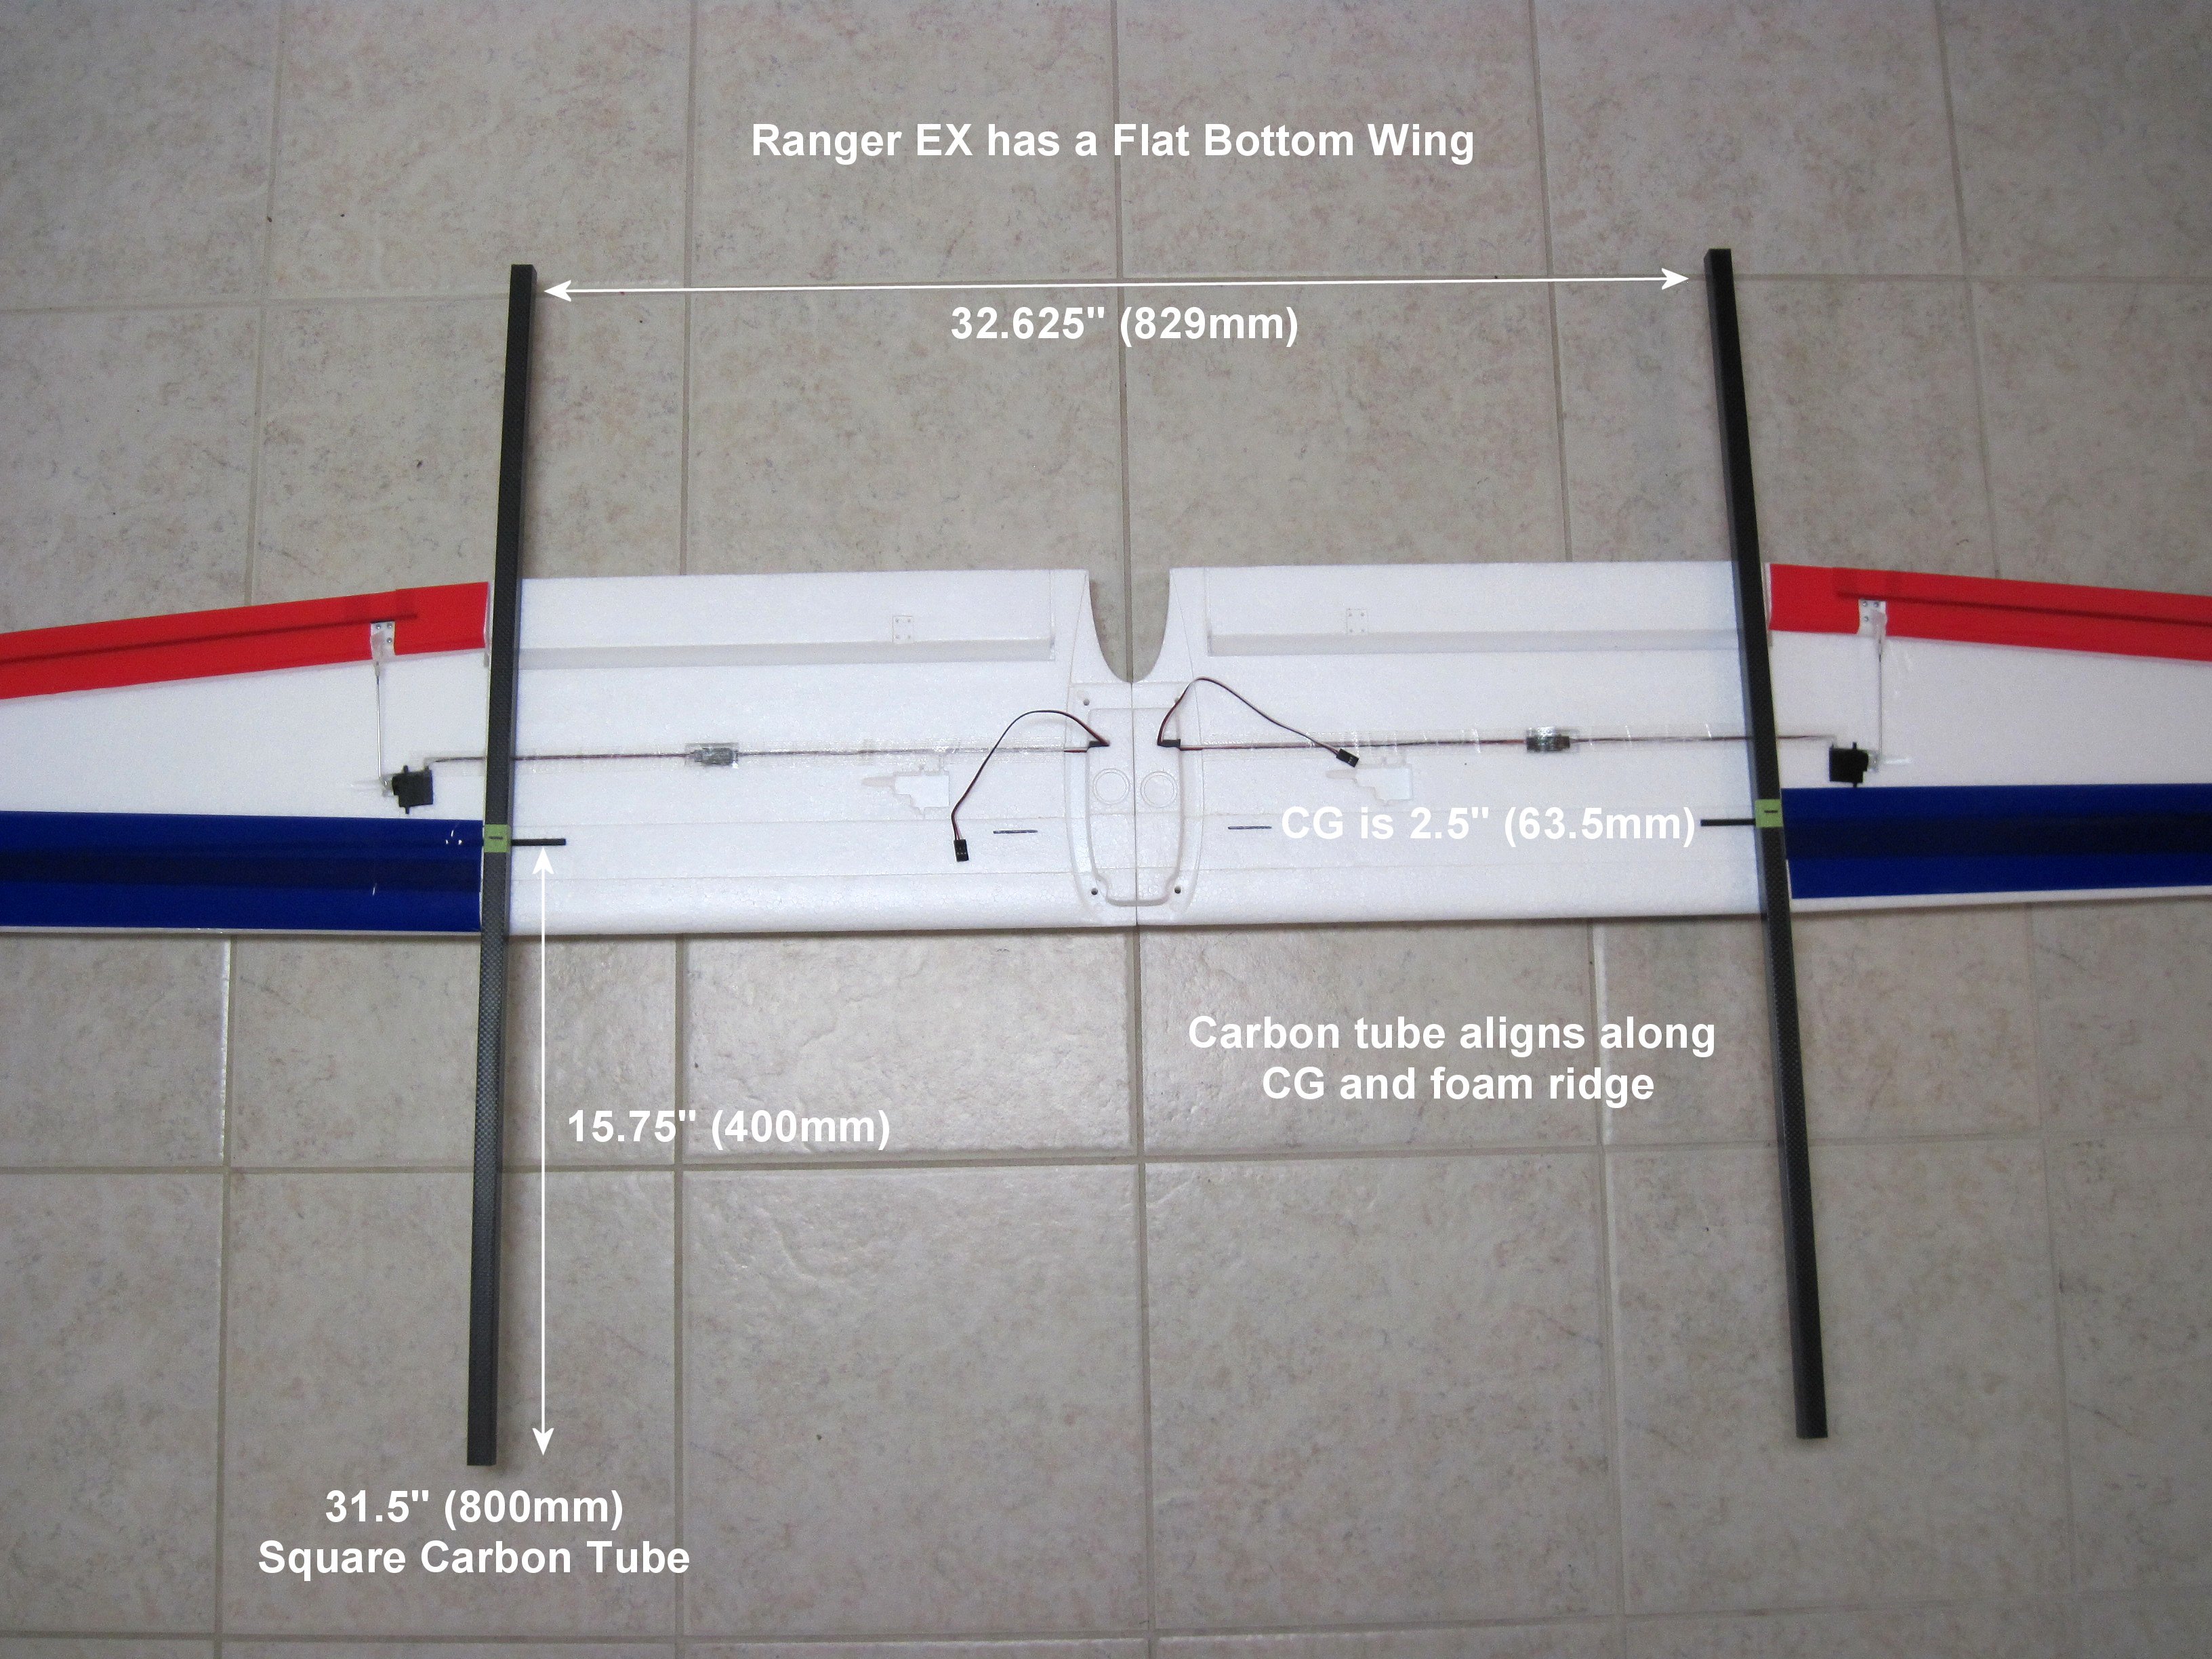
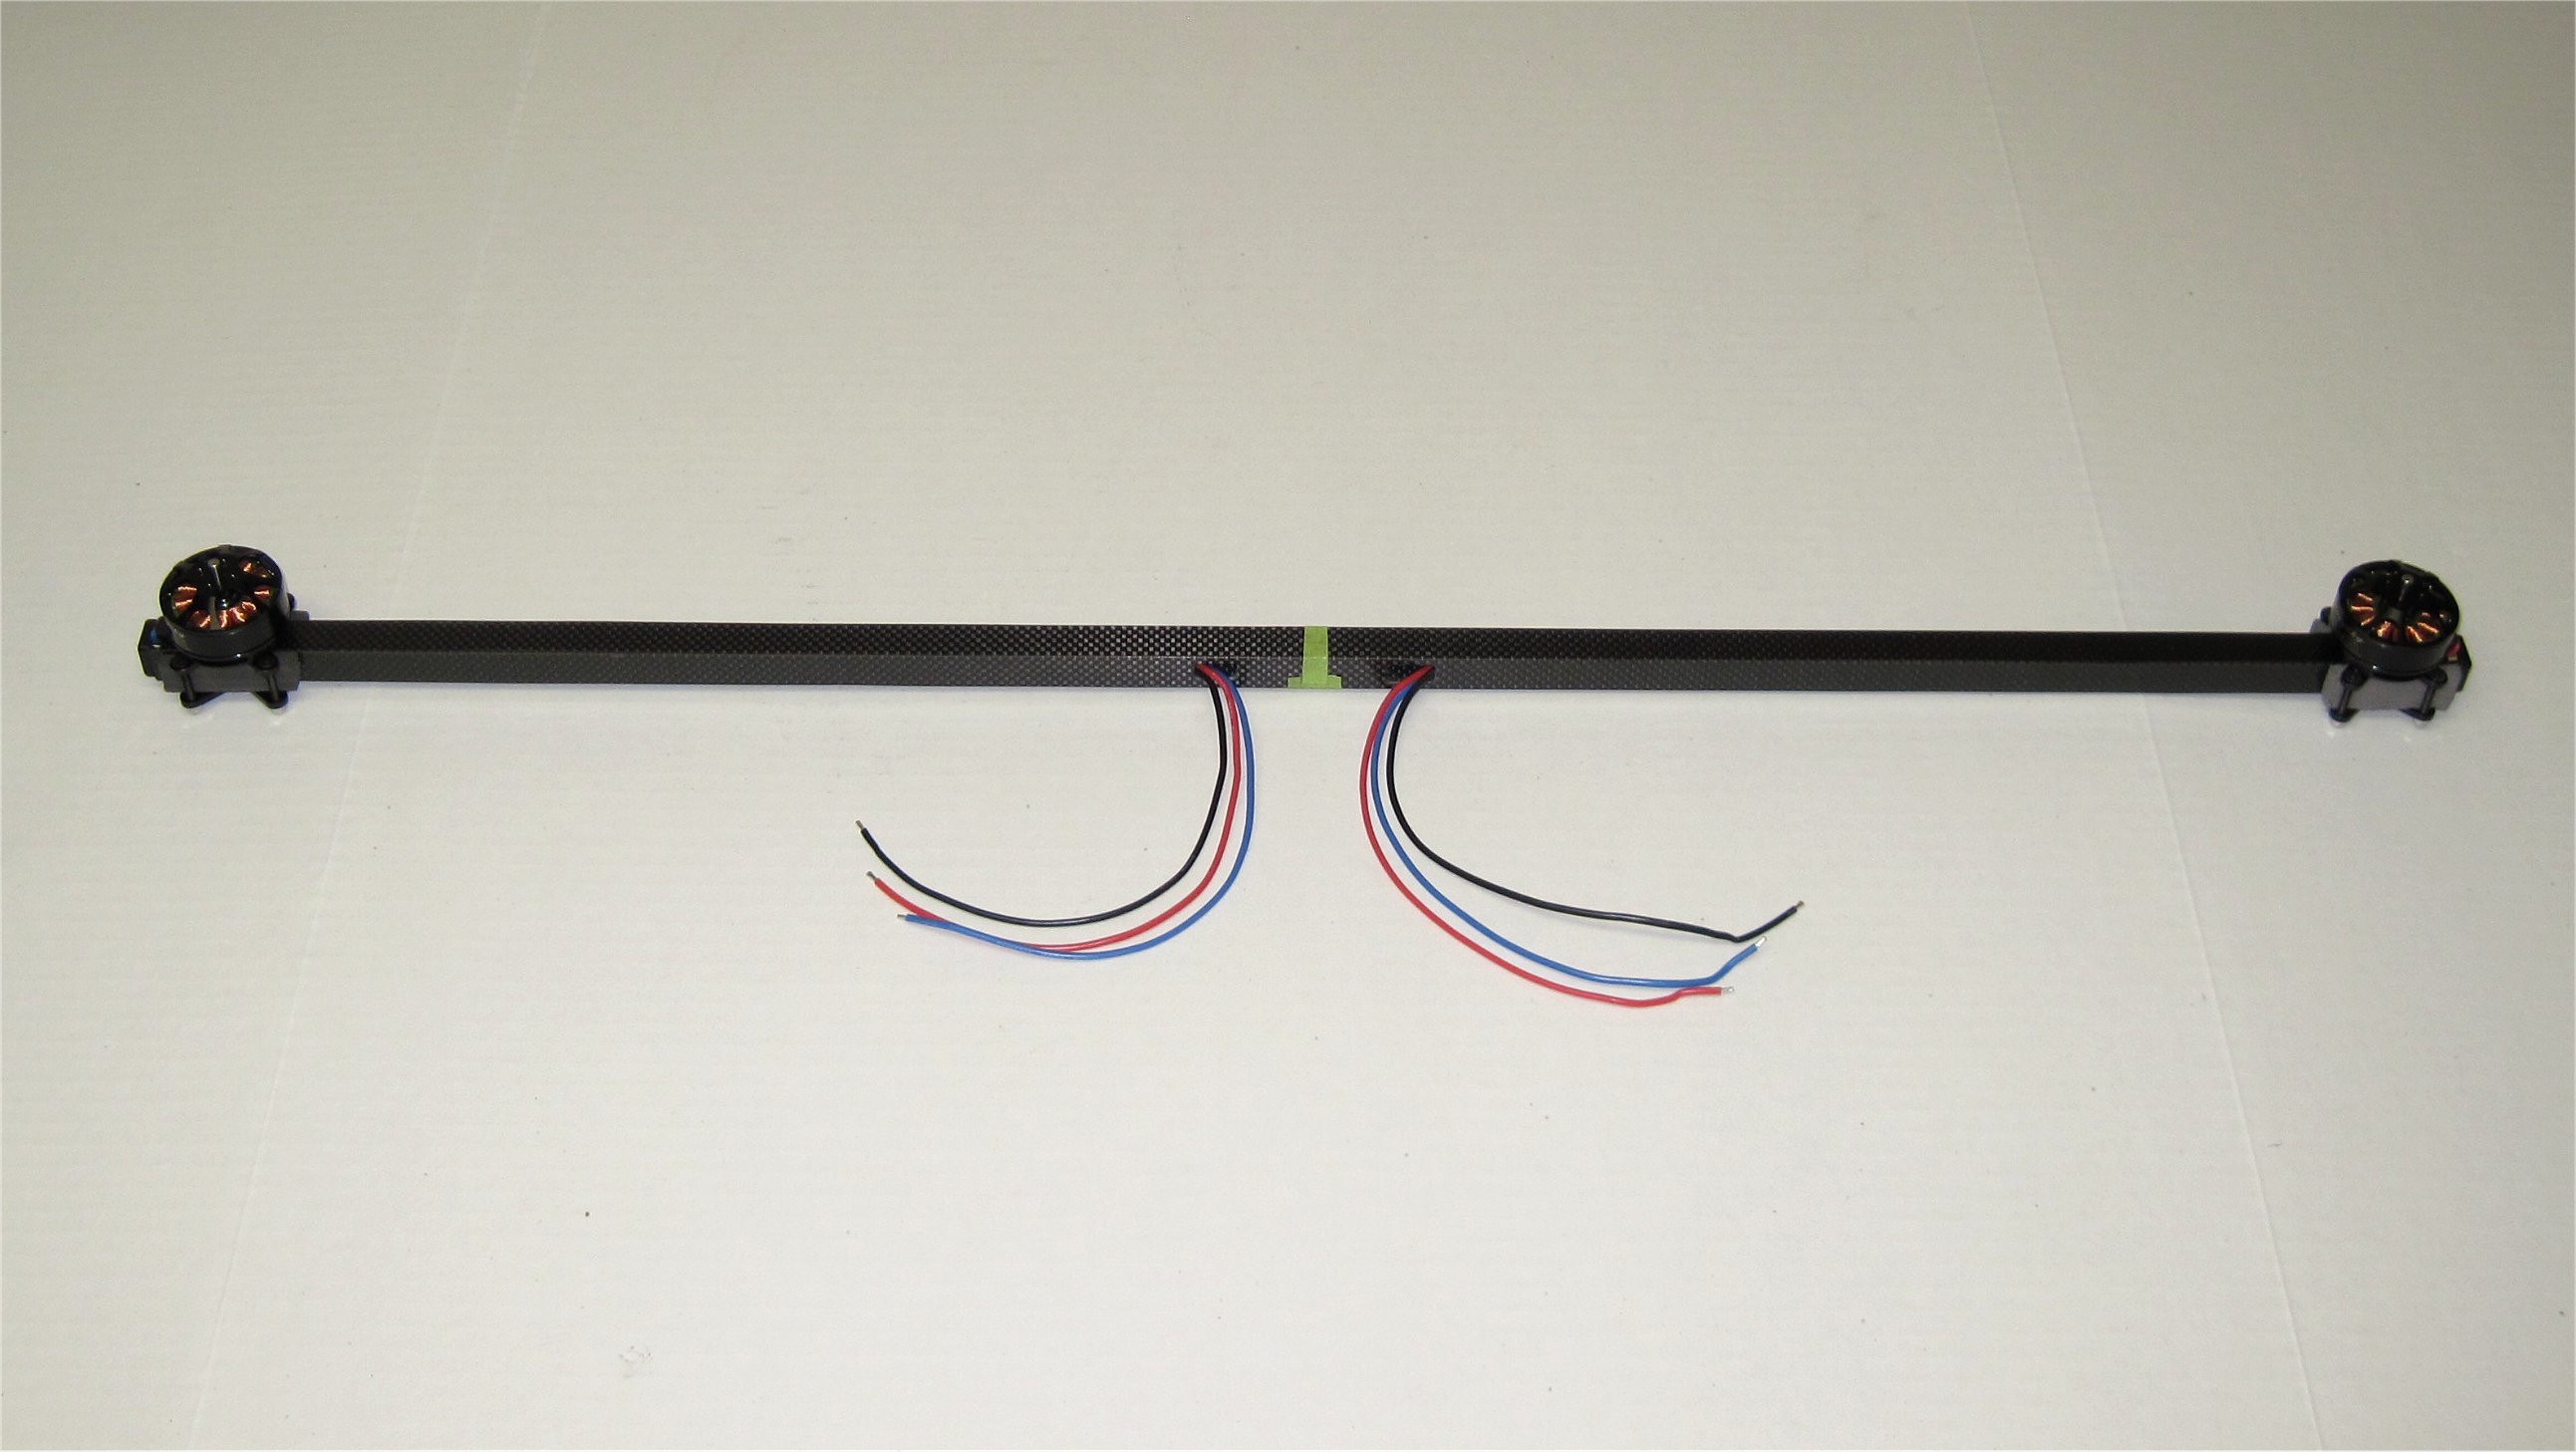
I’m using the same 15mmx15mmx800mm square carbon tubes from HK on my Ranger EX QuadPlane conversion as I did on my Bix3. The only difference is that I don’t need to cut them shorter. Another easy aspect of the tube installation is that the Ranger EX wing has a flat bottom airfoil and a foam ridge to align the tubes. Further, I purchased an extra wing set at GetFPV.com so that I can easily fly the Ranger EX as a QuadPlane or regular plane using APM.
Hey Greg, just curious, how did you attach the square carbon tubes to the wing?
In addition to the same tubes you use, I used this 1.5mm thick carbon fiber sheet: http://www.hobbyking.com/hobbyking/store/uh_viewItem.asp?idProduct=24964, split it in two trapezoids, one for each side, and glued it to the wing. This seems a bit too much and I’m thinking of cutting some more to clear the under wing for cleaner airflow.
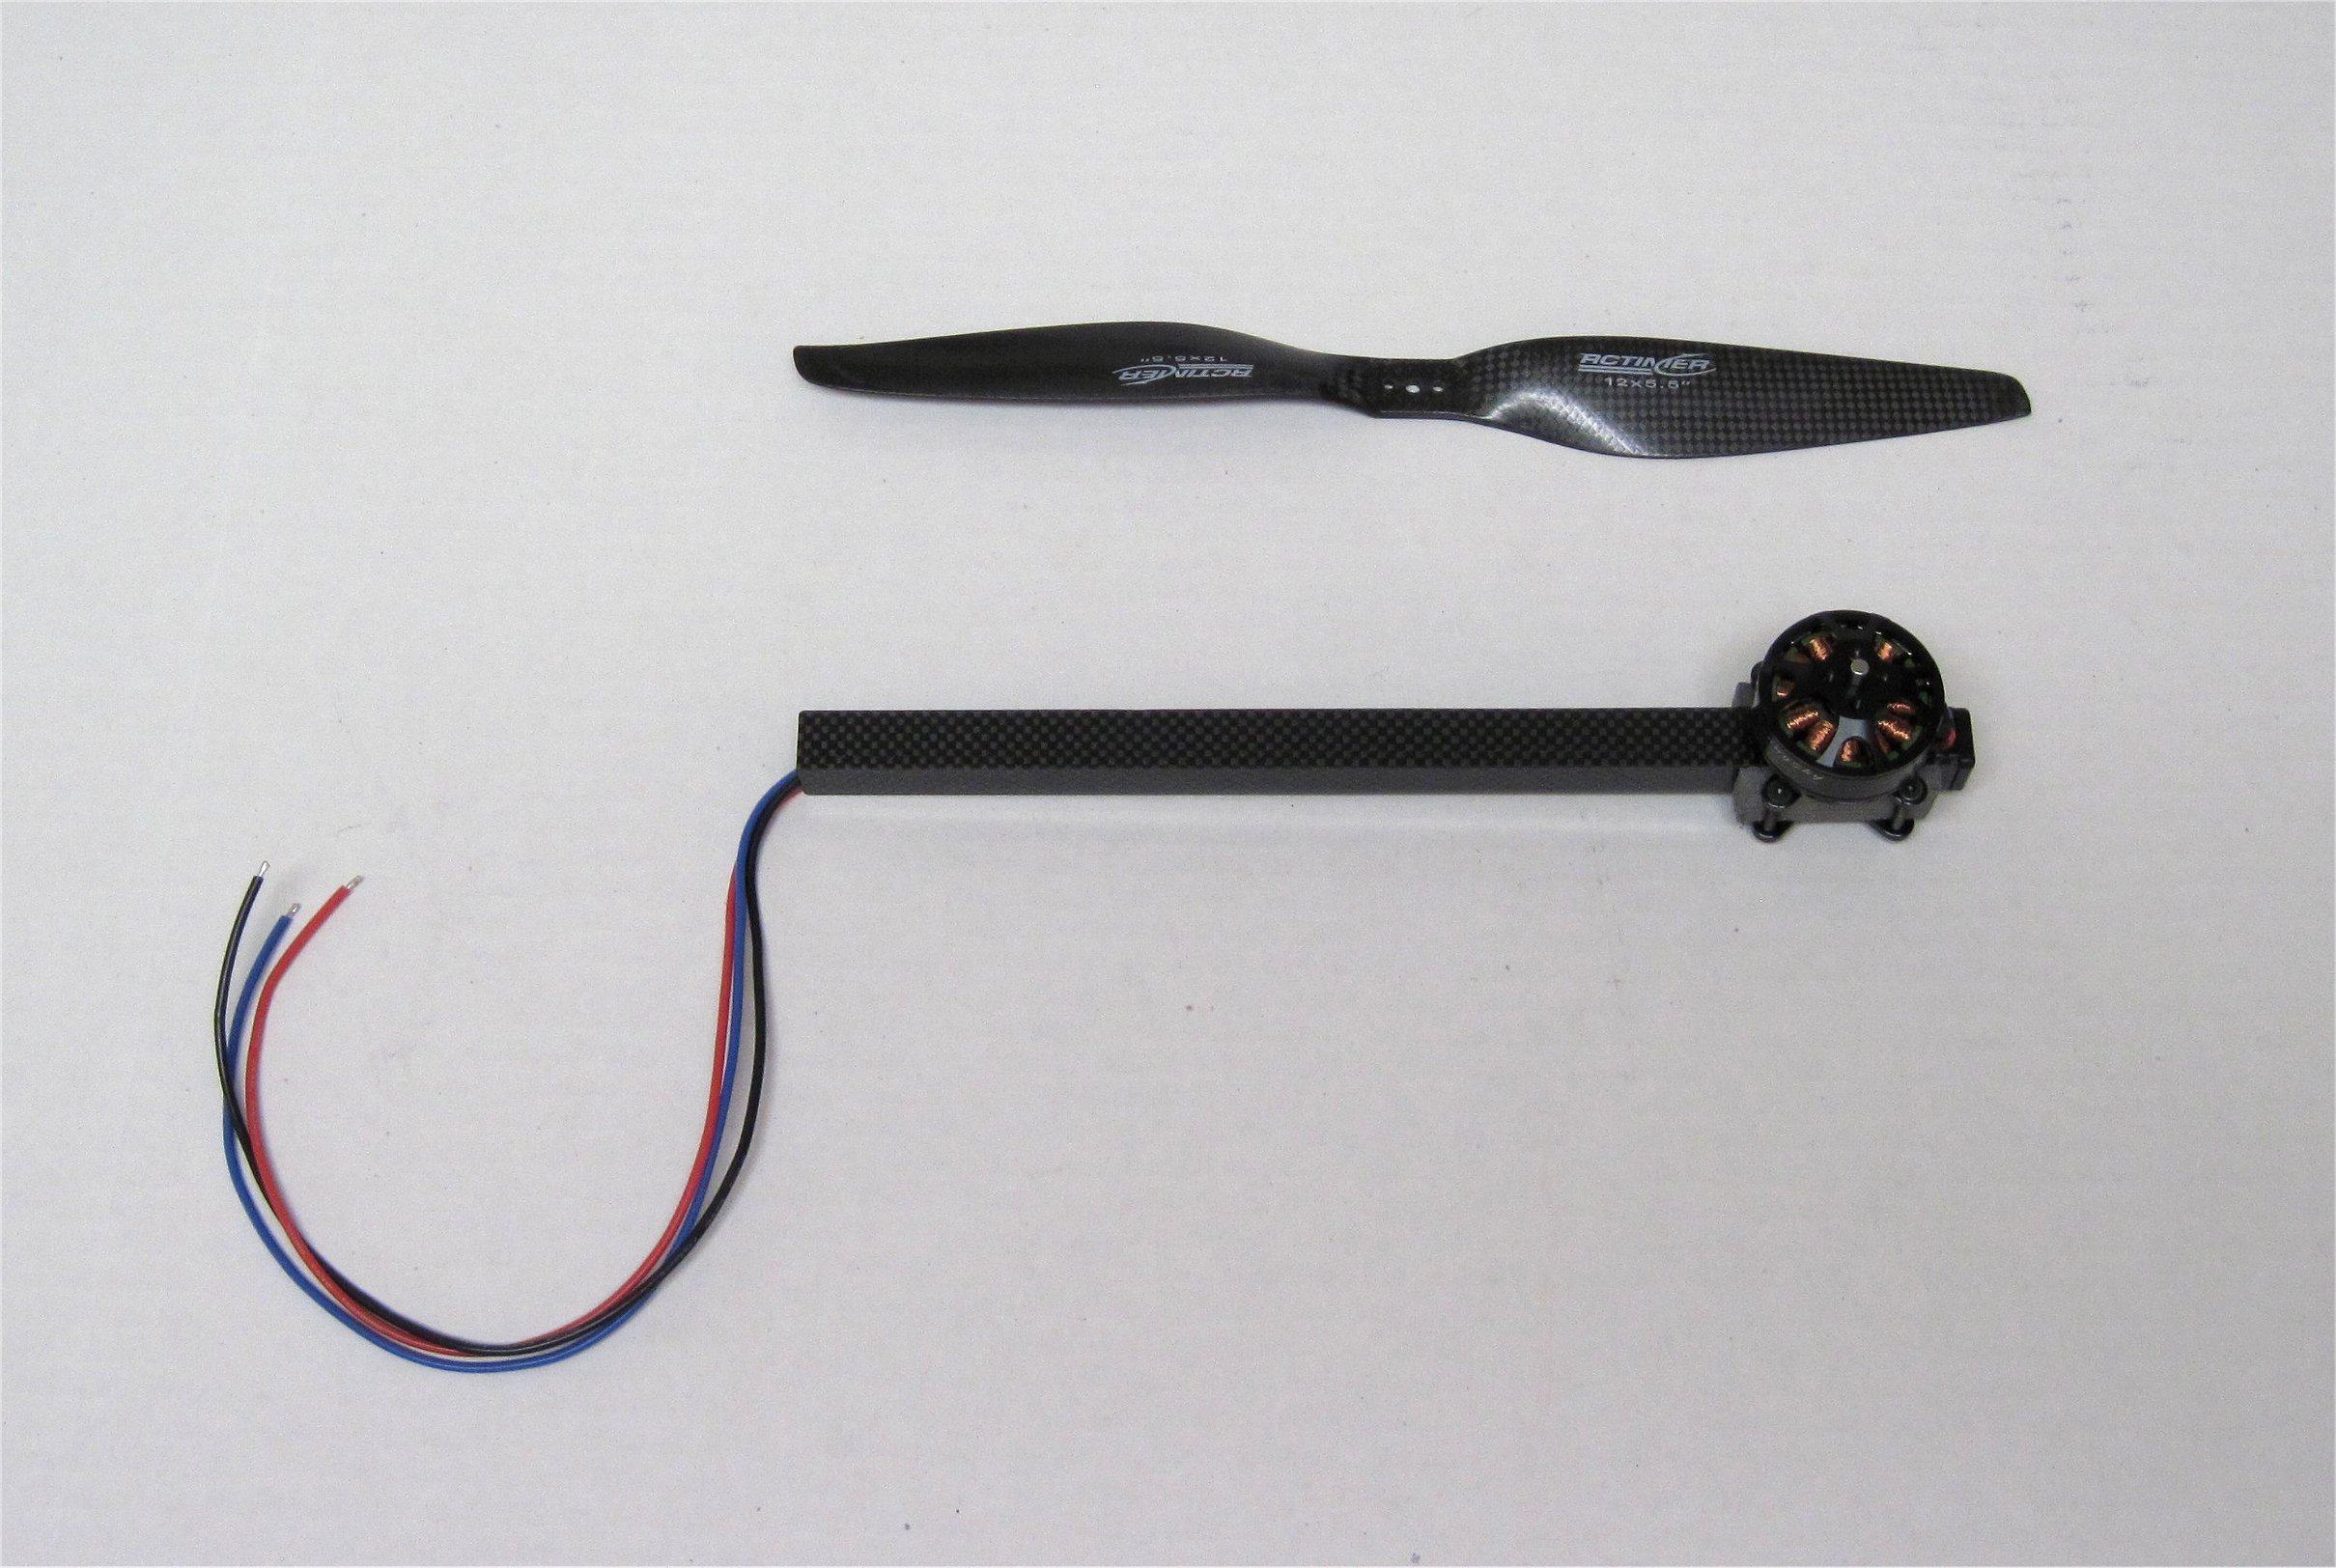
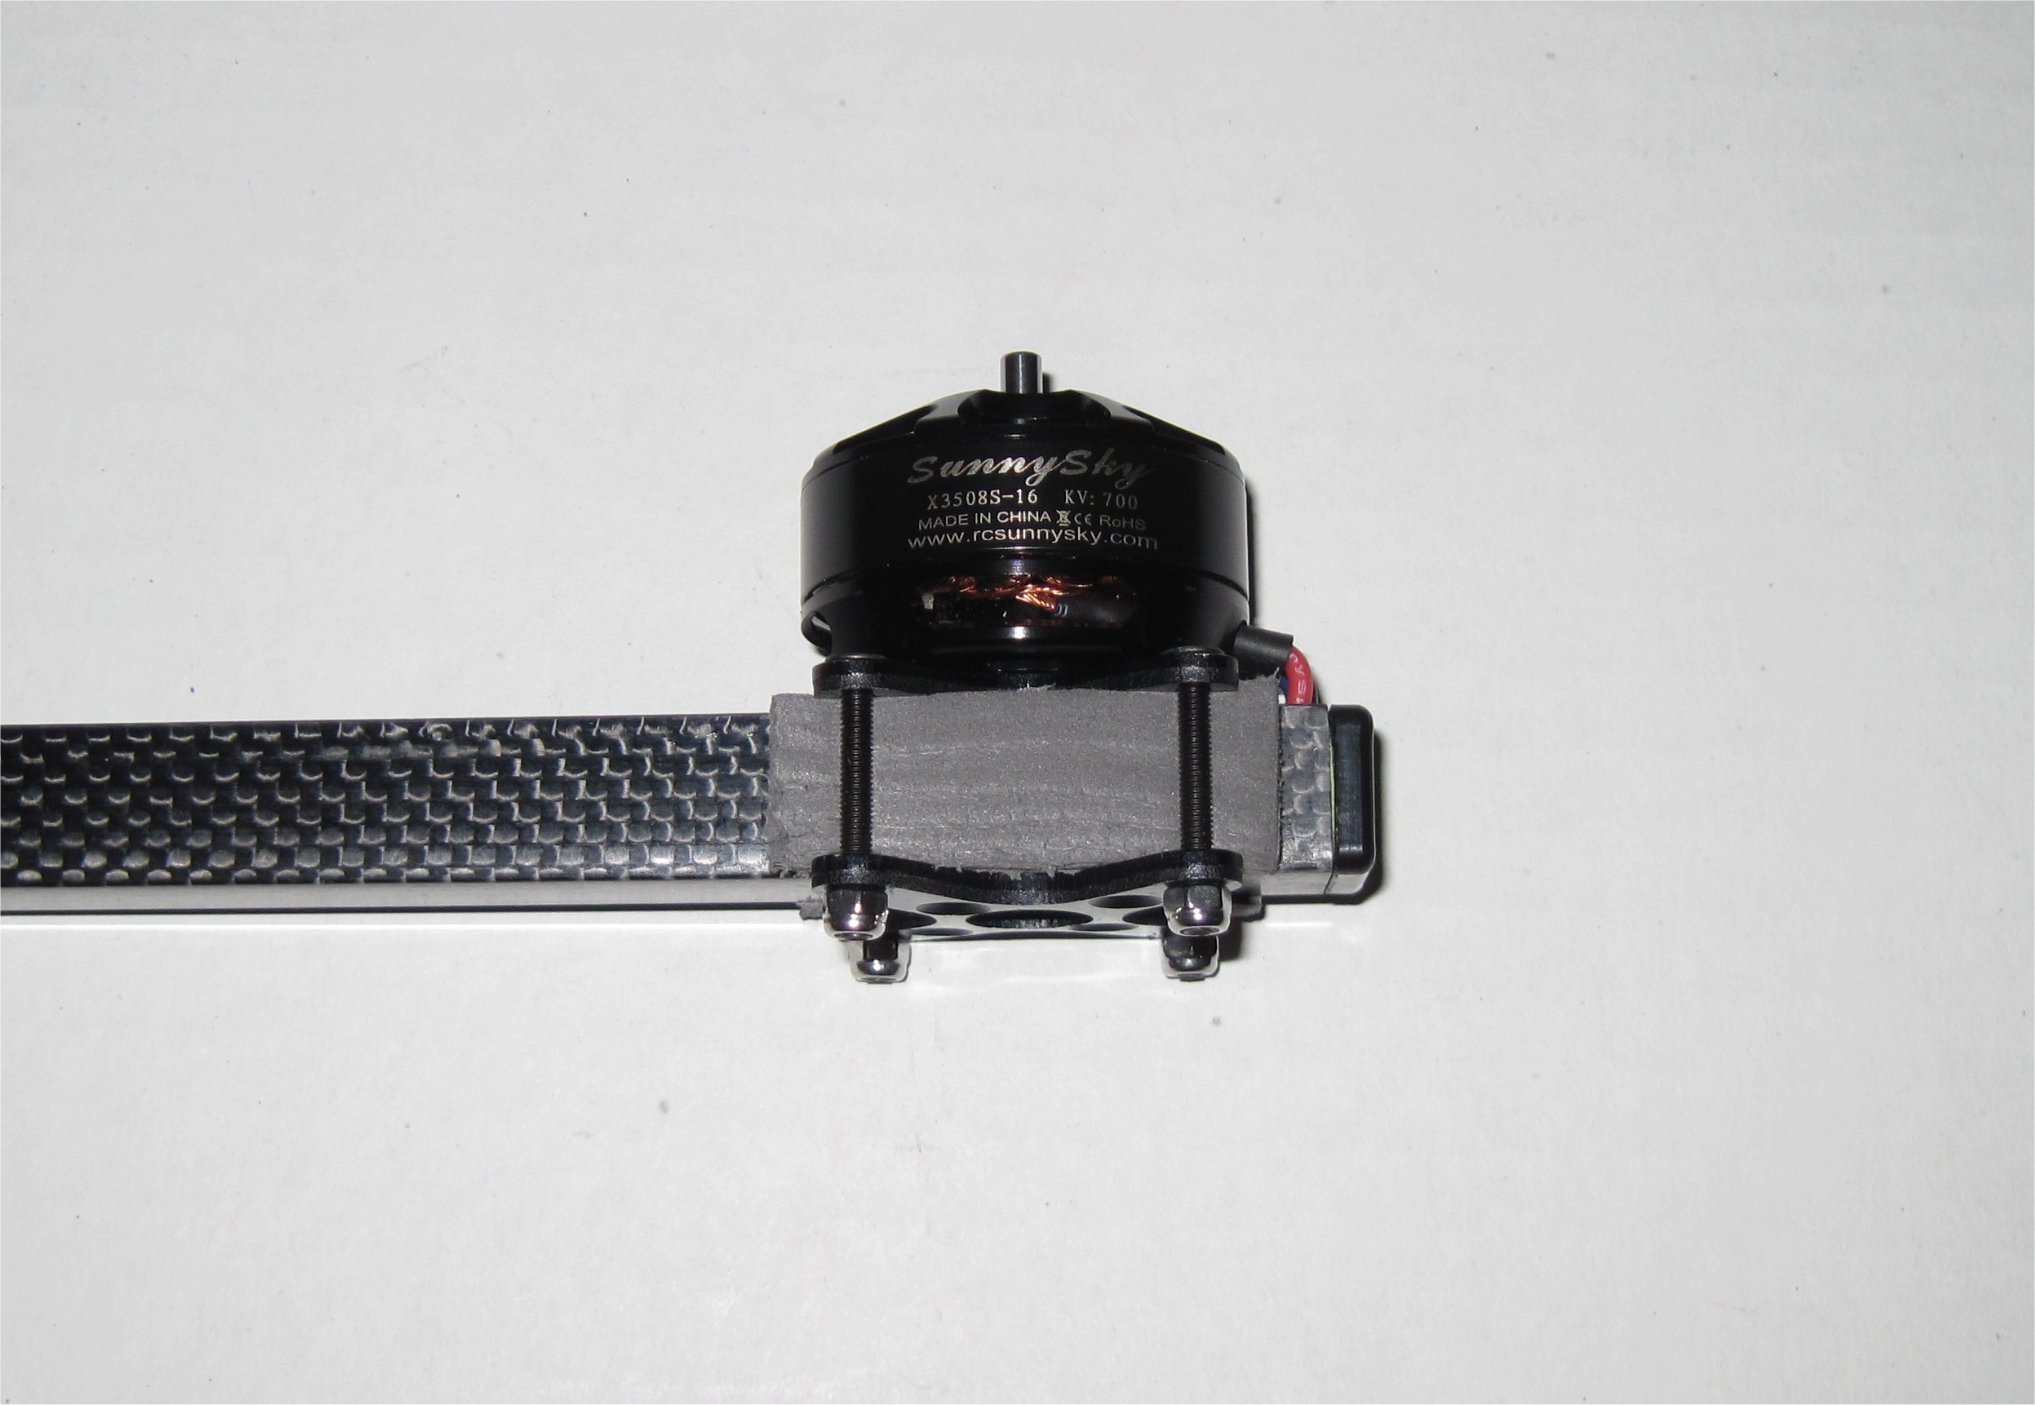
My plan is to use SunnySky X3508 700kv motors with 12" RC Timer t-style props on a 4s 8AH Lipo pack. Here is some information that I based my decision on.
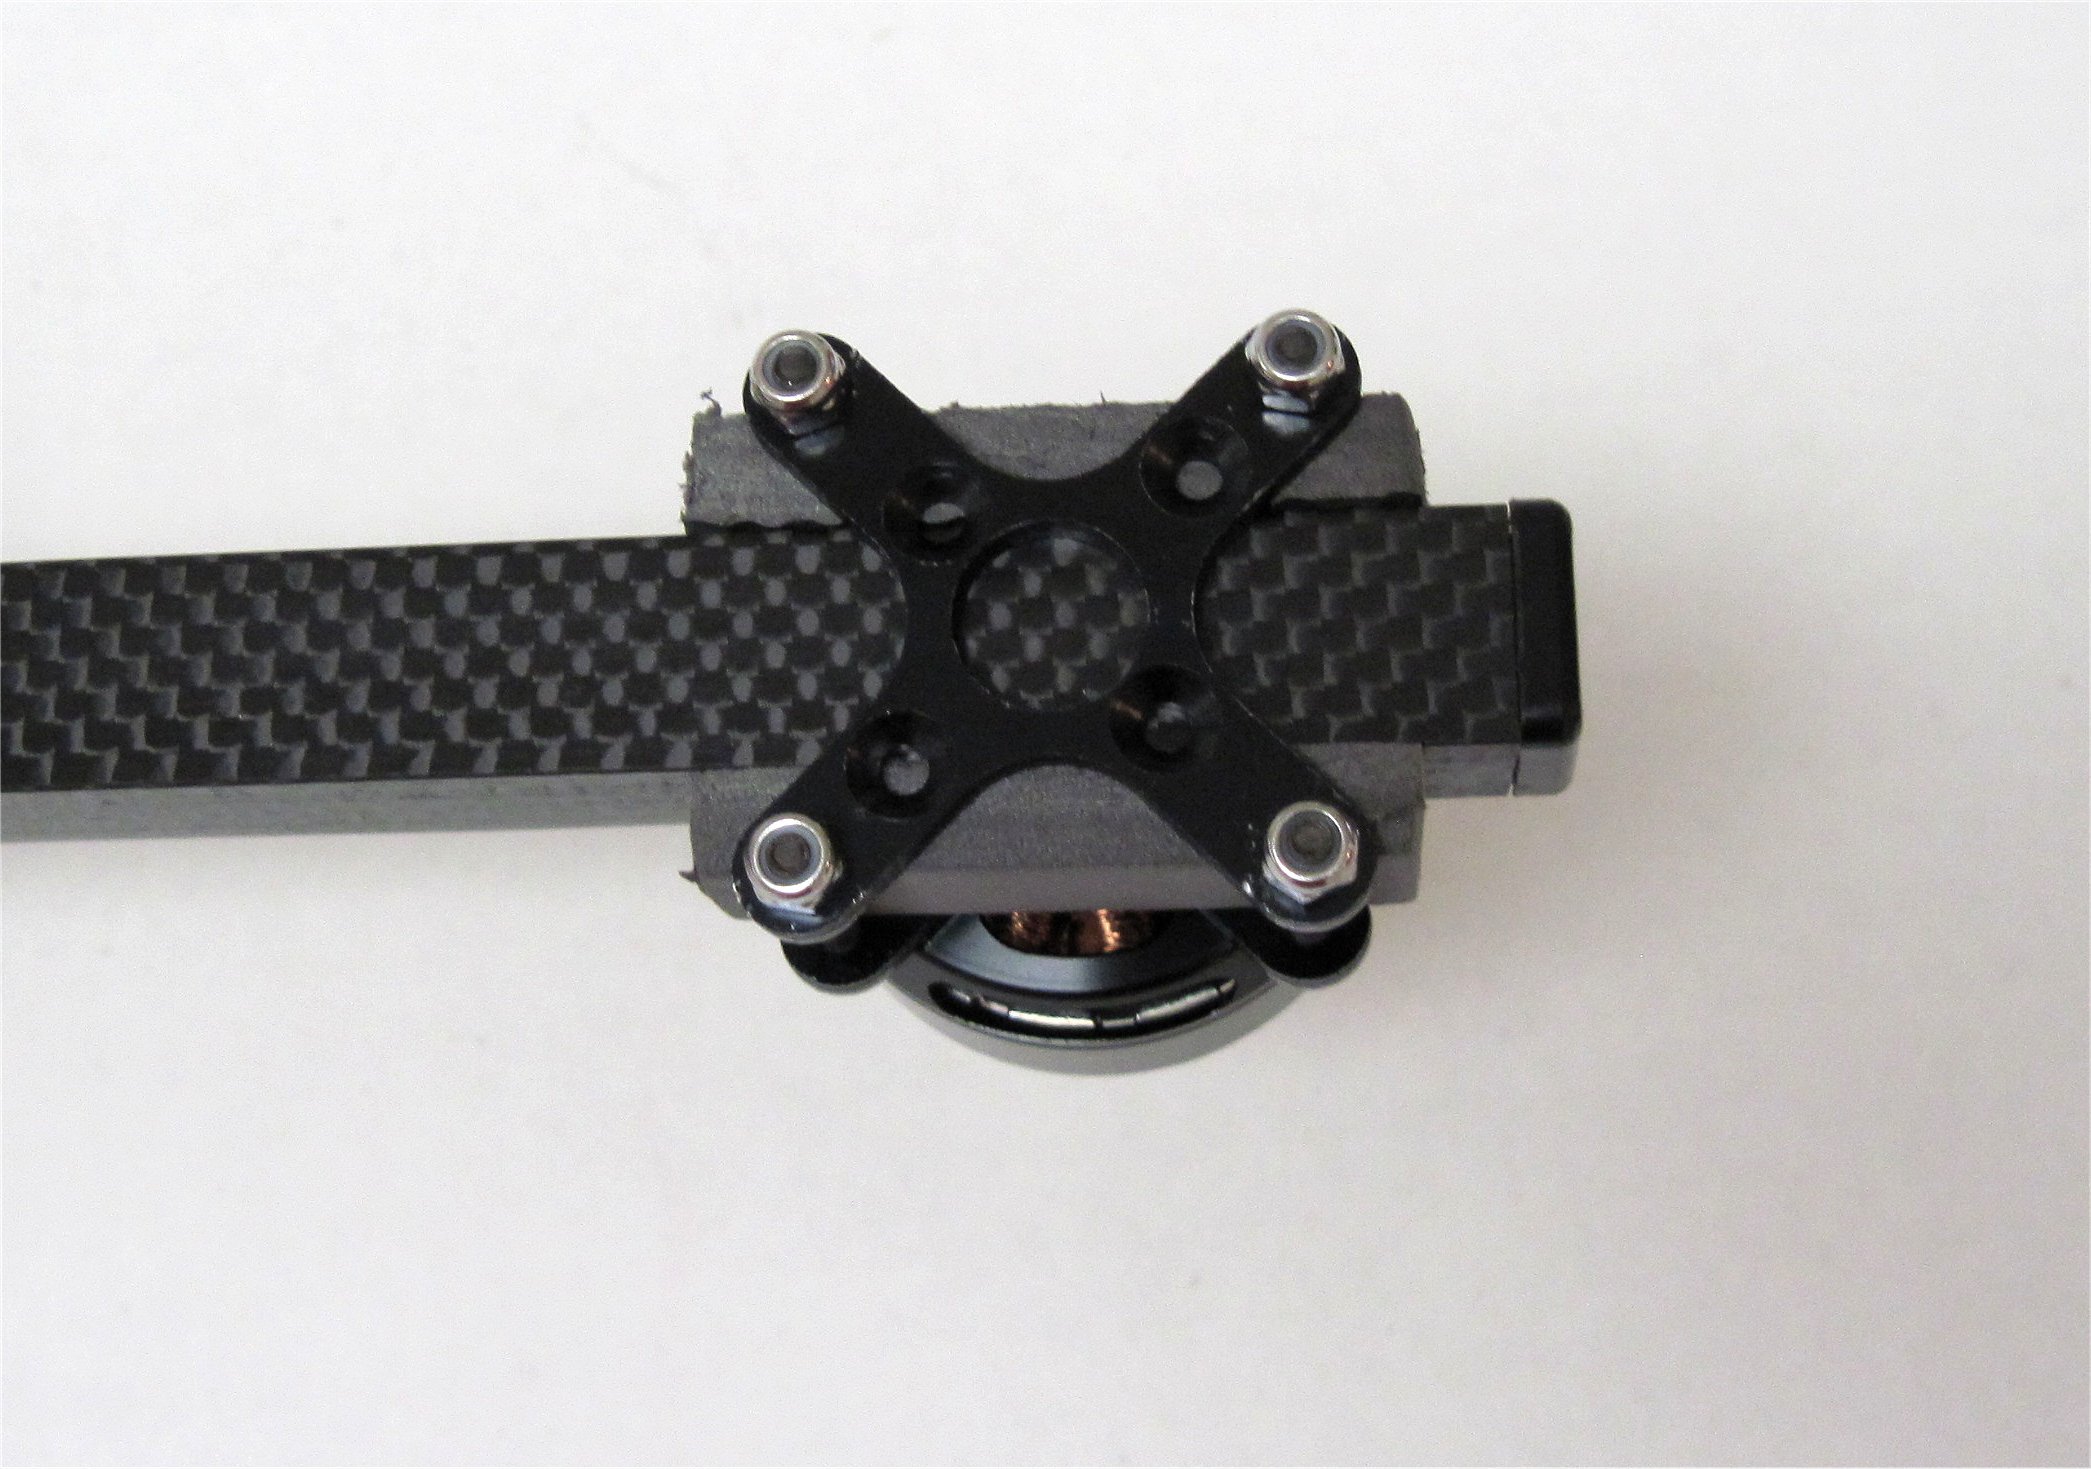
I prepared one of the 15x15x800mm square tubes for mounting on the wing by first marking the center line with tape so it can be glued in place over the CG. I decided to use Foam-Tac since it also adheres nicely to carbon and balsa. The carbon tube aligns itself with the CG marking at the exposed wing tube and the foam ridge between the flap area and aileron area. For extra security, I’ve added a custom cut right-angle piece of balsa stock to counter any rotational forces.
I should be able to glue things together soon.
The whole assembly should provide minimal drag for forward flight.
Thank’s Greg for share all this invaluable info, I follow in silence , I have a cuadplane in my wishlist.
What about to use racer esc that looks much lighter than standard ones?
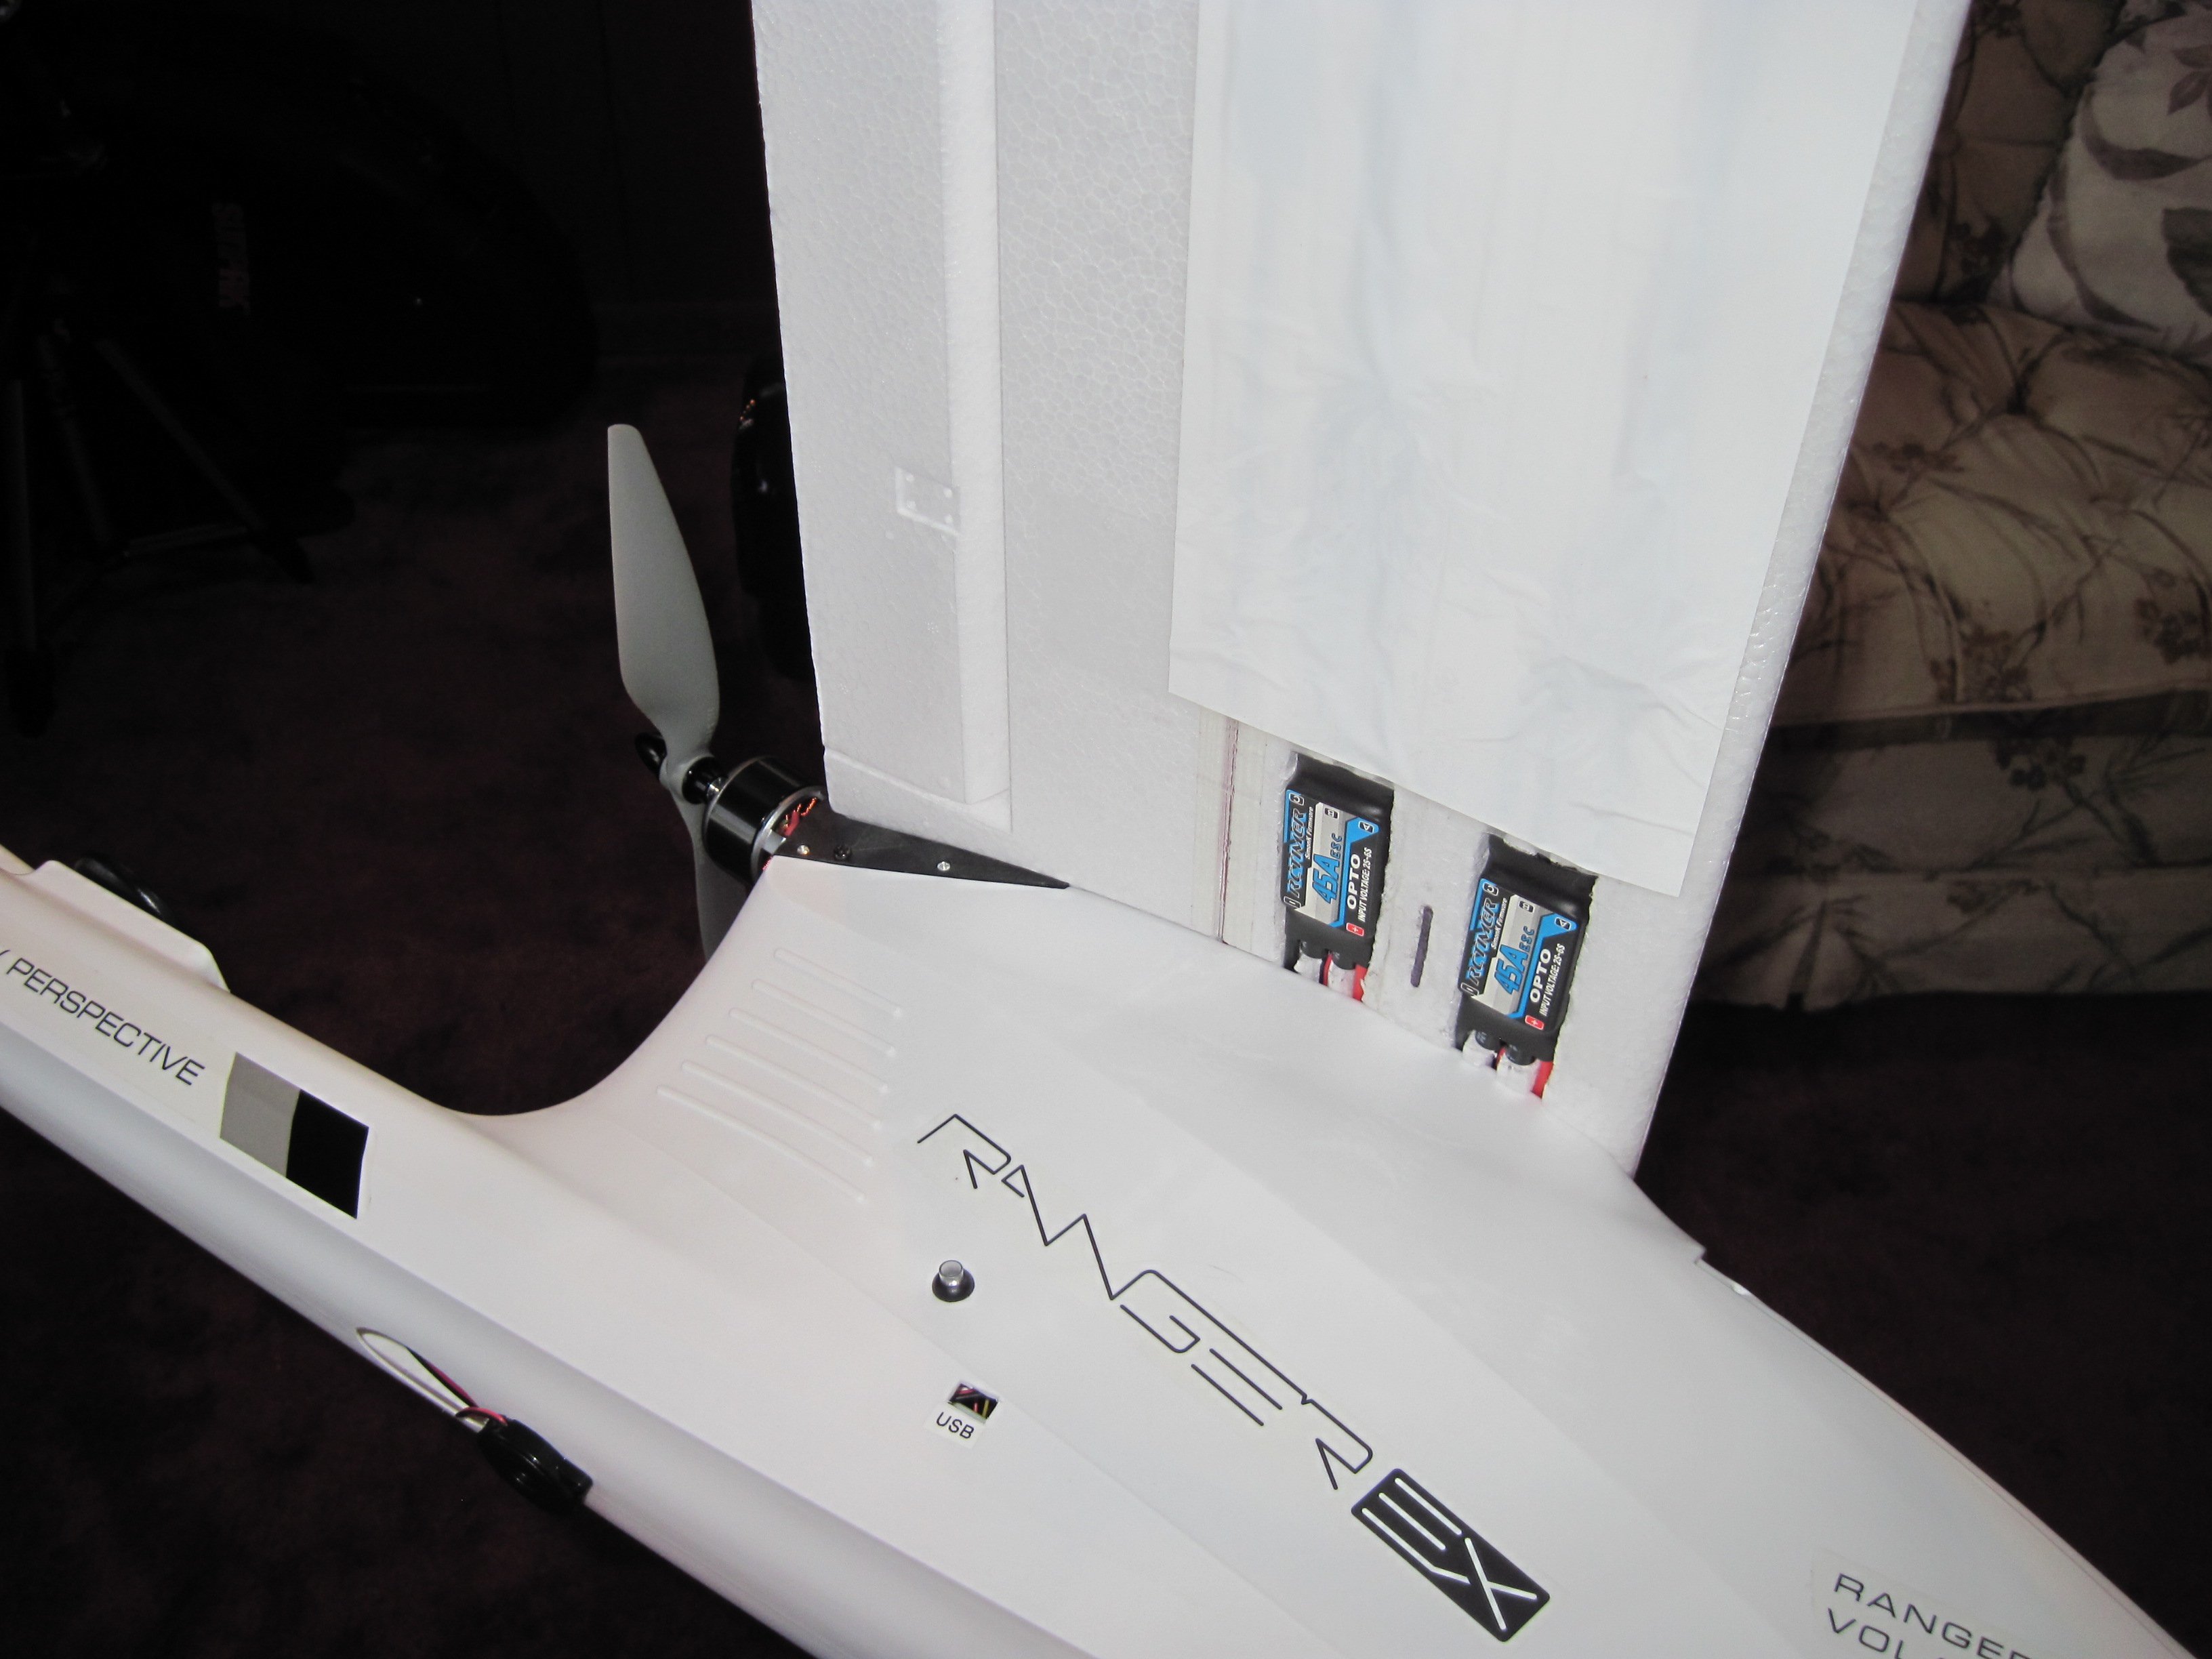
On this project, I don’t think weight is much of an issue so I went with my proven RC Timer ESCs from many Pixhawk projects. The 45-amp rating is quite excessive so perhaps the 30-amp version is a better choice for lower weight. I wasn’t sure yet where I will place the ESCs so perhaps no cooling is needed on a 45-amp rating. However, I suspect that I will place the ESCs in the wings flush with the bottom surface.
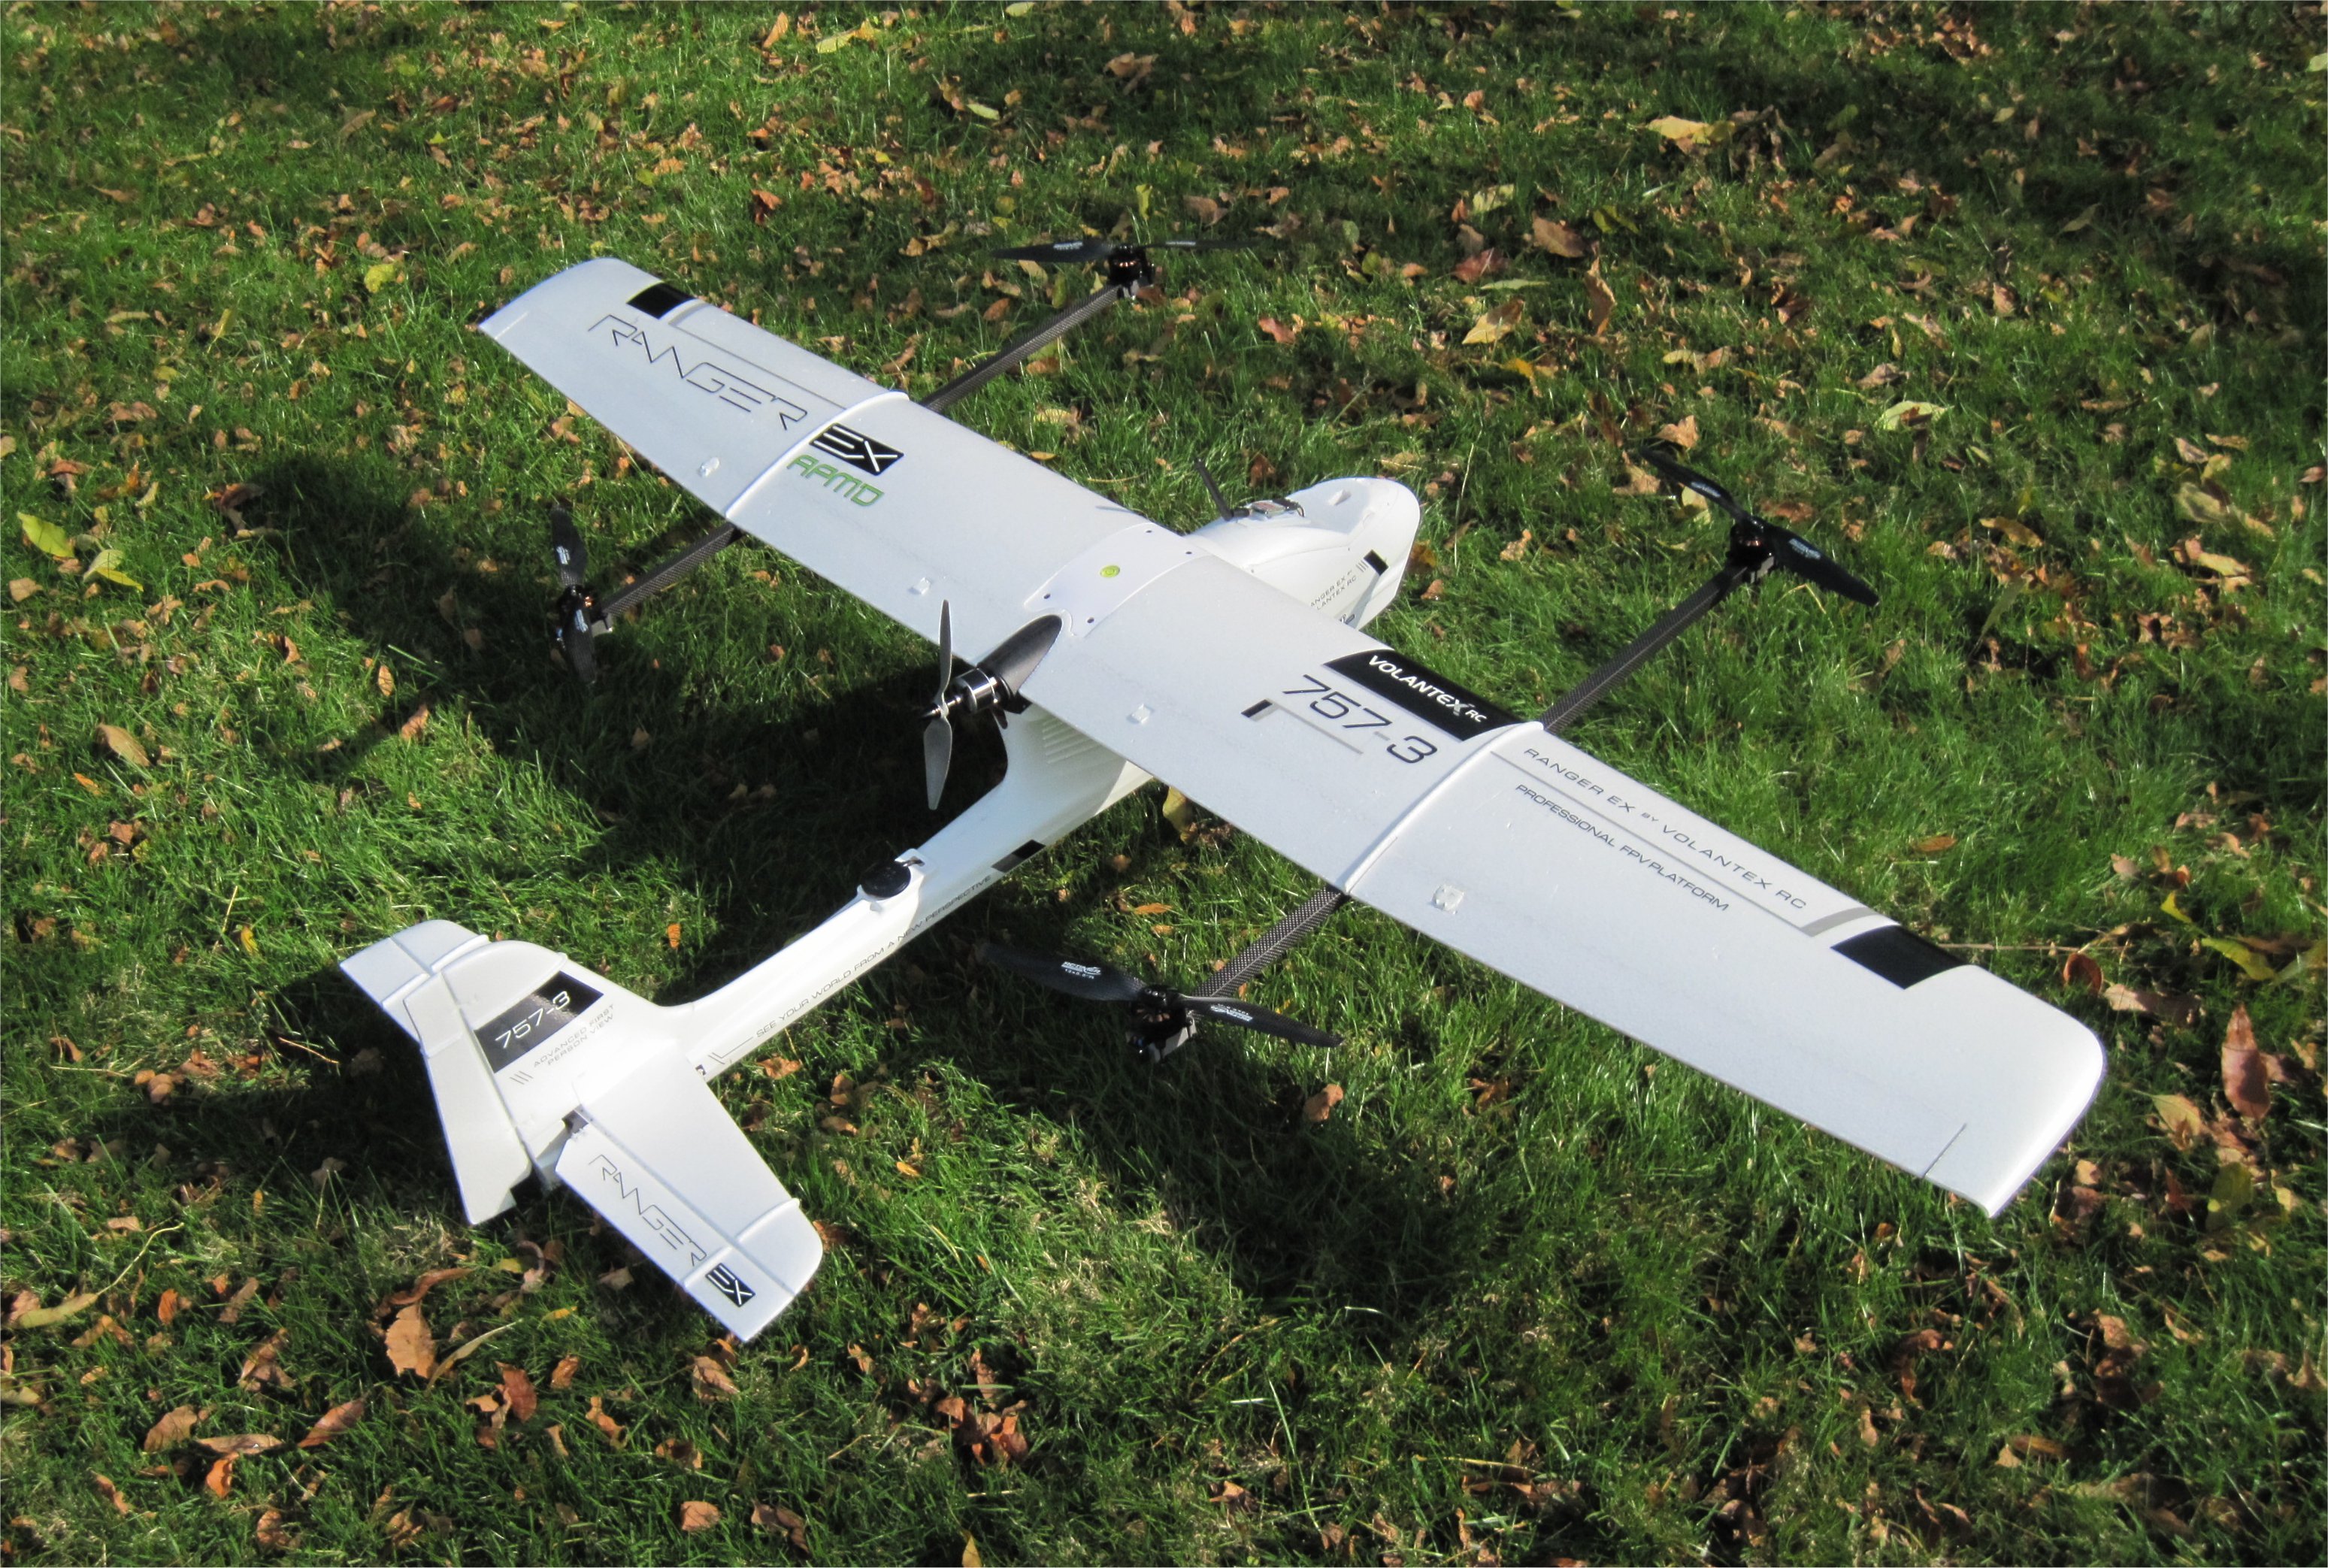
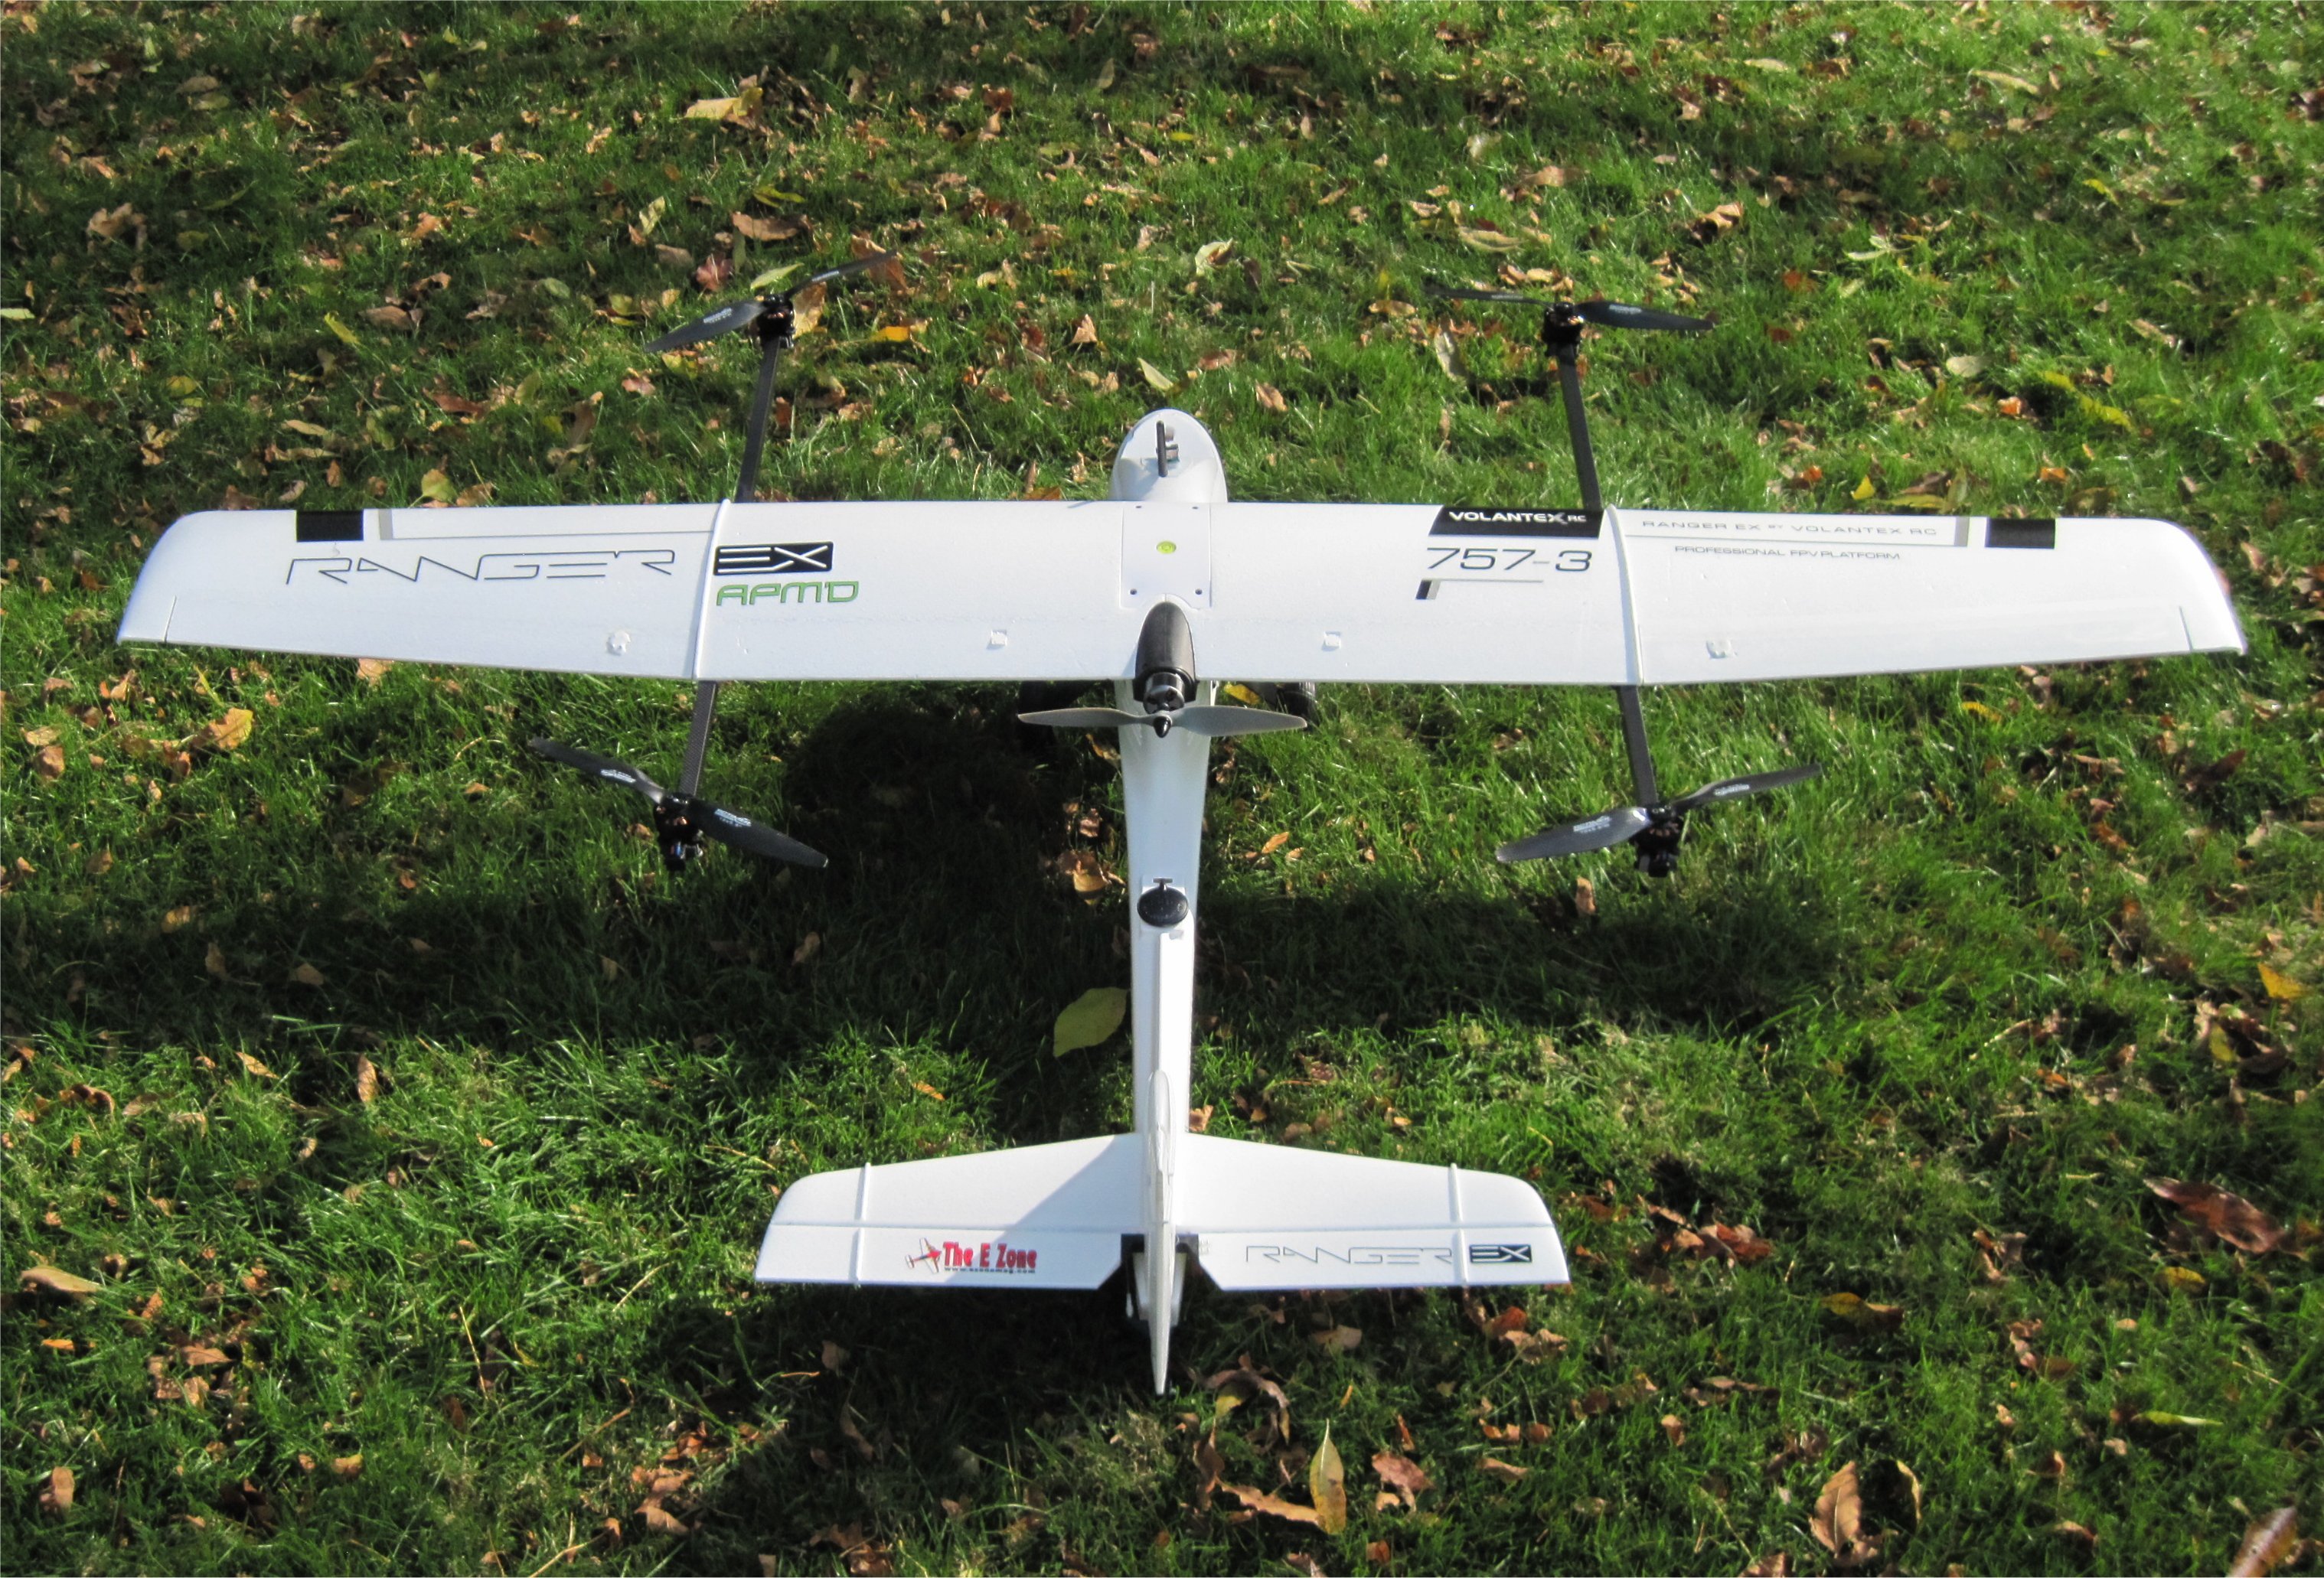
Some people have called the Volantex Ranger EX a stall-proof plane. I don’t know if this is true but the low speed tolerance of the design makes it a good choice for a QuadPlane. I can test a QuadPlane all winter long in a paved parking lot. Fun stuff!
I glued the carbon tube and balsa wedge to the wing separately and it worked very well. I did the gluing in two stages and weighed down the carbon tube during the drying period with a 2.5lb plate. The balsa was then painted black.
The result seems very strong. I tested it with a reasonable amount of force and feel confident that it won’t come off in flight.
Hi Bob,
Welcome! It will be raining in Rochester this weekend so I’ll get back to working on the Ranger EX QuadPlane conversion. Our flying season is over now so it will be fun to focus on a QuadPlane project that I can test all winter long in a plowed parking lot at a park down the street.
You mention problems with the first flight. Did you write up what they were? From your mods I assume it was related to thrust angle and wheels. Any other pointers for a new build?
Thanks
Bob,
My first post in this thread has 4 images showing the various needed changes to the stock Ranger EX. The plane needed some larger wheels and the gear mains swept forward a bit to prevent tip overs on ROG take-offs. The thrust angle was incorrect and the supplied tractor prop wrong for the built-in thrust offset of the stock motor mount.
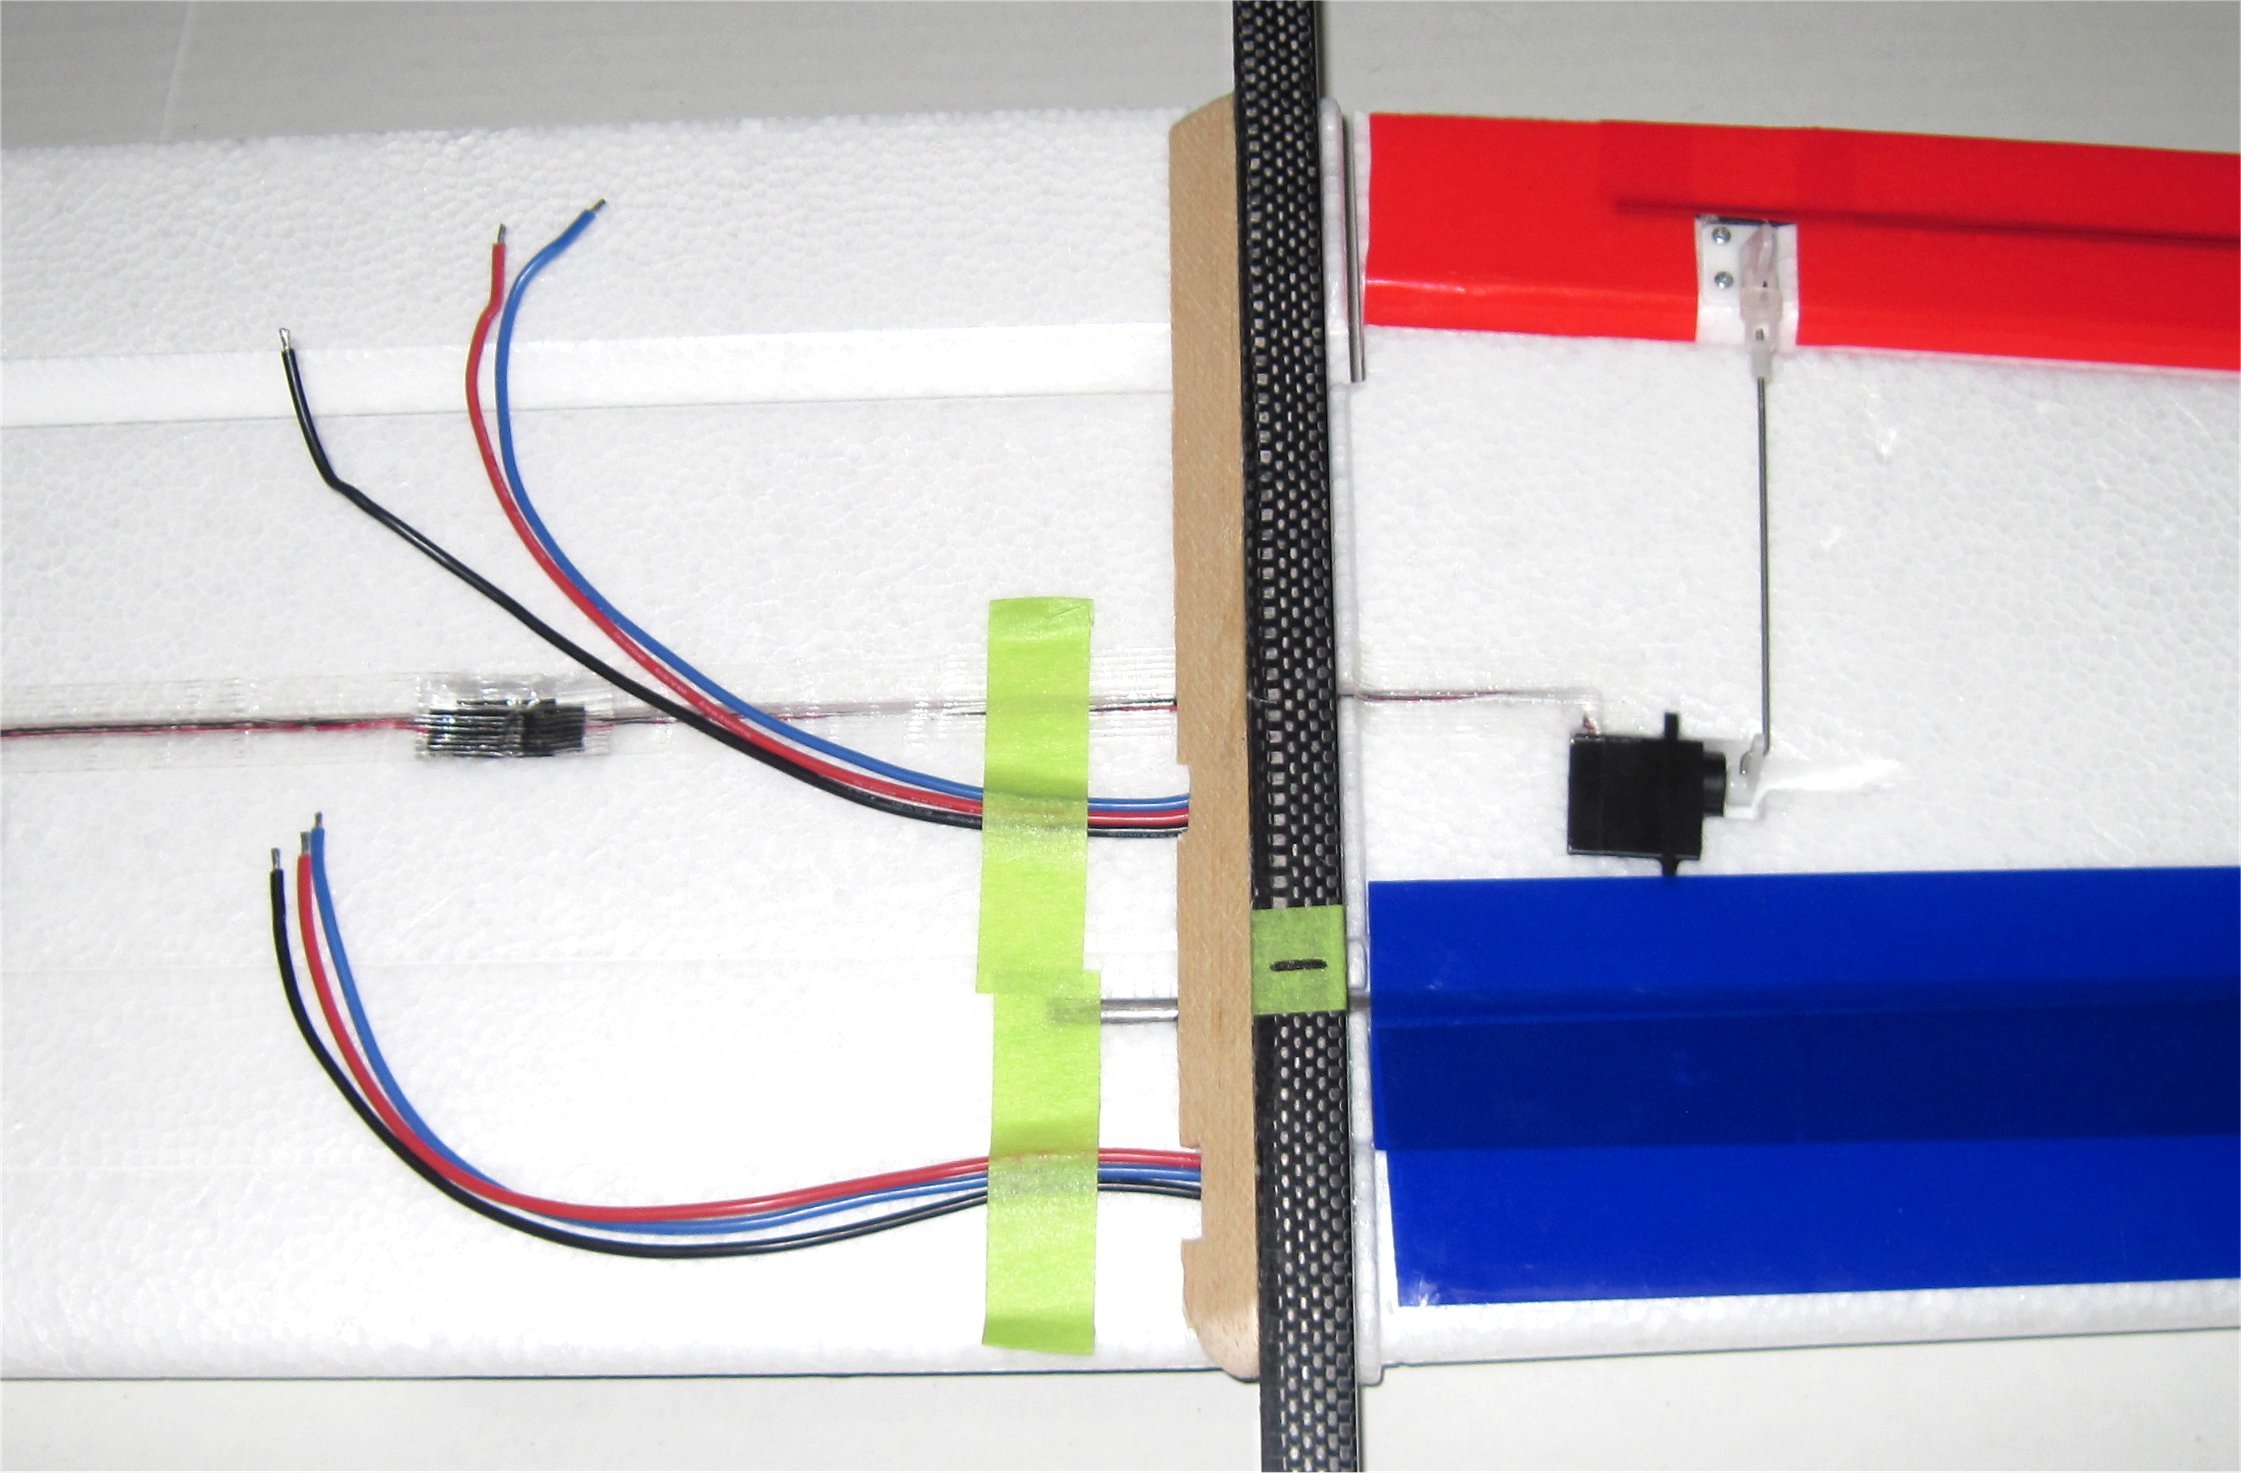
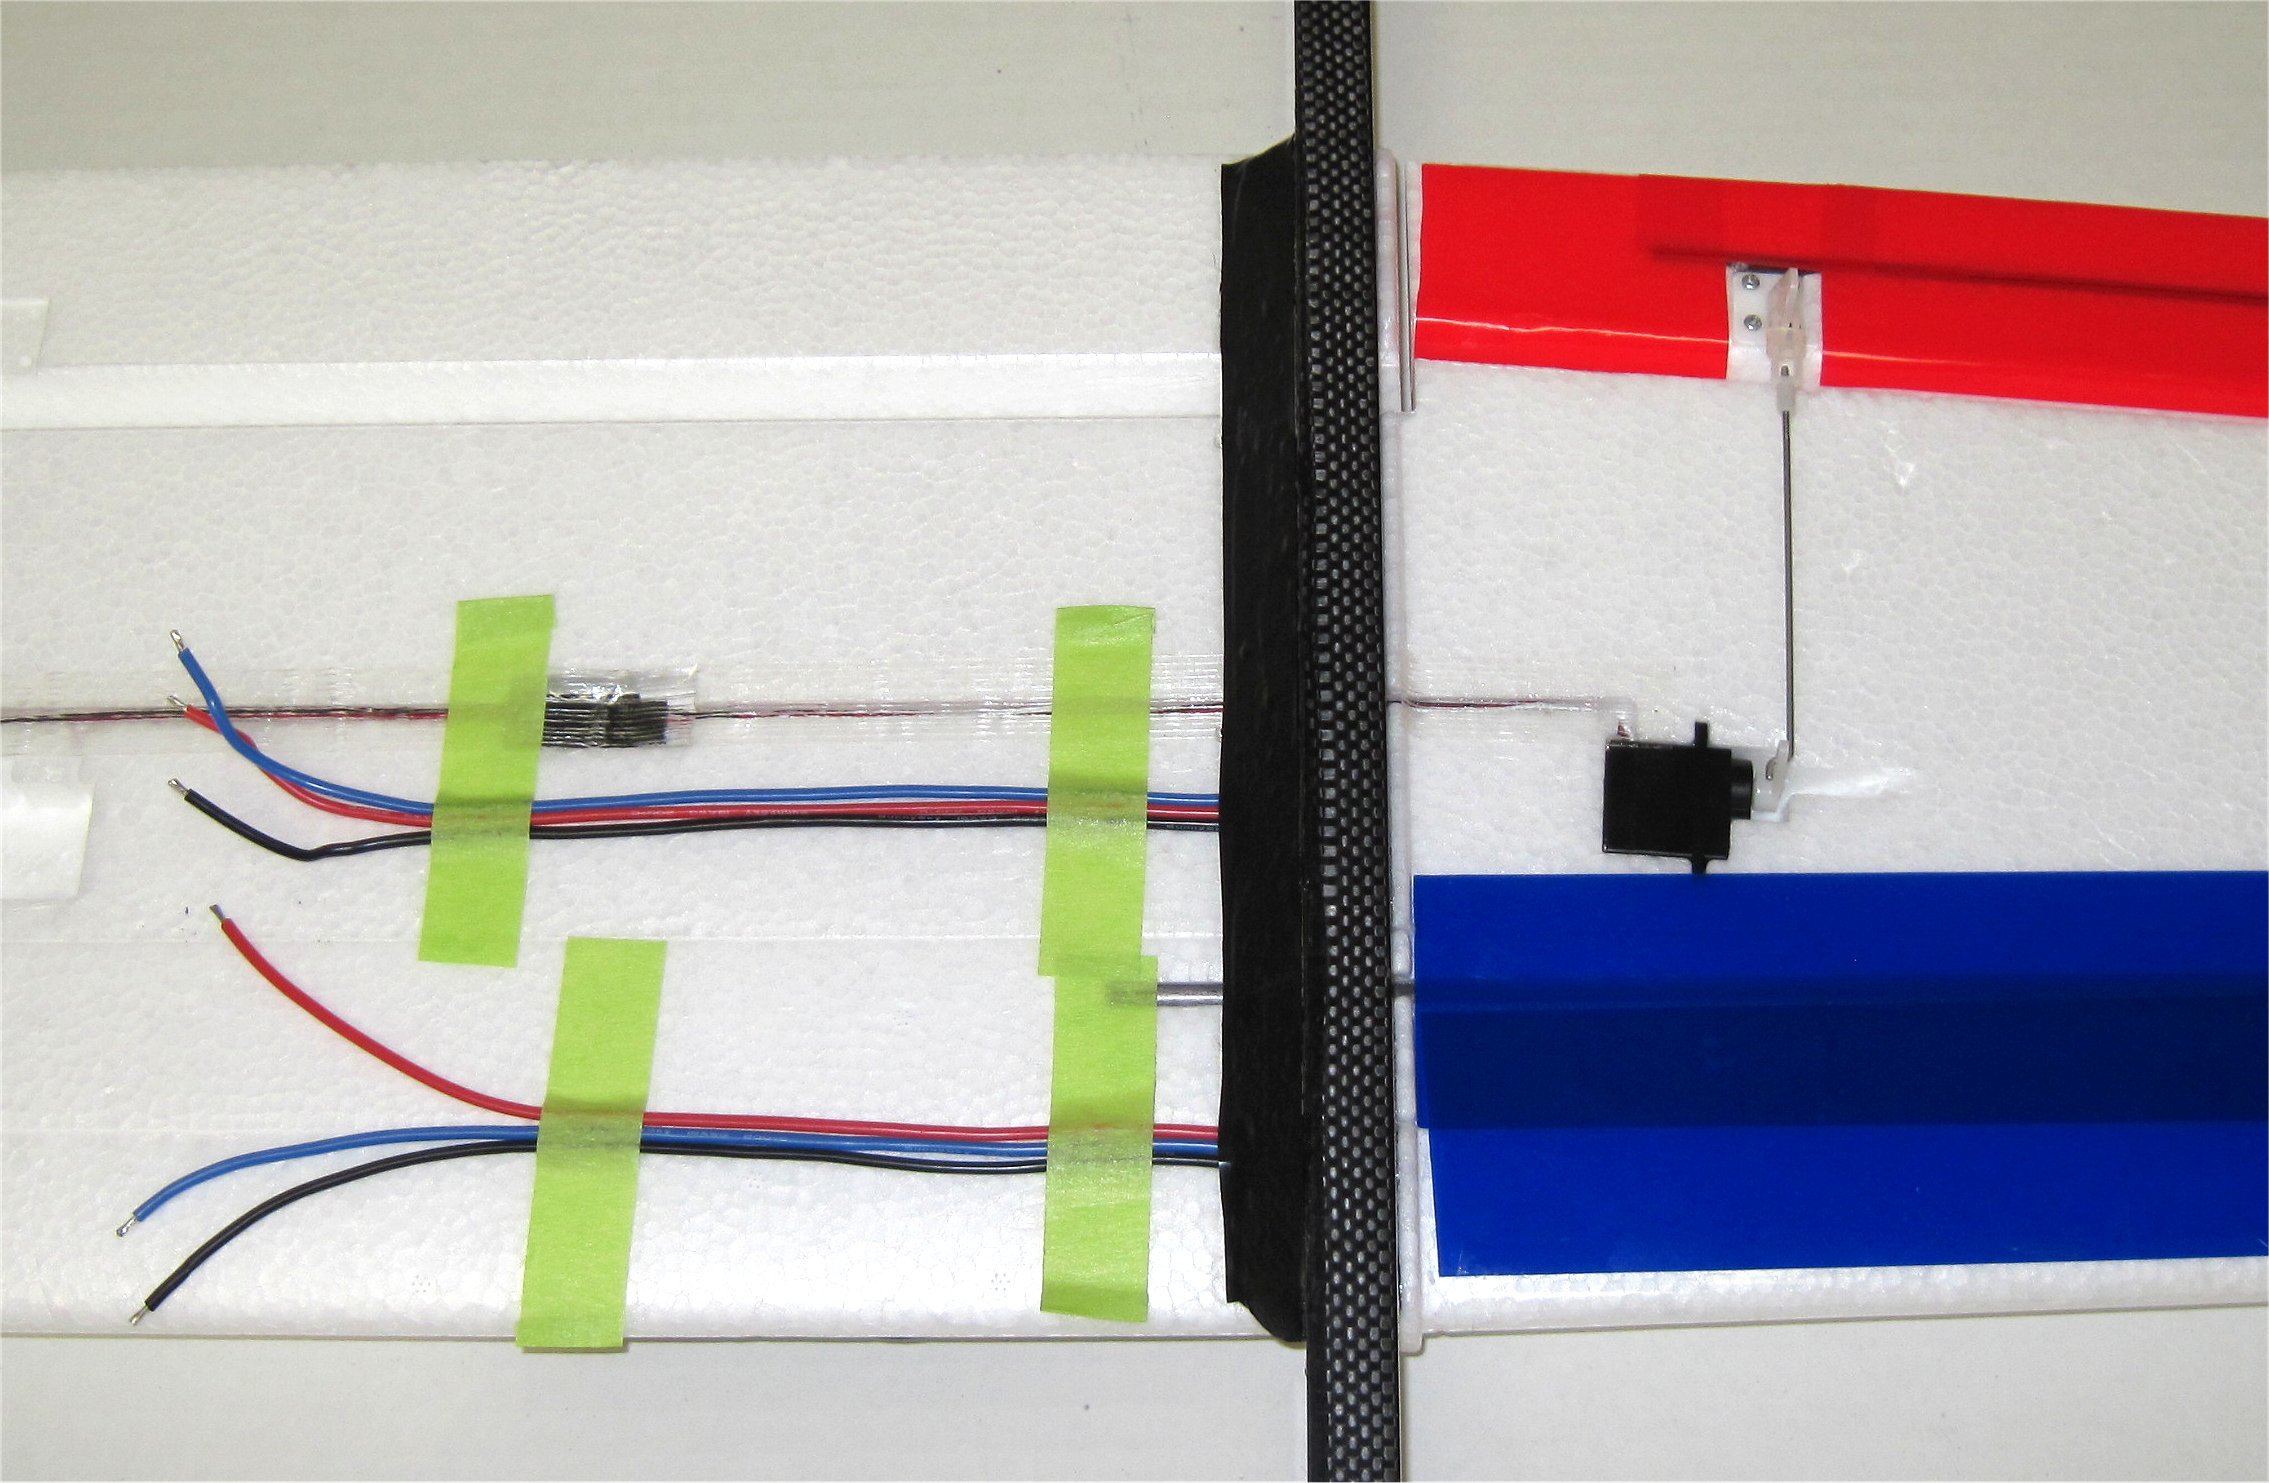
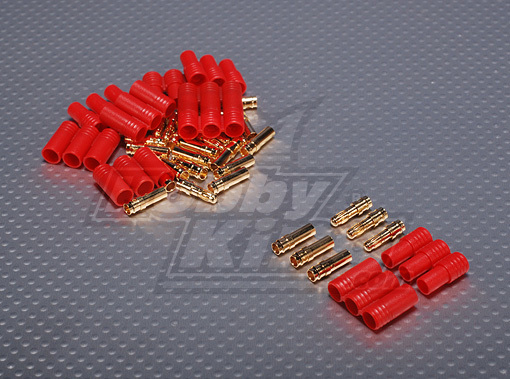
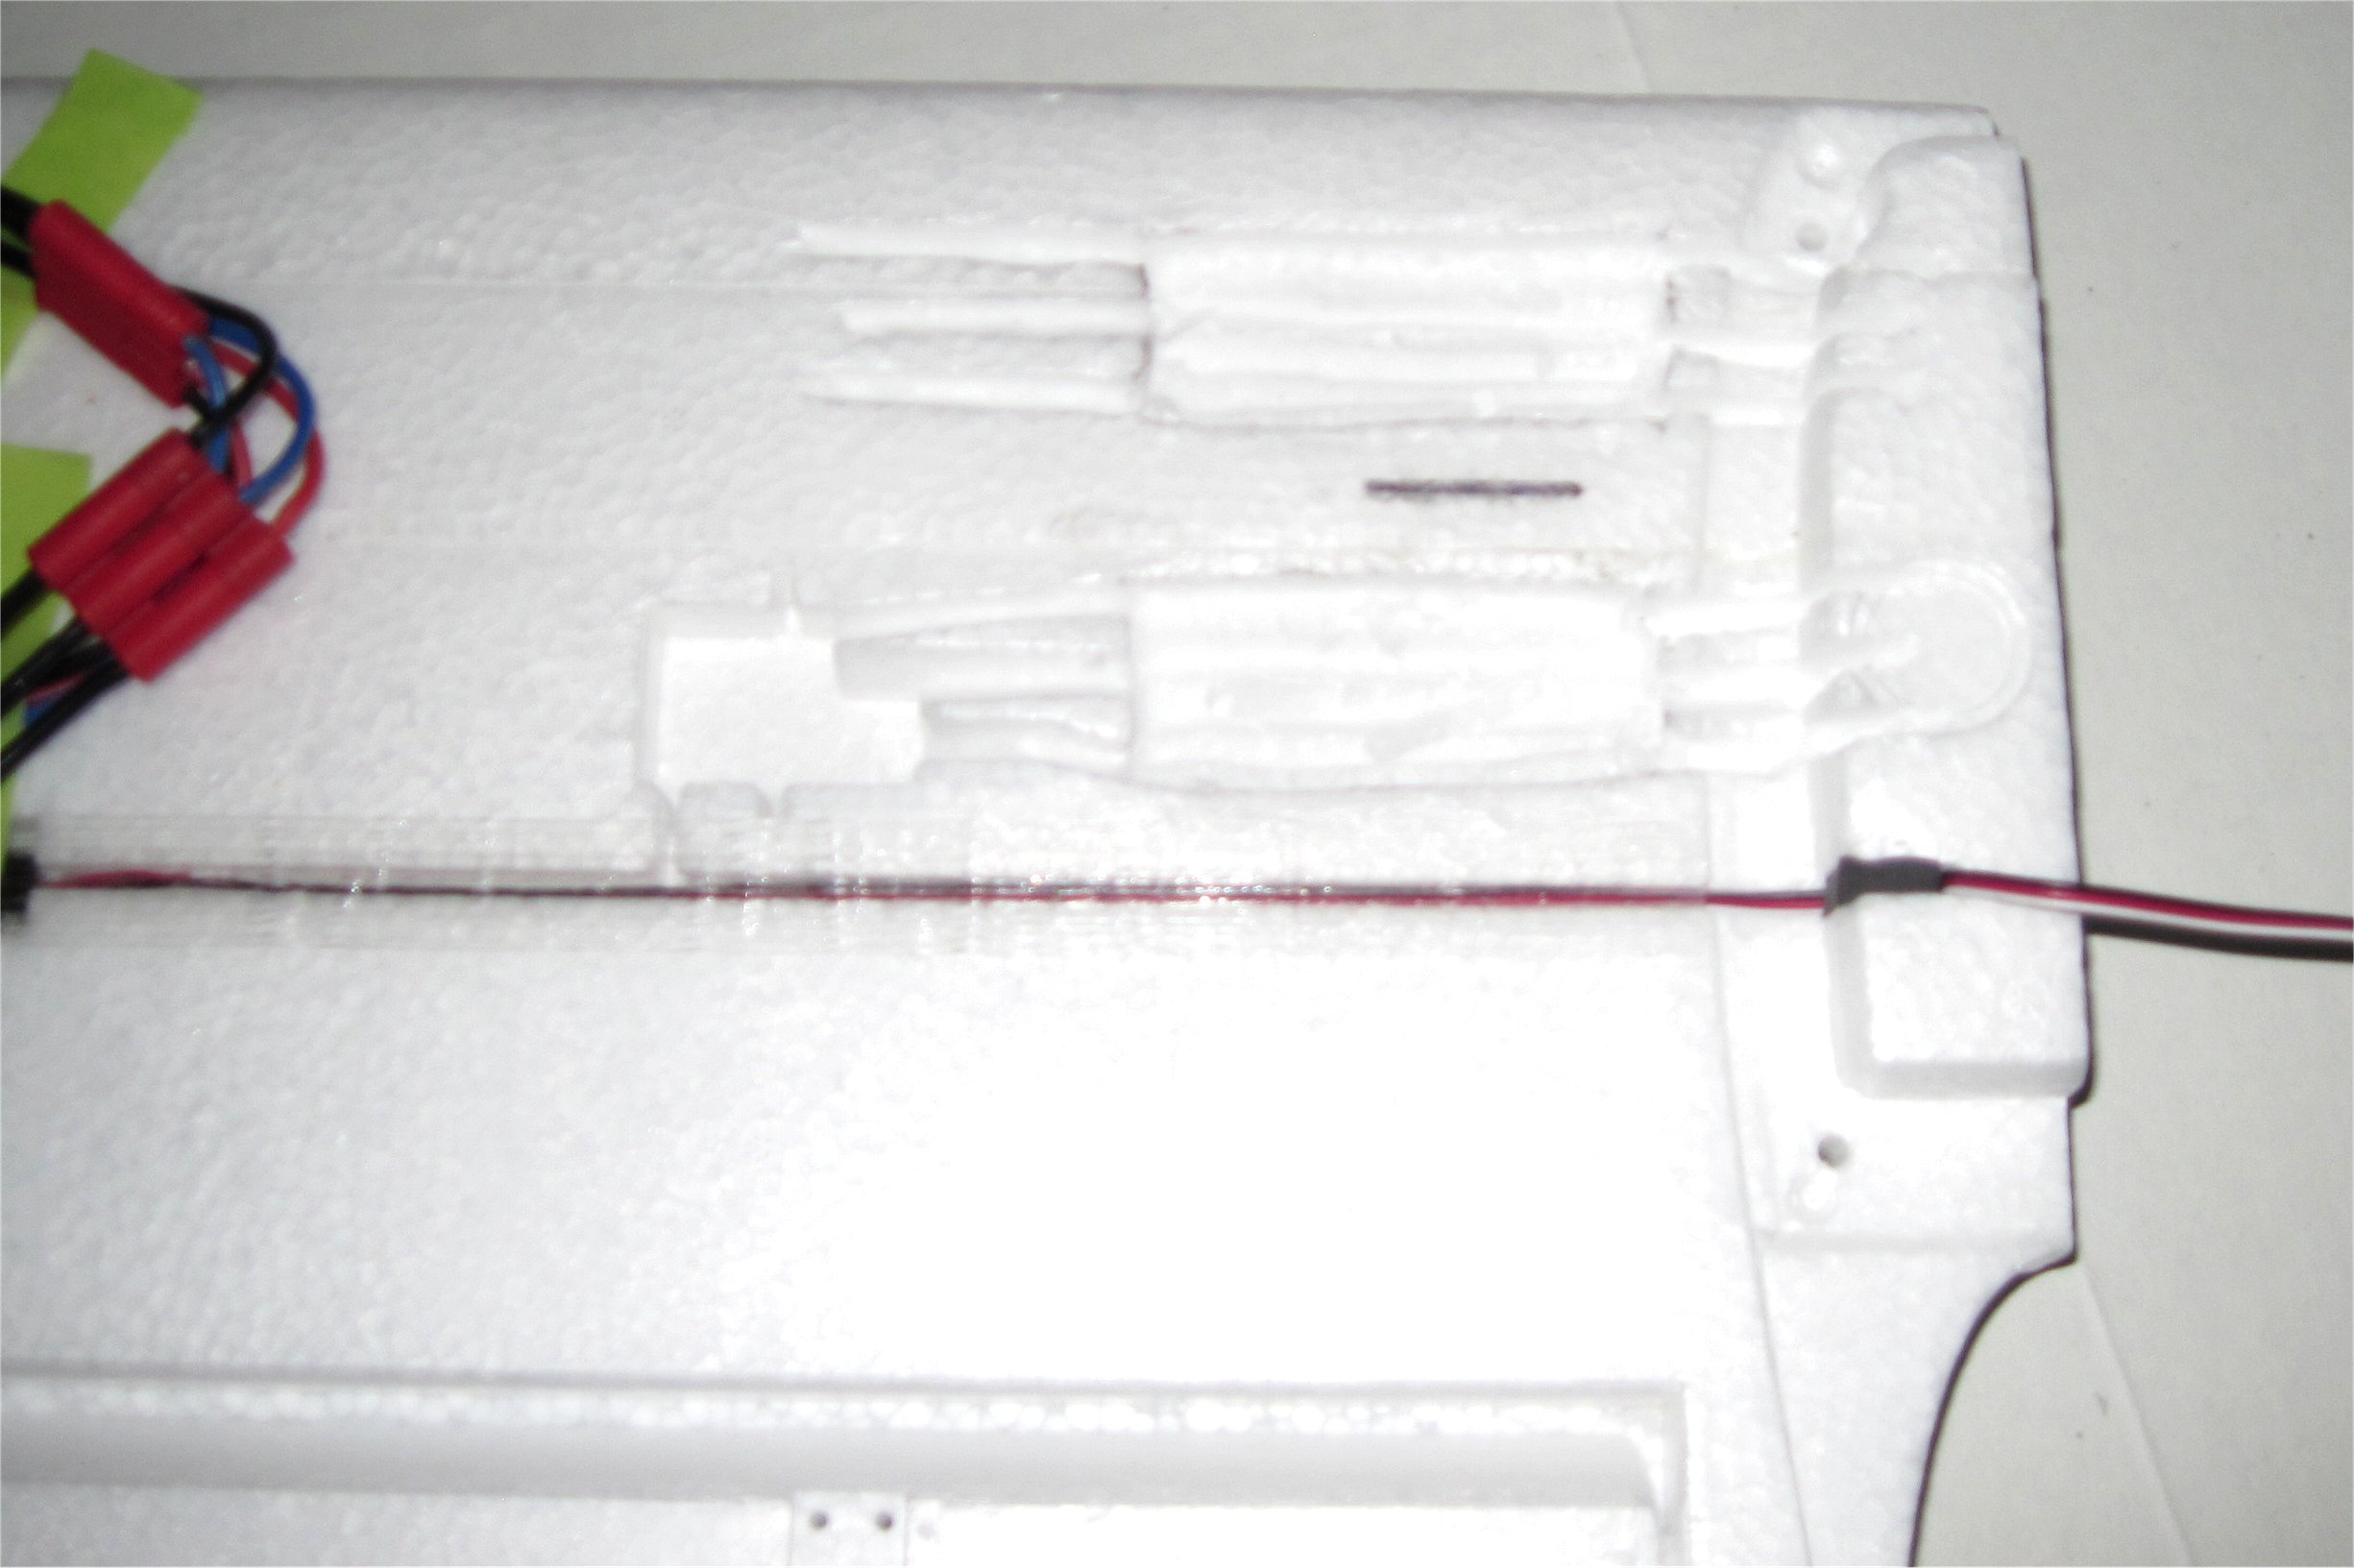
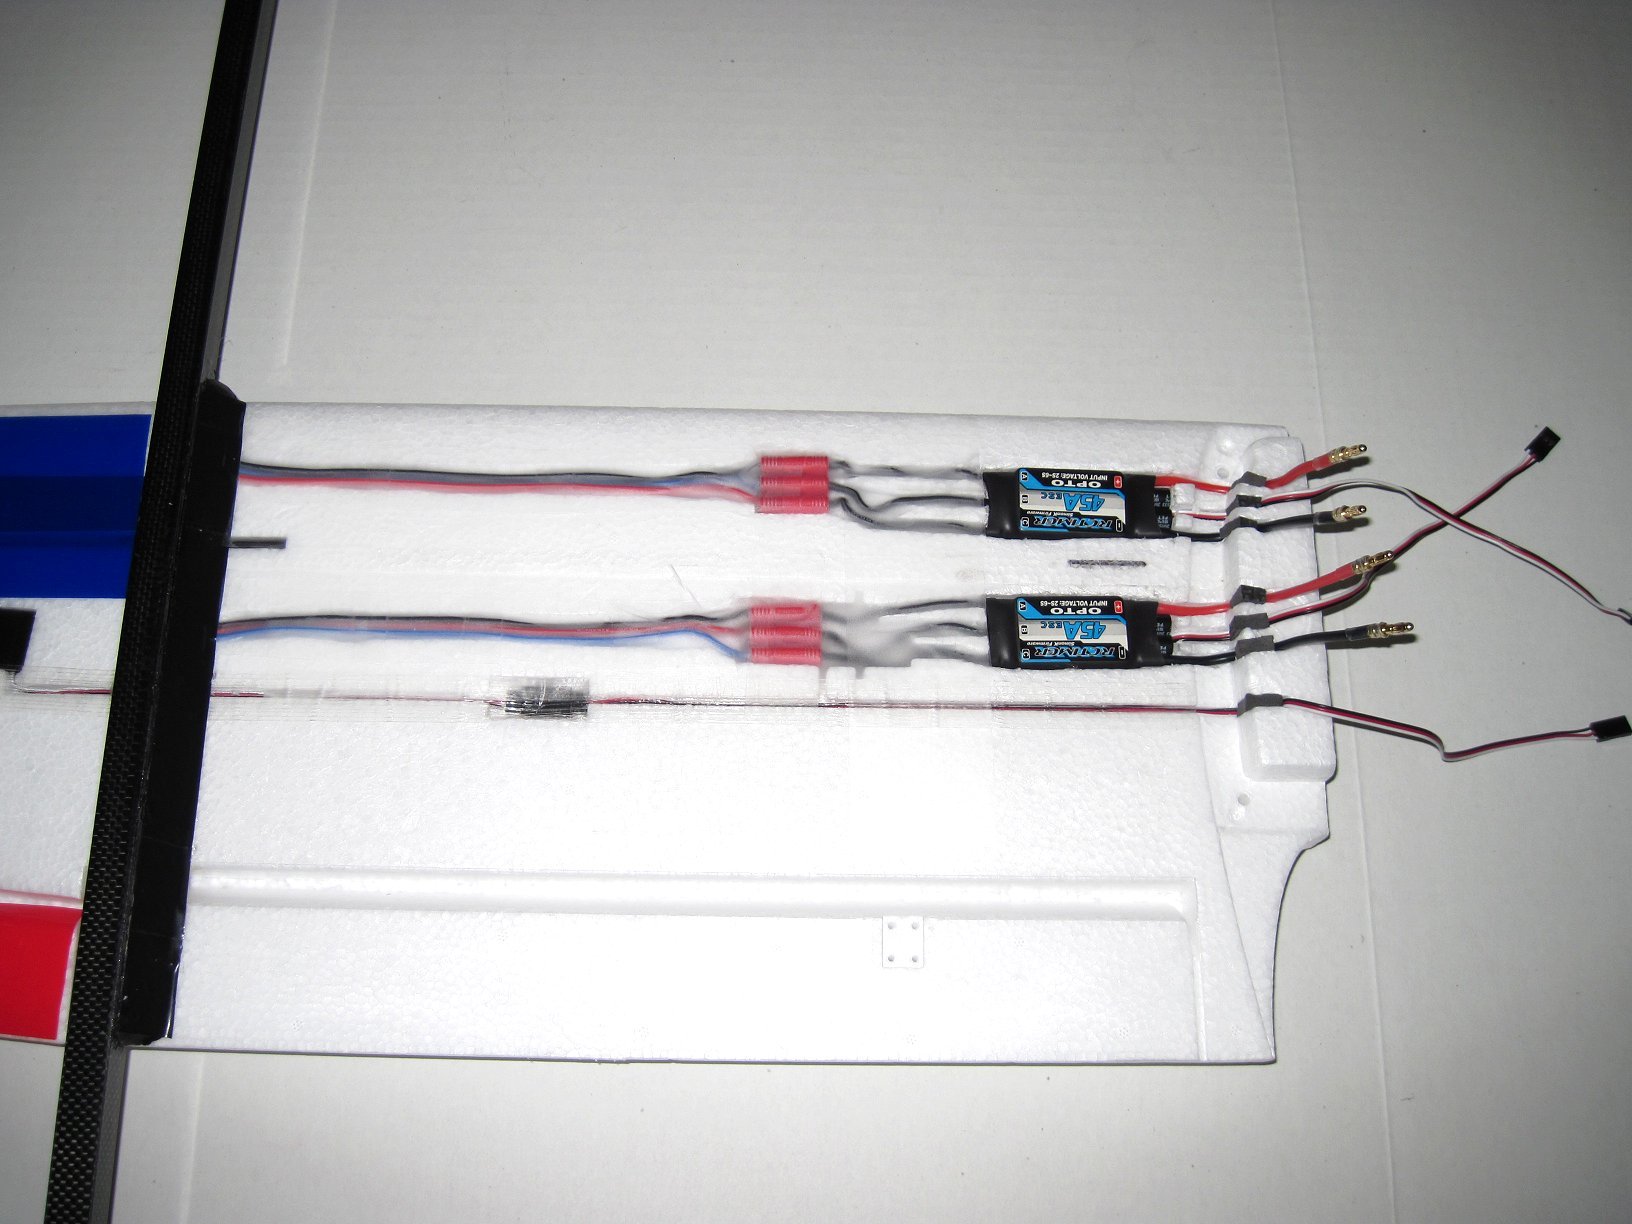
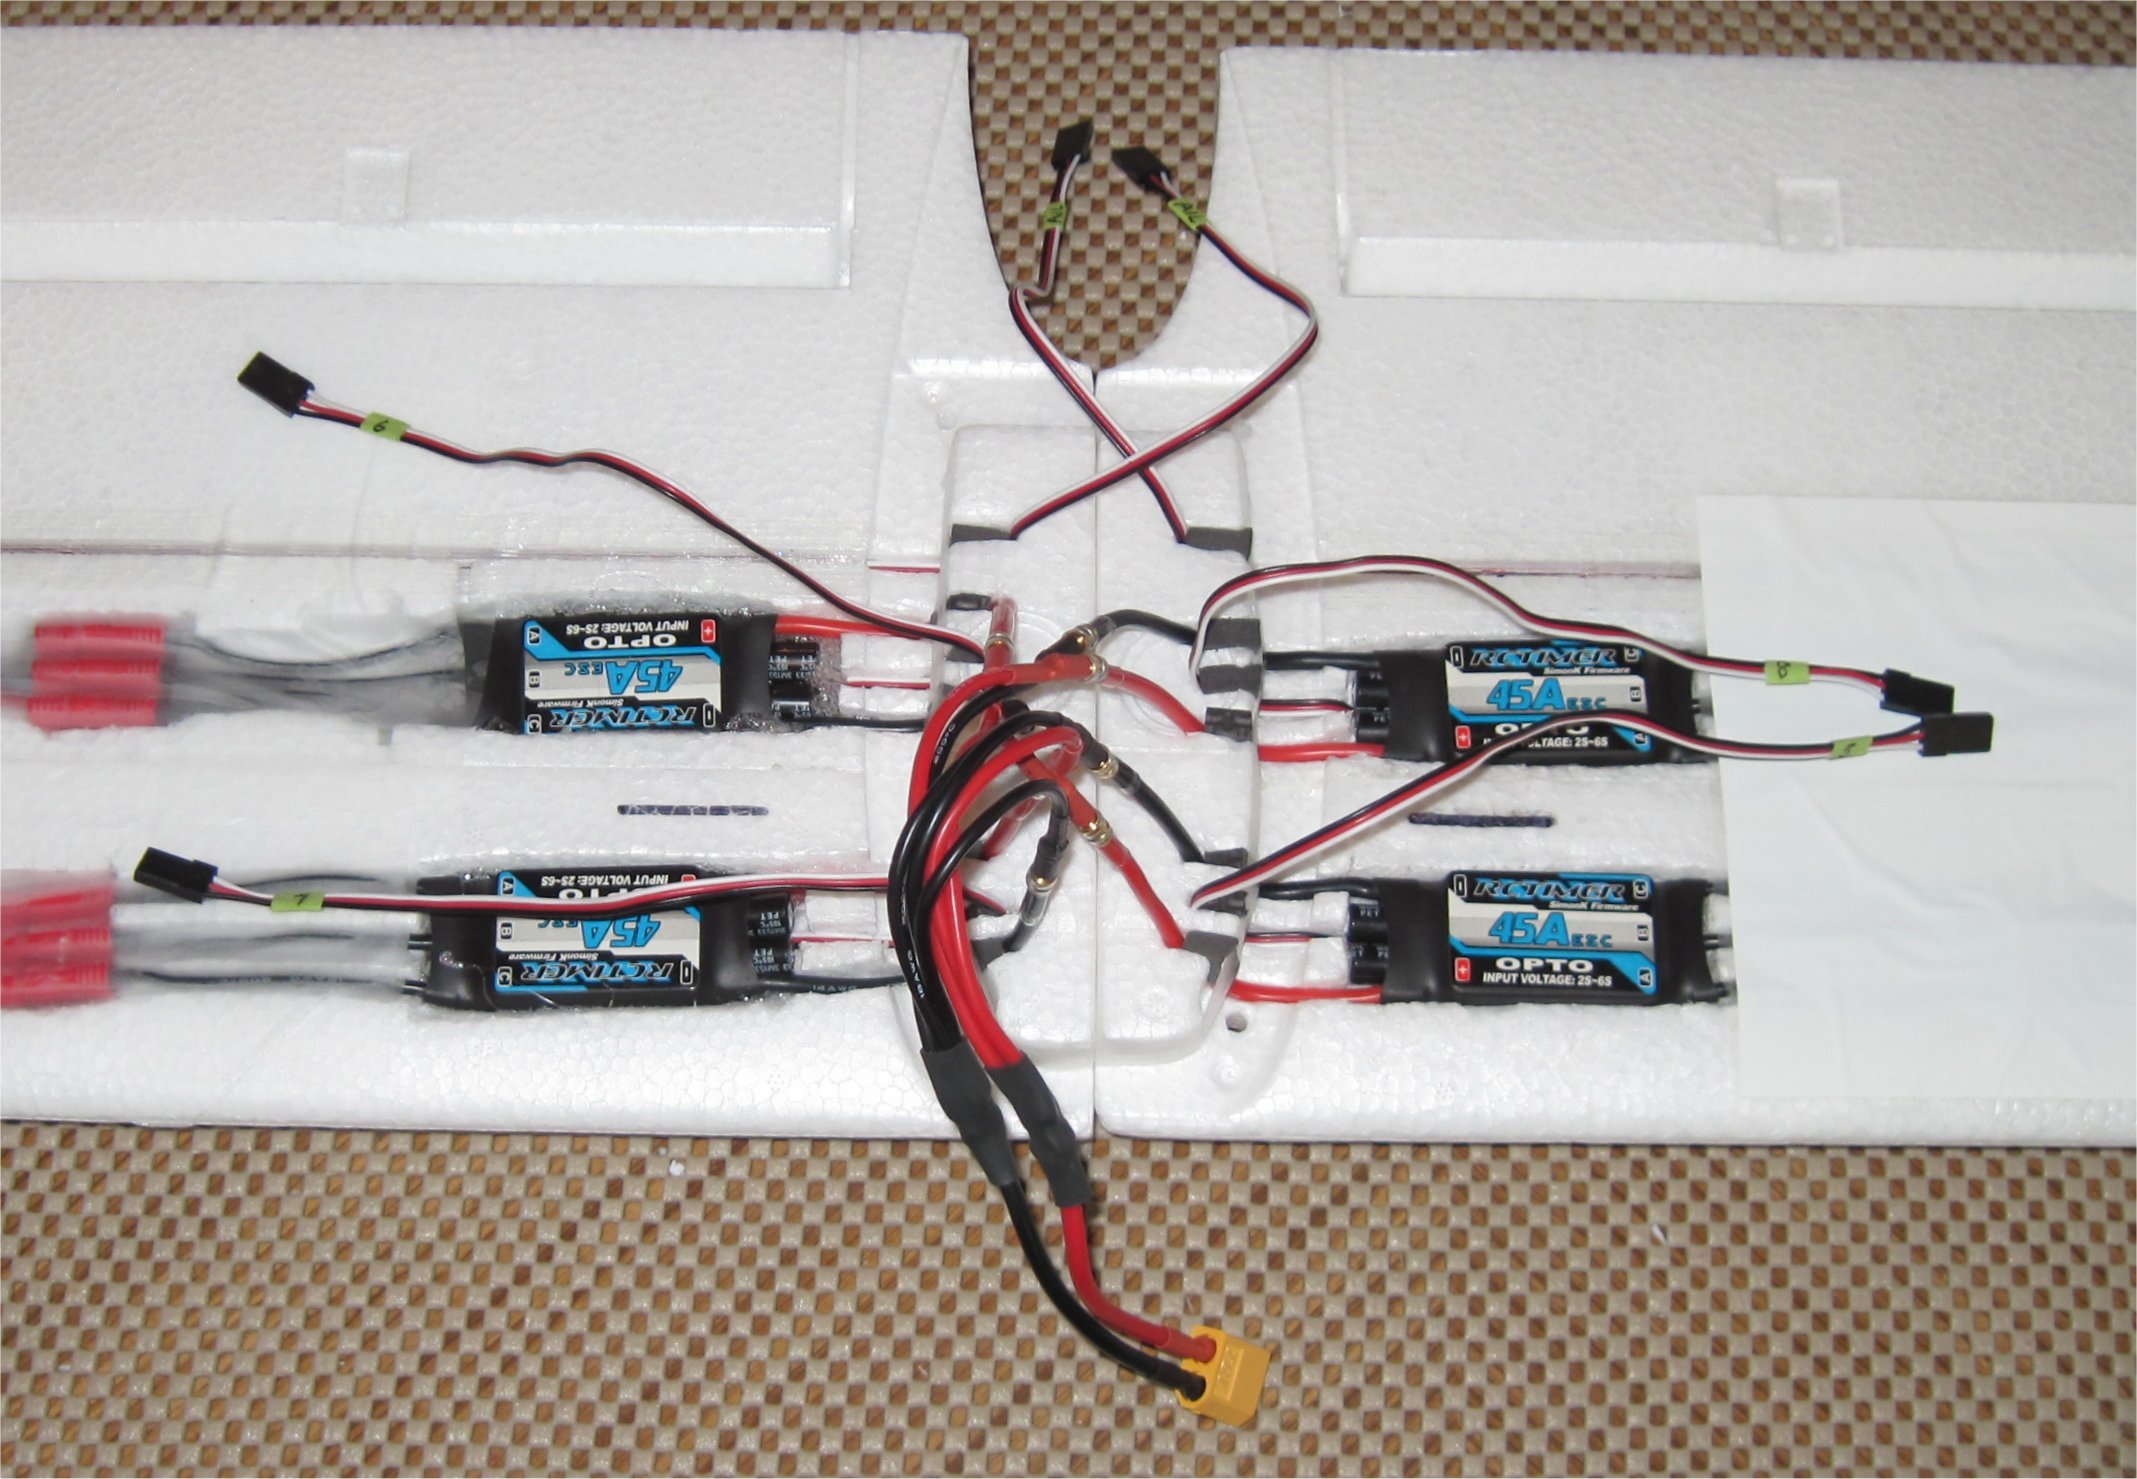
I finished my right wing installation of the ESCs and wires. I decided to use the 3.5mm 3 wire Bullet-connectors from Hobby King so I could solder everything up and easily change the motor direction, if needed, by reversing one end.
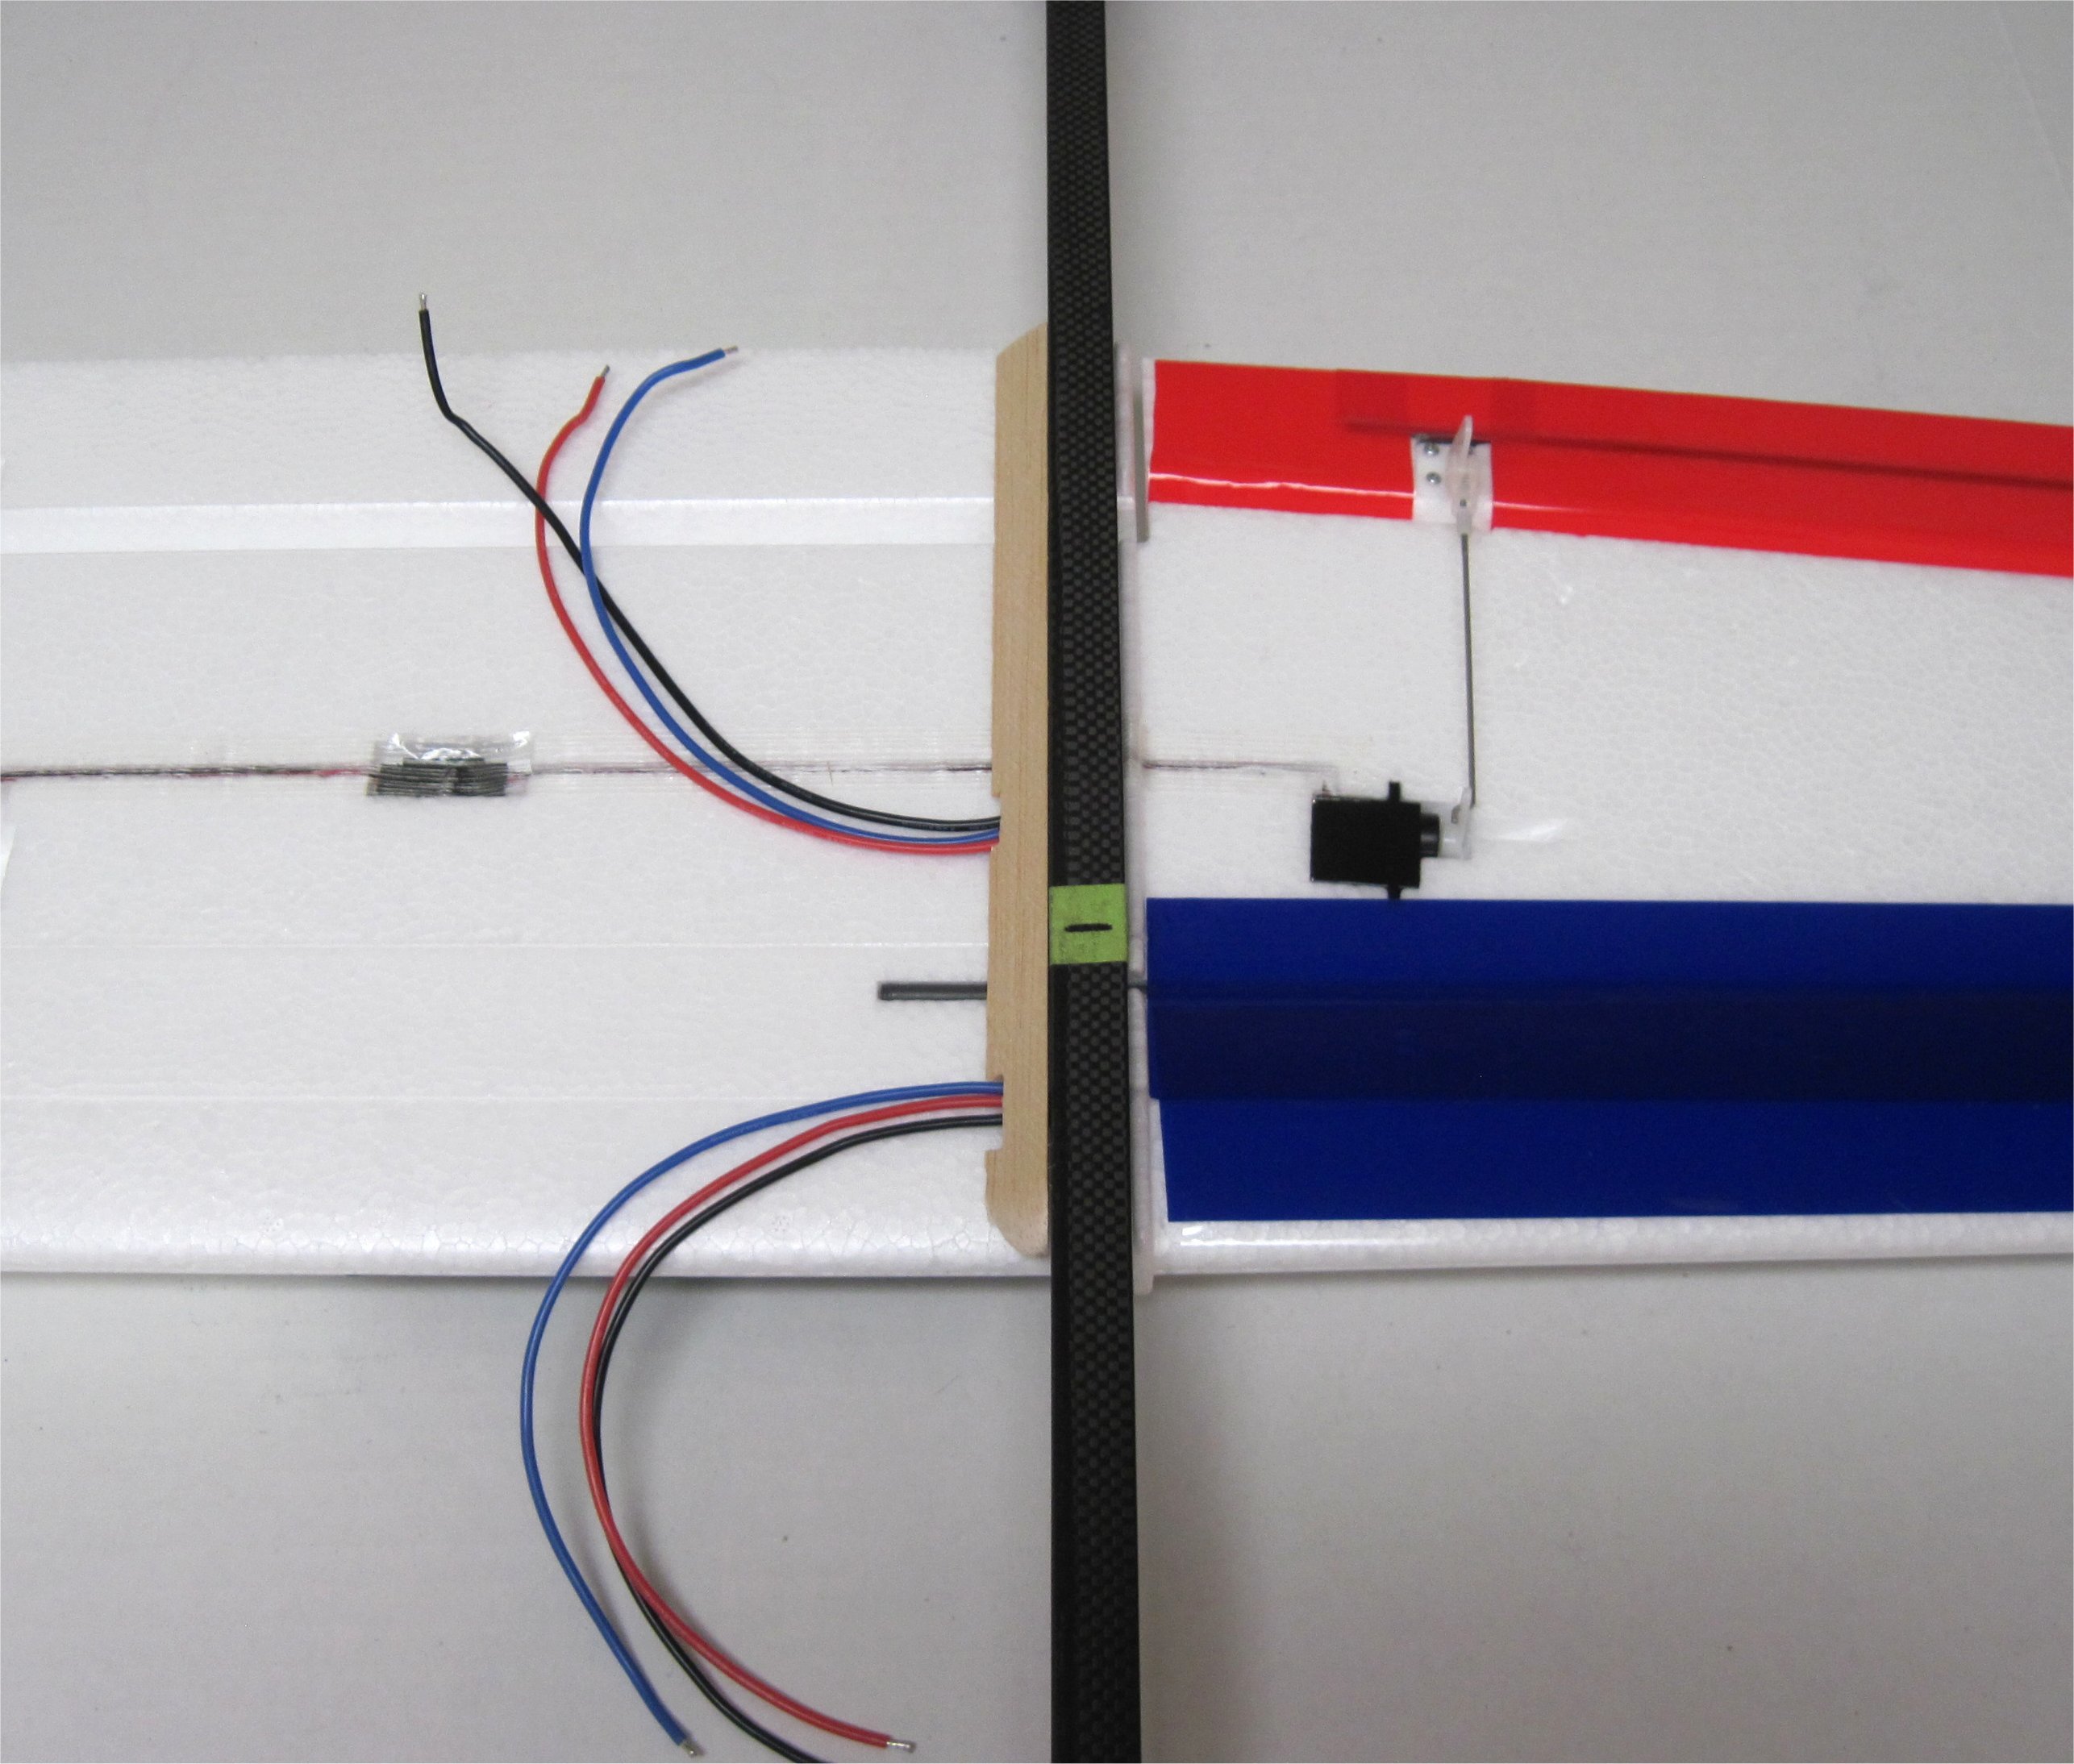
After first checking the motor direction with a spare receiver and 4s Lipo pack, I used a razor knife to bury the wires and ESCs flush (or near flush) with the bottom surface of the wing. A tip here is that the 3.5mm bullet connectors that power the ESC will plug directly into a Lipo pack with an XT60 connector. Since my ESCs are OPTO-isolated, I also needed a 5v receiver pack to power the receiver. The ESC then gets 5v from the receiver throttle channel.
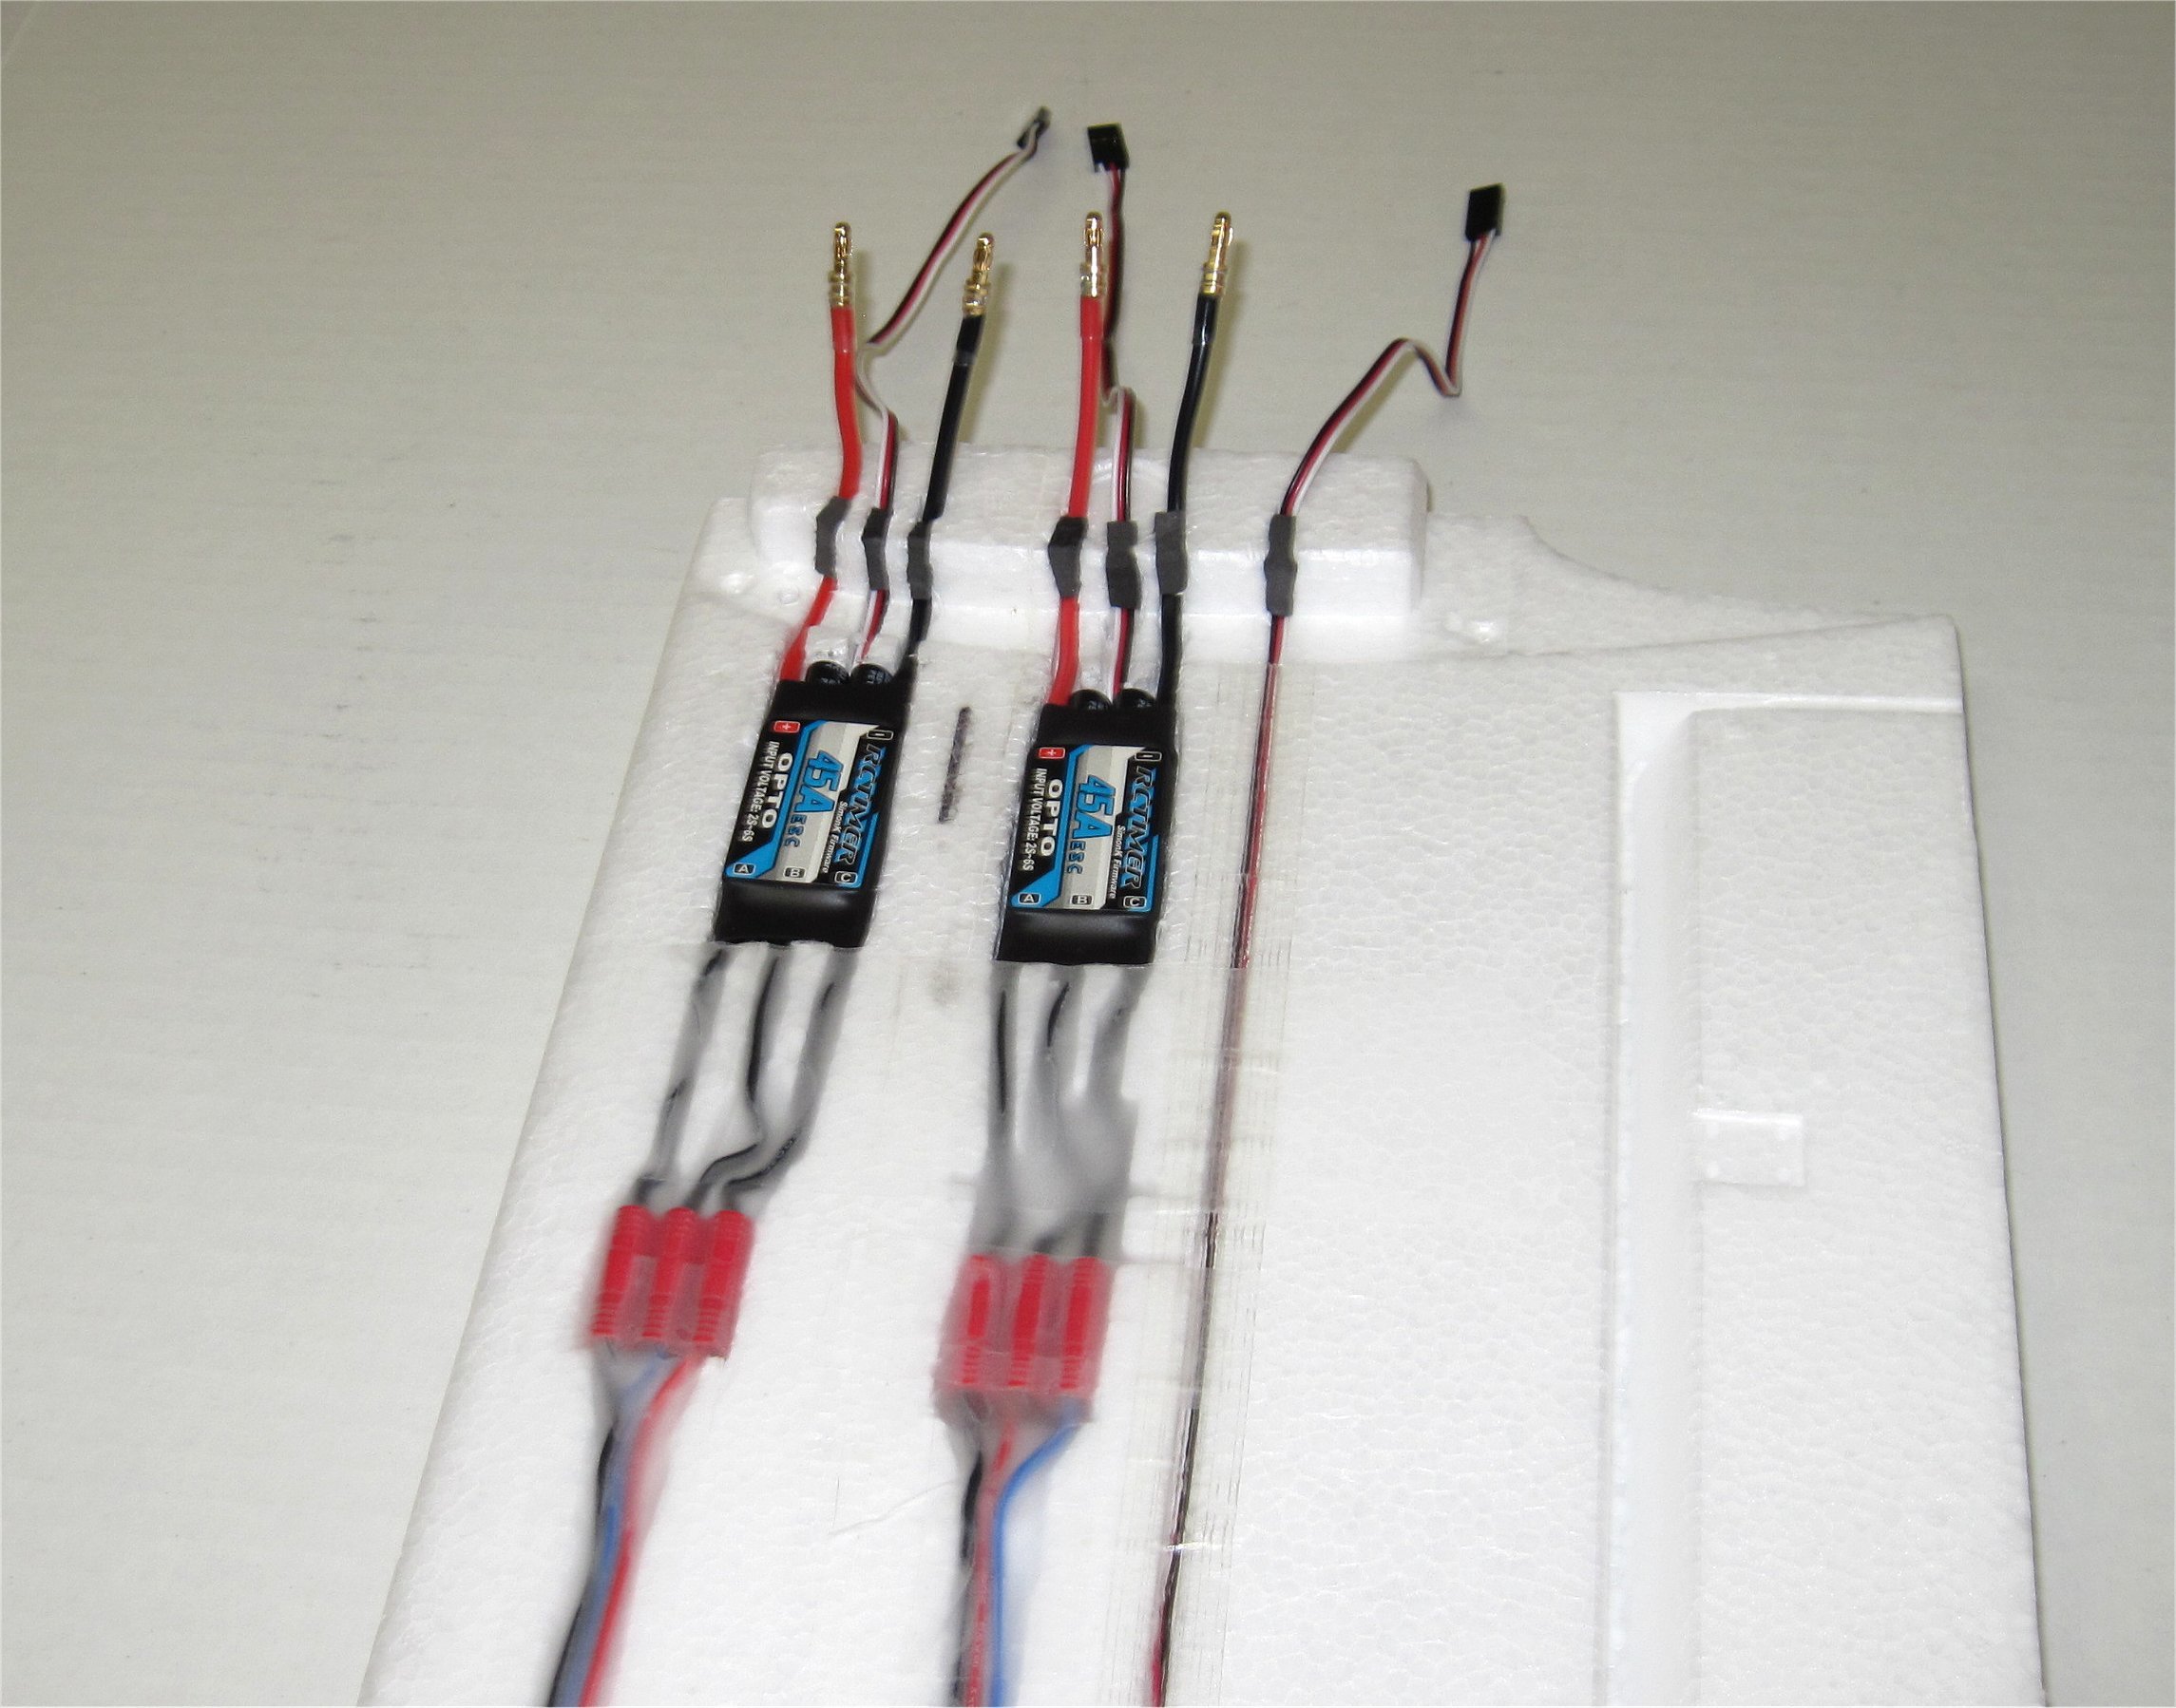
The ESCs were glued in place on the bottom using Beacon 3-in-1 foam glue and the 3-wire motor connectors with servo tape. I then covered the wires and connectors with Blenderm surgical tape which sticks very well to the Ranger EX foam. Lastly, the wires and connectors were covered with a piece of white Monokote trim sheet.
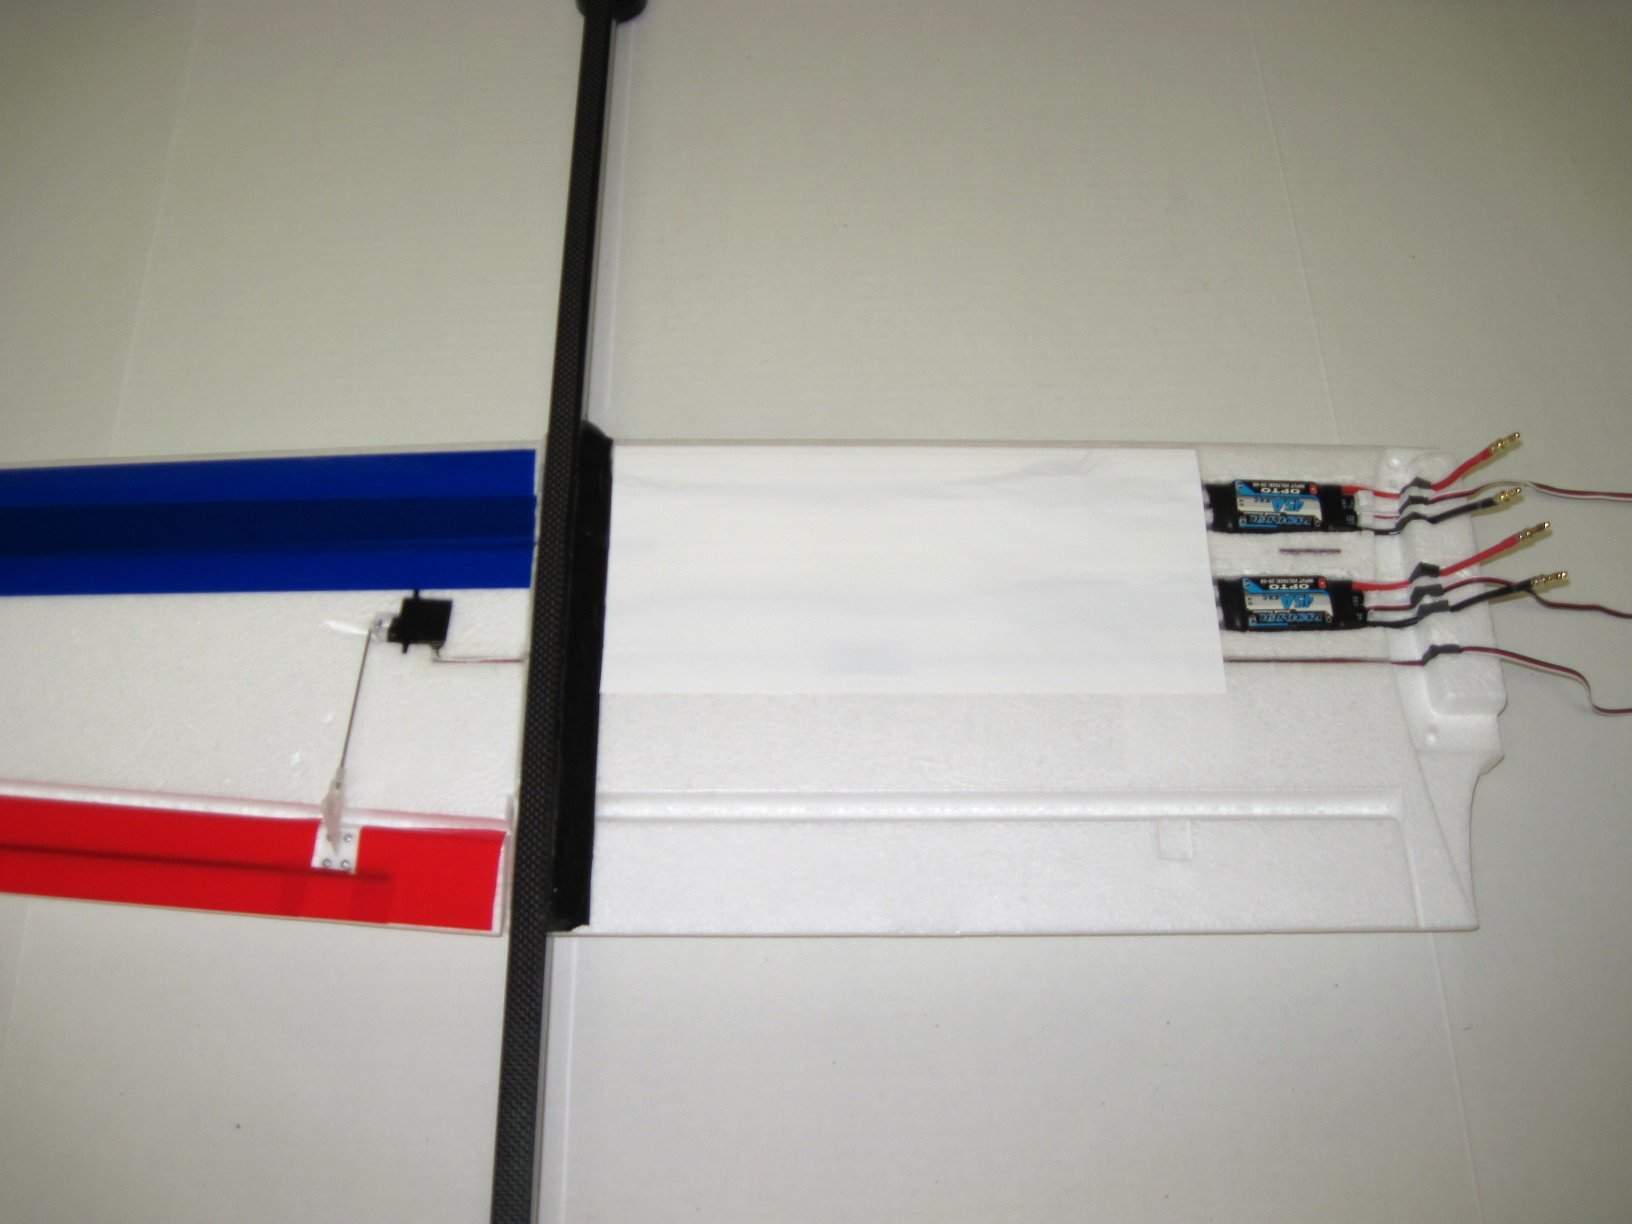
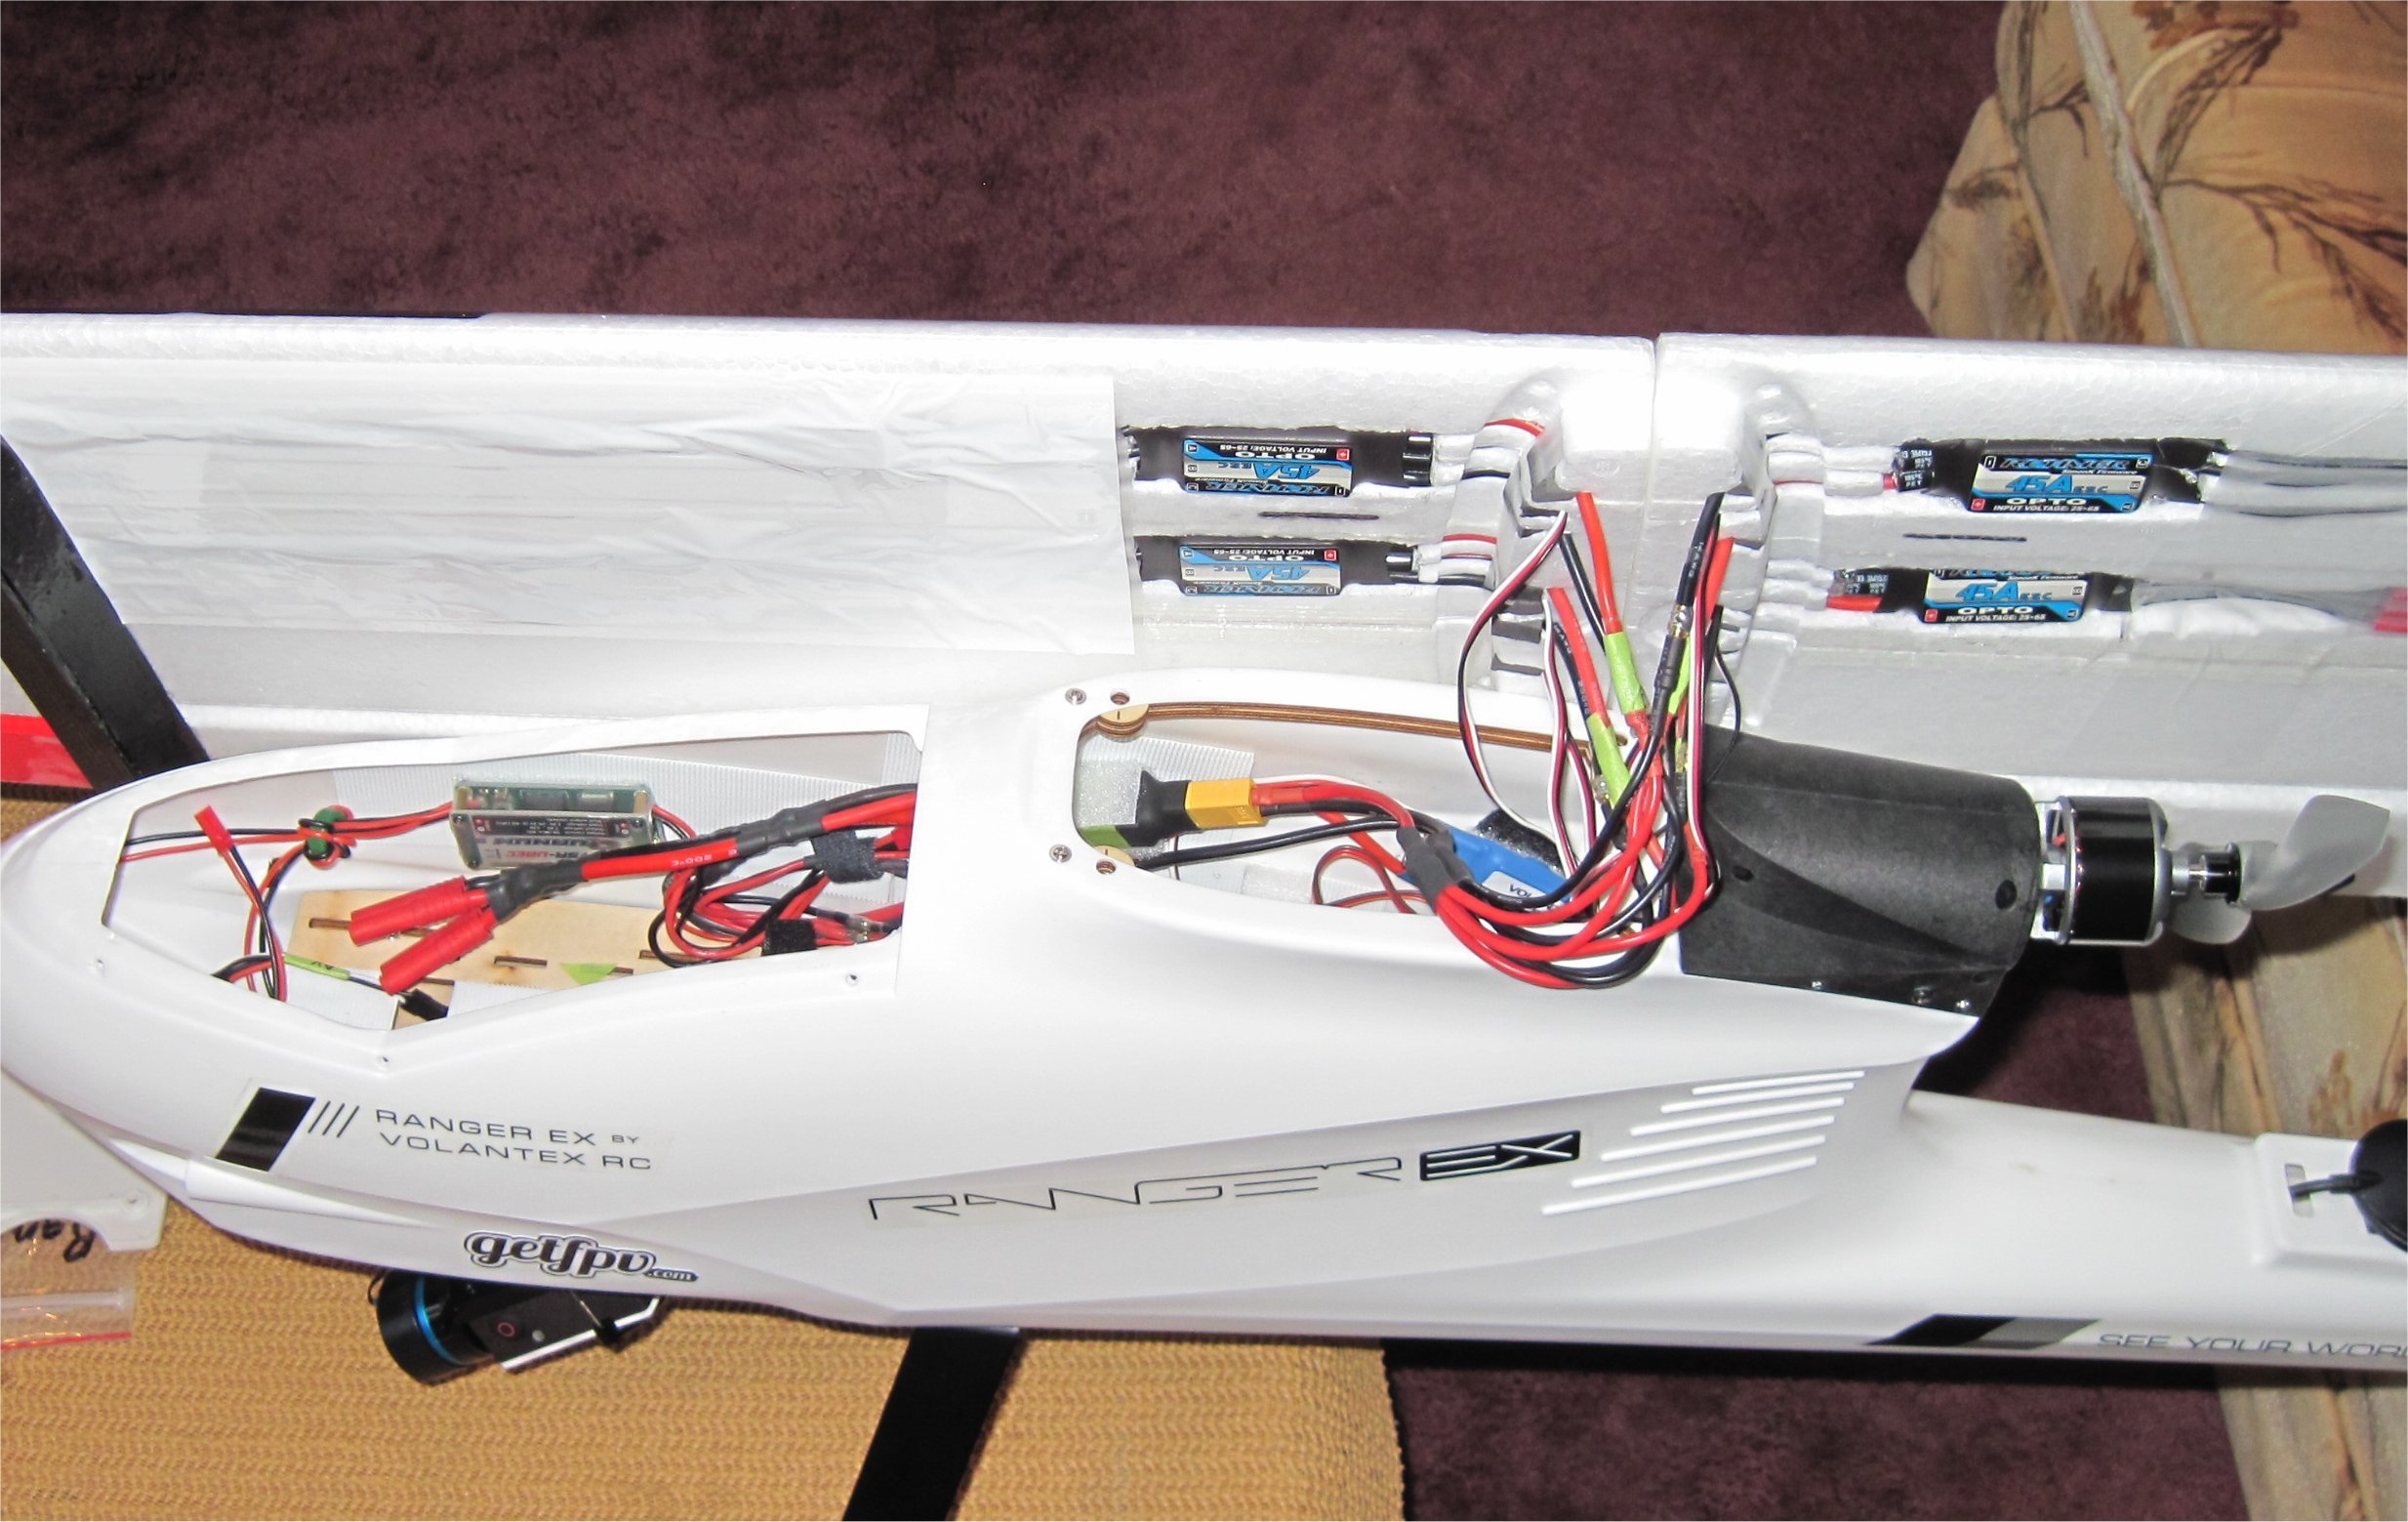
The ESC power leads and servo leads were buried flat with the surface of the center wing area so that it fits properly into the fuselage. To hold the wires in place, I used small square pieces of flooring foam that I cut from a larger piece.
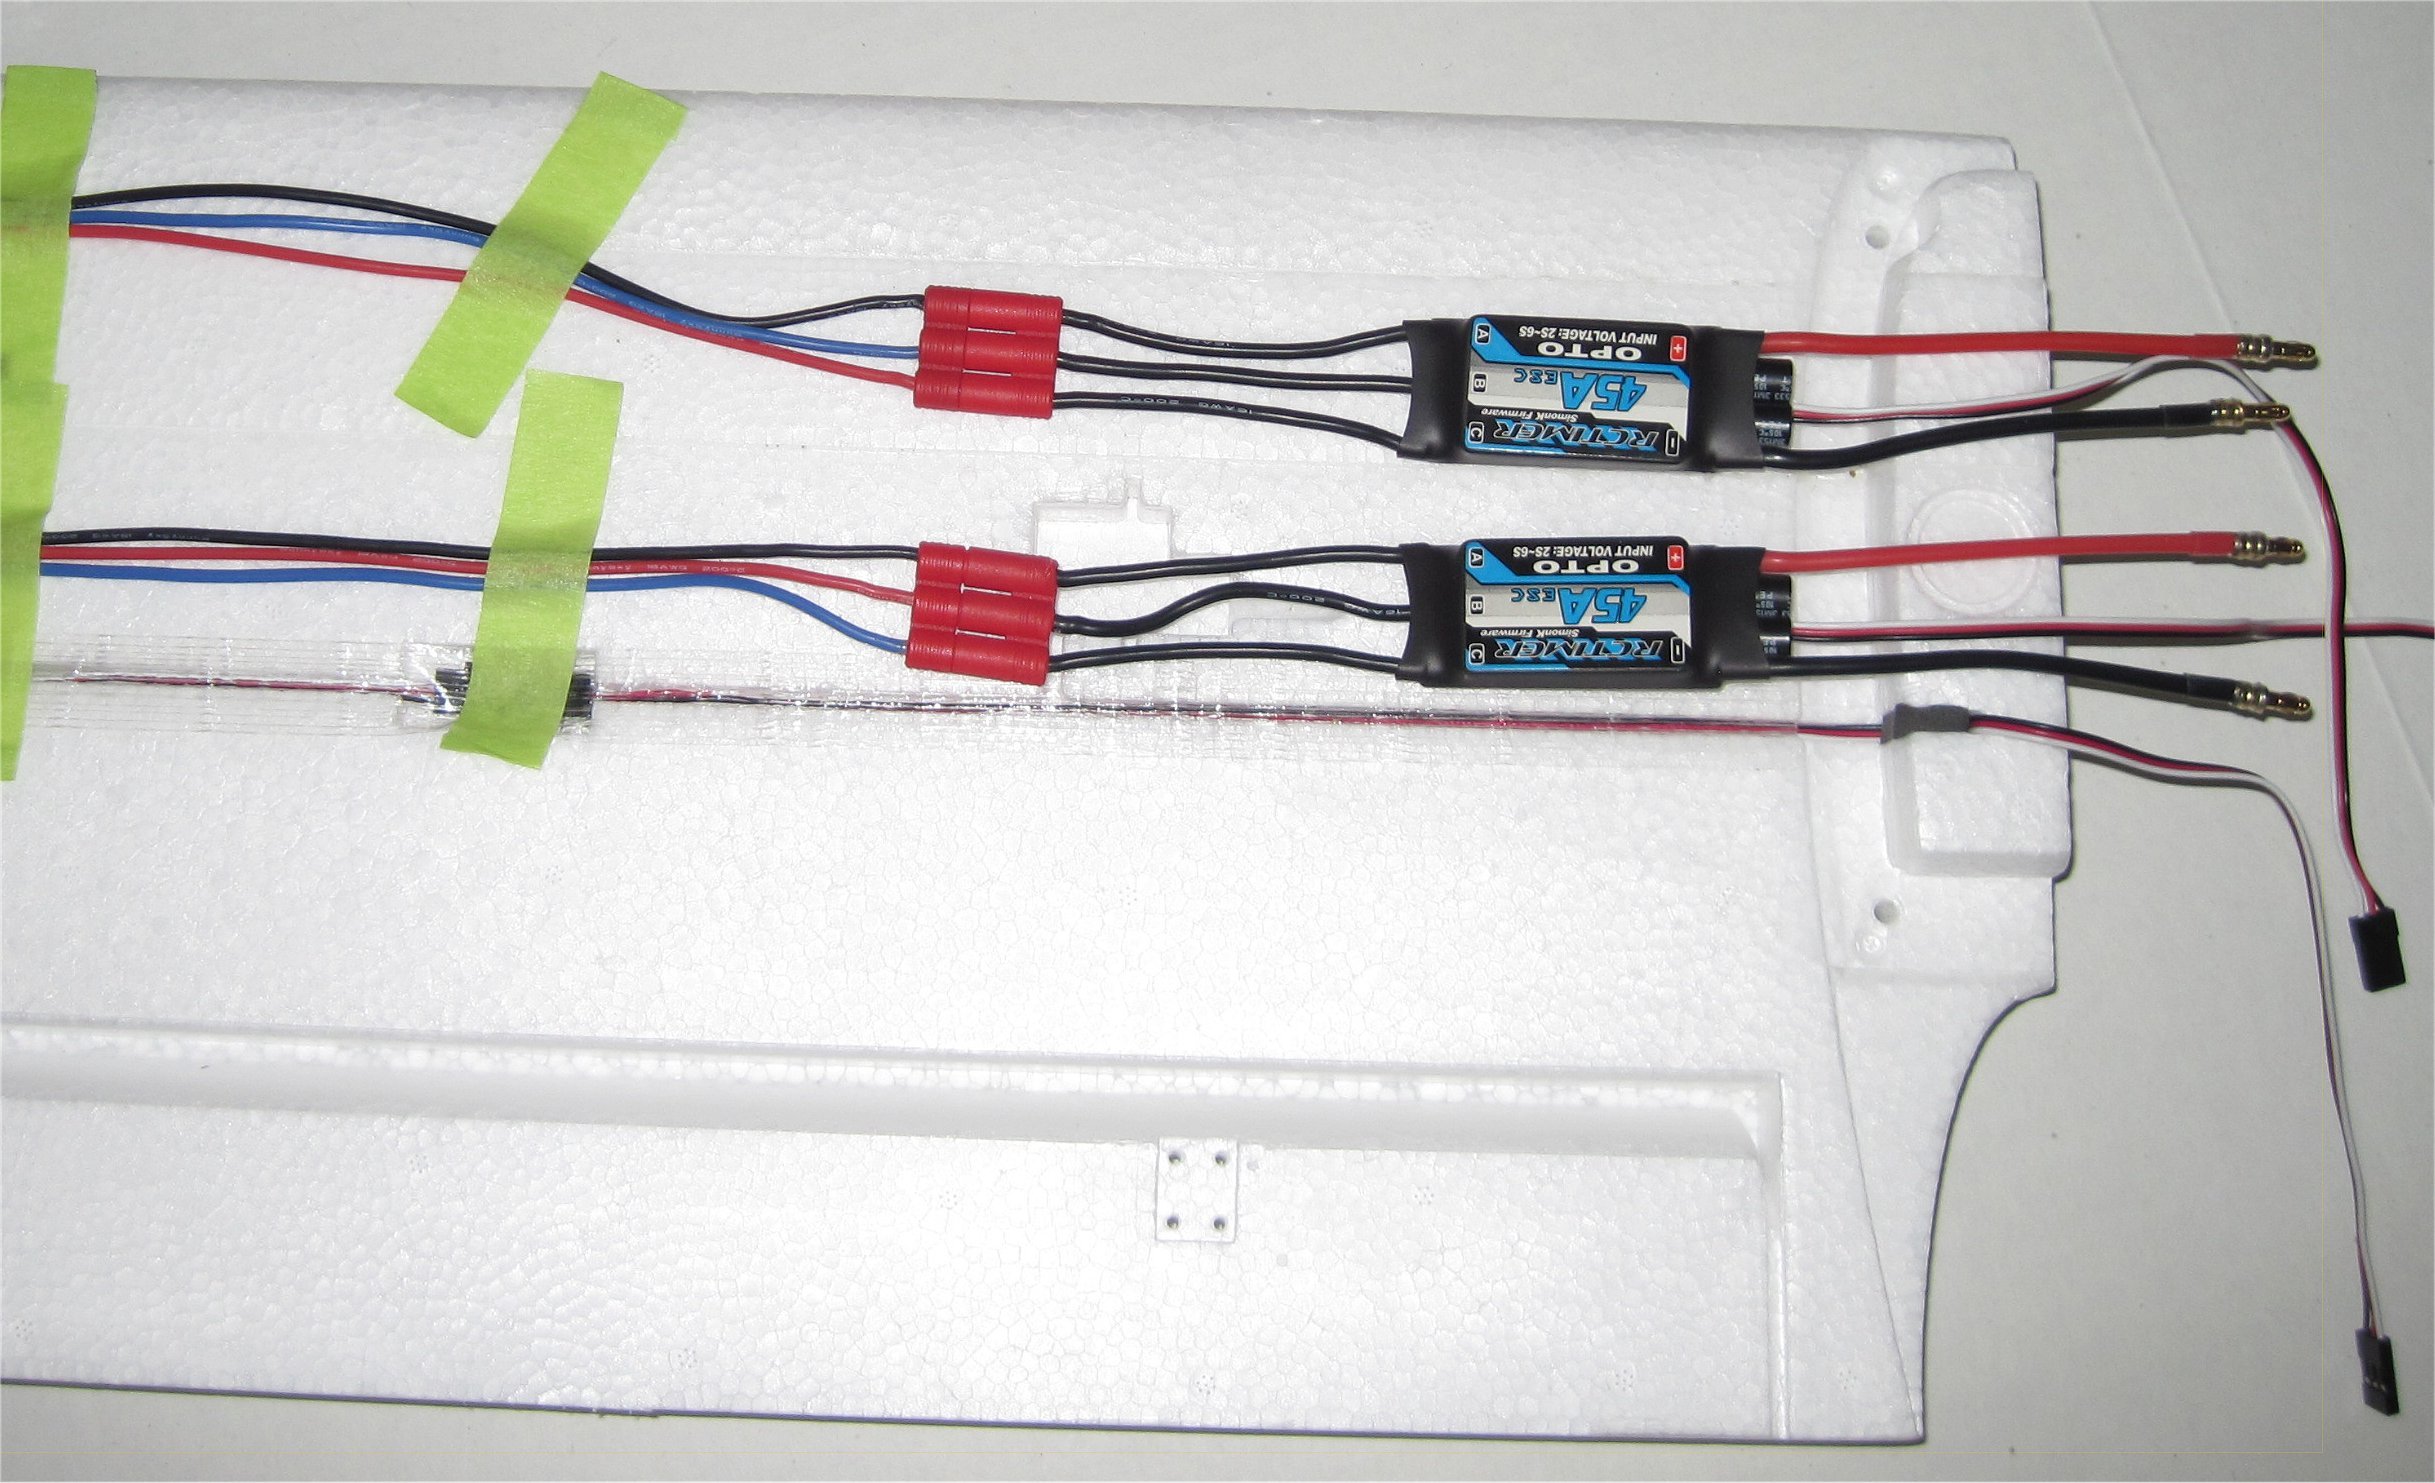
In preparation for my hover test this weekend (since the weather looks nice) I finished the gluing and wiring on my left wing half but skipped the final cosmetic finishes on the balsa post and Monokote trim covering. Hobby King sells a 3-pair or 6-pair adapter cable from 3.5mm bullet connectors to XT60 so you need to adapt them for the 4-pair version shown below. The #14 wire on the XT60 connector works well on my Tarot 650 Sport quadcopter (same power system) so I didn’t change it here as the hovering duration needs to only be a few minutes.
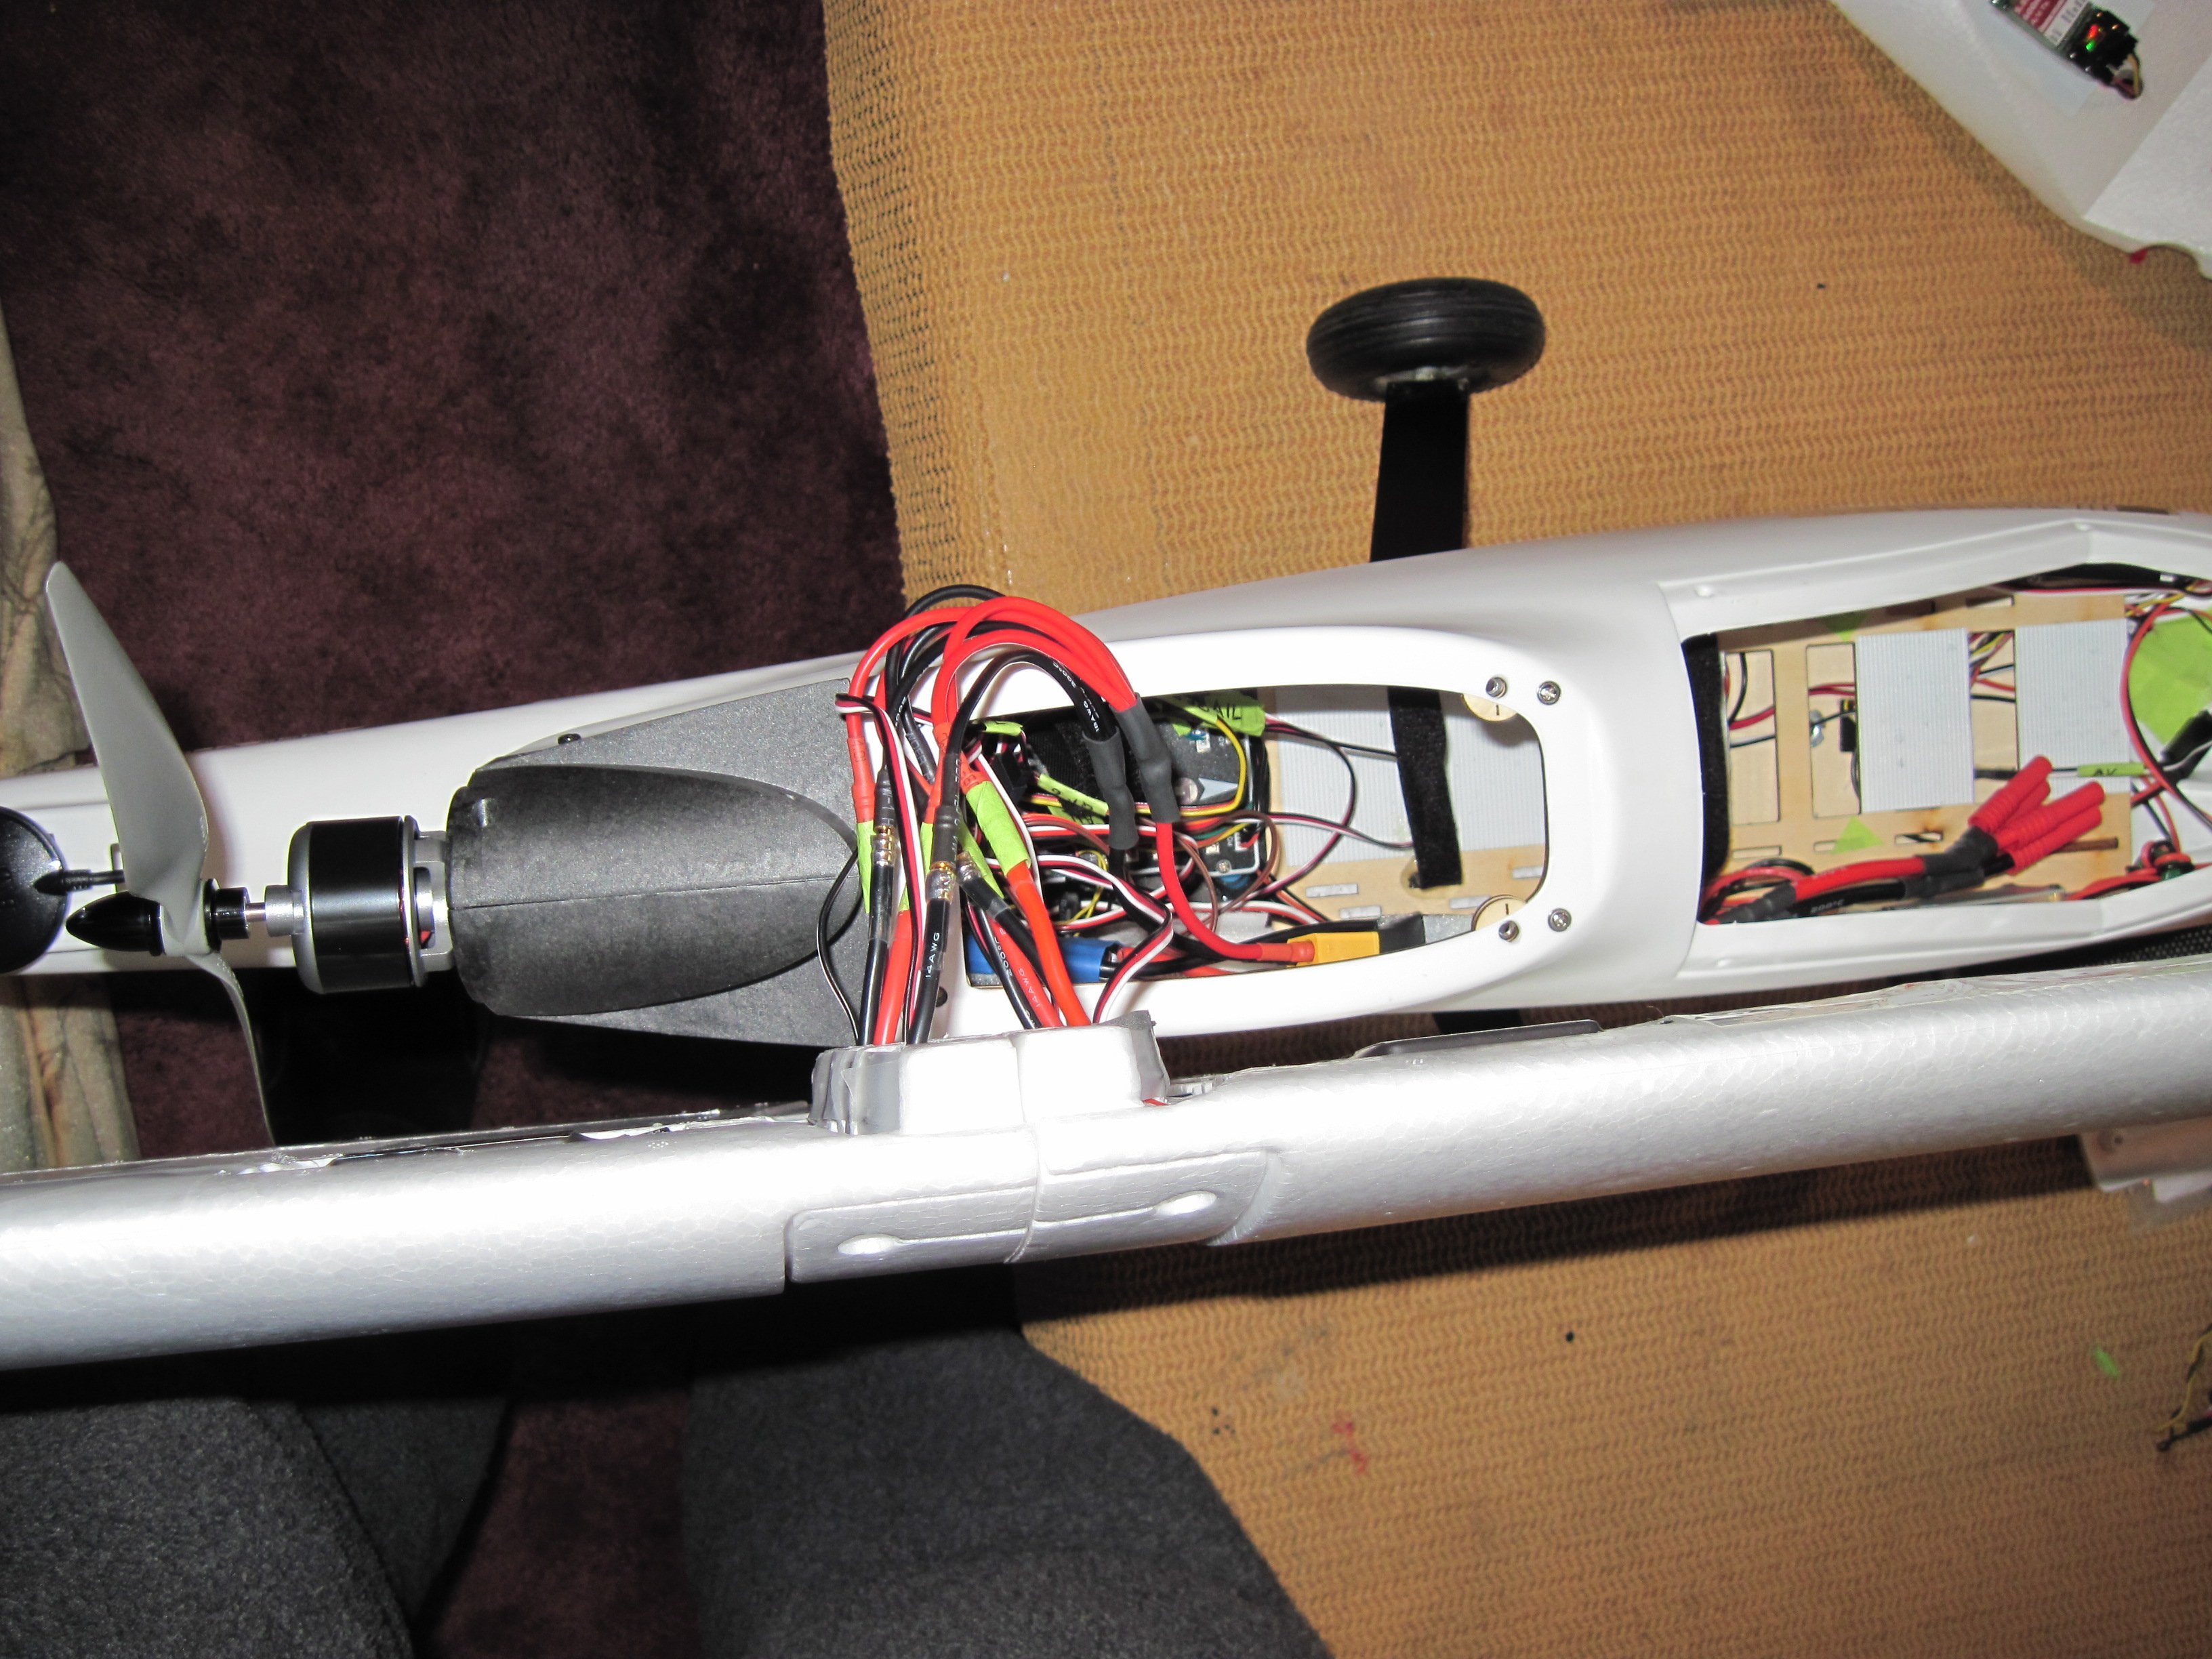
To connect the 4 ESC control cables, I used four 12" servo extenders plugged into the Pixhawk channels 5-8. Recall that the QuadPlane motor position of 1-4 maps to outputs 5-8 on the Pixhawk. Everything is easily connected or disconnected for travel. The wires fit nicely in the spacious Ranger EX fuselage.
The weather was nice today so I decided to try an initial hover in my backyard. Before taking the Ranger EX outside, I calibrated the QuadPlane ESCs using the Q_ESC_CAL=1 procedure since it is easy for me to disconnect power to the ESCs…even with the wing on. The procedure worked great!
As it turned out, the default settings for Q_PIDs on Plane v3.6.0 were rather odd and did not work well on my initial hover tests. The 800mm carbon tubes wobbled up and down, front to back rather forcefully. Although the Ranger EX would not lift off under these conditions, I thoroughly tested my glue joints using Foam-Tac. I’ll have to check the Q_PIDs on my Bix conversion since I didn’t make any changes there.
Here were my default Q_PIDs for Roll and Pitch:
Q_A_RAT_PIT_D,0.022
Q_A_RAT_PIT_FILT,0
Q_A_RAT_PIT_I,0.224
Q_A_RAT_PIT_IMAX,0.4
Q_A_RAT_PIT_P,0.39
Q_A_RAT_RLL_D,0.004
Q_A_RAT_RLL_FILT,0
Q_A_RAT_RLL_I,0.15
Q_A_RAT_RLL_IMAX,0.3
Q_A_RAT_RLL_P,0.3
After some iterative testing using my laptop for a 900MHz telemetry link, I ended up with these Q_PIDs and the Ranger EX would hover!
Q_A_RAT_PIT_D,0.005
Q_A_RAT_PIT_FILT,0
Q_A_RAT_PIT_I,0.15
Q_A_RAT_PIT_IMAX,1
Q_A_RAT_PIT_P,0.2
Q_A_RAT_RLL_D,0.005
Q_A_RAT_RLL_FILT,0
Q_A_RAT_RLL_I,0.15
Q_A_RAT_RLL_IMAX,1
Q_A_RAT_RLL_P,0.2
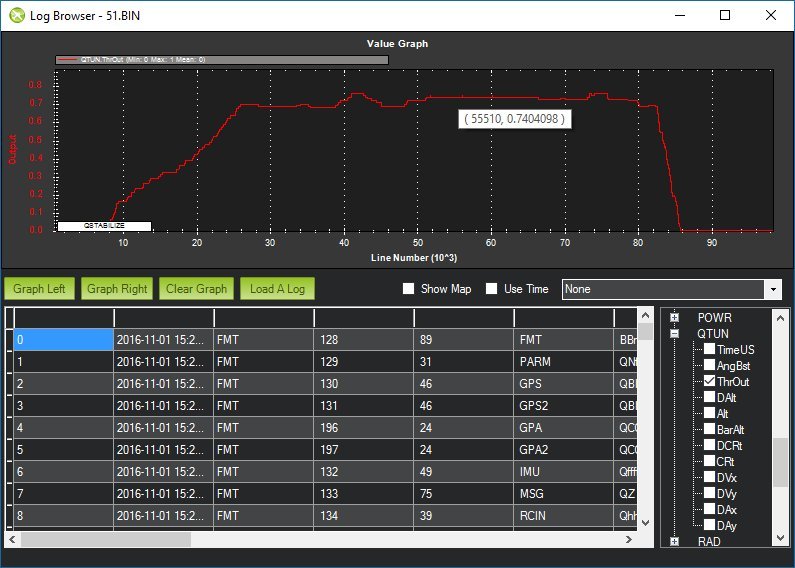
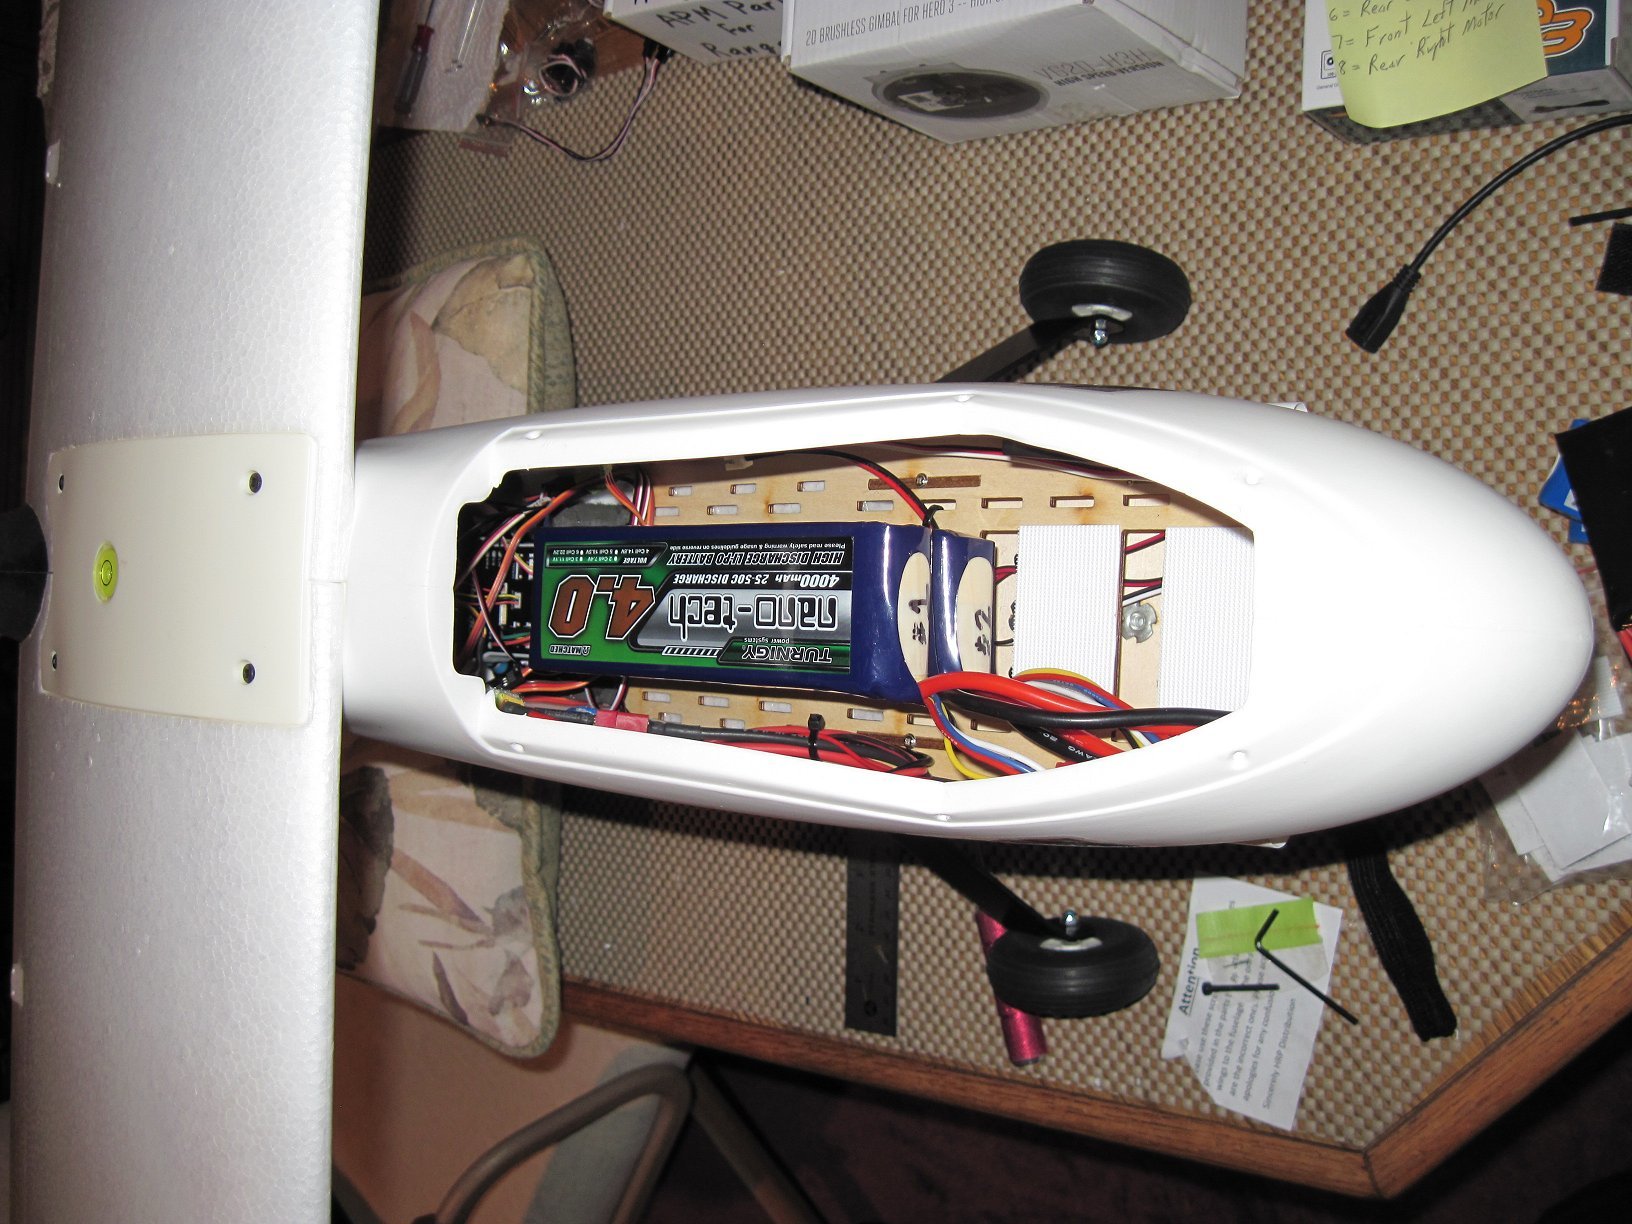
I also changed my Q_M_SPIN_ARMED to 0 because I don’t like the props spinning at low throttle. My Mauch Current Sensor hasn’t arrived yet so I didn’t measure the current draw when hovering. I made a second short hover before I finished so I could see the Throttle MID setting and it is about 740 which is what I expected. The hover test included my 3-axis Feiyu Tech Ultra gimbal and GoPro H3 camera. The Lipo packs weighed 30oz total for my 4s 8AH 25C Nano-Techs.
Greg - looking good. Question - how are you finding yaw authority? Does it not cause the wings to twist badly when the alternate (eg. front left and rear right) motors are doing the lift?


 , I have a cuadplane in my wishlist.