Hi,
I am using a Pixhawk to run the APM rover software and I need it to transmit data from external sensors which are read via i2c. I have already implemented the i2c communication and can read the necessary variables. (Code here: https://github.com/uzgit/ardupilot) I have also generated a mavlink message to transmit the variable, but it does not show up in APM Planner, presumably because APM Planner does not have that particular message implemented. I have had some success sending the information as text, but this is a fairly hacky method and does not allow for real-time graphing of the extra telemetry data, nor does it allow the variables to be displayed on the HUD as the rest of the variables can be.
So my question is: what parts of the APM Planner code do I need to edit in order to make it recognize and work with new telemetry data, as it works with the default telemetry data?
So far, I have added the mavlink message for the new data into the ardupilotmega, common, and pixhawk directories in the APM Planner code and run make. The subsequent instance of APM Planner does not behave any differently.
You need to make the MAVLink libraries identical or build for v1.0 for APM planner 2.0 (it doesn’t yet support v2.0, maybe you can build v2.0 and see what happens)
see the out of ./ardupilot/Build.ArduCopter/libraries/GCS_MAVLink as a guide
I plane to make MAVLink a submodule of APM planner 2.0 in the next release after 2.0.23
Considering that the ardupilot code that I have loaded onto the Pixhawk should have all the messages that I need, would it be enough to copy all the message headers in my edited ardupilot code into the corresponding directories for APM Planner and then recompile?
Also, is there anything that I have to do, after getting the mavlink message to work correctly, in order to be able to graph the data in realtime and view them in the HUD?
And if I use MAVproxy, I assume I will have to sync its message definitions with the other two. Is that correct?
Correct, all the headers and it should work as expected. MAVProxy would be the same, though the easiest for MAVProxy or any component using submodules it to point the submodule at a fork of mavlink with your changes in the branch you want.
Today I generated the headers for the messages on the pixhawk in a separate directory (using v1.0) and copied them into the relevant places in apm_planner/libs/mavlink/include/mavlink/v1.0/. I recompiled and nothing was different.
I also tried simply adding the single file mavlink_msg_external_data.h (the file I am testing for sending more data) into the …/v1.0/ardupilotmega directory and adding it to the includes in ardupilotmega.h. It compiled, but didn’t show the data in the GUI.
I played around with editing some other message headers, like the mavlink_msg_battery2.h, and did see minor changes in the GUI, but nothing that I could exploit.
I also tried just adding more variables to the message definition for battery2, already in ardupilot’s ardupilotmega.h, and then recompiling for ardupilot. Then I generated the mavlink v1.0 file for battery2 and putting it in the ardupilotmega folder for apm_planner. After recompiling, the battery2 message no longer appeared.
I can successfully send information using the battery2 message, but only 2 variables, since that is the original definition of it.
There are global headers that are also modified so it’s not as easy as adding the header for the new message. You need to whole output from the generator between amp planner 2.0 and autopilot to be the same
Could you give some advice on how exactly I should do this? I have generated the mavlink messages for ardupilot (but using v1.0, and language C) and routed the output from the generator into the directory apm_planner/libs/mavlink/include/mavlink/v1.0/ (tried this both with and without deleting all files and directories here first as well). The code requires a few minor edits after this, but compiles fairly easily. But then once I run APM Planner, there is only a placeholder for a message called EMPTY, which only contains a char[0].
I had to regenerate the messages for v1.0 because make px4-v2-upload only makes v2.0 messages.
Just tried doing a similar thing with just the common/ library: generated the mavlink headers for the ardupilot’s common.xml (with an added definition for an EXTERNAL_DATA message with ID=227, which I believe does not conflict with any other messages in the library) and copied them into the (emptied) common/ directory for apm_planner. Also had to copy the MAV_AUTOPILOT_TYPE enum from the original common.h into the new common.h, as it did not include a definition for MAV_AUTOPILOT_PIXHAWK. Also had to remove passing of *_MIN_LEN variables from all newly generated headers.
The code compiles after I do this, and the program runs without errors, but I still have no luck displaying my new message…
I’ve done some work on something similar (extending mavlink to make use of message id 227 to send, and graph some extra data in real-time). Are you constrained to using APM planner? I did this in Mission Planner and can share how I did it there if you like?
I update APM Planner 2.0 to the latest MAVLink the other day. There was some minor changes in the mavgen output. You’ll find the code a drop in replacement now.
@uzapm, I am working exactly on the same thing these days. Have you sorted out how to generate v1.0 messages? If I build apm planner with v2.0 MAVLink messsage headers, it fails. I created a post in this forum https://discuss.ardupilot.org/t/custom-data-sending-via-mavlink-protocol-dev/21343/2 and I put steps which I have done in the vehicle code, maybe you are missing something there, check it out.
I am stuck at building APM Planner with new headers, maybe we will solve this problem finally.
Oops, I actually solved this issue months ago and forgot to update this page.
This will assume that you added your new mavlink message to the common.xml file.
The best way that I’ve found to accomplish adding a new mavlink message to your system, for use with APM Planner 2.0, is to
Fork the mavlink repository (https://github.com/ardupilot/mavlink). Clone it to your system, make your to the message definitions. Most likely you should make these changes in the common.xml file, although other people may have different opinions on that.
Fork the ardupilot repository (https://github.com/ardupilot/ardupilot) and replace the existing mavlink submodule with the one you have just edited. This way the ArduPilot compilation/build will always be smooth. Then compile, upload to your pixhawk and be sure your ArduPilot system itself is working.
I would then recommend testing your message by using mavproxy, because it is much easier and faster to work with than APM Planner 2.0. Install mavproxy using apt-get if you’re using linux.
Generate your mavlink files by going to the mavlink repository that you have cloned and running mavgenerate.py. Use the GUI that pops up to select common.xml as the input file and then select common.py as the output file name. Use python as the language. This is where you can select whether you want to use mavlink v1 or v2. For this mavproxy test you’ll want to use v2. Once common.py is generated, find the auto-generated function for your message and add some obnoxious print statement that will let you know that your message is working. Copy and replace the common.py file that came with your mavproxy installation. I don’t have the path to this file with me right now but if you need it I can find it. Once you replace this file with your own, you can run something like mavproxy.py --master=/dev/ttyUSB0,115200 --mav20 --dialect common which will start mavproxy communicating with your pixhawk using the common dialect. If everything goes well, you should be able to see your obnoxious print statement every time your custom message comes in. The reason I prefer to test with mavproxy is that it takes almost no time to compile, whereas APM Planner 2.0 takes a long time to compile and is much more finicky.
If you can confirm that your message is working using mavproxy, then you can start trying to get it to work with APM Planner. Clone the APM Planner 2.0 repository (https://github.com/ArduPilot/apm_planner). In the mavlink repo, use mavgenerate.py to generate mavlink files for all files in the mavlink/message_definitions/v1.0/ directory using the the protocol v1.0, and language C. I would recommend putting all of your output files from this process into a single directory. Then copy them all into apm_planner/libs/mavlink/include/mavlink/v1.0 directory, removing all of the original files first (I would suggest backing up the original files for ease.). Then recompile APM Planner as per the directions on the github page and if nothing terrible happened, your message will show up in APM Planner as all of the standard messages do.
I will try steps you have recommended, but I followed the tutorial at ardupilot dev web and I edited mavlink submodule already in ardupilot repo, build is ok, everything seem to be working, headers were generated in the message_definitions directory. I missed the part with mavgenerate.py, so I hope it will help. I will let you know!
EDIT::
Is this path the right one? (for common.py file): /usr/local/lib/python2.7/dist-packages/pymavlink/dialects/v20/
If I understood what you were suggesting, this is the screen where my message should appear? When I send message by gcs().send_message(MY_MSG_DEF)?
I am able to see where the problem is - when I run “status” command in MAVProxy console, besides standard params it prints out this: BAD_DATA {unknown MAVLink message ID 145, data:…. My message ID is 145 so I suppose that the message is being sent via MAVLink, but problem is still in the headers …
That does appear to be the correct path. Careful when editing the common.py, as if you write an erroneous command in the file, it may regenerate the file without warning.
It seems mavproxy.py is working correctly, however I see nothing on that particular screen that is indicative of your added message. If you edit the common.py file, you can use print statements to cause your message to print messages to that screen. Each message in common.py has its own class definition, with two functions init and pack, and you can print any messages or variables from the init function. If you need to, consider adding a command similar to the following before your gcs().send_message(MY_MSG_DEF) command: gcs().send_text(MAV_SEVERITY_INFO, “Hello, mavproxy!”);
This will cause the ArduPilot firmware itself to send a message to the mavproxy console even if your custom message itself is not working.
One potential problem I see, right of the bat, is that according to the definition of the mavlink common dialect, and in common.xml, there is already a message with ID=145. Unless you deleted the definition for the original message, which may cause problems, this is one likely problem. I would suggest using IDs between 235 and 240. I personally use 237 and 238.
The message ID is good and even some of the data looks good (I am sending 6 numbers, 1,2,3,4,5,6).
I think I am going to implement it in the APM planner already, since that is what I need and I think that message is being sent (due to the screenshot) so the problem, I think, somewhere in the dependencies - header files.
The gcs().send_text(MAV_SEVERITY_INFO, "Hello, mavproxy!") command was working long time ago, I tried it.
As I am reading your “recommended steps” again, I may see a little misunderstanding in our conversation, which I was not able to see before.
I am not editing common.py file, I think I do not even need it. I am little bit further than that. I am developing 3 months already and this is the last part of the development. I am fairly familiar with ardupilot vehicle code. I would like to point out, that I want to send my message from vehicle code, not in common.py - or is that needed? (Editing of common.py if I am already sending that message from ardupilot code).
For the others, I can write simple steps, what I have done (to work with MAVProxy):
Edit /ardupilot/modules/mavlink/message_definitions/v1.0/common.xml by adding your message
Build whole project
There should be updated common.py file in ardupilot/modules/mavlink/ , check if your message is there (search in common.py for the definitions)
If the file is not updated or does not contain definitions needed for your message, generate common.py file with mavgenerate.py also located in ardupilot/modules/mavlink/, it will open GUI, I guess you will know how to work with it (command to launcha mavgenerate python mavgenerate.py
Copy /ardupilot/modules/mavlink/message_definitions/v1.0/common.xml to /usr/local/lib/python2.7/dist-packages/pymavlink/message_definitions/v1.0/
Copy /home/edo/ardupilot/modules/mavlink/common.py to /usr/local/lib/python2.7/dist-packages/pymavlink/dialects/v10/
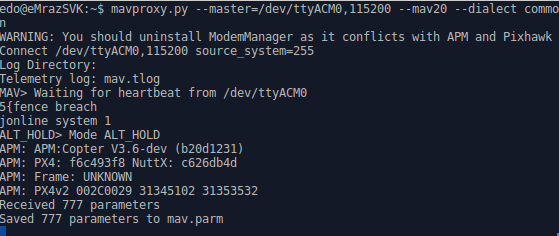
Launch mavproxy by: mavproxy.py --master=/dev/ttyACM3,115200 --mav10 --dialect common
You may have noticed versions used here, I used v1.0, you can use whatever you want, but keep in mind you have to look out for it when copying, launching mavproxy etc.
This is not all work you have to do. Sending the message right way is anothern concern, maybe I will write full tutorial for this when finish my work.
EDIT: @uzapm this is the funny one! My message contained parameter with name ‘is’ , so the mavgenerate.py generated a function, it looked like this def __init__(self, time_boot_ms, esc_id, speed, vs, is, vbus, pwm, temp). When I tried to run mavproxy it gaave me error at ‘is’, because python thought it is a comparator