I’m using MP 1.3.43 build 1.1.6202.10835 ArduCopter v3.2.1 (36b405fb) and under Configuration it’s not showing the full parameter list or tree. I’ve tried to uninstall and then reinstall the latest version of MP, but it doesn’t help.
Any thoughts as to why I can’t see the full list of parameters or the tree?
Also, I’m having a hard time trouble shooting why I’m not getting photos during auto-created survey missions while the Trigger Camera Now command works (I’m using a servo to trigger the camera. I have attached a Zip file containing logs, WP files, and screen shots. I’m using an APM 2.5 or 2.6.
I had searched dozens of times. Maybe I would have found the discussion thread with the right search terms, or figured it out if the online documentation was less misleading by adding the following added text (in brackets):
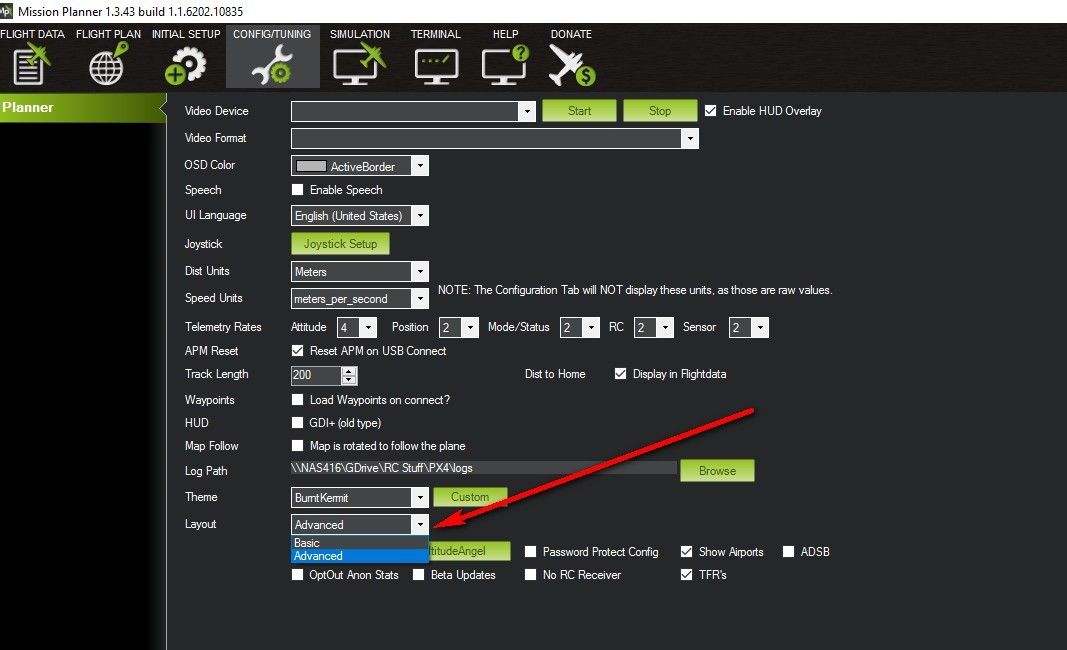
Advanced Params
You will see this menu item if the auto pilot Is connected [and you have ADVANCED selected under Config/Tuning/Planner/Layout as shown in the following figure]. Here is what you can do in this section TBD
The same could be added in the next paragraph…
Full Parameter List
You will see this menu item if the auto pilot Is connected.
If my question has been asked quite a few times, maybe the wording in the documentation is one of the reasons.
I’m not complaining about the documentation - I don’t know that I could have written it better.
Thanks for the help everyone. I have it figured it out, flew a survey mission, and got photos!
This was my problem (to close the loop on this for others who may struggle with the same problem):
I assumed that when I set the servo limits for PUSHED and NOT PUSHED on the INITIAL SETUP / OPTIONAL HARDWARE / GIMBAL tab, that that was all I needed to do, but, apparently those settings only work with the TAKE PHOTO NOW command, which is accessible in the pop-up list that you get when you right click on the live site map in Mission Planner. The servo seemed to work fine with the TAKE PHOTO NOW command, so I assumed that I was all set - not so!
I also need to adjust other settings for the APM to activate the servo during a mission. In Flight Plan I had to right clicked in the area that I wanted to survey and selected DRAW POLYGON / ADD POINT and create a polygon of the area I wanted to survey. Then I had to right click within the polygon and select AUTO WP / SURVEY (GRID), which brought up the survey aerial map and settings, including the camera settings. NOTE: You have to make sure the ADVANCED OPTIONS check box is checked on the SIMPLE tab for the next part. I then selected the CAMERA CONFIG tab, and then selected one of the TRIGGER METHODs at the bottom of the tab’s dialog box (see screen shot below). I selected the DO_REPEAT_SERVO “radio button,” and entered SERVO 11 (since my camera trigger servo is plugged into RC11 on the APM), PWM 1645 (which is right for my servo setup), and I left the CYCLE TIME (S) at the default of 2 (which I assume is how fast the camera can cycle between photos). These settings are the additional settings I needed to tweak to get the APM to take photos during a mission.
Everything seems to be fine now, but I noticed that the TRIGGER METHOD settings aren’t saved so I assume I have to reenter these for every mission (please verify if this is right and you know, or tell me how to make is so I don’t have to reenter these values). In any case, I can move on to figuring out the rest of the workflow; i.e., geotagging the photos and post-processing them into a point cloud, etc. My next stop is…